ignition TOYOTA AVALON 2020 (in English) Service Manual
[x] Cancel search | Manufacturer: TOYOTA, Model Year: 2020, Model line: AVALON, Model: TOYOTA AVALON 2020Pages: 540, PDF Size: 10.4 MB
Page 326 of 540

3265-1. Using the air conditioning system and defogger
■Using automatic mode
Fan speed is adjusted automatically according to the temperatur e setting and
the ambient conditions.
Therefore, the fan may stop for a while until warm or cool air is ready to flow
immediately after is pressed.
■ Fogging up of the windows
●The windows will easily fog up when the humidity in the vehicle is high.
Turning on will dehumidify the air from the outlets and defog the
windshield effectively.
● If you turn off, the windows may fog up more easily.
● The windows may fog up if the recirculated air mode is used.
■ When driving on dusty roads
Close all windows. If dust thrown up by the vehicle is still drawn into the vehi-
cle after closing the windows, it is recommended that the air i ntake mode be
set to outside air mode and the fan speed to any setting except off.
■ Outside/recirculated air mode
●Setting to the recirculated air mode temporarily is recommended in prevent-
ing dirty air from entering the vehicle interior and helping to cool the vehicle
when the outside air temperature is high.
● Outside/recirculated air mode may automatically switch dependin g on the
temperature setting or the inside temperature.
■ When the outside temperature exceeds 75°F (24°C) and the air co ndition-
ing system is on
● In order to reduce the air conditioning power consumption, the air condition-
ing system may switch to recirculated air mode automatically. This may also
reduce fuel consumption.
● Recirculated air mode is selected as a default mode when the en gine switch
is turned to IGNITION ON mode.
● It is possible to switch to outside air mode at any time by pre ssing .
■ When the outside t emperature is low
The dehumidification function may not operate even when is pre ssed.
Page 331 of 540
3315-1. Using the air conditioning system and defogger
5
Interior features
■Rear (if equipped)
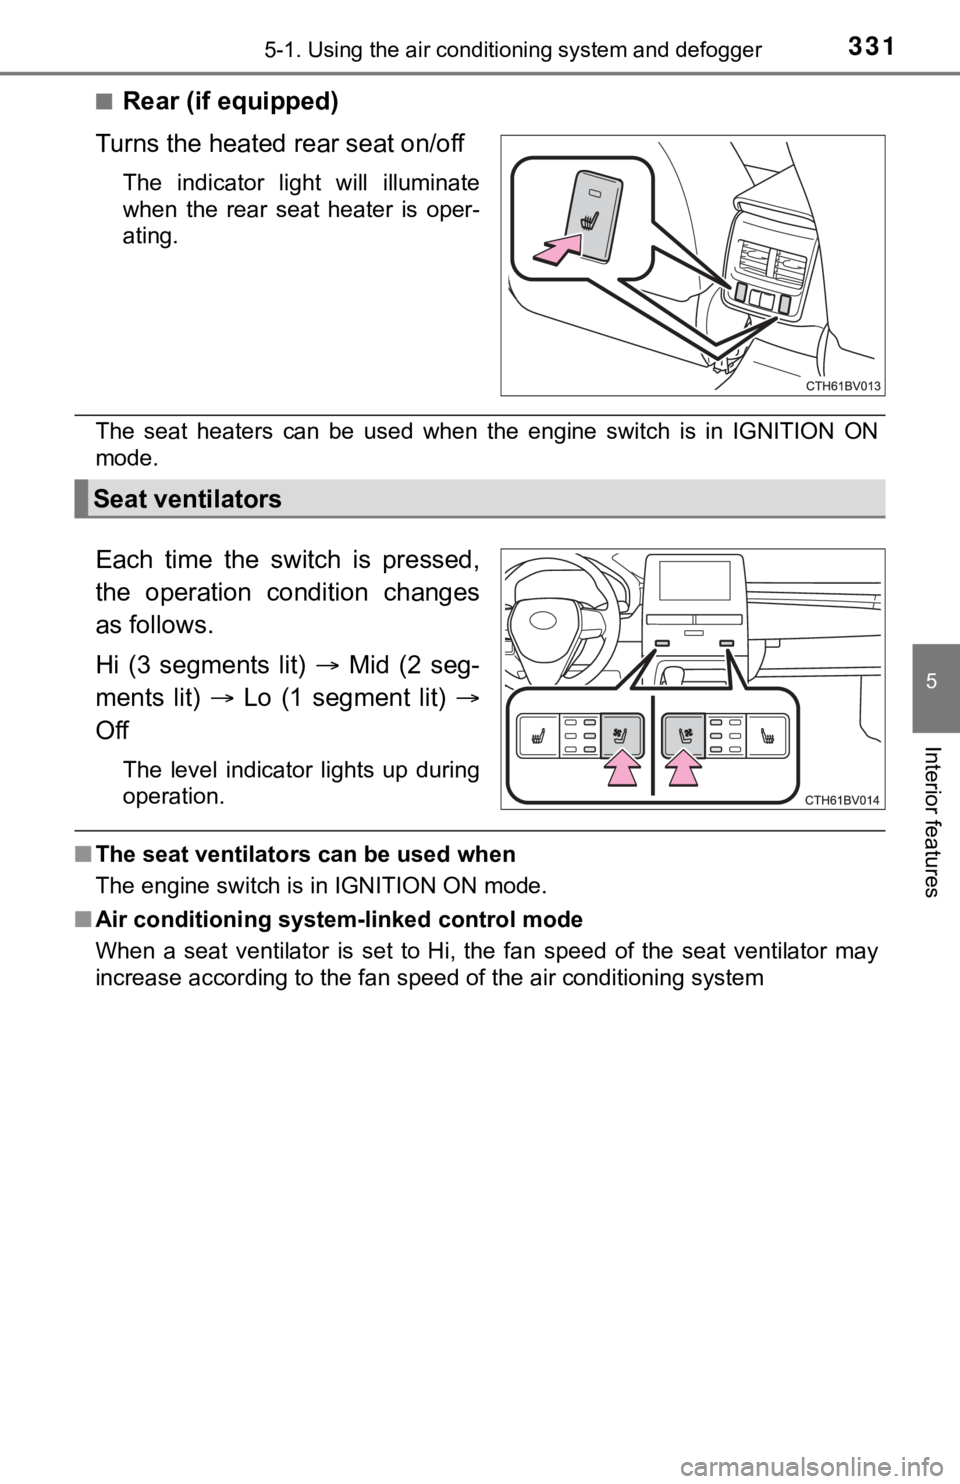
Turns the heated rear seat on/off
The indicator light will illuminate
when the rear seat heater is oper-
ating.
The seat heaters can be used when the engine switch is in IGNITION ON
mode.
Each time the switch is pressed,
the operation condition changes
as follows.
Hi (3 segments lit) Mid (2 seg-
ments lit) Lo (1 segment lit)
Off
The level indicator lights up during
operation.
■ The seat ventilators can be used when
The engine switch is in IGNITION ON mode.
■ Air conditioning system-linked control mode
When a seat ventilator is set to Hi, the fan speed of the seat ventilator may
increase according to the fan speed of the air conditioning system
Seat ventilators
Page 336 of 540
3365-3. Using the storage features
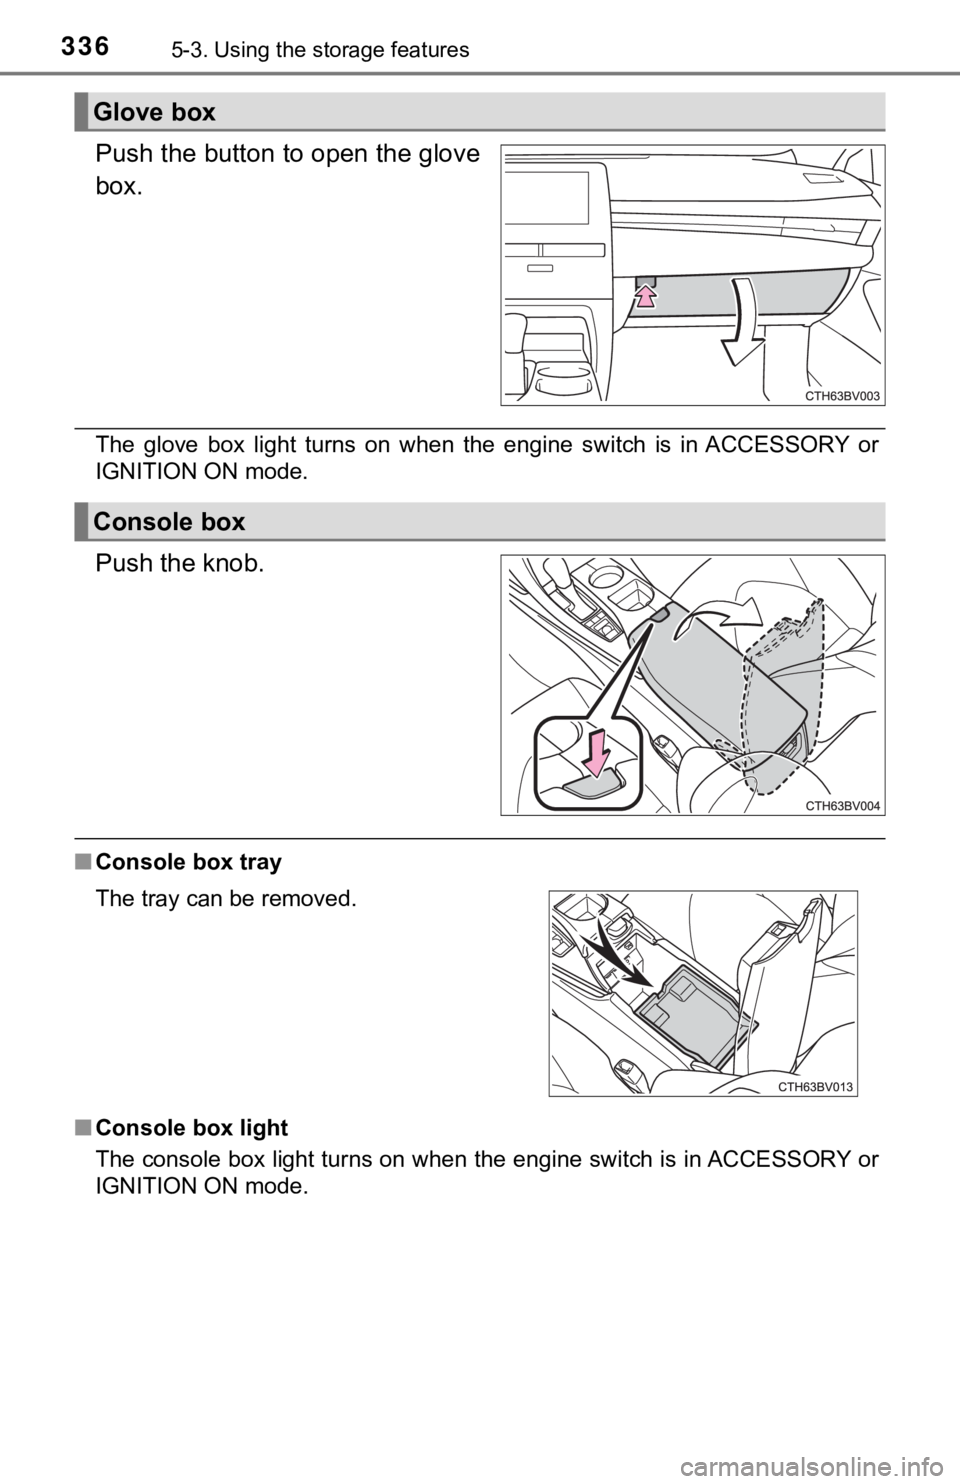
Push the button to open the glove
box.
The glove box light turns on when the engine switch is in ACCES SORY or
IGNITION ON mode.
Push the knob.
■ Console box tray
■ Console box light
The console box light turns on when the engine switch is in ACC ESSORY or
IGNITION ON mode.
Glove box
Console box
The tray can be removed.
Page 343 of 540
3435-4. Other interior features
5
Interior features
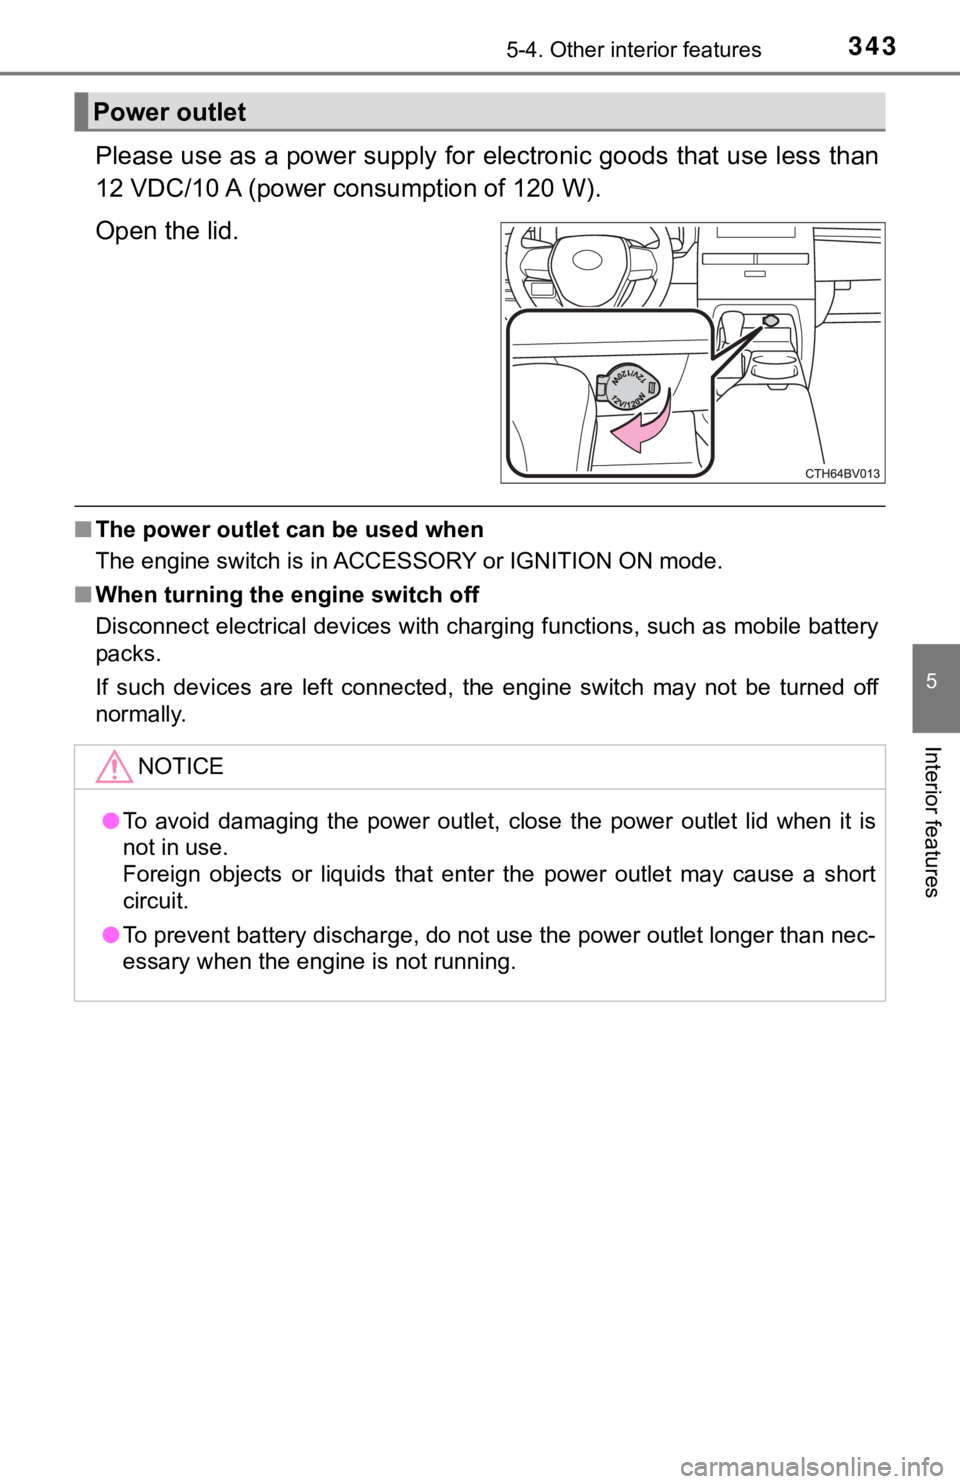
Please use as a power supply for electronic goods that use less than
12 VDC/10 A (power c onsumption of 120 W).
Open the lid.
■ The power outlet can be used when
The engine switch is in ACCESSORY or IGNITION ON mode.
■ When turning the engine switch off
Disconnect electrical devices with charging functions, such as mobile battery
packs.
If such devices are left connected, the engine switch may not b e turned off
normally.
Power outlet
NOTICE
● To avoid damaging the power outlet, close the power outlet lid when it is
not in use.
Foreign objects or liquids that enter the power outlet may cause a short
circuit.
● To prevent battery discharge, do not use the power outlet longe r than nec-
essary when the engine is not running.
Page 344 of 540
3445-4. Other interior features
The USB charging ports are used to supply 2.1 A of electricity at 5 V
to external devices (power consumption of 10.5 W).
The USB charging ports are for charging only. They are not desi gned
for data transfer or other purposes.
Depending on the external device, it may not charge properly. R efer to
the manual included with the dev ice before using a USB charging
port.
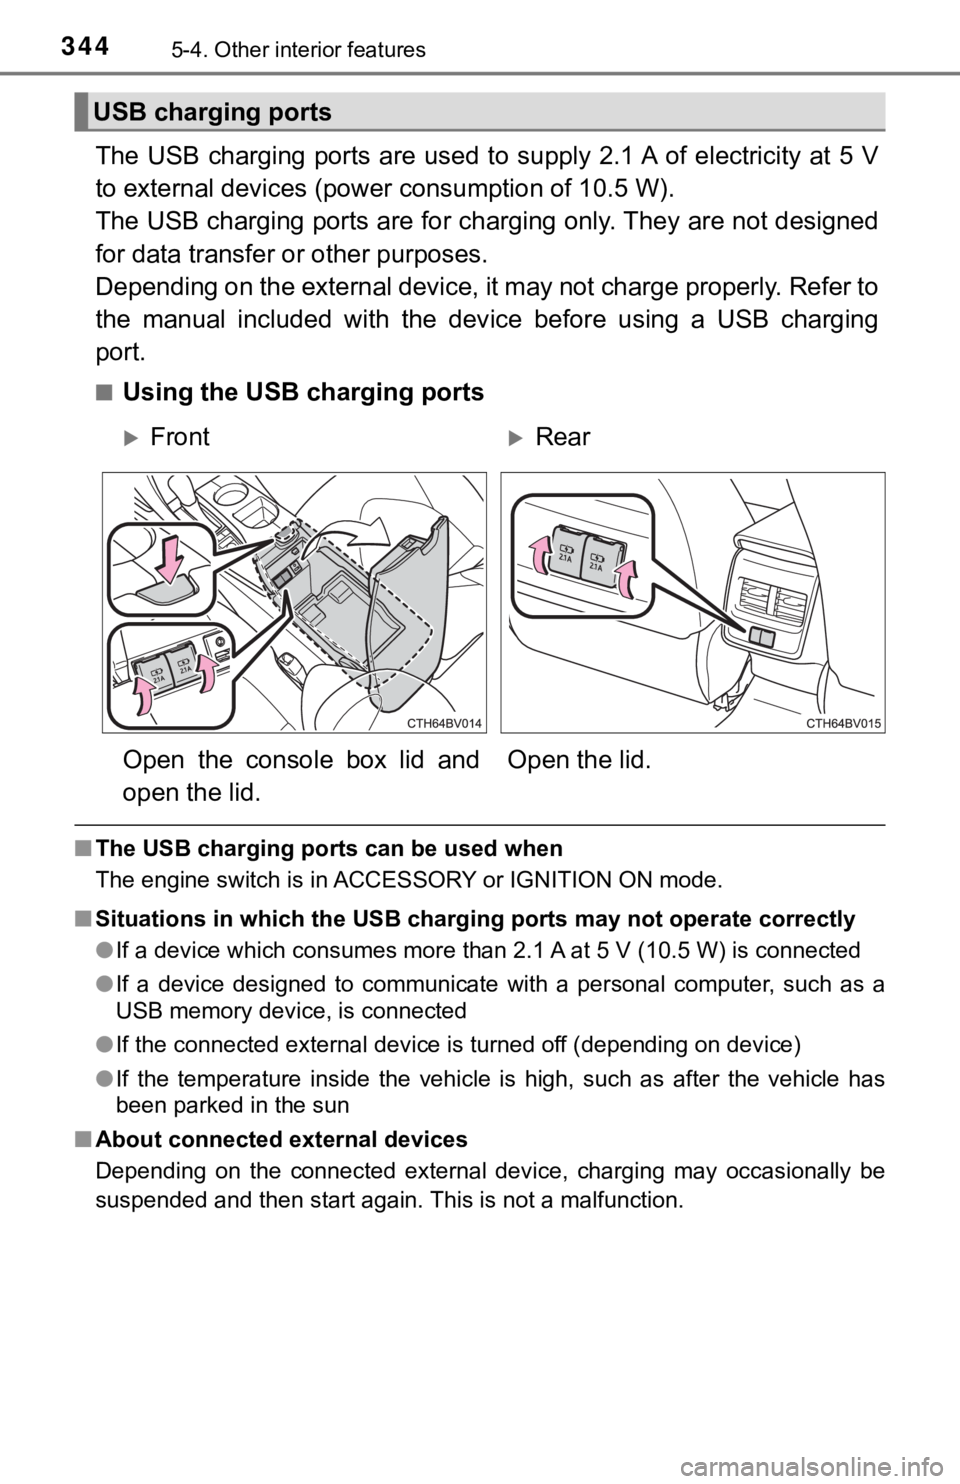
■Using the USB charging ports
■ The USB charging ports can be used when
The engine switch is in ACCESSORY or IGNITION ON mode.
■ Situations in which the USB charg ing ports may not operate correctly
● If a device which consumes more than 2.1 A at 5 V (10.5 W) is connected
● If a device designed to communicate with a personal computer, s uch as a
USB memory device, is connected
● If the connected external device is turned off (depending on de vice)
● If the temperature inside the vehicle is high, such as after the vehicle has
been parked in the sun
■ About connected external devices
Depending on the connected external device, charging may occasi onally be
suspended and then start again. This is not a malfunction.
USB charging ports
FrontRear
Open the console box lid and
open the lid. Open the lid.
Page 349 of 540

3495-4. Other interior features
5
Interior features
■The wireless charger can be operated when
The engine switch is in ACCESSORY or IGNITION ON mode.
■ Portable devices that can be charged
●Portable devices compatible with the Qi wireless charging stand ard can be
charged by the wireless charger. However, compatibility with all devices
which meet the Qi wireless charging standard is not guaranteed.
● The wireless charger is designed to supply low power electricit y (5 W or
less) to a cellular phone, smartphone, or other portable device .
■ If a cover or accessory is attach ed to the portable device
Do not charge a portable device if a cover or accessory which i s not Qi com-
patible is attached. Depending on the type of cover and/or acce ssory
attached, it may not be possible to charge the portable device. If the portable
device is placed on the charging area and does not charge, remo ve the cover
and/or accessories.
■ If interference is heard in AM ra dio broadcasts while charging
Turn off the wireless charger and check if the noise is reduced. If noise is
reduced, press and hold the power supply switch of the wireless charger for 2
seconds. The frequency of the wireless charger is changed and n oise may be
reduced. When the frequency is changed, the operation indicator light will
blink (orange) 2 times.
■ Charging precautions
●If the electronic key cannot be detected in the cabin, charging cannot be
performed. When a door is opened and closed, charging may be te mporarily
suspended.
● While charging, the wireless charger and the portable device wi ll become
warm. This is not a malfunction.
If a portable device becomes warm while charging and charging stops due
to the protection function of the portable device, wait until the portable
device cools down and charge it again.
■ Sound generated during operation
When the power supply switch is turned on or while a portable d evice is being
identified, operation sounds may be heard. This is not a malfunction.
■ Cleaning the wireless charger
P. 370
Page 400 of 540

4006-3. Do-it-yourself maintenance
●Performance may be affected in the following situations.
• When driving near a TV tower, electric power plant, gas station, radio
station, large display, airport or other facilit y that generates strong
radio waves or electrical noise
• When carrying a portable radio, cellular phone, cordless phone or
other wireless communication device
If tire position information is not correctly displayed due to the radio
wave conditions, the display ma y be corrected by changing the l ocation
of the vehicle as the radio wa ve conditions may change.
●When the vehicle is stopped, the time taken for the warning to start or
turn off may be longer.
●When the inflation pressure of a tire drops rapidly, for exampl e when a
tire has burst, the warning may not operate.
■Initialization procedure
●Make sure to perform the initialization procedure after adjusti ng the tire
inflation pressure.
Also, make sure the tires are cold before performing the initia lization
procedure or adjusting the tire inflation pressure.
●If the engine switch is turned off during initialization, it is not necessary
to restart the initialization procedure from the beginning as i t will begin
automatically when the engine switch is turned back to IGNITION ON
mode.
●If initialization has accidentally been started when it is not necessary,
adjust the tire inflation pressu re to the specified level when the tires are
cold and then perform the ini tialization procedure again.
●While the position of each tire is being determined and the inf lation pres-
sures are not being displayed on the multi-information display, if the
inflation pressure of a tire drops, the tire pressure warning l ight will come
on.
■Warning performance of the tire pressure warning system
The warning of the tire pressu re warning system will change in accor-
dance with the conditions under which it was initialized. For t his reason,
the system may give a warning even if the tire pressure does no t reach a
low enough level, or if the pressure is higher than the pressur e that was
adjusted to when the sys tem was initialized.
Page 402 of 540

4026-3. Do-it-yourself maintenance
■When registering ID codes
●Before performing ID code registration, make sure that no wheels with
tire pressure warning valve and transmitters installed are near the vehi-
cle.
●Make sure to initialize the tire pressure warning system after registering
the ID codes. If the system is initialized before registering t he ID codes,
the initialized values will be invalid.
●As the tires will be war m when registration is completed, make sure to
allow the tires to cool befo re performing initialization.
■Canceling ID code registration
●To cancel ID code registration after it has been started, turn the engine
switch off before driving the vehicle.
If the vehicle is driven after ID code registration is started, to cancel reg-
istration, perform the ID code r egistration start procedure aga in and turn
the engine switch of f before driving.
●If ID code registration has been canceled, the tire pressure wa rning light
will blink for approximately 1 mi nute when the engine switch is turned to
IGNITION ON mode and then illumina te. The tire pressure warning sys-
tem will be operational when the tire pressure warning light tu rns off.
●If the warning light does not turn off even after several minut es have
elapsed, ID code registration may not have been cancelled corre ctly. To
cancel registration, perform the ID code registration start procedure
again and then turn the engine switch off before driving.
Page 436 of 540

4367-2. Steps to take in an emergency
■When the tire pressure warning light comes on
Inspect the tires to check if a tire is punctured.
If a tire is punctured: P. 445
If none of the tires are punctured:
Turn the engine switch off then turn it to IGNITION ON mode. Ch eck if the
tire pressure warning light comes on or blinks.
If the tire pressure wa rning light comes on
After the temperature of the tires has lowered sufficiently, ch eck the
inflation pressure of each tire and adjust them to the specifie d level.
If the warning light does not turn off even after several minut es have
elapsed, check that the inflation pressure of each tire is at t he specified
level and perform initialization. (P. 3 9 5 )
If the warning light does not tu rn off several minutes after the initialization
has been performed, have the vehi cle inspected by your Toyota dealer
immediately.
If the tire pressure warning light blinks fo r 1 minute then stays on
There may be a malfunction in the tire pressure warning system. Have
the vehicle inspected by you r Toyota dealer immediately.
■The tire pressure warning light may come on due to natural caus es
The tire pressure warning light may come on due to natural caus es such
as natural air leaks and tire inflation pressure changes caused by tem-
perature. In this case, adjusting the tire inflation pressure w ill turn off the
warning light (afte r a few minutes).
■When a tire is replace d with a spare tire
The compact spare tire is not equipped with a tire pressure war ning valve
and transmitter. If a tire goes flat, the tire pressure warning light will not
turn off even though the flat tire has been replaced with the s pare tire.
Replace the spare tire with the repaired tire and adjust the ti re inflation
pressure. The tire pressure war ning light will go off after a few minutes.
■Conditions that the tire pressure warning system may not functi on
properly
P. 3 9 9
■Warning buzzer
In some cases, the buzzer may not be heard because of noisy pla ce or an
audio sound.
1
2
Page 460 of 540
4607-2. Steps to take in an emergency
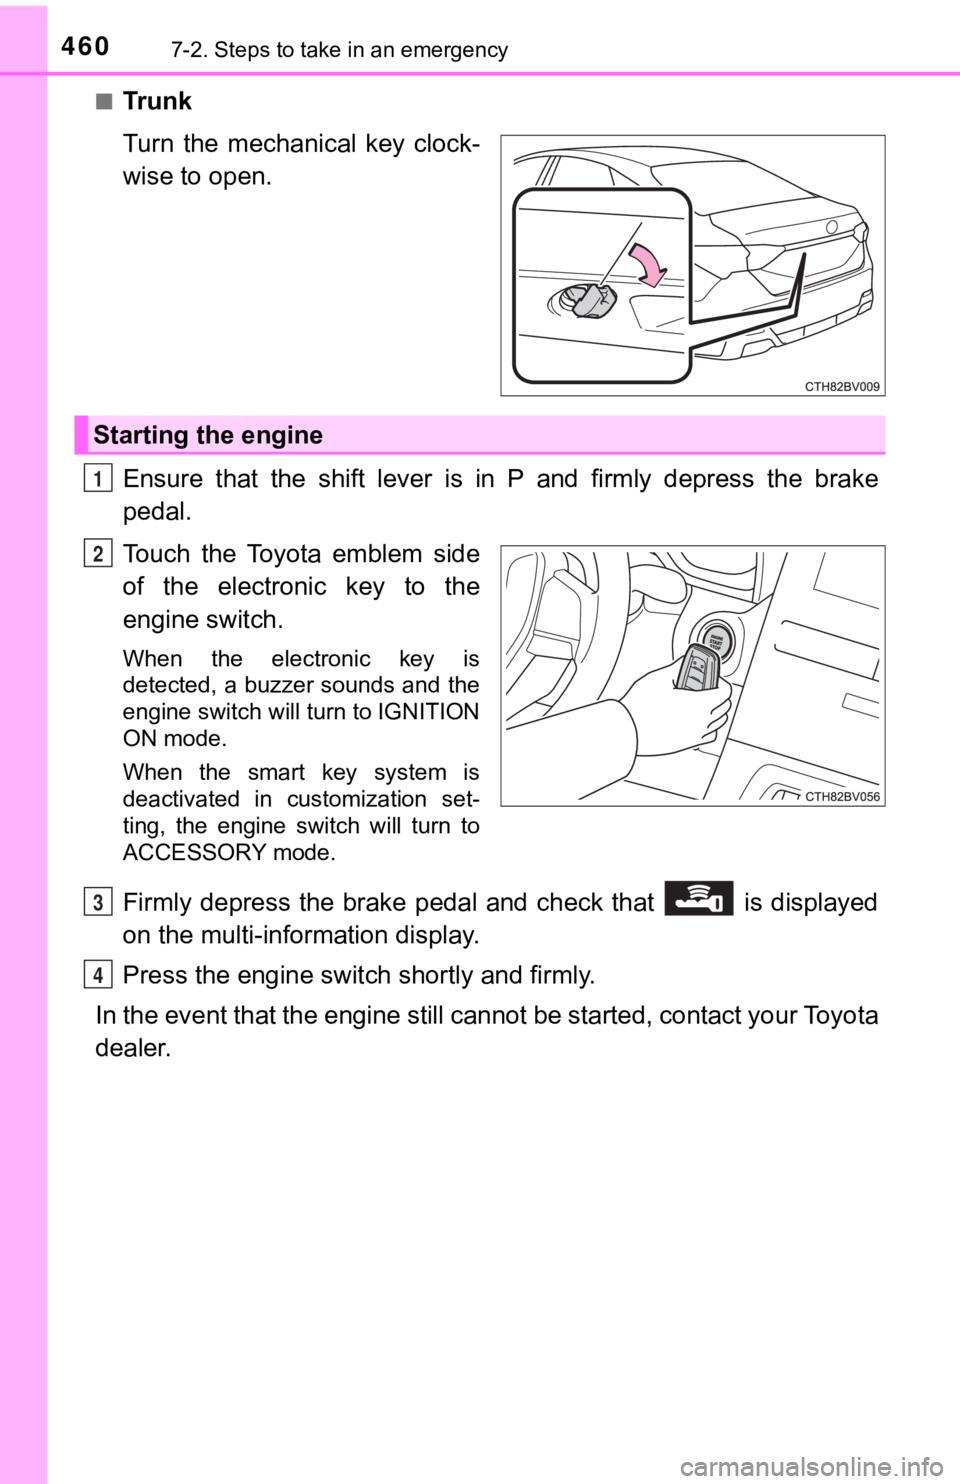
■Tr u n k
Turn the mechanical key clock-
wise to open.
Ensure that the shift lever is in P and firmly depress the brake
pedal.
Touch the Toyota emblem side
of the electronic key to the
engine switch.
When the electronic key is
detected, a buzzer sounds and the
engine switch will turn to IGNITION
ON mode.
When the smart key system is
deactivated in customization set-
ting, the engine switch will turn to
ACCESSORY mode.
Firmly depress the brake pedal and check that is displayed
on the multi-information display.
Press the engine switch shortly and firmly.
In the event that the engine still cannot be started, contact your Toyota
dealer.
Starting the engine
1
2
3
4