tire pressure TOYOTA AVALON 2020 Owners Manual (in English)
[x] Cancel search | Manufacturer: TOYOTA, Model Year: 2020, Model line: AVALON, Model: TOYOTA AVALON 2020Pages: 540, PDF Size: 10.4 MB
Page 5 of 540

5
1
8 7 5 4
3
2
9
6
5-4. Other interior featuresOther interior features ....... 342
• Sun visors ..................... 342
• Vanity mirrors................ 342
• Power outlet .................. 343
• USB charging ports....... 344
• Wireless charger ........... 346
• Armrest ......................... 355
• Assist grips ................... 355
• Coat hooks.................... 356
Garage door opener .......... 357 6-1. Maintenance and care
Cleaning and protecting the vehicle exterior .......... 366
Cleaning and protecting the vehicle interior ........... 369
6-2. Maintenance Maintenance requirements ................... 372
General maintenance ........ 374
Emission inspection and maintenance (I/M)
programs ......................... 378
6-3. Do-it-yourself maintenance
Do-it-yourself service precautions ...................... 379
Hood .................................. 381
Positioning a floor jack....... 382
Engine compartment ......... 383
Tires................................... 393
Tire inflation pressure ........ 407
Wheels............................... 410
Air conditioning filter .......... 412
Electronic key battery ........ 414
Checking and replacing fuses ................................ 416
Light bulbs ......................... 4196Maintenance and care
Page 17 of 540
17Pictorial index
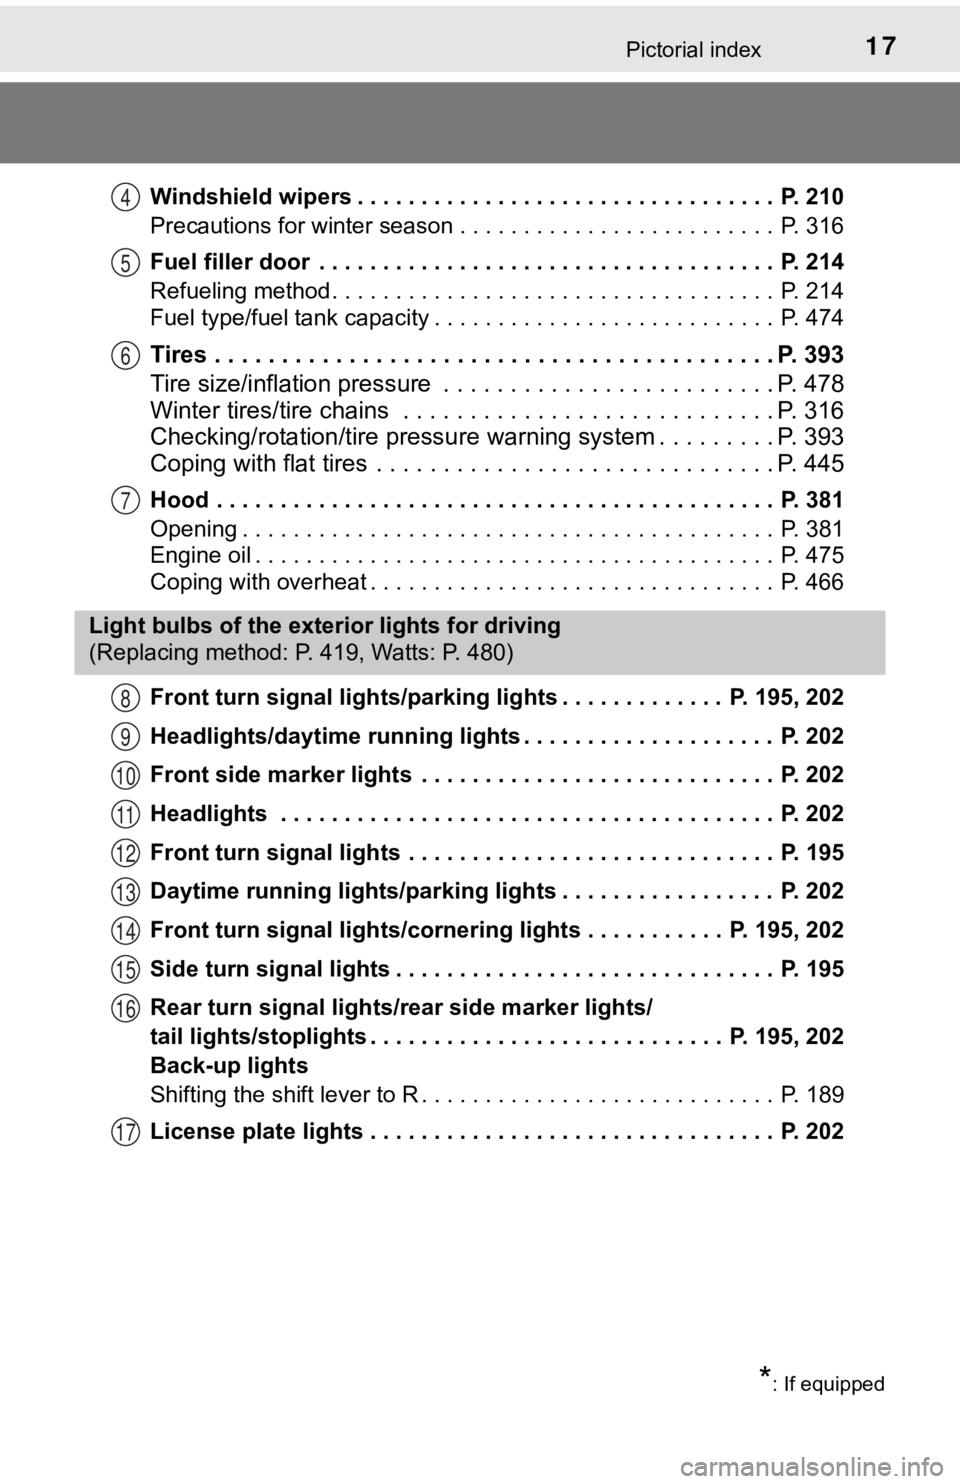
Windshield wipers . . . . . . . . . . . . . . . . . . . . . . . . . . . . . . . . . P. 210
Precautions for winter season . . . . . . . . . . . . . . . . . . . . . . . . . P. 316
Fuel filler door . . . . . . . . . . . . . . . . . . . . . . . . . . . . . . . . . . . . P. 214
Refueling method . . . . . . . . . . . . . . . . . . . . . . . . . . . . . . . . . . . P. 214
Fuel type/fuel tank capacity . . . . . . . . . . . . . . . . . . . . . . . . . . . P. 474
Tires . . . . . . . . . . . . . . . . . . . . . . . . . . . . . . . . . . . . . . . . . . P. 393
Tire size/inflation pressure . . . . . . . . . . . . . . . . . . . . . . . . . P. 478
Winter tires/tire chains . . . . . . . . . . . . . . . . . . . . . . . . . . . . P. 316
Checking/rotation/tire pressur e warning system . . . . . . . . .P. 393
Coping with flat tires . . . . . . . . . . . . . . . . . . . . . . . . . . . . . . P. 445
Hood . . . . . . . . . . . . . . . . . . . . . . . . . . . . . . . . . . . . . . . . . . . . P. 381
Opening . . . . . . . . . . . . . . . . . . . . . . . . . . . . . . . . . . . . . . . . . . P. 381
Engine oil . . . . . . . . . . . . . . . . . . . . . . . . . . . . . . . . . . . . . . . . . P. 475
Coping with overheat . . . . . . . . . . . . . . . . . . . . . . . . . . . . . . . . P. 466
Front turn signal lights/parking lights . . . . . . . . . . . . . P. 195, 202
Headlights/daytime running lights . . . . . . . . . . . . . . . . . . . . P. 202
Front side marker lights . . . . . . . . . . . . . . . . . . . . . . . . . . . . P. 202
Headlights . . . . . . . . . . . . . . . . . . . . . . . . . . . . . . . . . . . . . . . P. 202
Front turn signal lights . . . . . . . . . . . . . . . . . . . . . . . . . . . . . P. 195
Daytime running lights/parking lights . . . . . . . . . . . . . . . . . P. 202
Front turn signal lights/cornering lights . . . . . . . . . . . P. 195, 202
Side turn signal lights . . . . . . . . . . . . . . . . . . . . . . . . . . . . . . P. 195
Rear turn signal lights/r ear side marker lights/
tail lights/stoplights . . . . . . . . . . . . . . . . . . . . . . . . . . . . P. 195, 202
Back-up lights
Shifting the shift lever to R . . . . . . . . . . . . . . . . . . . . . . . . . . . . P. 189
License plate lights . . . . . . . . . . . . . . . . . . . . . . . . . . . . . . . . P. 202
4
5
6
7
Light bulbs of the exter ior lights for driving
(Replacing method: P. 419, Watts: P. 480)
*: If equipped
8
9
10
11
12
13
14
15
16
17
Page 86 of 540
862. Instrument cluster
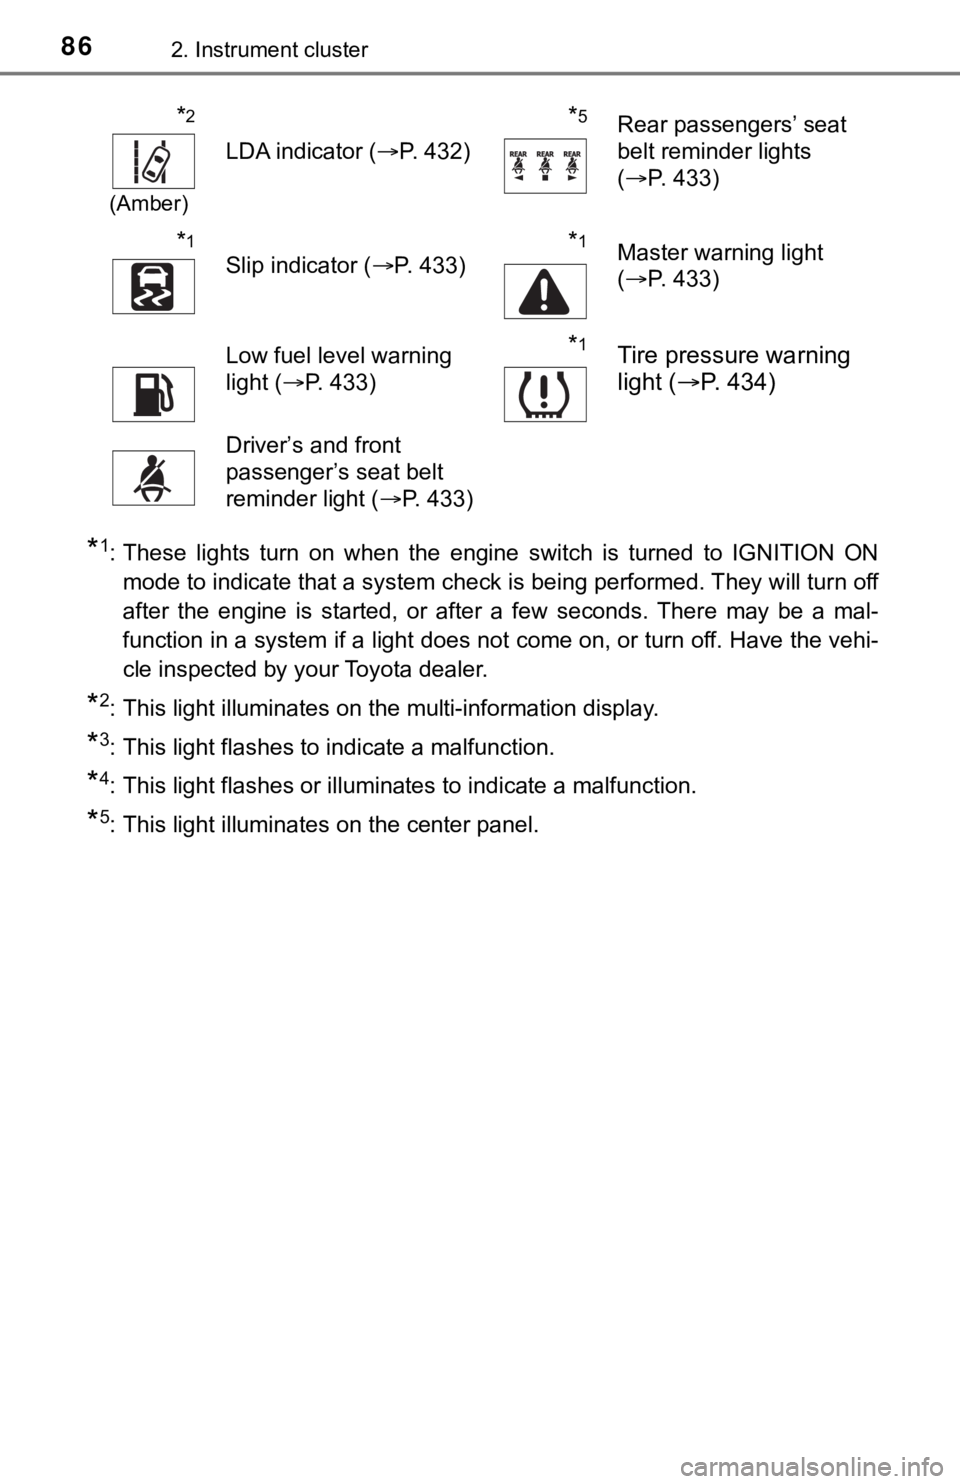
*1: These lights turn on when the engine switch is turned to IGNITION ON
mode to indicate that a system check is being performed. They will turn off
after the engine is started, or after a few seconds. There may be a mal-
function in a system if a light does not come on, or turn off. Have the vehi-
cle inspected by your Toyota dealer.
*2: This light illuminates on the multi-information display.
*3: This light flashes to indicate a malfunction.
*4: This light flashes or illuminates to indicate a malfunction.
*5: This light illuminates on the center panel.
*2
(Amber)
LDA indicator ( P. 432)
*5Rear passengers’ seat
belt reminder lights
(P. 433)
*1
Slip indicator ( P. 433)*1Master warning light
(P. 433)
Low fuel level warning
light ( P. 433)*1Tire pressure warning
light ( P. 434)
Driver’s and front
passenger’s seat belt
reminder light ( P. 433)
Page 96 of 540
962. Instrument cluster
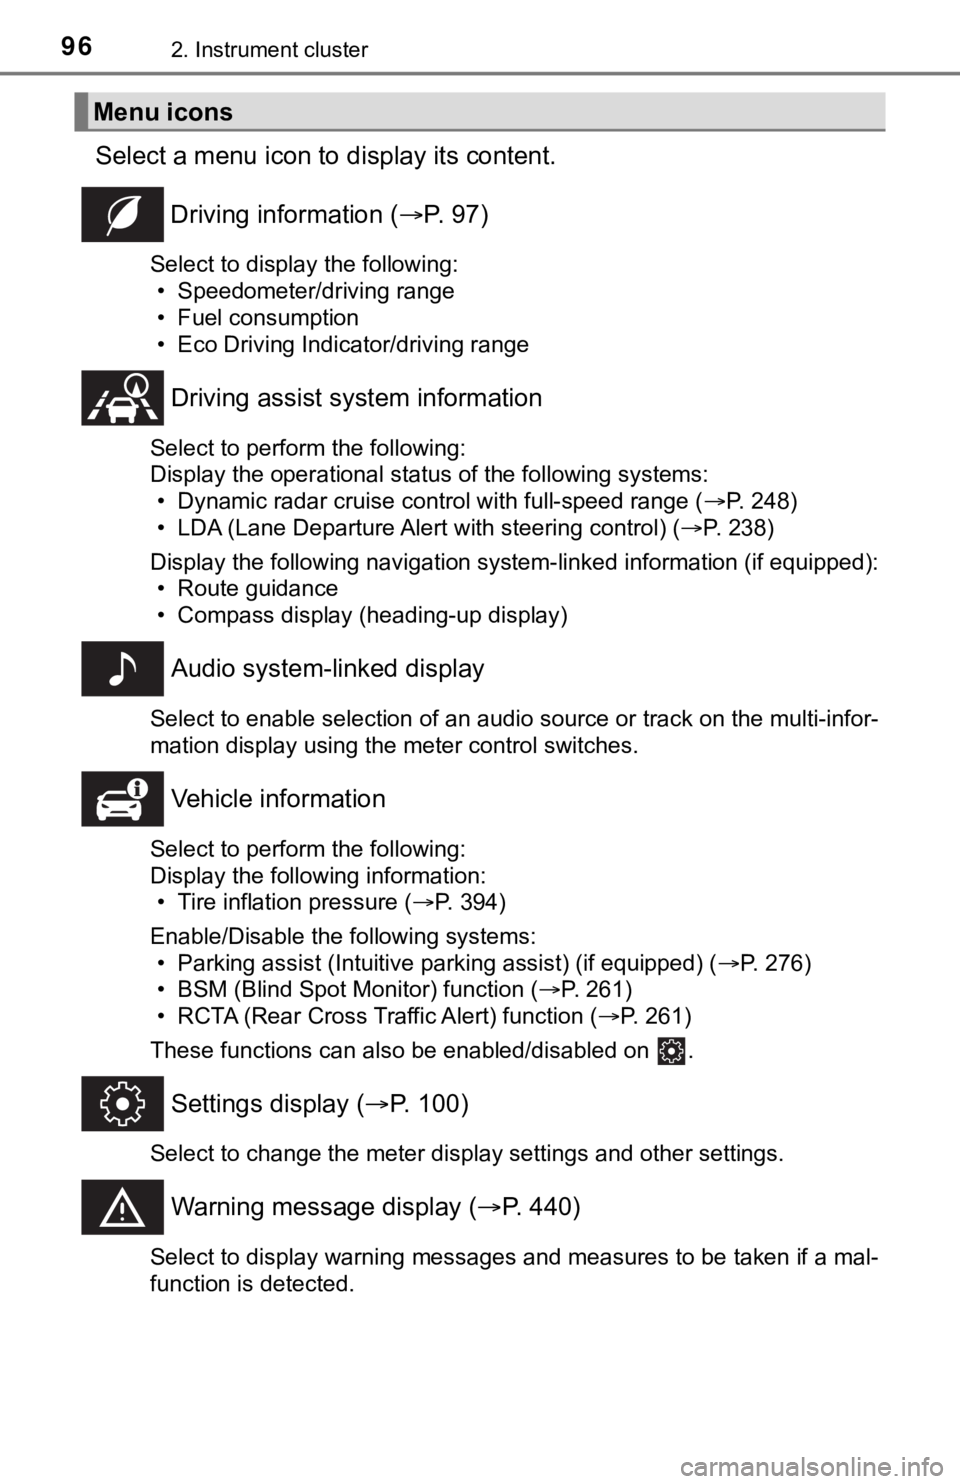
Select a menu icon to display its content.
Driving information ( P. 9 7 )
Select to display the following:
• Speedometer/driving range
• Fuel consumption
• Eco Driving Indicator/driving range
Driving assist sys tem information
Select to perform the following:
Display the operational status of the following systems:
• Dynamic radar cruise control with full-speed range ( P. 248)
• LDA (Lane Departure Alert with steering control) ( P. 238)
Display the following navigation system-linked information (if equipped):
• Route guidance
• Compass display (heading-up display)
Audio system-linked display
Select to enable selection of an audio source or track on the multi-infor-
mation display using the meter control switches.
Vehicle information
Select to perform the following:
Display the following information: • Tire inflation pressure ( P. 394)
Enable/Disable the following systems: • Parking assist (Intuitive parking assist) (if equipped) ( P. 276)
• BSM (Blind Spot Monitor) function ( P. 261)
• RCTA (Rear Cross Traffic Alert) function ( P. 261)
These functions can also be enabled/disabled on .
Settings display ( P. 100)
Select to change the meter display settings and other settings.
Warning message display ( P. 440)
Select to display warning messages and measures to be taken if a mal-
function is detected.
Menu icons
Page 104 of 540

1042. Instrument cluster
■ Vehicle settings
Press and hold to change the se ttings of the following items:
ItemSettingsDetails
TPWS (Tire pressure warning system) ( P. 394)
Set pressure (tire pressure warning sys-
tem initialization)
Select to initialize the tire pres-
sure warning system. To per-
form initialization, press and hold
the switch.
Before performing initialization,
make sure to adjust the inflation
pressure of each tire to the spec-
ified level. (P. 395)
Change wheel (register tire pressure
warning system sensor ID codes)
Select to register the ID codes of
the tire pressure sensors to the
tire pressure warning system. To
register the ID codes, press and
hold the switch.
(P. 396)
Scheduled maintenance display
Maintenance data reset
Select to reset the message indi-
cating maintenance is required,
after the required maintenance is
performed. ( P. 373)
Page 107 of 540
1072. Instrument cluster
2
Instrument cluster
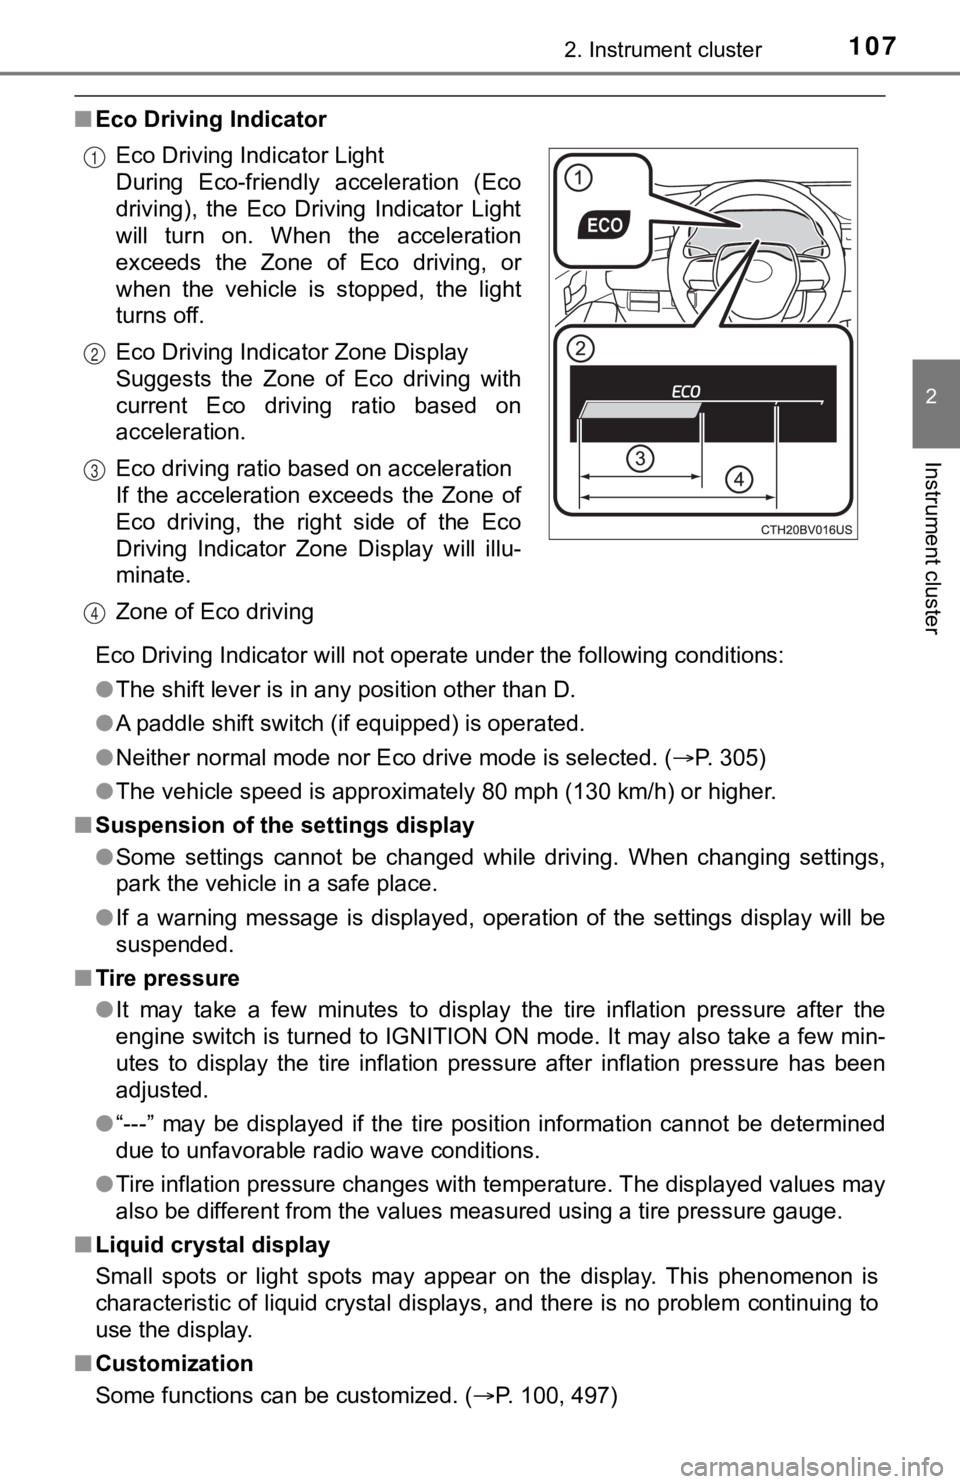
■Eco Driving Indicator
Eco Driving Indicator will not operate under the following cond itions:
● The shift lever is in any position other than D.
● A paddle shift switch (if equipped) is operated.
● Neither normal mode nor Eco drive mode is selected. ( P. 305)
● The vehicle speed is approximately 80 mph (130 km/h) or higher.
■ Suspension of the settings display
●Some settings cannot be changed while driving. When changing se ttings,
park the vehicle in a safe place.
● If a warning message is displayed, operation of the settings di splay will be
suspended.
■ Tire pressure
●It may take a few minutes to display the tire inflation pressur e after the
engine switch is turned to IGNITION ON mode. It may also take a few min-
utes to display the tire inflation pressure after inflation pre ssure has been
adjusted.
● “---” may be displayed if the tire position information cannot be determined
due to unfavorable radio wave conditions.
● Tire inflation pressure changes with temperature. The displayed values may
also be different from the values measured using a tire pressur e gauge.
■ Liquid crystal display
Small spots or light spots may appear on the display. This phen omenon is
characteristic of liquid crystal displays, and there is no prob lem continuing to
use the display.
■ Customization
Some functions can be customized. ( P. 100, 497)
Eco Driving Indicator Light
During Eco-friendly acceleration (Eco
driving), the Eco Driving Indicator Light
will turn on. When the acceleration
exceeds the Zone of Eco driving, or
when the vehicle is stopped, the light
turns off.
Eco Driving Indicator Zone Display
Suggests the Zone of Eco driving with
current Eco driving ratio based on
acceleration.
Eco driving ratio based on acceleration
If the acceleration exceeds the Zone of
Eco driving, the right side of the Eco
Driving Indicator Zone Display will illu-
minate.
Zone of Eco driving
1
2
3
4
Page 235 of 540
2354-5. Using the driving support systems
4
Driving
• When a very bright light, such as the sun or the headlights of oncomingtraffic, shines directly into the camera sensor
• When the surrounding area is dim, such as at dawn or dusk, or while at
night or in a tunnel
• After the engine has started the vehicle has not been driven for a certain
amount of time
• While making a left/right turn and for a few seconds after mak ing a left/
right turn
• While driving on a curve and for a few seconds after driving o n a curve
• If your vehicle is skidding
• If the wheels are misaligned
• If a wiper blade is blocking the camera sensor
• The vehicle is wobbling.
• The vehicle is being driven at extremely high speeds.
• When driving on a hill
• If the radar sensor or camera sensor is misaligned
● In some situations such as the following, sufficient braking fo rce may not be
obtained, preventing the system from performing properly:
• If the braking functions cannot operate to their full extent, such as when
the brake parts are extremely cold, extremely hot, or wet
• If the vehicle is not properly maintained (brakes or tires are excessively
worn, improper tire inflation pressure, etc.)
• When the vehicle is being driven on a gravel road or other sli ppery sur-
face
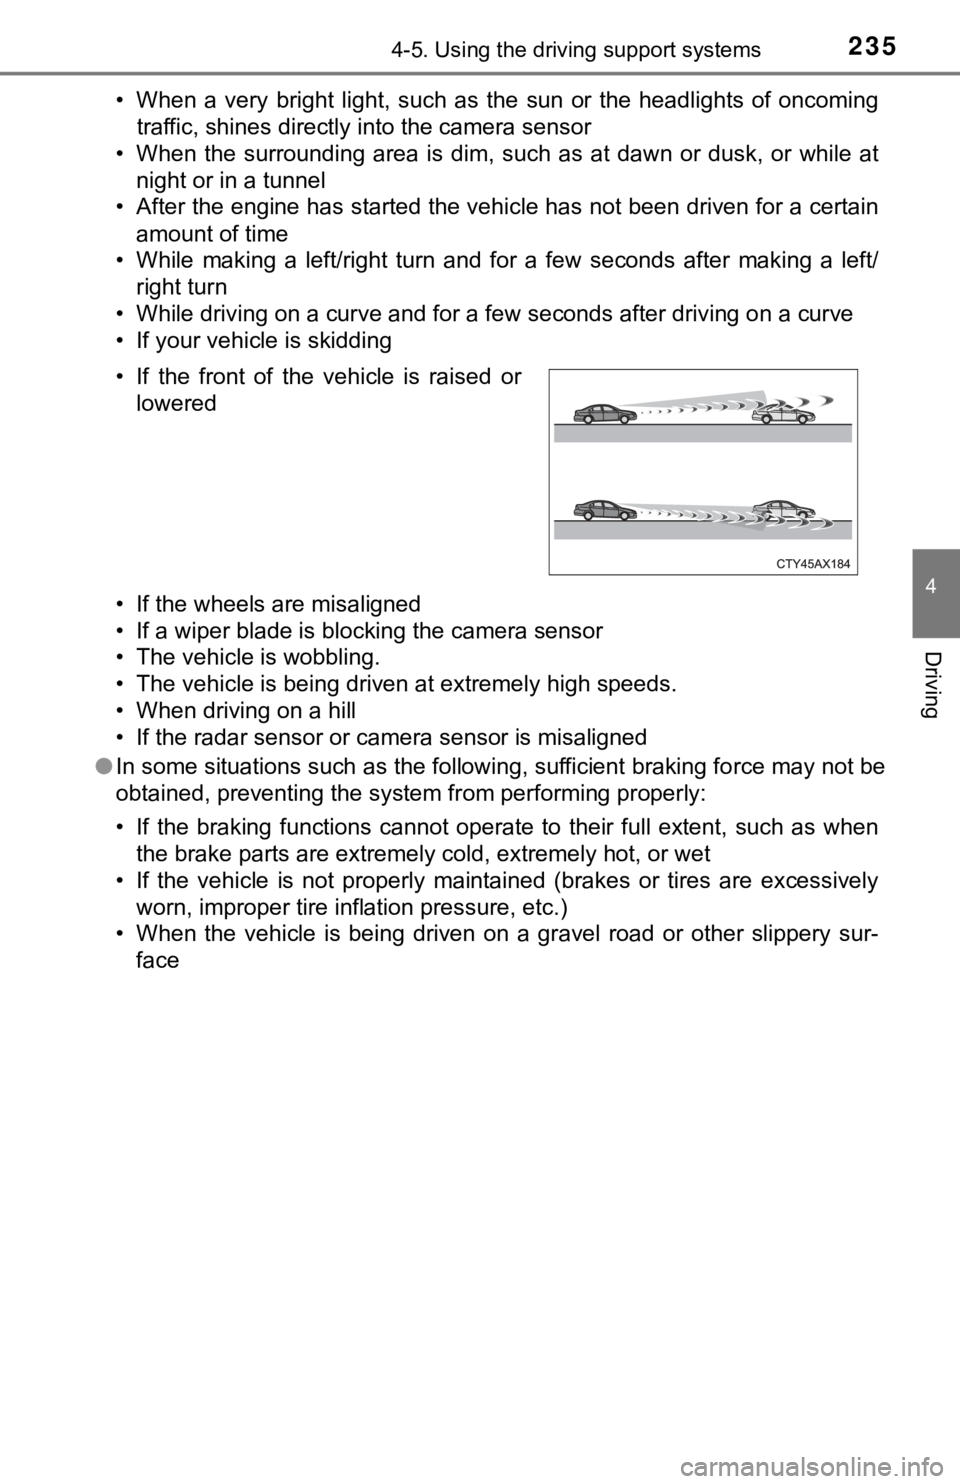
• If the front of the vehicle is raised or
lowered
Page 246 of 540

2464-5. Using the driving support systems
■Conditions in which function s may not operate properly
In the following situations, the camera sensor may not detect w hite (yellow)
lines and various functions may not operate normally.
● There are shadows on the road that run parallel with, or cover, the white
(yellow) lines.
● The vehicle is driven in an area without white (yellow) lines, such as in front
of a tollgate or checkpoint, or at an intersection, etc.
● The white (yellow) lines are cracked, “Botts’ dots”, “Raised pa vement
marker” or stones are present.
● The white (yellow) lines cannot be seen or are difficult to see due to sand,
etc.
● The vehicle is driven on a road surface that is wet due to rain , puddles, etc.
● The traffic lines are yellow (which may be more difficult to re cognize than
lines that are white).
● The white (yellow) lines cross over a curb, etc.
● The vehicle is driven on a bright surface, such as concrete.
● The vehicle is driven on a surface that is bright due to reflec ted light, etc.
● The vehicle is driven in an area where the brightness changes s uddenly,
such as at the entrances and exits of tunnels, etc.
● Light from the headlights of an oncoming vehicle, the sun, etc. enters the
camera.
● The vehicle is driven where the road diverges, merges, etc.
● The vehicle is driven on a slope.
● The vehicle is driven on a road which tilts left or right, or a winding road.
● The vehicle is driven on an unpaved or rough road.
● The vehicle is driven around a sharp curve.
● The traffic lane is excessively narrow or wide.
● The vehicle is extremely tilted due to carrying heavy luggage or having
improper tire pressure.
● The distance to the preceding vehicle is extremely short.
● The vehicle is moving up and down a large amount due to road co nditions
during driving (poor roads or road seams).
● The headlight lenses are dirty and emit a faint amount of light at night, or the
beam axis has deviated.
● The vehicle is struck by a crosswind.
● The vehicle has just changed lanes or crossed an intersection.
● Snow tires, etc. are equipped.
Page 297 of 540

2974-5. Using the driving support systems
4
Driving
NOTICE
■To prevent the system from malfunctioning
● If the area around a sensor is subjected to an impact, the syst em may not
operate properly due to the sensor being misaligned. Have the v ehicle
inspected by your Toyota dealer.
● When using a high pressure washer to wash the vehicle, do not spray the
sensors directly, as doing so may cause a sensor to malfunction .
● When using steam to clean the vehicle, do not direct steam too close to
the sensors as doing so may cause a sensor to malfunction.
■ To prevent a radar sensor from malfunctioning
● If the area around a radar sensor is subjected to an impact, th e system
may not operate properly due to a sensor malfunction. Have the vehicle
inspected by your Toyota dealer.
● Observe the radar sensor handling precautions. ( P. 264)
■ To prevent unnecessary operation of the Intelligent Clearance S onar
system
In the following situations, disable the Intelligent Clearance Sonar system
as the system may operate even though there is no possibility o f a collision.
● When inspecting the vehicle using a chassis roller, chassis dynamo or free
roller
● When loading the vehicle onto a boat, truck or other transport vessel
● If the suspension has been modified or tires of a size other th an specified
are installed
● If the front of the vehicle is raised or lowered due to the carried load
● When equipment that may obstruct a sensor is installed, such as a towing
eyelet, bumper protector (an additional trim strip, etc.), bicy cle carrier, or
snow plow
● When using an automatic car wash
Page 315 of 540

3154-5. Using the driving support systems
4
Driving
WARNING
■Hill- start assist control does not operate effectively when
● Do not overly rely on hill-start assist control. Hill-start ass ist control may
not operate effectively on steep inclines and roads covered wit h ice.
● Unlike the parking brake, hill-st art assist control is not intended to hold the
vehicle stationary for an extended period of time. Do not attempt to use
hill-start assist control to hold the vehicle on an incline, as doing so may
lead to an accident.
■ When the TRAC/VSC is activated
The slip indicator light flashes. Always drive carefully. Reckless driving may
cause an accident. Exercise particular care when the indicator light flashes.
■ When the TRAC/VSC systems are turned off
Be especially careful and drive at a speed appropriate to the r oad condi-
tions. As these are the systems to help ensure vehicle stabilit y and driving
force, do not turn the TRAC/VSC systems off unless necessary.
■ Replacing tires
Make sure that all tires are of the specified size, brand, trea d pattern and
total load capacity. In addition, make sure that the tires are inflated to the
recommended tire inflation pressure level.
The ABS, TRAC and VSC systems will not function correctly if di fferent tires
are installed on the vehicle.
Contact your Toyota dealer for further information when replaci ng tires or
wheels.
■ Handling of tires and the suspension
Using tires with any kind of problem or modifying the suspensio n will affect
the driving assist systems, and may cause a system to malfuncti on.
■ Secondary Collision Brake
Do not rely solely upon the Secondary Collision Brake. This sys tem is
designed to help reduce the possibility of further damage due t o a second-
ary collision, however, that effect changes according to variou s conditions.
Overly relying on the system may result in death or serious inj ury.