maintenance TOYOTA AVENSIS 2012 Workshop Manual
[x] Cancel search | Manufacturer: TOYOTA, Model Year: 2012, Model line: AVENSIS, Model: TOYOTA AVENSIS 2012Pages: 772, PDF Size: 34.43 MB
Page 558 of 772
558
4-3. Do-it-yourself maintenance
AVENSIS_EE (OM20B44E)
Wheels
If a wheel is bent, cracked or heavily corroded, it should be replaced.
Otherwise, the tire may separate from the wheel or cause loss of
handling control.
Wheel selection
When replacing wheels, care should be taken to ensure that
they are equivalent to those removed in load capacity, diameter,
rim width, and inset
*.
Replacement wheels are available at any authorized Toyota
dealer or repairer, or another duly qualified and equipped profes-
sional.
*: Conventionally referred to as “offset”.
Toyota does not recommend using:
Wheels of different sizes or types
Used wheels
Bent wheels that have been straightened
Aluminum wheel precautions
Use only Toyota wheel nuts and wrenches designed for use
with your aluminum wheels.
When rotating, repairing or changing your tires, check that the
wheel nuts are still tight after driving 1600 km (1000 miles).
Be careful not to damage the aluminum wheels when using
tire chains.
Use only Toyota genuine balance weights or equivalent and a
plastic or rubber hammer when balancing your wheels.
Page 559 of 772
559 4-3. Do-it-yourself maintenance
4
Maintenance and care
AVENSIS_EE (OM20B44E)
CAUTION
When replacing wheels
Do not use wheels that are a different size from those recommended in the
Owner’s Manual, as this may result in loss of handling control.
Never use an inner tube in a leaking wheel which is designed for a tube-
less tire. Doing so may result in an accident, causing death or serious
injury.
When installing the wheel nuts
Never use oil or grease on the wheel bolts or wheel nuts.
Oil and grease may cause the wheel nuts to be excessively tightened,
leading to bolt or disc wheel damage. In addition, the oil or grease can
cause the wheel nuts to loosen and the wheel may fall off, causing an acci-
dent and resulting in death or serious injury. Remove any oil or grease
from the wheel bolts or wheel nuts.
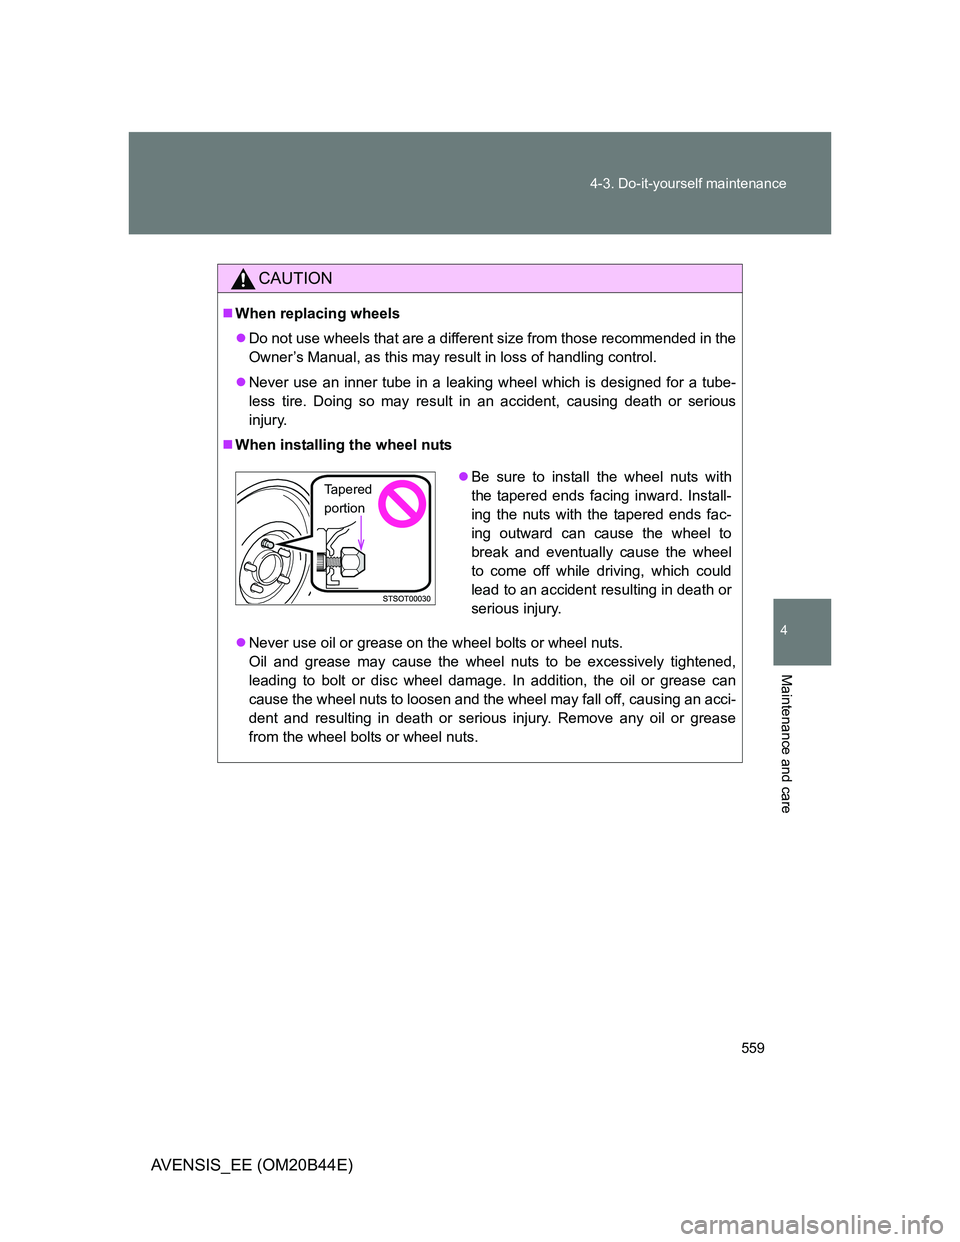
Be sure to install the wheel nuts with
the tapered ends facing inward. Install-
ing the nuts with the tapered ends fac-
ing outward can cause the wheel to
break and eventually cause the wheel
to come off while driving, which could
lead to an accident resulting in death or
serious injury.Tapered
portion
Page 560 of 772
560
4-3. Do-it-yourself maintenance
AVENSIS_EE (OM20B44E)
Air conditioning filter
The air conditioning filter must be cleaned or changed regularly to
maintain air conditioning efficiency.
Removal method
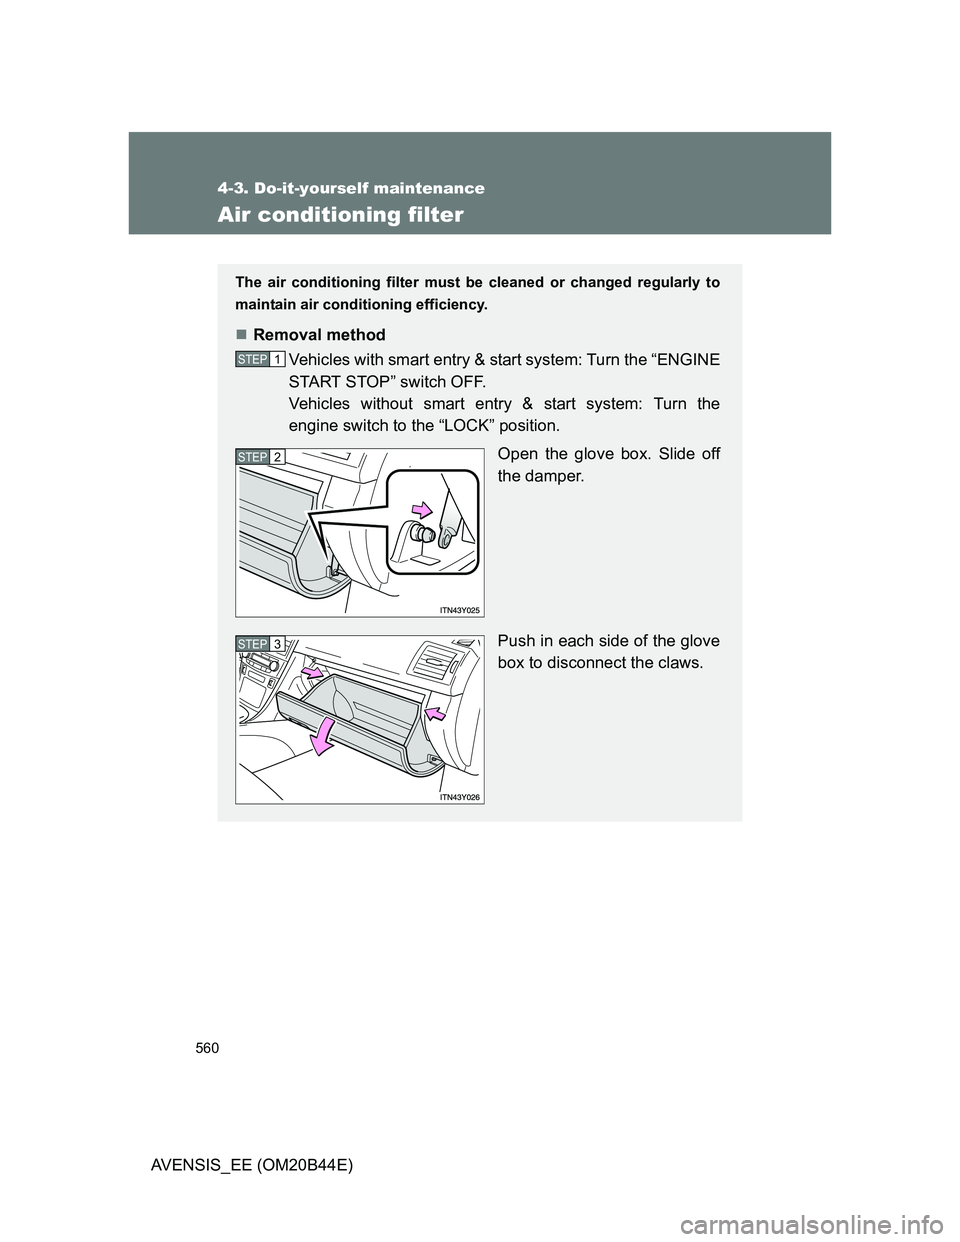
Vehicles with smart entry & start system: Turn the “ENGINE
START STOP” switch OFF.
Vehicles without smart entry & start system: Turn the
engine switch to the “LOCK” position.
Open the glove box. Slide off
the damper.
Push in each side of the glove
box to disconnect the claws.
STEP1
STEP2
STEP3
Page 561 of 772
561 4-3. Do-it-yourself maintenance
4
Maintenance and care
AVENSIS_EE (OM20B44E)
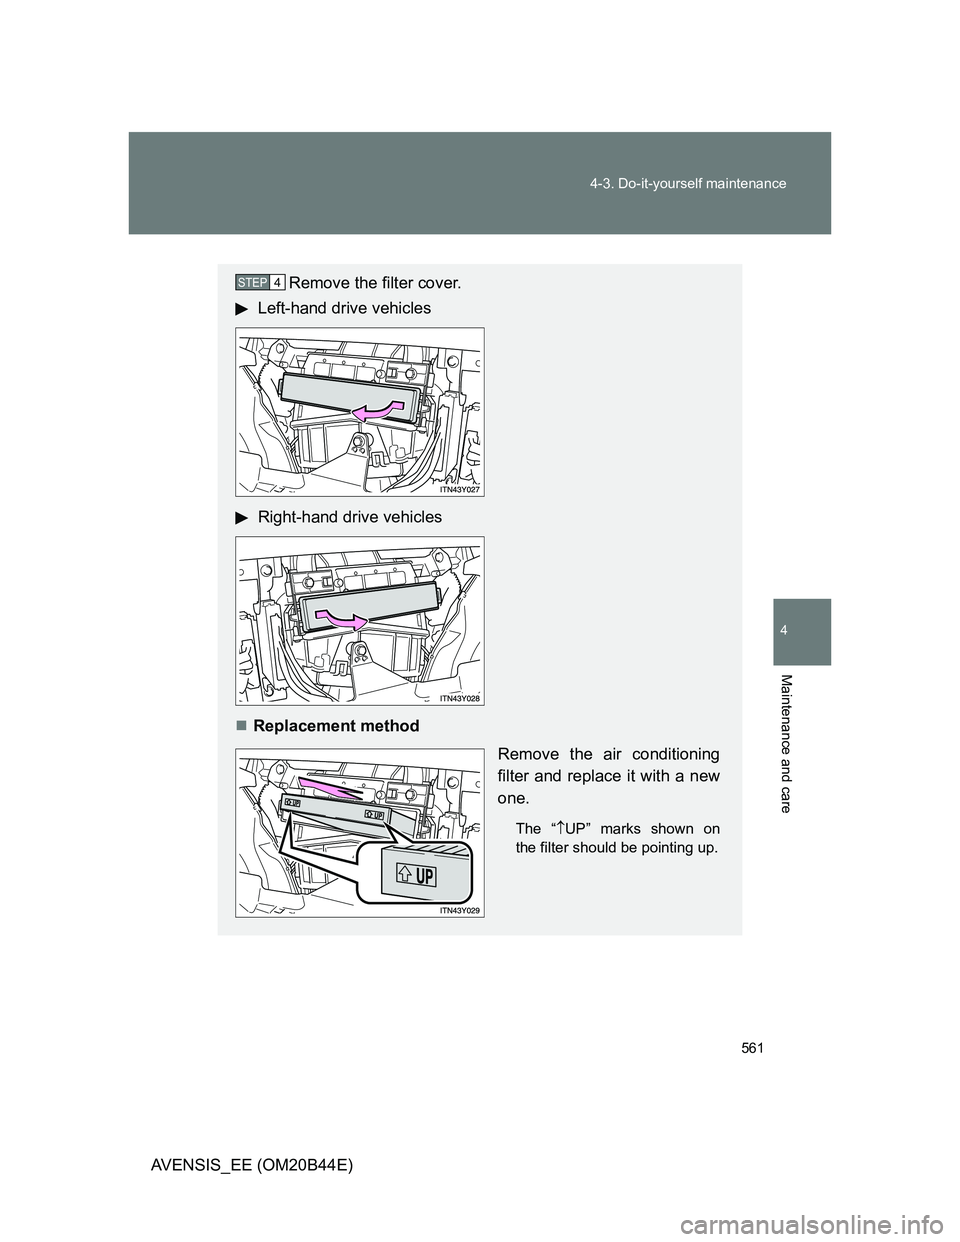
Remove the filter cover.
Left-hand drive vehicles
Right-hand drive vehicles
Replacement method
Remove the air conditioning
filter and replace it with a new
one.
The “UP” marks shown on
the filter should be pointing up.
STEP4
Page 562 of 772
562 4-3. Do-it-yourself maintenance
AVENSIS_EE (OM20B44E)
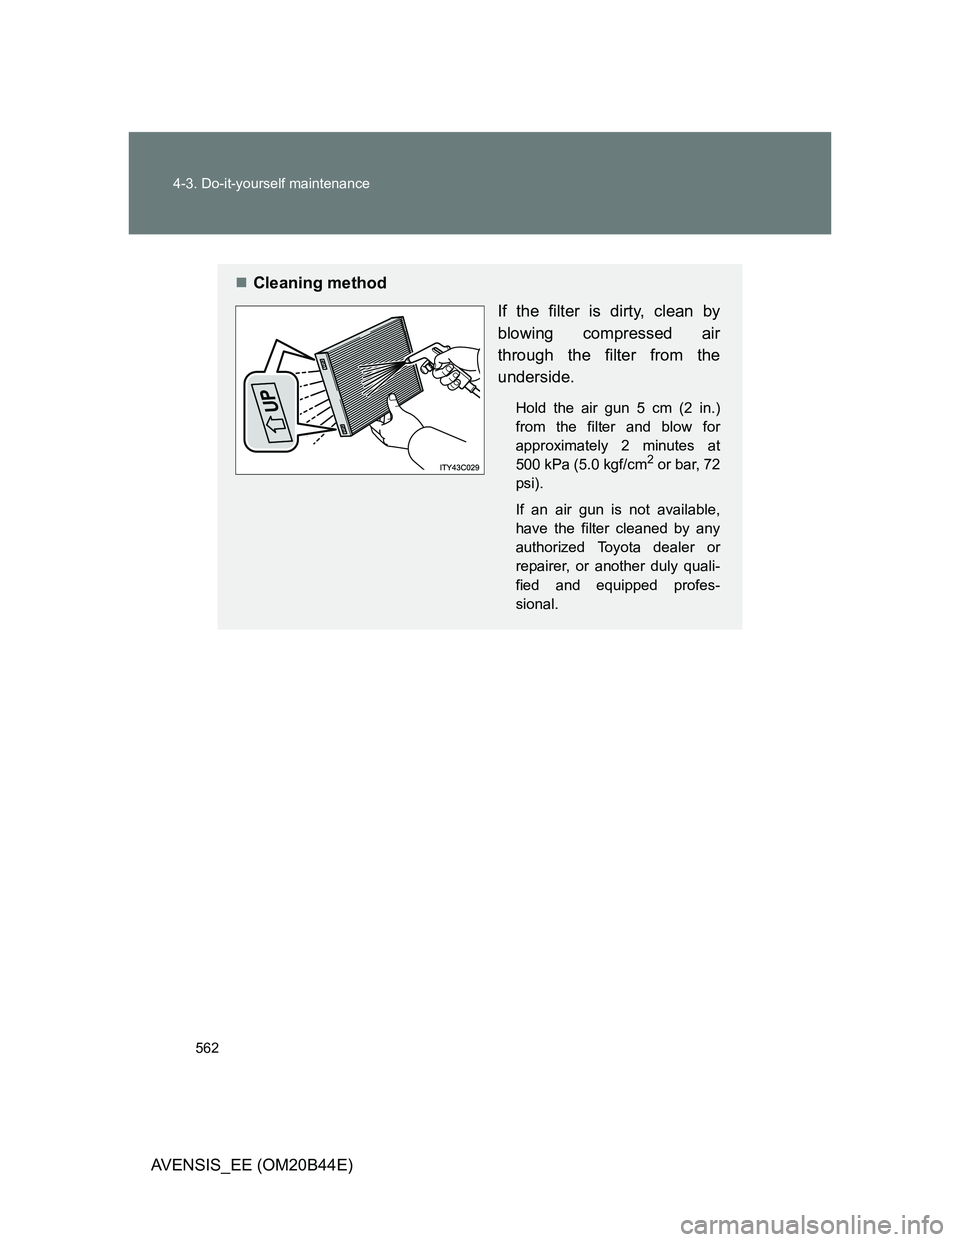
Cleaning method
If the filter is dirty, clean by
blowing compressed air
through the filter from the
underside.
Hold the air gun 5 cm (2 in.)
from the filter and blow for
approximately 2 minutes at
500 kPa (5.0 kgf/cm
2 or bar, 72
psi).
If an air gun is not available,
have the filter cleaned by any
authorized Toyota dealer or
repairer, or another duly quali-
fied and equipped profes-
sional.
Page 563 of 772
563 4-3. Do-it-yourself maintenance
4
Maintenance and care
AVENSIS_EE (OM20B44E)
Checking interval
Inspect and replace the air conditioning filter according to the maintenance
schedule. In dusty areas or areas with heavy traffic flow, early replacement
may be required. (For scheduled maintenance information, please refer to
the “Toyota Service Booklet” or “Toyota Warranty Booklet”.)
If air flow from the vents decreases dramatically
The filter may be clogged. Check the filter and replace if necessary.
NOTICE
To prevent damage to the system
When using the air conditioning system, make sure that a filter is always
installed.
When cleaning the filter, do not clean with water.
Page 564 of 772
564
4-3. Do-it-yourself maintenance
AVENSIS_EE (OM20B44E)
Key batter y
Replace the battery with a new one if it is discharged.
You will need the following items:
Flathead screwdriver (To prevent damage to the key, cover
the tip of the screwdriver with rag.)
Small Phillips-head screwdriver
Lithium battery
Vehicles with smart entry & start system: CR1632
Vehicles without smart entry & start system: CR2016
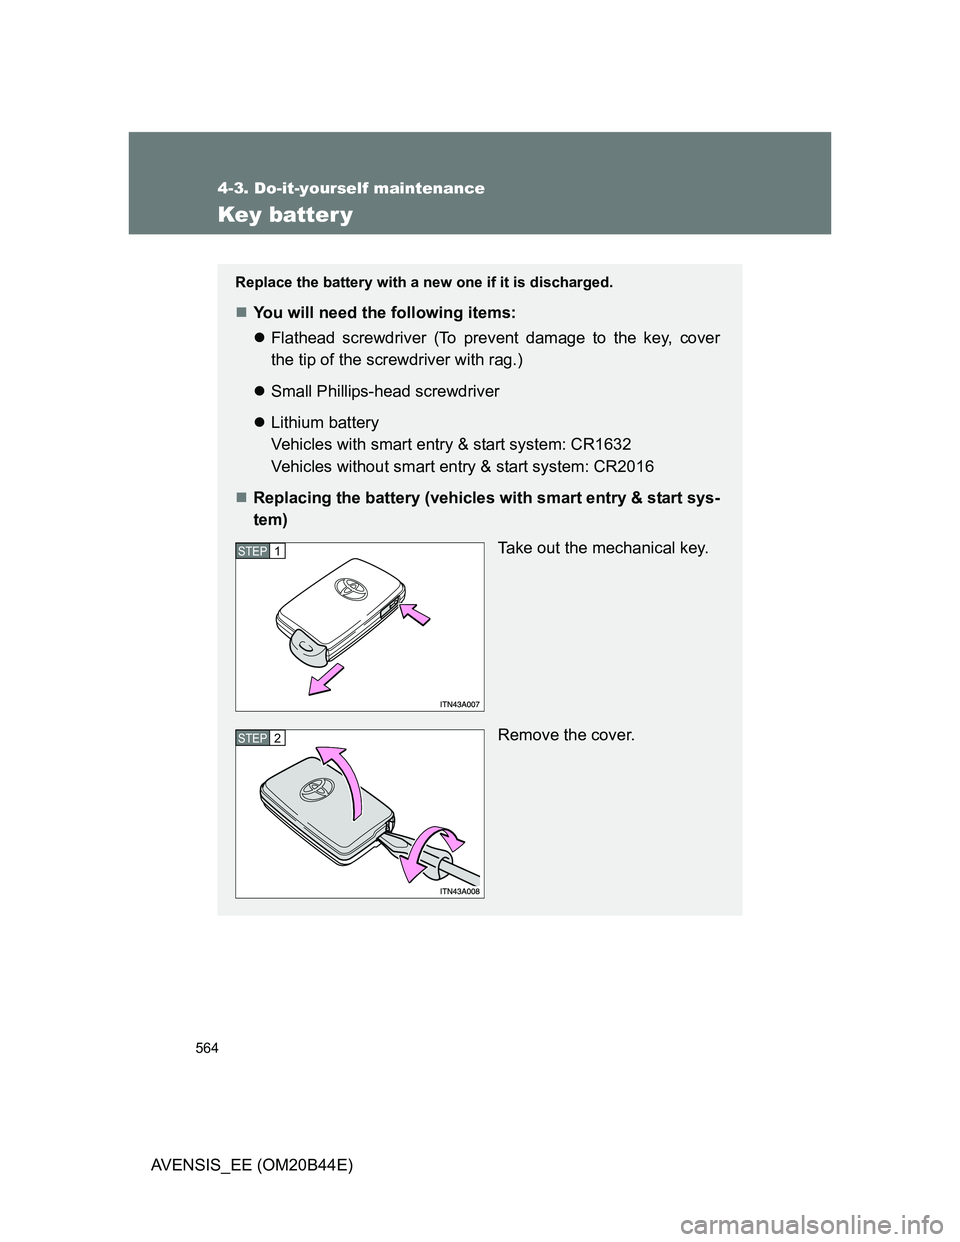
Replacing the battery (vehicles with smart entry & start sys-
tem)
Take out the mechanical key.
Remove the cover.
STEP1
STEP2
Page 565 of 772
565 4-3. Do-it-yourself maintenance
4
Maintenance and care
AVENSIS_EE (OM20B44E)
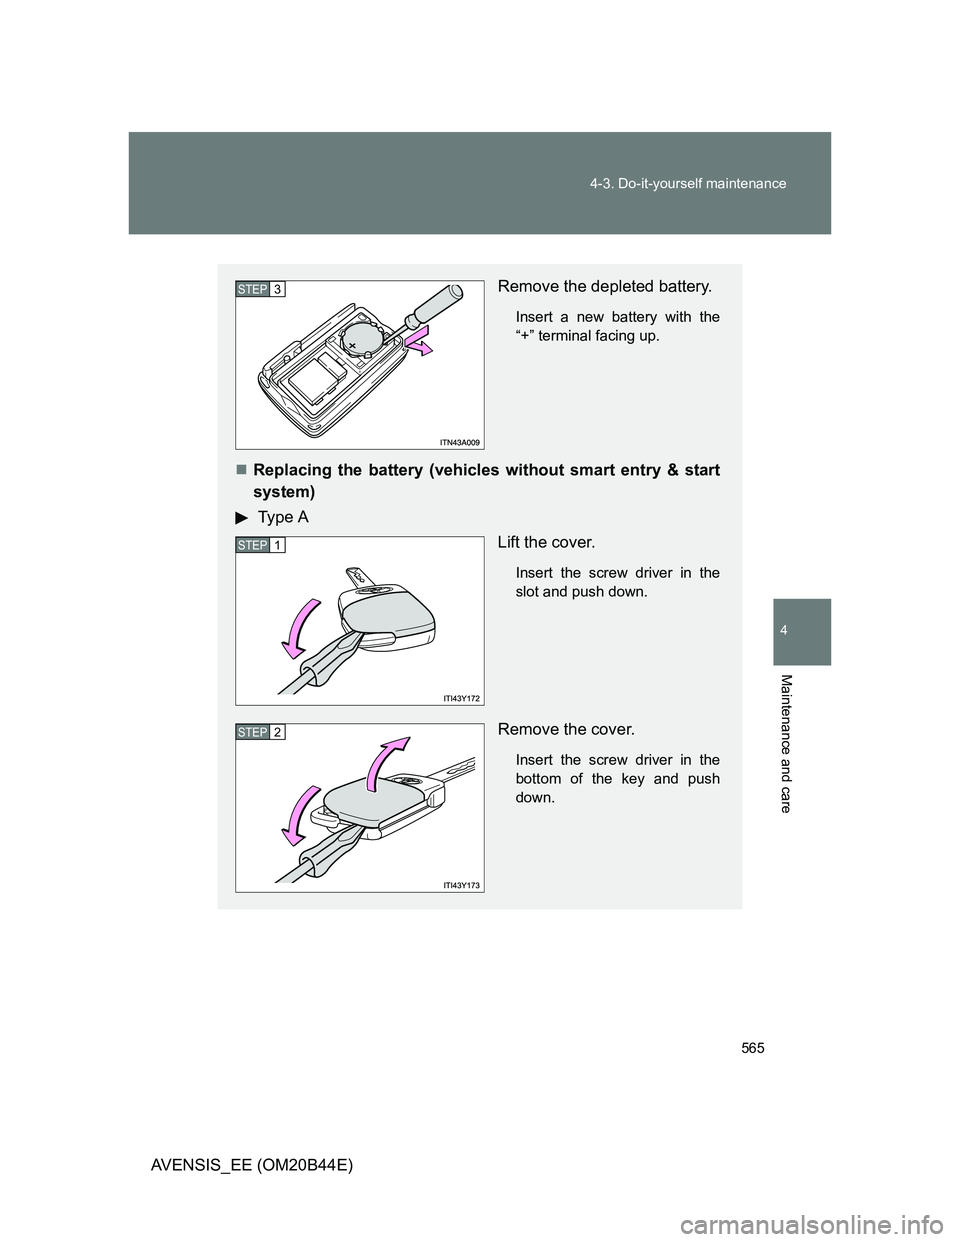
Remove the depleted battery.
Insert a new battery with the
“+” terminal facing up.
Replacing the battery (vehicles without smart entry & start
system)
Type A
Lift the cover.
Insert the screw driver in the
slot and push down.
Remove the cover.
Insert the screw driver in the
bottom of the key and push
down.
STEP3
STEP1
STEP2
Page 566 of 772
566 4-3. Do-it-yourself maintenance
AVENSIS_EE (OM20B44E)
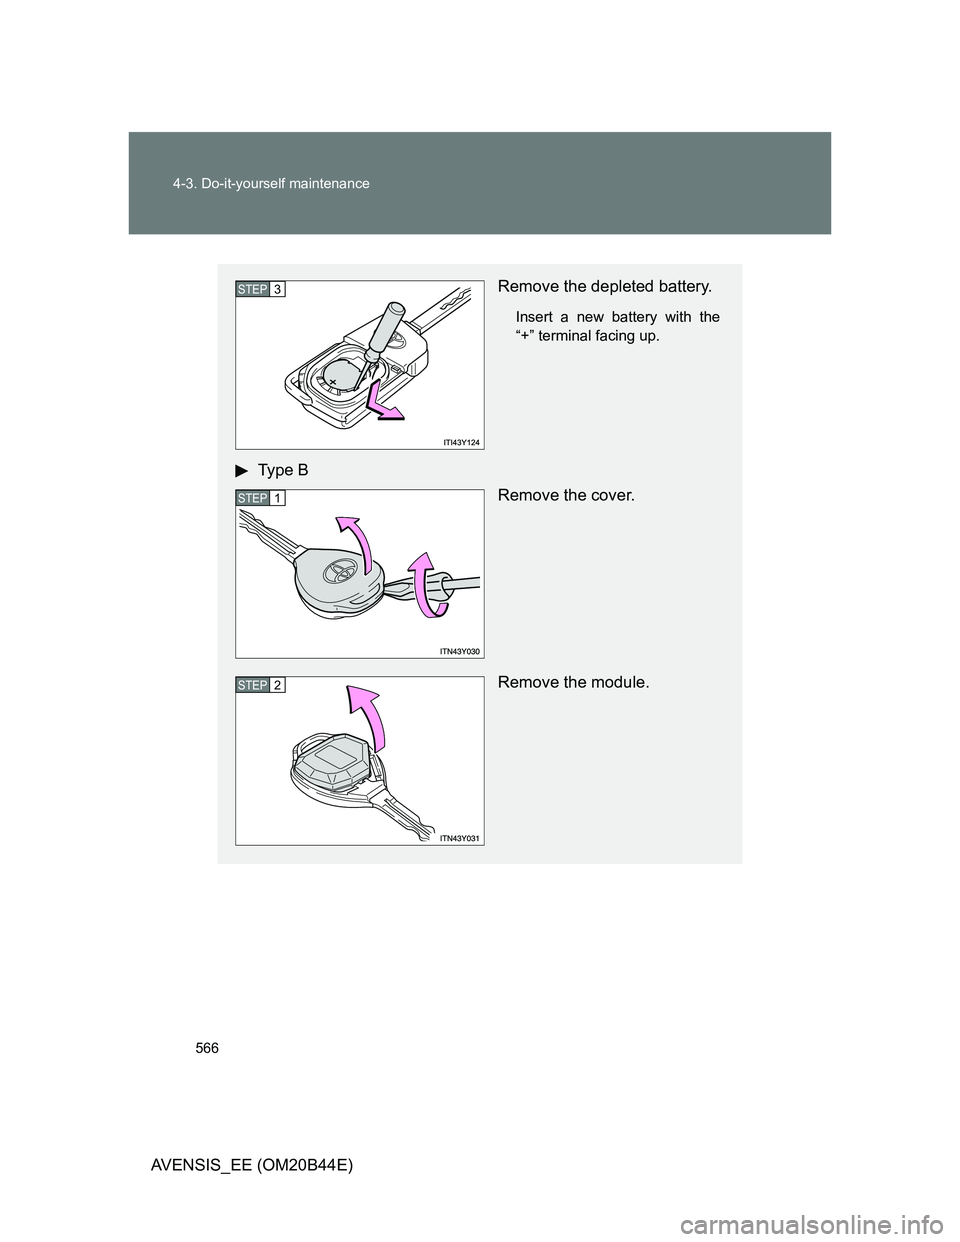
Remove the depleted battery.
Insert a new battery with the
“+” terminal facing up.
Type B
Remove the cover.
Remove the module.
STEP3
STEP1
STEP2
Page 567 of 772
567 4-3. Do-it-yourself maintenance
4
Maintenance and care
AVENSIS_EE (OM20B44E)
If the key battery is discharged
The following symptoms may occur.
The smart entry & start system and wireless remote control will not func-
tion properly.
The operational range is reduced.
Use the following types of lithium battery
Vehicles with smart entry & start system: CR1632
Vehicles without smart entry & start system: CR2016
Batteries can be purchased at any authorized Toyota dealer or repairer,
or another duly qualified and equipped professional, jewelers, or camera
stores.
Replace only with the same or equivalent type recommended by any
authorized Toyota dealer or repairer, or another duly qualified and
equipped professional.
Dispose of used batteries according to the local laws.
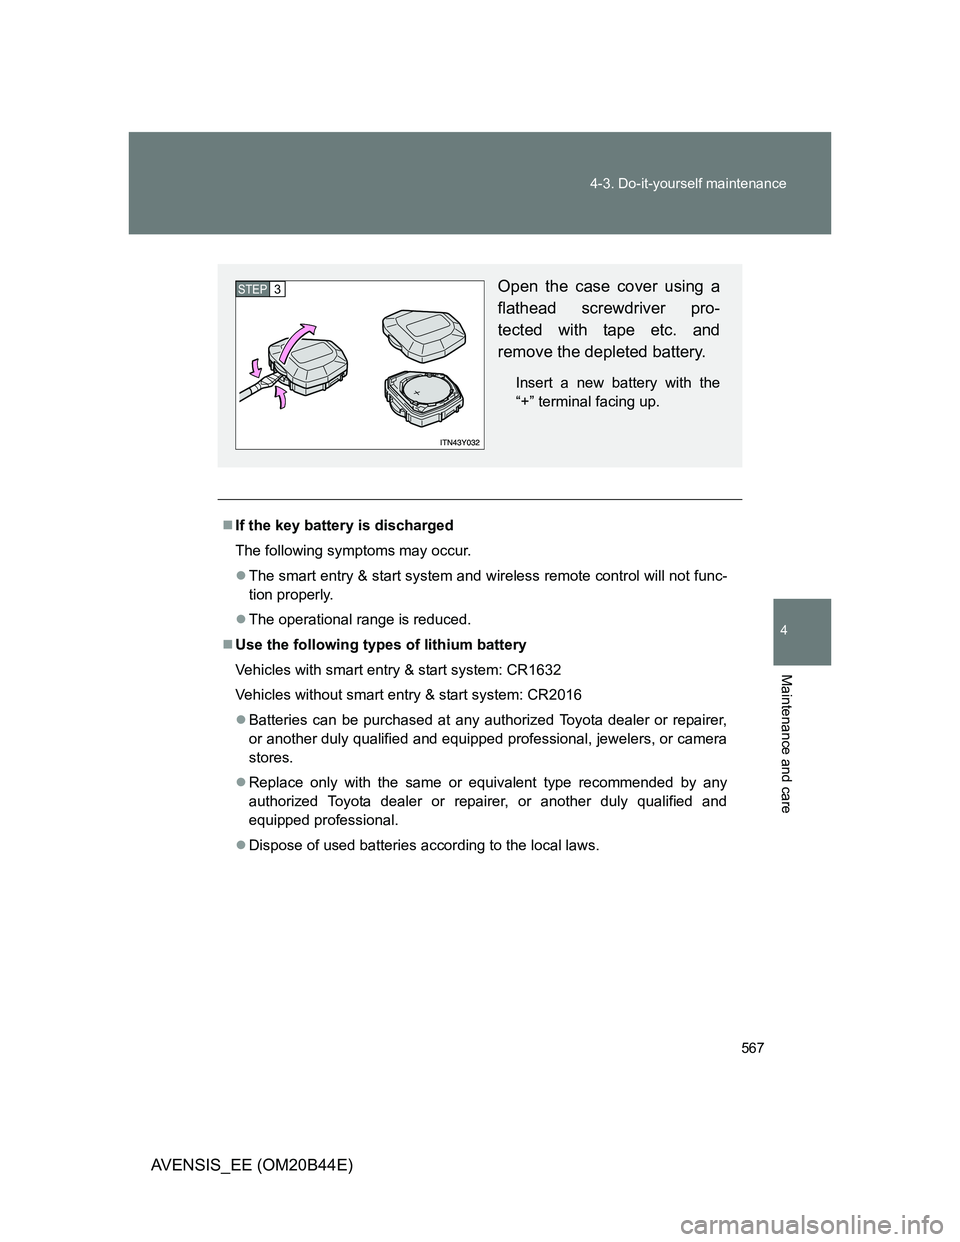
Open the case cover using a
flathead screwdriver pro-
tected with tape etc. and
remove the depleted battery.
Insert a new battery with the
“+” terminal facing up.
STEP3