headlights TOYOTA AYGO 2017 Owners Manual (in English)
[x] Cancel search | Manufacturer: TOYOTA, Model Year: 2017, Model line: AYGO, Model: TOYOTA AYGO 2017Pages: 480, PDF Size: 40.72 MB
Page 11 of 480
11Pictorial index
AYGO_OM_Europe_OM99Q24E
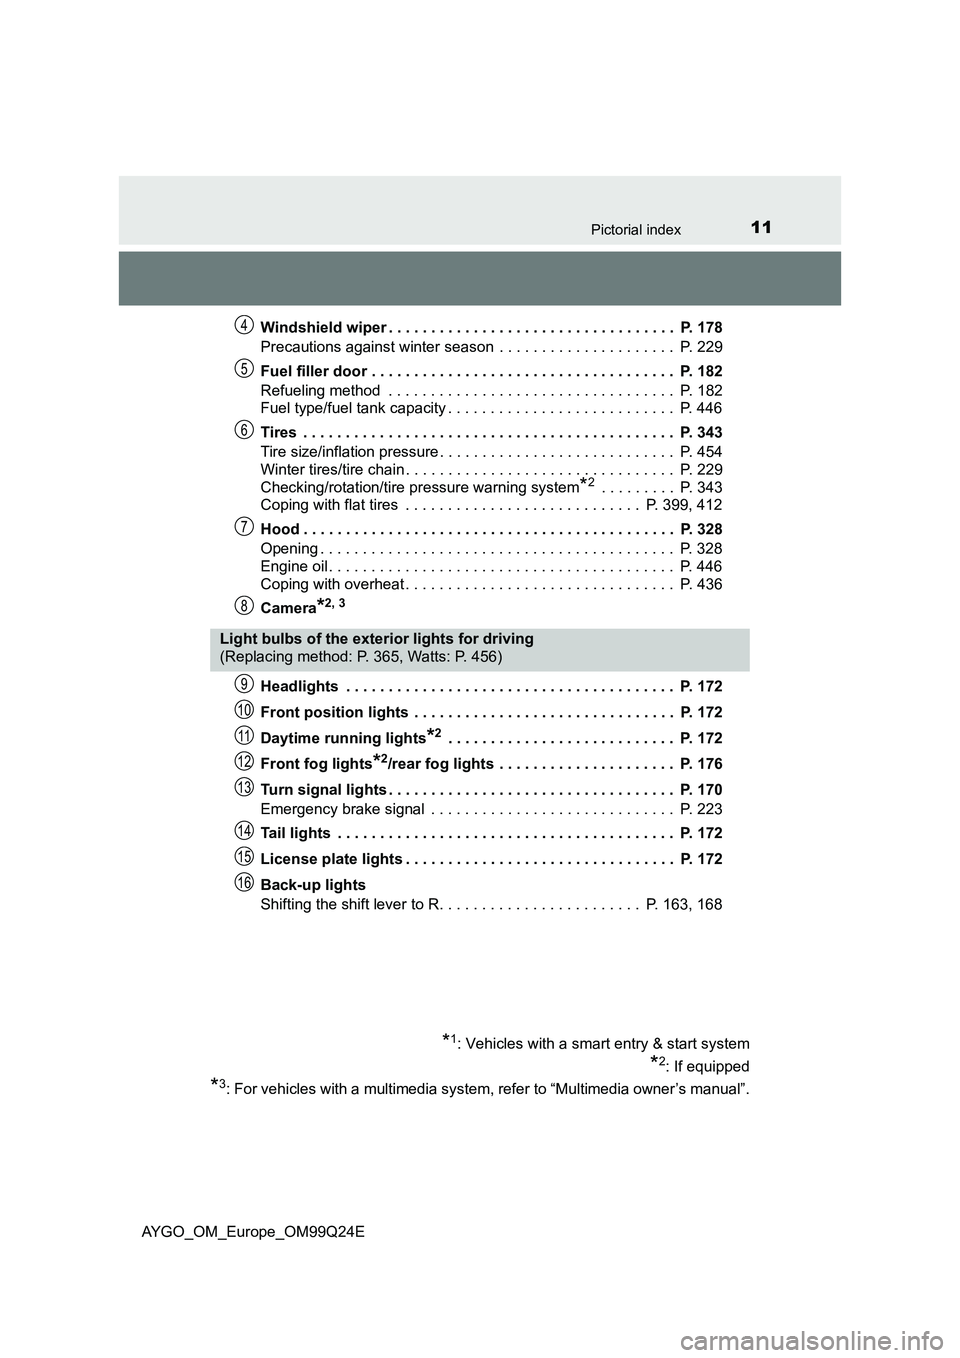
Windshield wiper . . . . . . . . . . . . . . . . . . . . . . . . . . . . . . . . . . P. 178
Precautions against winter season . . . . . . . . . . . . . . . . . . . . . P. 229
Fuel filler door . . . . . . . . . . . . . . . . . . . . . . . . . . . . . . . . . . . . P. 182
Refueling method . . . . . . . . . . . . . . . . . . . . . . . . . . . . . . . . . . P. 182
Fuel type/fuel tank capacity . . . . . . . . . . . . . . . . . . . . . . . . . . . P. 446
Tires . . . . . . . . . . . . . . . . . . . . . . . . . . . . . . . . . . . . . . . . . . . . P. 343
Tire size/inflation pressure . . . . . . . . . . . . . . . . . . . . . . . . . . . . P. 454
Winter tires/tire chain . . . . . . . . . . . . . . . . . . . . . . . . . . . . . . . . P. 229
Checking/rotation/tire pressure warning system*2 . . . . . . . . . P. 343
Coping with flat tires . . . . . . . . . . . . . . . . . . . . . . . . . . . . P. 399, 412
Hood . . . . . . . . . . . . . . . . . . . . . . . . . . . . . . . . . . . . . . . . . . . . P. 328
Opening . . . . . . . . . . . . . . . . . . . . . . . . . . . . . . . . . . . . . . . . . . P. 328
Engine oil . . . . . . . . . . . . . . . . . . . . . . . . . . . . . . . . . . . . . . . . . P. 446
Coping with overheat . . . . . . . . . . . . . . . . . . . . . . . . . . . . . . . . P. 436
Camera*2, 3
Headlights . . . . . . . . . . . . . . . . . . . . . . . . . . . . . . . . . . . . . . . P. 172
Front position lights . . . . . . . . . . . . . . . . . . . . . . . . . . . . . . . P. 172
Daytime running lights*2 . . . . . . . . . . . . . . . . . . . . . . . . . . . P. 172
Front fog lights*2/rear fog lights . . . . . . . . . . . . . . . . . . . . . P. 176
Turn signal lights . . . . . . . . . . . . . . . . . . . . . . . . . . . . . . . . . . P. 170
Emergency brake signal . . . . . . . . . . . . . . . . . . . . . . . . . . . . . P. 223
Tail lights . . . . . . . . . . . . . . . . . . . . . . . . . . . . . . . . . . . . . . . . P. 172
License plate lights . . . . . . . . . . . . . . . . . . . . . . . . . . . . . . . . P. 172
Back-up lights
Shifting the shift lever to R. . . . . . . . . . . . . . . . . . . . . . . . P. 163, 168
4
5
6
7
8
Light bulbs of the exterior lights for driving
(Replacing method: P. 365, Watts: P. 456)
*1: Vehicles with a smart entry & start system
*2: If equipped
*3: For vehicles with a multimedia system , refer to “Multimedia owner’s manual”.
9
10
11
12
13
14
15
16
Page 13 of 480
13Pictorial index
AYGO_OM_Europe_OM99Q24E
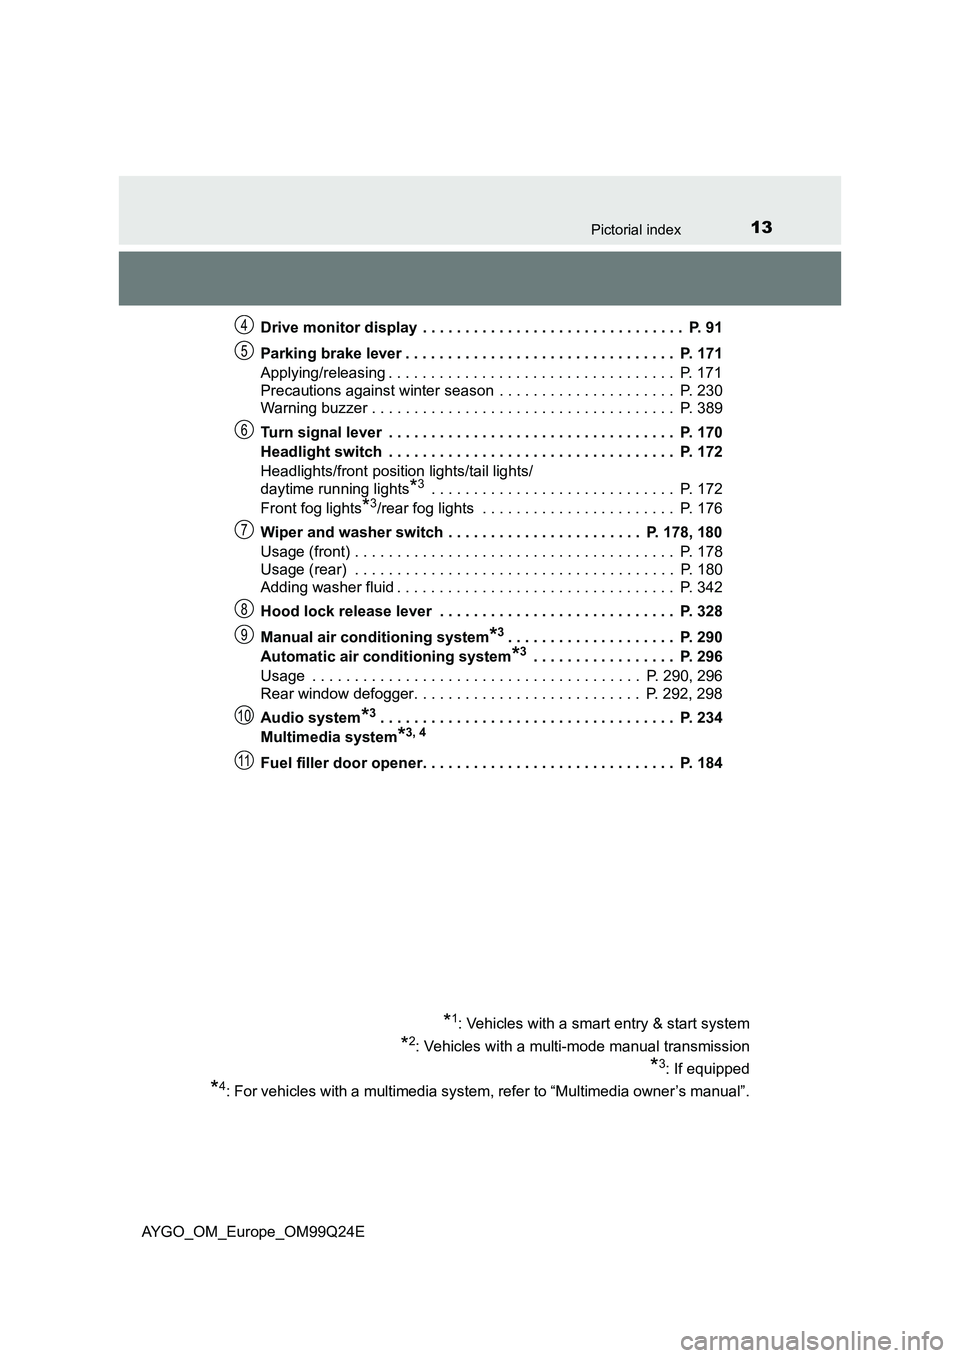
Drive monitor display . . . . . . . . . . . . . . . . . . . . . . . . . . . . . . . P. 91
Parking brake lever . . . . . . . . . . . . . . . . . . . . . . . . . . . . . . . . P. 171
Applying/releasing . . . . . . . . . . . . . . . . . . . . . . . . . . . . . . . . . . P. 171
Precautions against winter season . . . . . . . . . . . . . . . . . . . . . P. 230
Warning buzzer . . . . . . . . . . . . . . . . . . . . . . . . . . . . . . . . . . . . P. 389
Turn signal lever . . . . . . . . . . . . . . . . . . . . . . . . . . . . . . . . . . P. 170
Headlight switch . . . . . . . . . . . . . . . . . . . . . . . . . . . . . . . . . . P. 172
Headlights/front position lights/tail lights/
daytime running lights*3 . . . . . . . . . . . . . . . . . . . . . . . . . . . . . P. 172
Front fog lights*3/rear fog lights . . . . . . . . . . . . . . . . . . . . . . . P. 176
Wiper and washer switch . . . . . . . . . . . . . . . . . . . . . . . P. 178, 180
Usage (front) . . . . . . . . . . . . . . . . . . . . . . . . . . . . . . . . . . . . . . P. 178
Usage (rear) . . . . . . . . . . . . . . . . . . . . . . . . . . . . . . . . . . . . . . P. 180
Adding washer fluid . . . . . . . . . . . . . . . . . . . . . . . . . . . . . . . . . P. 342
Hood lock release lever . . . . . . . . . . . . . . . . . . . . . . . . . . . . P. 328
Manual air conditioning system*3. . . . . . . . . . . . . . . . . . . . P. 290
Automatic air conditioning system*3 . . . . . . . . . . . . . . . . . P. 296
Usage . . . . . . . . . . . . . . . . . . . . . . . . . . . . . . . . . . . . . . . P. 290, 296
Rear window defogger. . . . . . . . . . . . . . . . . . . . . . . . . . . P. 292, 298
Audio system*3. . . . . . . . . . . . . . . . . . . . . . . . . . . . . . . . . . . P. 234
Multimedia system*3, 4
Fuel filler door opener. . . . . . . . . . . . . . . . . . . . . . . . . . . . . . P. 184
*1: Vehicles with a smart entry & start system
*2: Vehicles with a multi-mode manual transmission
*3: If equipped
*4: For vehicles with a multimedia system , refer to “Multimedia owner’s manual”.
4
5
6
7
8
9
10
11
Page 19 of 480
19Pictorial index
AYGO_OM_Europe_OM99Q24E
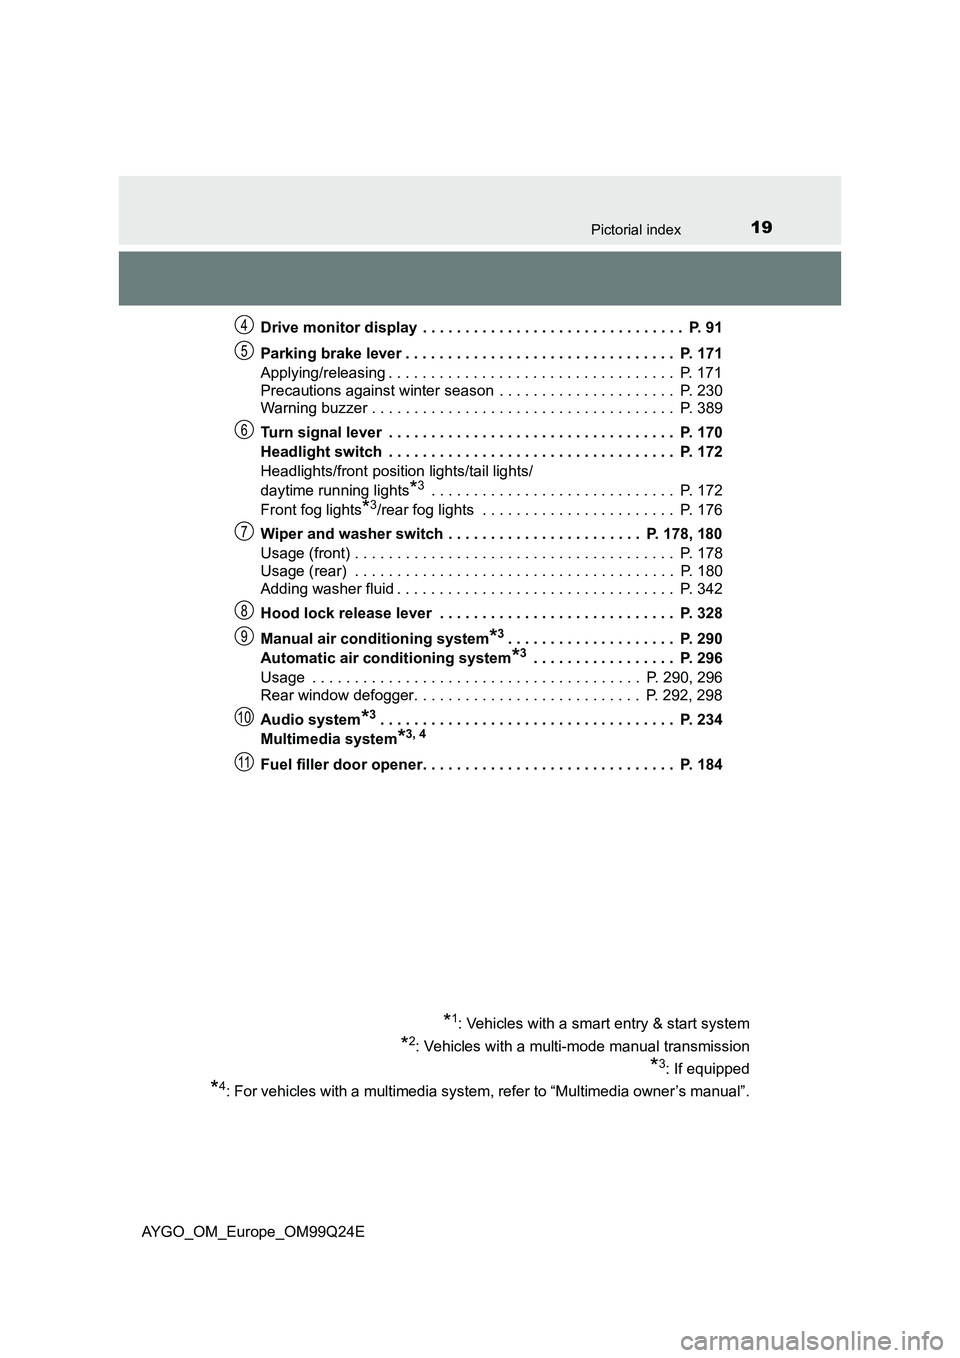
Drive monitor display . . . . . . . . . . . . . . . . . . . . . . . . . . . . . . . P. 91
Parking brake lever . . . . . . . . . . . . . . . . . . . . . . . . . . . . . . . . P. 171
Applying/releasing . . . . . . . . . . . . . . . . . . . . . . . . . . . . . . . . . . P. 171
Precautions against winter season . . . . . . . . . . . . . . . . . . . . . P. 230
Warning buzzer . . . . . . . . . . . . . . . . . . . . . . . . . . . . . . . . . . . . P. 389
Turn signal lever . . . . . . . . . . . . . . . . . . . . . . . . . . . . . . . . . . P. 170
Headlight switch . . . . . . . . . . . . . . . . . . . . . . . . . . . . . . . . . . P. 172
Headlights/front position lights/tail lights/
daytime running lights*3 . . . . . . . . . . . . . . . . . . . . . . . . . . . . . P. 172
Front fog lights*3/rear fog lights . . . . . . . . . . . . . . . . . . . . . . . P. 176
Wiper and washer switch . . . . . . . . . . . . . . . . . . . . . . . P. 178, 180
Usage (front) . . . . . . . . . . . . . . . . . . . . . . . . . . . . . . . . . . . . . . P. 178
Usage (rear) . . . . . . . . . . . . . . . . . . . . . . . . . . . . . . . . . . . . . . P. 180
Adding washer fluid . . . . . . . . . . . . . . . . . . . . . . . . . . . . . . . . . P. 342
Hood lock release lever . . . . . . . . . . . . . . . . . . . . . . . . . . . . P. 328
Manual air conditioning system*3. . . . . . . . . . . . . . . . . . . . P. 290
Automatic air conditioning system*3 . . . . . . . . . . . . . . . . . P. 296
Usage . . . . . . . . . . . . . . . . . . . . . . . . . . . . . . . . . . . . . . . P. 290, 296
Rear window defogger. . . . . . . . . . . . . . . . . . . . . . . . . . . P. 292, 298
Audio system*3. . . . . . . . . . . . . . . . . . . . . . . . . . . . . . . . . . . P. 234
Multimedia system*3, 4
Fuel filler door opener. . . . . . . . . . . . . . . . . . . . . . . . . . . . . . P. 184
*1: Vehicles with a smart entry & start system
*2: Vehicles with a multi-mode manual transmission
*3: If equipped
*4: For vehicles with a multimedia system , refer to “Multimedia owner’s manual”.
4
5
6
7
8
9
10
11
Page 134 of 480
1343-4. Adjusting the steering wheel and mirrors
AYGO_OM_Europe_OM99Q24E
Inside rear view mirror
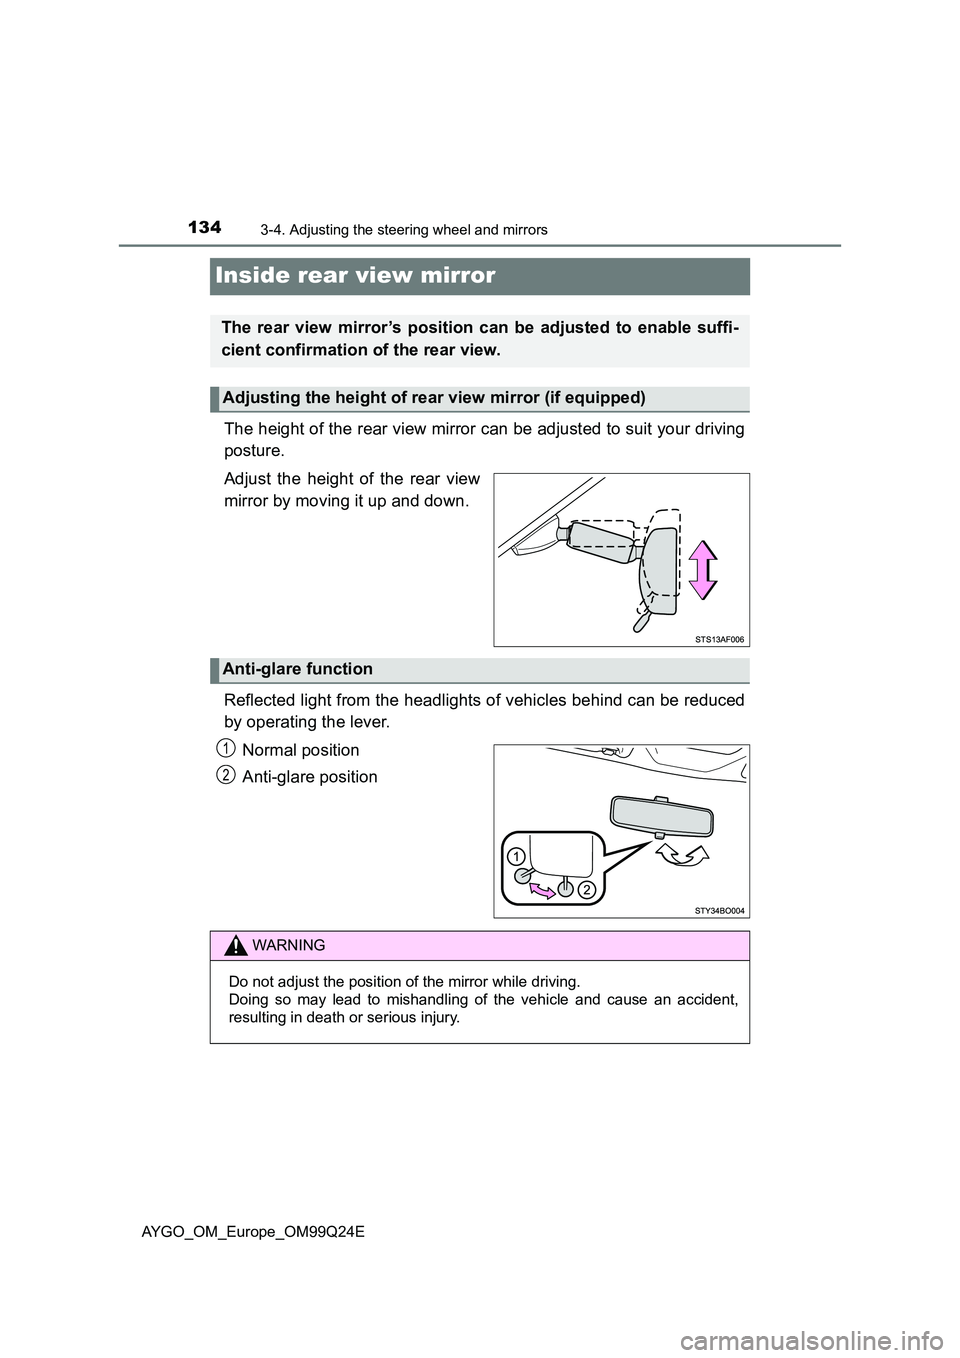
The height of the rear view mirror can be adjusted to suit your driving
posture.
Adjust the height of the rear view
mirror by moving it up and down.
Reflected light from the headlights of vehicles behind can be reduced
by operating the lever.
Normal position
Anti-glare position
The rear view mirror’s position can be adjusted to enable suffi-
cient confirmation of the rear view.
Adjusting the height of rear view mirror (if equipped)
Anti-glare function
1
2
WARNING
Do not adjust the position of the mirror while driving.
Doing so may lead to mishandling of the vehicle and cause an accident,
resulting in death or serious injury.
Page 172 of 480
1724-3. Operating the lights and wipers
AYGO_OM_Europe_OM99Q24E
Headlight switch
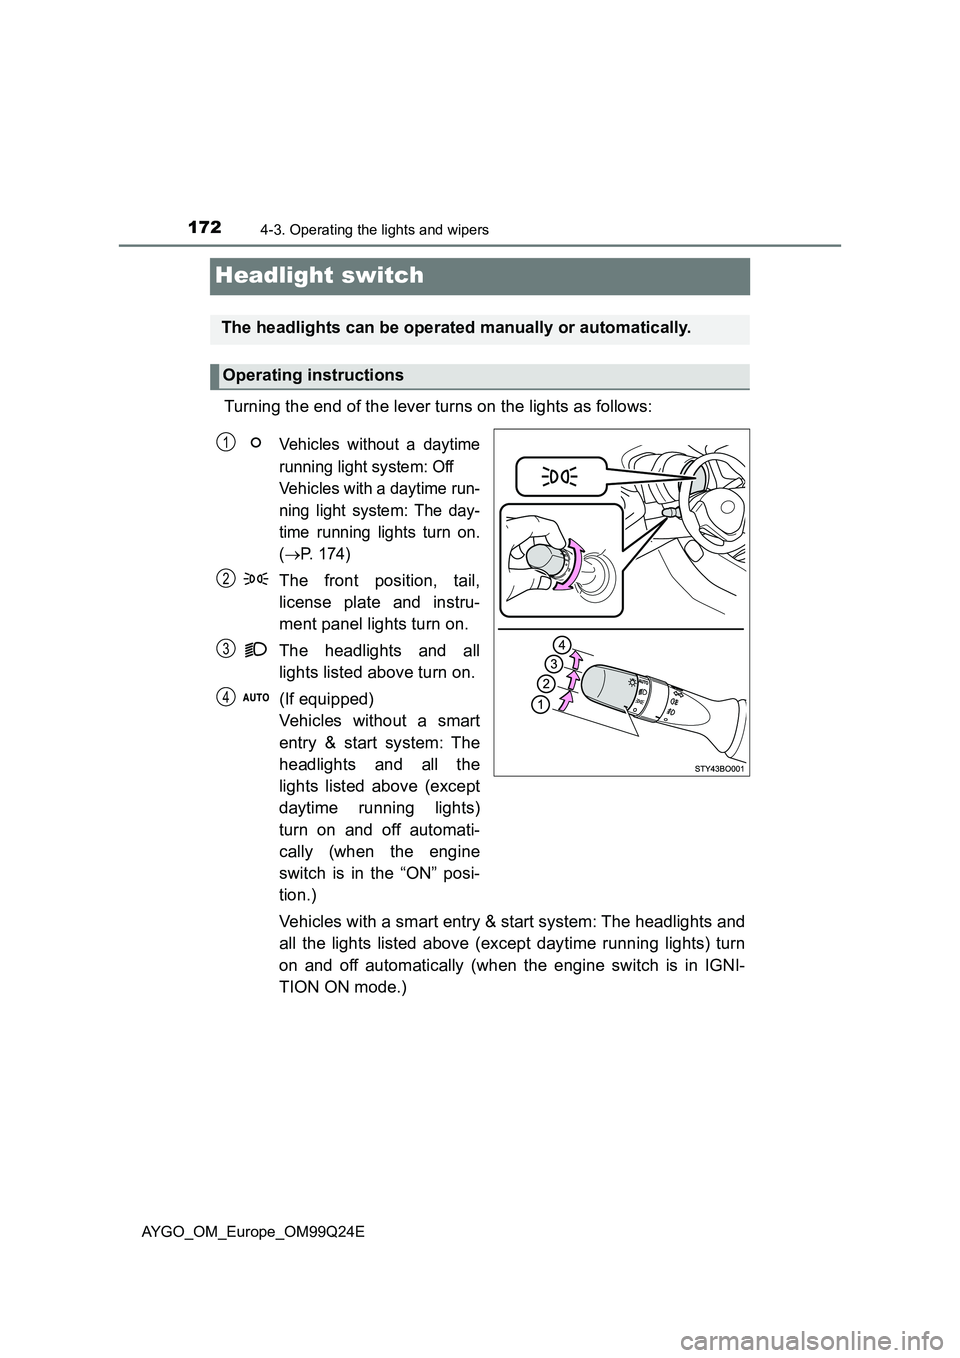
Turning the end of the lever turns on the lights as follows:
Vehicles without a daytime
running light system: Off
Vehicles with a daytime run-
ning light system: The day-
time running lights turn on.
(P. 174)
The front position, tail,
license plate and instru-
ment panel lights turn on.
The headlights and all
lights listed above turn on.
(If equipped)
Vehicles without a smart
entry & start system: The
headlights and all the
lights listed above (except
daytime running lights)
turn on and off automati-
cally (when the engine
switch is in the “ON” posi-
tion.)
Vehicles with a smart entry & start system: The headlights and
all the lights listed above (except daytime running lights) turn
on and off automatically (when the engine switch is in IGNI-
TION ON mode.)
The headlights can be operated manually or automatically.
Operating instructions
1
2
3
4
Page 173 of 480
1734-3. Operating the lights and wipers
4
Driving
AYGO_OM_Europe_OM99Q24E
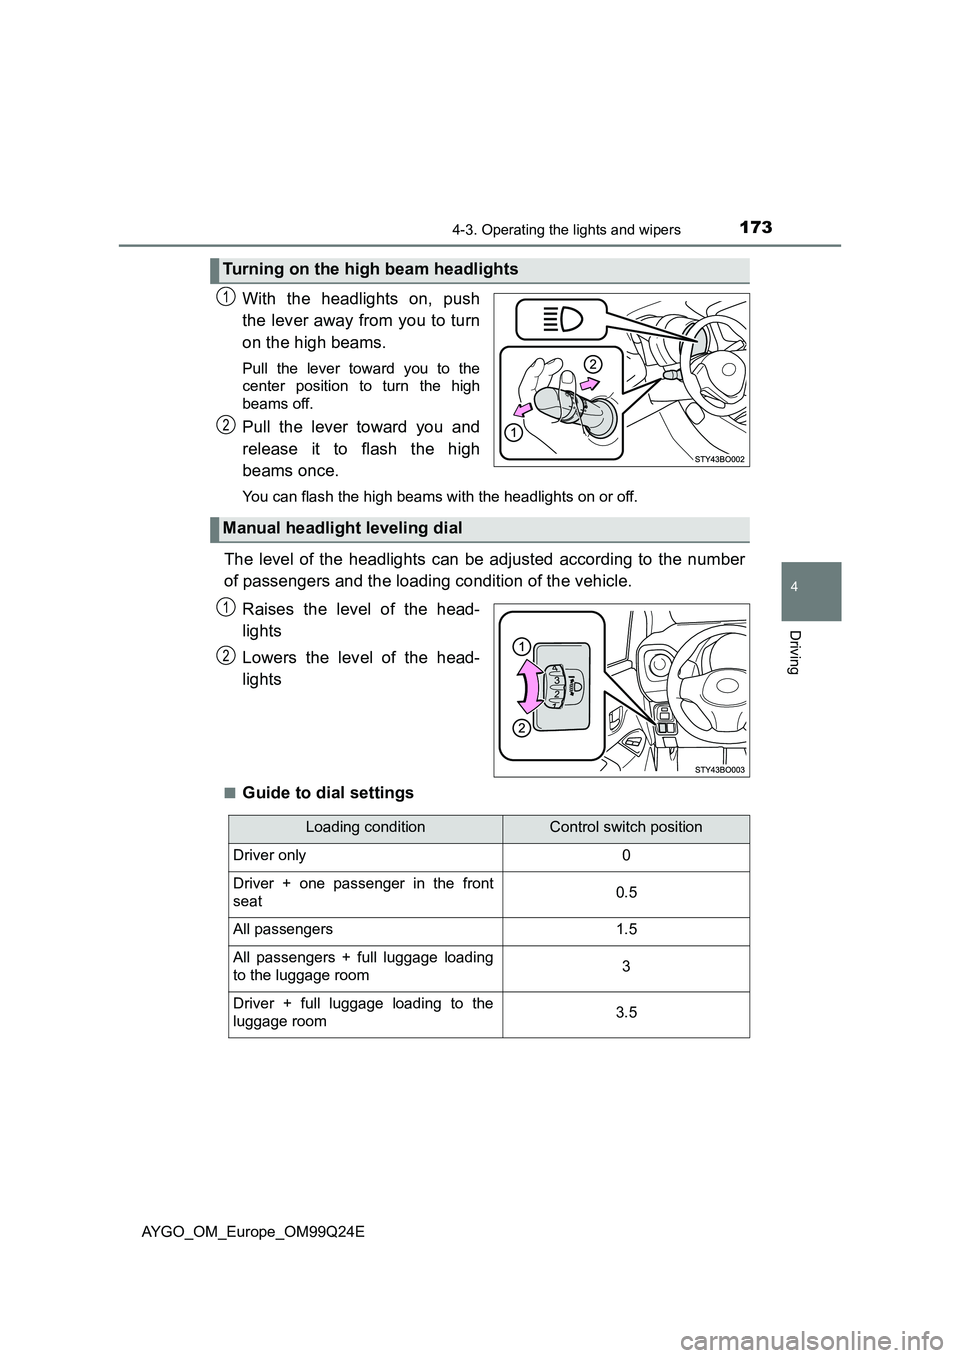
With the headlights on, push
the lever away from you to turn
on the high beams.
Pull the lever toward you to the
center position to turn the high
beams off.
Pull the lever toward you and
release it to flash the high
beams once.
You can flash the high beams wi th the headlights on or off.
The level of the headlights can be adjusted according to the number
of passengers and the loading condition of the vehicle.
Raises the level of the head-
lights
Lowers the level of the head-
lights
■Guide to dial settings
Turning on the high beam headlights
1
2
Manual headlight leveling dial
1
2
Loading conditionControl switch position
Driver only0
Driver + one passenger in the front
seat0.5
All passengers1.5
All passengers + full luggage loading
to the luggage room3
Driver + full luggage loading to the
luggage room3.5
Page 174 of 480
1744-3. Operating the lights and wipers
AYGO_OM_Europe_OM99Q24E
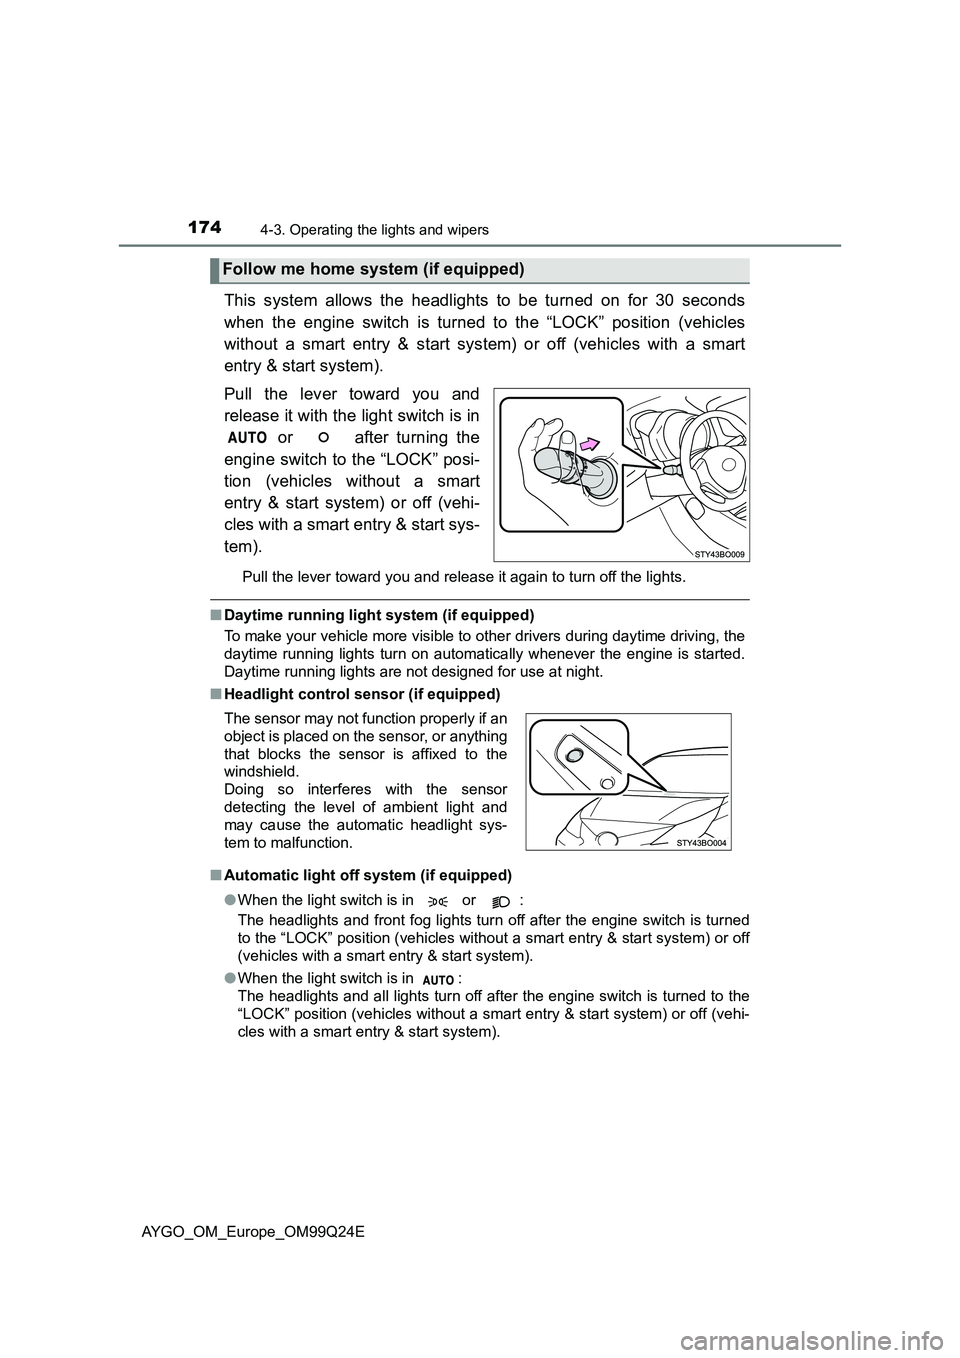
This system allows the headlights to be turned on for 30 seconds
when the engine switch is turned to the “LOCK” position (vehicles
without a smart entry & start system) or off (vehicles with a smart
entry & start system).
Pull the lever toward you and
release it with the light switch is in
or after turning the
engine switch to the “LOCK” posi-
tion (vehicles without a smart
entry & start system) or off (vehi-
cles with a smart entry & start sys-
tem).
Pull the lever toward you and release it again to turn off the lights.
■ Daytime running light system (if equipped)
To make your vehicle more visible to other drivers during daytime driving, the
daytime running lights turn on automatic ally whenever the engine is started.
Daytime running lights are not designed for use at night.
■ Headlight control sensor (if equipped)
■ Automatic light off system (if equipped)
● When the light switch is in or :
The headlights and front fog lights turn off after the engine switch is turned
to the “LOCK” position (vehicles without a smart entry & start system) or off
(vehicles with a smart entry & start system).
● When the light switch is in :
The headlights and all lights turn off after the engine switch is turned to the
“LOCK” position (vehicles without a smart entry & start system) or off (vehi-
cles with a smart entry & start system).
Follow me home system (if equipped)
The sensor may not function properly if an
object is placed on the sensor, or anything
that blocks the sensor is affixed to the
windshield.
Doing so interferes with the sensor
detecting the level of ambient light and
may cause the automatic headlight sys-
tem to malfunction.
Page 175 of 480
1754-3. Operating the lights and wipers
4
Driving
AYGO_OM_Europe_OM99Q24E
■ Light reminder buzzer
Vehicles without a smart entry & start system
A buzzer sounds when the engine switch is turned to the “LOCK” position, the
driver’s door is opened while the lights are turned on.
Vehicles with a smart entry & start system
A buzzer sounds when the engine switch is turned off and the driver’s door is
opened while the lights are turned on.
■ Battery-saving function (if equipped)
In the following conditions, the remaining lights will go off automatically after
20 minutes in order to prevent the vehicle battery from being discharged:
● The headlights and/or tail lights are on.
● Vehicles without a smart entry & start system: The engine switch is turned to
the “ACC” position or turned off.
Vehicles with a smart entry & start system: The engine switch is turned to
ACCESSORY mode or turned off.
● The light switch is in or .
This function will be canceled in any of the following situations:
● Vehicles without a smart entry & start system: When the engine switch is
turned to the “ON” position.
Vehicles with a smart entry & start system: When the engine switch is turned
to IGNITION ON mode.
● When the light switch is operated.
● When a door is opened or closed.
NOTICE
■To prevent battery discharge
Do not leave the lights on longer than necessary when the engine is not
running.
Page 177 of 480
1774-3. Operating the lights and wipers
4
Driving
AYGO_OM_Europe_OM99Q24E
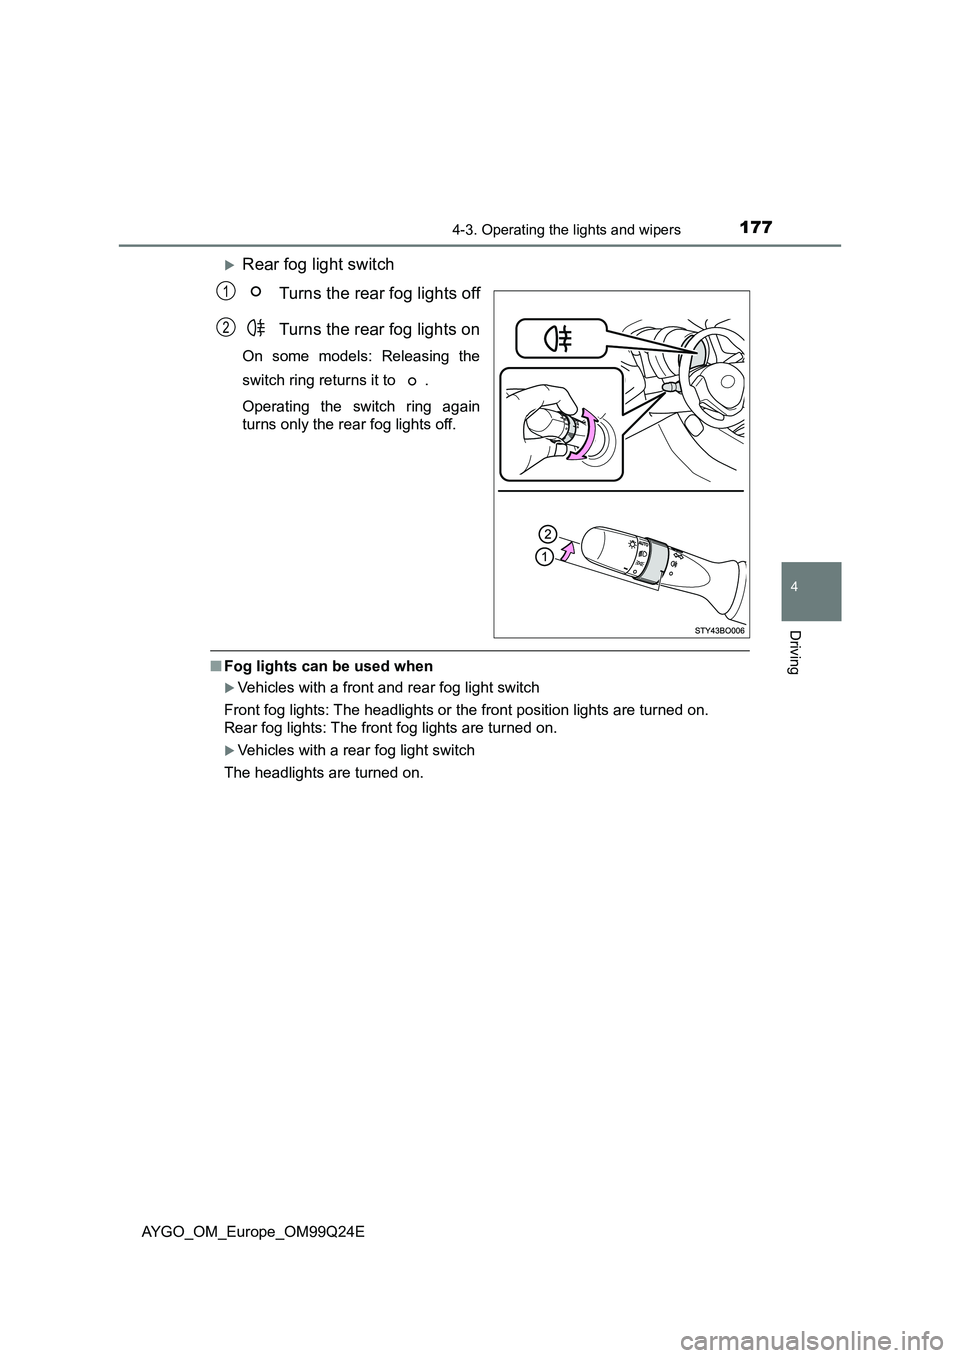
Rear fog light switch
Turns the rear fog lights off
Turns the rear fog lights on
On some models: Releasing the
switch ring returns it to .
Operating the switch ring again
turns only the rear fog lights off.
■ Fog lights can be used when
Vehicles with a front and rear fog light switch
Front fog lights: The headlights or the front position lights are turned on.
Rear fog lights: The front fog lights are turned on.
Vehicles with a rear fog light switch
The headlights are turned on.
1
2
Page 191 of 480
1914-5. Toyota Safety Sense
4
Driving
AYGO_OM_Europe_OM99Q24E
WARNING
●If the area of the windshield in front of the front sensor is covered with
water droplets, use the windshield wipers to remove them.
If the water droplets are not sufficiently removed, the performance of the
front sensor may be reduced.
● If water droplets cannot be properly removed from the area of the wind-
shield in front of the front sensor by the windshield wipers, replace the
wiper insert or wiper blade.
If the wiper inserts or wiper blades need to be replaced, contact any autho-
rized Toyota dealer or repairer, or another duly qualified and equipped pro-
fessional.
● Do not attach window tinting to the windshield.
● Replace the windshield if it is damaged or cracked.
If the windshield needs to be replaced, contact any authorized Toyota
dealer or repairer, or another duly qualified and equipped professional.
● Do not install an antenna in front of the sensor.
● Do not get the front sensor wet.
● Do not allow bright lights to shine into the front sensor.
● Do not dirty or damage the front sensor.
When cleaning the inside of the windshi eld, do not allow glass cleaner to
contact the lens. Also, do not touch the lens.
If the lens is dirty or damaged, contact any authorized Toyota dealer or
repairer, or another duly qualified and equipped professional.
● Do not subject the front sensor to a strong impact.
● Do not change the installation position or direction of the front sensor or
remove it.
● Do not disassemble the front sensor.
● Do not install an electronic device or device that emits strong electric
waves near the front sensor.
● Do not modify any components of the vehicle around the front sensor
(inside rear view mirror, sun visors, etc.) or ceiling.
● Do not attach any accessories that may obstruct the front sensor to the
hood, front grille or front bumper. Contact any authorized Toyota dealer or
repairer, or another duly qualified and equipped professional for details.
● If a surfboard or other long object is to be mounted on the roof, make sure
that it will not obstruct the front sensor.
● Do not modify the headlights or other lights.
● Do not attach anything to or place anything on the dashboard.
■ Installation area of front sensor on windshield
When the windshield is fogging up easily, the glass around the front sensor
may be hot due to the heater running. If the glass is touched, it may result in
burns.