height TOYOTA BZ4X 2022 (in English) User Guide
[x] Cancel search | Manufacturer: TOYOTA, Model Year: 2022, Model line: BZ4X, Model: TOYOTA BZ4X 2022Pages: 674, PDF Size: 120.02 MB
Page 281 of 674

279
5
Owners Manual_Europe_M42D76_en
5-4. Using the driving support systems
Driving
■Situations in which the sensors
may not operate properly
●When the height or inclination of the
vehicle has been changed due to modifications
●When the windshield is dirty, fogged up, cracked or damaged
●When the ambient temperature is high or low
●When mud, water, snow, dead insects, foreign matter, etc., is attached to the front of the sensor
●When in inclement weather such as heavy rain, fog, snow, or a sandstorm
●When water, snow, dust, etc., is
thrown up in front of the vehicle, or when driving through mist or smoke
●When the headlights are not illumi-nated while driving in the dark, such as at night or when in a tunnel
●When the lens of a headlight is dirty and illumination is weak
●When the headlights are misaligned
●When a headlight is malfunctioning
●When a the headlights of another
vehicle, sunlight, or reflected light shines directly into the front camera
●When the brightness of the surround-ing area changes suddenly
●When driving near a TV tower, broad-casting station, electric power plant,
WARNING
■Front camera installation area on the windshield
If the system determines that the windshield may be fogged up, it will automatically operate the heater to
defog the part of the windshield around the front camera. When clean-ing, etc., be careful not to touch the
area around the front camera until the windshield has cooled sufficiently, as touching it may cause burns.
■Precautions for the driver moni-tor camera (if equipped)
Observe the following precautions. Failure to do so may lead to malfunc-tion of the driver monitor camera and
the systems not operating properly, possibly leading to an accident result-ing in death or serious injury.
●Do not subject the driver monitor camera or its surrounding area to
strong impact.
If subjected to a strong impact, the
driver monitor camera may move out
of alignment and the driver may no
longer be detected correctly. In this
case, have the vehicle inspected by
any authorized Toyota retailer or
Toyota authorized repairer, or any reli-
able repairer.
●Do not disassemble or modify the driver monitor camera.
●Do not attach accessories, stickers (including transparent stickers), etc. to the driver monitor camera or its
surrounding area.
●Do not allow the driver monitor
camera or its surrounding area to get wet.
●Do not cover the driver monitor camera or place anything in front of it.
●Keep the lens of the driver monitor camera free from damage.
●Do not touch the lens of the driver monitor camera or allow it to become dirty.
When there is dirt or fingerprints on
the camera lens, clean it with a dry,
soft cloth so as to not mark or dam-
age it.
●When cleaning the lens, do not use
detergents or organic solvents that may damage plastic.
Page 330 of 674
328
Owners Manual_Europe_M42D76_en
5-4. Using the driving support systems
in the road, etc.
• When driving on roads with sharp bends, consecutive curves, or uneven surfaces
• When vehicle lanes are wide, or when driving on the edge of a lane, and the vehicle in an adjacent lane is far away
from your vehicle • When an accessory (such as a bicycle carrier) is installed to the rear of the
vehicle • When there is a significant difference in height between your vehicle and
the vehicle that enters the detection area• Immediately after the Blind Spot Moni-
tor is turned on • When towing with the vehicle
●Instances of the Blind Spot Monitor unnecessarily detecting a vehicle and/or object may increase in the fol-
lowing situations: • When the sensor is misaligned due to a strong impact to the sensor or its
surrounding area • When the distance between your vehi-cle and a guardrail, wall, etc., that
enters the detection area is short • When driving up and down consecu-tive steep inclines, such as hills, dips
in the road, etc. • When vehicle lanes are narrow, or when driving on the edge of a lane,
and a vehicle traveling in a lane other than the adjacent lanes enters the detection area
• When driving on roads with sharp bends, consecutive curves, or uneven surfaces
• When the tires are slipping or spinning • When the distance between your vehi-cle and a following vehicle is short
• When an accessory (such as a bicycle carrier) is installed to the rear of the vehicle
• When towing with the vehicle
*: If equipped
SEA (Safe Exit Assist)*
The Safe Exit Assist is a sys-
tem that uses radar sensors
installed on the inner side of
the rear bumper to help occu-
pants judge if an approaching
vehicle or bicycle may collide
with a door to reduce the pos-
sibility of a collision.
WARNING
■Cautions regarding the use of
the system
●The driver is solely responsible for safe driving. Always drive safely,
taking care to observe your sur- roundings.
●Safe Exit Assist is a supplementary system that, when the vehicle is stopped, informs occupants of the
existence of approaching vehicles and bicycles. As this system alone cannot be used to judge safety,
over-reliance on this system may lead to an accident resulting in death or serious injury.
As the system may not function cor- rectly under certain conditions, visual confirmation of safety with
the passengers’ own eyes and mir- rors is necessary.
Page 348 of 674
346
Owners Manual_Europe_M42D76_en
5-4. Using the driving support systems
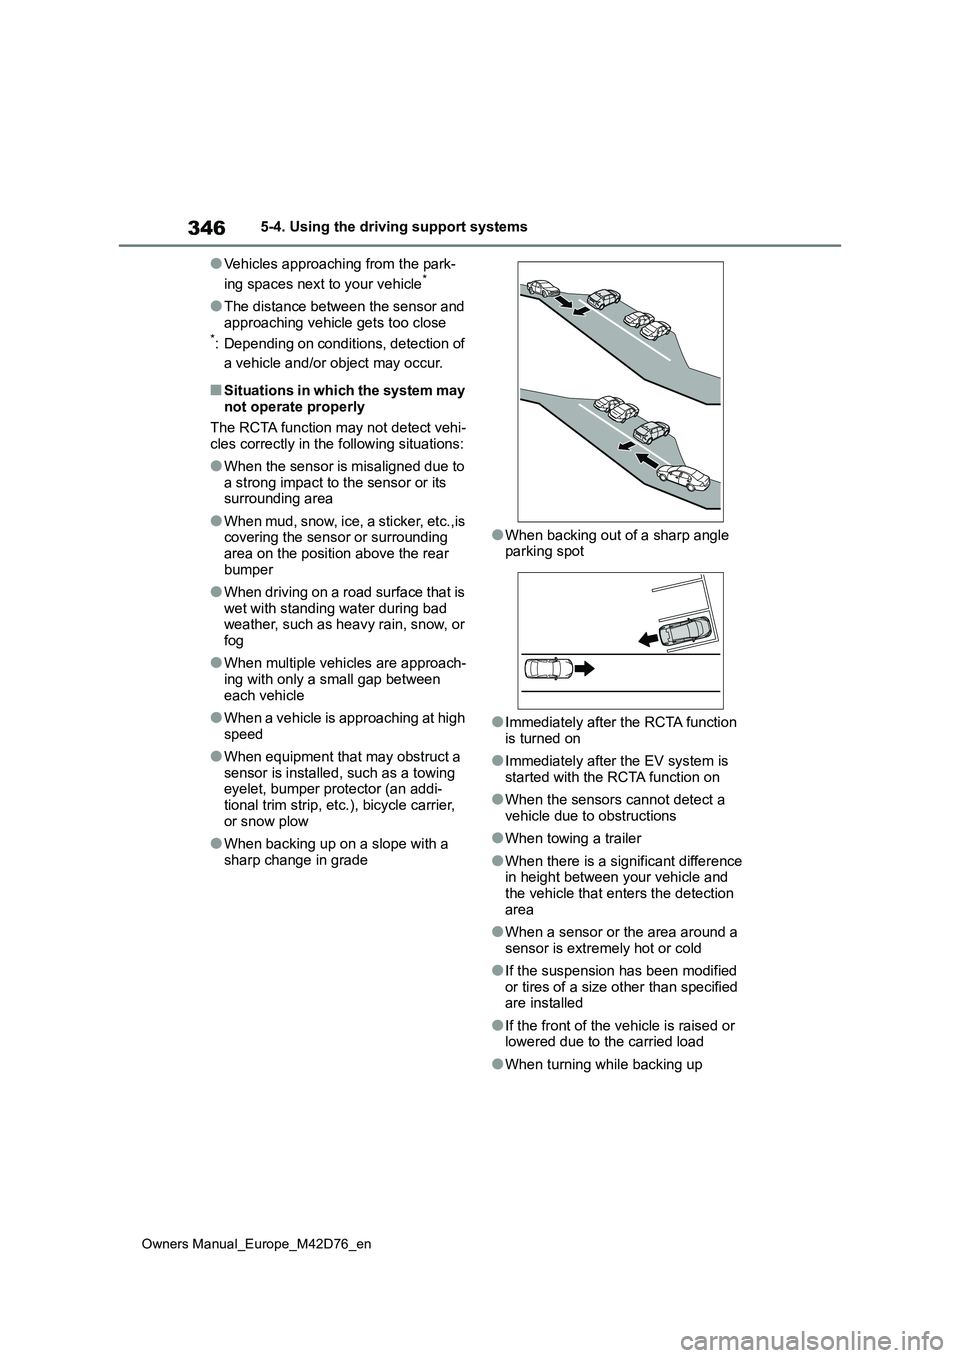
●Vehicles approaching from the park-
ing spaces next to your vehicle*
●The distance between the sensor and
approaching vehicle gets too close*: Depending on conditions, detection of
a vehicle and/or object may occur.
■Situations in which the system may not operate properly
The RCTA function may not detect vehi-
cles correctly in the following situations:
●When the sensor is misaligned due to
a strong impact to the sensor or its surrounding area
●When mud, snow, ice, a sticker, etc.,is covering the sensor or surrounding area on the position above the rear
bumper
●When driving on a road surface that is
wet with standing water during bad weather, such as heavy rain, snow, or fog
●When multiple vehicles are approach-ing with only a small gap between
each vehicle
●When a vehicle is approaching at high
speed
●When equipment that may obstruct a
sensor is installed, such as a towing eyelet, bumper protector (an addi-tional trim strip, etc.), bicycle carrier,
or snow plow
●When backing up on a slope with a
sharp change in grade
●When backing out of a sharp angle parking spot
●Immediately after the RCTA function is turned on
●Immediately after the EV system is started with the RCTA function on
●When the sensors cannot detect a vehicle due to obstructions
●When towing a trailer
●When there is a significant difference in height between your vehicle and the vehicle that enters the detection
area
●When a sensor or the area around a
sensor is extremely hot or cold
●If the suspension has been modified
or tires of a size other than specified are installed
●If the front of the vehicle is raised or lowered due to the carried load
●When turning while backing up
Page 353 of 674
351
5
Owners Manual_Europe_M42D76_en
5-4. Using the driving support systems
Driving
ing such as a rain coat, long skirt, etc.,
making their silhouette obscure • Pedestrians whose body is partially hidden by an object, such as a cart or
umbrella • Pedestrians which are obscured by darkness, such as at night
●In some situations, such as the follow-ing, pedestrians may not be detected
by the rear camera detection function, preventing the function from operating properly:
• When backing up in inclement weather (rain, snow, fog, etc.)• When the rear camera is obscured
(dirt, snow, ice, etc., are attached) or scratched• When a very bright light, such as the
sun, or the headlights of another vehi- cle, shines directly into the rear cam-era
• When backing up in a place where the surrounding brightness changes sud-denly, such as at the entrance or exit
of a garage or underground parking lot• When backing up in a dim environ-
ment such as during dusk or in an underground parking lot• When the camera position and direc-
tion are deviated • When a towing hook is attached• When water droplets are flowing on
the camera lens • When the vehicle height is extremely changed (nose up, nose down)
• When tire chains or an emergency tire puncture repair kit is used• When the rear washer is operating
• If the suspension has been modified or tires of a size other than specified are installed.
• If an electronic component, such as a backlit license plate or rear fog light, is installed near the rear camera
• If a bumper protector, such as an additional trim strip, is installed to the rear bumper
■Situations in which the system may
operate unexpectedly
●Even though there are no pedestrians
in the detection area, some objects,
such as the following, may be detected, possibly causing the rear camera detection function to operate.
• Three dimensional objects, such as a pole, traffic cone, fence, or parked vehicle
• Moving objects, such as a car or motorcycle• Objects moving toward your vehicle
when backing up, such as flags or puddles (or airborne matter, such as smoke, steam, rain, or snow)
• Cobblestone or gravel roads, tram rails, road repairs, white lines, pedes-trian crossings or fallen leaves on the
road • Metal covers (gratings), such as those used for drainage ditches
• Objects reflected in a puddle or on a wet road surface• Shadows on the road
●In some situations, such as the follow-ing, the rear camera detection func-
tion may operate even though there are no pedestrians in the detection area.
• When backing up toward the roadside or a bump on the road• When backing up toward an
incline/decline • If the rear of the vehicle is raised or lowered due to the carried load
• If a bumper protector, such as an additional trim strip, is installed to the rear bumper
• If the orientation of the rear camera has been changed• If a towing eyelet is installed to the
rear of the vehicle • When water is flowing over the rear camera lens
• When the rear camera is obscured (dirt, snow, ice, etc., are attached) or scratched
• If there is a flashing light in the detec- tion area, such as the emergency flashers of another vehicle
• When a tire chains or an emergency tire puncture repair kit is used
●Situations in which the rear camera detection function may be difficult to
Page 355 of 674
353
5
Owners Manual_Europe_M42D76_en
5-4. Using the driving support systems
Driving
■Static Objects Around the
Vehicle (vehicles with
Advanced Park)
P. 3 6 3
WARNING
■Cautions regarding the use of
the system
Do not overly rely on the system, as doing so may lead to an accident.
Always drive while checking the safety of the surroundings of the vehi-cle.
Depending on the vehicle and road conditions, weather, etc., the system may not operate.
The detection capabilities of sensors and radars are limited. Always drive while checking the safety of the sur-
roundings of the vehicle.
●The driver is solely responsible for
safe driving. Always drive carefully, taking care to observe your sur-roundings. The Parking Support
Brake system is designed to pro- vide support to lessen the severity of collisions. However, it may not
operate in some situations.
●The Parking Support Brake system
is not designed to stop the vehicle completely. Additionally, even if the system has stopped the vehicle, it
is necessary to depress the brake pedal immediately as brake control will be canceled after approximately
2 seconds.
●It is extremely dangerous to check
the system operations by intention- ally driving the vehicle into the direction of a wall, etc. Never
attempt such actions.
■When to disable the Parking Sup- port Brake
In the following situations, disable the
Parking Support Brake as the system may operate even though there is no possibility of a collision.
●When inspecting the vehicle using a chassis roller, chassis dynamo or
free roller
●When loading the vehicle onto a
boat, truck or other transport vessel
●If the suspension has been modi-
fied or tires of a size other than specified are installed
●If the front of the vehicle is raised or lowered due to the carried load
●When equipment that may obstruct a sensor is installed, such as a tow-ing eyelet, bumper protector (an
additional trim strip, etc.), bicycle carrier, or snow plow
●When using automatic car washing devices
●If the vehicle cannot be driven in a stable manner, such as when the vehicle has been in an accident or
is malfunctioning
●When the vehicle is driven in a
sporty manner or off-road
●When the tires are not properly
inflated
●When the tires are very worn
●When a tire chains, compact spare tire or an emergency tire puncture
repair kit is used
■Precautions for the suspension
Do not modify the suspension of the vehicle. If the height or tilt of the vehi-cle is changed, the sensors may not
be able to detect detectable objects and the system may not operate cor-rectly, possibly leading to an accident.
Page 370 of 674
368
Owners Manual_Europe_M42D76_en
5-4. Using the driving support systems
WARNING
• Be careful so that a necktie, scarf, or arm does not get caught. Keep
your upper body away from the steering wheel. Also, keep children away from the steering wheel.
• Long fingernails may be caught and when the steering wheel is rotating,
leading to injury.
• In an emergency, depress the
brake pedal to stop the vehicle, and then press the Advanced Park main switch to disable the system.
●Do not allow anyone to put their hands outside of a window while
this system is operating.
■Precautions for the cameras and
sensors
●Due to the characteristics of the camera lens, the position of and
distance to people and objects dis- played on the screen may differ from the actual situation. For details
on the following, refer to “Multime- dia owner’s manual”.
●Make sure to observe the precau-tions for using the Toyota parking assist-sensor ( P.348), otherwise
a sensor may not operate correctly, possibly leading to an accident.
●In situations such as the following, the sensors may not operate cor-rectly, possibly leading to an acci-
dent. Proceed carefully.
• When there is a parked vehicle next
to the target parking space, if the displayed target parking space is far from the actual target parking
space, a sensor may be mis- aligned. Have the vehicle inspected by any authorized Toyota retailer or
Toyota authorized repairer, or any reliable repairer.
• Do not install any accessories near the detection area of the sensors.
■To ensure correct operation of the Advanced Park
Observe the following precautions.
Failing to do so may result in the vehi- cle being unable to be driven safely and possibly leading to an accident.
●Do not use this system in situations such as the following:
• When in areas other than common parking spaces
• When the surface of the parking space is sand or gravel and is not
clearly defined with parking space lines
• When the parking space is not level, such as when on a slope or has differences in height
• Mechanical parking system
• Parking lot with a device which raises to contact the bottom of the vehicle
• When the road surface is frozen, slick, or covered with snow
• When it is extremely hot and the asphalt is melting
• When there is an object in front of the vehicle
• When there is an object between your vehicle and the target parking
spot or within the target parking spot (within the displayed blue box)
• When there is a gutter between your vehicle and the target parking space or within the target parking
spot (within the displayed blue box)
• When there is a hole or gutter in the
exit direction
• When in high pedestrian or vehicle
traffic areas
• When the parking space is in a
location that is difficult to park in (too narrow for your vehicle, etc.)
Page 381 of 674
379
5
Owners Manual_Europe_M42D76_en
5-4. Using the driving support systems
Driving
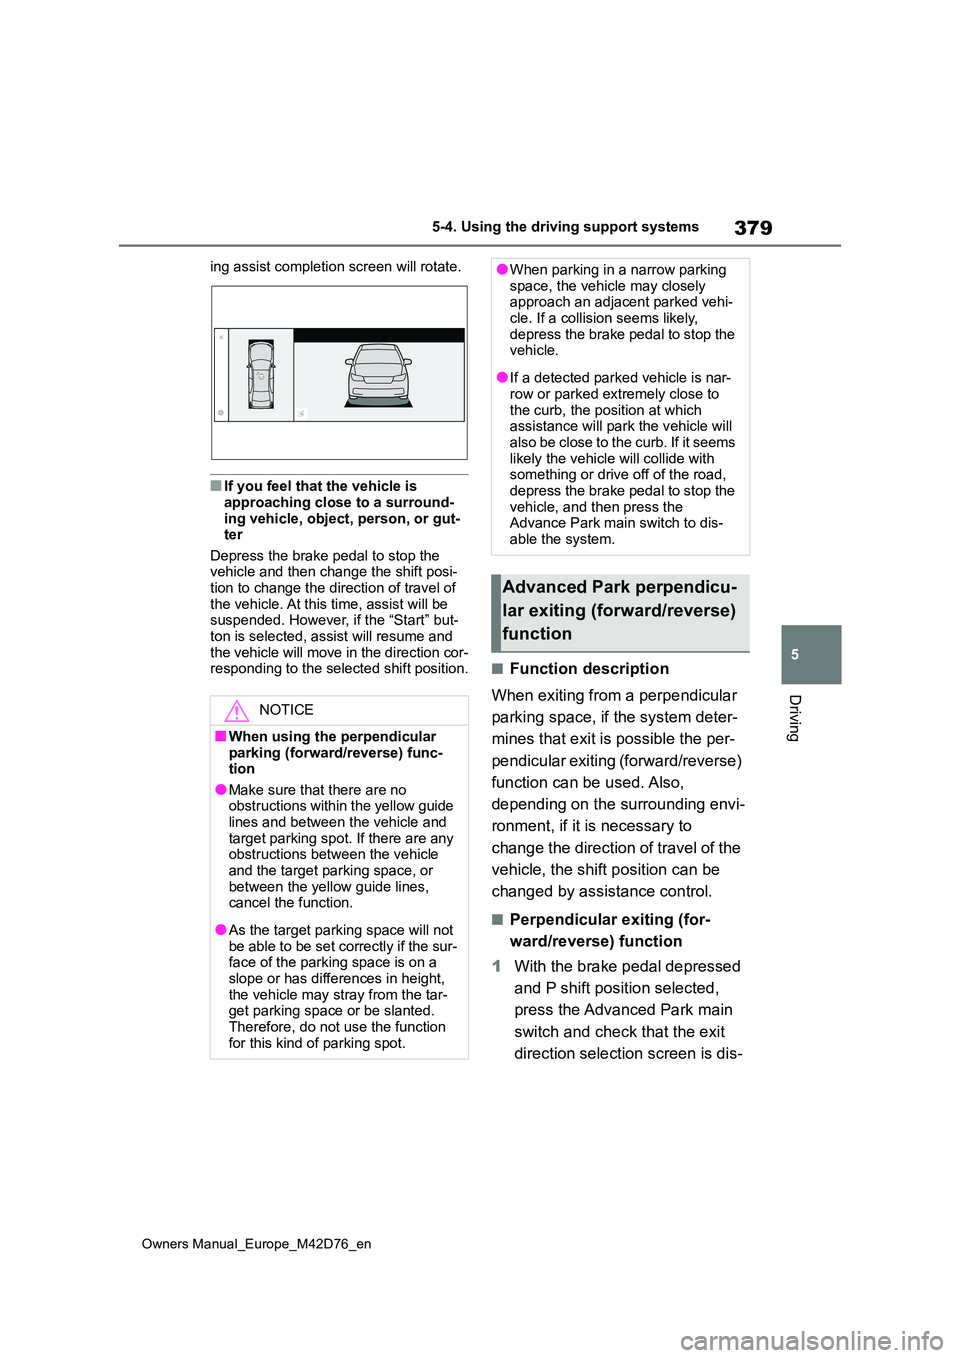
ing assist completion screen will rotate.
■If you feel that the vehicle is
approaching close to a surround- ing vehicle, object, person, or gut-ter
Depress the brake pedal to stop the vehicle and then change the shift posi-tion to change the direction of travel of
the vehicle. At this time, assist will be suspended. However, if the “Start” but-ton is selected, assist will resume and
the vehicle will move in the direction cor- responding to the selected shift position.■Function description
When exiting from a perpendicular
parking space, if the system deter-
mines that exit is possible the per-
pendicular exiting (forward/reverse)
function can be used. Also,
depending on the surrounding envi-
ronment, if it is necessary to
change the direction of travel of the
vehicle, the shift position can be
changed by assistance control.
■Perpendicular exiting (for-
ward/reverse) function
1 With the brake pedal depressed
and P shift position selected,
press the Advanced Park main
switch and check that the exit
direction selection screen is dis-
NOTICE
■When using the perpendicular parking (forward/reverse) func-tion
●Make sure that there are no obstructions within the yellow guide lines and between the vehicle and
target parking spot. If there are any obstructions between the vehicle and the target parking space, or
between the yellow guide lines, cancel the function.
●As the target parking space will not be able to be set correctly if the sur-face of the parking space is on a
slope or has differences in height, the vehicle may stray from the tar-get parking space or be slanted.
Therefore, do not use the function for this kind of parking spot.
●When parking in a narrow parking space, the vehicle may closely approach an adjacent parked vehi-
cle. If a collision seems likely, depress the brake pedal to stop the vehicle.
●If a detected parked vehicle is nar-row or parked extremely close to
the curb, the position at which assistance will park the vehicle will also be close to the curb. If it seems
likely the vehicle will collide with something or drive off of the road, depress the brake pedal to stop the
vehicle, and then press the Advance Park main switch to dis-able the system.
Advanced Park perpendicu-
lar exiting (forward/reverse)
function
Page 386 of 674
384
Owners Manual_Europe_M42D76_en
5-4. Using the driving support systems
■Function description
When exiting from a parallel park-
ing space, if the system determines
that exit is possible the parallel exit-
ing function can be used. Also,
depending on the surrounding envi-
ronment, if it is necessary to
change the direction of travel of the
vehicle, the shift position can be
changed by assistance control.
■Leaving a parking space using
the parallel exiting function
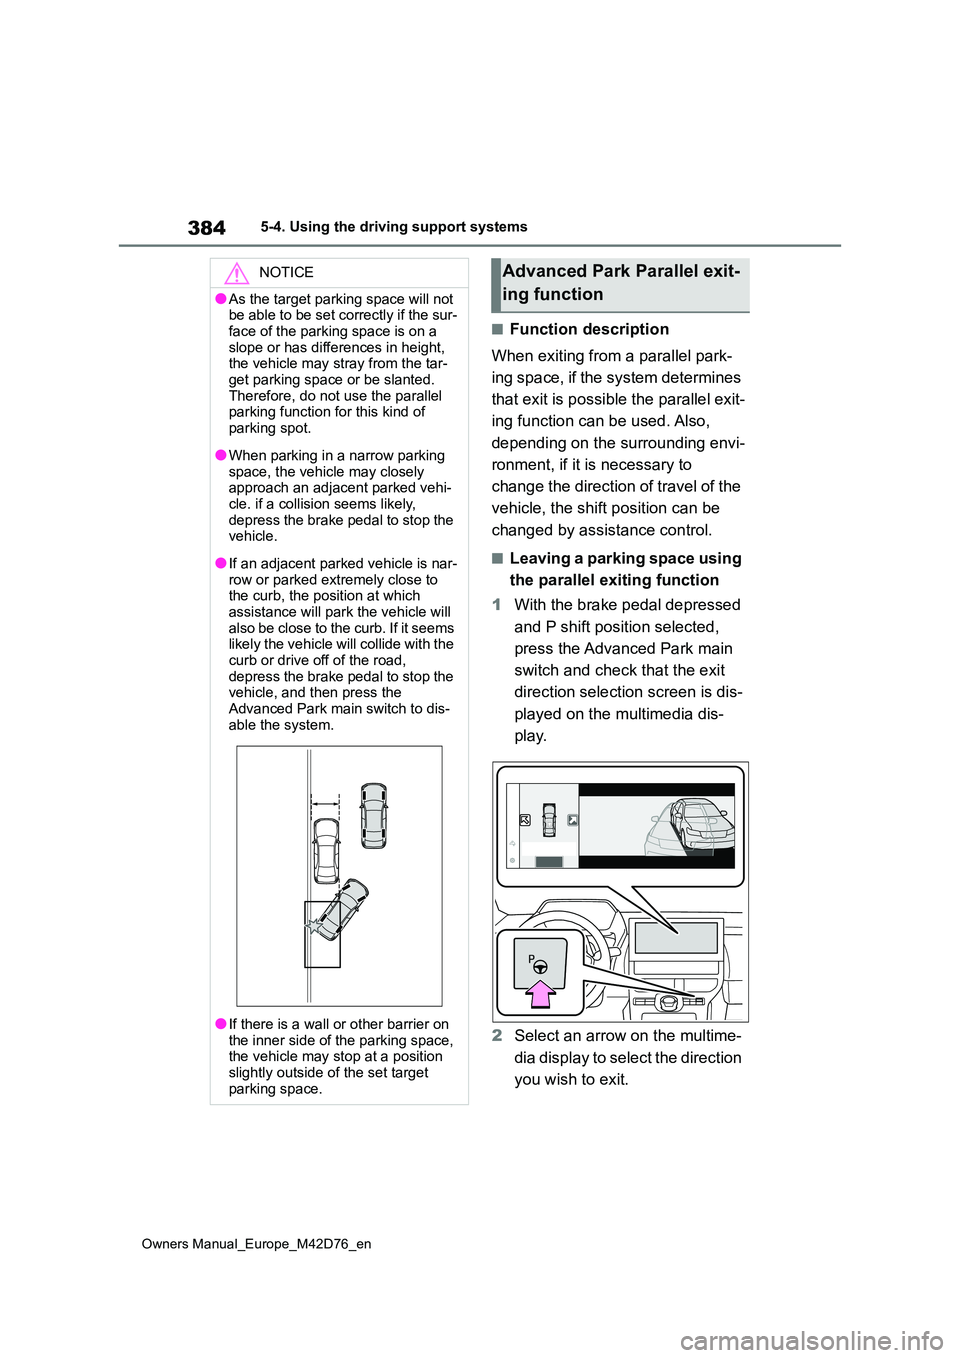
1 With the brake pedal depressed
and P shift position selected,
press the Advanced Park main
switch and check that the exit
direction selection screen is dis-
played on the multimedia dis-
play.
2 Select an arrow on the multime-
dia display to select the direction
you wish to exit.
NOTICE
●As the target parking space will not be able to be set correctly if the sur-
face of the parking space is on a slope or has differences in height, the vehicle may stray from the tar-
get parking space or be slanted. Therefore, do not use the parallel parking function for this kind of
parking spot.
●When parking in a narrow parking
space, the vehicle may closely approach an adjacent parked vehi-cle. if a collision seems likely,
depress the brake pedal to stop the vehicle.
●If an adjacent parked vehicle is nar-row or parked extremely close to the curb, the position at which
assistance will park the vehicle will also be close to the curb. If it seems likely the vehicle will collide with the
curb or drive off of the road, depress the brake pedal to stop the vehicle, and then press the
Advanced Park main switch to dis- able the system.
●If there is a wall or other barrier on the inner side of the parking space, the vehicle may stop at a position
slightly outside of the set target parking space.
Advanced Park Parallel exit-
ing function
Page 416 of 674
414
Owners Manual_Europe_M42D76_en
5-5. Driving tips
Specific design characteristics
give it a higher center of gravity
than ordinary passenger cars.
This vehicle design feature
causes this type of vehicle to be
more likely to rollover. Utility
vehicles have a significantly
higher rollover rate than other
types of vehicles.
An advantage of the higher
ground clearance is a better view
of the road allowing you to antici-
pate problems.
It is not designed for cornering at
the same speeds as ordinary
passenger cars any more than
low-slung sports cars designed
to perform satisfactorily under
off-road conditions. Therefore,
sharp turns at excessive speeds
may cause rollover.
Your vehicle is not designed to be
driven off-road. However, in the
Utility vehicle precau-
tions
This vehicle belongs to the
utility vehicle class, which has
higher ground clearance and
narrower tread in relation to
the height of its center of grav-
ity.
Utility vehicle feature
WARNING
■Utility vehicle precautions
Always observe the following precau-
tions to minimize the risk of death or serious injury or damage to your vehi-cle:
●In a rollover crash, an unbelted per-son is significantly more likely to die than a person wearing a seat belt.
Therefore, the driver and all pas- sengers should always fasten their seat belts.
●Avoid sharp turns or abrupt maneu-vers, if at all possible.
Failure to operate this vehicle cor- rectly may result in loss of control or vehicle rollover causing death or
serious injury.
●Loading cargo on the roof luggage
carrier (if equipped) will make the center of the vehicle gravity higher. Avoid high speeds, sudden starts,
sharp turns, sudden braking or abrupt maneuvers, otherwise it may result in loss of control or vehicle
rollover due to failure to operate this vehicle correctly.
●Always slow down in gusty cross-winds. Because of its profile and higher center of gravity, your vehi-
cle is more sensitive to side winds than an ordinary passenger car. Slowing down will allow you to have
better control.
●Do not drive horizontally across
steep slopes. Driving straight up or straight down is preferred. Your vehicle (or any similar off-road vehi-
cle) can tip over sideways much more easily than forward or back-ward.
Off-road driving
Page 440 of 674
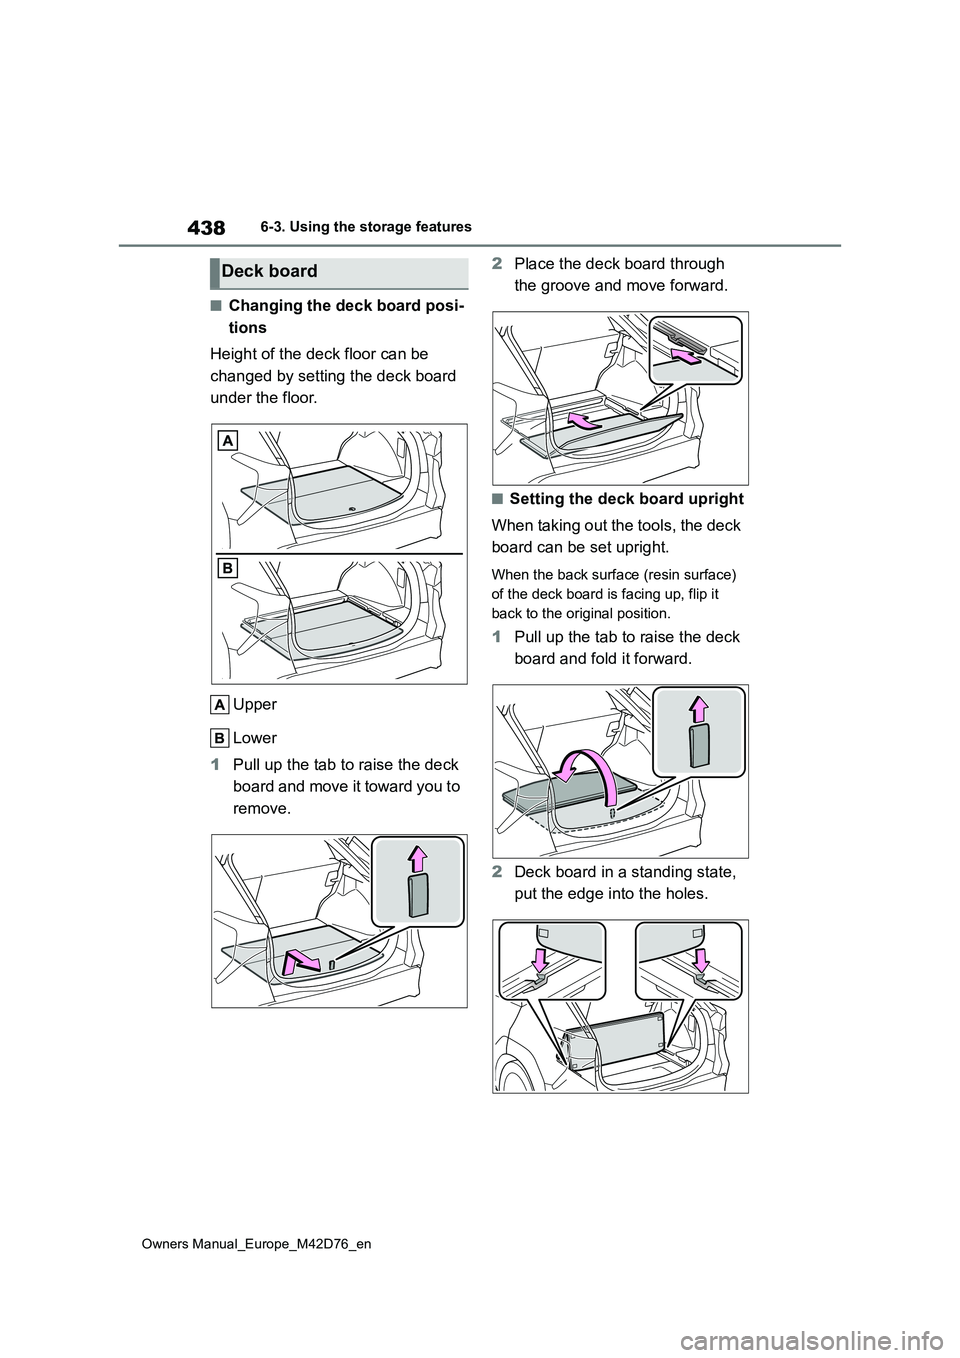
438
Owners Manual_Europe_M42D76_en
6-3. Using the storage features
■Changing the deck board posi-
tions
Height of the deck floor can be
changed by setting the deck board
under the floor.
Upper
Lower
1 Pull up the tab to raise the deck
board and move it toward you to
remove.
2 Place the deck board through
the groove and move forward.
■Setting the deck board upright
When taking out the tools, the deck
board can be set upright.
When the back surface (resin surface)
of the deck board is facing up, flip it
back to the original position.
1 Pull up the tab to raise the deck
board and fold it forward.
2 Deck board in a standing state,
put the edge into the holes.
Deck board