ECO mode TOYOTA BZ4X 2023 Owner's Manual
[x] Cancel search | Manufacturer: TOYOTA, Model Year: 2023, Model line: BZ4X, Model: TOYOTA BZ4X 2023Pages: 628, PDF Size: 11.91 MB
Page 190 of 628

1904-2. Opening, closing and locking the doors
Owners Manual_USA_M42C01_enlock and unlock repeatedly. In that
case, follow the fo
llowing correc-
tion procedures to wash the vehi-
cle:
• Place the electronic key in a loca- tion 6 ft. (2 m) or more away from
the vehicle. (Take care to ensure
that the key is not stolen.)
• Set the electronic key to battery-
saving mode to disable the smart
key system. ( P.188)
●If the electronic key is inside the
vehicle and a door handle
becomes wet during a car wash, a
message may be shown on the
multi-informatio n display and a
buzzer will sound outside the vehi-
cle. To turn off the alarm, lock all
the doors.
●The lock sensor may not work
properly if it com es into contact
with ice, snow, mud, etc. Clean
the lock sensor and attempt to
operate it again.
●A sudden approach to the effec-
tive range or door handle may pre-
vent the doors from being
unlocked. In this case, return the
door handle to the original position
and check that the doors unlock
before pulling the door handle
again.
●If there is another electronic key in
the detection area, it may take
slightly longer to unlock the doors
after the door handle is gripped.
■When the vehicle is not driven
for extended periods
●To prevent theft of the vehicle, do
not leave the electronic key within
6 ft. (2 m) of the vehicle.
●The smart key system can be
deactivated in advance. ( P.569)
●Battery-saving mode can reduce
the power consumption of elec-
tronic keys. ( P.188)
■To operate the system properly
Make sure to carry the electronic
key when operating the system. Do
not get the electronic key too close to the vehicle when operating the
system from the out
side of the vehi-
cle.
Depending on the position and hold-
ing condition of the electronic key,
the key may not be detected cor-
rectly and the system may not oper-
ate properly. (The alarm may go off
accidentally, or the door lock pre-
vention may not operate.)
■If the smart key system does
not operate properly
●If the doors cannot be locked or
unlocked, perform the following.
• Bring the electronic key close to the door handle and perform a
lock or unlock operation.
• Use the wireless remote control.
If the doors cannot be locked or
unlocked by perform the above, use
the mechanical key. ( P.539)
However, if the mechanical key is
used while the alarm system is set,
the warning will sound. ( P. 6 9 )
●If the EV system cannot be
started, refer to P.540
■Customization
Settings (e.g. smart key system)
can be changed.
(Customizable features: P.569)
If the smart key system has been
deactivated in a customized setting,
refer to the explanations for the fol-
lowing operations.
●Locking and unlocking the doors:
Use the wireless remote control or
mechanical key. ( P.167, 539)
●Starting the EV system and
changing power switch modes:
P. 5 4 0
●Stopping the EV system: P. 2 3 3
Page 202 of 628
2024-4. Adjusting the steering wheel and mirrors
Owners Manual_USA_M42C01_en
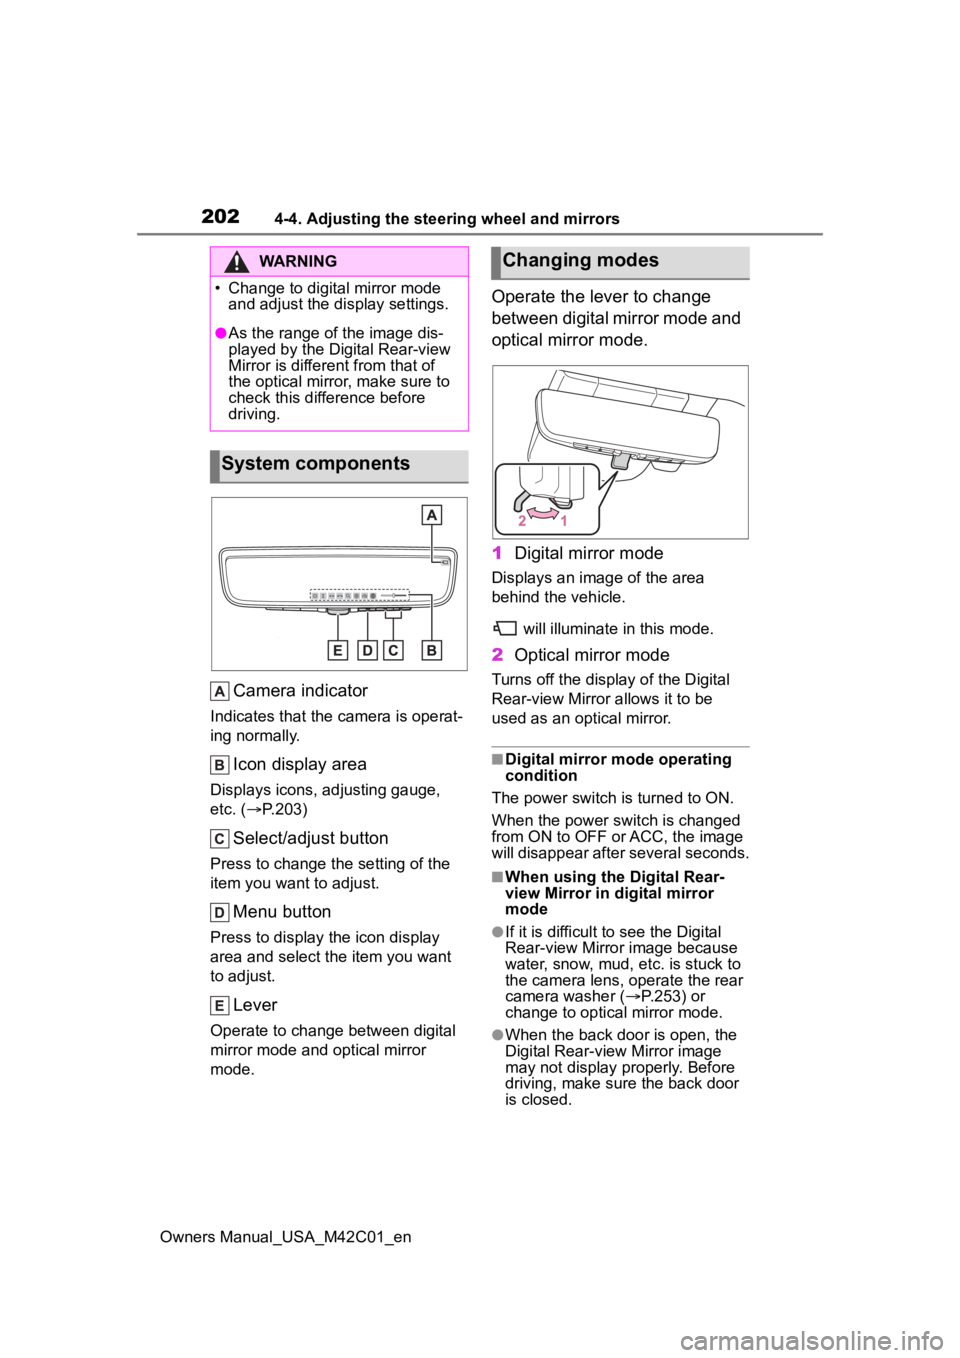
Camera indicator
Indicates that the camera is operat-
ing normally.
Icon display area
Displays icons, adjusting gauge,
etc. ( P.203)
Select/adjust button
Press to change the setting of the
item you want to adjust.
Menu button
Press to display the icon display
area and select the item you want
to adjust.
Lever
Operate to change between digital
mirror mode and optical mirror
mode.
Operate the lever to change
between digital mirror mode and
optical mirror mode.
1 Digital mirror mode
Displays an ima ge of the area
behind the vehicle.
will illuminate in this mode.
2Optical mirror mode
Turns off the display of the Digital
Rear-view Mirror allows it to be
used as an optical mirror.
■Digital mirror mode operating
condition
The power switch is turned to ON.
When the power switch is changed
from ON to OFF o r ACC, the image
will disappear after several seconds.
■When using the Digital Rear-
view Mirror in d igital mirror
mode
●If it is difficult to see the Digital
Rear-view Mirror image because
water, snow, mud, e tc. is stuck to
the camera lens, operate the rear
camera washer ( P.253) or
change to optical mirror mode.
●When the back door is open, the
Digital Rear-view Mirror image
may not display properly. Before
driving, make sure the back door
is closed.
WARNING
�
Page 203 of 628
2034-4. Adjusting the steering wheel and mirrors
Owners Manual_USA_M42C01_en
4
Before driving
●If the display is difficult to see due
to reflected light, close the elec-
tronic sunshade for the panoramic
moon roof (if equipped).
●Any of the following conditions
may occur when d riving in the
dark, such as at night. None of
them indicates that a malfunction
has occurred.
• Colors of objects in the displayed image may differ f rom their actual
color.
• Depending on the height of the lights of the vehicle behind, the
area around the vehicle may
appear white and blurry.
• Automatic image adjustment for
brighter surrounding image may
cause flickering.
If it is difficult to see the displayed
image or flickering bothers you,
change to optical mirror mode.
●The Digital Rear-view Mirror may
become hot while it is in digital
mirror mode.
This is not a malfunction.
●Depending on your physical con-
dition or age, it may take longer
than usual to focus on the dis-
played image. In this case,
change to optical mirror mode.
●Do not let passengers stare at the
displayed image when the vehicle
is being driven, as doing so may
cause motion sickness.
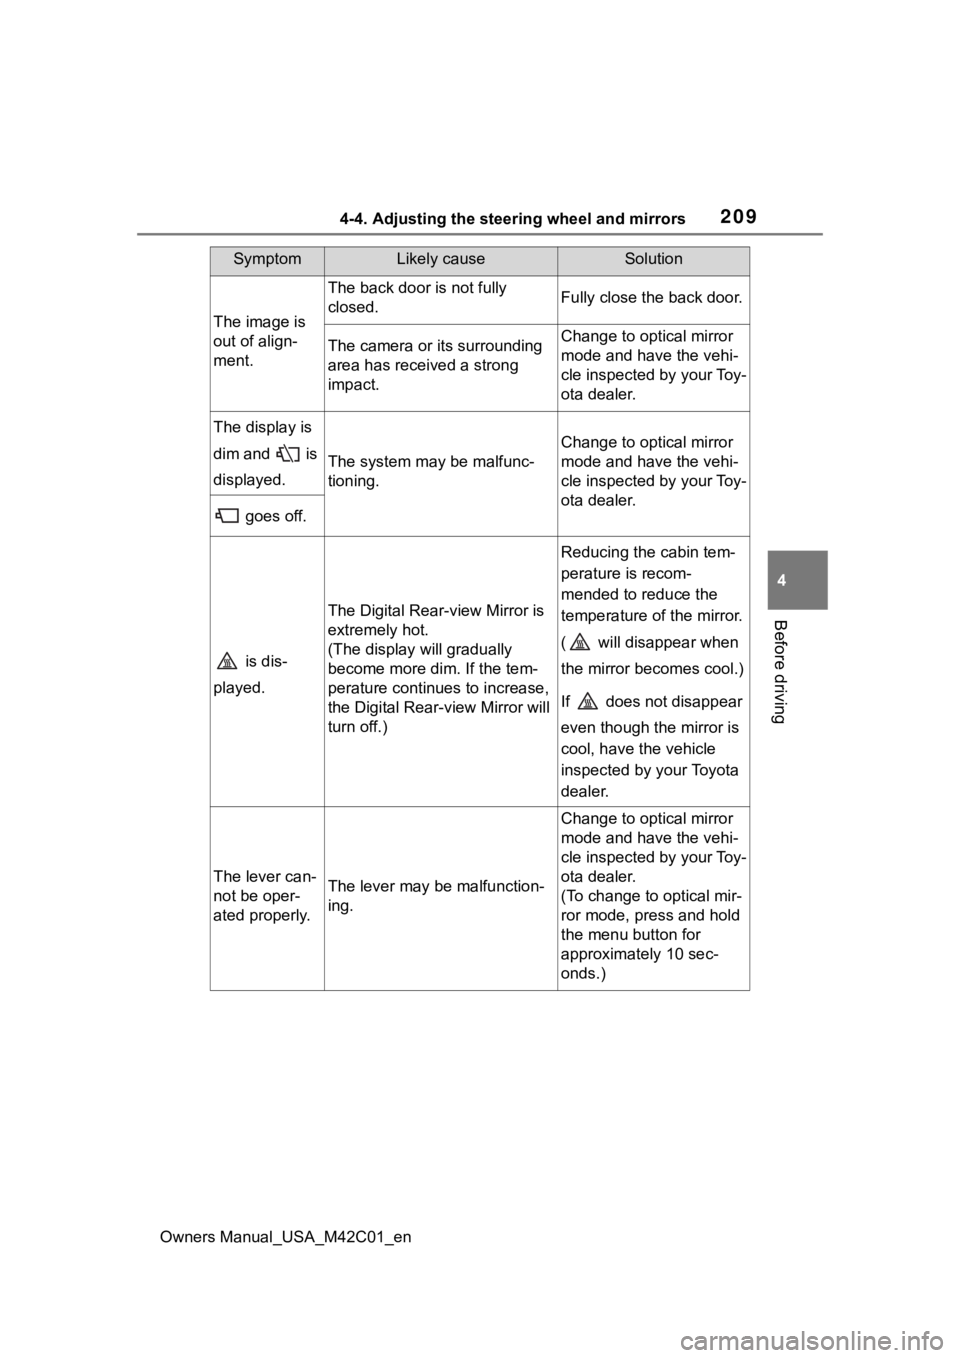
■When the system malfunctions
If the symbol show n in the illustra-
tion is displayed when using the
Digital Rear-view Mirror in digital
mirror mode, the system may be
malfunctioning. The symbol will dis-
appear in a few seconds. Operate
the lever, change to optical mirror
mode and have the vehicle
inspected by your Toyota dealer.
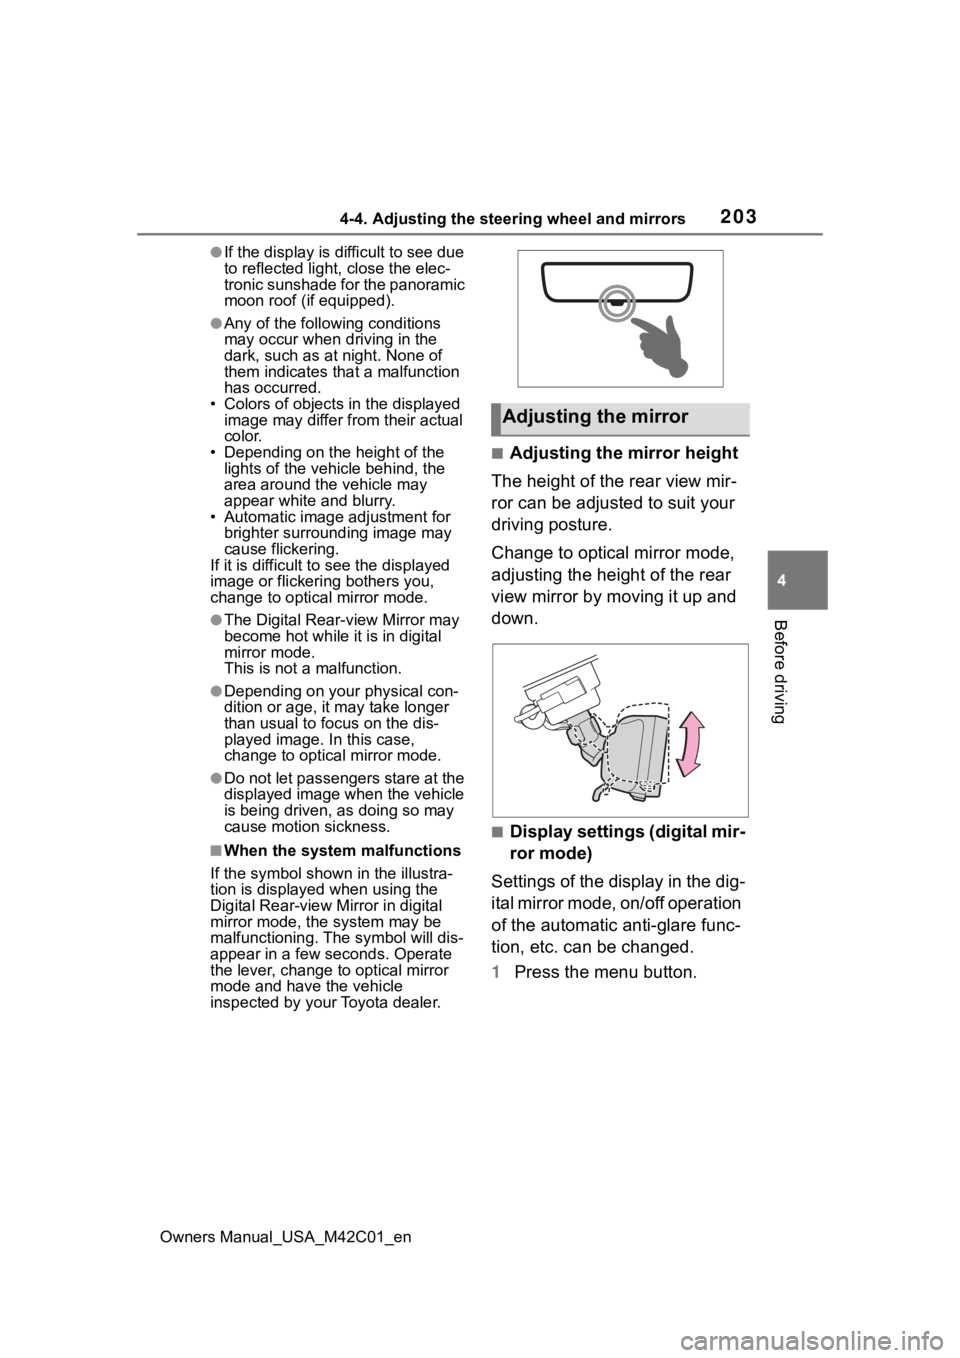
■Adjusting the mirror height
The height of the rear view mir-
ror can be adjusted to suit your
driving posture.
Change to optical mirror mode,
adjusting the height of the rear
view mirror by moving it up and
down.
■Display settings (digital mir-
ror mode)
Settings of the display in the dig-
ital mirror mode, on/off operation
of the automatic anti-glare func-
tion, etc. can be changed.
1 Press the menu button.
Adjusting the mirror
Page 204 of 628
2044-4. Adjusting the steering wheel and mirrors
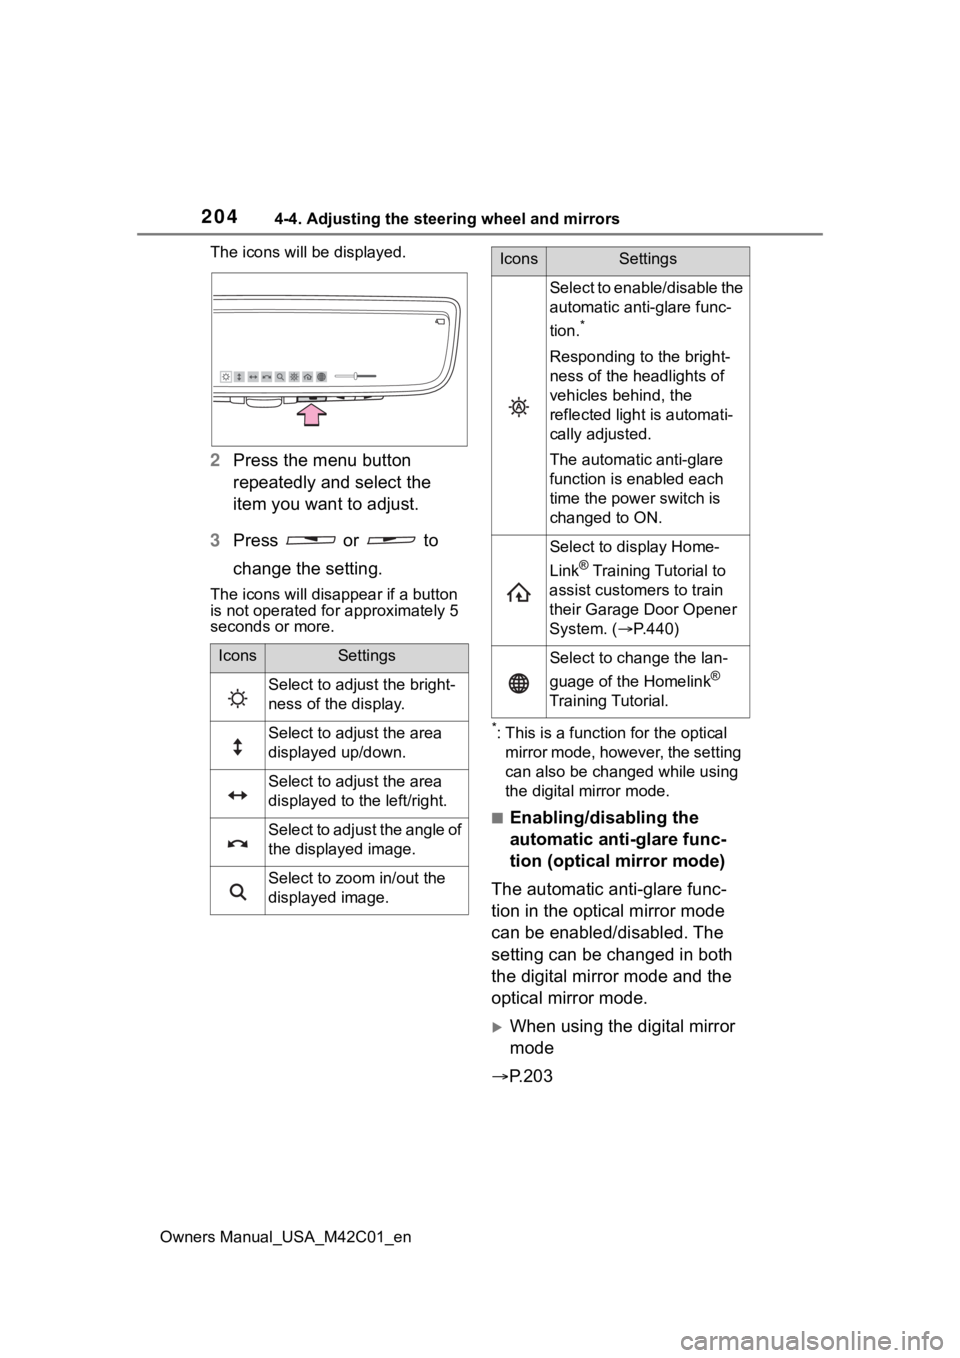
Owners Manual_USA_M42C01_enThe icons will be displayed.
2
Press the menu button
repeatedly and select the
item you want to adjust.
3 Press or to
change the setting.
The icons will disapp ear if a button
is not operated fo r approximately 5
seconds or more.
*: This is a functi on for the optical
mirror mode, however, the setting
can also be changed while using
the digital mirror mode.
■Enabling/disabling the
automatic anti-glare func-
tion (optical mirror mode)
The automatic anti-glare func-
tion in the optical mirror mode
can be enabled/disabled. The
setting can be changed in both
the digital mirror mode and the
optical mirror mode.
When using the digital mirror
mode
P.203
IconsSettings
Select to adjust the bright-
ness of the display.
Select to adjust the area
displayed up/down.
Select to adjust the area
displayed to the left/right.
Select to adjust the angle of
the displayed image.
Select to zoom in/out the
displayed image.
Select to enable/disable the
automatic anti-glare func-
tion.
*
Responding to the bright-
ness of the headlights of
vehicles behind, the
reflected light is automati-
cally adjusted.
The automatic anti-glare
function is enabled each
time the power switch is
changed to ON.
Select to display Home-
Link
® Training Tutorial to
assist customers to train
their Garage Door Opener
System. ( P.440)
Select to change the lan-
guage of the Homelink
®
Training Tutorial.
IconsSettings
Page 205 of 628
2054-4. Adjusting the steering wheel and mirrors
Owners Manual_USA_M42C01_en
4
Before driving
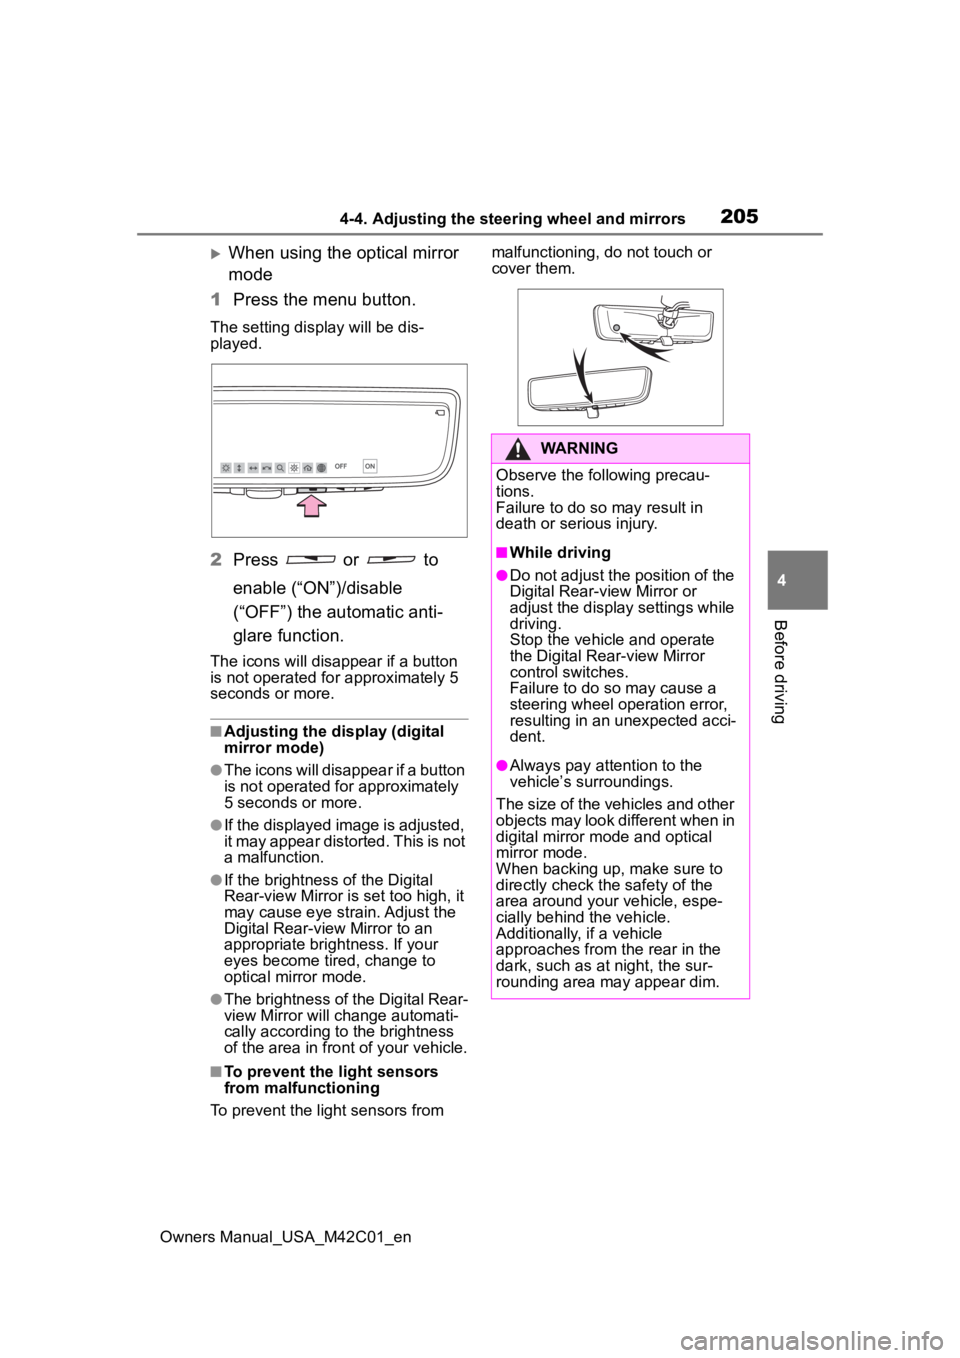
When using the optical mirror
mode
1 Press the menu button.
The setting display will be dis-
played.
2Press or to
enable (“ON”)/disable
(“OFF”) the automatic anti-
glare function.
The icons will disappear if a button
is not operated fo r approximately 5
seconds or more.
■Adjusting the display (digital
mirror mode)
●The icons will disappear if a button
is not operated for approximately
5 seconds or more.
●If the displayed image is adjusted,
it may appear distorted. This is not
a malfunction.
●If the brightness of the Digital
Rear-view Mirror is set too high, it
may cause eye strain. Adjust the
Digital Rear-view Mirror to an
appropriate brightness. If your
eyes become tired, change to
optical mirror mode.
●The brightness of the Digital Rear-
view Mirror will ch ange automati-
cally according to the brightness
of the area in front of your vehicle.
■To prevent the light sensors
from malfunctioning
To prevent the light sensors from malfunctioning, do not touch or
cover them.
WARNING
Observe the following precau-
tions.
Failure to do so may result in
death or serious injury.
■While driving
●Do not adjust the position of the
Digital Rear-view Mirror or
adjust the display settings while
driving.
Stop the vehicle and operate
the Digital Rear-view Mirror
control switches.
Failure to do so may cause a
steering wheel operation error,
resulting in an unexpected acci-
dent.
●Always pay attention to the
vehicle’s surroundings.
The size of the vehicles and other
objects may look different when in
digital mirror mode and optical
mirror mode.
When backing up, make sure to
directly check the safety of the
area around your vehicle, espe-
cially behind the vehicle.
Additionally, if a vehicle
approaches from the rear in the
dark, such as at night, the sur-
rounding area may appear dim.
Page 209 of 628
2094-4. Adjusting the steering wheel and mirrors
Owners Manual_USA_M42C01_en
4
Before driving
The image is
out of align-
ment.
The back door is not fully
closed.Fully close the back door.
The camera or its surrounding
area has received a strong
impact.Change to optical mirror
mode and have the vehi-
cle inspected by your Toy-
ota dealer.
The display is
dim and is
displayed.
The system may be malfunc-
tioning.
Change to optical mirror
mode and have the vehi-
cle inspected by your Toy-
ota dealer.
goes off.
is dis-
played.
The Digital Rear-view Mirror is
extremely hot.
(The display will gradually
become more dim. If the tem-
perature continues to increase,
the Digital Rear-view Mirror will
turn off.)
Reducing the cabin tem-
perature is recom-
mended to reduce the
temperature of the mirror.
( will disappear when
the mirror becomes cool.)
If does not disappear
even though the mirror is
cool, have the vehicle
inspected by your Toyota
dealer.
The lever can-
not be oper-
ated properly.The lever may be malfunction-
ing.
Change to optical mirror
mode and have the vehi-
cle inspected by your Toy-
ota dealer.
(To change to optical mir-
ror mode, press and hold
the menu button for
approximately 10 sec-
onds.)
SymptomLikely causeSolution
Page 221 of 628
2215-1. Before driving
Owners Manual_USA_M42C01_en
5
Driving
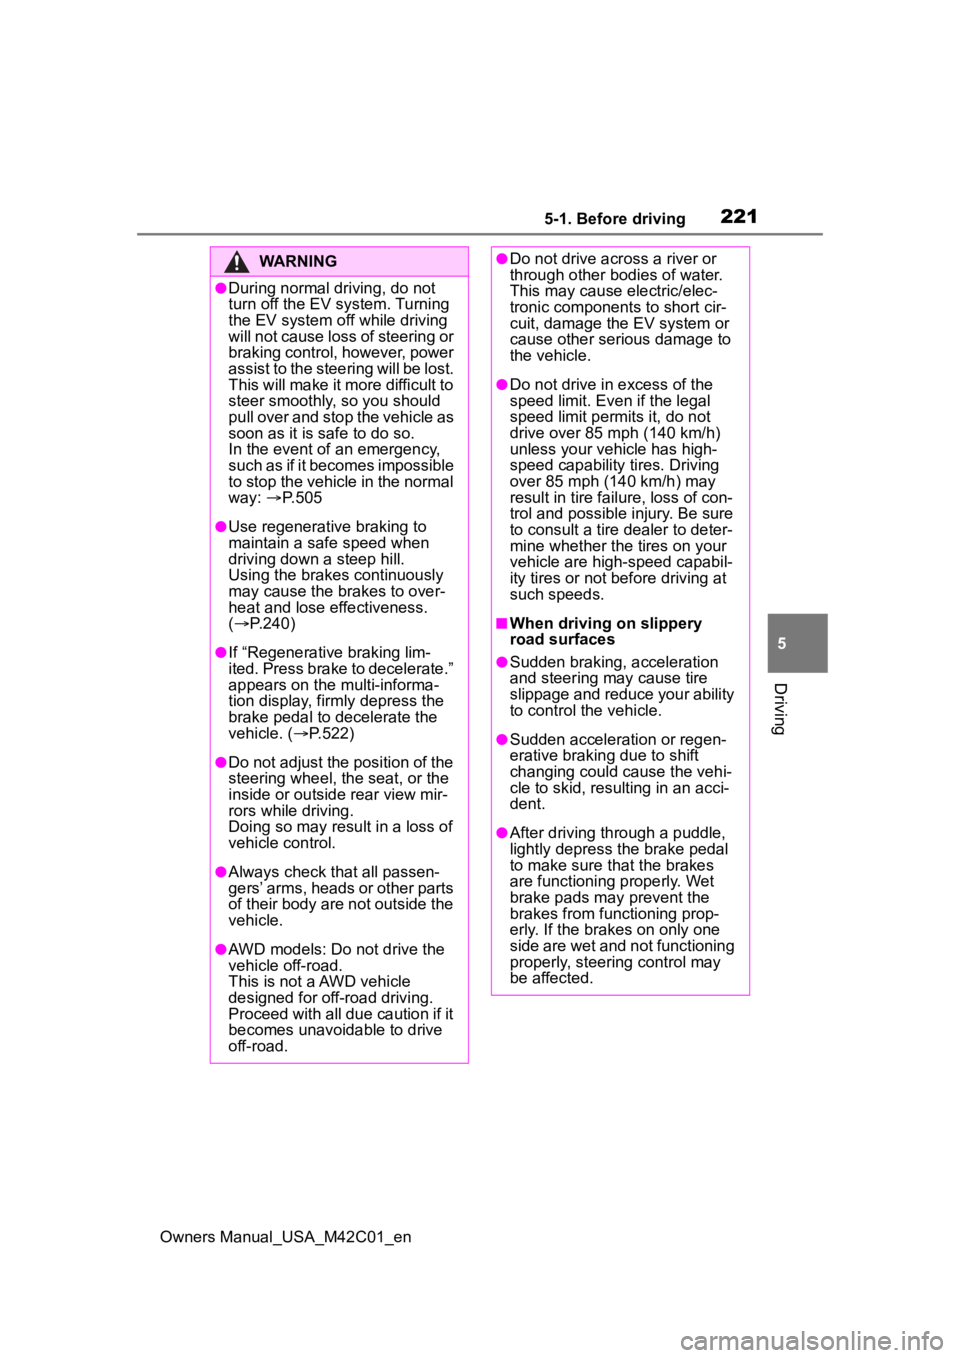
WARNING
●During normal driving, do not
turn off the EV system. Turning
the EV system off while driving
will not cause loss of steering or
braking control, however, power
assist to the steering will be lost.
This will make it more difficult to
steer smoothly, so you should
pull over and stop the vehicle as
soon as it is safe to do so.
In the event of an emergency,
such as if it becomes impossible
to stop the vehicle in the normal
way: P. 5 0 5
●Use regenerative braking to
maintain a safe speed when
driving down a steep hill.
Using the brakes continuously
may cause the brakes to over-
heat and lose effectiveness.
( P.240)
●If “Regenerative braking lim-
ited. Press brake to decelerate.”
appears on the multi-informa-
tion display, firmly depress the
brake pedal to decelerate the
vehicle. ( P.522)
●Do not adjust the position of the
steering wheel, the seat, or the
inside or outside rear view mir-
rors while driving.
Doing so may result in a loss of
vehicle control.
●Always check that all passen-
gers’ arms, heads or other parts
of their body are not outside the
vehicle.
●AWD models: Do not drive the
vehicle off-road.
This is not a AWD vehicle
designed for off-road driving.
Proceed with all due caution if it
becomes unavoidable to drive
off-road.
●Do not drive across a river or
through other bodies of water.
This may cause electric/elec-
tronic components to short cir-
cuit, damage the EV system or
cause other serious damage to
the vehicle.
●Do not drive in excess of the
speed limit. Even if the legal
speed limit permits it, do not
drive over 85 mph (140 km/h)
unless your vehicle has high-
speed capability tires. Driving
over 85 mph (140 km/h) may
result in tire fa ilure, loss of con-
trol and possible injury. Be sure
to consult a tire dealer to deter-
mine whether the tires on your
vehicle are high-speed capabil-
ity tires or not before driving at
such speeds.
■When driving on slippery
road surfaces
●Sudden braking, acceleration
and steering may cause tire
slippage and reduce your ability
to control the vehicle.
●Sudden acceleration or regen-
erative braking due to shift
changing could cause the vehi-
cle to skid, resulting in an acci-
dent.
●After driving through a puddle,
lightly depress the brake pedal
to make sure that the brakes
are functioning properly. Wet
brake pads may prevent the
brakes from functioning prop-
erly. If the brakes on only one
side are wet and not functioning
properly, steering control may
be affected.
Page 225 of 628
2255-1. Before driving
Owners Manual_USA_M42C01_en
5
Driving
operation is performed with the
accelerator pedal depressed,
the EV system output may be
restrained.
• When the shift position is shifted to R
*.
• When the shift position is
shifted from P or R to forward
drive shift position such as D
*.
When the system op erates, a mes-
sage appears on the multi-informa-
tion display. Read the message and
follow the instruction.
*: Depending on the situation, the shift position may not be
changed.
■Drive-Start Control (DSC)
●When the TRAC is turned off
( P.388), sudden start restraint
control also does not operate. If
your vehicle have trouble escap-
ing from the mud or fresh snow
due to sudden start restraint con-
trol operation, deactivate TRAC
( P.388) so that the vehicle may
become able to e scape from the
mud or fresh snow.
Also, sudden start restraint control
will not operate in the following con-
ditions:
• When “X-MODE” is selected (if equipped)
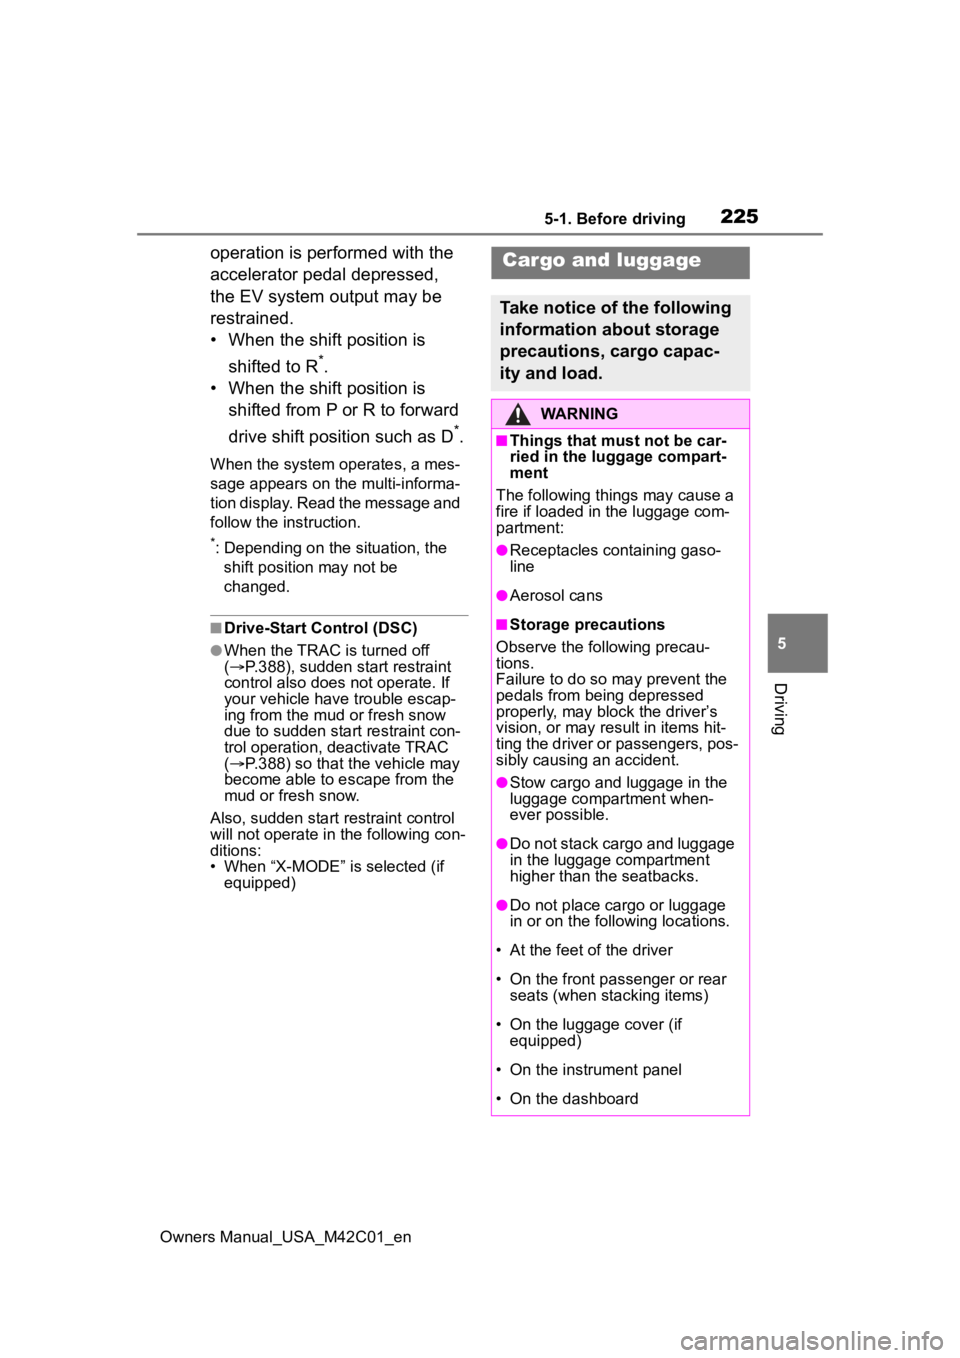
Cargo and luggage
Take notice of the following
information about storage
precautions, cargo capac-
ity and load.
WARNING
■Things that must not be car-
ried in the luggage compart-
ment
The following things may cause a
fire if loaded in the luggage com-
partment:
●Receptacles containing gaso-
line
●Aerosol cans
■Storage precautions
Observe the following precau-
tions.
Failure to do so may prevent the
pedals from being depressed
properly, may block the driver’s
vision, or may res ult in items hit-
ting the driver or passengers, pos-
sibly causing an accident.
●Stow cargo and luggage in the
luggage compartment when-
ever possible.
●Do not stack cargo and luggage
in the luggage compartment
higher than the seatbacks.
●Do not place cargo or luggage
in or on the follo wing locations.
• At the feet of the driver
• On the front passenger or rear seats (when stacking items)
• On the luggage cover (if equipped)
• On the instrument panel
• On the dashboard
Page 232 of 628

2325-2. Driving procedures
Owners Manual_USA_M42C01_enshown on the multi-information
display, read the message and fol-
low the instructions.
●If the door is unlocked with the
mechanical key, the EV system
cannot be started using the smart
key system. Refer to P.540 to start
the EV system. However, if the
electronic key is carried inside the
vehicle and the do
ors are locked
( P.170), the EV system can be
started.
■When the ambient temperature
is low, such as during winter
driving conditions
●When starting the EV system, the
flashing time of the “READY” indi-
cator may be long. Leave the
vehicle as it is until the “READY”
indicator is steady on, as steady
means the vehicle is able to move.
●When the traction battery is
extremely cold (below approxi-
mately -22°F [-30°C]) under the
influence of the outside tempera-
ture, it may not be possible to start
the EV system. In this case, try to
start the EV system again after the
temperature of the traction battery
increases due to the outside tem-
perature increase, etc.
■Sounds and vibrations specific
to an battery electric vehicle
P. 7 4
■If the 12-volt battery is dis-
charged
The EV system cannot be started
using the smart key system. Refer
to P.541 to restart the EV system.
■Electronic key battery depletion
P. 1 6 2
■Conditions affecting operation
P. 1 8 8
■Note for the entry function
P. 1 8 9
■If there is a malfunction in the
smart key system
If “Smart Key System Malfunction”
is displayed on the multi-information
display, the system may be malfunc-
tioning. Have the vehicle inspected
by your Toyota dealer immediately.
■If the “READY” indicator does
not come on
In the event that the “READY” indi-
cator does not come on even after
performing the proper procedures
for starting the vehicle, contact your
Toyota dealer immediately.
■If the EV system is malfunction-
ing
P. 8 0
■Electronic key battery
P.497
■Operation of the power switch
●If the switch is not pressed shortly
and firmly, the power switch mode
may not change or the EV system
may not start.
●If attempting to restart the EV sys-
tem immediately after turning the
power switch to OFF, the EV sys-
tem may not start in some cases.
After turning the power switch to
OFF, please wait a few seconds
before restarti ng the EV system.
■Customization
If the smart key system has been
deactivated in a customized setting,
refer to P.540.
WARNING
■When starting the EV system
Always start the EV system while
sitting in the driver’s seat. Do not
depress the accelerator pedal
while starting the EV system
under any circumstances.
Doing so may cause an accident
resulting in death o r serious injury.
Page 233 of 628

2335-2. Driving procedures
Owners Manual_USA_M42C01_en
5
Driving
1 Stop the vehicle completely.
2 Set the parking brake.
( P.243)
3 Press the P position switch.
( P.237)
Check that the shift position indica-
tor shows P and the parking brake
indicator is illuminated.
4Press the power switch.
The EV system will stop, and the
meter display will be extinguished
(the shift position indicator will be
extinguished a few seconds after
the meter display).
5Release the brake pedal and
check that “ACCESSORY” or
“POWER ON” is not shown
on the meter.
■Automatic EV system shut off
feature
●The vehicle is equipped with a
feature that automatically shuts off
the EV system when the shift posi-
tion is in P with the EV system operating for an extended period.
●The EV system will automatically
shut off after approximately 1 hour
if it has been left operating while
the shift position is in P.
●The timer for the automatic EV
system shut off feature will reset if
the brake pedal is depressed or if
the shift position is in a position
other than P.
●After the vehicle
is parked, if the
door is locked with the door lock
switch ( P.170) from the inside or
the mechanical key (P.539) from
the outside, the automatic EV sys-
tem shut off feature will be dis-
abled. The timer for the automatic
EV system shut off feature will be
re-enabled if the driver’s door is
opened.
■When the shift control system
malfunctions
When attempting to turn the power
switch off while t here is a malfunc-
tion in the shift control system, the
power switch mode may change to
ACC. In this case, ACC may be
turned off by applying the parking
brake and pressing the power
switch again.
If there is a malfunction in the sys-
tem, have the vehicle inspected by
your Toyota dealer immediately.
■Automatic P position selection
function
P.238
NOTICE
■When starting the EV system
If the EV system becomes difficult
to start, have your vehicle
checked by your Toyota dealer
immediately.
■Symptoms indicating a mal-
function with the power
switch
If the power switch seems to be
operating somewh at differently
than usual, such as the switch
sticking slightly, there may be a
malfunction. Contact your Toyota
dealer immediately.
Stopping the EV system