parking brake TOYOTA C-HR 2019 (in English) Owner's Manual
[x] Cancel search | Manufacturer: TOYOTA, Model Year: 2019, Model line: C-HR, Model: TOYOTA C-HR 2019Pages: 532, PDF Size: 10.35 MB
Page 190 of 532

1904-2. Driving procedures
C-HR_OM_USA_OM10569U■
Parking brake indicator light and parking brake lamp
●Depending on the engine switch position/mode, the parking brake indicator
light and parking brake lamp will turn on and stay on as descri bed below:
Vehicles without a smart key system
In the “ON” position: Comes on until the parking brake is released.
Not in the “ON” position: Stays on for approximately 15 seconds.
Vehicles with a smart key system
IGNITION ON mode: Comes on until the parking brake is released.
Not in IGNITION ON mode: Stays on for approximately 15 seconds.
● When the engine switch is turned off with the parking brake set, the parking
brake indicator light and parking brake lamp stay on for about 15 seconds.
This does not indicate a malfunction.
■ Changing the mode
When changing the automatic mode on/off, the message will be sh own on the
multi-information display and the buzzer sounds.
■ Parking the vehicle
P. 157
■ Parking brake engaged warning buzzer
A buzzer will sound if the vehicle is driven with the parking b rake engaged.
“EPB Applied.” is displayed on the multi-information display.
■ Warning messages and buzzers
Warning messages and buzzers are used to indicate a system malfunction or
to inform the driver of the need for caution. If a warning message is shown on
the multi-information display, read the message and follow the instructions.
■ If the brake system warning light comes on
P. 422
■ Usage in winter time
P. 287
Page 191 of 532

1914-2. Driving procedures
4
Driving
C-HR_OM_USA_OM10569U
WARNING
■When parking the vehicle
Do not leave a child in the vehicle alone. The parking brake ma y be
released unintentionally and there is the danger of the vehicle moving that
may lead to an accident resulting in death or serious injury.
■ Parking brake switch
Do not set any objects near the parking brake switch. Objects m ay interfere
with the switch and may lead the parking brake to unexpectedly operate.
NOTICE
■When parking the vehicle
Before you leave the vehicle, shift the shift lever to P, set t he parking brake
and make sure that the vehicle does not move.
■ When the system malfunctions
Stop the vehicle in a safe place and check the warning messages .
■ When the parking brake cannot be released due to a malfunction
Driving the vehicle with the parking brake set will lead to bra ke components
overheating, which may affect braking performance and increase brake
wear. Have the vehicle inspected by your Toyota dealer immediat ely if this
occurs.
Page 192 of 532

1924-2. Driving procedures
C-HR_OM_USA_OM10569U
Brake Hold
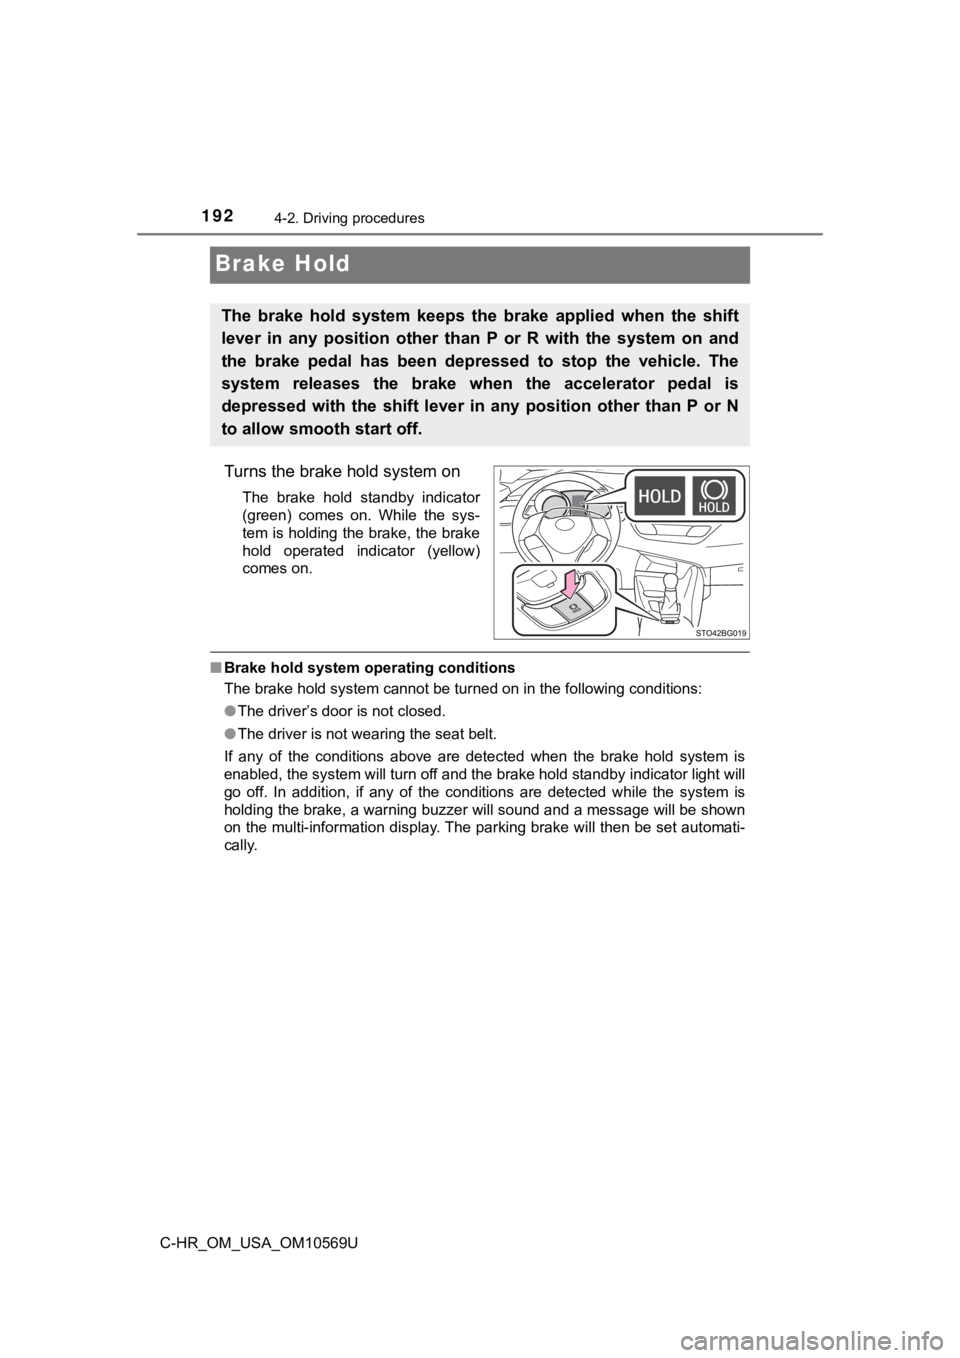
Turns the brake hold system on
The brake hold standby indicator
(green) comes on. While the sys-
tem is holding the brake, the brake
hold operated indicator (yellow)
comes on.
■Brake hold system operating conditions
The brake hold system cannot be turned on in the following cond itions:
● The driver’s door is not closed.
● The driver is not wearing the seat belt.
If any of the conditions above are detected when the brake hold system is
enabled, the system will turn off and the brake hold standby in dicator light will
go off. In addition, if any of the conditions are detected whil e the system is
holding the brake, a warning buzzer will sound and a message wi ll be shown
on the multi-information display. The parking brake will then b e set automati-
cally.
The brake hold system keeps the brake applied when the shift
lever in any position other than P or R with the system on and
the brake pedal has been depressed to stop the vehicle. The
system releases the brake when the accelerator pedal is
depressed with the shift lever in any position other than P or N
to allow smooth start off.
Page 193 of 532

1934-2. Driving procedures
4
Driving
C-HR_OM_USA_OM10569U■
Brake hold function
●If the brake pedal is left released for a period of about 3 min utes after the
system has started holding the brake, the parking brake will be set automat-
ically. In this case, a warning buzzer sounds and a message is shown on the
multi-information display.
● To turn the system off while the system is holding the brake, f irmly depress
the brake pedal and press the button again.
● The brake hold function may not hold the vehicle when the vehic le is on a
steep incline. In this situation, it may be necessary for the d river to apply the
brakes. A warning buzzer will sound and the multi-information d isplay will
inform the driver of this situation. If a warning message is sh own on the
multi-information display, read the message and follow the inst ructions.
■ When the parking brake is set aut omatically while the system is holding
the brakes
With the brake pedal depressed, release the parking brake by op erating the
parking brake switch, making sure that the parking brake indica tor light goes
off. ( P. 187)
■ If “Brake Hold Fault Depress Brake to Deactivate Visit Your Dea ler” is
displayed on the multi-information display
The system may be malfunctioning. Have the vehicle inspected by your
Toyota dealer.
■ Warning messages and buzzers
Warning messages and buzzers are used to indicate a system malfunction or
to inform the driver of the need for caution. If a warning message is shown on
the multi-information display, read the message and follow the instructions.
Page 194 of 532

1944-2. Driving procedures
C-HR_OM_USA_OM10569U
WARNING
■When the vehicle is on a steep incline
When using the brake hold system on a steep incline exercise ca ution. The
brake hold function may not hold the vehicle in such a situatio n.
■ When stopped on a slippery road
The system cannot stop the vehicle when the gripping ability of the tires has
been exceeded. Do not use the system when stopped on a slippery road.
NOTICE
■When parking the vehicle
The brake hold system is not designed for use when parking the vehicle for
a long period of time. Turning the engine switch off while the system is hold-
ing the brake may release the brake, which would cause the vehi cle to
move. When operating the engine switch, depress the brake pedal , shift the
shift lever to P and set the parking brake.
Page 197 of 532

1974-3. Operating the lights and wipers
4
Driving
C-HR_OM_USA_OM10569U
■Daytime running light system
●The daytime running lights illuminate using the same lights as the parking
lights and illuminate brighter than the parking lights.
● To make your vehicle more visible to other drivers during dayti me driving,
the daytime running lights turn on automatically when all of th e following
conditions are met. (The daytime running lights are not designe d for use at
night.)
• The engine is running
• The parking brake is released
• The headlight switch is in the (Canada only), or “AUTO”
*
position
*: When the surroundings are bright
The daytime running lights remain on after they illuminate, even if the parking
brake is set again.
● For the U.S.A.: Daytime running lights can be turned off by ope rating the
switch.
● Compared to turning on the headlights, the daytime running ligh t system
offers greater durability and consumes less electricity, so it can help improve
fuel economy.
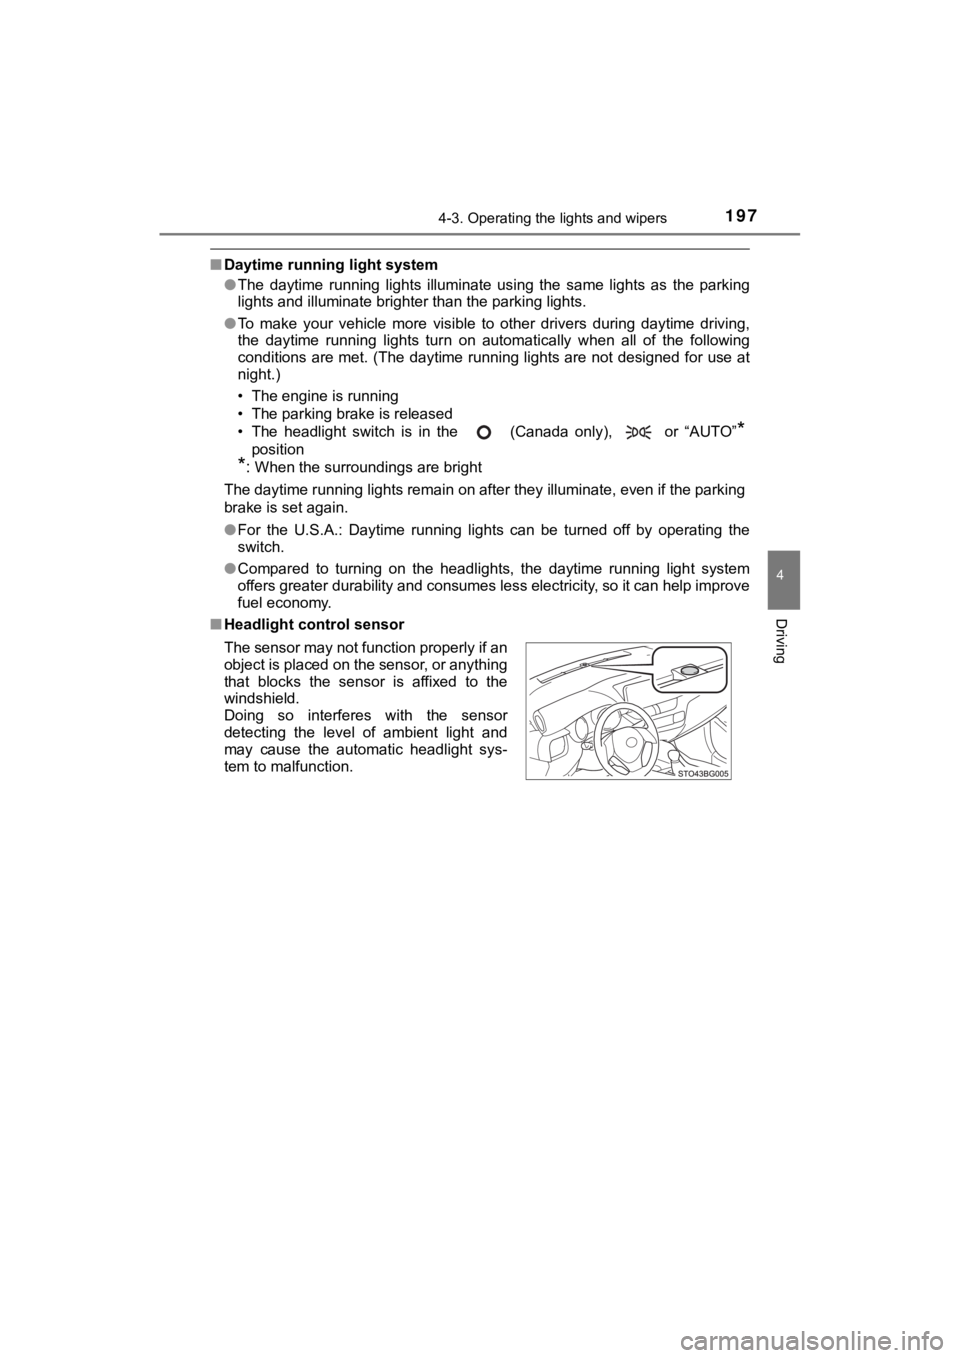
■ Headlight control sensor
The sensor may not function properly if an
object is placed on the sensor, or anything
that blocks the sensor is affixed to the
windshield.
Doing so interferes with the sensor
detecting the level of ambient light and
may cause the automatic headlight sys-
tem to malfunction.
Page 259 of 532

2594-5. Using the driving support systems
4
Driving
C-HR_OM_USA_OM10569U
■Dynamic radar cruise control wi th full-speed range can be set when
● The shift lever is in D.
● Vehicle speed is at or above approximately 30 mph (50 km/h).
However, when a preceding vehicle is detected, the dynamic rada r cruise
control with full-speed range can be set even if the vehicle speed is at or
below approximately 30 mph (50 km/h).
■ Accelerating after setting the vehicle speed
The vehicle can accelerate by operating the accelerator pedal. After acceler-
ating, the set speed resumes. However, during vehicle-to-vehicl e distance
control mode, the vehicle speed may decrease below the set spee d in order
to maintain the distance to the preceding vehicle.
■ When the vehicle stops while follow-up cruising
●Pushing the lever up while the vehicle ahead stops will resume follow-up
cruising if the vehicle ahead starts off within approximately 3 seconds after
the lever is pushed up.
● If the vehicle ahead starts off within 3 seconds after your veh icle stops, fol-
low-up cruising will be resumed.
■ Automatic cancelation of vehicle-to-vehicle distance control mode
Vehicle-to-vehicle distance control mode is automatically cance led in the fol-
lowing situations:
● Actual vehicle speed falls at or below approximately 25 mph (40 km/h) when
there are no vehicles ahead.
● The preceding vehicle leaves the lane when your vehicle is following at a
vehicle speed at or below approximately 25 mph (40 km/h). Other wise, the
sensor cannot properly detect the vehicle.
● VSC is activated.
● TRAC is activated for a period of time.
● When the VSC or TRAC system is turned off.
● The sensor cannot detect correctly because it is covered in some way.
● Pre-collision braking is activated.
● The parking brake is operated.
● The vehicle is stopped by system control on a steep incline.
● The following are detected when the vehicle has been stopped by system
control:
• The driver is not wearing a seat belt.
• The driver’s door is opened.
• The vehicle has been stopped for about 3 minutes.
If vehicle-to-vehicle distance control mode is automatically ca nceled for any
other reason, there may be a malfunction in the system. Contact your Toyota
dealer.
Page 283 of 532

2834-5. Using the driving support systems
4
Driving
C-HR_OM_USA_OM10569U■
Automatic reactivation of TRAC and VSC systems
After turning the TRAC and VSC systems off, the systems will be automati-
cally re-enabled in the following situations:
● Vehicles without a smart key system: When the engine switch is turned to
the “LOCK” position
Vehicles with a smart key system: When the engine switch is tur ned off
● If only the TRAC system is turned off, the TRAC will turn on wh en vehicle
speed increases
If both the TRAC and VSC systems are turned off, automatic re-e nabling will
not occur when vehicle speed increases.
■ Operating conditions of ACA
The system operates when the following occurs:
●TRAC/VSC can operate
● The driver is attempting to accelerate while turning
● The system detects that the vehicle is drifting to the outer si de
● The brake pedal is released
■ Reduced effectiveness of the EPS system
The effectiveness of the EPS system is reduced to prevent the s ystem from
overheating when there is frequent steering input over an exten ded period of
time. The steering wheel may feel heavy as a result. Should thi s occur, refrain
from excessive steering input or stop the vehicle and turn the engine off. The
EPS system should return to normal within 10 minutes.
■ Operating conditions of hill-start assist control
When the following four conditions are met, the hill-start assi st control will
operate:
● The shift lever is in a position other than P or N (when starting off forward/
backward on an upward incline).
● The vehicle is stopped.
● The accelerator pedal is not depressed.
● The parking brake is not engaged.
■ Automatic system cancelation of hill-start assist control
The hill-start assist control will turn off in any of the follo wing situations:
● The shift lever is shifted to P or N.
● The accelerator pedal is depressed.
● The parking brake is engaged.
● 2 seconds at maximum elapsed after the brake pedal is released.
Page 284 of 532

2844-5. Using the driving support systems
C-HR_OM_USA_OM10569U
WARNING
■The ABS does not operate effectively when
● The limits of tire gripping performance have been exceeded (suc h as
excessively worn tires on a snow covered road).
● The vehicle hydroplanes while driving at high speed on wet or s lick roads.
■ Stopping distance when the ABS is operating may exceed that of nor-
mal conditions
The ABS is not designed to shorten the vehicle’s stopping distance. Always
maintain a safe distance from the vehicle in front of you, espe cially in the
following situations:
● When driving on dirt, gravel or snow-covered roads
● When driving with tire chains
● When driving over bumps in the road
● When driving over roads with potholes or uneven surfaces
■ TRAC/VSC may not operate effectively when
Directional control and power may not be achievable while drivi ng on slip-
pery road surfaces, even if the TRAC/VSC system is operating.
Drive the vehicle carefully in conditions where stability and p ower may be
lost.
■ ACA does not operate effectively when
● Do not overly rely on ACA. ACA may not operate effectively when acceler-
ating down slopes or driving on slippery road surfaces.
● When ACA frequently operates, ACA may temporarily stop operatin g to
ensure proper operation of the brakes, TRAC and VSC.
■ Hill- start assist control does not operate effectively when
● Do not overly rely on hill-start assist control. Hill-start ass ist control may
not operate effectively on steep inclines and roads covered wit h ice.
● Unlike the parking brake, hill-start assist control is not inte nded to hold the
vehicle stationary for an extended period of time. Do not attempt to use
hill-start assist control to hold the vehicle on an incline, as doing so may
lead to an accident.
Page 287 of 532

2874-6. Driving tips
4
Driving
C-HR_OM_USA_OM10569U
Accelerate the vehicle slowly, keep a safe distance between you and
the vehicle ahead, and drive at a reduced speed suitable to roa d con-
ditions.
● Park the vehicle and move the shift lever to P without setting the
parking brake. The parking brake may freeze up, preventing it from
being released. If the vehicle is parked without setting the pa rking
brake, make sure t o block the wheels.
Failure to do so may be dangerou s because it may cause the vehi-
cle to move unexpectedly, pos sibly leading to an accident.
● If the vehicle is parked without setting the parking brake, confirm
that the shift lever c annot be moved out of P
*.
*
: The shift lever will be locked if it is attempted to be shifte d from P to any
other position without depressing the brake pedal. If the shift lever can be
shifted from P, there may be a problem with the shift lock syst em. Have the
vehicle inspected by your Toyota dealer immediately.
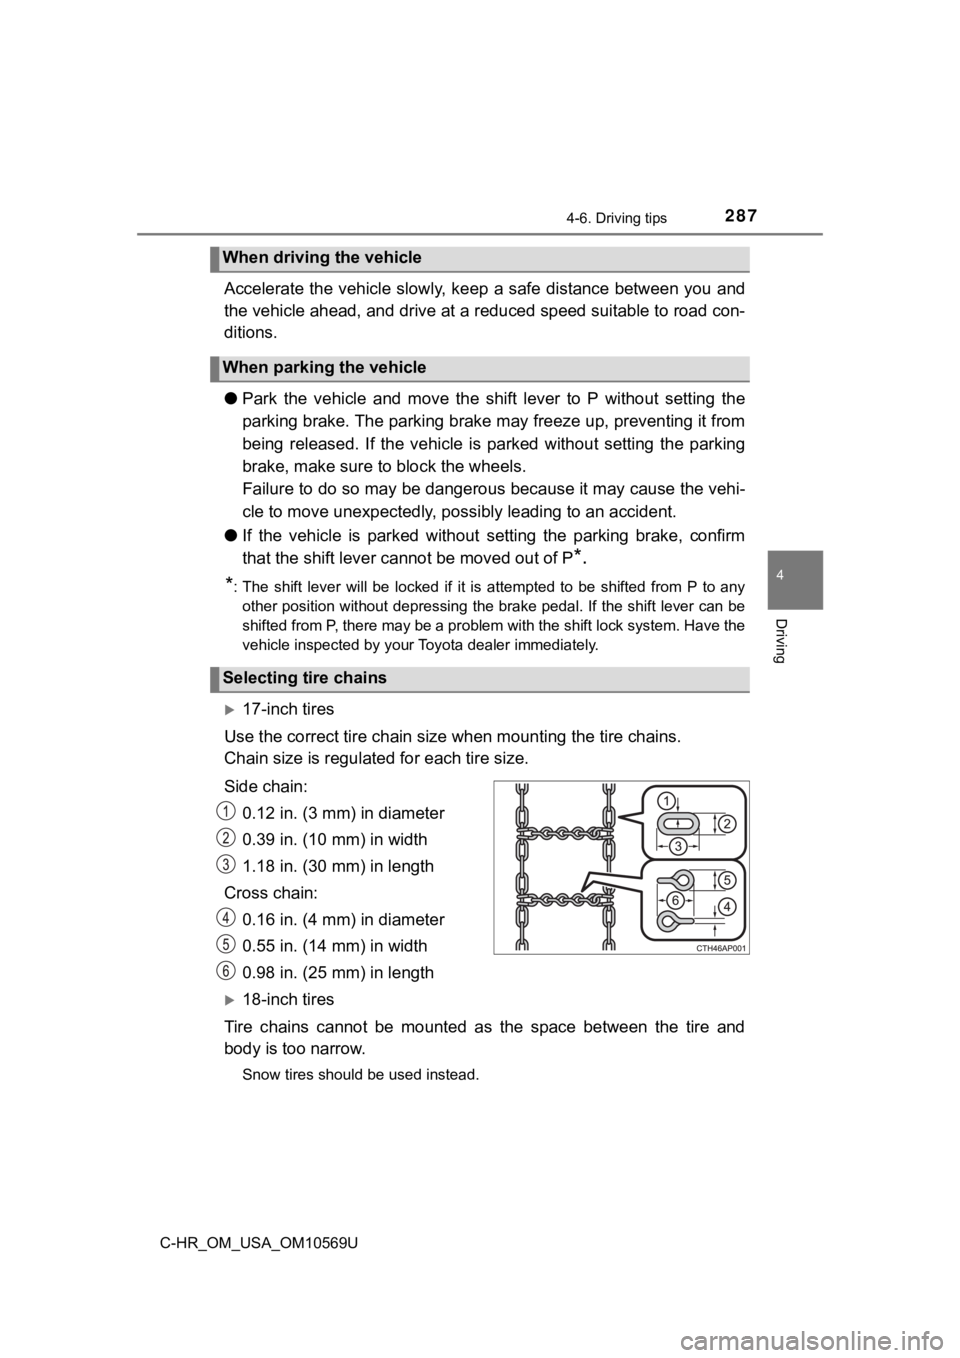
17-inch tires
Use the correct tire chain size when mount ing the tire chains.
Chain size is regulate d for each tire size.
Side chain: 0.12 in. (3 mm) in diameter
0.39 in. (10 mm) in width
1.18 in. (30 mm) in length
Cross chain: 0.16 in. (4 mm) in diameter
0.55 in. (14 mm) in width
0.98 in. (25 mm) in length
18-inch tires
Tire chains cannot be mounted as the space between the tire and
body is too narrow.
Snow tires should be used instead.
When driving the vehicle
When parking the vehicle
Selecting tire chains