reset TOYOTA CAMRY 2010 XV40 / 8.G Owners Manual
[x] Cancel search | Manufacturer: TOYOTA, Model Year: 2010, Model line: CAMRY, Model: TOYOTA CAMRY 2010 XV40 / 8.GPages: 538, PDF Size: 9.22 MB
Page 13 of 538
13
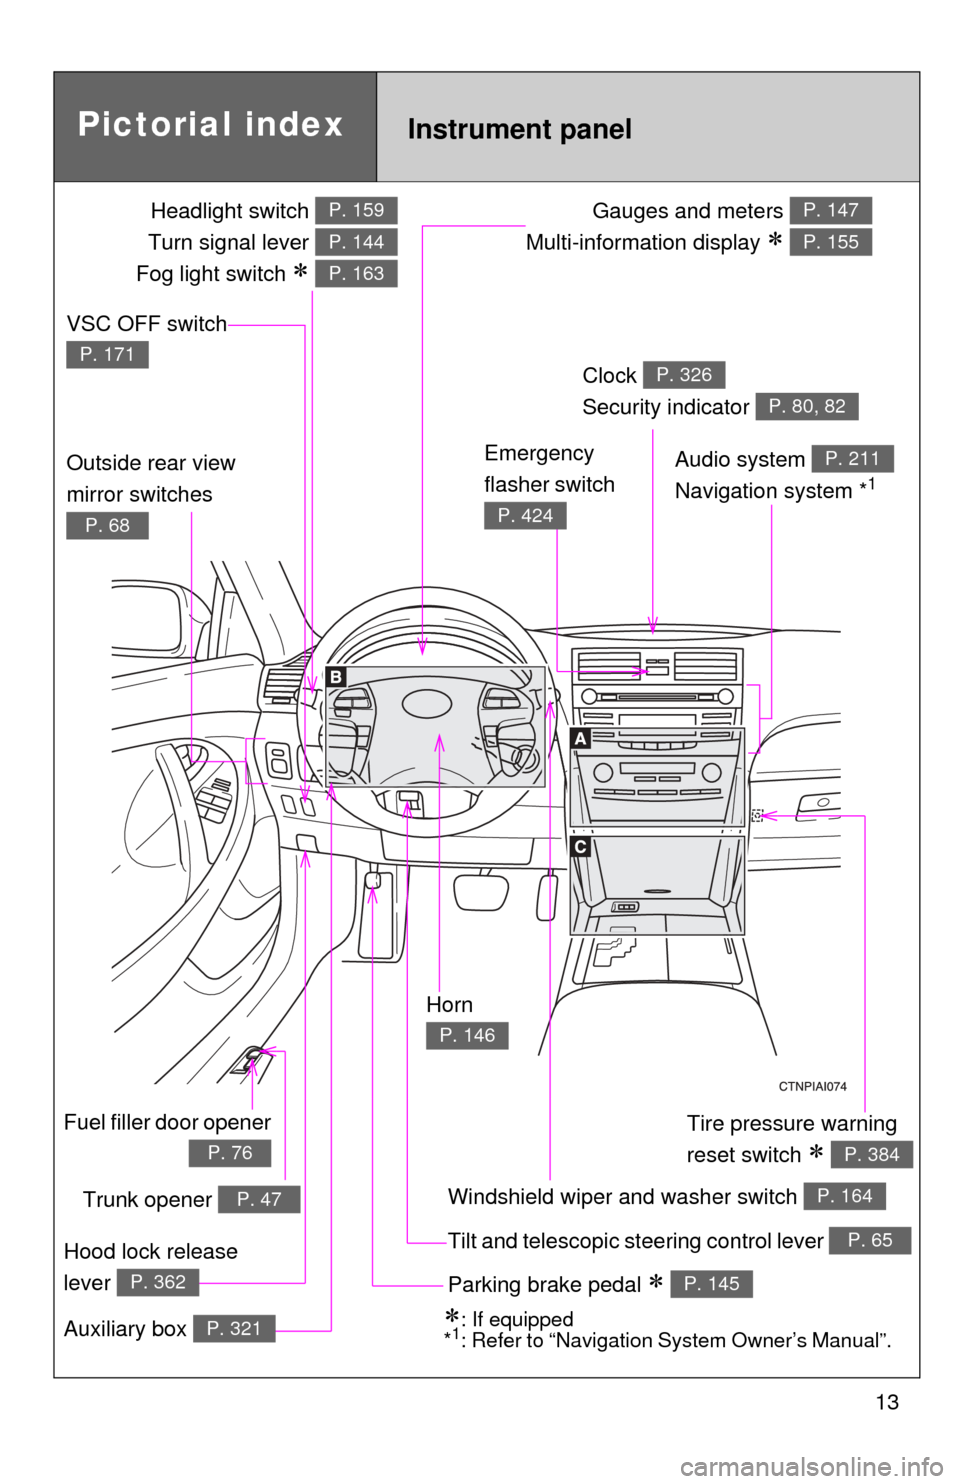
Gauges and meters
Multi-information display
P. 147
P. 155
Tilt and telescopic steering control lever P. 65
Pictorial index
Trunk opener P. 47
Headlight switch
Turn signal lever
Fog light switch
P. 159
P. 144
P. 163
Instrument panel
Audio system
Navigation system *1
P. 211
Windshield wiper and washer switch P. 164
Clock
Security indicator P. 326
P. 80, 82
Outside rear view
mirror switches
P. 68
Tire pressure warning
reset switch
P. 384
Parking brake pedal P. 145
Hood lock release
lever
P. 362
Fuel filler door opener
P. 76
Auxiliary box P. 321: If equipped
*1: Refer to “Navigation System Owner’s Manual”.
Emergency
flasher switch
P. 424
VSC OFF switch
P. 171
Horn
P. 146
Page 148 of 538
148 2-2. Instrument cluster
Odometer/trip meter/instrument panel light control and trip meter
reset button
Switches between odometer and trip meter displays. Pressing and
holding the button will reset the trip meter when the trip meter is being
displayed. To adjust the brightness of the instrument panel light, turn
the button. ( P. 150)
Automatic transmission shift position indicator lights
P. 138
Automatic transmission shift range display
P. 138
Page 149 of 538
149
2-2. Instrument cluster
2
When driving
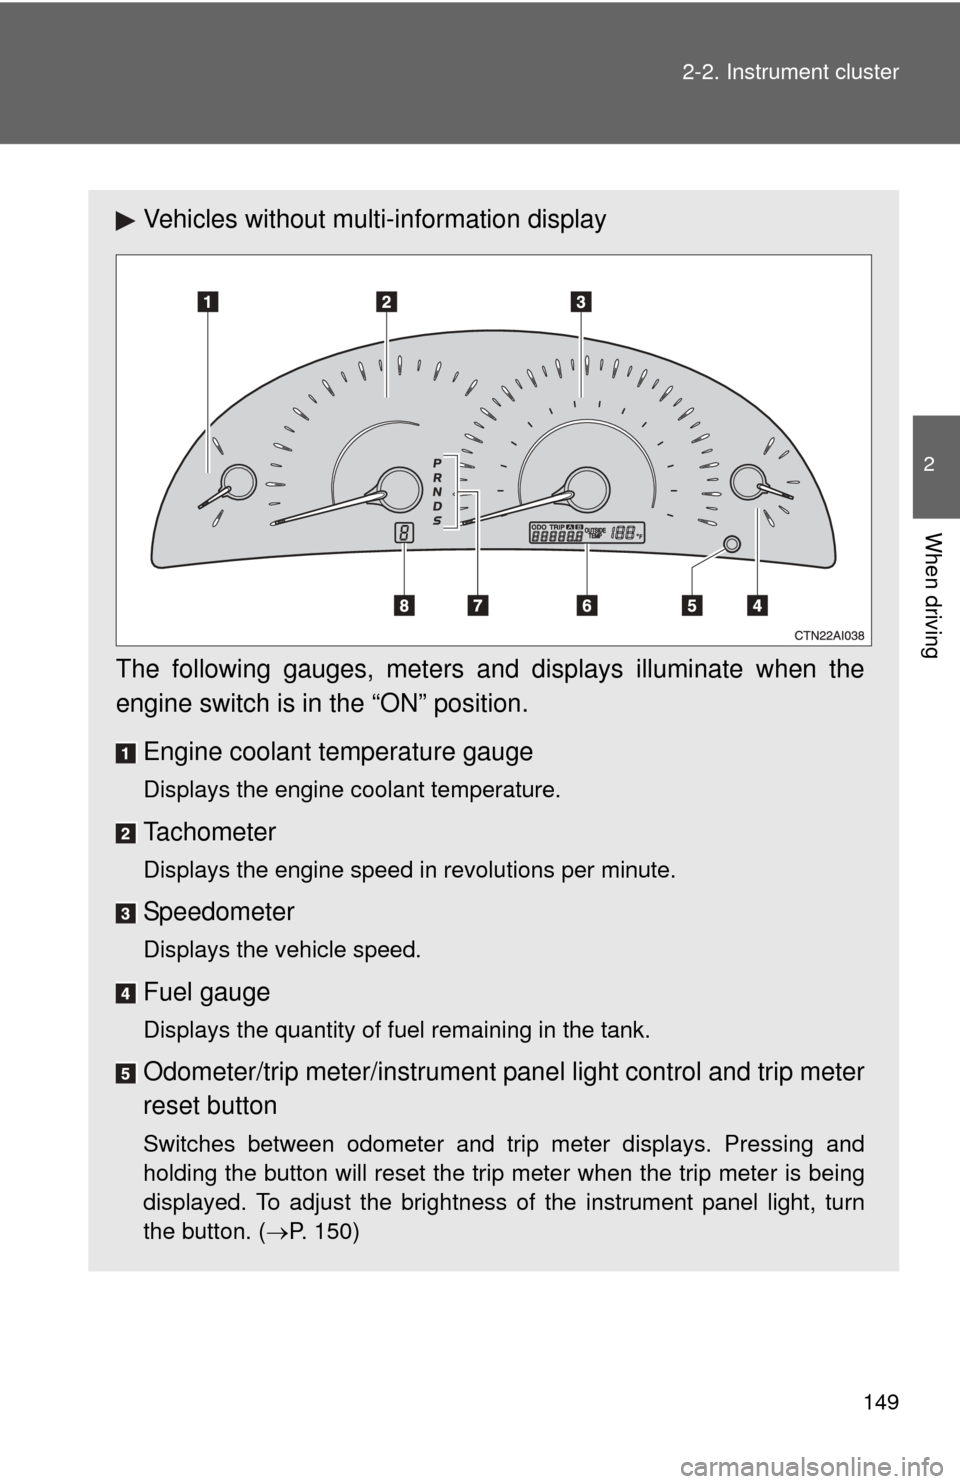
Vehicles without multi-information display
The following gauges, meters and displays illuminate when the
engine switch is in the “ON” position. Engine coolant temperature gauge
Displays the engine coolant temperature.
Tachometer
Displays the engine speed in revolutions per minute.
Speedometer
Displays the vehicle speed.
Fuel gauge
Displays the quantity of fuel remaining in the tank.
Odometer/trip meter/instrument p anel light control and trip meter
reset button
Switches between odometer and trip meter displays. Pressing and
holding the button will reset the trip meter when the trip meter is being
displayed. To adjust the brightness of the instrument panel light, turn
the button. ( P. 150)
Page 150 of 538
150 2-2. Instrument cluster
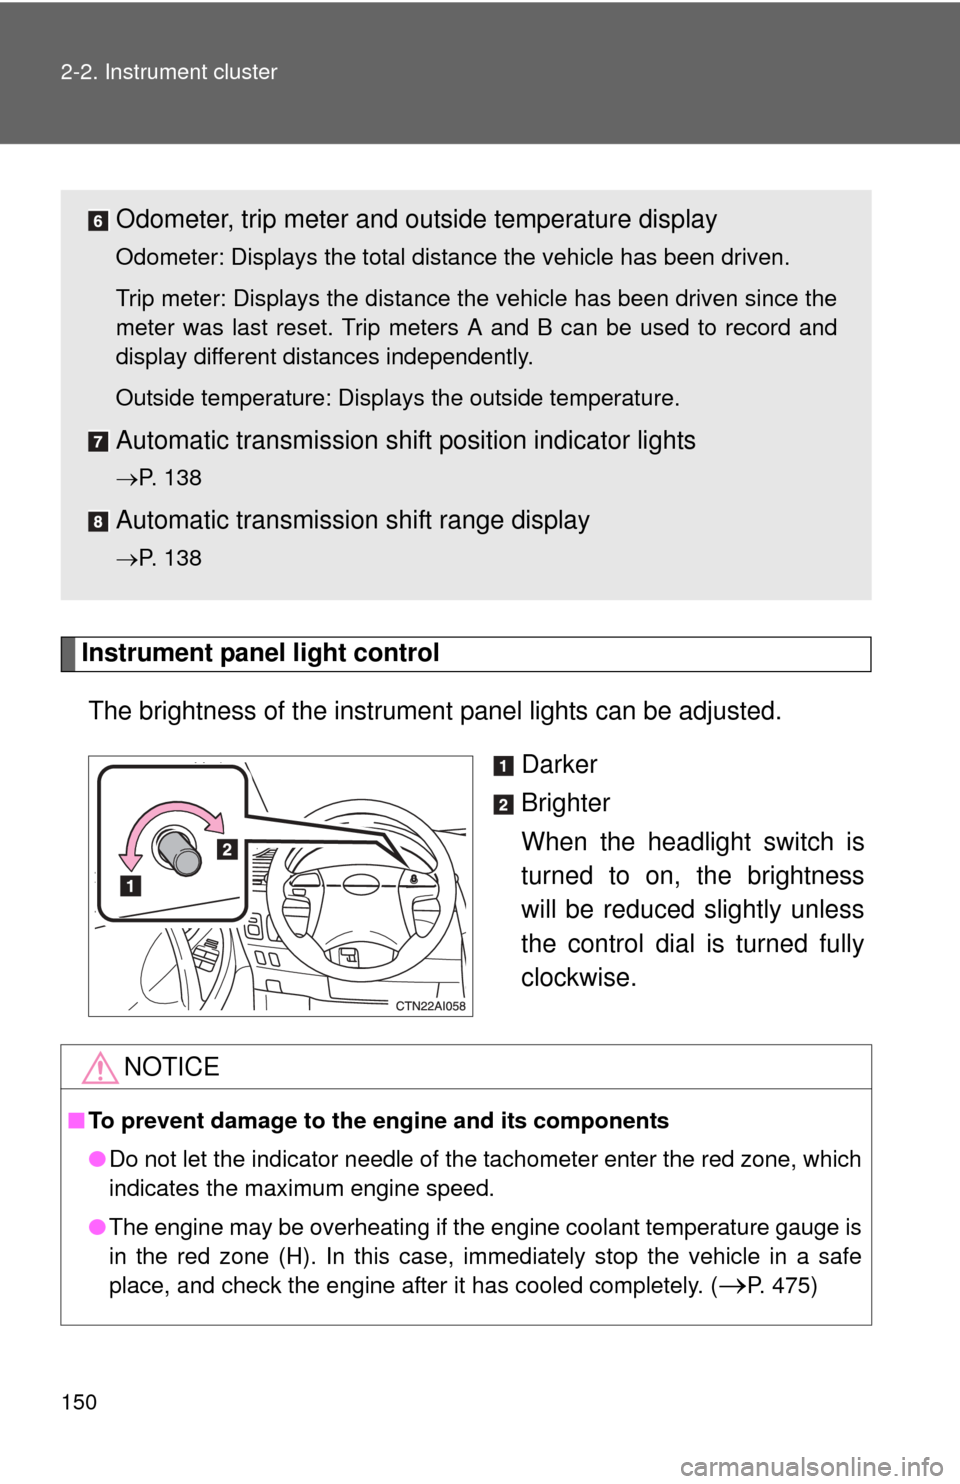
Instrument panel light controlThe brightness of the instrument panel lights can be adjusted.
Darker
Brighter
When the headlight switch is
turned to on, the brightness
will be reduced slightly unless
the control dial is turned fully
clockwise.
Odometer, trip meter and outside temperature display
Odometer: Displays the total distance the vehicle has been driven.
Trip meter: Displays the distance the vehicle has been driven since the
meter was last reset. Trip meters A and B can be used to record and
display different distances independently.
Outside temperature: Displays the outside temperature.
Automatic transmission shift position indicator lights
P. 138
Automatic transmission shift range display
P. 138
NOTICE
■To prevent damage to the engine and its components
●Do not let the indicator needle of the tachometer enter the red zone, which
indicates the maximum engine speed.
● The engine may be overheating if the engine coolant temperature gauge is
in the red zone (H). In this case, immediately stop the vehicle in a safe
place, and check the engine after it has cooled completely. (
P. 475)
Page 155 of 538
155
2-2. Instrument cluster
2
When driving
Multi-information display
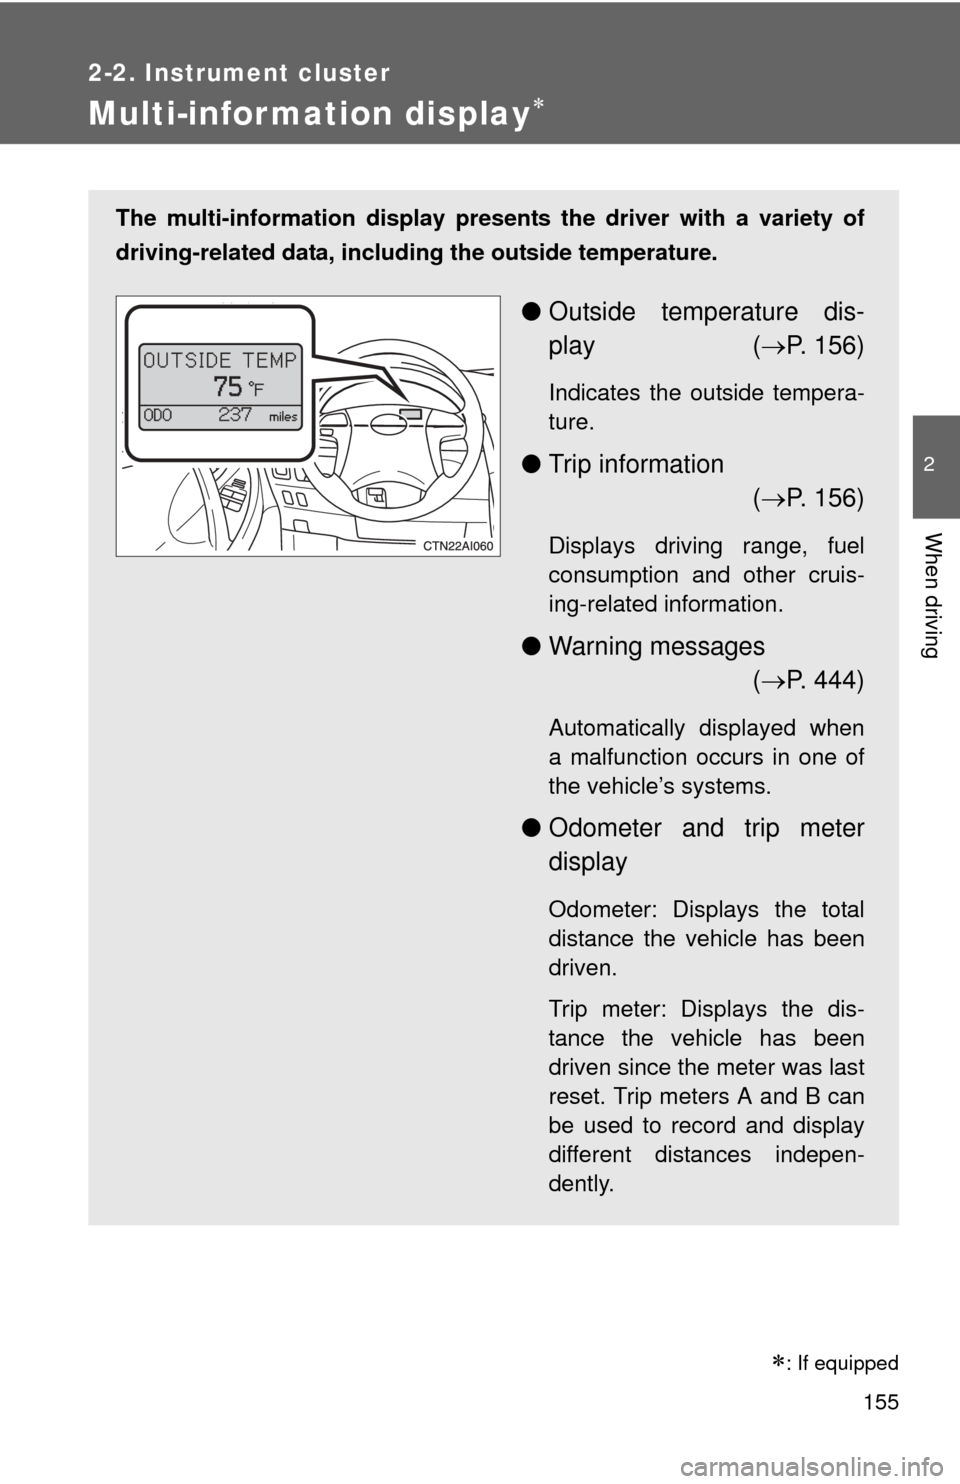
The multi-information display presents the driver with a variety of
driving-related data, includ ing the outside temperature.
●Outside temperature dis-
play ( P. 156)
Indicates the outside tempera-
ture.
● Trip information
( P. 156)
Displays driving range, fuel
consumption and other cruis-
ing-related information.
● Warning messages
( P. 444)
Automatically displayed when
a malfunction occurs in one of
the vehicle’s systems.
● Odometer and trip meter
display
Odometer: Displays the total
distance the vehicle has been
driven.
Trip meter: Displays the dis-
tance the vehicle has been
driven since the meter was last
reset. Trip meters A and B can
be used to record and display
different distances indepen-
dently.
: If equipped
Page 168 of 538
168 2-4. Using other driving systems
■Cruise control can be set when
●Automatic transmission:
The shift lever is in D, 4, 5 or 6 range of S.
● Vehicle speed is above 25 mph (40 km/h).
■ Accelerating
The vehicle can be accelerated normally. After acceleration, the set speed
resumes.
■ Automatic cruise control cancellation
The set speed is automatically canceled in any of the following situations.
●Actual vehicle speed falls more than 10 mph (16 km/h) below the preset
vehicle speed.
At this time, the memorized set speed is not retained.
● Actual vehicle speed is below 25 mph (40 km/h).
● VSC is activated.
■ If the cruise control indicator light flashes
Press the “ON-OFF” button once to deactivate the system, and then press
the button again to reactivate the system.
If the cruise control speed cannot be set or if the cruise control cancels
immediately after being activated, there may be a malfunction in the cruise
control system. Contact your Toyota dealer and have your Toyota inspected.
Page 218 of 538
216 3-2. Using the audio system
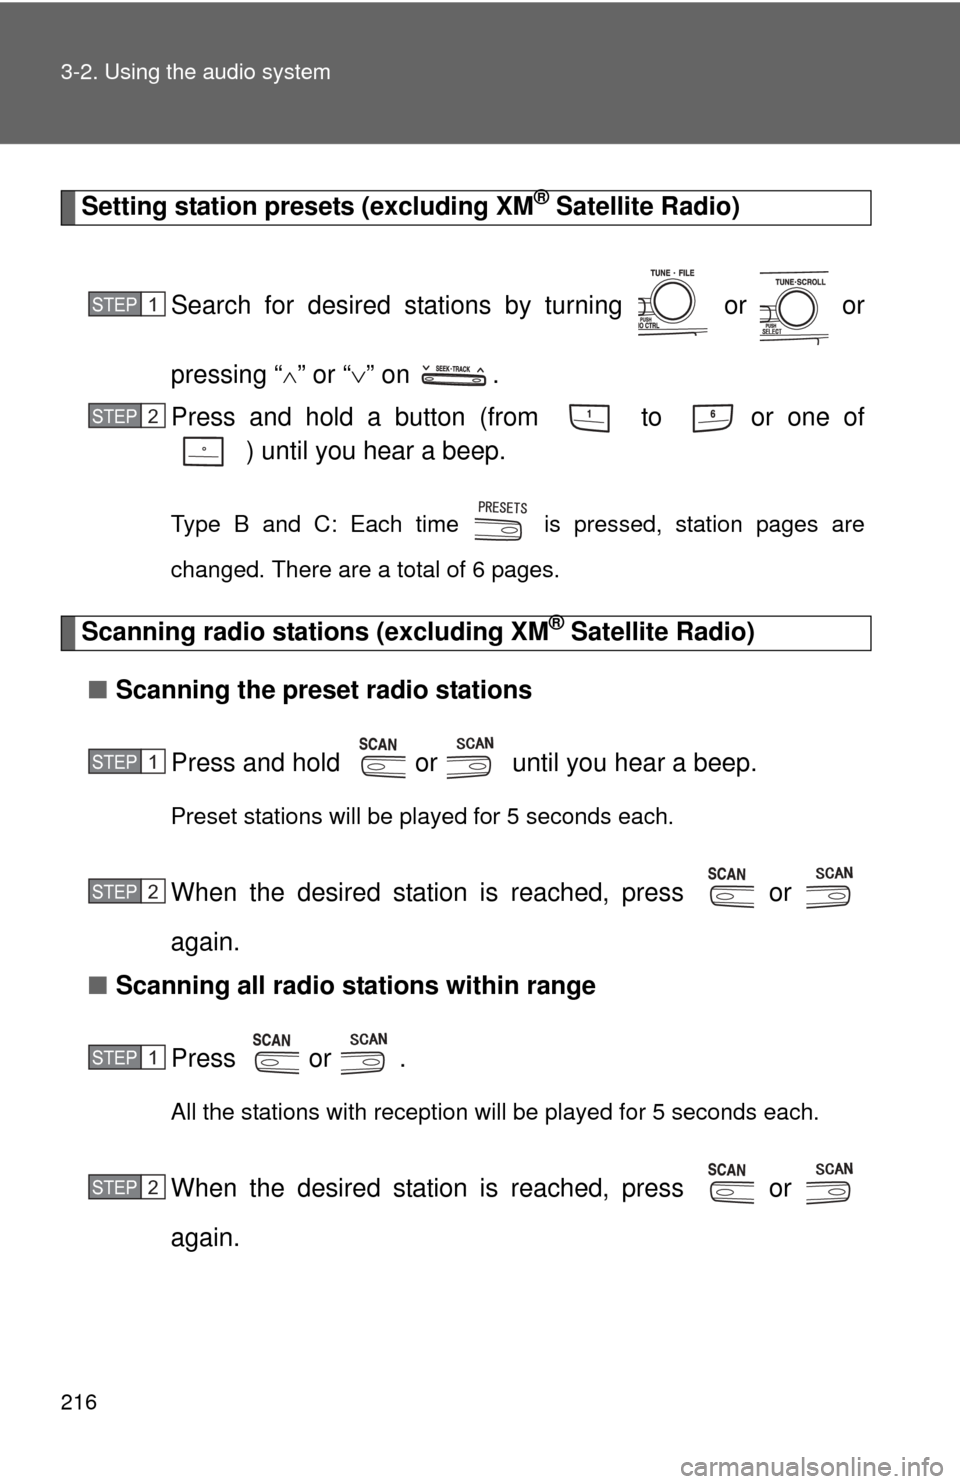
Setting station presets (excluding XM® Satellite Radio)
Search for desired stations by turning or or
pressing “
” or “ ” on .
Press and hold a button (from to or one of ) until you hear a beep.
Type B and C: Each time is pressed, station pages are
changed. There are a total of 6 pages.
Scanning radio stations (excluding XM® Satellite Radio)
■ Scanning the preset radio stations
Press and hold or until you hear a beep.
Preset stations will be played for 5 seconds each.
When the desired station is reached, press or
again.
■ Scanning all radio stations within range
Press
or .
All the stations with reception will be played for 5 seconds each.
When the desired station is reached, press or
again.
STEP1
STEP2
STEP1
STEP2
STEP1
STEP2
Page 220 of 538
218 3-2. Using the audio system
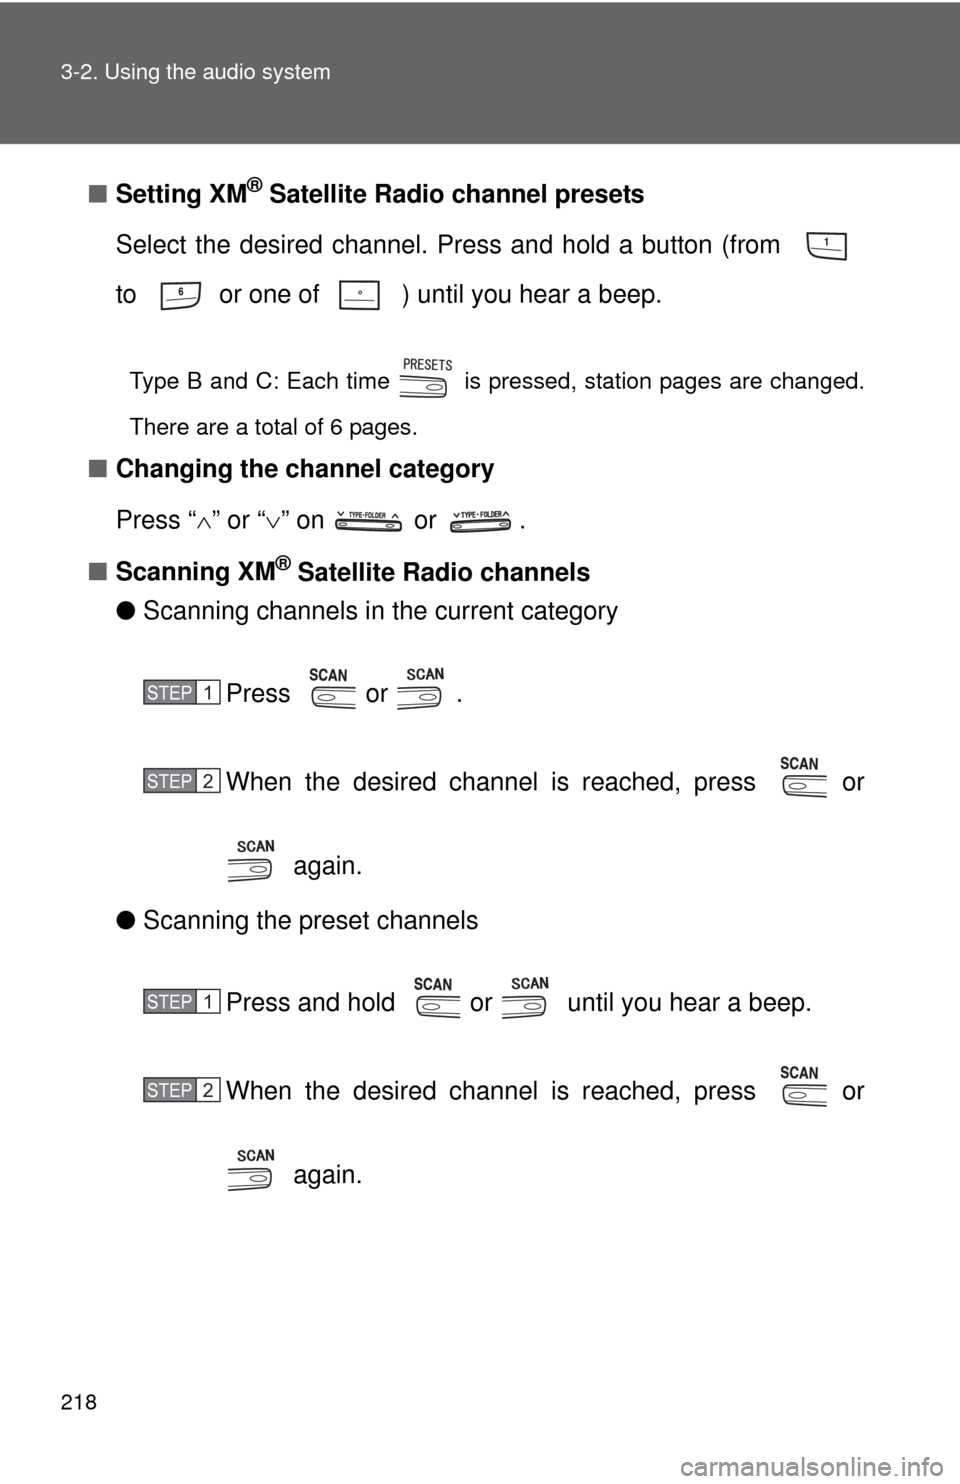
■Setting XM® Satellite Radio channel presets
Select the desired channel. Press and hold a button (from
to or one of ) until you hear a beep.
Type B and C: Each time is pressed, station pages are changed.
There are a total of 6 pages.
■ Changing the channel category
Press “ ” or “ ” on or .
■ Scanning XM
® Satellite Radio channels
● Scanning channels in the current category
Press or .
When the desired channel is reached, press or
again.
● Scanning the preset channels
Press and hold or until you hear a beep.
When the desired channel is reached, press or
again.
STEP1
STEP2
STEP1
STEP2
Page 222 of 538
220 3-2. Using the audio system
■When the battery is disconnected
All preset stations are erased. (type A only)
■ Reception sensitivity
●Maintaining perfect radio reception at all times is difficult due to the con-
tinually changing position of the antenna, differences in signal strength
and surrounding objects, such as trains, transmitters, etc.
● The radio antenna is mounted inside the rear window. To maintain clear
radio reception, do not attach metallic window tinting or other metallic
objects to the antenna wire mounted inside the rear window.
■ XM
® Satellite Radio
An XM
® Satellite Radio is a tuner designed exclusively to receive broadcasts
provided under a separate subscription. Availability is limited to the 48 con-
tiguous states and 10 Canadian provinces.
● XM
® subscriptions
For detailed information about XM® Satellite Radio or to subscribe:
U.S.A.
Visit on the web at www.xmradio.com
or call 1-800-967-2346.
Canada
Visit on the web at www.xmradio.ca
or call 1-877-438-9677.
● Radio ID
You will need the radio ID when activating XM
® service or reporting a
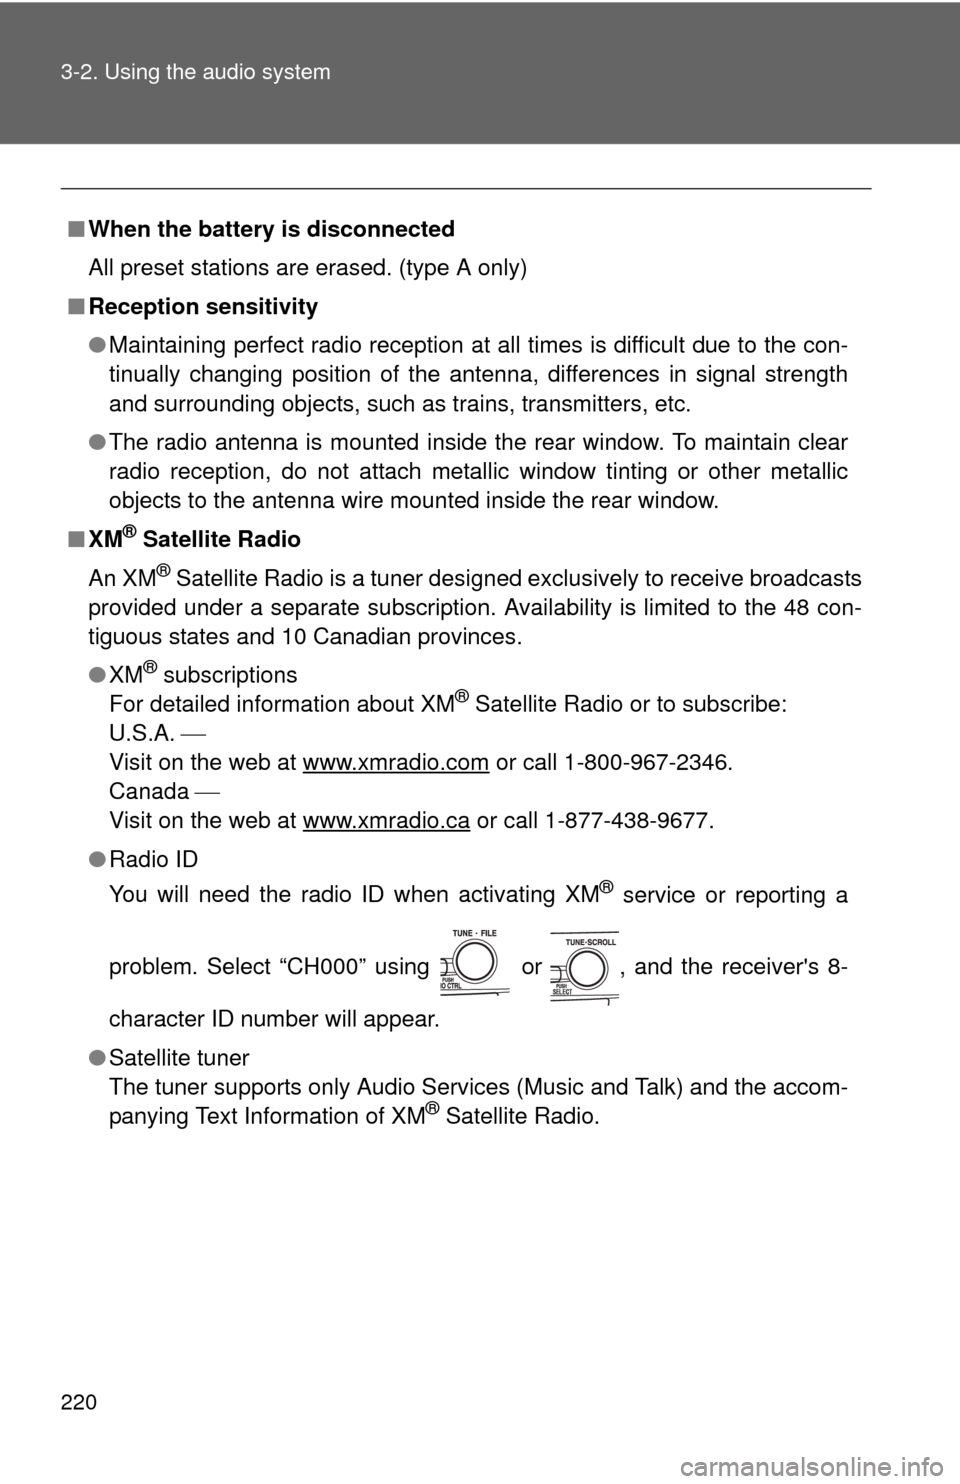
problem. Select “CH000” using or , and the receiver's 8-
character ID number will appear.
● Satellite tuner
The tuner supports only Audio Services (Music and Talk) and the accom-
panying Text Information of XM
® Satellite Radio.
Page 246 of 538
244 3-2. Using the audio system
Switching the displayPress .
Each time is pressed, the display changes in the following order:
Track title Track title/Artist name Track title/Album name Track
title/Elapsed time
■ About iPod®
iPod® is registered trademarks of Apple computer, Inc.
■ iPod
® player functions
● When an iPod
® player is connected and the audio source is changed to
iPod® player mode, the iPod® player will resume play from the same
point in which it was last used.
● Depending on the iPod
® player that is connected to the system, certain
functions may not be available. Disconnecting the device and reconnect-
ing it once again may resolve some malfunctions.
■ iPod
® player problems
To resolve most problems encountered when using your iPod
® player, dis-
connect your iPod® player from the vehicle iPod® player connection and
reset it.
For instructions on how to reset your iPod
® player, refer to your iPod® player
Owner's Manual.
■ Cable pass-through
P. 323
■ Error messages
“IPOD ERROR”: This indicates a problem in the iPod
® player, inside
the USB box or the connection between them.
“NO SONGS”: This indicates that there is no music data in the iPod
® player.
“UPDATE YOUR IPOD”: This indicates that the version of the iPod
® player
is not compatible.