key TOYOTA CAMRY 2011 XV50 / 9.G Manual Online
[x] Cancel search | Manufacturer: TOYOTA, Model Year: 2011, Model line: CAMRY, Model: TOYOTA CAMRY 2011 XV50 / 9.GPages: 554, PDF Size: 9.69 MB
Page 353 of 554
Maintenance and care4
353
4-1. Maintenance and careCleaning and protecting the vehicle exterior......... 354
Cleaning and protecting the vehicle interior.......... 356
4-2. Maintenance Maintenance requirements .................. 359
General maintenance....... 361
Emission inspection and maintenance (I/M)
programs........................ 364 4-3. Do-it-yourself
maintenance
Do-it-yourself service precautions .................... 365
Hood ................................ 368
Positioning a floor jack ..... 369
Engine compartment ........ 371
Tires ................................. 387
Tire inflation pressure ...... 397
Wheels ............................. 401
Air conditioning filter......... 403
Key battery ....................... 406
Checking and replacing fuses .............................. 410
Light bulbs........................ 423
Page 368 of 554
367
4-3. Do-it-yourself maintenance
4
Maintenance and care
CAUTION
●
Do not smoke, cause sparks or expose an open flame to fuel or the bat-
tery. Fuel and battery fumes are flammable.
● Be extremely cautious when working on the battery. It contains poisonous
and corrosive sulfuric acid.
● Take care because brake fluid can harm your hands or eyes and damage
painted surfaces.
If fluid gets on your hands or in your eyes, flush the affected area with
clean water immediately.
If you still experience discomfort, see a doctor.
■ When working near the electric c ooling fans or radiator grille
Vehicles with smart key system: Be sure the “ENGINE START STOP” switch
is OFF. With the “ENGINE START STOP” switch in IGNITION ON mode, the
electric cooling fans may automatically start to run if the air conditioning is on
and/or the coolant temperature is high. ( P. 380)
Vehicles without smart key system: Be sure the engine switch is OFF. With
the engine switch in the “ON” position, the electric cooling fans may auto-
matically start to run if the air conditioning is on and/or the coolant tempera-
ture is high. ( P. 380)
■ Safety glasses
Wear safety glasses to prevent flying or falling material, fluid spray, etc. from
getting in the eyes.
NOTICE
■If you remove the air cleaner
Driving with the air cleaner removed may cause excessive engine wear due
to dirt in the air. Also, a backfire could cause a fire in the engine compart-
ment.
Page 385 of 554
384 4-3. Do-it-yourself maintenance
BatteryCheck the battery as follows.
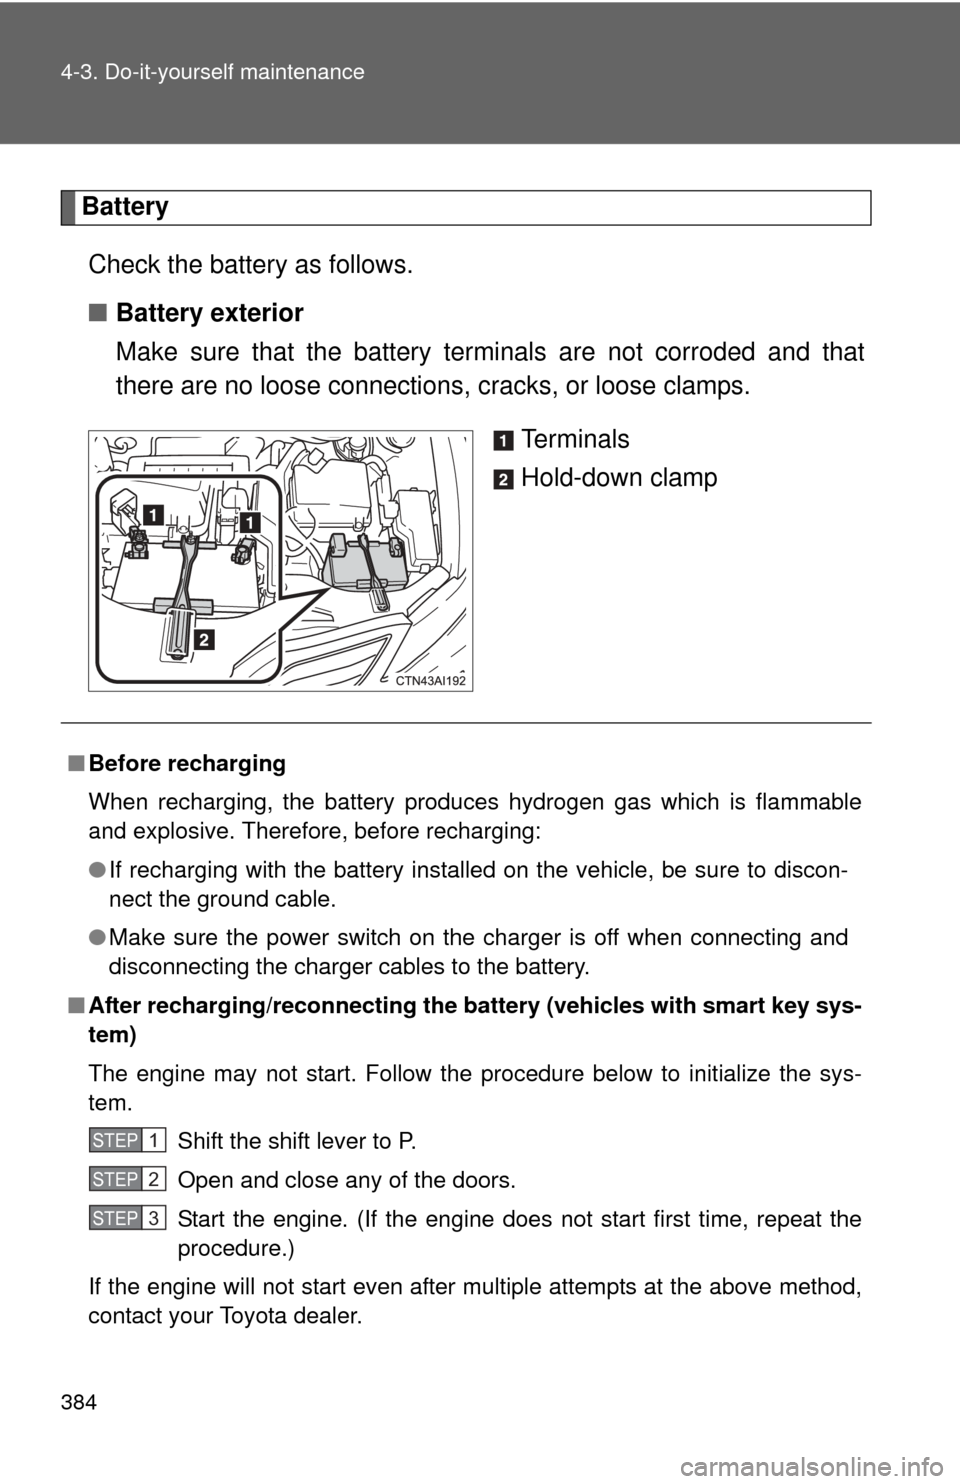
■ Battery exterior
Make sure that the battery terminals are not corroded and that
there are no loose connections, cracks, or loose clamps.
Te r m i n a l s
Hold-down clamp
■Before recharging
When recharging, the battery produces hydrogen gas which is flammable
and explosive. Therefore, before recharging:
●If recharging with the battery installed on the vehicle, be sure to discon-
nect the ground cable.
● Make sure the power switch on the charger is off when connecting and
disconnecting the charger cables to the battery.
■ After recharging/reconnecting the battery (vehicles with smart key sys-
tem)
The engine may not start. Follow the procedure below to initialize the sys-
tem.
Shift the shift lever to P.
Open and close any of the doors.
Start the engine. (If the engine does not start first time, repeat the
procedure.)
If the engine will not start even after multiple attempts at the above method,
contact your Toyota dealer.
STEP1
STEP2
STEP3
Page 390 of 554
389
4-3. Do-it-yourself maintenance
4
Maintenance and care
Installing tire pressure warning valves and transmitters
When replacing tires or wheels, tire pressure warning valves and
transmitters must also be installed.
When new tire pressure warning valves and transmitters are
installed, new tire pressure warning valve and transmitter ID codes
must be registered in the tire pre ssure warning computer and the tire
pressure warning system must be initialized. Have tire pressure
warning valve and transmitter ID codes registered by your Toyota
dealer. ( P. 390)
Initializing the tire pressure warning system
■ The tire pressure warning system must be initialized when
inflation the tire pressure is changed (such as when changing
traveling speed or load weight.)
When the tire pressure warning syst em is initialized, the current tire
inflation pressure is set as the pressure benchmark.
■ How to initialize the tire pressure warning system
Park the vehicle in a safe place and turn the “ENGINE START
STOP” switch or the engine switch OFF.
While the vehicle is moving, in itialization is not performed.
Adjust the tire inflation pressure to the specified cold tire infla-
tion pressure level. ( P. 497)
Make sure to adjust the tire pressure to the specified cold tire
inflation pressure level. The ti re pressure warning system will
operate based on this pressure level.
Turn the “ENGINE START STOP” switch to IGNITION ON
mode (vehicles with smart key sy stem) or engine switch to the
“ON” position (vehicles without smart key system).
STEP1
STEP2
STEP3
Page 391 of 554
390 4-3. Do-it-yourself maintenance
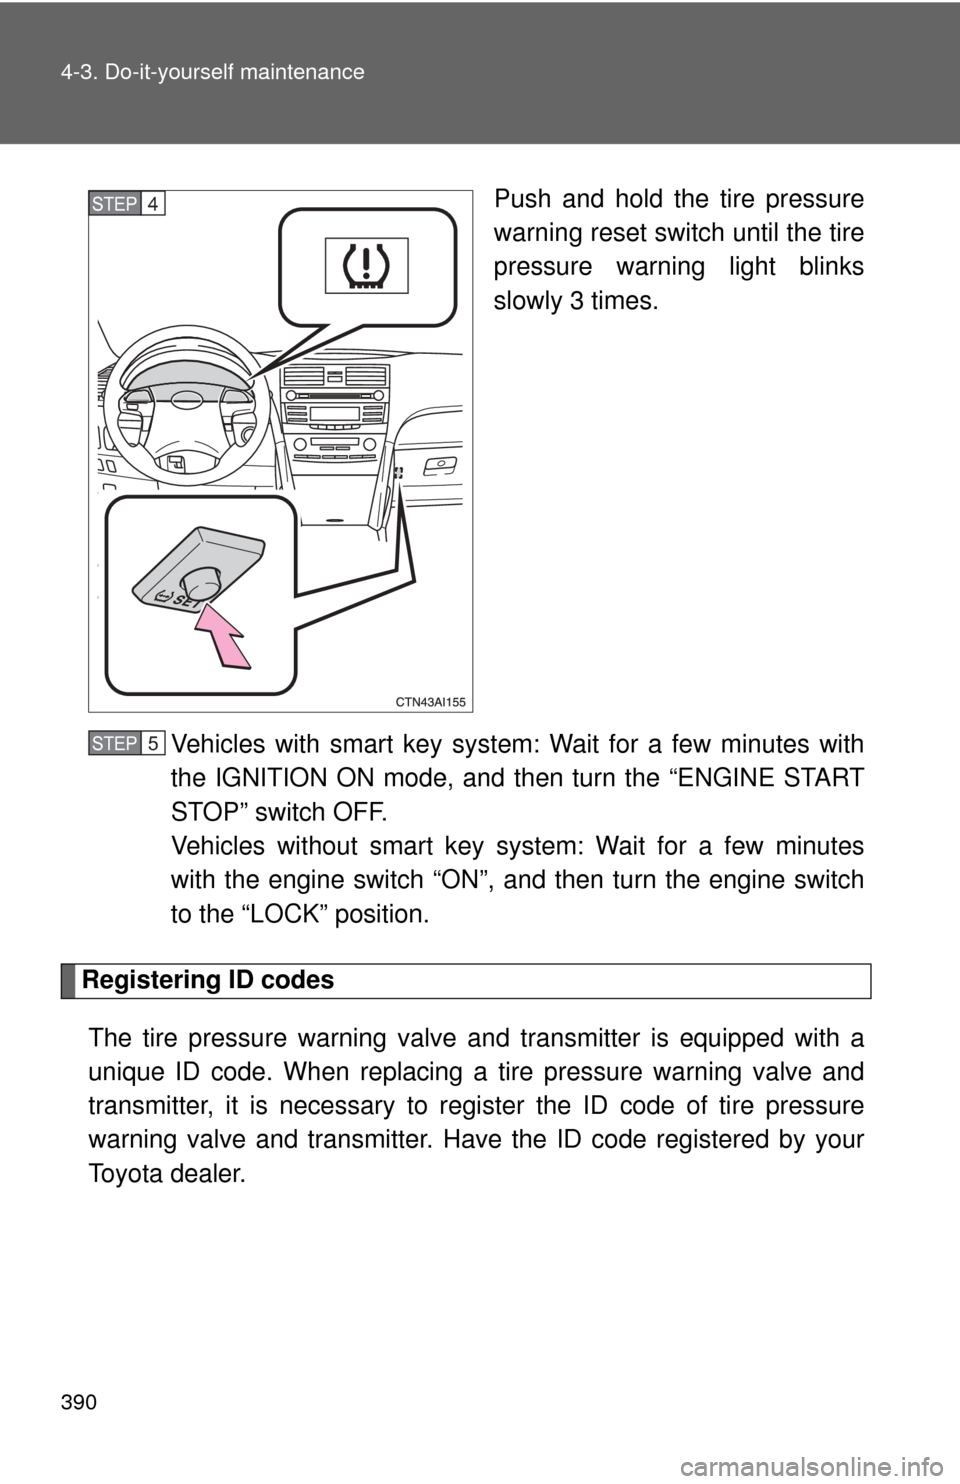
Push and hold the tire pressure
warning reset switch until the tire
pressure warning light blinks
slowly 3 times.
Vehicles with smart key system: Wait for a few minutes with
the IGNITION ON mode, and then turn the “ENGINE START
STOP” switch OFF.
Vehicles without smart key system: Wait for a few minutes
with the engine switch “ON”, a nd then turn the engine switch
to the “LOCK” position.
Registering ID codes
The tire pressure warning valve and transmitter is equipped with a
unique ID code. When replacing a tire pressure warning valve and
transmitter, it is necessary to regi ster the ID code of tire pressure
warning valve and transmitter. Have the ID code registered by your
Toyota dealer.
STEP4
STEP5
Page 404 of 554
403
4-3. Do-it-yourself maintenance
4
Maintenance and care
Air conditioning filter
The air conditioning filter must be cleaned or changed regularly to
maintain air conditioning efficiency.
■ Removal method
Vehicles with smart key system: Turn the “ENGINE START
STOP” switch OFF.
Vehicles without smart key system: Turn the engine switch
OFF.
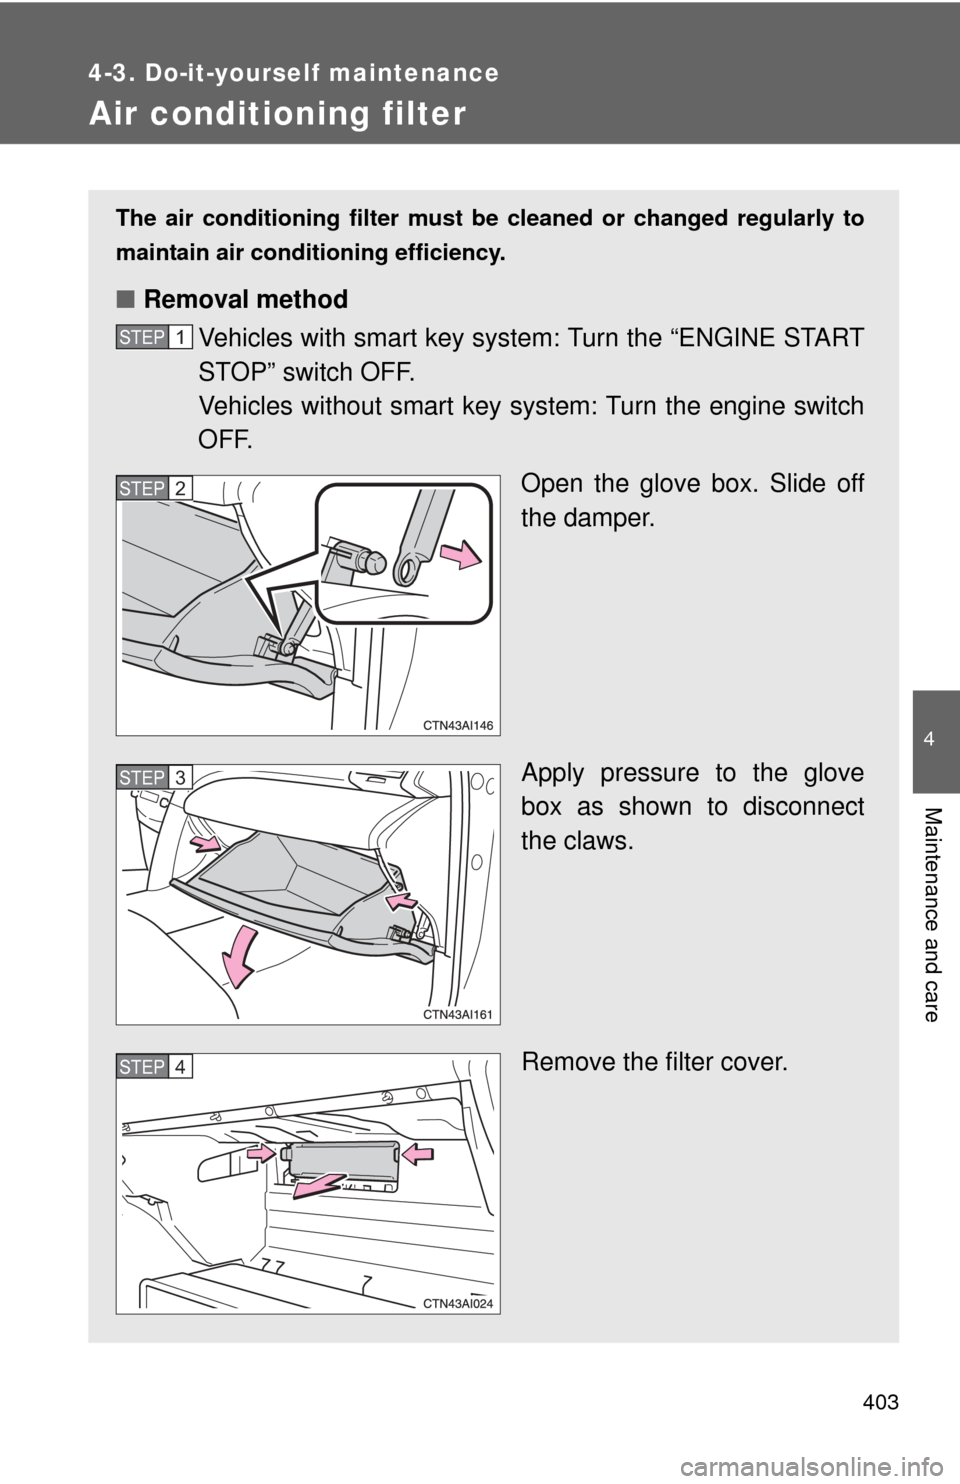
Open the glove box. Slide off
the damper.
Apply pressure to the glove
box as shown to disconnect
the claws.
Remove the filter cover.
STEP1
STEP2
STEP3
STEP4
Page 407 of 554
406
4-3. Do-it-yourself maintenance
Key batter y
Replace the battery with a new one if it is discharged.
■You will need the following items:
●Flathead screwdriver (To prevent damage to the key, cover
the tip of the screwdriver with rag.)
● Small Phillips-hea d screwdriver
● Lithium battery CR1632 (vehicles with smart key system), or
CR2016 (vehicles withou t smart key system)
■ Replacing the battery
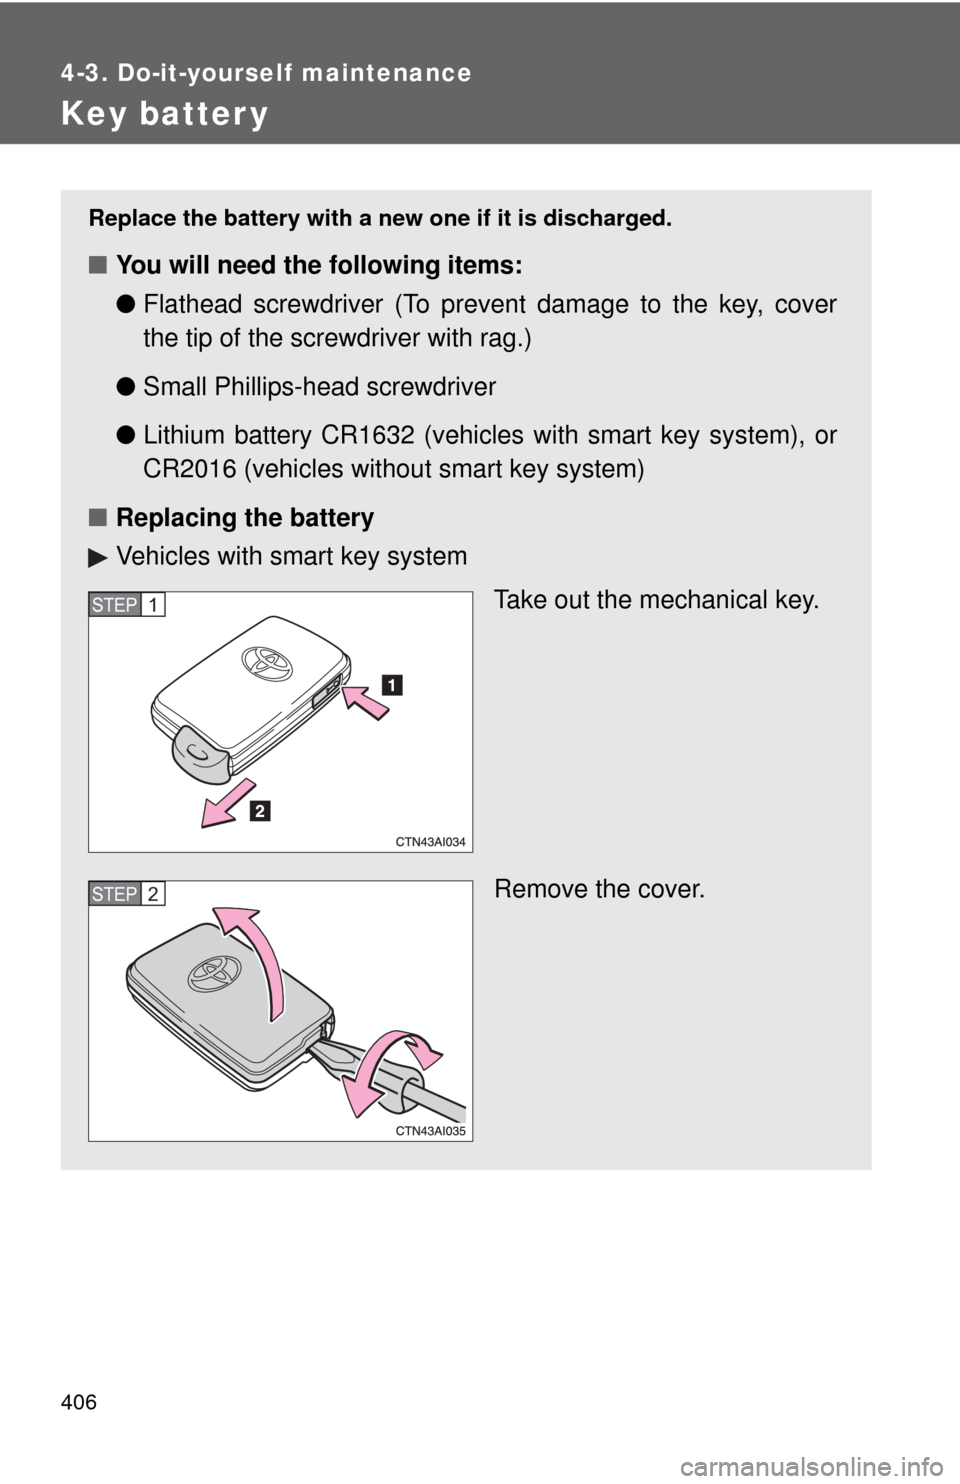
Vehicles with smart key system
Take out the mechanical key.
Remove the cover.
STEP1
STEP2
Page 408 of 554
407
4-3. Do-it-yourself maintenance
4
Maintenance and care
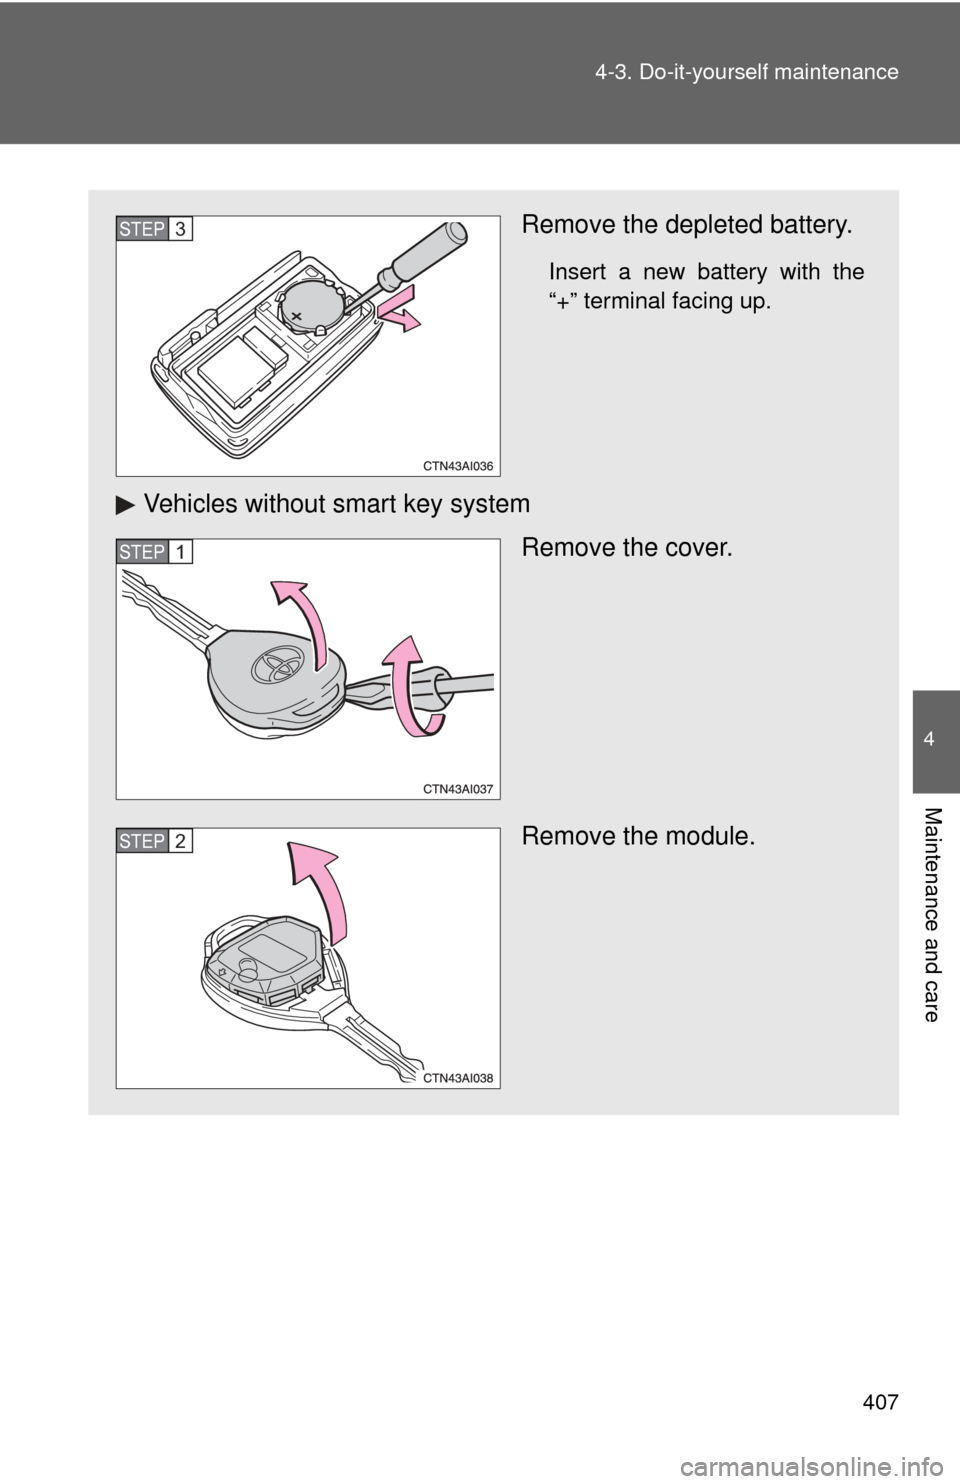
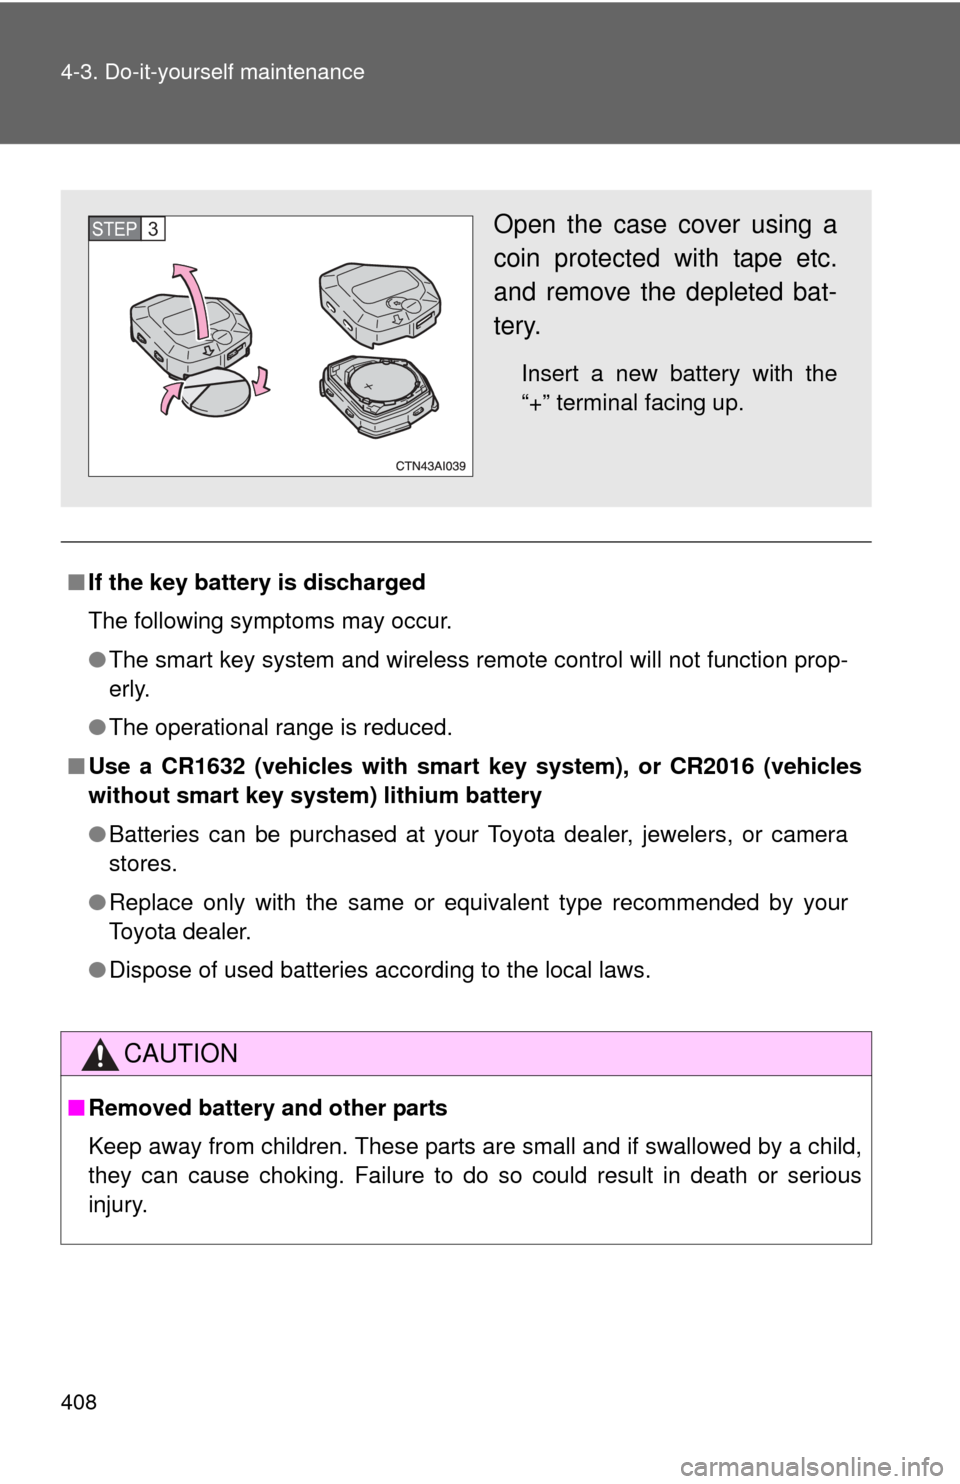
Remove the depleted battery.
Insert a new battery with the
“+” terminal facing up.
Vehicles without smart key system
Remove the cover.
Remove the module.
STEP3
STEP1
STEP2
Page 409 of 554
408 4-3. Do-it-yourself maintenance
■If the key battery is discharged
The following symptoms may occur.
●The smart key system and wireless remote control will not function prop-
erly.
● The operational range is reduced.
■ Use a CR1632 (vehicles with smar t key system), or CR2016 (vehicles
without smart key system) lithium battery
● Batteries can be purchased at your Toyota dealer, jewelers, or camera
stores.
● Replace only with the same or equivalent type recommended by your
Toyota dealer.
● Dispose of used batteries according to the local laws.
CAUTION
■Removed battery and other parts
Keep away from children. These parts are small and if swallowed by a child,
they can cause choking. Failure to do so could result in death or serious
injury.
Open the case cover using a
coin protected with tape etc.
and remove the depleted bat-
tery.
Insert a new battery with the
“+” terminal facing up.
STEP3
Page 411 of 554
410
4-3. Do-it-yourself maintenance
Checking and replacing fuses
If any of the electrical components do not operate, a fuse may have
blown. If this happens, check and replace the fuses as necessary.
Vehicles with smart key system: Turn the “ENGINE START
STOP” switch OFF.
Vehicles without smart key system: Turn the engine switch
OFF.
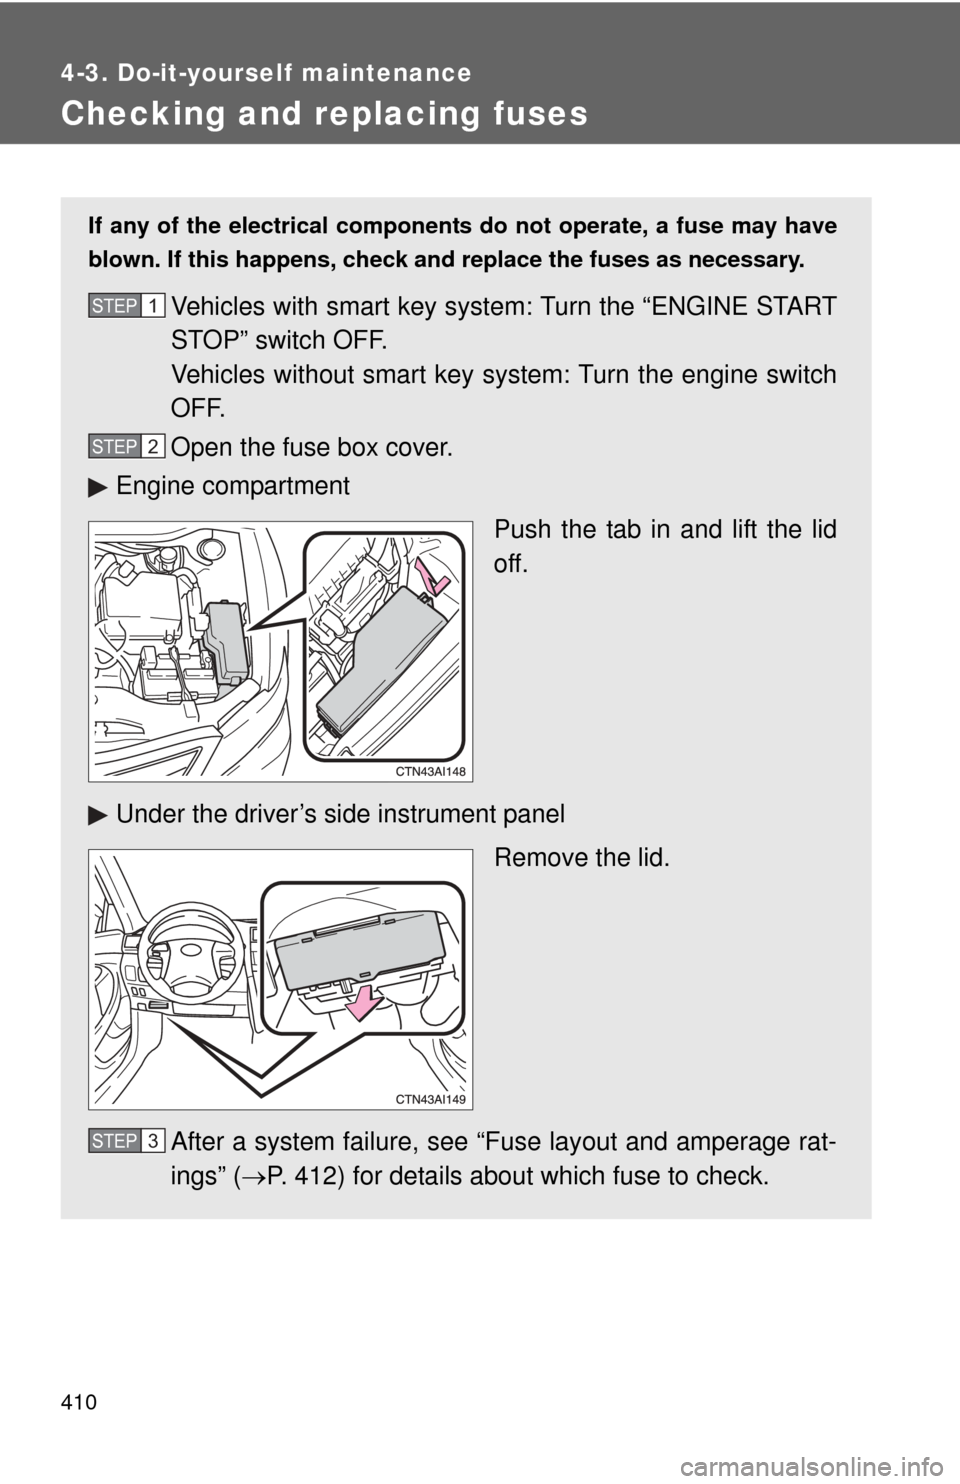
Open the fuse box cover.
Engine compartment
Push the tab in and lift the lid
off.
Under the driver’s side instrument panel Remove the lid.
After a system failure, see “Fuse layout and amperage rat-
ings” ( P. 412) for details about which fuse to check.STEP1
STEP2
STEP3