reset TOYOTA CAMRY 2013 XV50 / 9.G Owners Manual
[x] Cancel search | Manufacturer: TOYOTA, Model Year: 2013, Model line: CAMRY, Model: TOYOTA CAMRY 2013 XV50 / 9.GPages: 540, PDF Size: 7 MB
Page 170 of 540
170
2-2. Instrument cluster
Gauges and meters
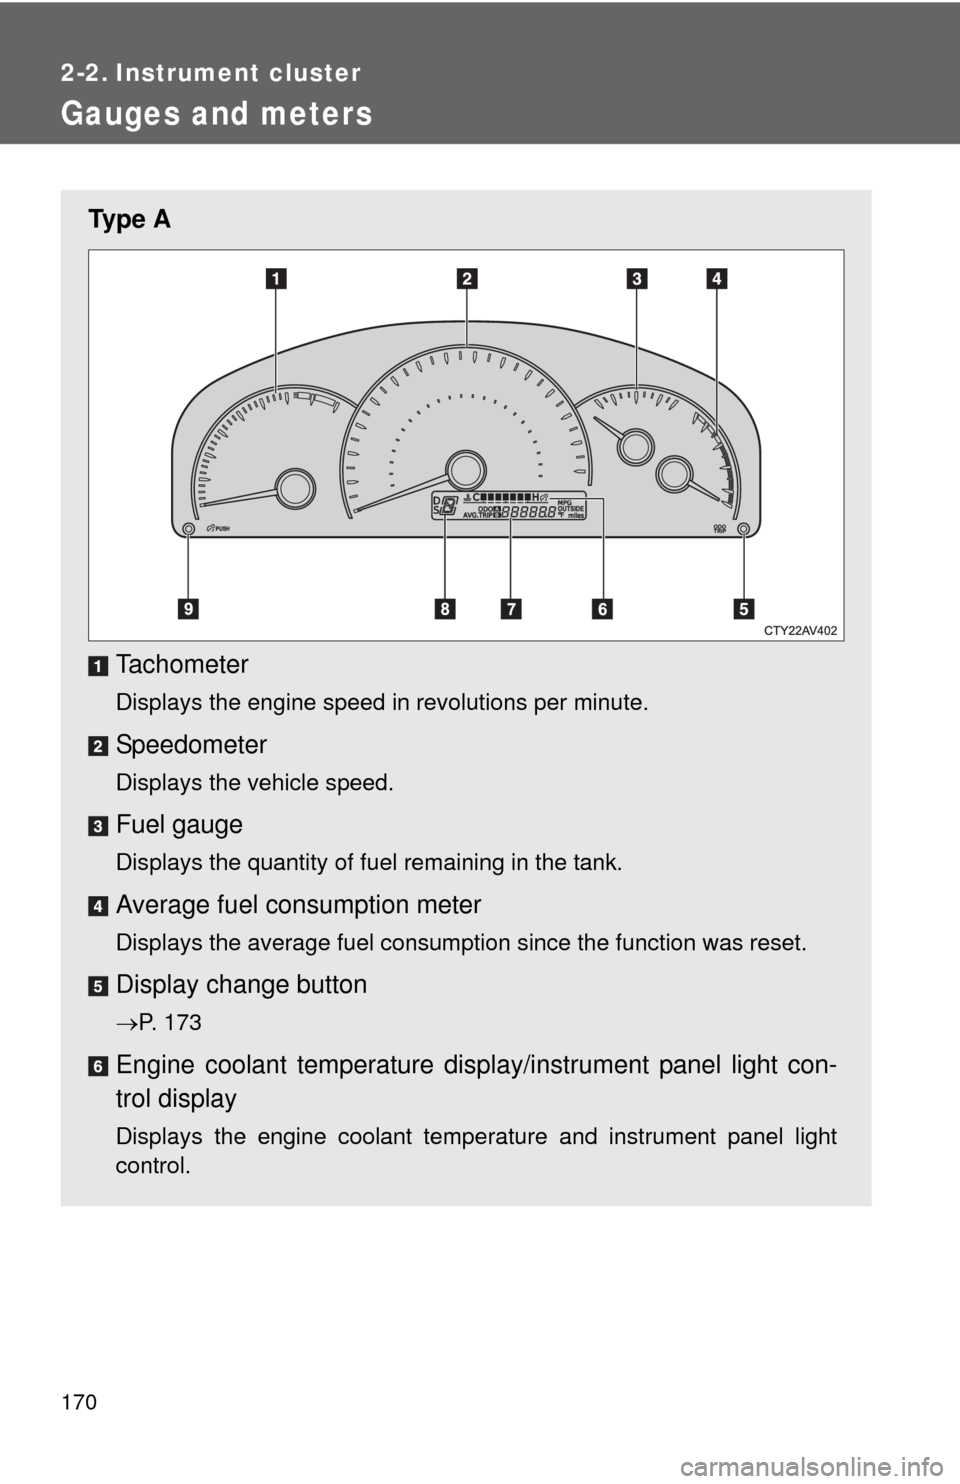
Ty p e ATachometer
Displays the engine speed in revolutions per minute.
Speedometer
Displays the vehicle speed.
Fuel gauge
Displays the quantity of fuel remaining in the tank.
Average fuel consumption meter
Displays the average fuel consumption since the function was reset.
Display change button
P. 173
Engine coolant temperature displa y/instrument panel light con-
trol display
Displays the engine coolant temperature and instrument panel light
control.
Page 172 of 540
172 2-2. Instrument cluster
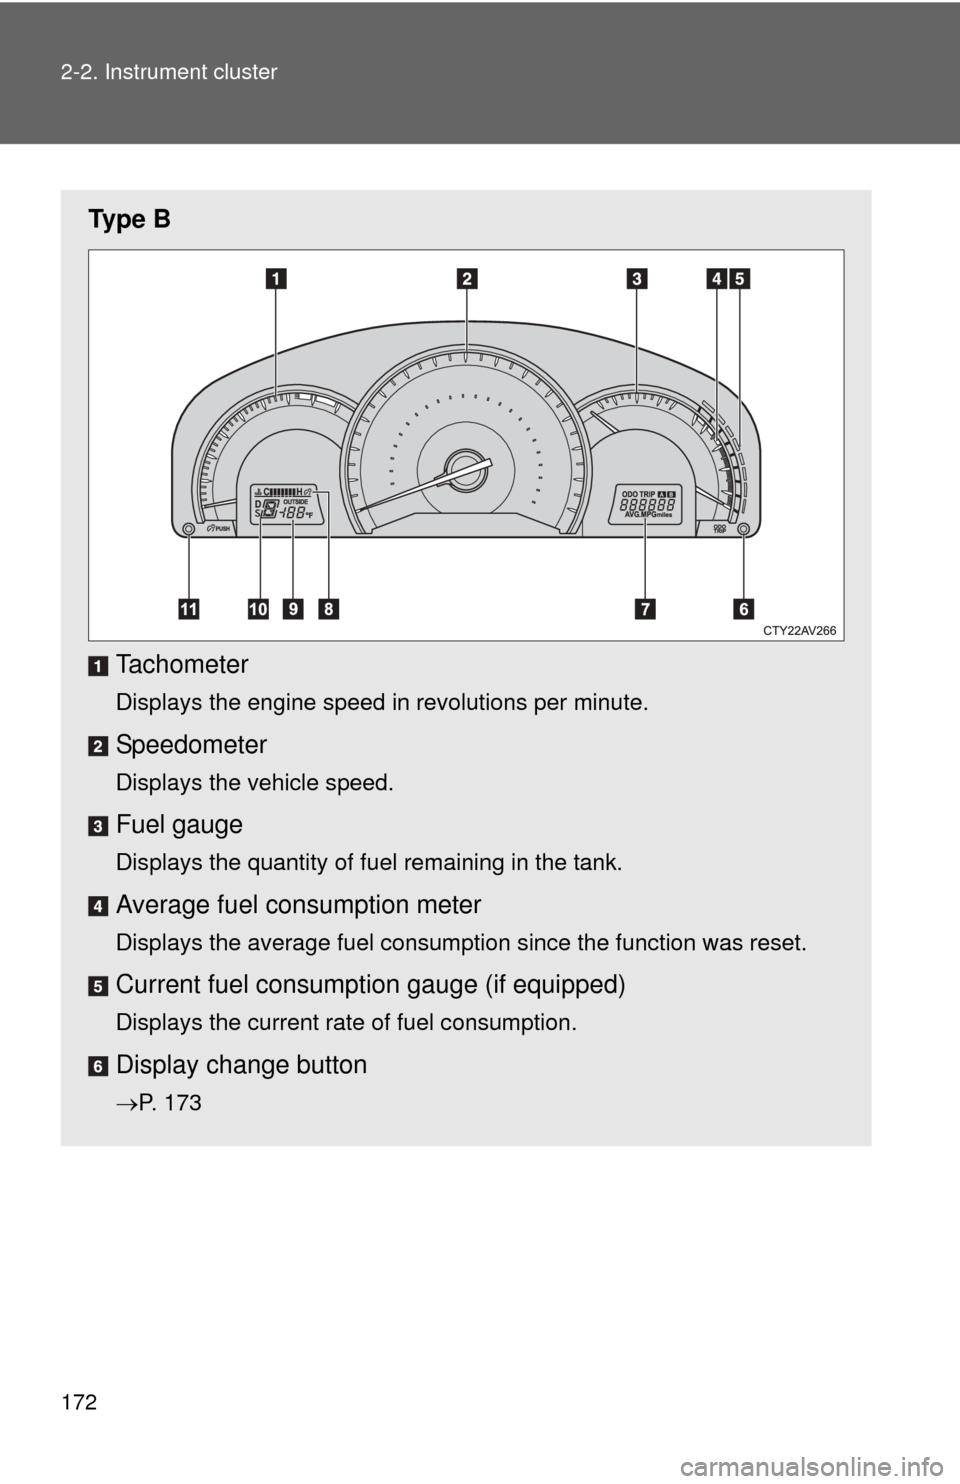
Ty p e BTachometer
Displays the engine speed in revolutions per minute.
Speedometer
Displays the vehicle speed.
Fuel gauge
Displays the quantity of fuel remaining in the tank.
Average fuel consumption meter
Displays the average fuel consumption since the function was reset.
Current fuel consumpt ion gauge (if equipped)
Displays the current rate of fuel consumption.
Display change button
P. 173
Page 174 of 540
174 2-2. Instrument cluster
Ty p e A
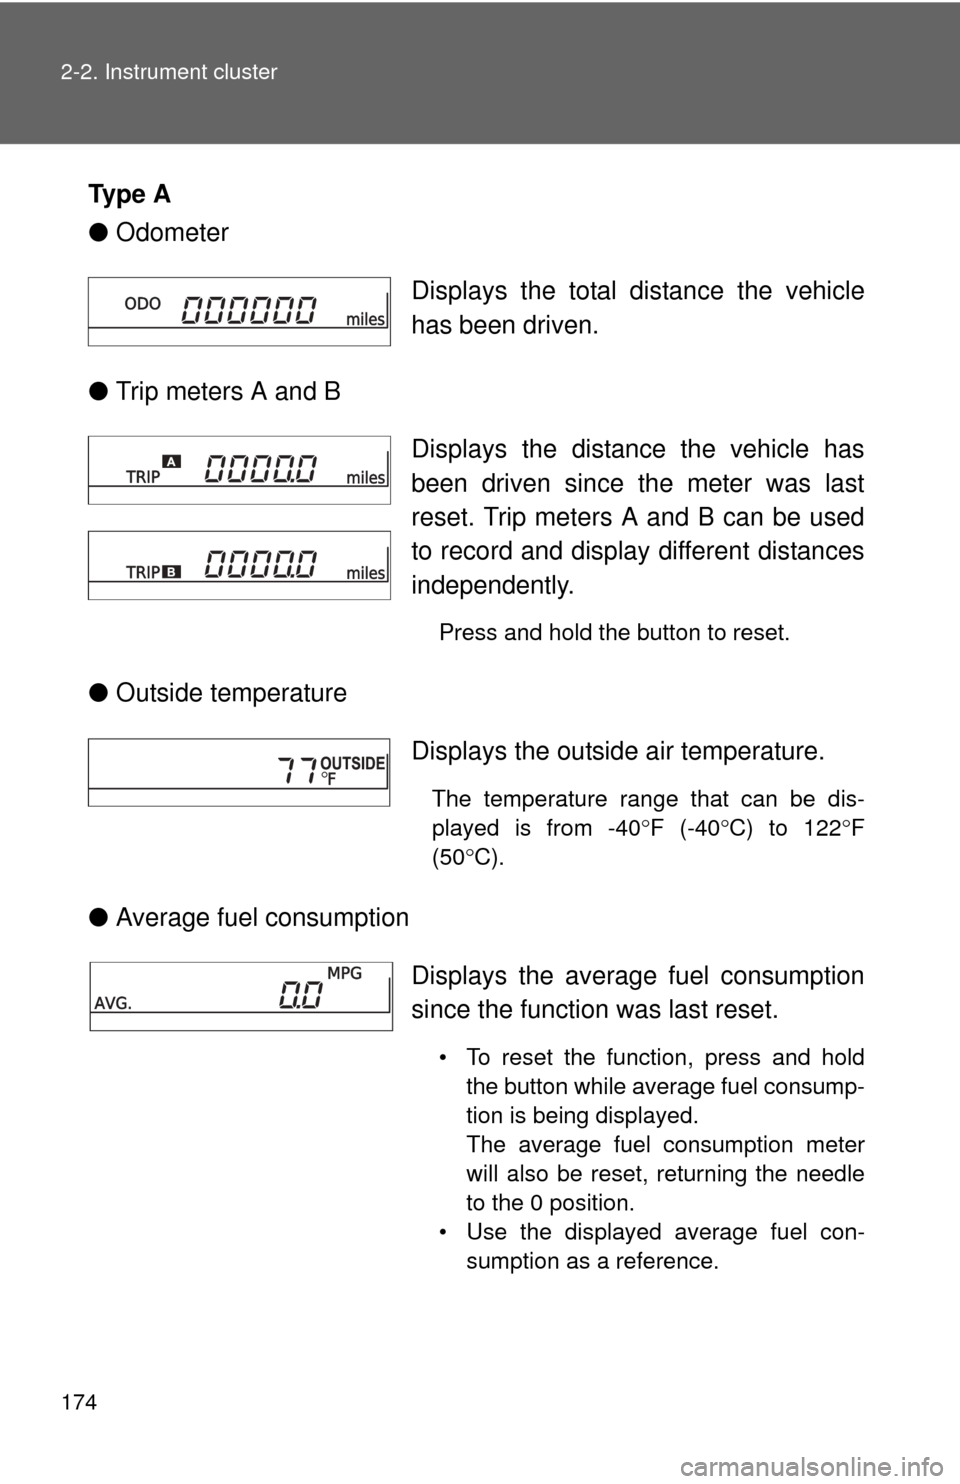
●Odometer
● Trip meters A and B
● Outside temperature
● Average fuel consumption Displays the total distance the vehicle
has been driven.
Displays the distance the vehicle has
been driven since the meter was last
reset. Trip meters A and B can be used
to record and display different distances
independently.
Press and hold the button to reset.
Displays the outside air temperature.
The temperature range that can be dis-
played is from -40
F (-40 C) to 122 F
(50 C).
Displays the average fuel consumption
since the function was last reset.
• To reset the function, press and hold
the button while average fuel consump-
tion is being displayed.
The average fuel consumption meter
will also be reset, returning the needle
to the 0 position.
• Use the displayed average fuel con- sumption as a reference.
Page 175 of 540
175
2-2. Instrument cluster
2
When driving
●
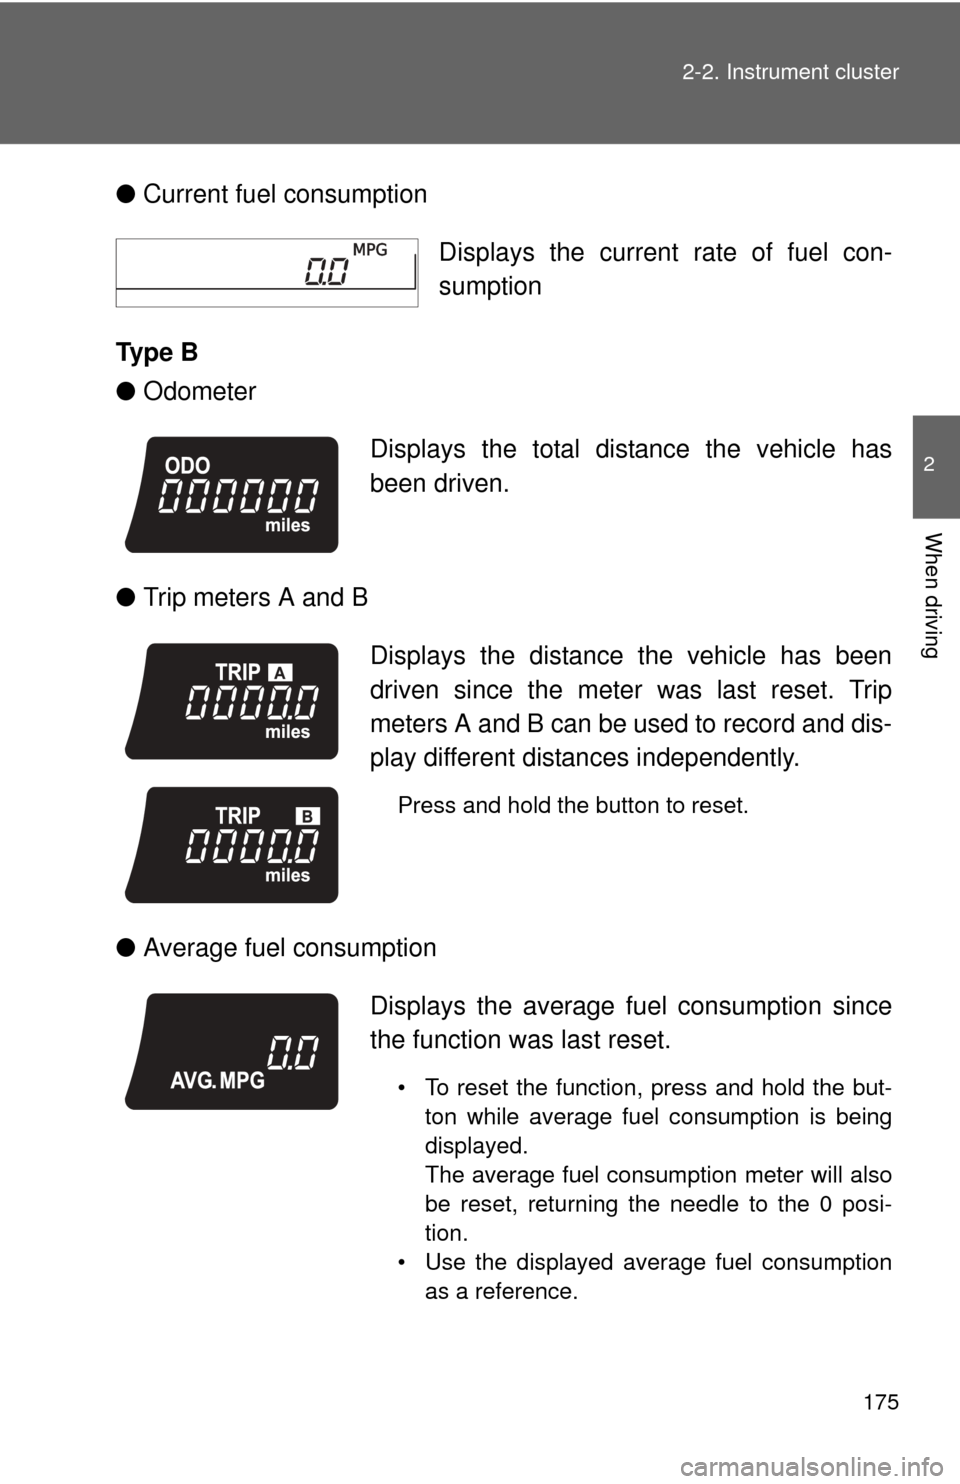
Current fuel consumption
Ty p e B
● Odometer
● Trip meters A and B
● Average fuel consumption Displays the current rate of fuel con-
sumption
Displays the total distance the vehicle has
been driven.
Displays the distance the vehicle has been
driven since the meter was last reset. Trip
meters A and B can be used to record and dis-
play different distances independently.
Press and hold the button to reset.
Displays the average fu el consumption since
the function was last reset.
• To reset the function, press and hold the but- ton while average fuel consumption is being
displayed.
The average fuel consumption meter will also
be reset, returning the needle to the 0 posi-
tion.
• Use the displayed average fuel consumption as a reference.
Page 202 of 540
202 2-4. Using other driving systems
■Cruise control can be set when
●The shift lever is in the D or range 4 or higher of S has been selected.
● Range 4 or higher has been selected by using the paddle shift.
(vehicles with paddle shift switch)
● Vehicle speed is above approximately 25 mph (40 km/h).
■ Accelerating after setting the vehicle speed
●The vehicle can be accelerated normally. After acceleration, the set
speed resumes.
● Even without canceling the cruise control, the set speed can be
increased by first accelerating the vehicle to the desired speed and then
pushing the lever down to set the new speed.
■ Automatic cruise control cancelation
Cruise control will stop maintaining the vehicle speed in any of the following
situations.
●Actual vehicle speed falls more than approximately 10 mph (16 km/h)
below the preset vehicle speed.
At this time, the memorized set speed is not retained.
● Actual vehicle speed is below approximately 25 mph (40 km/h).
● VSC is activated.
■ If the cruise control indicator light comes on in yellow
Press the “ON-OFF” button once to deactivate the system, and then press
the button again to reactivate the system.
If the cruise control speed cannot be set or if the cruise control cancels
immediately after being activated, there may be a malfunction in the cruise
control system. Have the vehicle inspected by your Toyota dealer.
Page 253 of 540
253
3-2. Using the audio system
3
Interior features
Using the radio
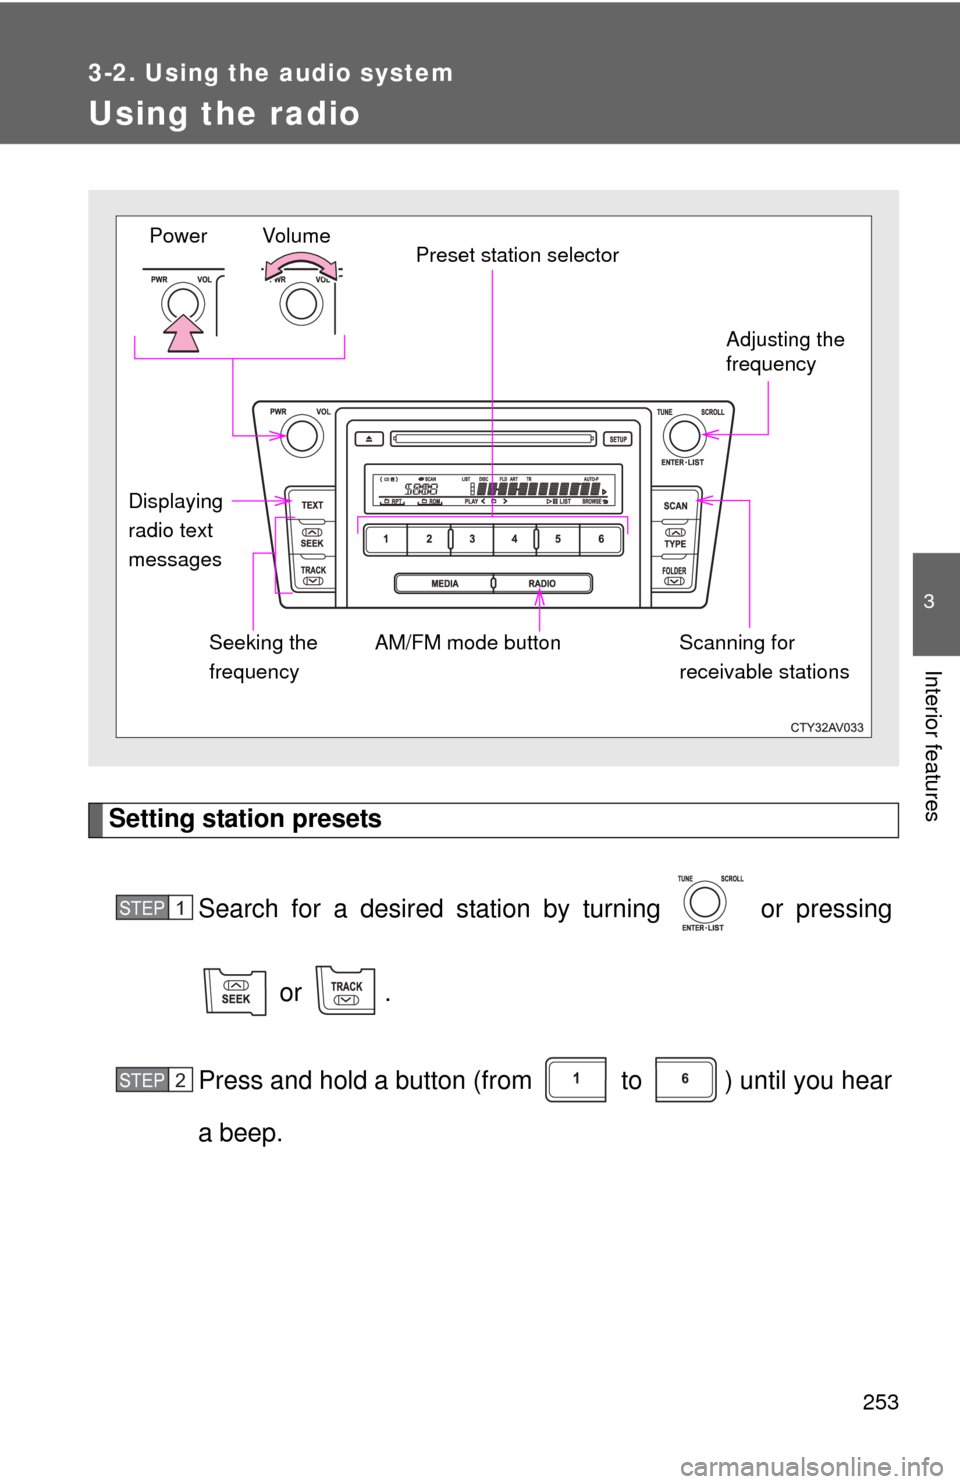
Setting station presetsSearch for a desired station by turning or pressing
or .
Press and hold a button (from to ) until you hear
a beep.
Vo lu m e Preset station selector
Seeking the
frequency Adjusting the
frequency
AM/FM mode button
Power
Displaying
radio text
messages Scanning for
receivable stations
STEP1
STEP2
Page 254 of 540
254 3-2. Using the audio system
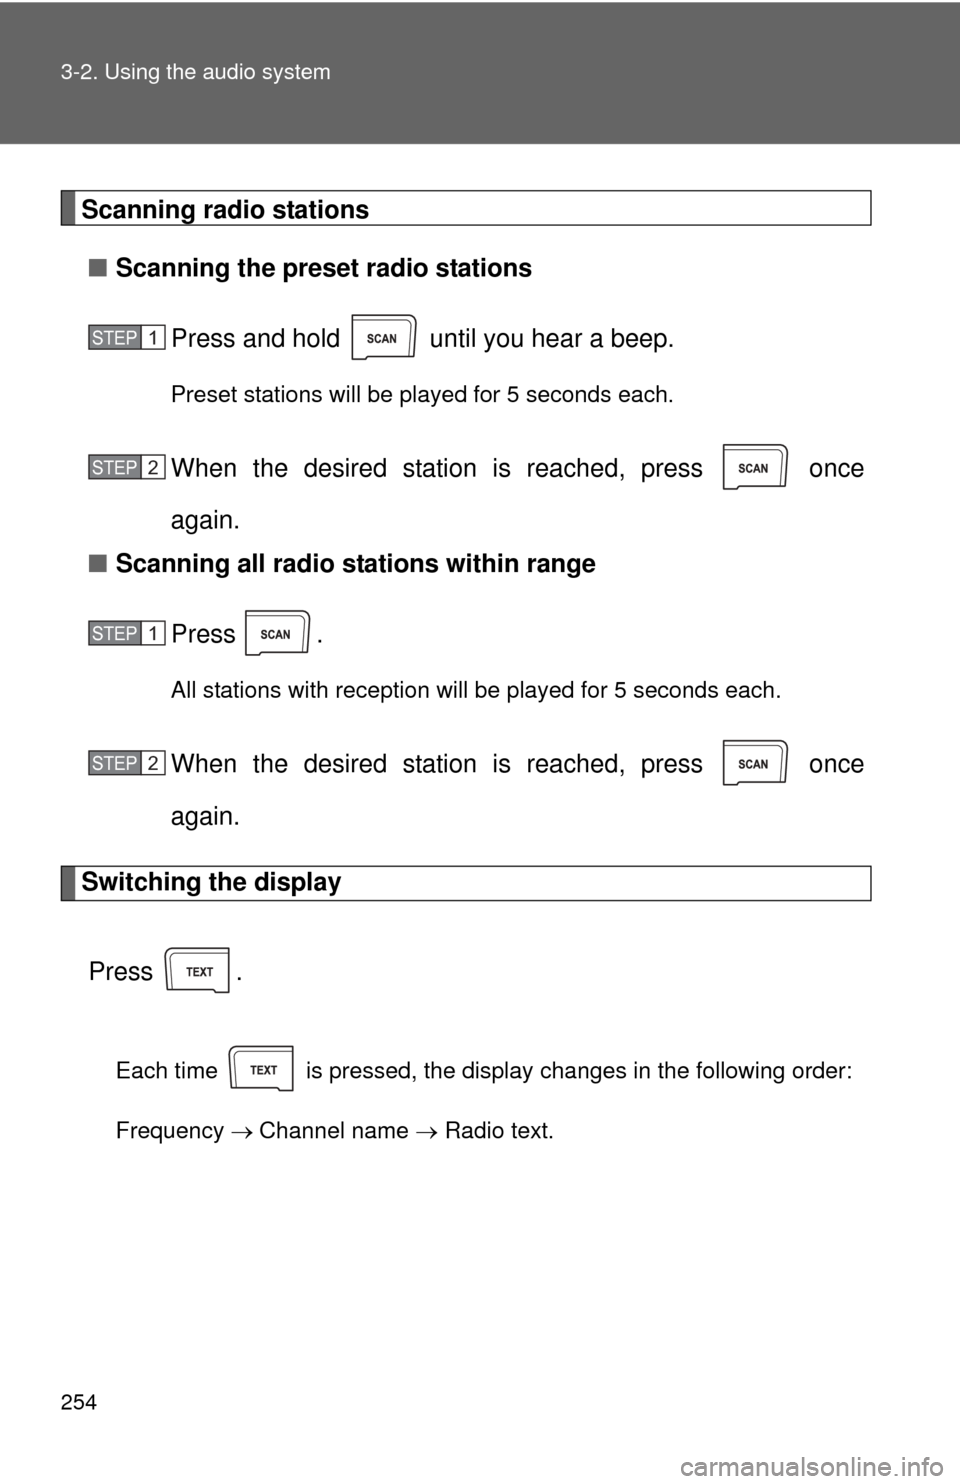
Scanning radio stations■ Scanning the preset radio stations
Press and hold until you hear a beep.
Preset stations will be played for 5 seconds each.
When the desired station is reached, press once
again.
■ Scanning all radio stations within range
Press
.
All stations with reception will be played for 5 seconds each.
When the desired station is reached, press once
again.
Switching the display
Press .
Each time is pressed, the display changes in the following order:
Frequency Channel name Radio text.
STEP1
STEP2
STEP1
STEP2
Page 276 of 540
276 3-2. Using the audio system
■iPod problems
To resolve most problems encountered when using your iPod, disconnect
your iPod from the vehicle iPod connection and reset it.
For instructions on how to reset your iPod, refer to your iPod Owner’s Man-
ual.
■ Display
P. 258
■ Error messages
“ERROR 1”: This indicates that the data in the iPod cannot be read.
“ERROR 3”: This indicates that the iPod may be malfunctioning.
“ERROR 4”: This indicates that an over current error has occurred.
“ERROR 5”: This indicates that an iPod communication error has
occurred.
“ERROR 6”: This indicates that an authentication error has occurred.
“NO SONGS”: This indicates that there is no music data in the iPod.
“NO PLAYLISTS”: This indicates that some available songs are not found in a selected playlist.
“UPDATE”: This indicates that the version of the iPod is not compati- ble. Upgrade your iPod software to the latest version.
Page 349 of 540
349
4-2. Maintenance
4
Maintenance and care
■
Reset the maintenance data (U.S.A. only)
After the required maintenance is performed according to the maintenance
schedule, please reset the maintenance data.
To reset the data, follow the procedures described below:
Turn the engine switch (vehicles without a smart key system) or the
“ENGINE START STOP” switch (vehicles with a smart key system)
off with the trip meter A reading shown. ( P. 173)
While pressing the display change button ( P. 170), turn the
engine switch to the “ON” position (vehicles without a smart key
system) or “ENGINE START STOP” switch to IGNITION ON mode
(vehicles with a smart key system)
Continue to press and hold the button until the trip meter displays
“000000”.
■ Allow inspection and repairs to be performed by a Toyota dealer
● Toyota technicians are well-trained specialists and are kept up to date
with the latest service information. They are well informed about the
operations of all systems on your vehicle.
● Keep a copy of the repair order. It proves that the maintenance that has
been performed is under warranty coverage. If any problem should arise
while your vehicle is under warranty, your Toyota dealer will promptly
take care of it.
STEP1
STEP2
STEP3
Page 430 of 540
430 5-2. Steps to take in an emergency
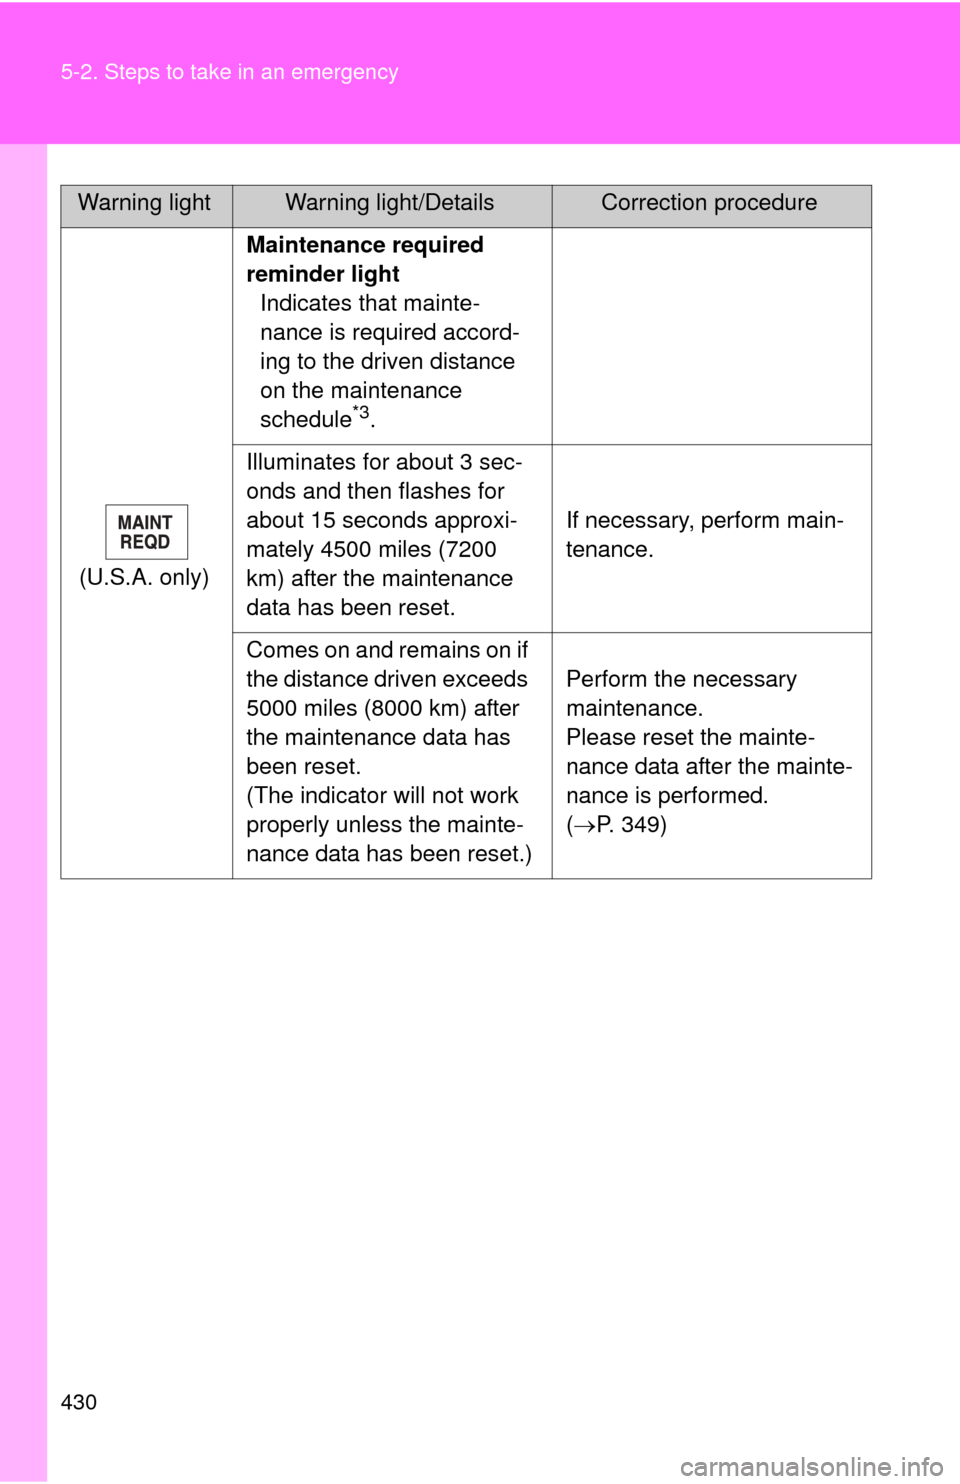
(U.S.A. only)Maintenance required
reminder light
Indicates that mainte-
nance is required accord-
ing to the driven distance
on the maintenance
schedule
*3.
Illuminates for about 3 sec-
onds and then flashes for
about 15 seconds approxi-
mately 4500 miles (7200
km) after the maintenance
data has been reset. If necessary, perform main-
tenance.
Comes on and remains on if
the distance driven exceeds
5000 miles (8000 km) after
the maintenance data has
been reset.
(The indicator will not work
properly unless the mainte-
nance data has been reset.) Perform the necessary
maintenance.
Please reset the mainte-
nance data after the mainte-
nance is performed.
(
P. 349)
Warning lightWarning light/DetailsCorrection procedure