check engine TOYOTA CAMRY 2019 Accessories, Audio & Navigation (in English)
[x] Cancel search | Manufacturer: TOYOTA, Model Year: 2019, Model line: CAMRY, Model: TOYOTA CAMRY 2019Pages: 354, PDF Size: 8.08 MB
Page 32 of 354

32
1. BASIC INFORMATION BEFORE OPERATION
1. INITIAL SCREEN
Vehicles without a smart key system
When the engine switch is turned to the
“ACC” or “ON” position, the initial screen
will be displayed and the system will begin
operating.
Vehicles with a smart key system
When the engine
to ACCESSORY or IGNITION ON
mode, the initial screen will be displayed
and the system will begin operating.
After a few seconds, the caution screen
will be displayed.
After about 5 seconds or selecting “Con-
tinue” , the caution screen automatically
switches to the next screen.
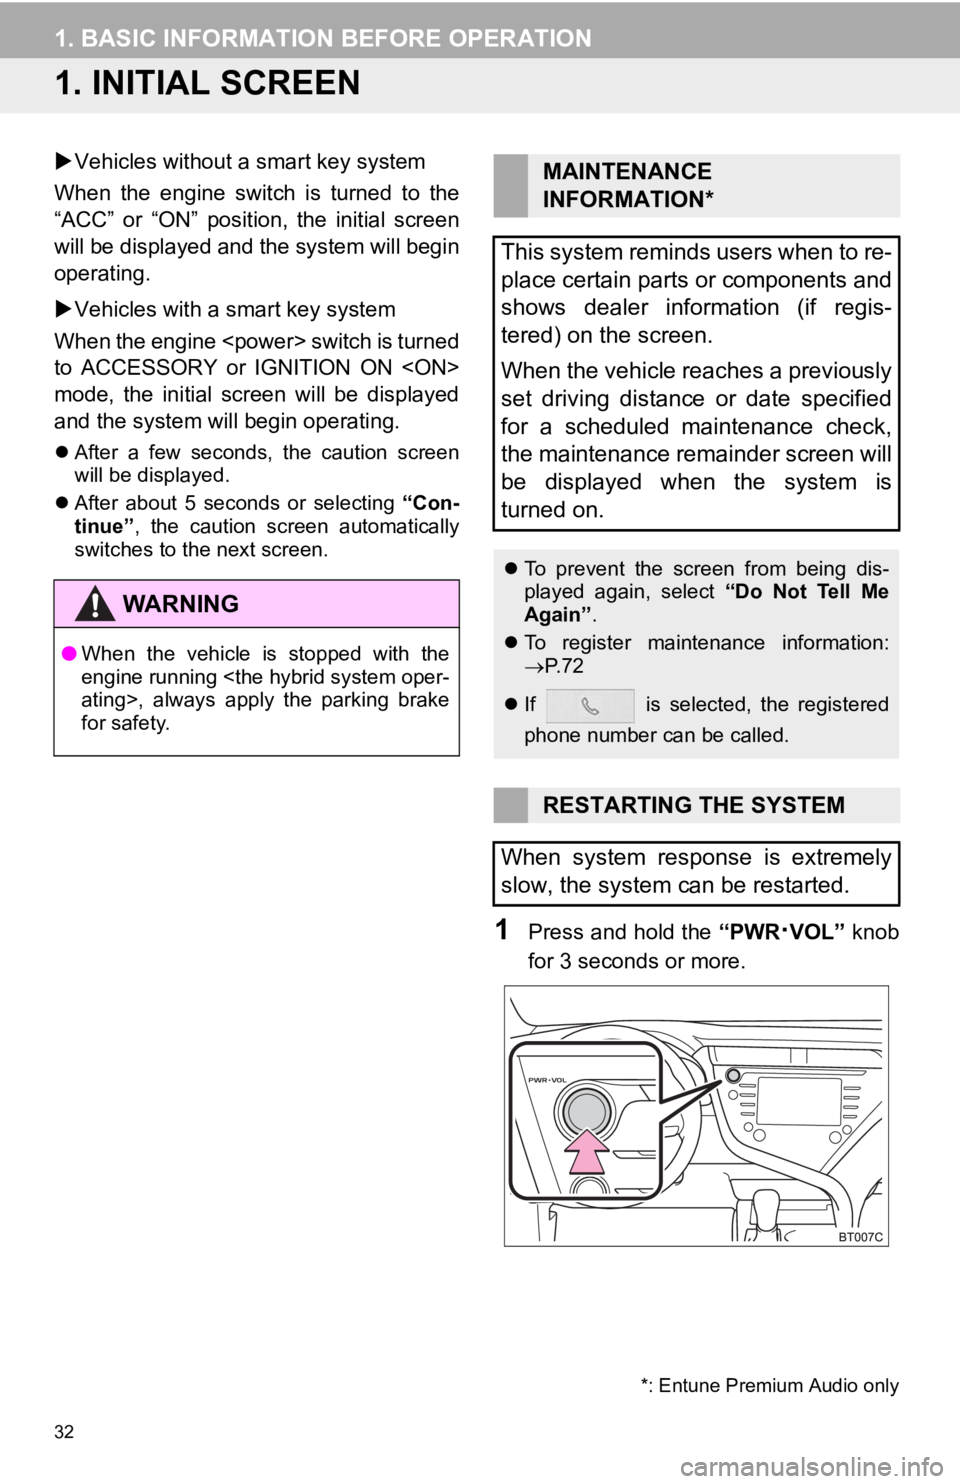
1Press and hold the “PWR·VOL” knob
for 3 seconds or more.
WA R N I N G
● When the vehicle is stopped with the
engine running
for safety.
MAINTENANCE
INFORMATION*
This system reminds users when to re-
place certain parts or components and
shows dealer information (if regis-
tered) on the screen.
When the vehicle reaches a previously
set driving distance or date specified
for a scheduled maintenance check,
the maintenance remainder screen will
be displayed when the system is
turned on.
To prevent the screen from being dis-
played again, select “Do Not Tell Me
Again” .
To register maintenance information:
P. 7 2
If is selected, the registered
phone number can be called.
RESTARTING THE SYSTEM
When system response is extremely
slow, the system can be restarted.
*: Entune Premium Audio only
Page 179 of 354

179
PERIPHERAL MONITORING SYSTEM
6
3. PANORAMIC VIEW MONITOR
1. PANORAMIC VIEW MONITOR*
Panoramic view monitor assists the
driver in viewing the surroundings,
when operating at low speeds, by com-
bining the front, side and rear cameras
and displaying a complete vehicle
overhead image on the screen.
Vehicles without a smart key system
When you press the camera switch or
shift the shift lever to the “R” position
while the engine switch is in “ON” posi-
tion, the panoramic view monitor
operates.
Vehicles with a smart key system
When you press the camera switch or
shift the shift lever to the “R” position
while the engine
IGNITION ON
oramic view monitor operates.
The monitor displays various views of
the position and surroundings of the
vehicle.
INFORMATION
●The screen illustrations used in this text
are intended as examples, and may dif-
fer from the image that is actually dis-
played on the screen.
DRIVING PRECAUTIONS
The panoramic view monitor is a sup-
plemental device intended to assist the
driver when checking around the vehi-
cle. When using, be sure to visually
check all around the vehicle both di-
rectly and using the mirrors before pro-
ceeding. If you do not, you may hit
another vehicle or possibly cause an
accident.
Pay attention to the following precau-
tions when using the panoramic view
monitor.
WA R N I N G
●Never depend on the panoramic view
monitor entirely. The image and the
position of the guide lines displayed on
the screen may differ from the actual
state. Use caution just as you would
when driving any other vehicle.
● Always make sure to check all around
the vehicle with your own eyes when
driving.
● Never drive while looking only at the
screen as the image on the screen is dif-
ferent from actual conditions. If you are
driving while looking only at the screen,
you may hit a person or an object,
resulting in an accident. When driving,
be sure to check the vehicle’s surround-
ings with your own eyes and the vehi-
cle’s mirrors.
*: If equipped
Page 237 of 354

237
2. SETUP
PHONE
7
■FROM USB DEVICE
1Connect a USB device. (P.82)
2Select “Transfer Contacts from De-
vice” .
3Select “From USB” .
4Select “USB 1” or “USB 2” when the
multiple USB devices are connected.
If a USB device is connected, skip this
procedure.
When the contact is not registered
5Select a desired file from vCard file list.
6Check that a confirmation screen is
displayed when the operation is com-
plete.
When the contact is registered
5Select “Replace Contacts” or “Add
Contact”.
“Replace Contacts” : Select to transfer
the contact from the connected USB de-
vice or Bluetooth
® phone and replace the
current one.
“Add Contact” : Select to transfer the de-
sired contact data from the connected
USB device or Bluetooth
® phone to add to
the current one.
6Select a desired file from vCard file list.
7Check that a confirmation screen is
displayed when the operation is com-
plete.
Backed-up contact data (“vCard” for-
matted) can be transferred from USB
device or Bluetooth
® phone connected
via USB to this system.
INFORMATION
● Depending type of phone used and
number of files, it may take time to dis-
play vCard file lists and download con-
tacts.
● Downloading may not complete cor-
rectly in the following cases:
• If the engine
off during downloading.
• If the USB device or Bluetooth
® phone
is removed before downloading is
complete.