light TOYOTA CAMRY HYBRID 2014 XV50 / 9.G Owner's Manual
[x] Cancel search | Manufacturer: TOYOTA, Model Year: 2014, Model line: CAMRY HYBRID, Model: TOYOTA CAMRY HYBRID 2014 XV50 / 9.GPages: 612, PDF Size: 7.26 MB
Page 91 of 612
91
1
1-4. Adjustable components (seats, mirrors, steering wheel)
Before driving
Anti-glare inside rear view mirror
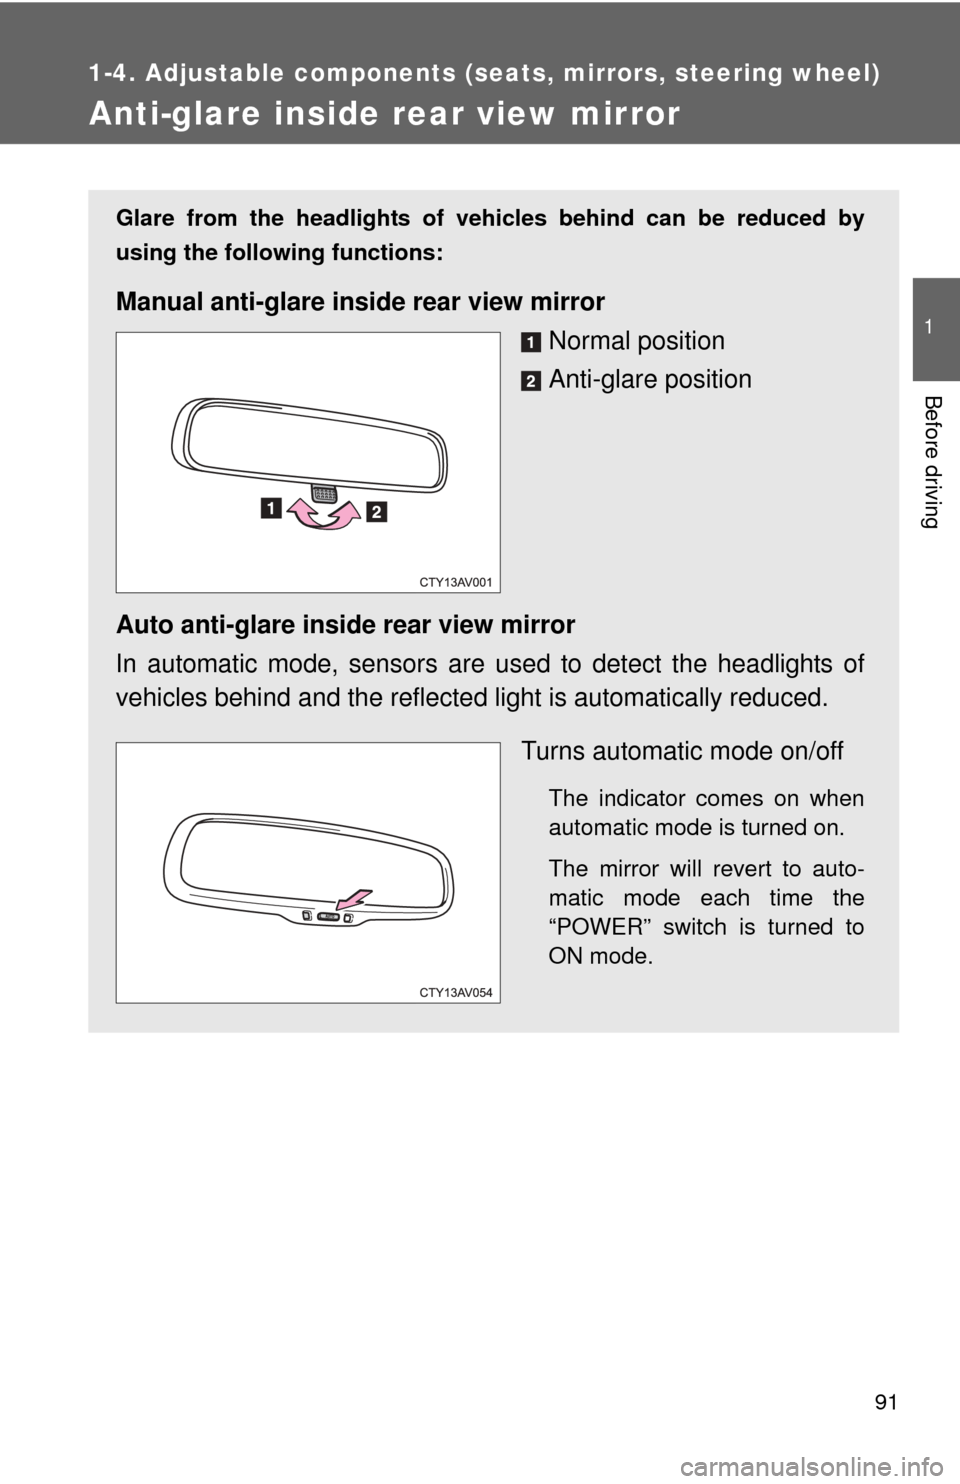
Glare from the headlights of vehicles behind can be reduced by
using the following functions:
Manual anti-glare inside rear view mirrorNormal position
Anti-glare position
Auto anti-glare inside rear view mirror
In automatic mode, sensors are used to detect the headlights of
vehicles behind and the reflecte d light is automatically reduced.
Turns automatic mode on/off
The indicator comes on when
automatic mode is turned on.
The mirror will revert to auto-
matic mode each time the
“POWER” switch is turned to
ON mode.
Page 96 of 612

96 1-5. Opening and closing the windows and moon roof
■The power windows can be operated when
The “POWER” switch is in ON mode.
■ Operating the power wi ndows after turning the hybrid system off
The power windows can be operated for approximately 45 seconds even
after the “POWER” switch is turned to ACCESSORY mode or turned off.
They cannot, however, be operated once either front door is opened.
■ Jam protection function (driver’s window only)
If an object becomes caught between the window and the window frame,
window travel is stopped and the window is opened slightly.
■ When the power window does not close normally (driver’s window
only)
If the jam protection function is operating abnormally and a window cannot
be closed, perform the following operations using the power window switch
on the driver’s door.
● After stopping the vehicle, the window can be closed by holding the
power window switch in the one-touch closing position while the
“POWER” switch is turned to ON mode.
● If the window still cannot be closed even by carrying out the operation
explained above, initialize the function by performing the following proce-
dure.
Hold the power window switch in the one-touch closing position.
Continue holding the switch for a further 6 seconds after the win-
dow has closed.
Hold the power window switch in the one-touch opening position.
Continue holding the switch for a further 2 seconds after the win-
dow has opened completely.
Hold the power window switch in the one-touch closing position
once again. Continue holding the switch for a further 2 seconds
after the window has closed.
If you release the switch while the window is moving, start again from the
beginning.
If the window continues to close but then re-open slightly even after perform-
ing the above procedure correctly, have the vehicle inspected by your Toyota
dealer.
STEP1
STEP2
STEP3
Page 98 of 612
98
1-5. Opening and closing the windows and moon roof
Moon roof
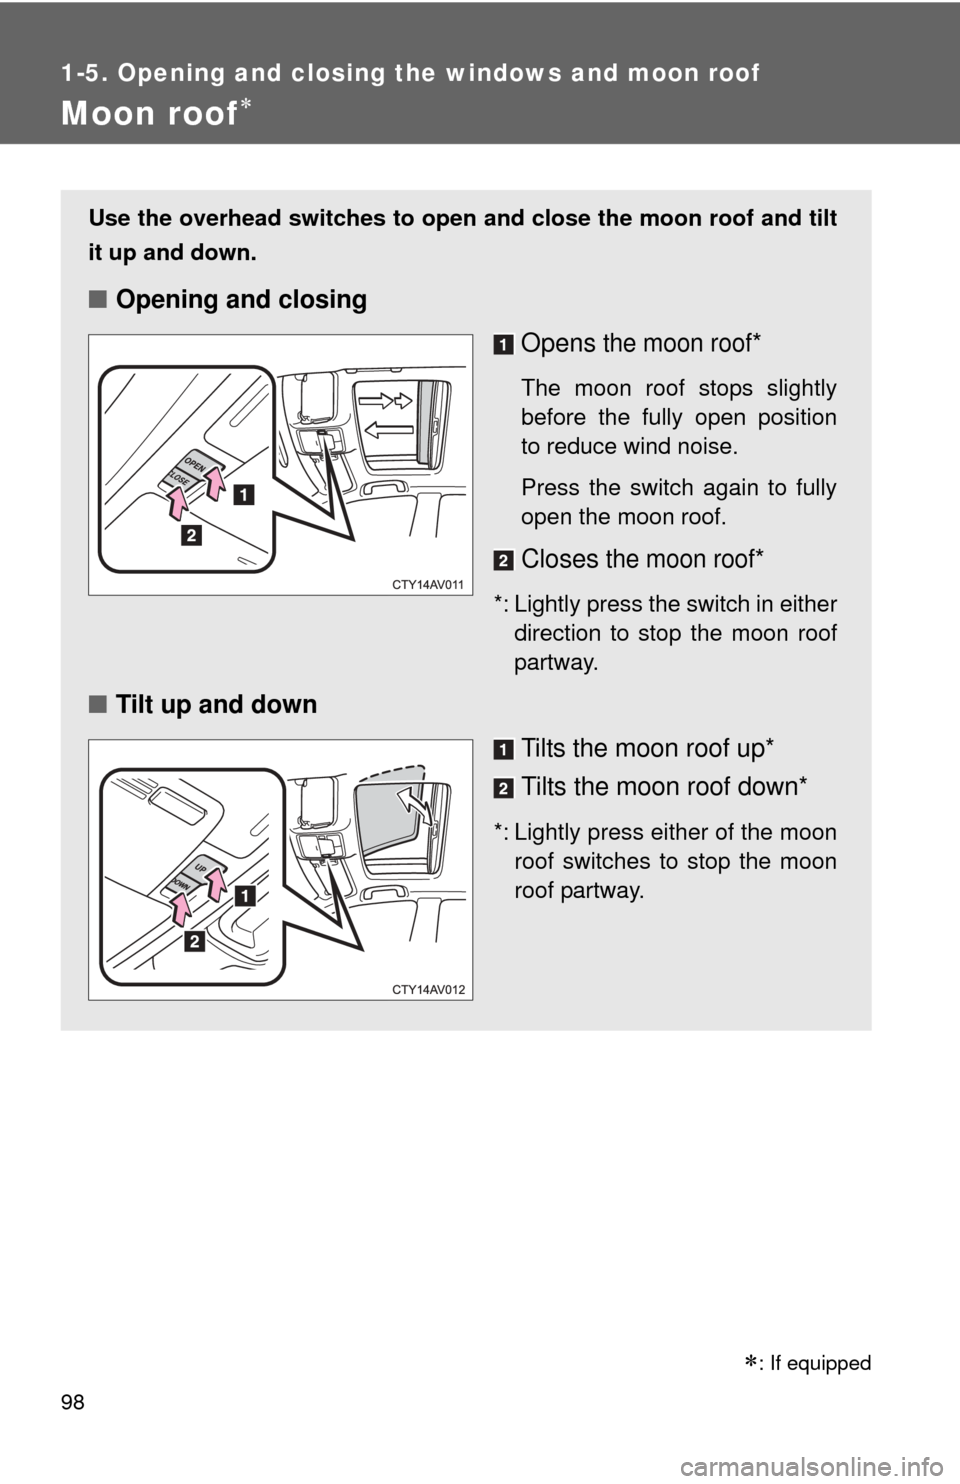
Use the overhead switches to open and close the moon roof and tilt
it up and down.
■Opening and closing
Opens
the moon roof*
The moon roof stops slightly
before the fully open position
to reduce wind noise.
Press the switch again to fully
open the moon roof.
Closes the moon roof*
*: Lightly press the switch in eitherdirection to stop the moon roof
partway.
■ Tilt up and down
Tilts the moon roof up*
Tilts the moon roof down*
*: Lightly press either of the moon
roof switches to stop the moon
roof partway.
: If equipped
Page 99 of 612

99
1-5. Opening and closing the windows and moon roof
1
Before driving
■
The moon roof can be operated when
The “POWER” switch is in ON mode.
■ Operating the moon roof af ter turning the engine off
The moon roof can be operated for approximately 45 seconds even after the
“POWER” switch is turned to ACCE SSORY mode or turned off. It cannot,
however, be operated once either front door is opened.
■ Jam protection function
If an object is detected between the moon roof and the frame while the moon
roof is closing or tilting down, travel is stopped and the moon roof opens
slightly.
■ Sunshade
The sunshade can be opened and closed manually. However, the sunshade
will open automatically when the moon roof is opened.
Page 100 of 612
100 1-5. Opening and closing the windows and moon roof
■When the moon roof does not close normally
Perform the following procedure:
●If the moon roof closes but then re-opens slightly
Stop the vehicle.
Press and hold the “CLOSE” switch.*
1
The moon roof will close, reopen and pause for approximately 10
seconds.*2 Then it will close again, tilt up and pause for approxi-
mately 1 second. Finally, it will tilt down, open and close.
Check to make sure that the moon roof is completely closed and
then release the switch.
● If the moon roof tilts down but then tilts back up
Stop the vehicle.
Press and hold the “UP” switch*
1 until the moon roof moves into the
tilt up position and stops.
Release the “UP” switch once and then press and hold the “UP”
switch again.*
1
The moon roof will pause for approximately 10 seconds in the tilt up
position.*2 Then it will adjust slightly and pause for approximately 1
second. Finally, it will tilt down, open and close.
Check to make sure that the moon roof is completely closed and
then release the switch.
*
1: If the switch is released at the incorrect time, the procedure will have to be performed again from the beginning.
*
2: If the switch is released after the above mentioned 10 second pause, automatic operation will be disabled. In that case, press and hold the
open/close switch in the close position or press and hold the “UP” switch.
The moon roof will tilt up and pause for approximately 1 second. Then it
will tilt down, open and close. Check to make sure that the moon roof is\
completely closed and then release the switch.
If the moon roof does not fully close even after performing the above proce-
dure correctly, have the vehicle inspected by your Toyota dealer.
STEP1
STEP2
STEP3
STEP1
STEP2
STEP3
STEP4
Page 103 of 612

103
1-6. Refueling
1
Before driving
Closing the fuel tank cap
After refueling, turn the fuel tank
cap until you hear a click. Once
the cap is released, it will turn
slightly in the opposite direction.
Page 104 of 612

104 1-6. Refueling
CAUTION
■When refueling the vehicle
Observe the following precautions while refueling the vehicle. Failure to do
so may result in death or serious injury.
●After exiting the vehicle and before opening the fuel door, touch an
unpainted metal surface to discharge any static electricity. It is important to
discharge static electricity before refueling because sparks resulting from
static electricity can cause fuel vapors to ignite while refueling.
● Always hold the grips on the fuel tank cap and turn it slowly to remove it.
A whooshing sound may be heard when the fuel tank cap is loosened.
Wait until the sound cannot be heard before fully removing the cap. In hot
weather, pressurized fuel may spray out the filler neck and cause injury.
● Do not allow anyone that has not discharged static electricity from their
body to come close to an open fuel tank.
● Do not inhale vaporized fuel.
Fuel contains substances that are harmful if inhaled.
● Do not smoke while refueling the vehicle.
Doing so may cause the fuel to ignite and cause a fire.
● Do not return to the vehicle or touch any person or object that is statically
charged.
This may cause static electricity to build up, resulting in a possible ignition
hazard.
■ When refueling
Securely insert the fuel nozzle into the fuel filler neck. If fuel is added with
the nozzle slightly lifted away from the fuel filler neck, the automatic shut off
function may not operate, resulting in fuel overflowing from the tank.
■ When replacing the fuel cap
Do not use anything but a genuine Toyota fuel tank cap designed for your
vehicle. Doing so may cause a fire or other incident which may result in
death or serious injury.
Page 106 of 612
106
1-7. Theft deterrent system
Immobilizer system
■System maintenance
The vehicle has a maintenance-free type immobilizer system.
■ Conditions affecting operation
Depending on the surrounding environment and conditions, the immobilizer
system may not operate properly. This may prevent the hybrid system from
starting. ( P. 58)
The vehicle's keys have built-in tran sponder chips that prevent the
hybrid system from starting if a key has not been previously regis-
tered in the vehicle's on-board computer.
Never leave the keys inside the vehicle when you leave the vehicle.
This system is designed to help prevent vehicle theft but does not
guarantee absolute security against all vehicle thefts.
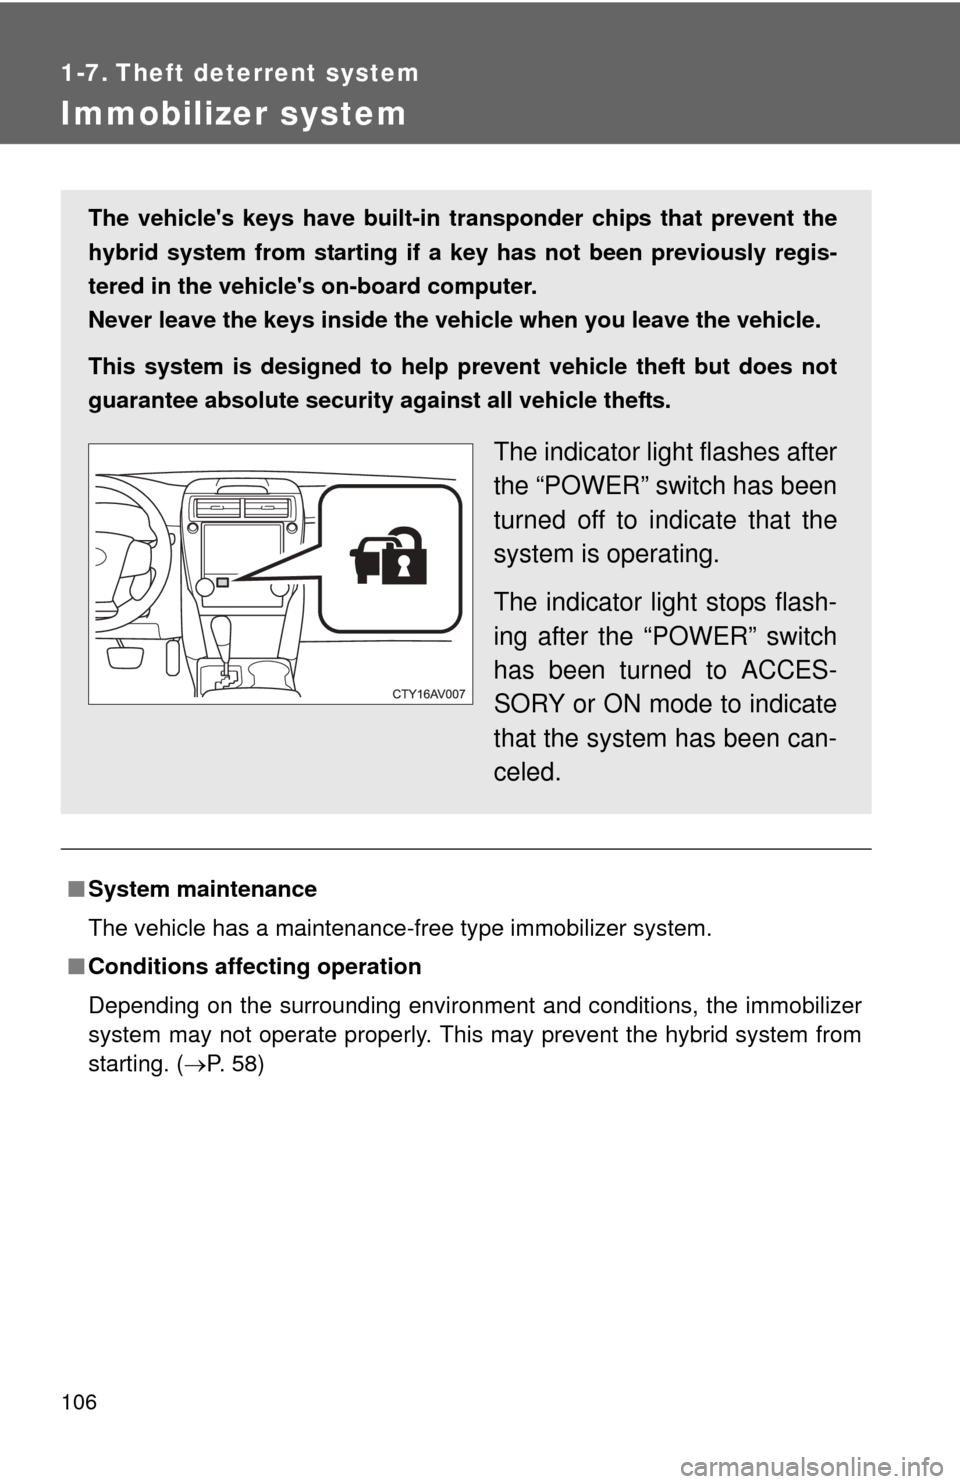
The indicator light flashes after
the “POWER” switch has been
turned off to indicate that the
system is operating.
The indicator light stops flash-
ing after the “POWER” switch
has been turned to ACCES-
SORY or ON mode to indicate
that the system has been can-
celed.
Page 108 of 612
108
1-7. Theft deterrent system
Alarm
: If equipped
The system sounds the alarm and flashes the lights when forced
entry is detected.
■ Triggering of the alarm
The alarm is triggered in the fo llowing situations when the alarm
is set:
● A locked door or trunk is unlocked or opened in any way other
than using the entry function, wireless remote control or
mechanical key.
● The hood is opened.
● Some models: The window is tapped or broken.
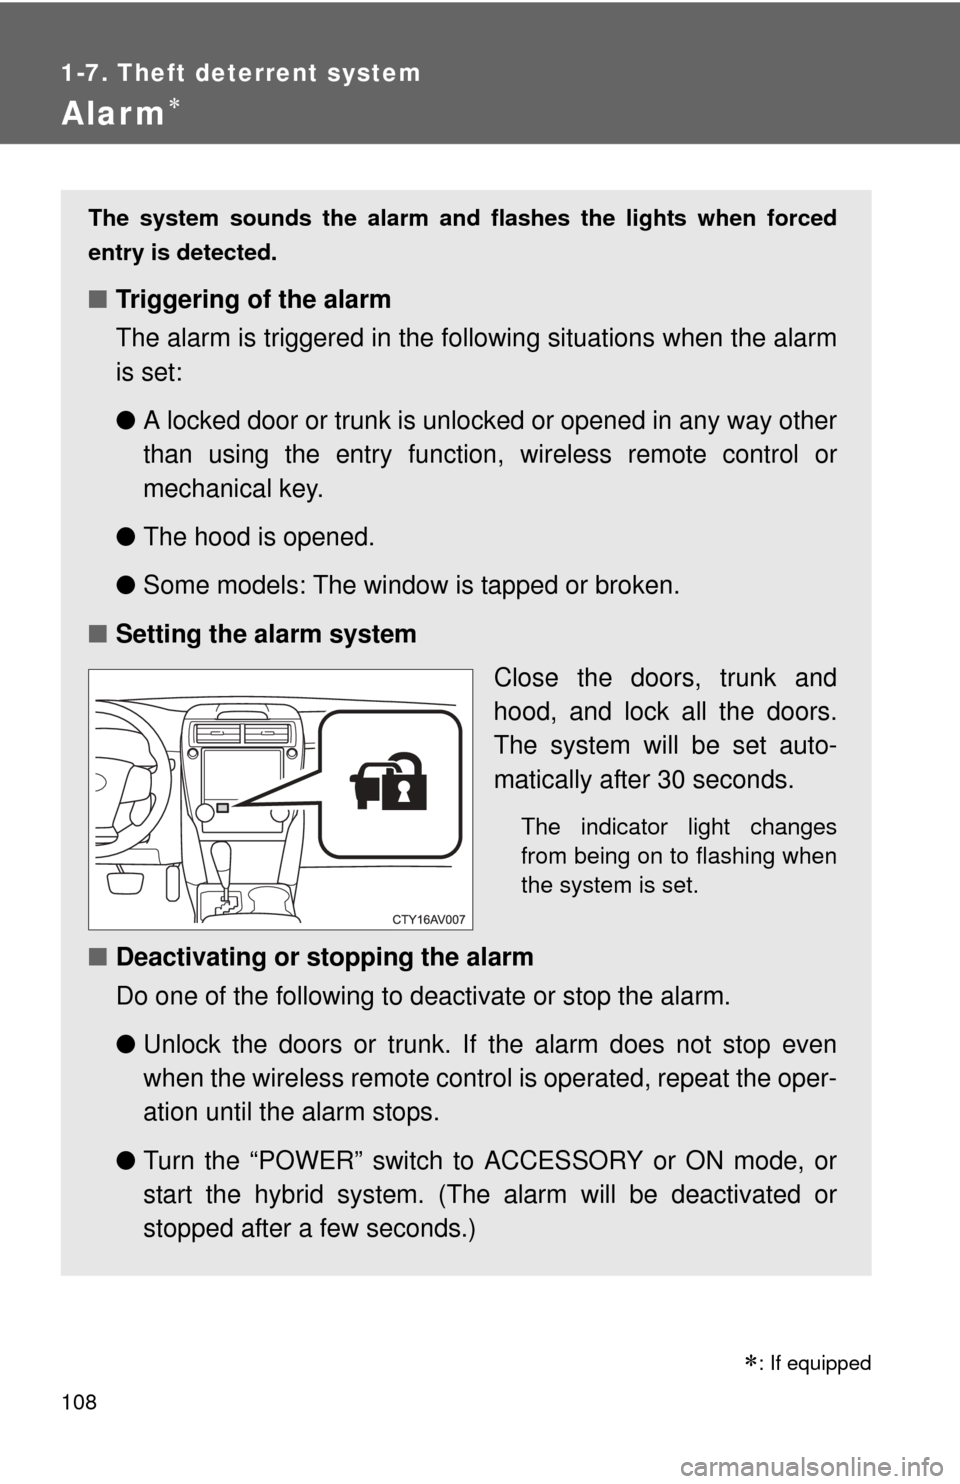
■ Setting the alarm system
Close the doors, trunk and
hood, and lock all the doors.
The system will be set auto-
matically after 30 seconds.
The indicator light changes
from being on to flashing when
the system is set.
■Deactivating or stopping the alarm
Do one of the following to deactivate or stop the alarm.
●Unlock the doors or trunk. If the alarm does not stop even
when the wireless remote contro l is operated, repeat the oper-
ation until the alarm stops.
● Turn the “POWER” switch to ACCESSORY or ON mode, or
start the hybrid system. (The alarm will be deactivated or
stopped after a few seconds.)
Page 114 of 612
114 1-8. Safety information
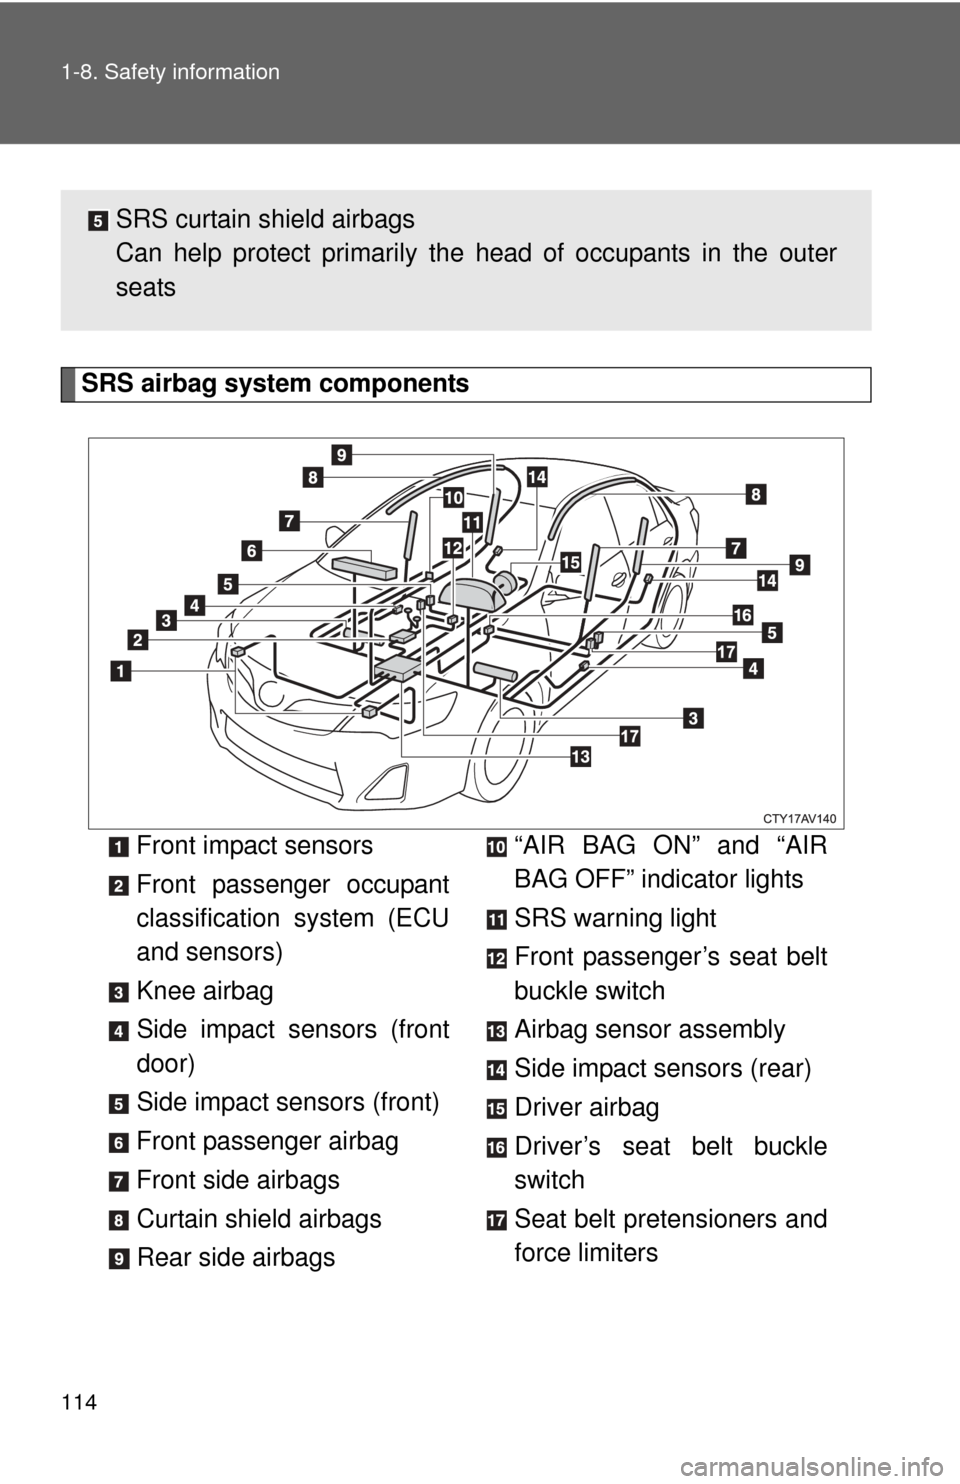
SRS airbag system components
Front impact sensors
Front passenger occupant
classification system (ECU
and sensors)
Knee airbag
Side impact sensors (front
door)
Side impact sensors (front)
Front passenger airbag
Front side airbags
Curtain shield airbags
Rear side airbags“AIR BAG ON” and “AIR
BAG OFF” indicator lights
SRS warning light
Front passenger’s seat belt
buckle switch
Airbag sensor assembly
Side impact sensors (rear)
Driver airbag
Driver’s seat belt buckle
switch
Seat belt pretensioners and
force limiters
SRS curtain shield airbags
Can help protect primarily the
head of occupants in the outer
seats