display TOYOTA COROLLA 2016 11.G Navigation Manual
[x] Cancel search | Manufacturer: TOYOTA, Model Year: 2016, Model line: COROLLA, Model: TOYOTA COROLLA 2016 11.GPages: 294, PDF Size: 3.42 MB
Page 239 of 294
239
3. ROUTE GUIDANCE
COROLLA_14CY_Navi_U
NAVIGATION SYSTEM
8
1Display the “Edit Route” screen.
(P.235)
2Select “Start from Adjacent Road” .
INFORMATION
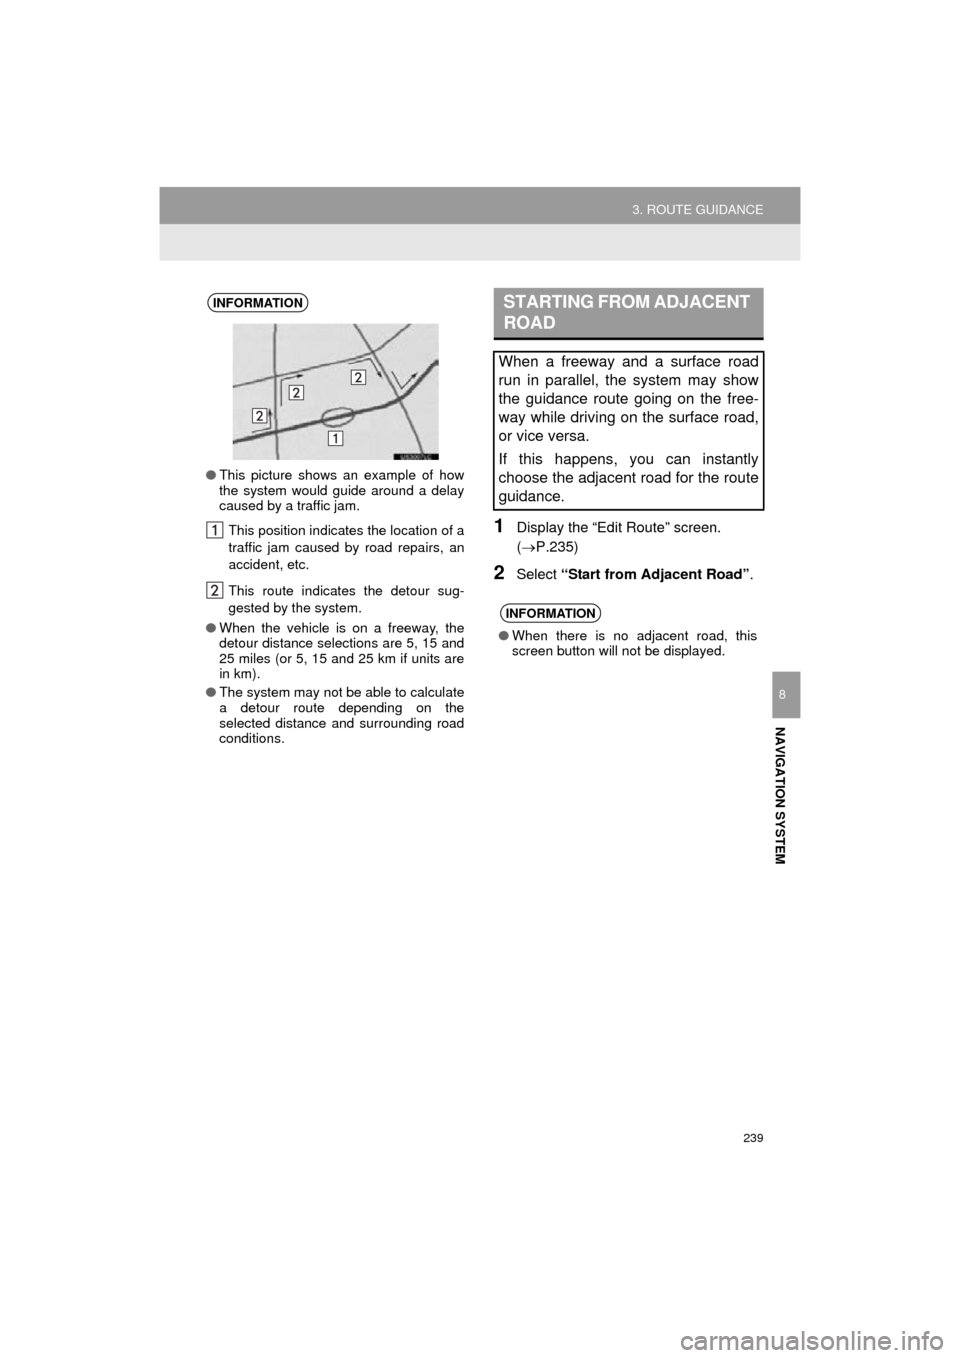
●This picture shows an example of how
the system would guide around a delay
caused by a traffic jam.
This position indicates the location of a
traffic jam caused by road repairs, an
accident, etc.
This route indicates the detour sug-
gested by the system.
● When the vehicle is on a freeway, the
detour distance selections are 5, 15 and
25 miles (or 5, 15 and 25 km if units are
in km).
● The system may not be able to calculate
a detour route depending on the
selected distance and surrounding road
conditions.
STARTING FROM ADJACENT
ROAD
When a freeway and a surface road
run in parallel, the system may show
the guidance route going on the free-
way while driving on the surface road,
or vice versa.
If this happens, you can instantly
choose the adjacent road for the route
guidance.
INFORMATION
● When there is no adjacent road, this
screen button will not be displayed.
Page 241 of 294
241
4. MEMORY POINTS
COROLLA_14CY_Navi_U
NAVIGATION SYSTEM
8
1Display the “Navigation Settings”
screen. (P.240)
2Select “Home” .
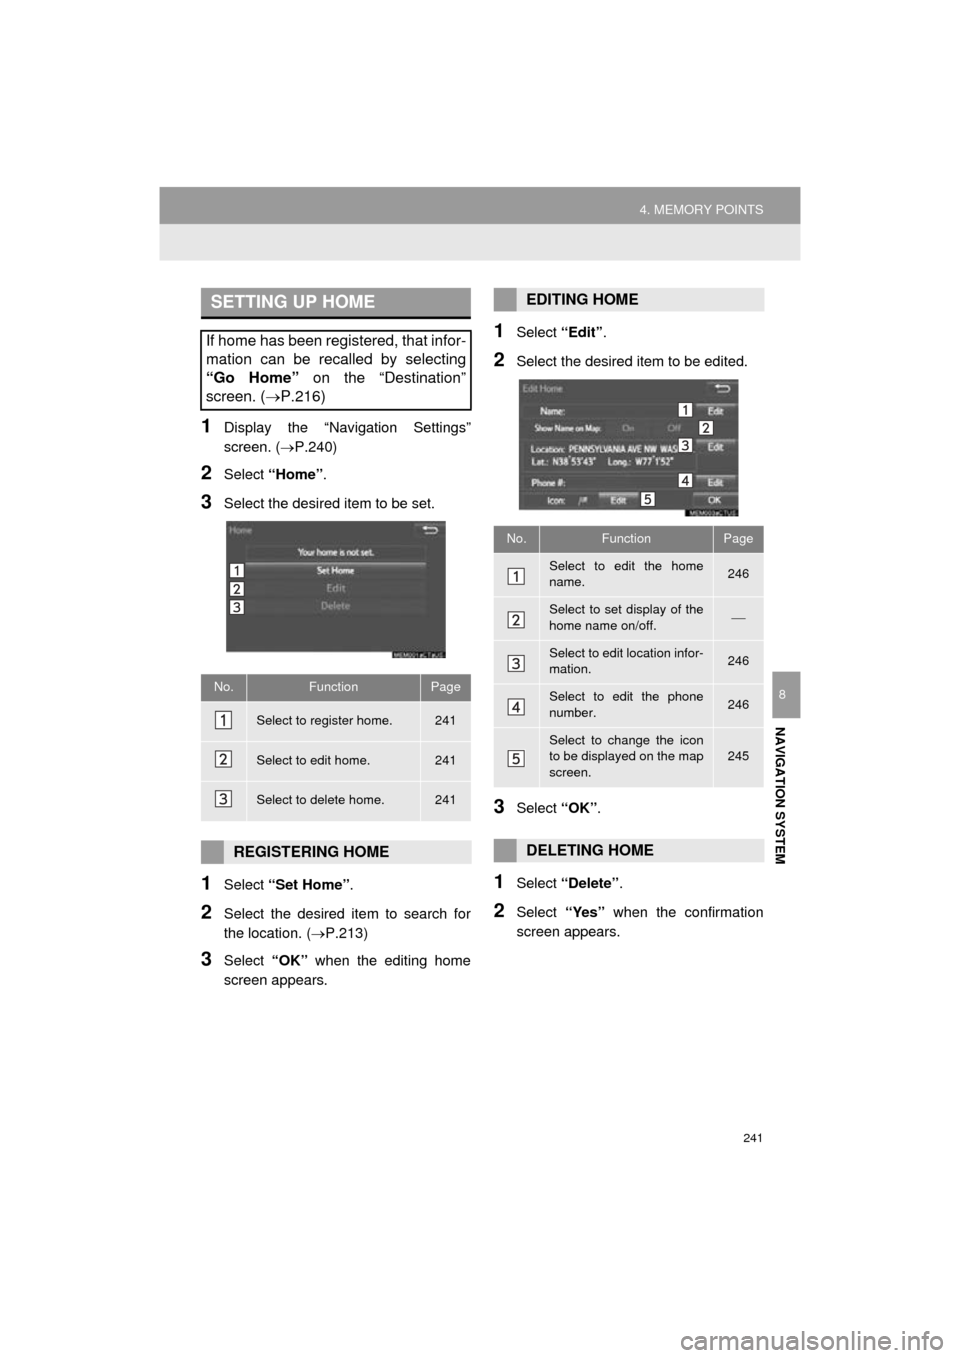
3Select the desired item to be set.
1Select “Set Home” .
2Select the desired item to search for
the location. ( P.213)
3Select “OK” when the editing home
screen appears.
1Select “Edit”.
2Select the desired item to be edited.
3Select “OK”.
1Select “Delete” .
2Select “Yes” when the confirmation
screen appears.
SETTING UP HOME
If home has been registered, that infor-
mation can be recalled by selecting
“Go Home” on the “Destination”
screen. ( P.216)
No.FunctionPage
Select to register home.241
Select to edit home.241
Select to delete home.241
REGISTERING HOME
EDITING HOME
No.FunctionPage
Select to edit the home
name.246
Select to set display of the
home name on/off.
Select to edit location infor-
mation.246
Select to edit the phone
number.246
Select to change the icon
to be displayed on the map
screen.245
DELETING HOME
Page 242 of 294
242
4. MEMORY POINTS
COROLLA_14CY_Navi_U
1Display the “Navigation Settings”
screen. (P.240)
2Select “Preset Destinations” .
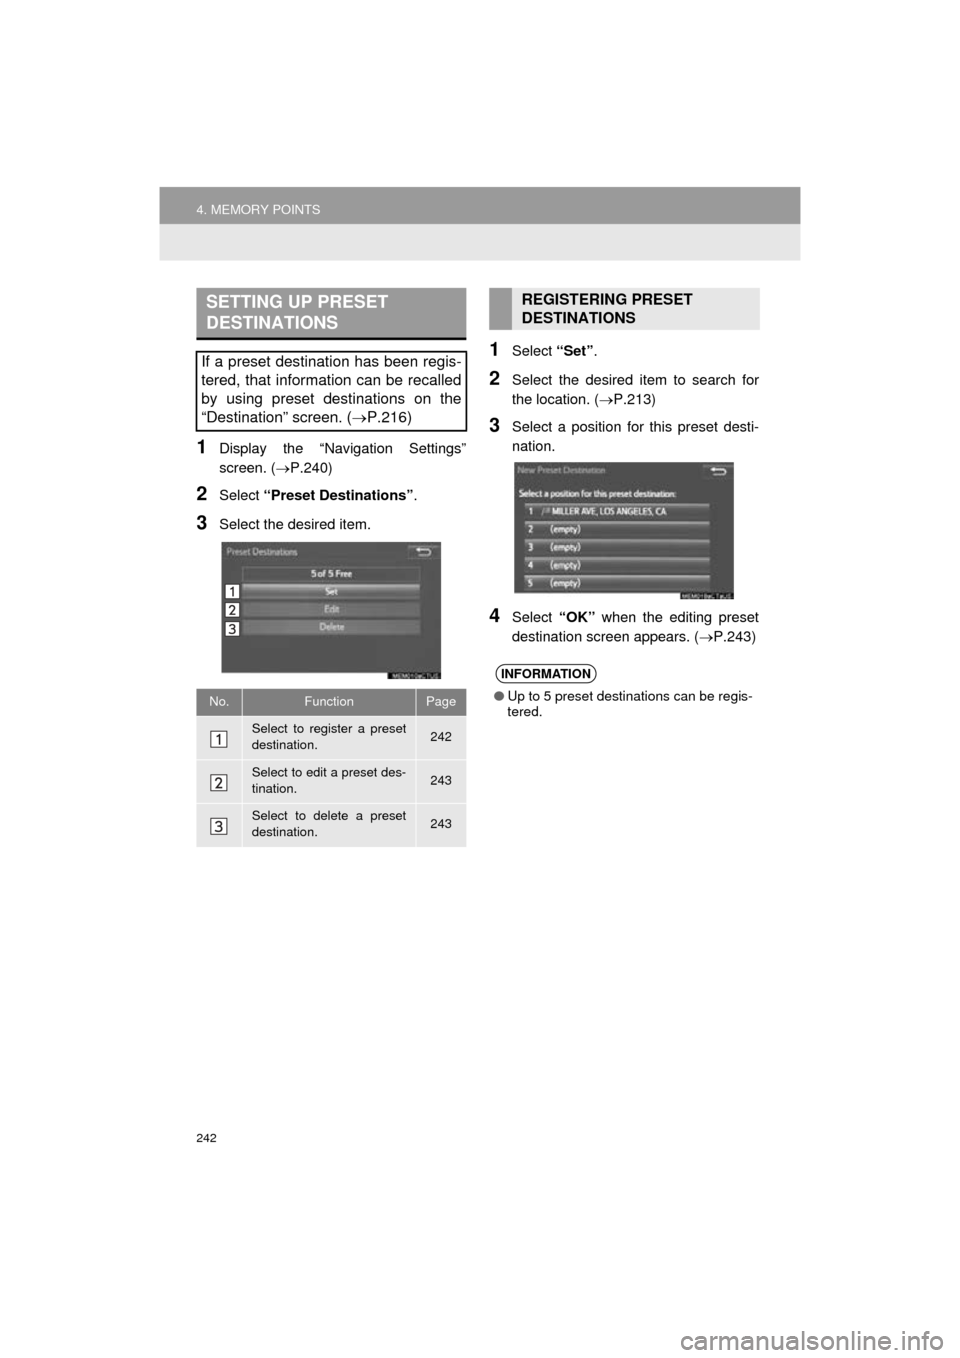
3Select the desired item.
1Select “Set”.
2Select the desired item to search for
the location. ( P.213)
3Select a position for this preset desti-
nation.
4Select “OK” when the editing preset
destination screen appears. ( P.243)
SETTING UP PRESET
DESTINATIONS
If a preset destination has been regis-
tered, that information can be recalled
by using preset destinations on the
“Destination” screen. (P.216)
No.FunctionPage
Select to register a preset
destination.242
Select to edit a preset des-
tination.243
Select to delete a preset
destination.243
REGISTERING PRESET
DESTINATIONS
INFORMATION
●Up to 5 preset destinations can be regis-
tered.
Page 243 of 294
243
4. MEMORY POINTS
COROLLA_14CY_Navi_U
NAVIGATION SYSTEM
8
1Select “Edit”.
2Select the desired preset destination.
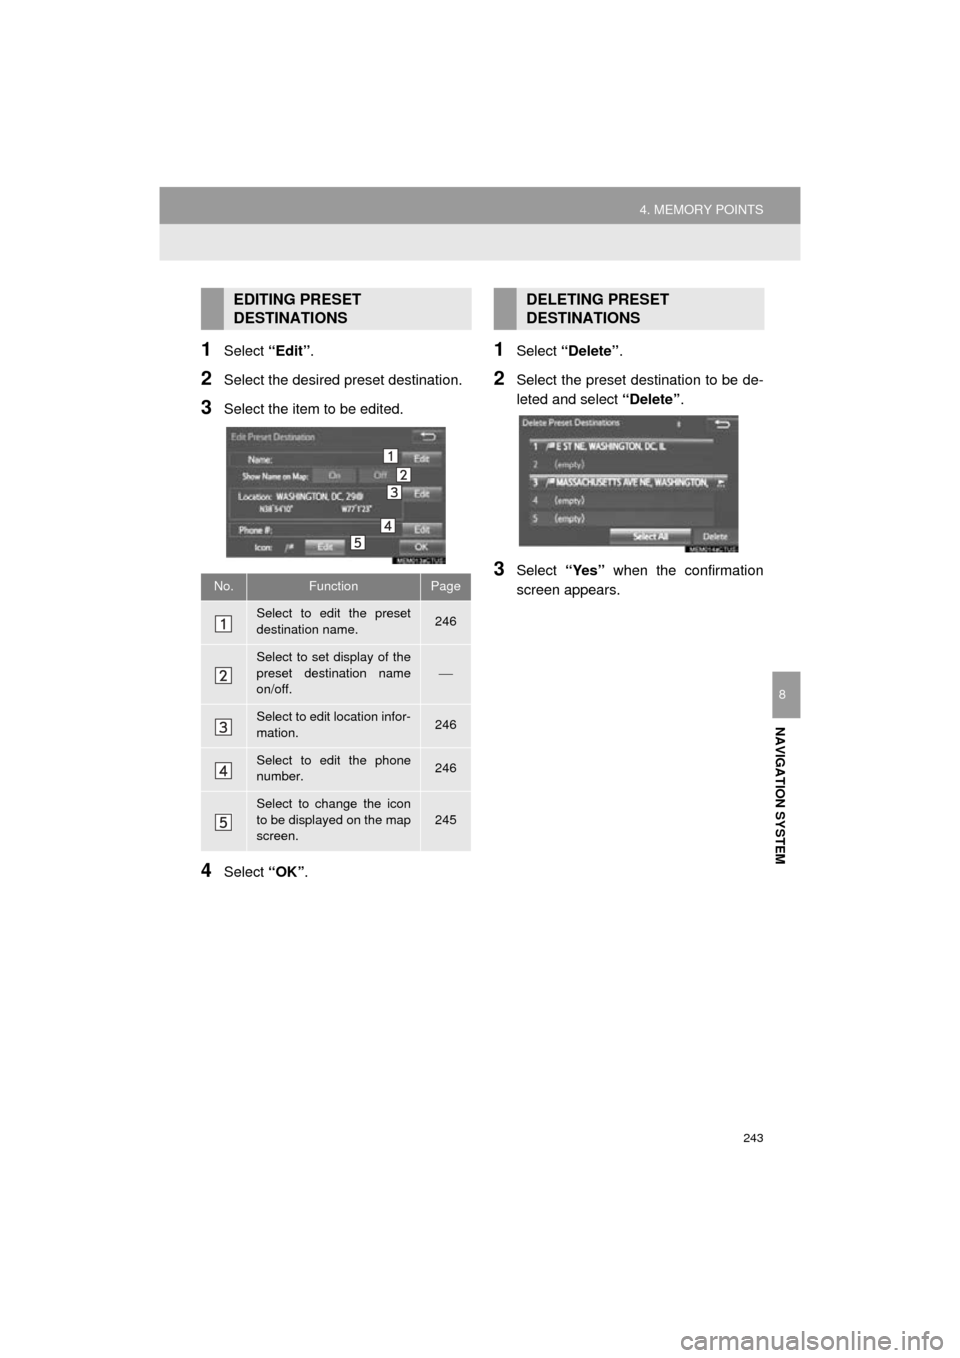
3Select the item to be edited.
4Select “OK”.
1Select “Delete” .
2Select the preset destination to be de-
leted and select “Delete”.
3Select “Yes” when the confirmation
screen appears.
EDITING PRESET
DESTINATIONS
No.FunctionPage
Select to edit the preset
destination name.246
Select to set display of the
preset destination name
on/off.
Select to edit location infor-
mation.246
Select to edit the phone
number.246
Select to change the icon
to be displayed on the map
screen.
245
DELETING PRESET
DESTINATIONS
Page 244 of 294
244
4. MEMORY POINTS
COROLLA_14CY_Navi_U
1Display the “Navigation Settings”
screen. (P.240)
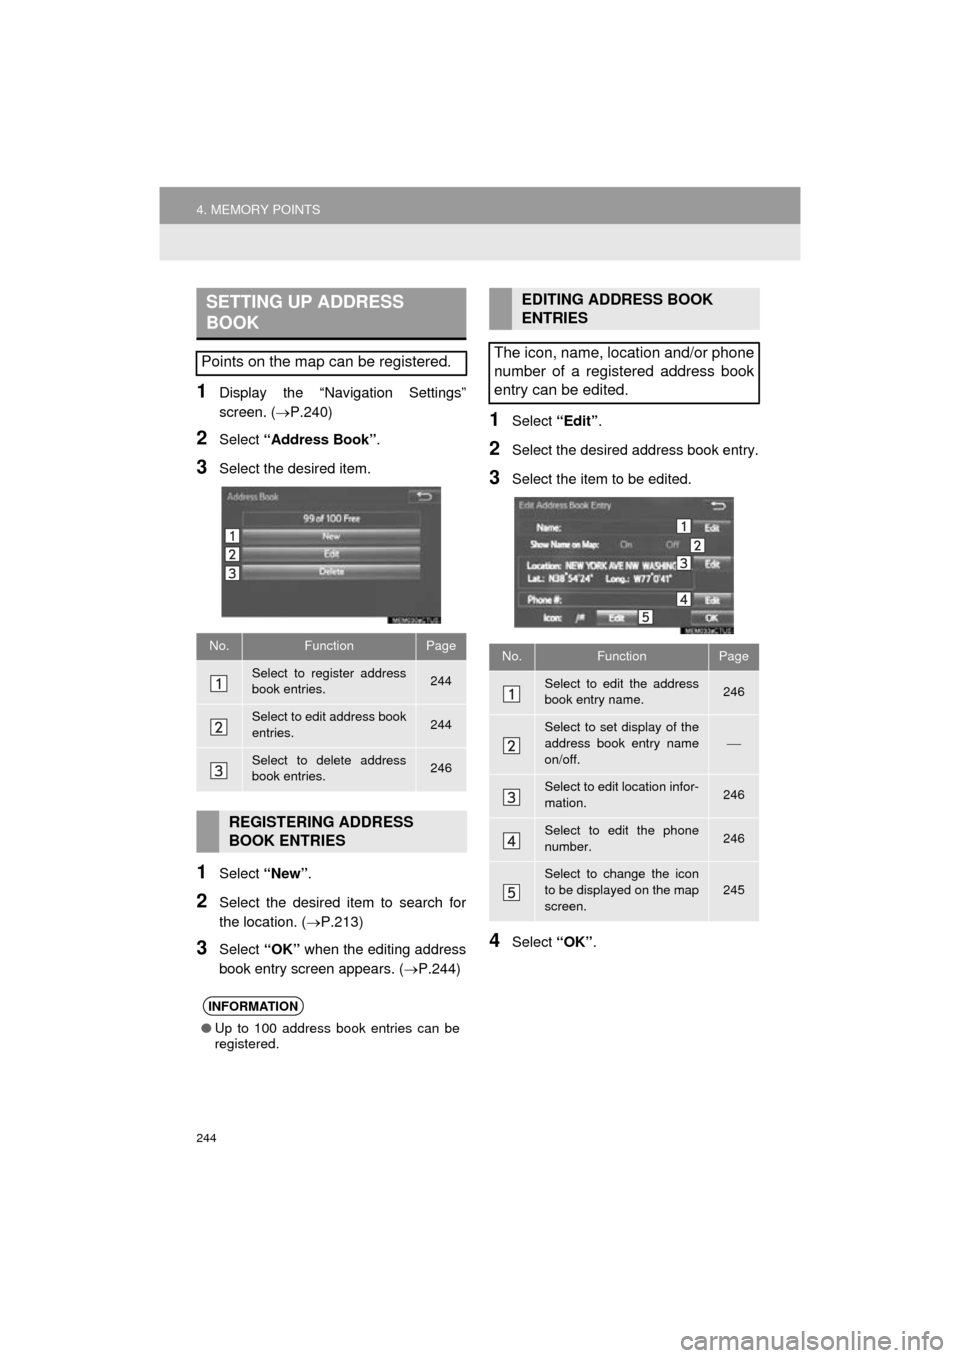
2Select “Address Book” .
3Select the desired item.
1Select “New”.
2Select the desired item to search for
the location. ( P.213)
3Select “OK” when the editing address
book entry screen appears. ( P.244)
1Select “Edit”.
2Select the desired address book entry.
3Select the item to be edited.
4Select “OK”.
SETTING UP ADDRESS
BOOK
Points on the map can be registered.
No.FunctionPage
Select to register address
book entries.244
Select to edit address book
entries.244
Select to delete address
book entries.246
REGISTERING ADDRESS
BOOK ENTRIES
INFORMATION
●Up to 100 address book entries can be
registered.
EDITING ADDRESS BOOK
ENTRIES
The icon, name, location and/or phone
number of a registered address book
entry can be edited.
No.FunctionPage
Select to edit the address
book entry name.246
Select to set display of the
address book entry name
on/off.
Select to edit location infor-
mation.246
Select to edit the phone
number.246
Select to change the icon
to be displayed on the map
screen.
245
Page 246 of 294
246
4. MEMORY POINTS
COROLLA_14CY_Navi_U
■CHANGING THE NAME
1Select “Edit” next to “Name”.
2Enter a name and select “OK”.
■CHANGING THE LOCATION
1Select “Edit” next to “Location”.
2Scroll the map to the desired point
(P.205) and select “OK”.
■CHANGING PHONE NUMBER
1Select “Edit” next to “Phone #”.
2Enter the phone number and select
“OK”.
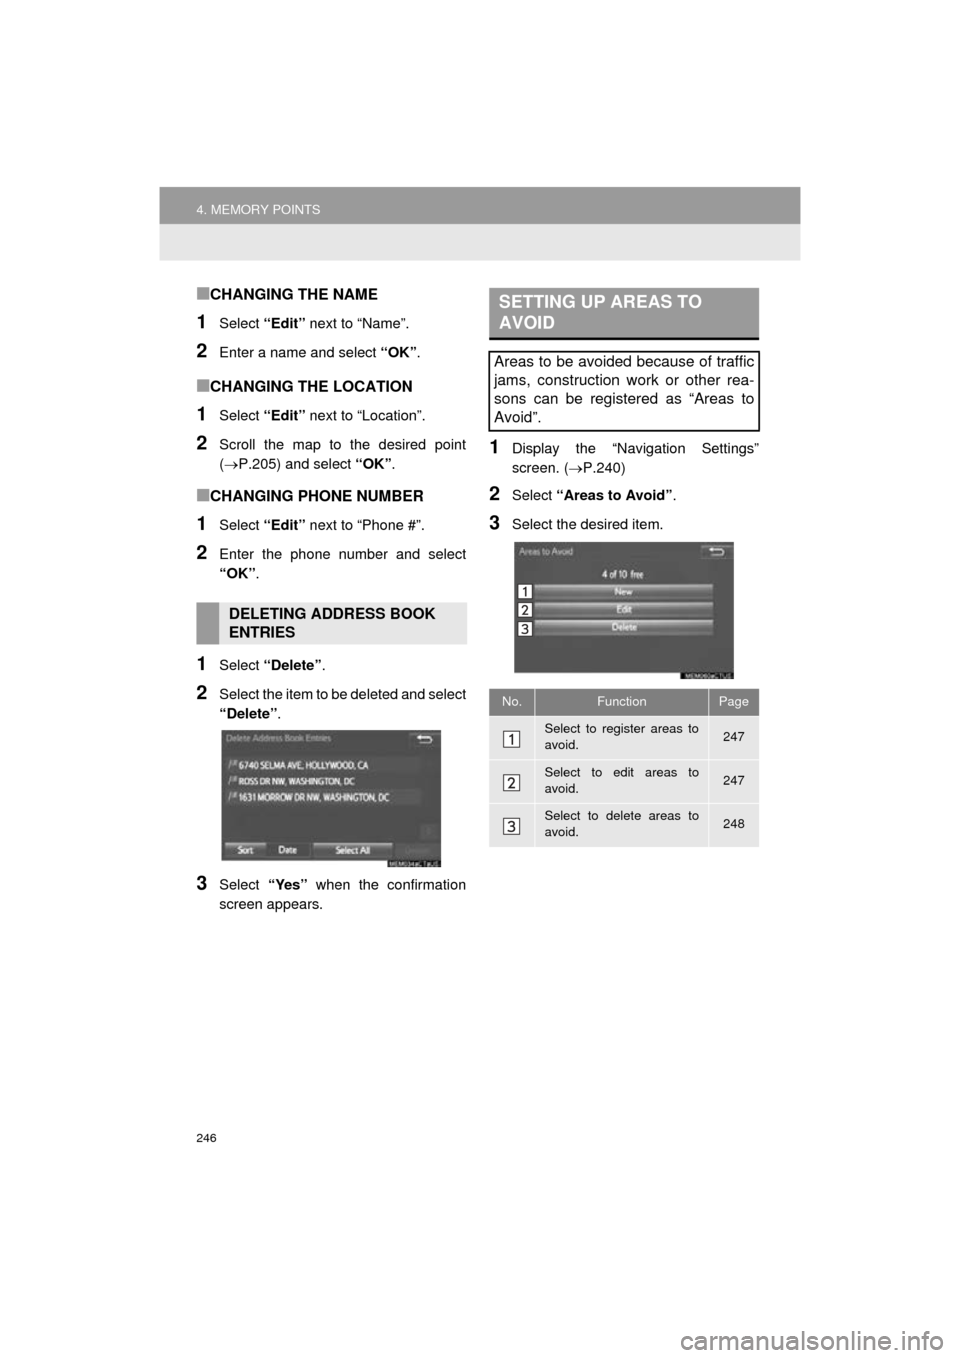
1Select “Delete” .
2Select the item to be deleted and select
“Delete”.
3Select “Yes” when the confirmation
screen appears.
1Display the “Navigation Settings”
screen. ( P.240)
2Select “Areas to Avoid” .
3Select the desired item.
DELETING ADDRESS BOOK
ENTRIES
SETTING UP AREAS TO
AVOID
Areas to be avoided because of traffic
jams, construction work or other rea-
sons can be registered as “Areas to
Avoid”.
No.FunctionPage
Select to register areas to
avoid.247
Select to edit areas to
avoid.247
Select to delete areas to
avoid.248
Page 247 of 294
247
4. MEMORY POINTS
COROLLA_14CY_Navi_U
NAVIGATION SYSTEM
8
1Select “New”.
2Select the desired item to search for
the location. ( P.213)
3Select either or to
change the size of the area to be avoid-
ed and select “OK”.
4Select “OK” when the editing area to
avoid screen appears.
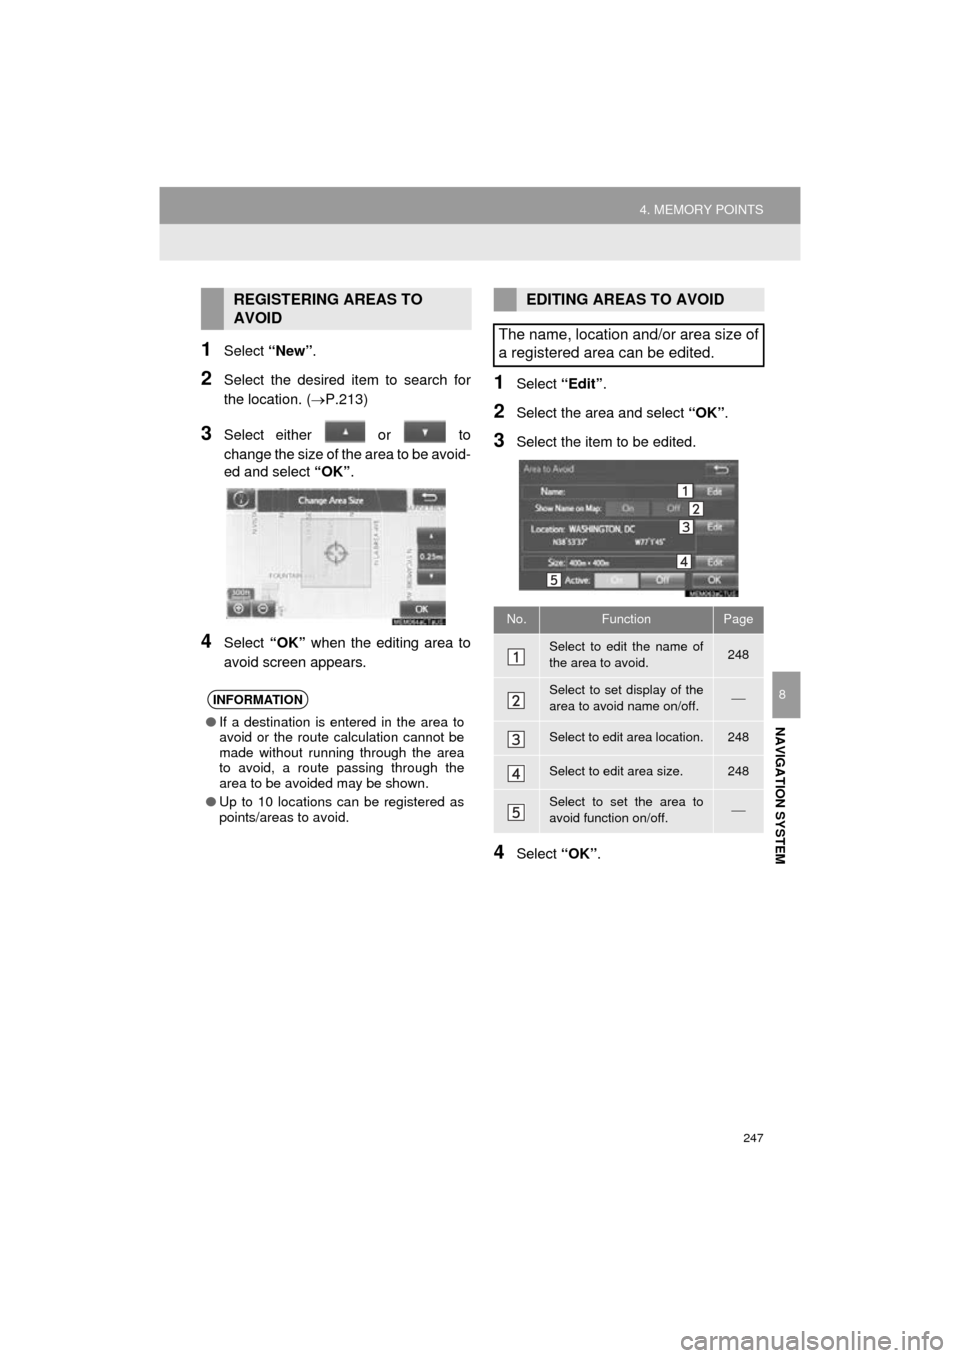
1Select “Edit”.
2Select the area and select “OK”.
3Select the item to be edited.
4Select “OK”.
REGISTERING AREAS TO
AVOID
INFORMATION
●If a destination is entered in the area to
avoid or the route calculation cannot be
made without running through the area
to avoid, a route passing through the
area to be avoided may be shown.
● Up to 10 locations can be registered as
points/areas to avoid.
EDITING AREAS TO AVOID
The name, location and/or area size of
a registered area can be edited.
No.FunctionPage
Select to edit the name of
the area to avoid.248
Select to set display of the
area to avoid name on/off.
Select to edit area location.248
Select to edit area size.248
Select to set the area to
avoid function on/off.
Page 248 of 294
248
4. MEMORY POINTS
COROLLA_14CY_Navi_U
■CHANGING THE NAME
1Select “Edit” next to “Name”.
2Enter a name and select “OK”.
■CHANGING THE LOCATION
1Select “Edit” next to “Location”.
2Scroll the map to the desired point
(P.205) and select “OK”.
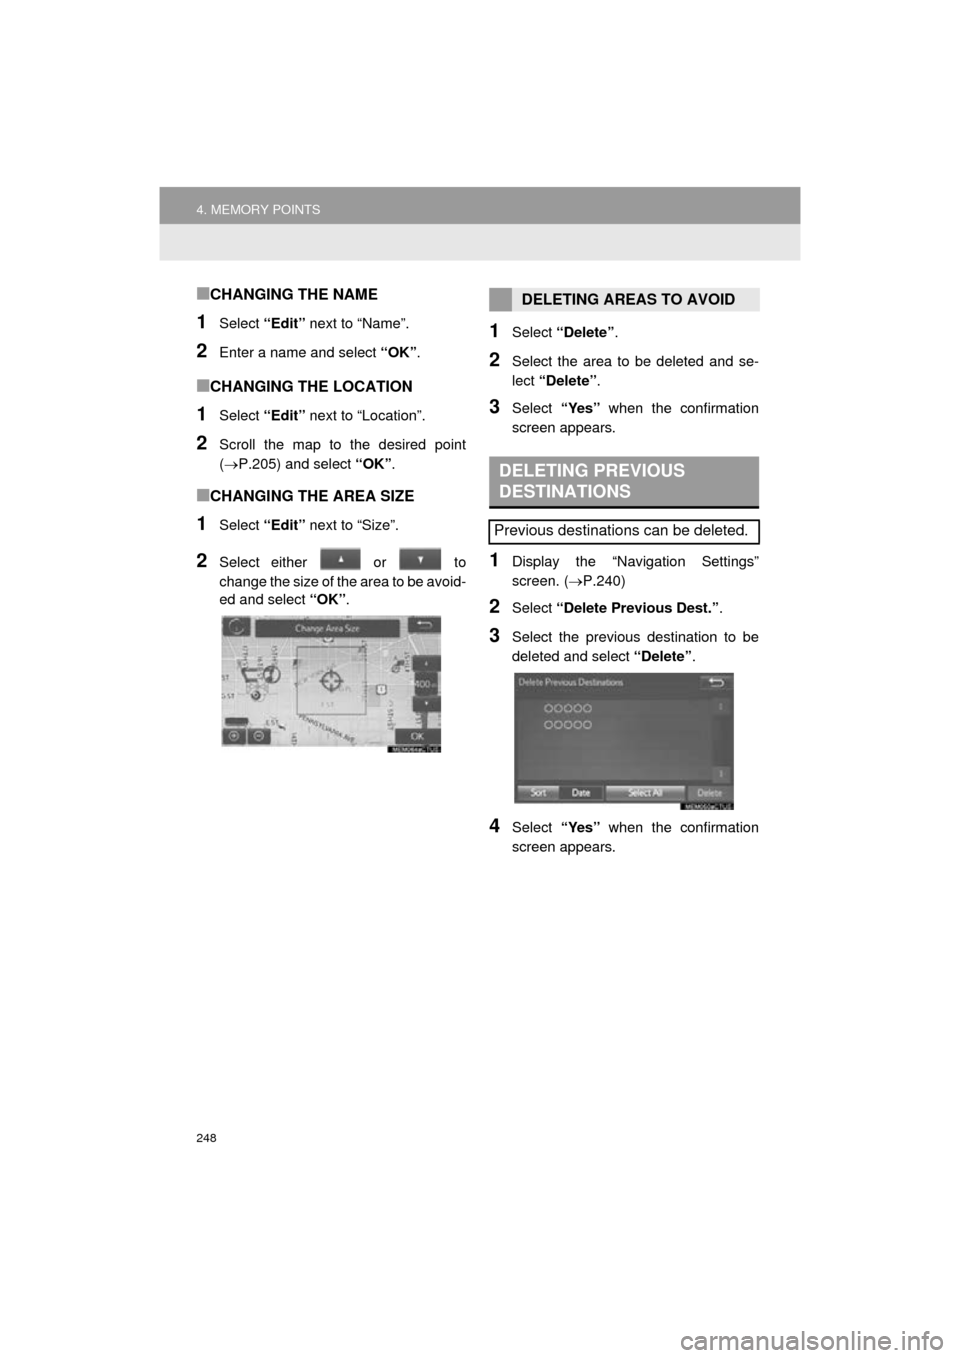
■CHANGING THE AREA SIZE
1Select “Edit” next to “Size”.
2Select either or to
change the size of the area to be avoid-
ed and select “OK”.
1Select “Delete” .
2Select the area to be deleted and se-
lect “Delete” .
3Select “Yes” when the confirmation
screen appears.
1Display the “Navigation Settings”
screen. ( P.240)
2Select “Delete Previous Dest.” .
3Select the previous destination to be
deleted and select “Delete”.
4Select “Yes” when the confirmation
screen appears.
DELETING AREAS TO AVOID
DELETING PREVIOUS
DESTINATIONS
Previous destinations can be deleted.
Page 250 of 294
250
5. SETUP
COROLLA_14CY_Navi_U
1Display the “Detailed Navi. Settings”
screen.
( P.249)
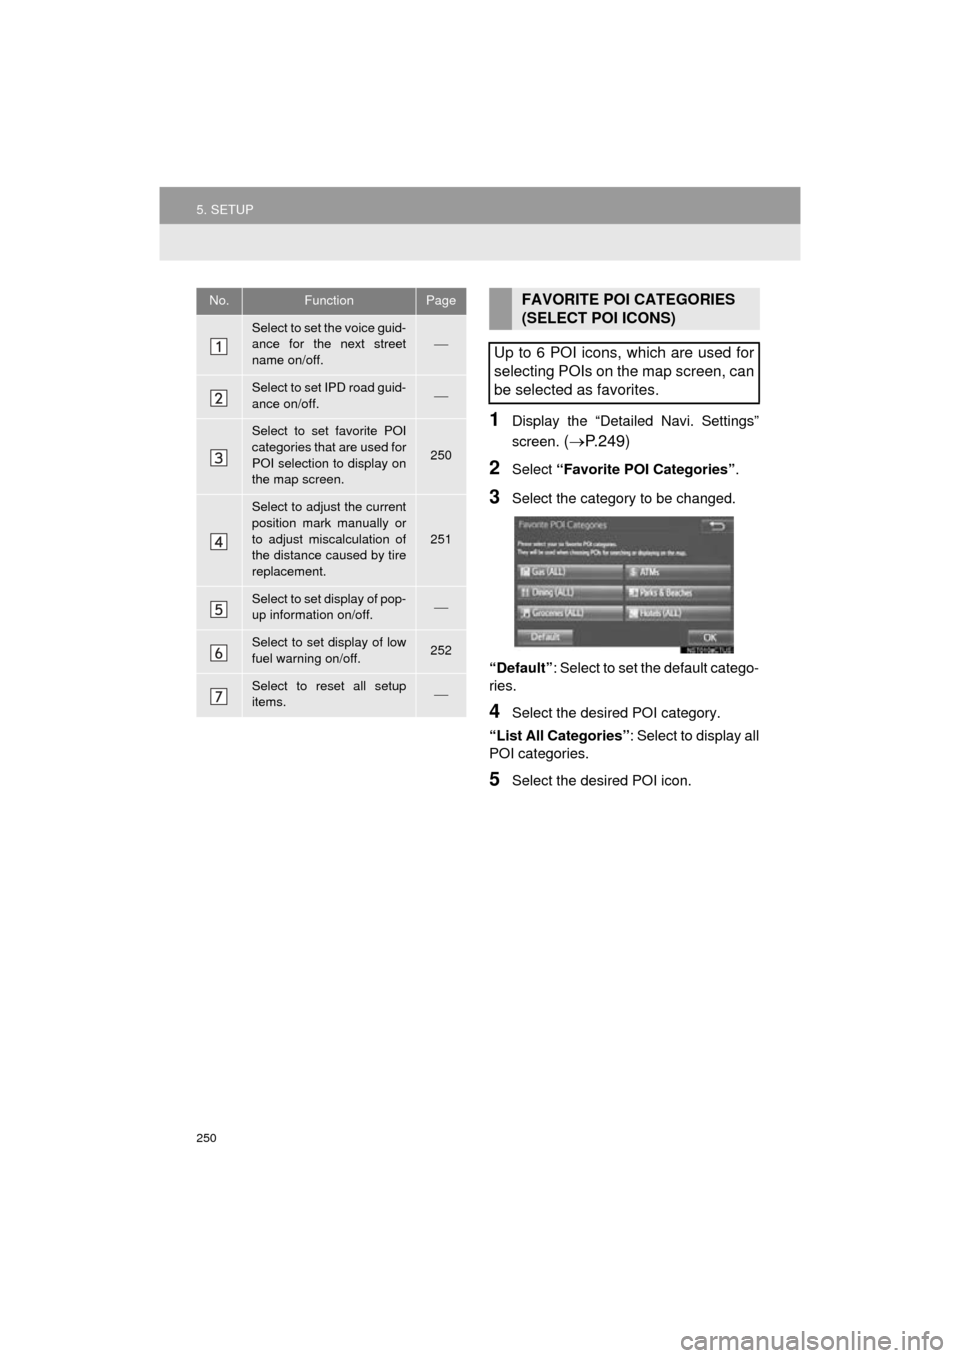
2Select “Favorite POI Categories” .
3Select the category to be changed.
“Default” : Select to set the default catego-
ries.
4Select the desired POI category.
“List All Categories”: Select to display all
POI categories.
5Select the desired POI icon.
No.FunctionPage
Select to set the voice guid-
ance for the next street
name on/off.
Select to set IPD road guid-
ance on/off.
Select to set favorite POI
categories that are used for
POI selection to display on
the map screen.
250
Select to adjust the current
position mark manually or
to adjust miscalculation of
the distance caused by tire
replacement.
251
Select to set display of pop-
up information on/off.
Select to set display of low
fuel warning on/off.252
Select to reset all setup
items.
FAVORITE POI CATEGORIES
(SELECT POI ICONS)
Up to 6 POI icons, which are used for
selecting POIs on the map screen, can
be selected as favorites.
Page 251 of 294
251
5. SETUP
COROLLA_14CY_Navi_U
NAVIGATION SYSTEM
8
1Display the “Detailed Navi. Settings”
screen.
( P.249)
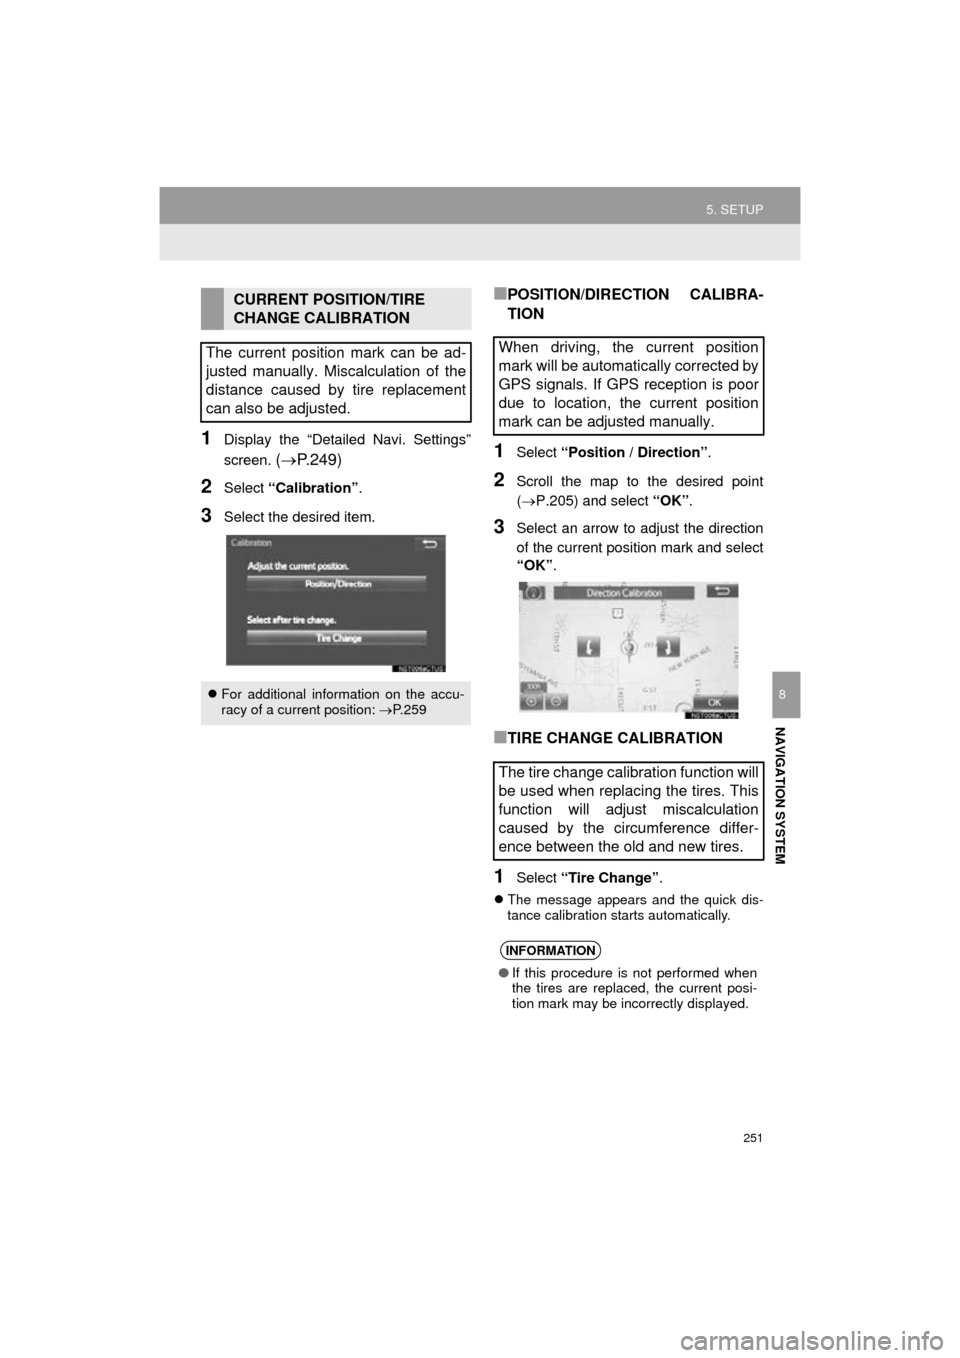
2Select “Calibration” .
3Select the desired item.
■POSITION/DIRECTION CALIBRA-
TION
1Select “Position / Direction” .
2Scroll the map to the desired point
(P.205) and select “OK”.
3Select an arrow to adjust the direction
of the current position mark and select
“OK” .
■TIRE CHANGE CALIBRATION
1Select “Tire Change” .
The message appears and the quick dis-
tance calibration starts automatically.
CURRENT POSITION/TIRE
CHANGE CALIBRATION
The current position mark can be ad-
justed manually. Miscalculation of the
distance caused by tire replacement
can also be adjusted.
For additional information on the accu-
racy of a current position: P. 2 5 9
When driving, the current position
mark will be automatically corrected by
GPS signals. If GPS reception is poor
due to location, the current position
mark can be adjusted manually.
The tire change calibration function will
be used when replacing the tires. This
function will adjust miscalculation
caused by the circumference differ-
ence between the old and new tires.
INFORMATION
● If this procedure is not performed when
the tires are replaced, the current posi-
tion mark may be incorrectly displayed.