remote control TOYOTA COROLLA 2019 (in English) Owner's Manual
[x] Cancel search | Manufacturer: TOYOTA, Model Year: 2019, Model line: COROLLA, Model: TOYOTA COROLLA 2019Pages: 608, PDF Size: 10.15 MB
Page 357 of 608
3575-10. Bluetooth®
5
Audio system
COROLLA_TMMMS_TMMC_U■
Compatible models
The Bluetooth
® audio system supports portable audio players with the follow-
ing specifications
● Bluetooth
® specifications:
Ver. 2.0, or higher (Recommended: Ver. 3.0+EDR or higher)
● Profiles:
• A2DP (Advanced Audio Distribution Profile) Ver. 1.0, or higher
(Recommended: Ver. 1.2 or higher)
This is a profile to transmit stereo audio or high quality soun d to Entune
Audio.
• AVRCP (Audio/Video Remote Control Profile) Ver. 1.0 or higher (Recommended: Ver. 1.4 or higher)
This is a profile to allow remote control the A/V equipment.
However, please note that some functions may be limited depending on the
type of portable audio player connected.
The hands-free system supports cellular phones with the followi ng specifica-
tions.
● Bluetooth
® specification:
Ver. 2.0 or higher (Recommended: Ver. 3.0+EDR or higher)
● Profiles:
• HFP (Hands Free Profile) Ver. 1.0 or higher (Recommended: Ver. 1.6 or
higher)
This is a profile to allow hands-free phone calls using a cellu lar phone or
head set. It has outgoing and incoming call functions.
• OPP (Object Push Profile) Ver . 1.1 or higher (Recommended: Ver . 1.2)
This is a profile to transfer contact data. When a Bluetooth
® compatible
cellular phone has both PBAP and OPP, OPP cannot be used.
• PBAP (Phone Book Access Profile) Ver. 1.0 or higher (Recommend ed:
Ve r. 1 . 1 )
This is a profile to transfer contact data.
• MAP (Message Access Profile) Ver.1.0 or higher This is a profile to using phone message.
If the cellular phone does not support HFP, you cannot register it with the
hands-free system. OPP, PBAP or MAP services must be selected i ndividu-
ally.
Page 396 of 608
3966-4. Other interior features
COROLLA_TMMMS_TMMC_U
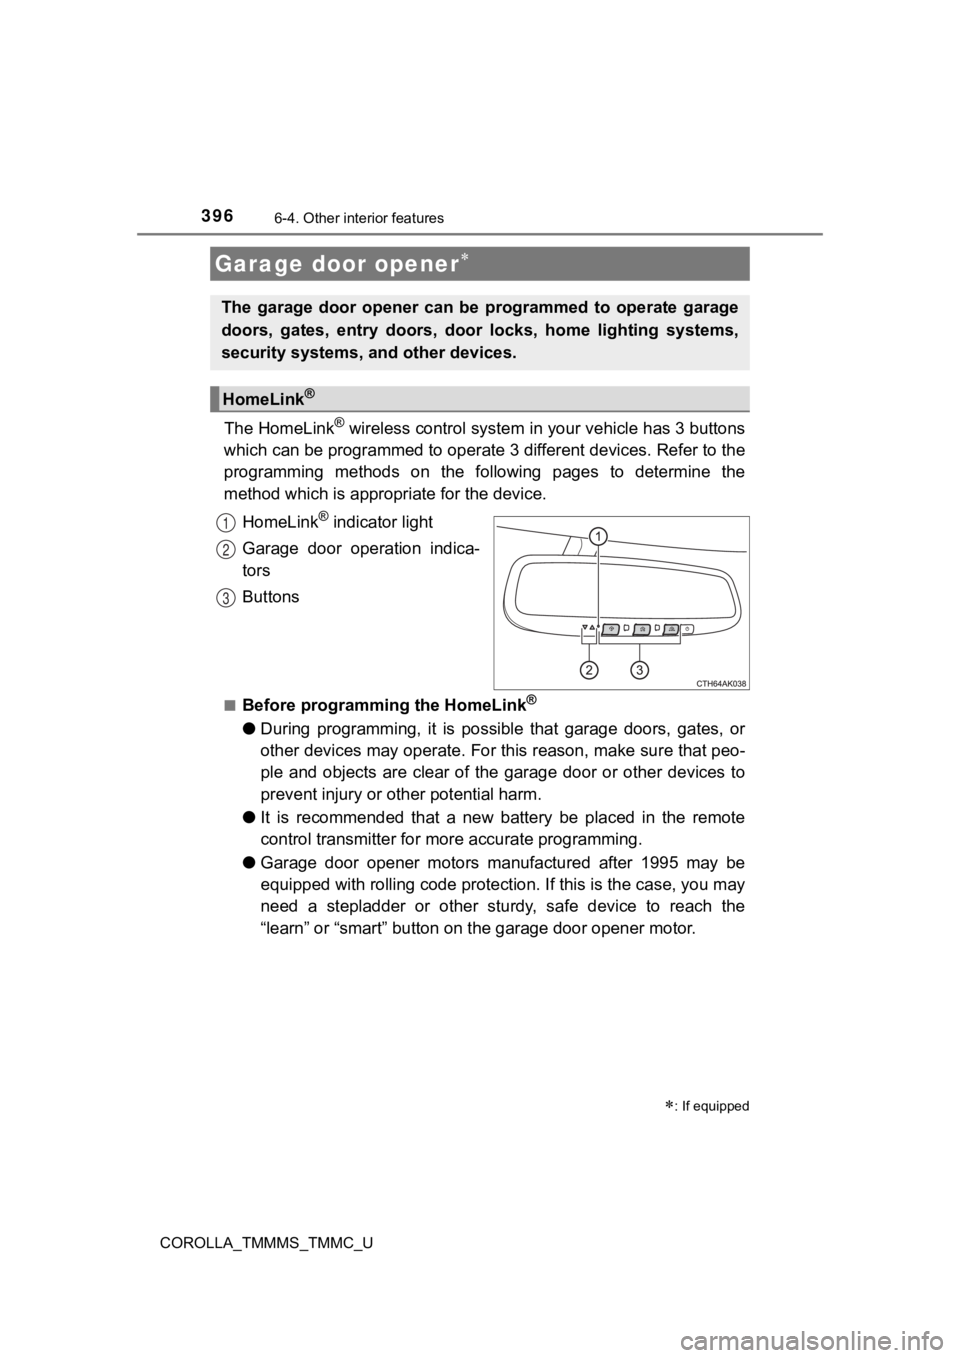
The HomeLink® wireless control system in your vehicle has 3 buttons
which can be programmed to operate 3 different devices. Refer to the
programming methods on the following pages to determine the
method which is approp riate for the device.
HomeLink
® indicator light
Garage door operation indica-
tors
Buttons
■Before programming the HomeLink®
● During programming, it is possible that garage doors, gates, or
other devices may operate. For this reason, make sure that peo-
ple and objects are clear of the garage door or other devices t o
prevent injury or other potential harm.
● It is recommended that a new battery be placed in the remote
control transmitter for mo re accurate programming.
● Garage door opener motors manufactured after 1995 may be
equipped with rolling code pro tection. If this is the case, you may
need a stepladder or other sturdy, safe device to reach the
“learn” or “smart” button on the garage door opener motor.
Garage door opener
: If equipped
The garage door opener can be programmed to operate garage
doors, gates, entry doors, door locks, home lighting systems,
security systems, and other devices.
HomeLink®
1
2
3
Page 397 of 608
3976-4. Other interior features
6
Interior features
COROLLA_TMMMS_TMMC_U■
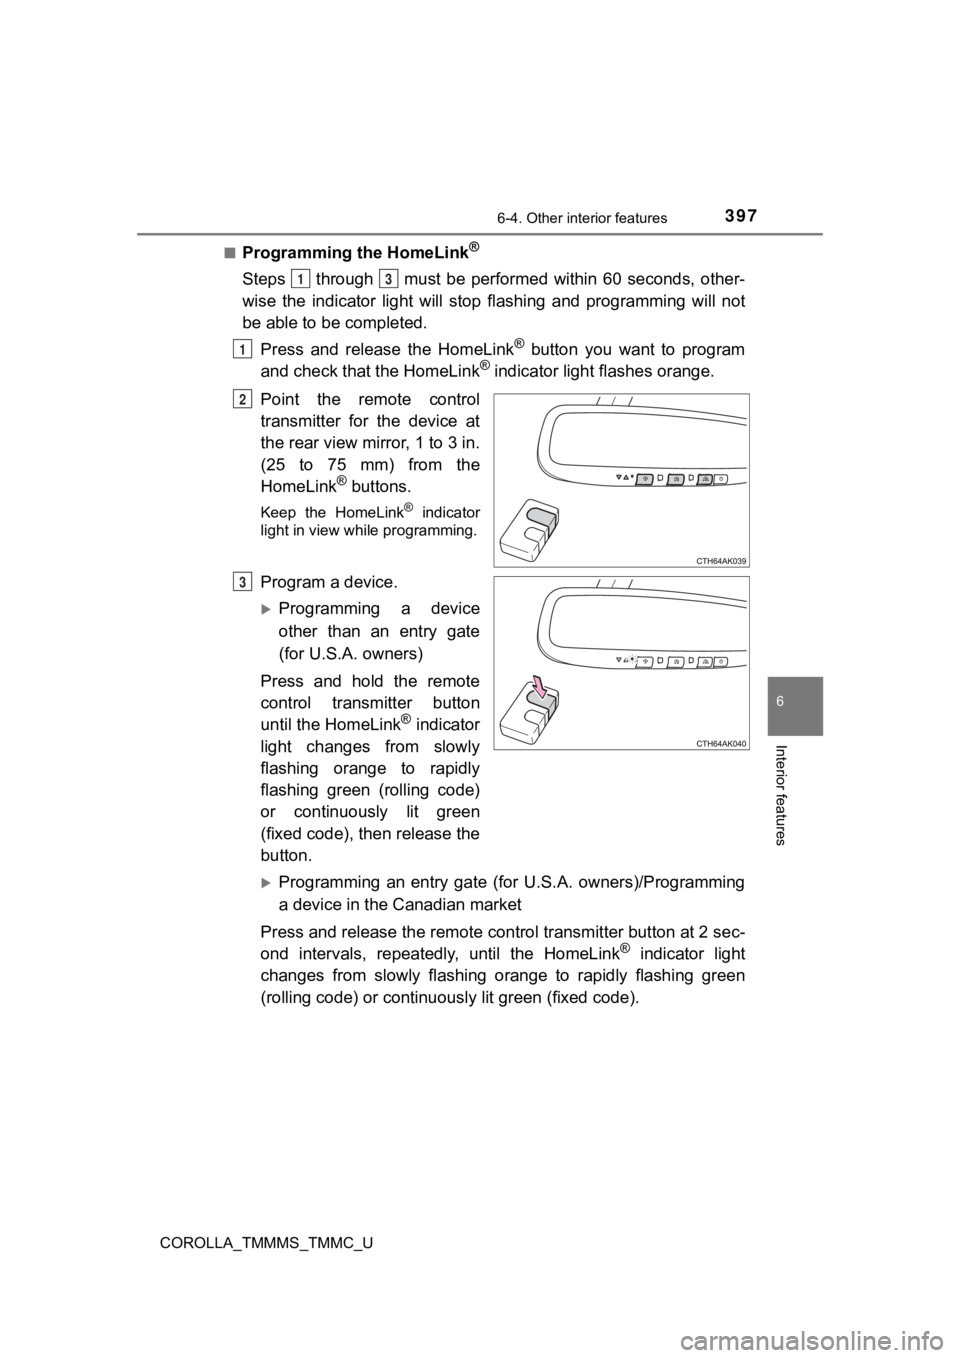
Programming the HomeLink®
Steps through must be performed within 60 seconds, other-
wise the indicator light will st
op flashing and programming wil l not
be able to be completed.
Press and release the HomeLink
® button you want to program
and check that the HomeLink® indicator light flashes orange.
Point the remote control
transmitter for the device at
the rear view mirror, 1 to 3 in.
(25 to 75 mm) from the
HomeLink
® buttons.
Keep the HomeLink® indicator
light in view while programming.
Program a device.
Programming a device
other than an entry gate
(for U.S.A. owners)
Press and hold the remote
control transmitter button
until the HomeLink
® indicator
light changes from slowly
flashing orange to rapidly
flashing green (rolling code)
or continuously lit green
(fixed code), then release the
button.
Programming an entry gate (for U.S.A. owners)/Programming
a device in the Canadian market
Press and release the remote con trol transmitter button at 2 sec-
ond intervals, repeatedly, until the HomeLink
® indicator light
changes from slowly flashing orange to rapidly flashing green
(rolling code) or continuous ly lit green (fixed code).
13
1
2
3
Page 402 of 608
4026-4. Other interior features
COROLLA_TMMMS_TMMC_U■
When support is necessary
Visit on the web at www.homelink.com/toyota or call 1-800-355-3 515.
WARNING
■When programming a garage door or other remote control device
The garage door or other device may operate, so ensure people a nd
objects are out of danger to prevent potential harm.
■ Conforming to federal safety standards
Do not use the HomeLink
® compatible transceiver with any garage door
opener or device that lacks safety stop and reverse features as required by
federal safety standards. This includes any garage door that ca nnot detect
an interfering object. A door or device without these features increases the
risk of death or serious injury.
■ When operating or programming HomeLink
®
Never allow a child to operate or play with the HomeLink® buttons.
Page 407 of 608
407
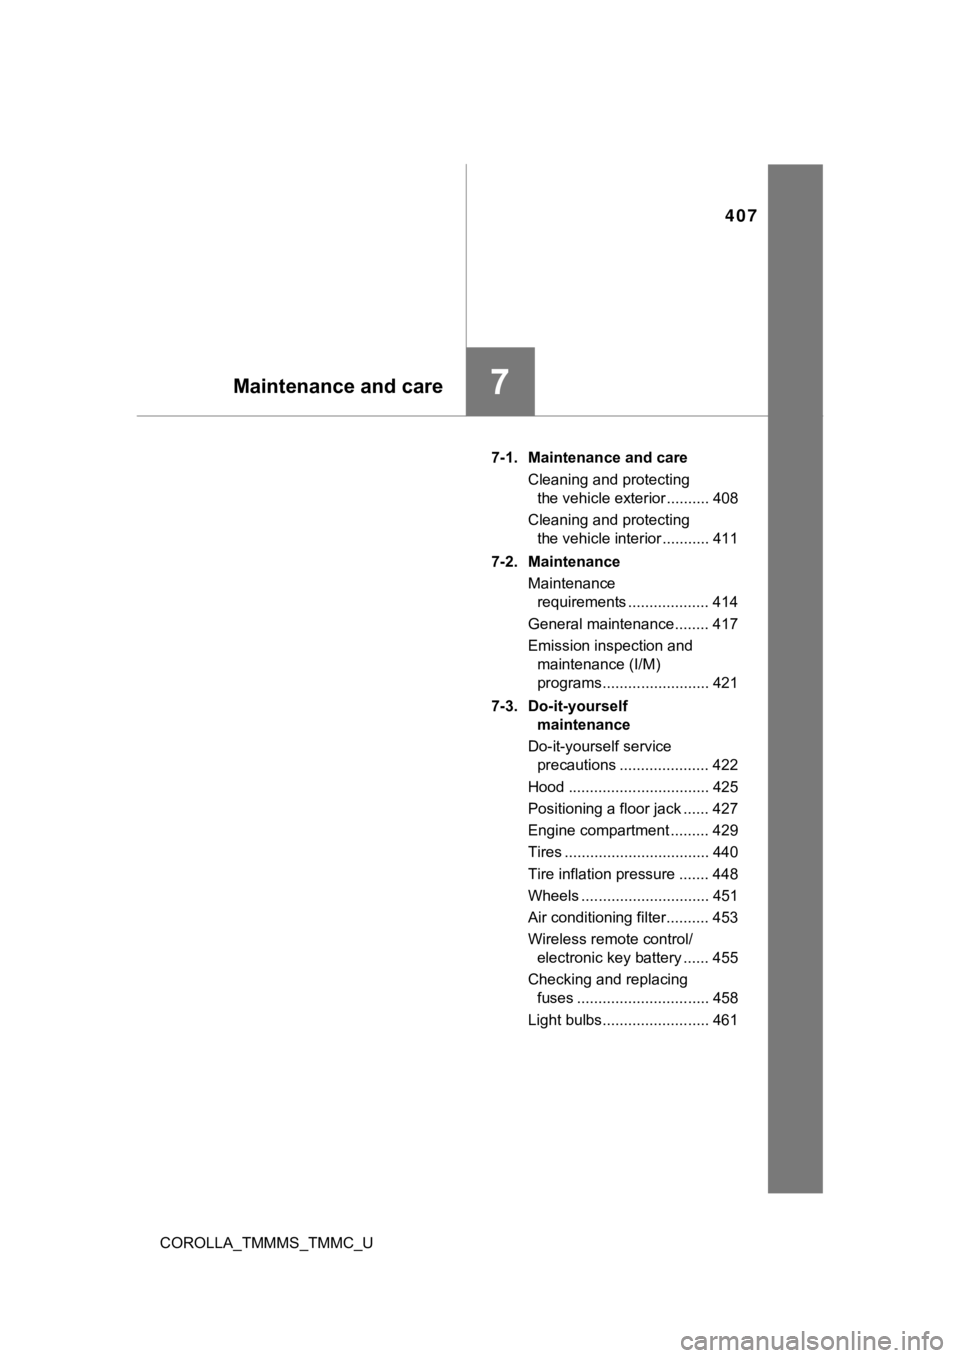
7Maintenance and care
COROLLA_TMMMS_TMMC_U7-1. Maintenance and care
Cleaning and protecting the vehicle exterior .......... 408
Cleaning and protecting the vehicle interior ........... 411
7-2. Maintenance Maintenance requirements ................... 414
General maintenance........ 417
Emission inspection and maintenance (I/M)
programs......................... 421
7-3. Do-it-yourself maintenance
Do-it-yourself service precautions ..................... 422
Hood ................................. 425
Positioning a floor jack ...... 427
Engine compartment ......... 429
Tires .................................. 440
Tire inflation pressure ....... 448
Wheels .............................. 451
Air conditioning filter.......... 453
Wireless remote control/ electronic key battery ...... 455
Checking and replacing fuses ............................... 458
Light bulbs......................... 461
Page 437 of 608
4377-3. Do-it-yourself maintenance
7
Maintenance and care
COROLLA_TMMMS_TMMC_U
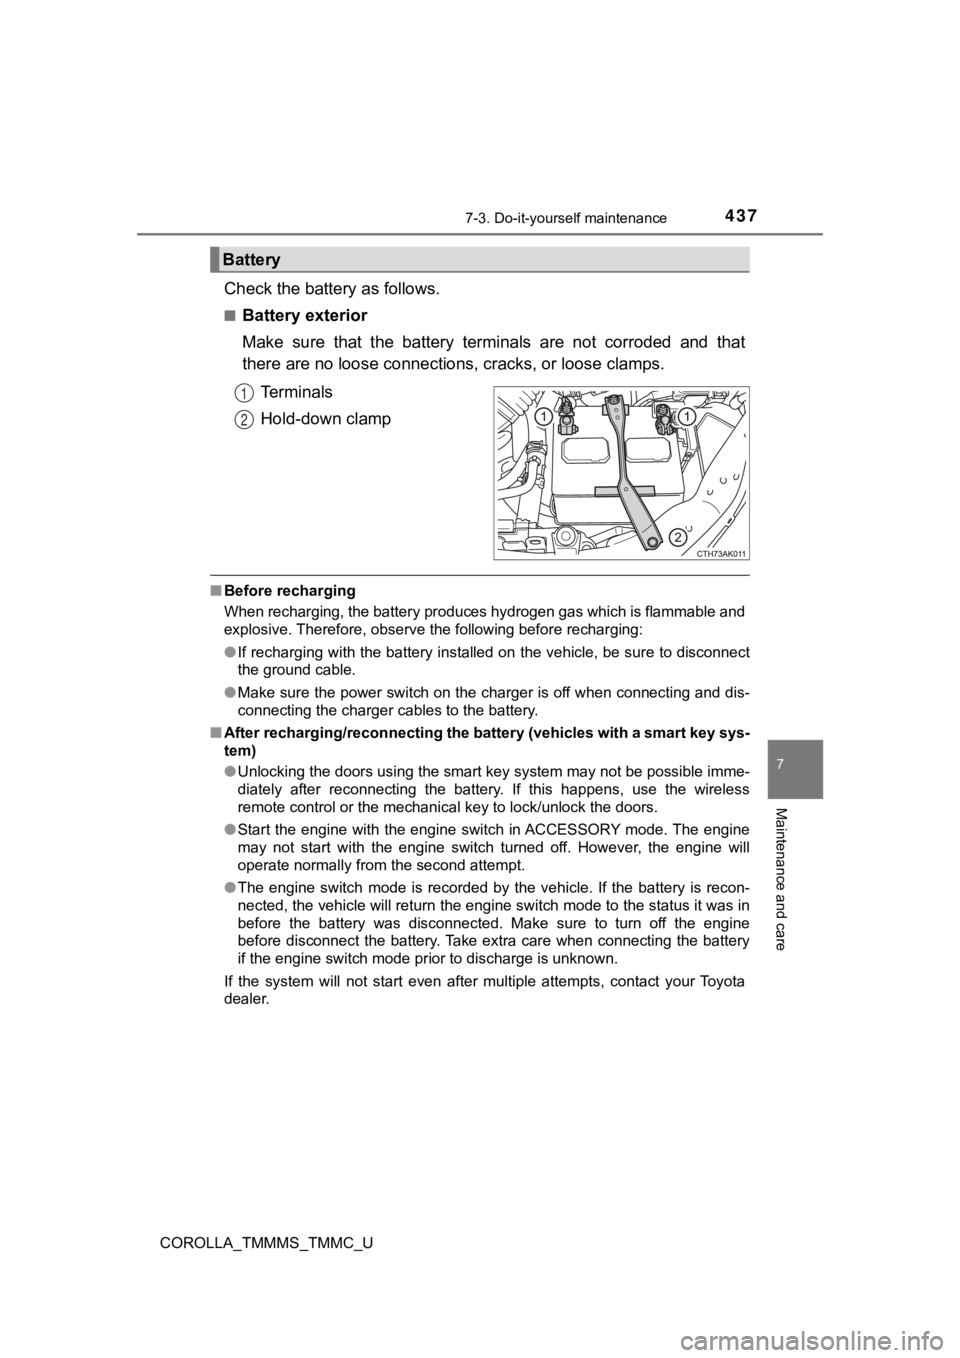
Check the battery as follows.
■Battery exterior
Make sure that the battery terminals are not corroded and that
there are no loose connections, cracks, or loose clamps.
Terminals
Hold-down clamp
■ Before recharging
When recharging, the battery produces hydrogen gas which is flammable and
explosive. Therefore, observe the following before recharging:
●If recharging with the battery installed on the vehicle, be sur e to disconnect
the ground cable.
● Make sure the power switch on the charger is off when connectin g and dis-
connecting the charger cables to the battery.
■ After recharging/reconnecting the battery (vehicles with a smar t key sys-
tem)
● Unlocking the doors using the smart key system may not be possi ble imme-
diately after reconnecting the battery. If this happens, use the wireless
remote control or the mechanical key to lock/unlock the doors.
● Start the engine with the engine switch in ACCESSORY mode. The engine
may not start with the engine switch turned off. However, the e ngine will
operate normally from the second attempt.
● The engine switch mode is recorded by the vehicle. If the batte ry is recon-
nected, the vehicle will return the engine switch mode to the s tatus it was in
before the battery was disconnected. Make sure to turn off the engine
before disconnect the battery. Take extra care when connecting the battery
if the engine switch mode prior to discharge is unknown.
If the system will not start even after multiple attempts, contact your Toyota
dealer.
Battery
1
2
Page 455 of 608
4557-3. Do-it-yourself maintenance
7
Maintenance and care
COROLLA_TMMMS_TMMC_U
●Flathead screwdriver
● Small flathead screwdriver
● Lithium battery CR2016 (vehicles without a smart key system), o r
CR2032 (vehicles with a smart key system)
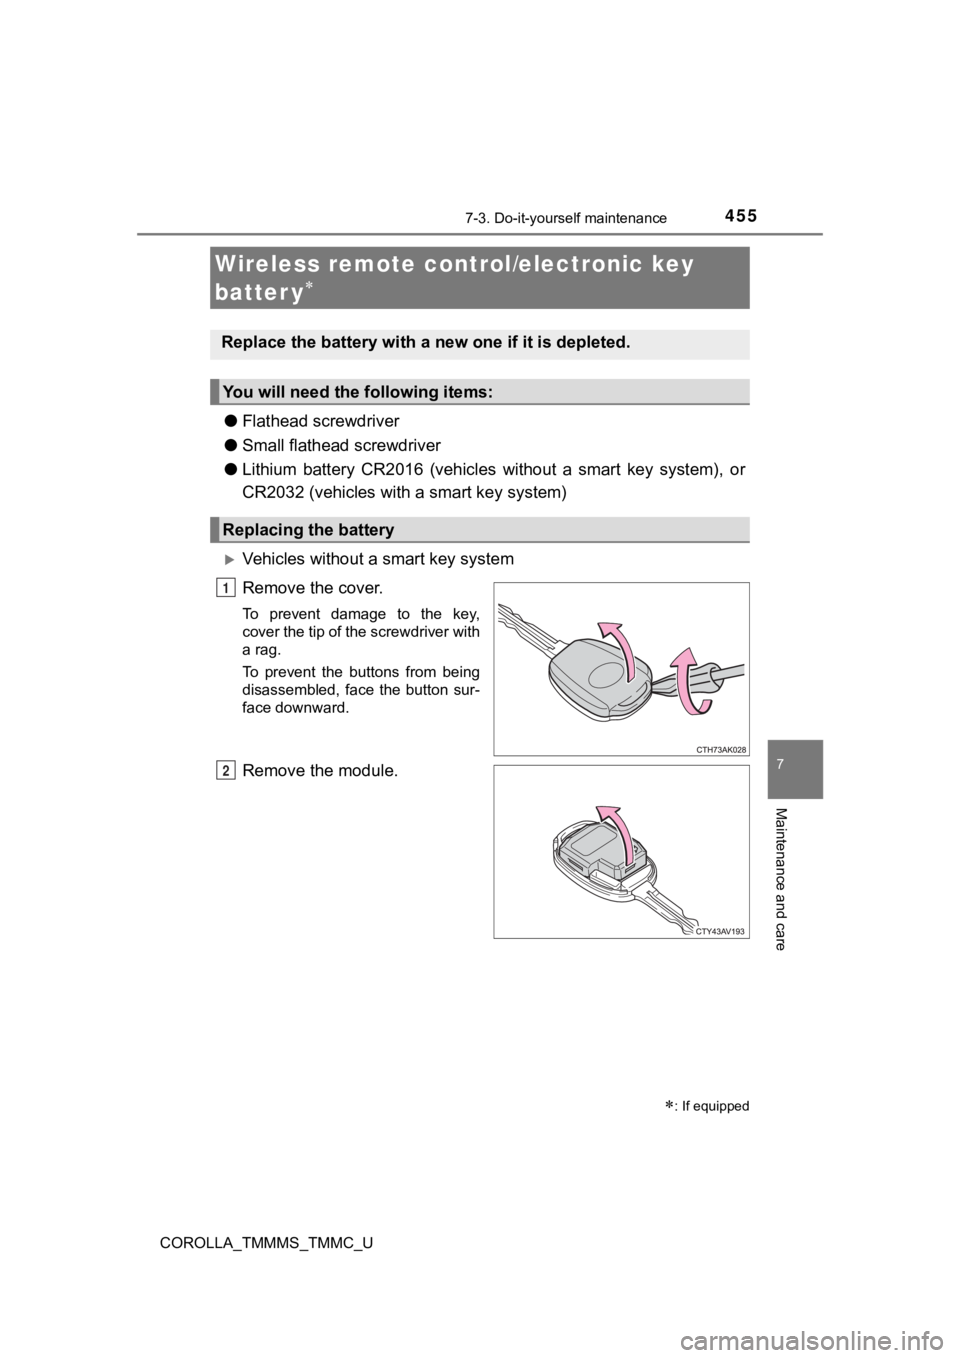
Vehicles without a smart key system
Remove the cover.
To prevent damage to the key,
cover the tip of the screwdriver with
a rag.
To prevent the buttons from being
disassembled, face the button sur-
face downward.
Remove the module.
Wireless remote control/electronic key
batter y
: If equipped
Replace the battery with a n ew one if it is depleted.
You will need the following items:
Replacing the battery
1
2
Page 457 of 608
4577-3. Do-it-yourself maintenance
7
Maintenance and care
COROLLA_TMMMS_TMMC_U
■Use a CR2016 (vehicles without a smart key system) or CR2032 (v ehicles
with a smart key system) lithium battery
● Batteries can be purchased at your Toyota dealer, local electri cal appliance
shops or camera stores.
● Replace only with the same or equivalent type recommended by the manu-
facturer.
● Dispose of used batteries according to local laws.
■ If the key battery is depleted
The following symptoms may occur:
●The smart key system (if equipped) and wireless remote control will not
function properly.
● The operational range will be reduced.
WARNING
■Removed battery a nd other parts
These parts are small and if swallowed by a child, they can cau se choking.
Keep away from children. Failure to do so could result in death or serious
injury.
NOTICE
■ For normal operation after replacing the battery
Observe the following precautions to prevent accidents:
● Always work with dry hands.
Moisture may cause the battery to rust.
● Do not touch or move any other component inside the remote cont rol.
● Do not bend either of the battery terminals.
Page 523 of 608
5238-2. Steps to take in an emergency
8
When trouble arises
COROLLA_TMMMS_TMMC_U
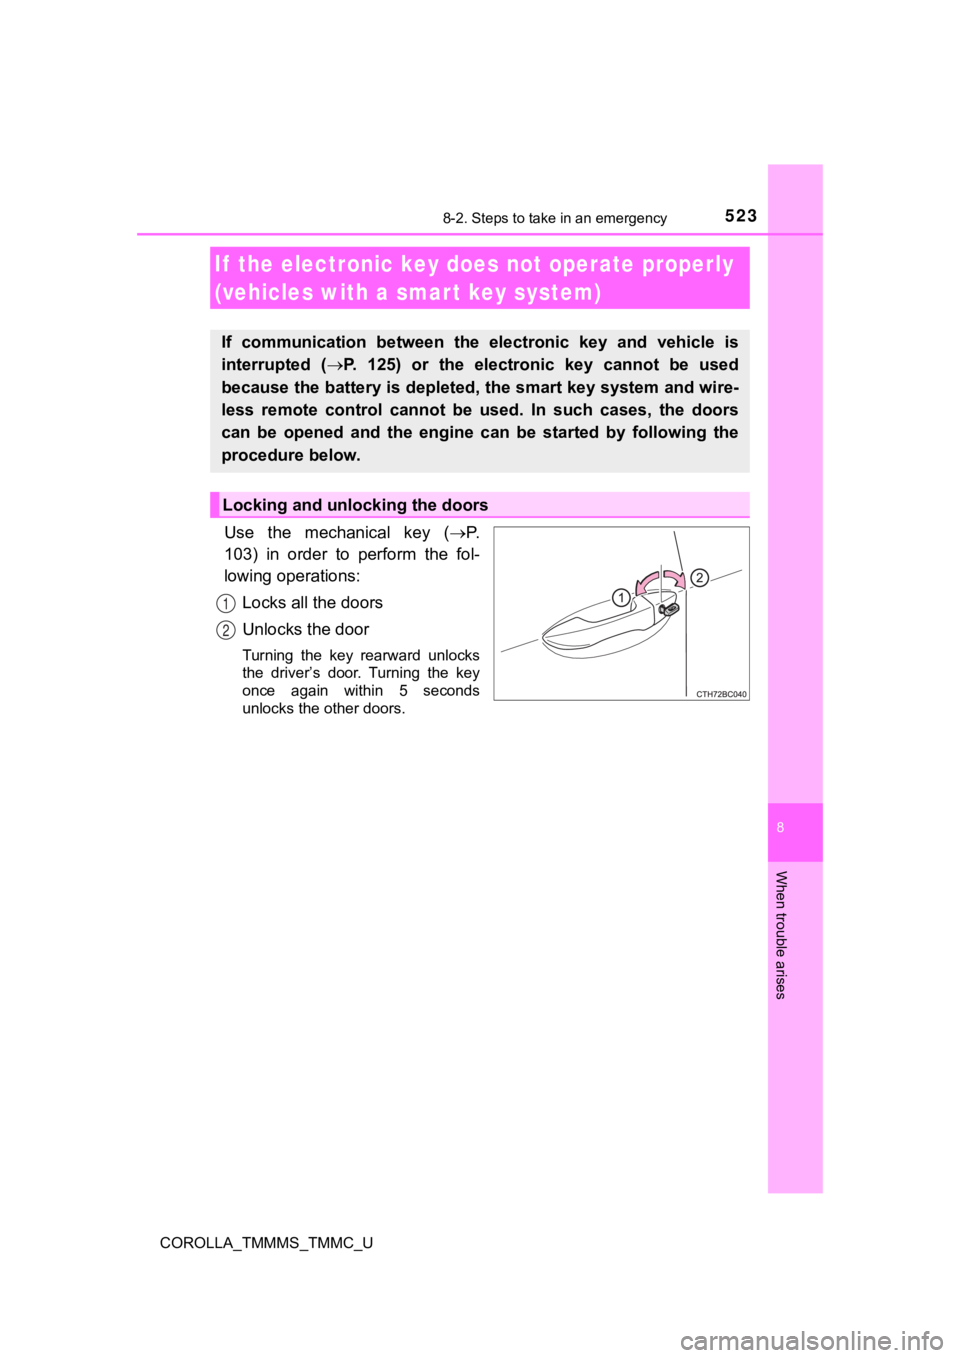
Use the mechanical key (P.
103) in order to perform the fol-
lowing operations:
Locks all the doors
Unlocks the door
Turning the key rearward unlocks
the driver’s door. Turning the key
once again within 5 seconds
unlocks the other doors.
If the electronic key does not operate properly
(vehicles with a smar t key system)
If communication between the electronic key and vehicle is
interrupted ( P. 125) or the electronic key cannot be used
because the battery is depleted, the smart key system and wire-
less remote control cannot be used. In such cases, the doors
can be opened and the engine c an be started by following the
procedure below.
Locking and unlocking the doors
1
2
Page 529 of 608
5298-2. Steps to take in an emergency
8
When trouble arises
COROLLA_TMMMS_TMMC_U
■Starting the engine when t he battery is discharged
The engine cannot be started by push-starting.
■ To prevent battery discharge
●Turn off the headlights and the audio system while the engine is off.
● Turn off any unnecessary electrical components when the vehicle is running
at a low speed for an extended period, such as in heavy traffic .
■ Charging the battery
The electricity stored in the battery will discharge gradually even when the
vehicle is not in use, due to natural discharge and the draining effects of cer-
tain electrical appliances. If the vehicle is left for a long t ime, the battery may
discharge, and the engine may be unable to start. (The battery recharges
automatically during driving.)
■ When recharging or replacing the battery
●Vehicles with a smart key system: In some cases, it may not be possible to
unlock the doors using the smart key system when the battery is dis-
charged. Use the wireless remote control or the mechanical key to lock or
unlock the doors.
● The engine may not start on the first attempt after the battery has recharged
but will start normally after the second attempt. This is not a malfunction.
● Vehicles with a smart key system: The engine switch mode is memorized by
the vehicle. When the battery is reconnected, the system will r eturn to the
mode it was in before the battery was discharged. Before disconnecting the
battery, turn the engine switch off.
If you are unsure what mode the engine switch was in before the battery dis-
charged, be especially careful when reconnecting the battery.