bluetooth TOYOTA COROLLA 2022 (in English) User Guide
[x] Cancel search | Manufacturer: TOYOTA, Model Year: 2022, Model line: COROLLA, Model: TOYOTA COROLLA 2022Pages: 678, PDF Size: 147.24 MB
Page 357 of 678
355
5
5-6. Using Bluetooth® devices
Audio system
when no phones have been regis-
tered, the registration screen will be
automatically displayed.
Page 358 of 678
3565-7. “SETUP” menu
5-7.“SETUP” menu
Select “Pairing” using the
“TUNE•SELECT” knob, and per-
form the procedure for registering a
device. ( P.354)
Select “List phone” using the
“TUNE•SELECT” knob. The list of
registered cellular phones will be
displayed.
Connecting the registered cellu-
lar phone to the audio system
1 Select the name of the cellular
phone to be connected using
the “TUNE•SELECT” knob.
2 Select “Select” using the knob.
Deleting a registered cellular
phone
1 Select the name of the cellular
phone to be deleted using the
“TUNE•SELECT” knob.
2 Select “Delete” using the knob.
3 Press (Yes).
Disconnecting the registered cel-
lular phone from the audio sys-
tem
1 Select the name of the cellular
phone to be disconnected using
the “TUNE•SELECT” knob.
2 Select “Disconnect” using the
knob.
3 Press (Yes).
Select “List audio” using the
“TUNE•SELECT” k nob. The list of
registered portable players will be
displayed.
Connecting the registered porta-
ble player to the audio system
1 Select the name of the portable
player to be connected using the
“TUNE•SELECT” knob.
2 Select “Select” using the knob.
Deleting the registered portable
player
1 Select the name of the portable
player to be deleted using the
“TUNE•SELECT” knob.
Using the “SETUP” menu
(“Bluetooth” menu)
Registering a Bluetooth®
device in the system allows the
system to function. The follow-
ing functions can be used for
registered devices. To enter
the setup menu, press the
“TUNE•SELECT” knob and
select “Bluetooth” using the
knob.
Registering a Bluetooth®
device
Listing the registered cellu-
lar phones
Listing the registered porta-
ble players
Page 359 of 678
357
5
5-7. “SETUP” menu
Audio system
2 Select “Delete” using the knob.
3 Press (Yes).
Disconnecting the registered
portable player from the audio
system
1 Select the name of the portable
player to be disconnected using
the “TUNE•SELECT” knob.
2 Select “Disconnect” using the
knob.
3 Press (Yes).
Selecting the connection method
1 Select the name of the desired
portable player using the
“TUNE•SELECT” knob.
2 Select “Connection method”
using the knob.
3 Select “From vehicle” or “From
audio” using the knob.
1 Select “Passkey” using the
“TUNE•SELECT” knob.
2 Select a 4 to 8-digit passkey
using the knob.
Input the number 1 digit at a time.
3 When the entire number to be
registered as a passkey has
been input, press (Enter).
If the passkey to be registered has 8
digits, pressing (Enter) is not neces-
sary.
If “BT power Off” is set to on, the
registered device will be connected
automatically when the engine
switch is turned to ACC.
Select “BT power On” or “BT power
Off” using the “TUNE•SELECT”
knob.
Select “Bluetooth info” using the
“TUNE•SELECT” knob.
Displaying the device name
Select “Device name” using the
“TUNE•SELECT” knob.
Displaying the device address
Select “Device address” using the
“TUNE•SELECT” knob.
If the “Display setting” is set to on,
the portable player connection sta-
tus will be displayed when the
engine switch is turned to ACC.
Select “Display setting On” or “Dis-
play setting Off” using the
“TUNE•SELECT” knob.
Select “Reset” using the
“TUNE•SELECT” knob.
Changing the passkey
Setting automatic connec-
tion of the device on or off
Displaying the device status
Setting the automatic con-
nection confirmation display
to on or off
Initialization
Page 360 of 678
3585-7. “SETUP” menu
Initializing the “HF sound set-
tings”
Select “Sound setting” using the
“TUNE•SELECT” knob and press
(Yes).
For details about “HF sound set-
tings”: P. 3 6 1
Initializing the device information
Select “Car device info” using the
“TUNE•SELECT” knob and press
(Yes).
Automatic connection of a portable
device, automatic connection con-
firmation display and the passkey
will be initialized.
Initializing the all settings
Select “Reset All” using the
“TUNE•SELECT” knob and press
(Yes).
The automatic transfer function is
available for PBAP compatible
Bluetooth® phones only.
1 Select “Phonebook” using the
“TUNE•SELECT” knob.
2 Select “Auto transfer On” or
“Auto transfer Off” using the
knob.
When set to on, the phone’s contact data and history are automatically
transferred.
1 Select “Phonebook” using the
“TUNE•SELECT” knob.
2 Select “Add contacts” using the
knob.
Transferring all contacts from the
cellular phone
3 Select “Overwrite all” using the
“TUNE•SELECT” knob and
press (Yes).
Using the “SETUP” menu
(“TEL” menu)
To enter the setup menu, press
the “TUNE•SELECT” knob and
select “TEL” using the knob.
Setting automatic con-
tact/history transfer
Adding a new phone num-
ber
Page 361 of 678
359
5
5-7. “SETUP” menu
Audio system
Transferring one contact from
the cellular phone
3 Select “Add one contact” using
the “TUNE•SELECT” knob and
press (Yes).
1 Select “Phonebook” using the
“TUNE•SELECT” knob.
2 Select “Delete contacts” using
the knob.
3 Select the desired phone num-
ber using the knob and press
(Yes).
To delete all the registered phone
numbers, press (All) and then
press (Yes).
Press (A-Z) to display the regis-
tered names in alphabetical order
of the initial.
1 Select “Phonebook” using the
“TUNE•SELECT” knob.
2 Select “Sort contacts” using the
knob.
3 Select “Sort by first” or “Sort by
last” using the knob.
This function is available for PBAP
compatible Bluetooth® phones only.
1 Select “Phonebook” using the
“TUNE•SELECT” knob.
2 Select “Transfer history” using
the knob and press (Yes).
1 Select “Phonebook” using the
“TUNE•SELECT” knob.
2 Select “Delete call history” using
the knob.
Deleting outgoing call history
3 Select “Outgoing calls” using the
“TUNE•SELECT” knob.
4 Select the desired phone num-
ber using the knob and press
(Yes).
To delete all outgoing call history data,
press (All) and then press (Yes).
Deleting incomi ng call history
3 Select “Incoming calls” using the
“TUNE•SELECT” knob.
4 Select the desired phone num-
ber using the knob and press
(Yes).
To delete all incoming call history data,
press (All) and then press (Yes).
Deleting missed call history
3 Select “Missed calls” using the
“TUNE•SELECT” knob.
4 Select the desired phone num-
ber using the knob and press
(Yes).
Deleting a registered phone
number
Changing the sorting order
of the contacts
Transferring call histories
Deleting call histories
Page 363 of 678
361
5
5-7. “SETUP” menu
Audio system
2 Select “Favourites” using the
“TUNE•SELECT” knob.
3 Select a desired number using
the knob.
4 Press (Delete favourites).
5 Select desired contact using the
knob.
Press (All) to delete all favorites.
6 Select (Yes) when the confir-
mation screen appears.
1 Select “HF sound setting” using
the “TUNE•SELECT” knob.
2 Select “Call volume” using the
knob.
3 Change the call volume.
To decrease the volume: Turn the knob
counterclockwise.
To increase the volume: Turn the knob clockwise.
To set the volume, press (Back).
1 Select “HF sound setting” using
the “TUNE•SELECT” knob.
2 Select “Ringtone volume” using
the knob.
3 Change the ring tone volume.
To decrease the volume: Turn the knob counterclockwise.
To increase the volume: Turn the knob
clockwise.
To set the volume, press (Back).
1 Select “HF sound setting” using
the “TUNE•SELECT” knob.
2 Select “Ringtone” using the
knob.
3 Using the knob, select a ring
tone (1 - 3 or “From phone”). To
set the selected ring tone, press
(Back).
■Phone number
Up to 5000 names (maximum of 1000
names per device) can be stored.
■Call history
Up to 10 numbers can be stored in each
of the outgoing, incoming and missed
call history memories.
■Limitation of number of digits
A phone number that exceeds 24 digits
cannot be registered.
■Bluetooth® phone system func-
tions
Certain functions may not be available
during driving.
Setting call volume
Setting ring tone volume
Setting ring tone
Page 364 of 678
3625-8. Bluetooth® Audio
5-8.Bluetooth® Audio
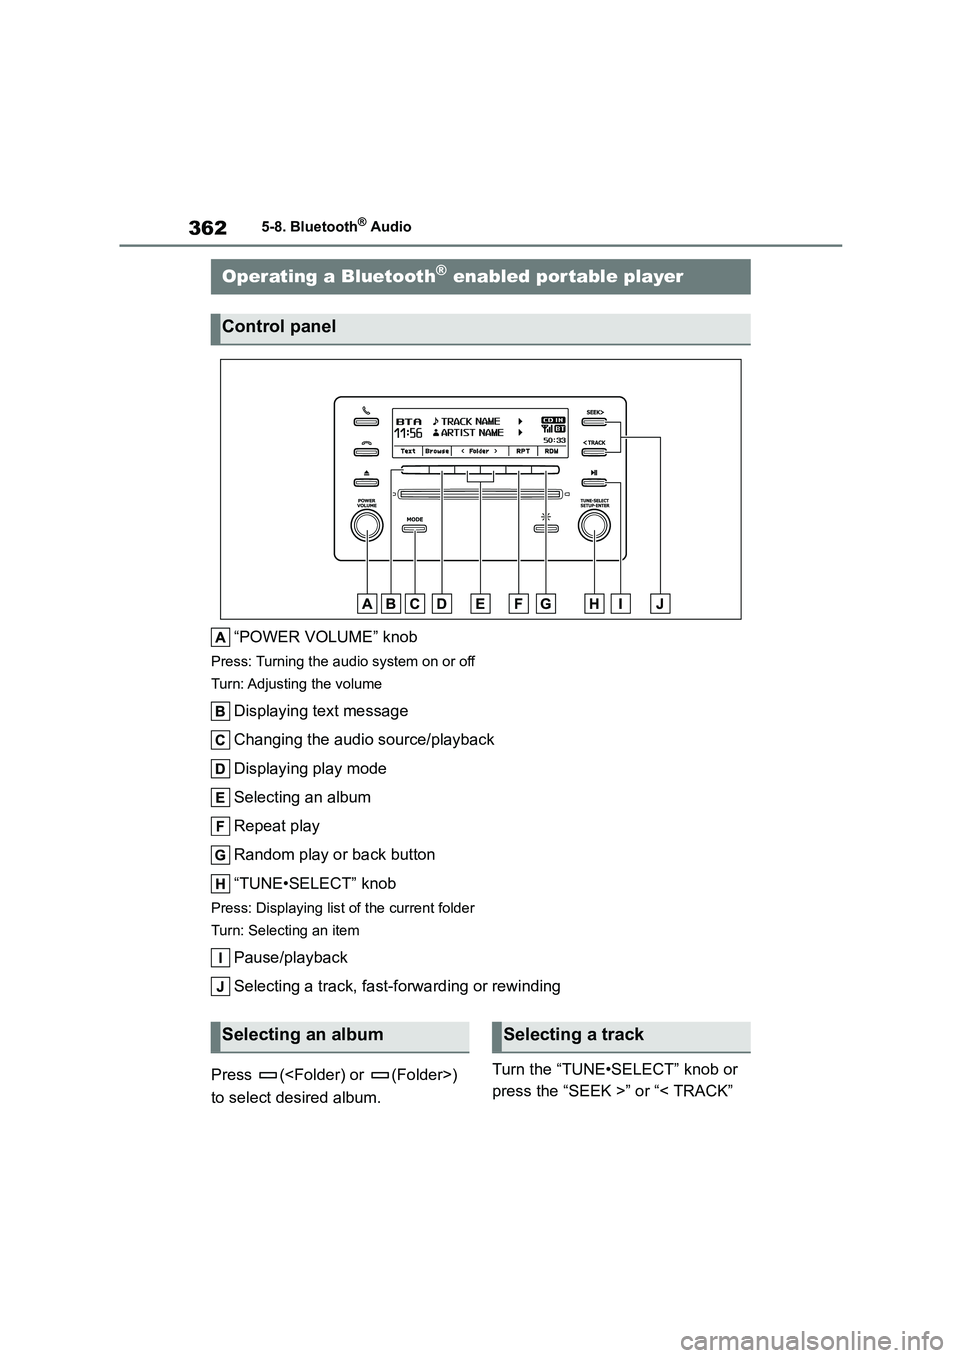
“POWER VOLUME” knob
Press: Turning the audio system on or off
Turn: Adjusting the volume
Displaying text message
Changing the audio source/playback
Displaying play mode
Selecting an album
Repeat play
Random play or back button
“TUNE•SELECT” knob
Press: Displaying list of the current folder
Turn: Selecting an item
Pause/playback
Selecting a track, fast-forwarding or rewinding
Press (
to select desired album.
Turn the “TUNE•SELECT” knob or
press the “SEEK >” or “< TRACK”
Operating a Bluetooth® enabled portable player
Control panel
Selecting an albumSelecting a track
Page 365 of 678
363
5
5-8. Bluetooth® Audio
Audio system
button to move up or down.
Press and hold the “SEEK >” or “<
TRACK” button until you hear a
beep.
Pressing (RPT) changes modes
in the following order: Track
repeat Album repeat*Off
*: Available except when “RDM” (ran-
dom play) is selected
Pressing (RDM) changes
modes in the following order:
Album random All album ran-
dom Off
1 Press (Browse).
The playlist will be displayed.
2Turn the “TUNE•SELECT” knob
to display the folder/file list.
3 Press the knob to select the
desired item.
4 Repeat the same procedure to
select the desired file.
To return to the previous display, press
(Back).
Press (Text) to display or hide
the album title.
If there are continuing texts, is dis-
played.
Press and hold (Text) until you hear
a beep to display the remaining texts.
■Bluetooth® audio system functions
Depending on the portable player that is
connected to the system, certain func- tions may not be available.
■Display
P. 3 3 5
Fast-forwarding and rewind-
ing tracks
Repeat play
Random play
Selecting a song playlist
Switching the display
Page 366 of 678
3645-9. Bluetooth® Phone
5-9.Bluetooth® Phone
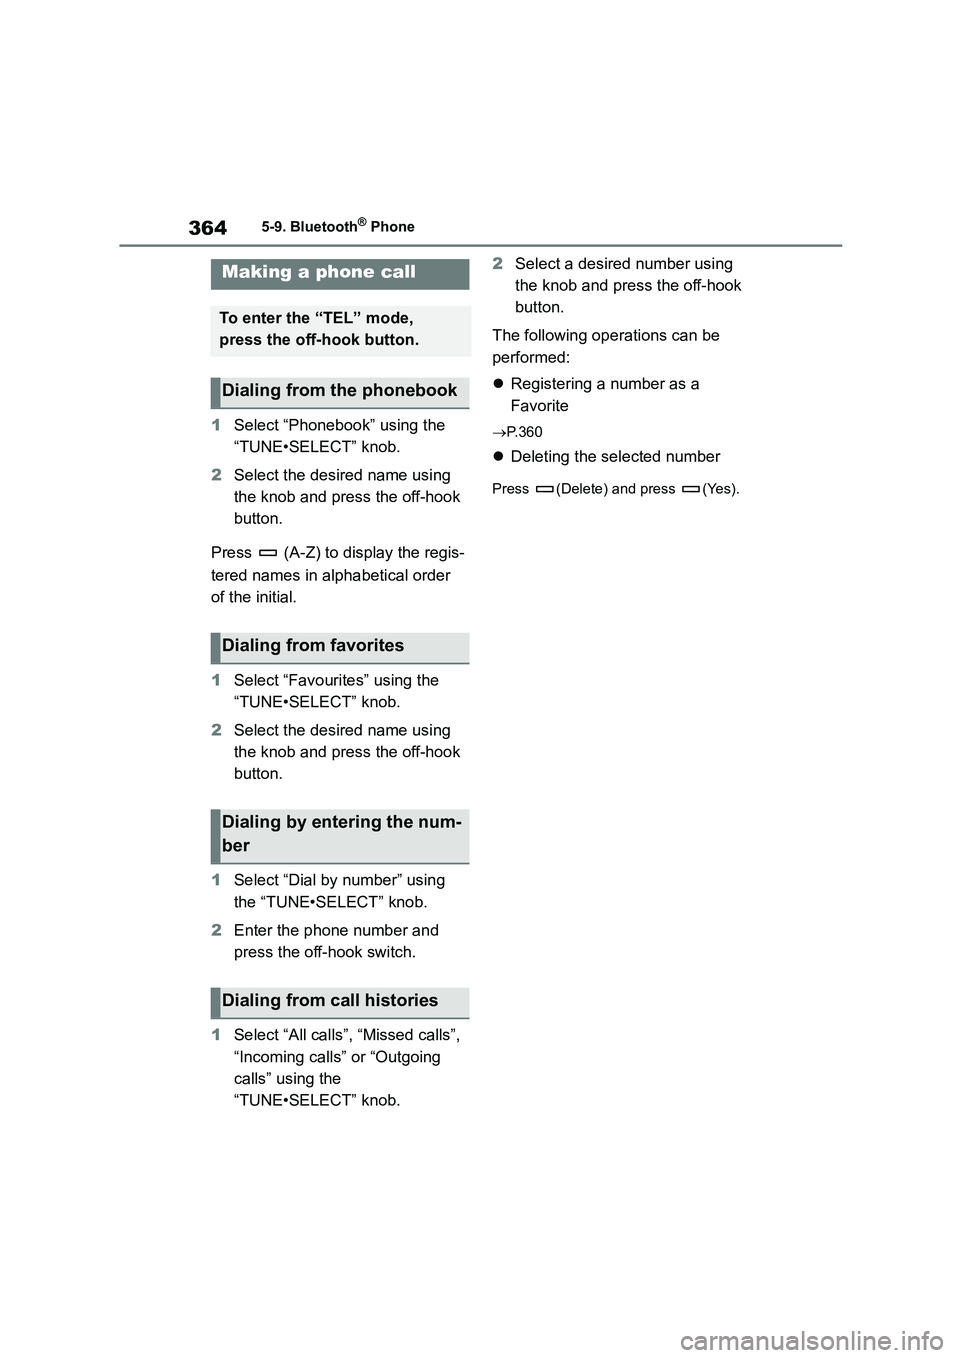
1Select “Phonebook” using the
“TUNE•SELECT” knob.
2 Select the desired name using
the knob and press the off-hook
button.
Press (A-Z) to display the regis-
tered names in alphabetical order
of the initial.
1 Select “Favourites” using the
“TUNE•SELECT” knob.
2 Select the desired name using
the knob and press the off-hook
button.
1 Select “Dial by number” using
the “TUNE•SELECT” knob.
2 Enter the phone number and
press the off-hook switch.
1 Select “All calls”, “Missed calls”,
“Incoming calls” or “Outgoing
calls” using the
“TUNE•SELECT” knob.
2 Select a desired number using
the knob and press the off-hook
button.
The following operations can be
performed:
Registering a number as a
Favorite
P. 3 6 0
Deleting the selected number
Press (Delete) and press (Yes).
Making a phone call
To enter the “TEL” mode,
press the off-hook button.
Dialing from the phonebook
Dialing from favorites
Dialing by entering the num-
ber
Dialing from call histories
Page 367 of 678
365
5
5-9. Bluetooth® Phone
Audio system
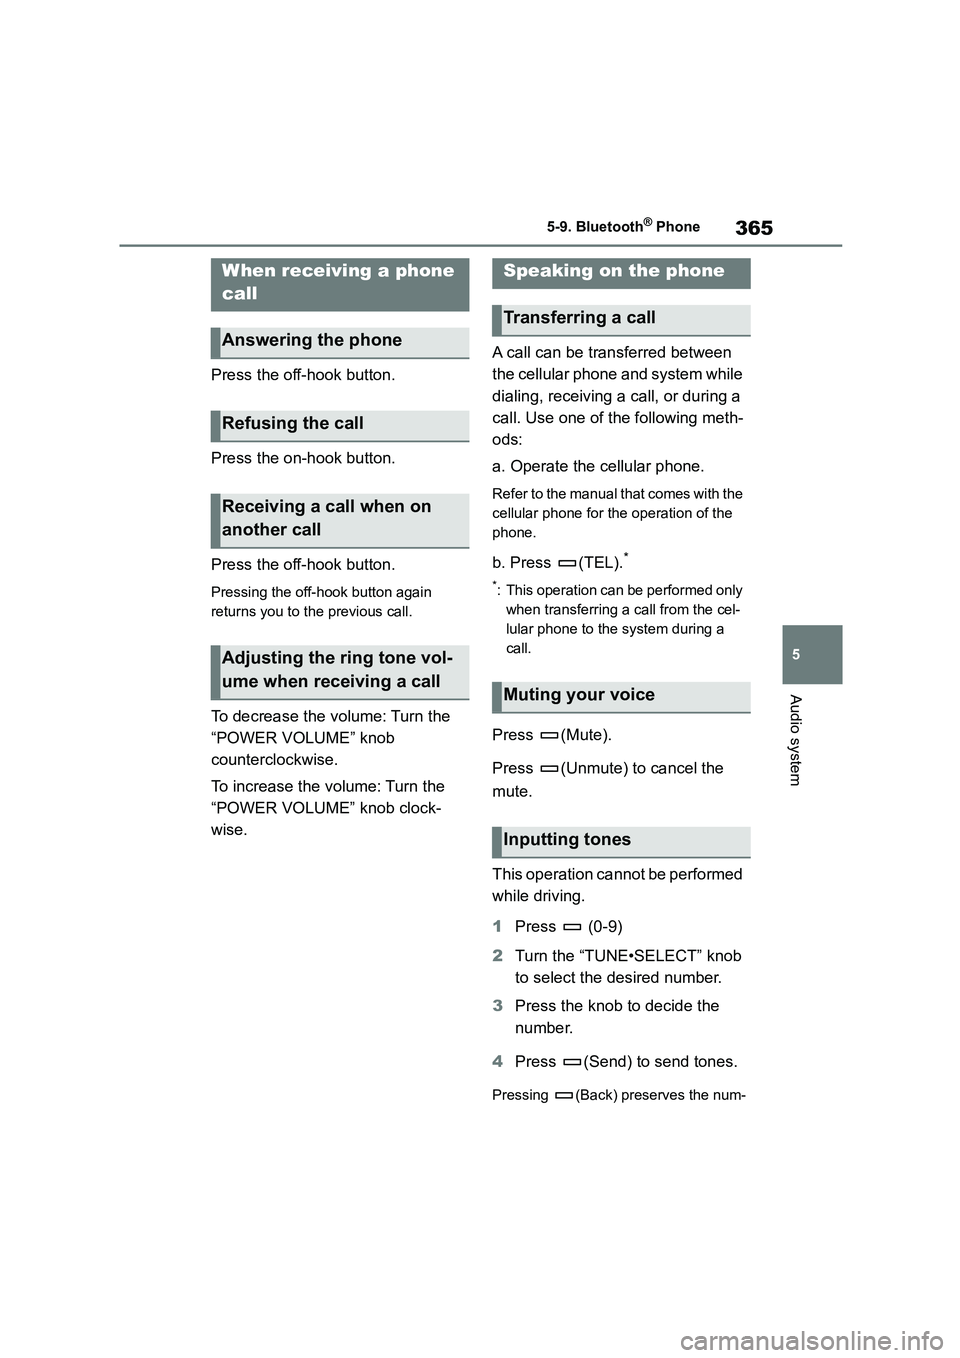
Press the off-hook button.
Press the on-hook button.
Press the off-hook button.
Pressing the off-hook button again
returns you to the previous call.
To decrease the volume: Turn the
“POWER VOLUME” knob
counterclockwise.
To increase the volume: Turn the
“POWER VOLUME” knob clock-
wise.
A call can be transferred between
the cellular phone and system while
dialing, receiving a call, or during a
call. Use one of the following meth-
ods:
a. Operate the cellular phone.
Refer to the manual that comes with the
cellular phone for the operation of the
phone.
b. Press (TEL).*
*: This operation can be performed only
when transferring a call from the cel-
lular phone to the system during a
call.
Press (Mute).
Press (Unmute) to cancel the
mute.
This operation cannot be performed
while driving.
1 Press (0-9)
2 Turn the “TUNE•SELECT” knob
to select the desired number.
3 Press the knob to decide the
number.
4 Press (Send) to send tones.
Pressing (Back) preserves the num-
When receiving a phone
call
Answering the phone
Refusing the call
Receiving a call when on
another call
Adjusting the ring tone vol-
ume when receiving a call
Speaking on the phone
Transferring a call
Muting your voice
Inputting tones