tow TOYOTA COROLLA 2022 Owners Manual (in English)
[x] Cancel search | Manufacturer: TOYOTA, Model Year: 2022, Model line: COROLLA, Model: TOYOTA COROLLA 2022Pages: 678, PDF Size: 147.24 MB
Page 4 of 678
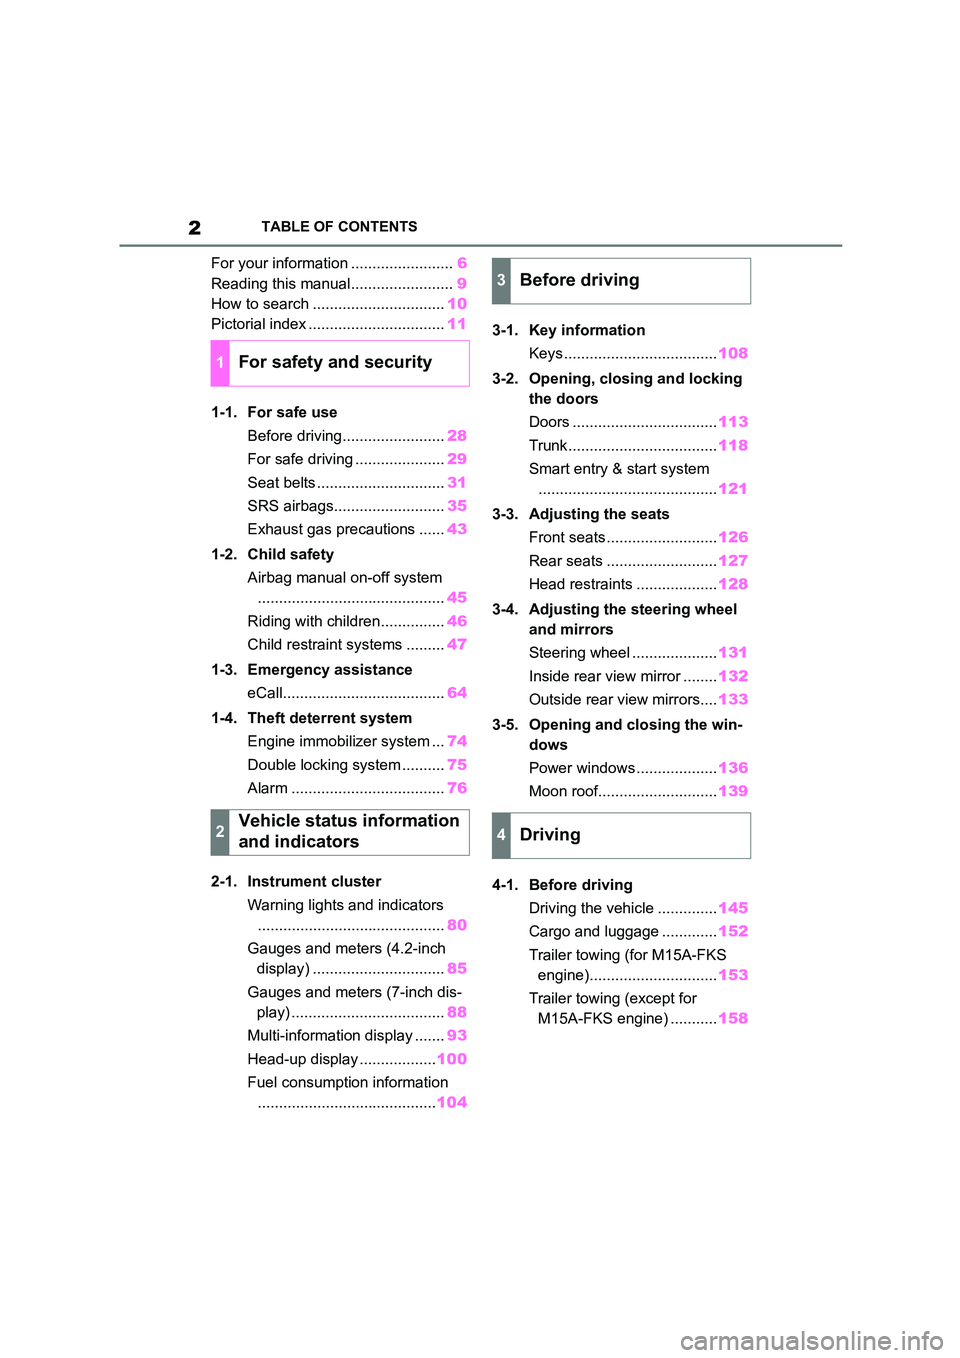
2TABLE OF CONTENTS
For your information ........................6
Reading this manual........................ 9
How to search ............................... 10
Pictorial index ................................ 11
1-1. For safe use
Before driving........................ 28
For safe driving ..................... 29
Seat belts .............................. 31
SRS airbags.......................... 35
Exhaust gas precautions ...... 43
1-2. Child safety
Airbag manual on-off system
............................................ 45
Riding with children............... 46
Child restraint systems ......... 47
1-3. Emergency assistance
eCall...................................... 64
1-4. Theft deterrent system
Engine immobilizer system ... 74
Double locking system .......... 75
Alarm .................................... 76
2-1. Instrument cluster
Warning lights and indicators
............................................ 80
Gauges and meters (4.2-inch
display) ............................... 85
Gauges and meters (7-inch dis-
play) .................................... 88
Multi-information display ....... 93
Head-up display .................. 100
Fuel consumption information
.......................................... 104
3-1. Key information
Keys .................................... 108
3-2. Opening, closing and locking
the doors
Doors .................................. 113
Trunk................................... 118
Smart entry & start system
.......................................... 121
3-3. Adjusting the seats
Front seats .......................... 126
Rear seats .......................... 127
Head restraints ................... 128
3-4. Adjusting the steering wheel
and mirrors
Steering wheel .................... 131
Inside rear view mirror ........ 132
Outside rear view mirrors.... 133
3-5. Opening and closing the win-
dows
Power windows ................... 136
Moon roof............................ 139
4-1. Before driving
Driving the vehicle .............. 145
Cargo and luggage ............. 152
Trailer towing (for M15A-FKS
engine).............................. 153
Trailer towing (except for
M15A-FKS engine) ........... 158
1For safety and security
2Vehicle status information
and indicators
3Before driving
4Driving
Page 7 of 678
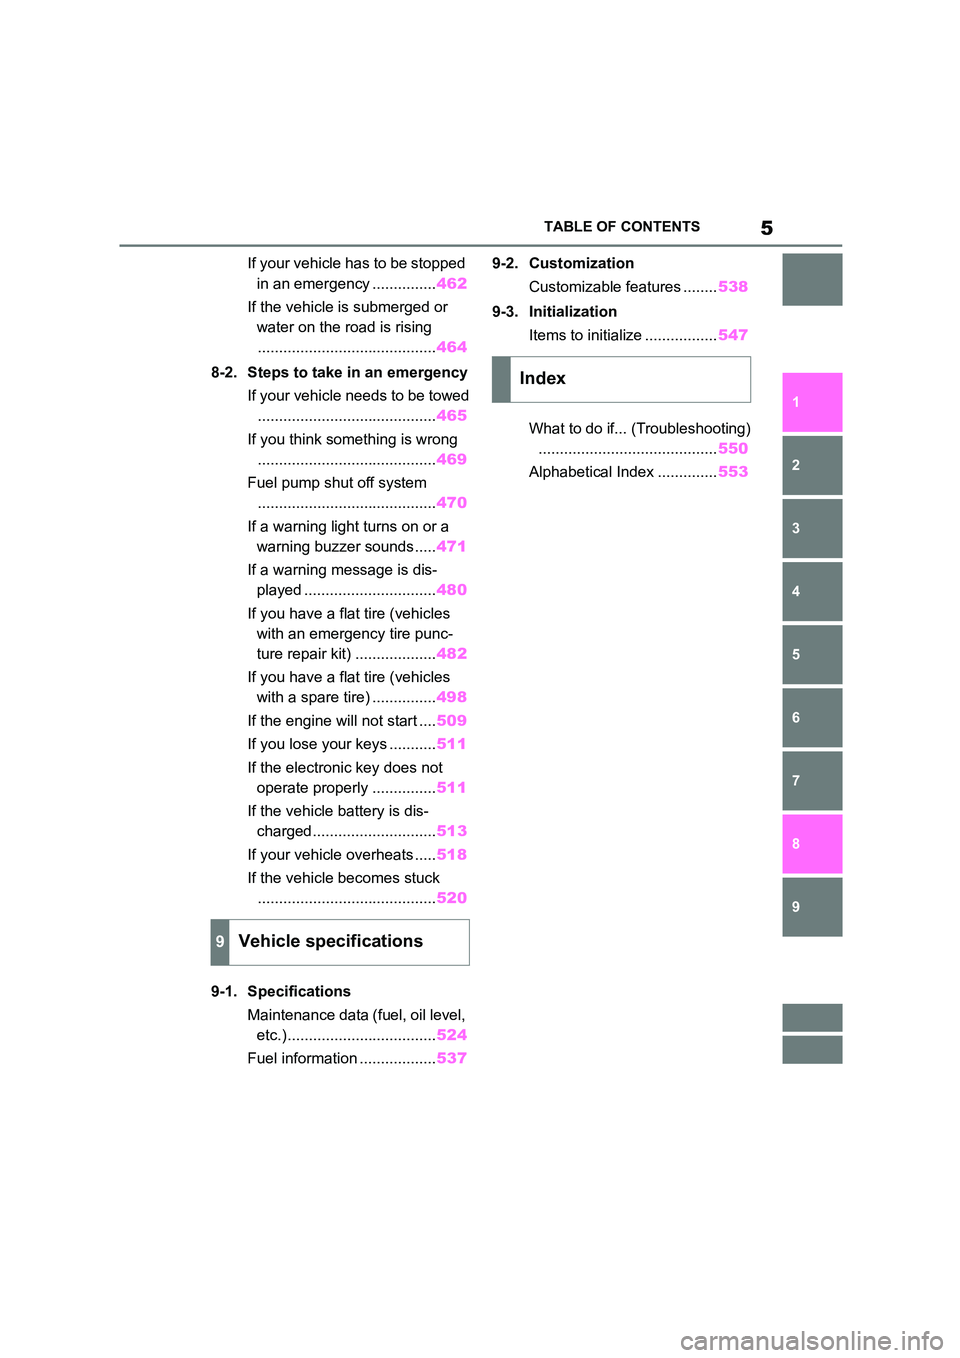
5TABLE OF CONTENTS
1
6
5
4
3
2
9
8
7
If your vehicle has to be stopped
in an emergency ............... 462
If the vehicle is submerged or
water on the road is rising
.......................................... 464
8-2. Steps to take in an emergency
If your vehicle needs to be towed
.......................................... 465
If you think something is wrong
.......................................... 469
Fuel pump shut off system
.......................................... 470
If a warning light turns on or a
warning buzzer sounds ..... 471
If a warning message is dis-
played ............................... 480
If you have a flat tire (vehicles
with an emergency tire punc-
ture repair kit) ................... 482
If you have a flat tire (vehicles
with a spare tire) ............... 498
If the engine will not start .... 509
If you lose your keys ........... 511
If the electronic key does not
operate properly ............... 511
If the vehicle battery is dis-
charged............................. 513
If your vehicle overheats ..... 518
If the vehicle becomes stuck
.......................................... 520
9-1. Specifications
Maintenance data (fuel, oil level,
etc.)................................... 524
Fuel information .................. 537
9-2. Customization
Customizable features ........ 538
9-3. Initialization
Items to initialize ................. 547
What to do if... (Troubleshooting)
.......................................... 550
Alphabetical Index .............. 553
9Vehicle specifications
Index
Page 15 of 678
13Pictorial index
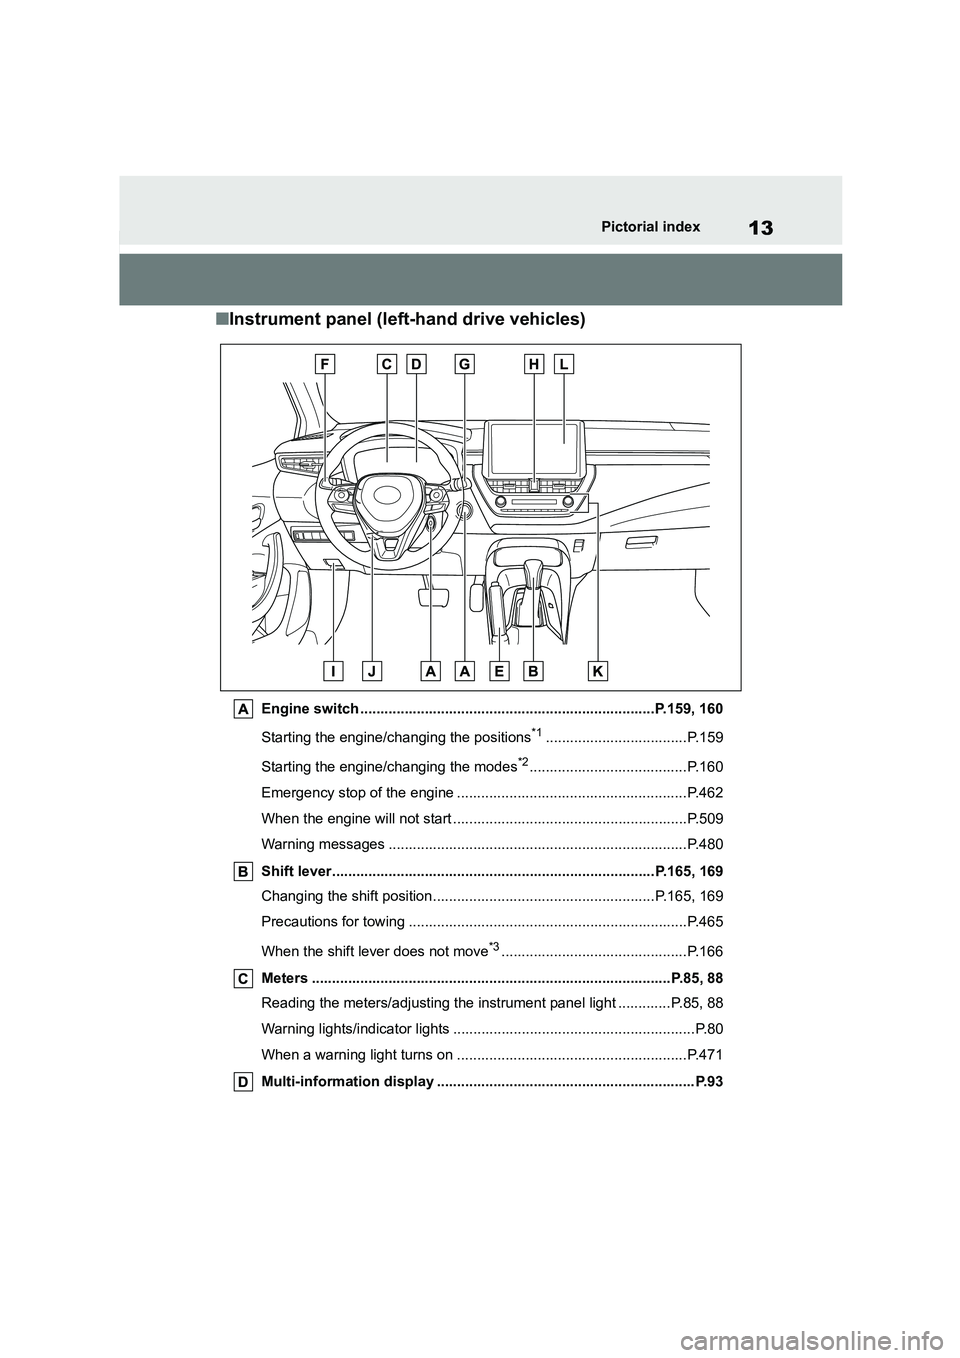
■Instrument panel (left-hand drive vehicles)
Engine switch .........................................................................P.159, 160
Starting the engine/changing the positions*1...................................P.159
Starting the engine/changing the modes*2.......................................P.160
Emergency stop of the engine .........................................................P.462
When the engine will not start ..........................................................P.509
Warning messages ..........................................................................P.480
Shift lever................................................................................P.165, 169
Changing the shift position.......................................................P.165, 169
Precautions for towing .....................................................................P.465
When the shift lever does not move*3..............................................P.166
Meters .........................................................................................P.85, 88
Reading the meters/adjusting the instrument panel light ............. P.85, 88
Warning lights/indicator lights ............................................................P.80
When a warning light turns on .........................................................P.471
Multi-information display ................................................................P.93
Page 22 of 678
20Pictorial index
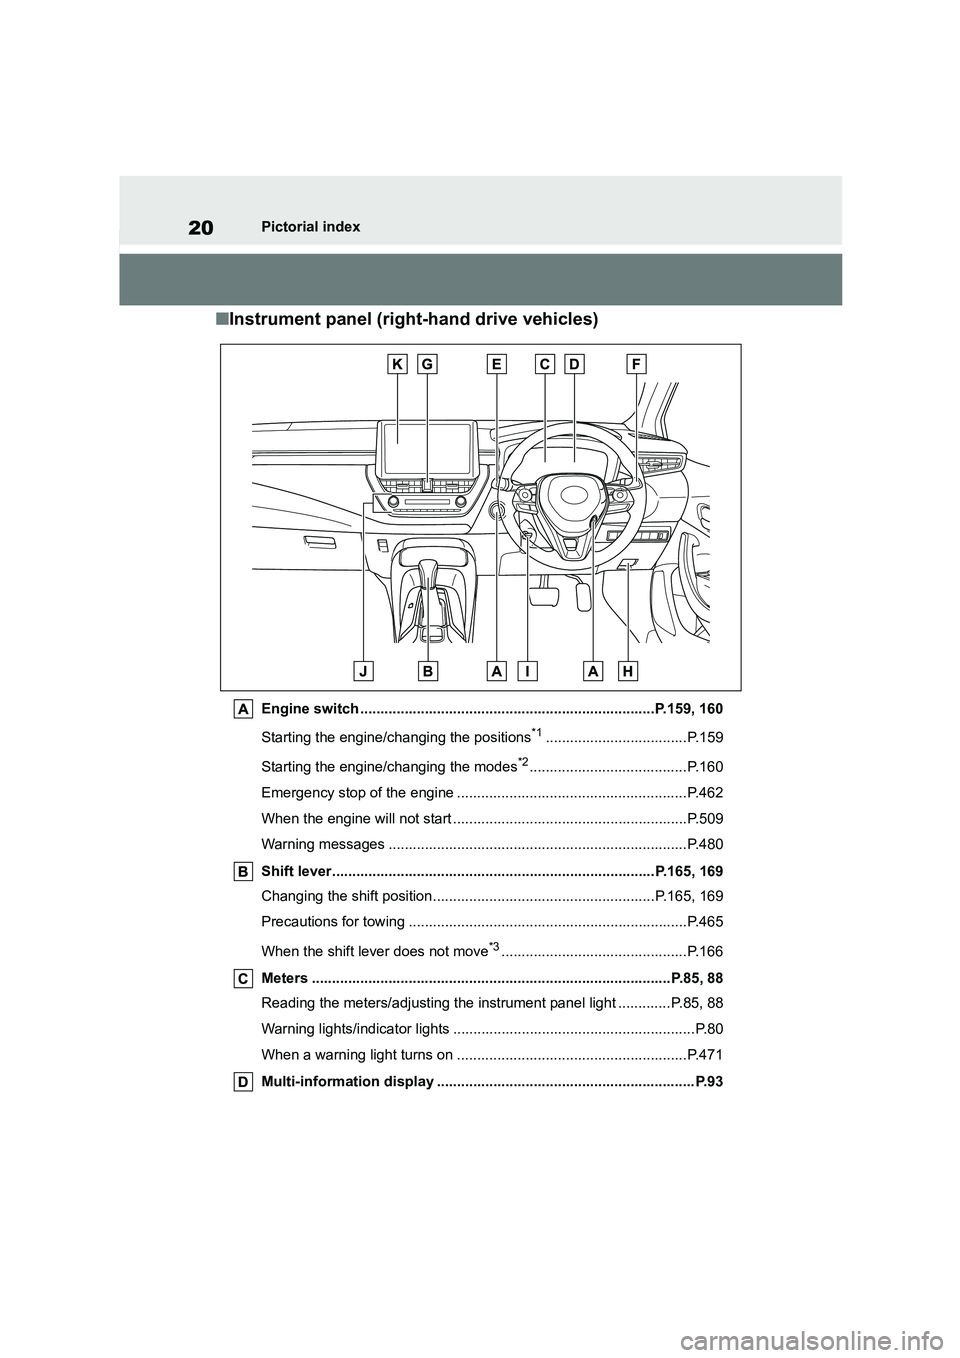
■Instrument panel (right-hand drive vehicles)
Engine switch .........................................................................P.159, 160
Starting the engine/changing the positions*1...................................P.159
Starting the engine/changing the modes*2.......................................P.160
Emergency stop of the engine .........................................................P.462
When the engine will not start ..........................................................P.509
Warning messages ..........................................................................P.480
Shift lever................................................................................P.165, 169
Changing the shift position.......................................................P.165, 169
Precautions for towing .....................................................................P.465
When the shift lever does not move*3..............................................P.166
Meters .........................................................................................P.85, 88
Reading the meters/adjusting the instrument panel light ............. P.85, 88
Warning lights/indicator lights ............................................................P.80
When a warning light turns on .........................................................P.471
Multi-information display ................................................................P.93
Page 35 of 678
33
1
1-1. For safe use
For safety and security
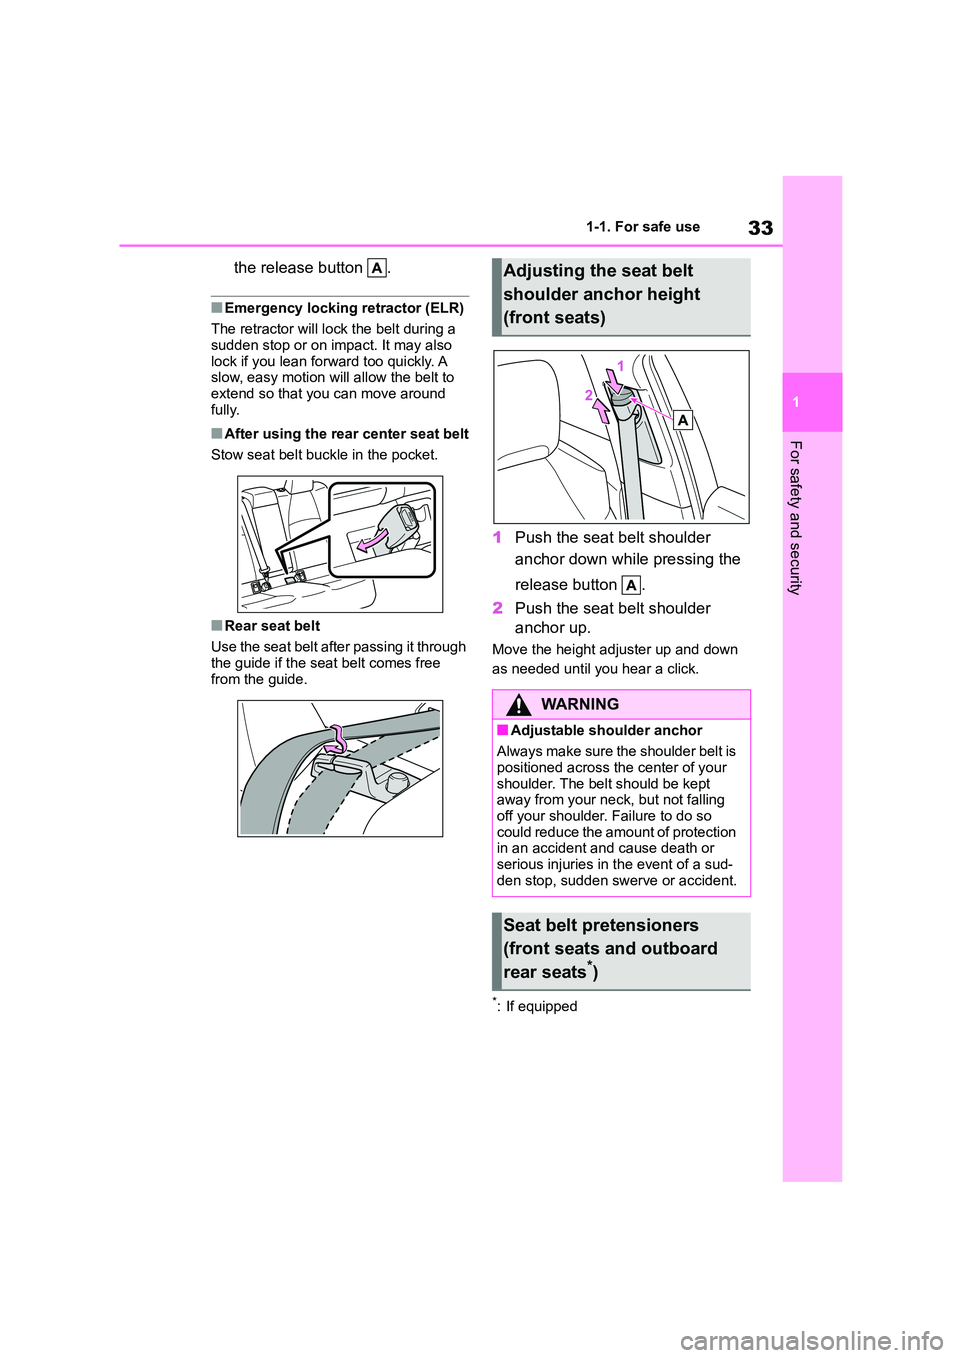
the release button .
■Emergency locking retractor (ELR)
The retractor will lock the belt during a sudden stop or on impact. It may also
lock if you lean forward too quickly. A
slow, easy motion will allow the belt to extend so that you can move around
fully.
■After using the rear center seat belt
Stow seat belt buckle in the pocket.
■Rear seat belt
Use the seat belt after passing it through the guide if the seat belt comes free
from the guide.
1 Push the seat belt shoulder
anchor down while pressing the
release button .
2 Push the seat belt shoulder
anchor up.
Move the height adjuster up and down
as needed until you hear a click.
*: If equipped
Adjusting the seat belt
shoulder anchor height
(front seats)
WA R N I N G
■Adjustable shoulder anchor
Always make sure the shoulder belt is
positioned across the center of your
shoulder. The belt should be kept away from your neck, but not falling
off your shoulder. Failure to do so
could reduce the amount of protection in an accident and cause death or
serious injuries in the event of a sud-
den stop, sudden sw erve or accident.
Seat belt pretensioners
(front seats and outboard
rear seats*)
Page 42 of 678
401-1. For safe use
WA R N I N G
●The driver and all passengers in the
vehicle must wear their seat belts
properly. The SRS airbags are supplemental
devices to be used with the seat
belts.
●The SRS driver airbag deploys with
considerable force, and can cause
death or serious injury especially if the driver is very close to the
airbag.
Since the risk zone for the driver’s airbag is the first 50 - 75 mm (2 - 3 in.)
of inflation, placing yourself 250 mm
(10 in.) from your driver airbag pro- vides you with a clear margin of
safety. This distance is measured
from the center of the steering wheel to your breastbone. If you sit less than
250 mm (10 in.) away now, you can
change your driving position in sev- eral ways:
• Move your seat to the rear as far as
you can while still reaching the ped- als comfortably.
• Slightly recline the back of the seat. Although vehicle designs vary,
many drivers can achieve the 250
mm (10 in.) distance, even with the driver seat all the way forward, sim-
ply by reclining the back of the seat
somewhat. If reclining the back of your seat makes it hard to see the
road, raise yourself by using a firm,
non-slippery cushion, or raise the seat if your vehicle has that feature.
• If your steering wheel is adjustable, tilt it downward. This points the
airbag toward your chest instead of
your head and neck.
The seat should be adjusted as rec-
ommended above, while still main- taining control of the foot pedals,
steering wheel, and your view of the
instrument panel controls.
●The SRS front passenger airbag also deploys with considerable
force, and can cause death or seri-
ous injury especially if the front pas- senger is very close to the airbag.
The front passenger seat should be
as far from the airbag as possible with the seatback adjusted, so the
front passenger sits upright.
●Improperly seated and/or restrained
infants and children can be killed or
seriously injured by a deploying airbag. An infant or child who is too
small to use a seat belt should be
properly secured using a child restraint system. Toyota strongly
recommends that all infants and
children be placed in the rear seats of the vehicle and properly
restrained. The rear seats are safer
for infants and children than the front passenger seat. (P. 4 7 )
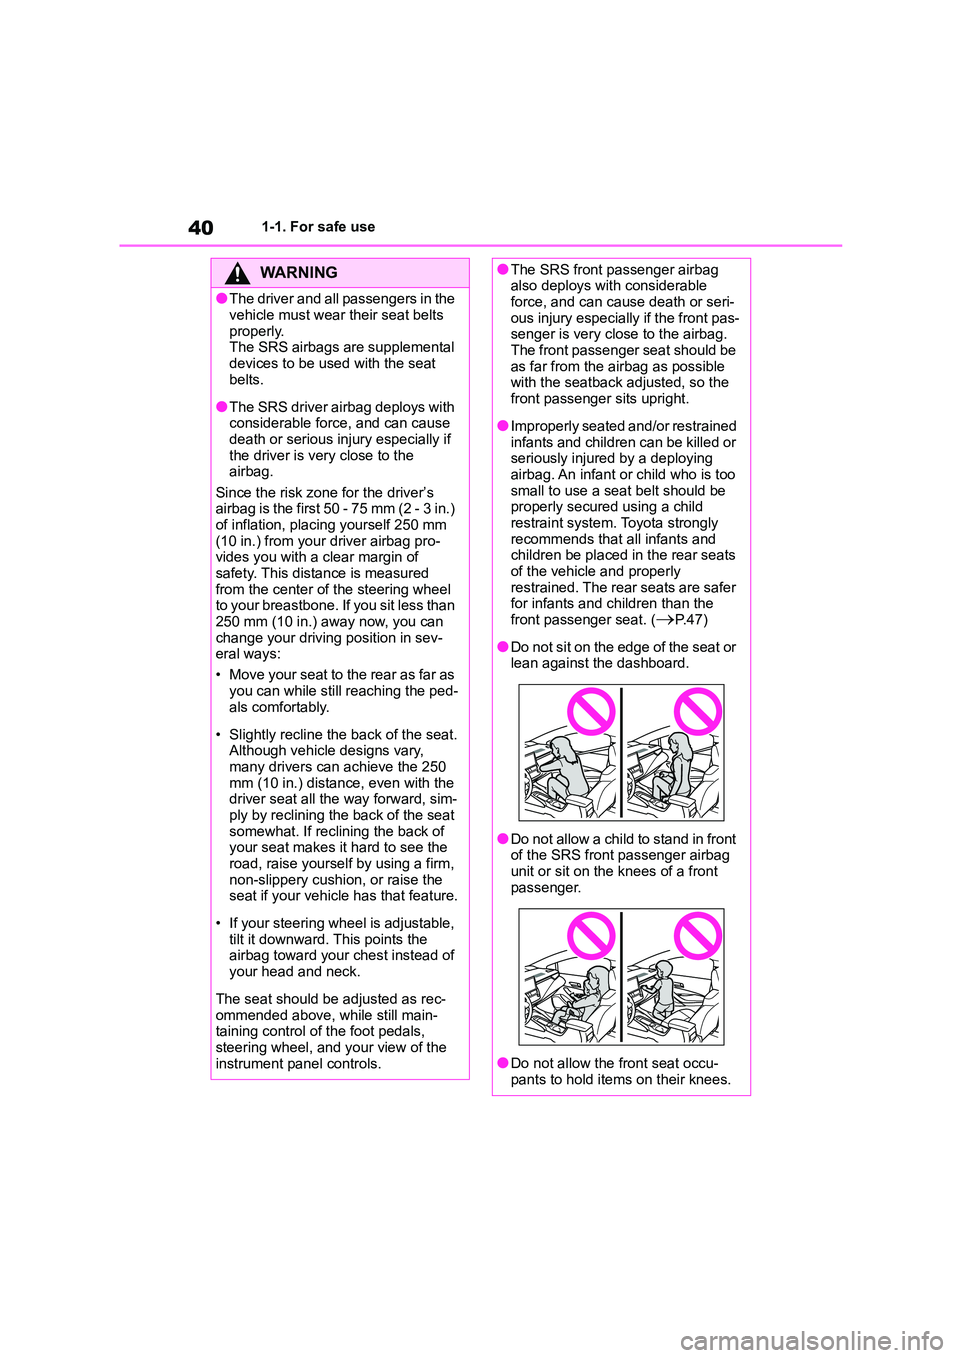
●Do not sit on the edge of the seat or lean against the dashboard.
●Do not allow a child to stand in front of the SRS front passenger airbag
unit or sit on the knees of a front
passenger.
●Do not allow the front seat occu-
pants to hold items on their knees.
Page 43 of 678
41
1
1-1. For safe use
For safety and security
WA R N I N G
●Vehicles with SRS side airbags: Do
not lean against the front door.
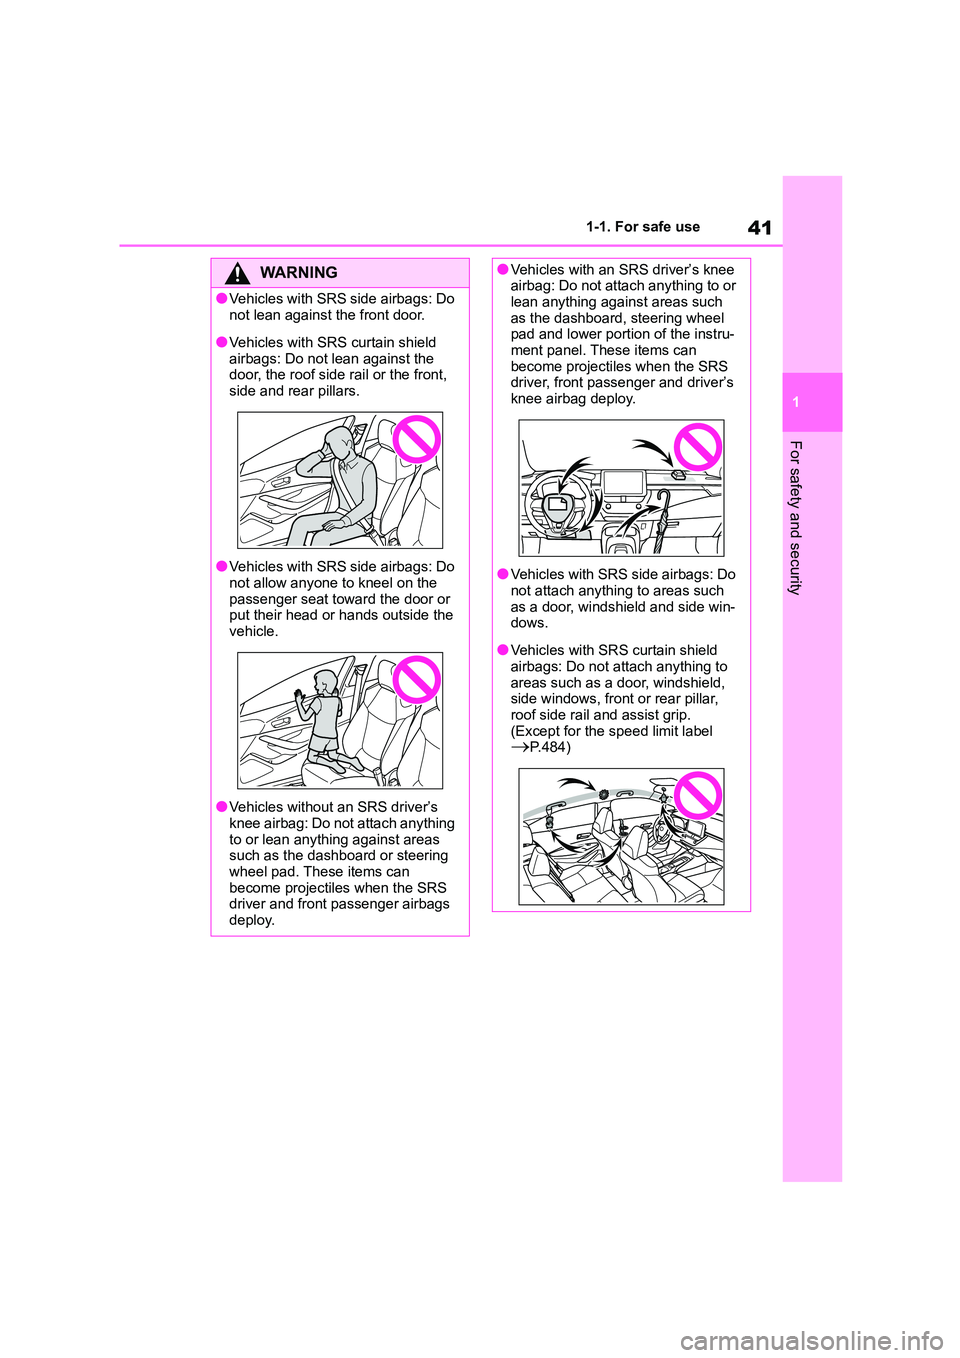
●Vehicles with SRS curtain shield
airbags: Do not lean against the
door, the roof side rail or the front, side and rear pillars.
●Vehicles with SRS side airbags: Do
not allow anyone to kneel on the passenger seat toward the door or
put their head or hands outside the
vehicle.
●Vehicles without an SRS driver’s
knee airbag: Do not attach anything to or lean anything against areas
such as the dashboard or steering
wheel pad. These items can become projectiles when the SRS
driver and front passenger airbags
deploy.
●Vehicles with an SRS driver’s knee airbag: Do not attach anything to or
lean anything against areas such
as the dashboard, steering wheel pad and lower portion of the instru-
ment panel. These items can
become projectiles when the SRS driver, front passe nger and driver’s
knee airbag deploy.
●Vehicles with SRS side airbags: Do
not attach anything to areas such
as a door, windshield and side win- dows.
●Vehicles with SRS curtain shield airbags: Do not attach anything to
areas such as a door, windshield,
side windows, front or rear pillar, roof side rail and assist grip.
(Except for the speed limit label
P.484)
Page 62 of 678
601-2. Child safety
restraint system maker for various
possible installation positions, or
check the c ompatibility after asking
the retailer of the child seat.
( P.52, 53)
1 If installing the child restraint
system to the front passenger
seat is unavoidable, refer to
P.49for the front passenger seat
adjustment.
2 If the head restraint interferes
with your child restraint system,
and the head restraint can be
removed, remove the head
restraint.
Otherwise, put the head
restraint in the upper most posi-
tion. ( P.128)
3 Run the seat belt through the
child restraint system and insert
the plate into th e buckle. Make
sure that the belt is not twisted.
Securely fix the seat belt to the
child restraint s ystem in accord-
ance to the directions enclosed
with the child restraint system.
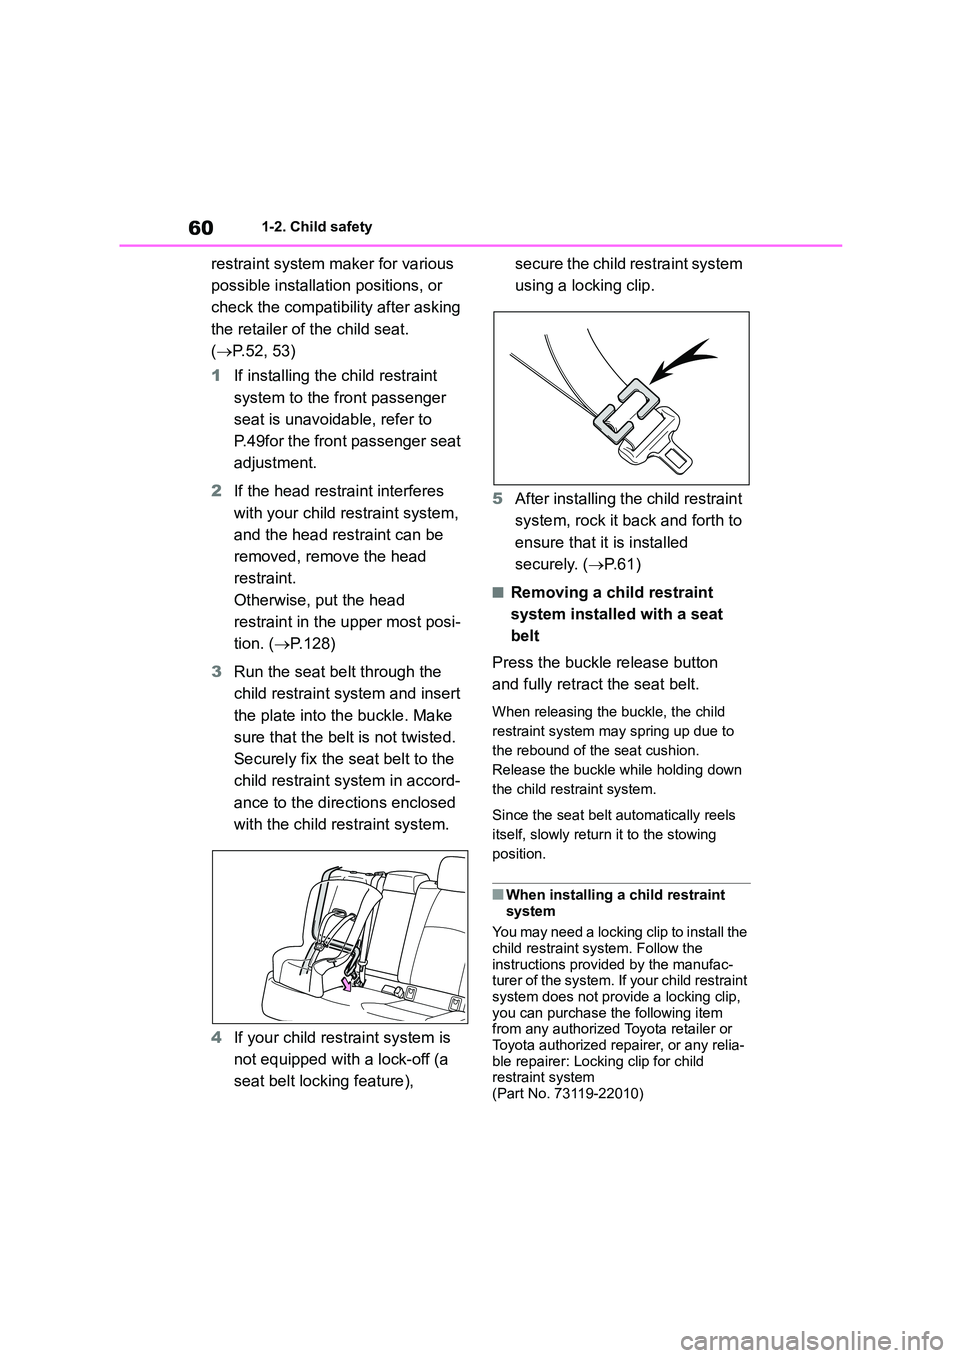
4 If your child restraint system is
not equipped with a lock-off (a
seat belt locking feature),
secure the child restraint system
using a locking clip.
5 After installing the child restraint
system, rock it back and forth to
ensure that it is installed
securely. ( P. 6 1 )
■Removing a child restraint
system installed with a seat
belt
Press the buckle release button
and fully retract the seat belt.
When releasing the buckle, the child
restraint system may spring up due to
the rebound of the seat cushion.
Release the buckle while holding down
the child restraint system.
Since the seat belt automatically reels
itself, slowly return it to the stowing
position.
■When installing a child restraint system
You may need a locking clip to install the
child restraint system. Follow the
instructions provided by the manufac- turer of the system. If your child restraint
system does not prov ide a locking clip,
you can purchase the following item from any authorized Toyota retailer or
Toyota authorized repairer, or any relia-
ble repairer: Locking clip for child restraint system
(Part No. 73119-22010)
Page 113 of 678
111
3
3-1. Key information
Before driving
Opens the trunk ( P. 1 1 9 )
*1: This setting must be customized at
any authorized Toyota retailer or
Toyota authorized repairer, or any
reliable repairer.
*2: If equipped
■Conditions affecting the operation
of the smart entry & start system or wireless remote control
Vehicles without a smart entry & start system
The wireless remote control function
may not operate normally in the follow- ing situations:
●When the wireless key battery is depleted
●Near a TV tower, electric power plant, gas station, radio station, large dis-
play, airport or other facility that gen-
erates strong radio waves or electrical noise
●When carrying a portable radio, cellu-lar phone or other wireless communi-
cation devices
●When the wireless key is in contact
with, or is covered by a metallic object
●When a wireless key (that emits radio
waves) is being used nearby
●If window tint with a metallic content or
metallic objects are attached to the
rear window
Vehicles with a smart entry & start
system
P.122
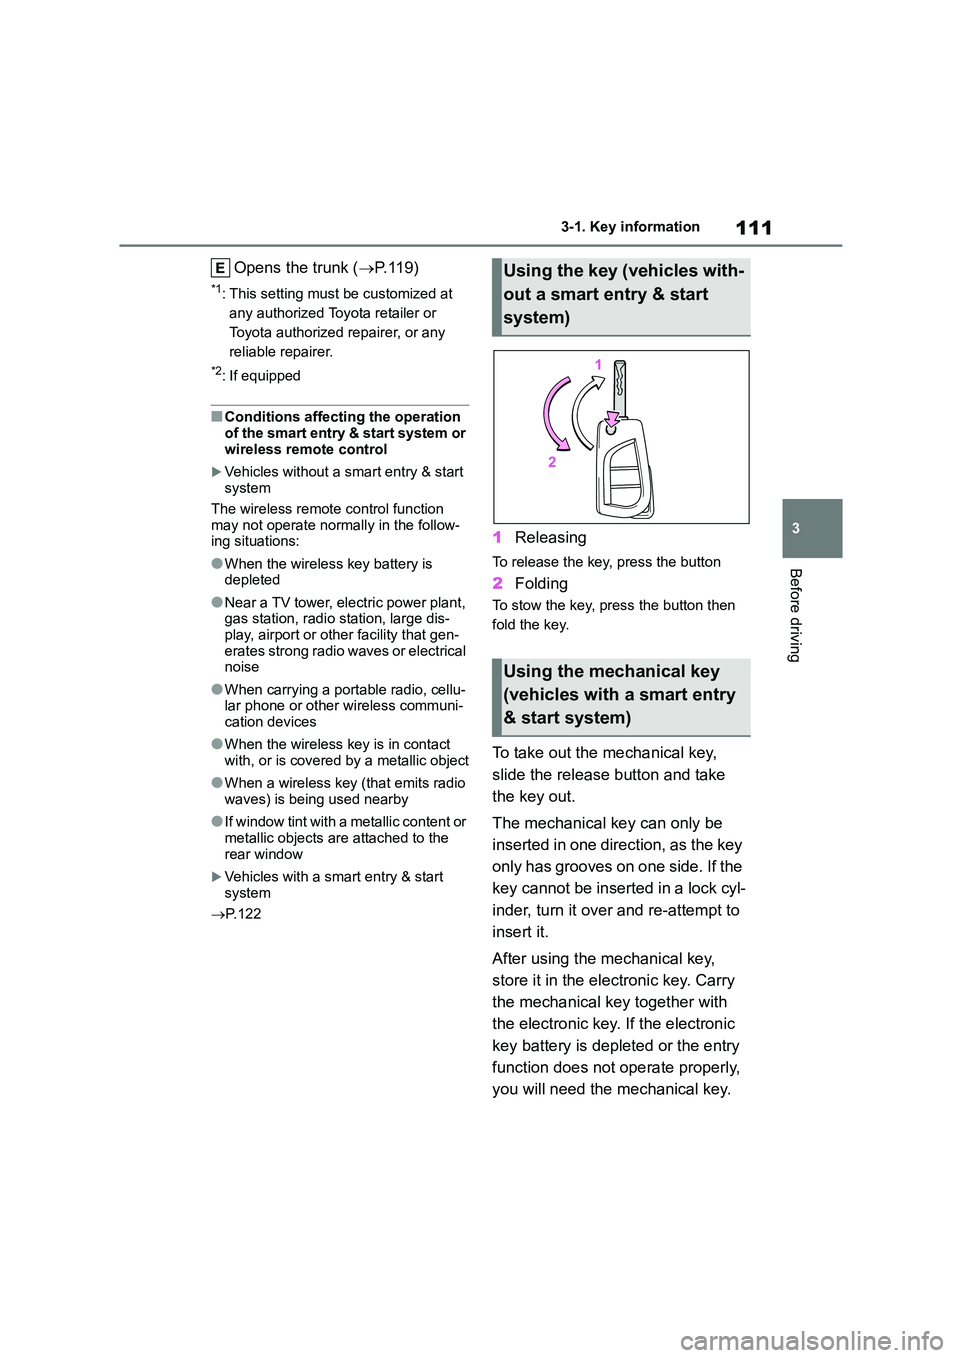
1Releasing
To release the key, press the button
2Folding
To stow the key, press the button then
fold the key.
To take out the mechanical key,
slide the release button and take
the key out.
The mechanical key can only be
inserted in one direction, as the key
only has grooves on one side. If the
key cannot be inserted in a lock cyl-
inder, turn it over and re-attempt to
insert it.
After using the mechanical key,
store it in the electronic key. Carry
the mechanical key together with
the electronic key. If the electronic
key battery is depleted or the entry
function does not operate properly,
you will need the mechanical key.
Using the key (vehicles with-
out a smart entry & start
system)
Using the mechanical key
(vehicles with a smart entry
& start system)
Page 124 of 678
1223-2. Opening, closing and locking the doors
●Interior buzzer sounds continuously
■Battery-saving function (vehicles
with entry function)
The battery-saving function will be acti-
vated in order to prevent the electronic
key battery and the vehicle battery from being discharged while the vehicle is not
operated for a long time.
●In the following situations, the smart
entry & start system may take some
time to unlock the doors.
• The electronic key has been left within approximately 3.5 m (11 ft.) of the out-
side of the vehicle for 2 minutes or
longer. • The smart entry & start system has
not been used for 5 days or longer.
●If the smart entry & start system has
not been used for 14 days or longer,
the doors cannot be unlocked from
any door except the driver’s door. In this case, hold the driver’s door han-
dle, or use the wireless remote control
or mechanical key to unlock the doors.
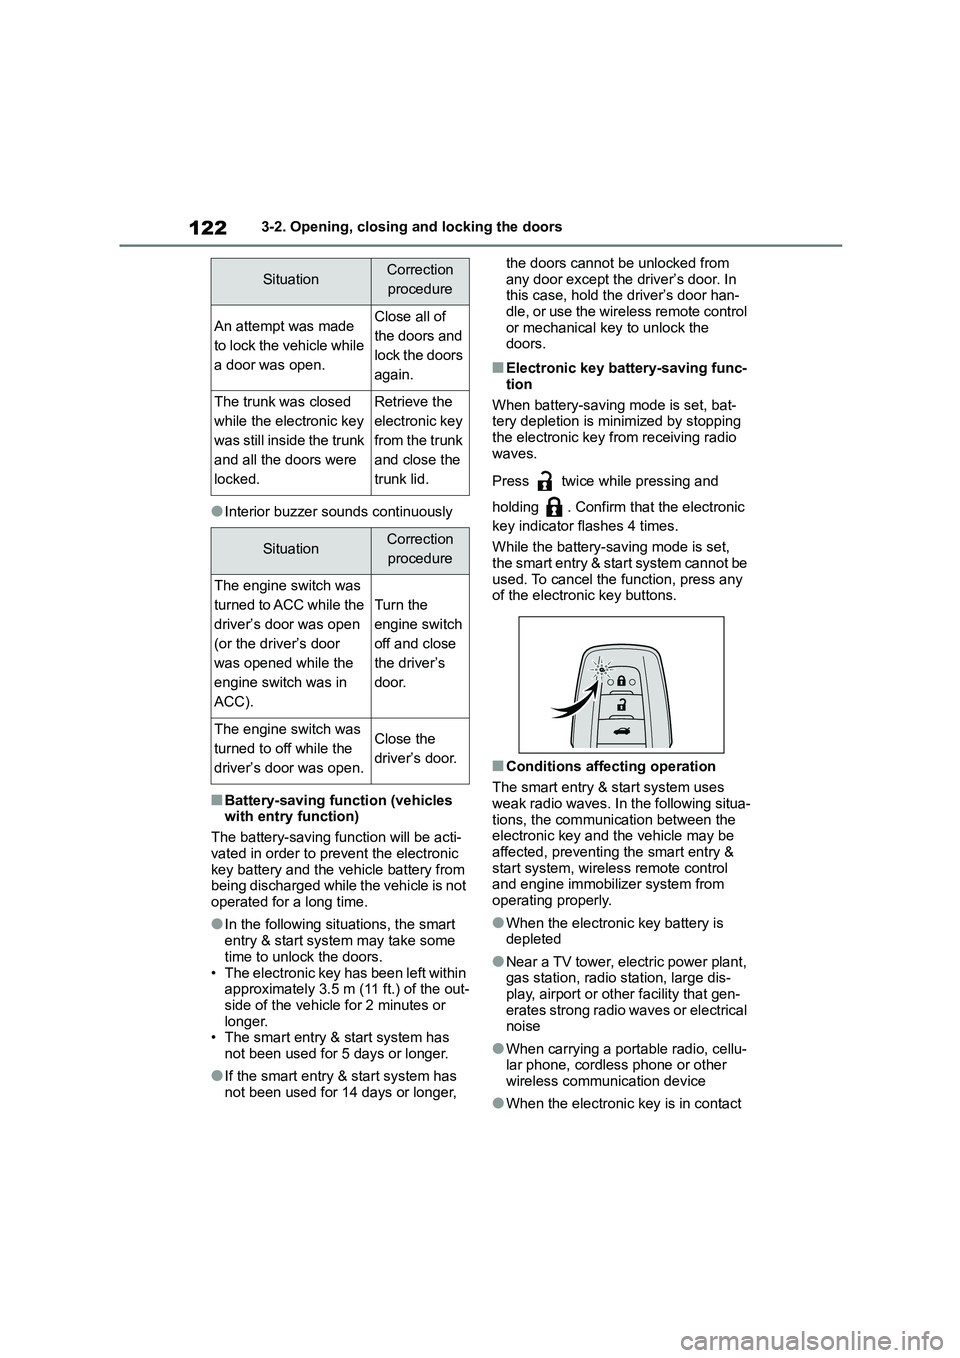
■Electronic key battery-saving func-
tion
When battery-saving mode is set, bat- tery depletion is minimized by stopping
the electronic key from receiving radio
waves.
Press twice while pressing and
holding . Confirm that the electronic
key indicator flashes 4 times.
While the battery-saving mode is set,
the smart entry & start system cannot be
used. To cancel the function, press any of the electronic key buttons.
■Conditions affecting operation
The smart entry & start system uses
weak radio waves. In the following situa-
tions, the communication between the electronic key and the vehicle may be
affected, preventing the smart entry &
start system, wirele ss remote control and engine immobilizer system from
operating properly.
●When the electronic key battery is depleted
●Near a TV tower, electric power plant, gas station, radio station, large dis-
play, airport or other facility that gen-
erates strong radio waves or electrical noise
●When carrying a portable radio, cellu-lar phone, cordless phone or other
wireless communication device
●When the electronic key is in contact
SituationCorrection
procedure
An attempt was made
to lock the vehicle while
a door was open.
Close all of
the doors and
lock the doors
again.
The trunk was closed
while the electronic key
was still inside the trunk
and all the doors were
locked.
Retrieve the
electronic key
from the trunk
and close the
trunk lid.
SituationCorrection
procedure
The engine switch was
turned to ACC while the
driver’s door was open
(or the driver’s door
was opened while the
engine switch was in
ACC).
Turn the
engine switch
off and close
the driver’s
door.
The engine switch was
turned to off while the
driver’s door was open.
Close the
driver’s door.