display TOYOTA COROLLA CROSS 2022 Owners Manual
[x] Cancel search | Manufacturer: TOYOTA, Model Year: 2022, Model line: COROLLA CROSS, Model: TOYOTA COROLLA CROSS 2022Pages: 612, PDF Size: 17.18 MB
Page 404 of 612
4045-17. Connected Services Operation
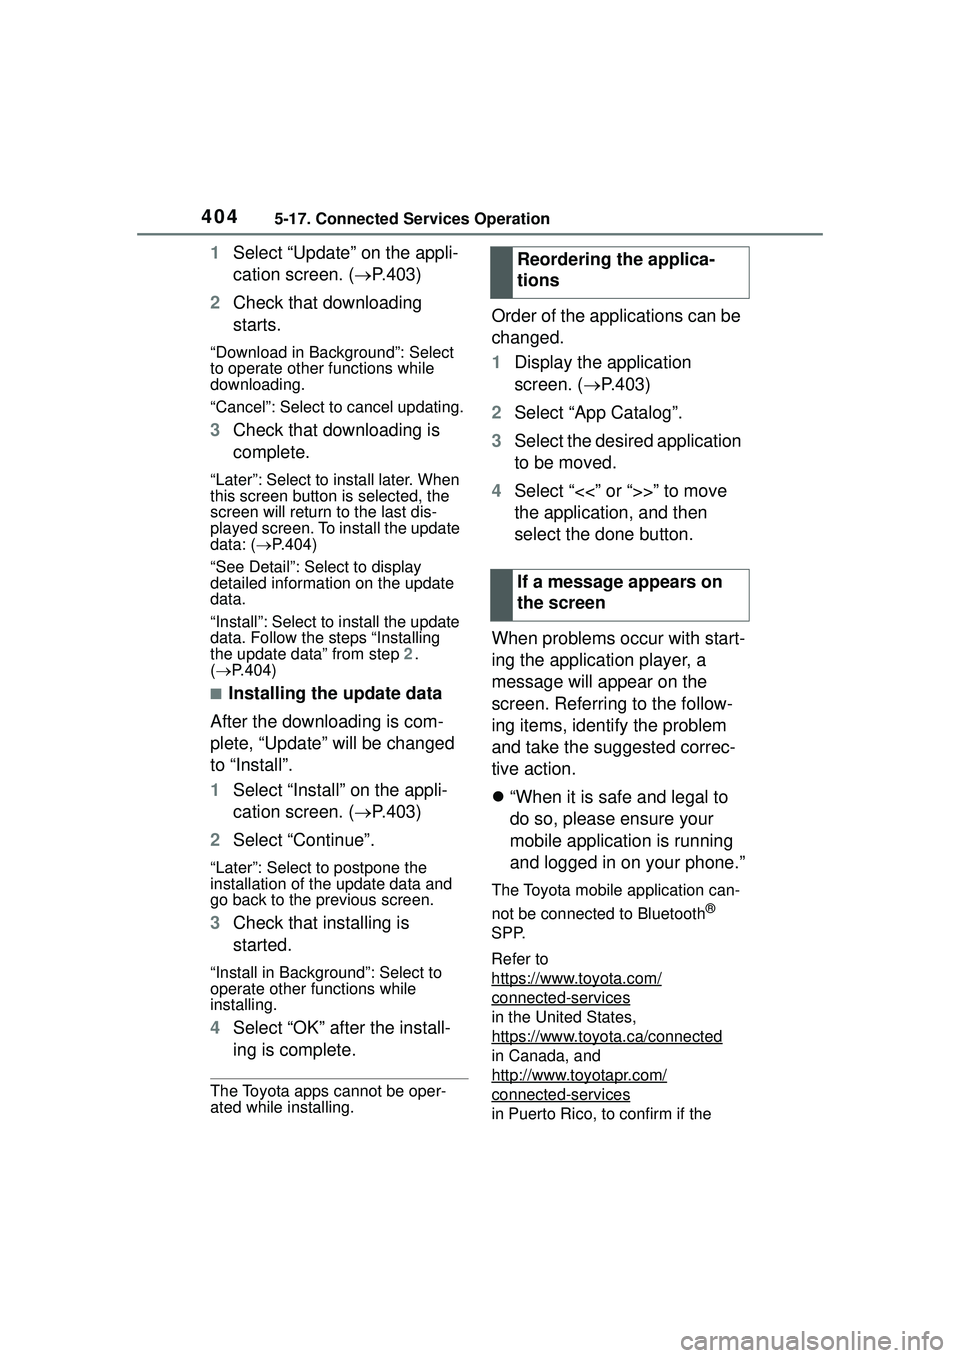
1Select “Update” on the appli-
cation screen. ( P.403)
2 Check that downloading
starts.
“Download in Background”: Select
to operate other functions while
downloading.
“Cancel”: Select to cancel updating.
3Check that downloading is
complete.
“Later”: Select to install later. When
this screen button is selected, the
screen will return to the last dis-
played screen. To install the update
data: ( P.404)
“See Detail”: Select to display
detailed information on the update
data.
“Install”: Select to install the update
data. Follow the steps “Installing
the update data” from step 2.
( P.404)
■Installing the update data
After the downloading is com-
plete, “Update” will be changed
to “Install”.
1 Select “Install” on the appli-
cation screen. ( P.403)
2 Select “Continue”.
“Later”: Select to postpone the
installation of the update data and
go back to the previous screen.
3Check that installing is
started.
“Install in Background”: Select to
operate other functions while
installing.
4Select “OK” after the install-
ing is complete.
The Toyota apps cannot be oper-
ated while installing.
Order of the applications can be
changed.
1Display the application
screen. ( P.403)
2 Select “App Catalog”.
3 Select the desired application
to be moved.
4 Select “<<” or “>>” to move
the application, and then
select the done button.
When problems occur with start-
ing the application player, a
message will appear on the
screen. Referring to the follow-
ing items, identify the problem
and take the suggested correc-
tive action.
“When it is safe and legal to
do so, please ensure your
mobile application is running
and logged in on your phone.”
The Toyota mobile application can-
not be connected to Bluetooth
®
SPP.
Refer to
https://www.toyota.com/
connected-services
in the United States,
https://www.toyota.ca/connected
in Canada, and
http://www.toyotapr.com/
connected-services
in Puerto Rico, to confirm if the
Reordering the applica-
tions
If a message appears on
the screen
Page 406 of 612

4065-17. Connected Services Operation
connected-services
in the United States,
https://www.toyota.ca/connected
in Canada, and
http://www.toyotapr.com/
connected-services
in Puerto Rico.
The keyboard layout can be
changed. (P.319)
1 Display the application
screen. ( P.403)
2 Select the desired application
screen button.
3 Select the character entering
space.
4 Enter a search term, and
then select “OK”.
5 Entering characters will be
reflected on the character
entering space.
For details on operating the key-
board: P.291
1 Display the application
screen. ( P.403)
2 Select the desired application
screen button.
3 Press the talk switch.
( P.358)
4 Say the desired keyword.
Completion of the keyword will be
detected automatically.
5Search results will be dis-
played on the screen.
Entering a keyword using
the software keyboard
Entering a keyword using
the voice recognition func-
tion
Page 407 of 612
4075-18. Toyota apps settings
5
Audio
5-18.Toyota apps settings
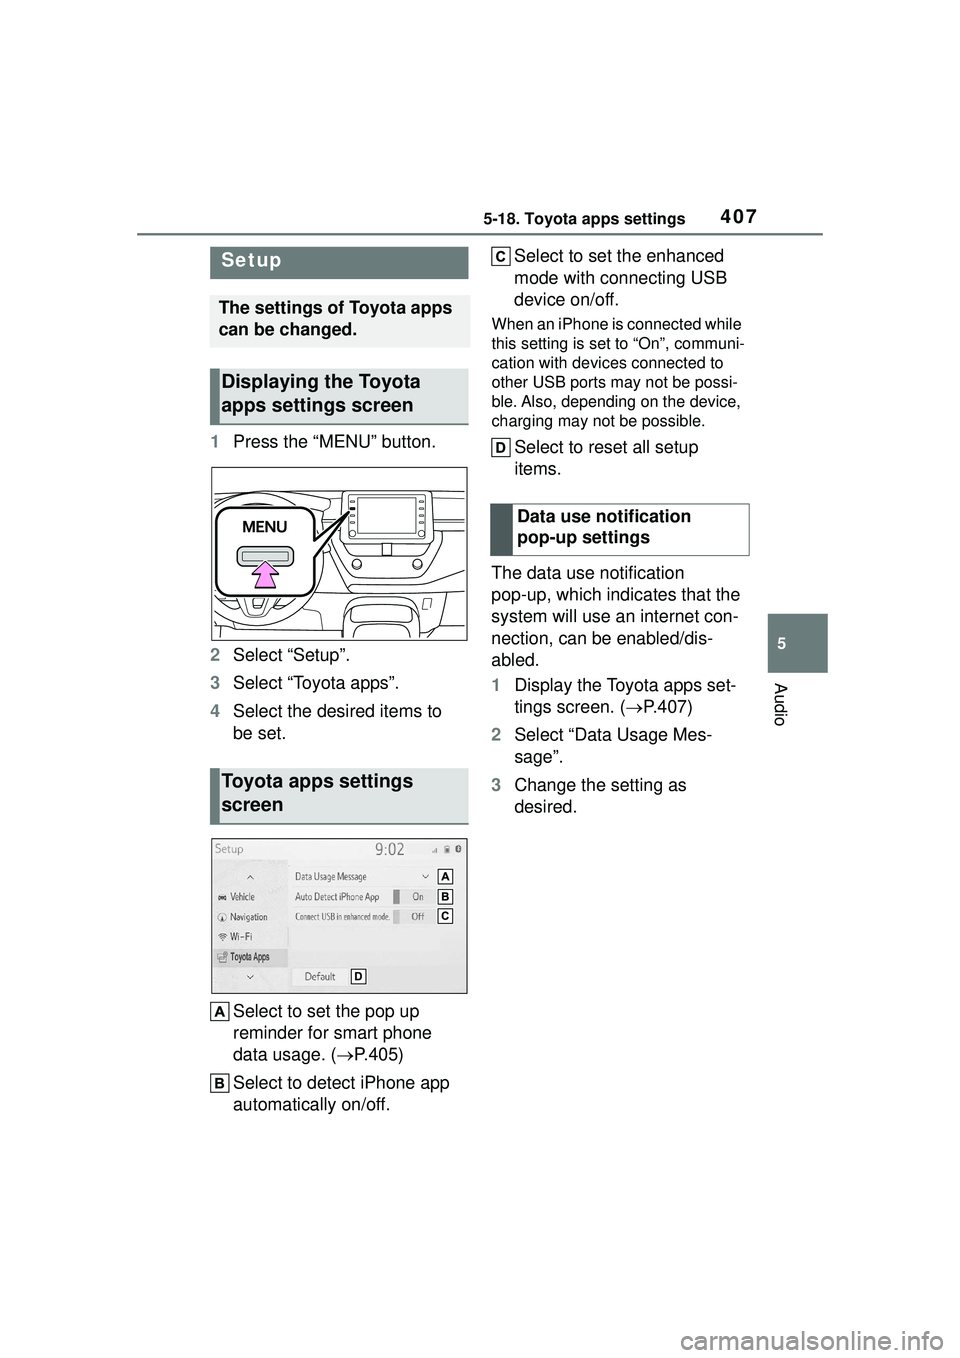
1Press the “MENU” button.
2 Select “Setup”.
3 Select “Toyota apps”.
4 Select the desired items to
be set.
Select to set the pop up
reminder for smart phone
data usage. ( P.405)
Select to detect iPhone app
automatically on/off. Select to set the enhanced
mode with connecting USB
device on/off.
When an iPhone is connected while
this setting is set to “On”, communi-
cation with devices connected to
other USB ports may not be possi-
ble. Also, depending on the device,
charging may not be possible.
Select to reset all setup
items.
The data use notification
pop-up, which indicates that the
system will use an internet con-
nection, can be enabled/dis-
abled.
1 Display the Toyota apps set-
tings screen. ( P.407)
2 Select “Data Usage Mes-
sage”.
3 Change the setting as
desired.
Setup
The settings of Toyota apps
can be changed.
Displaying the Toyota
apps settings screen
Toyota apps settings
screen
Data use notification
pop-up settings
Page 410 of 612
4106-1. Using the air conditioning system and defogger
6-1.Using the air conditioning system and defogger
*: If equipped
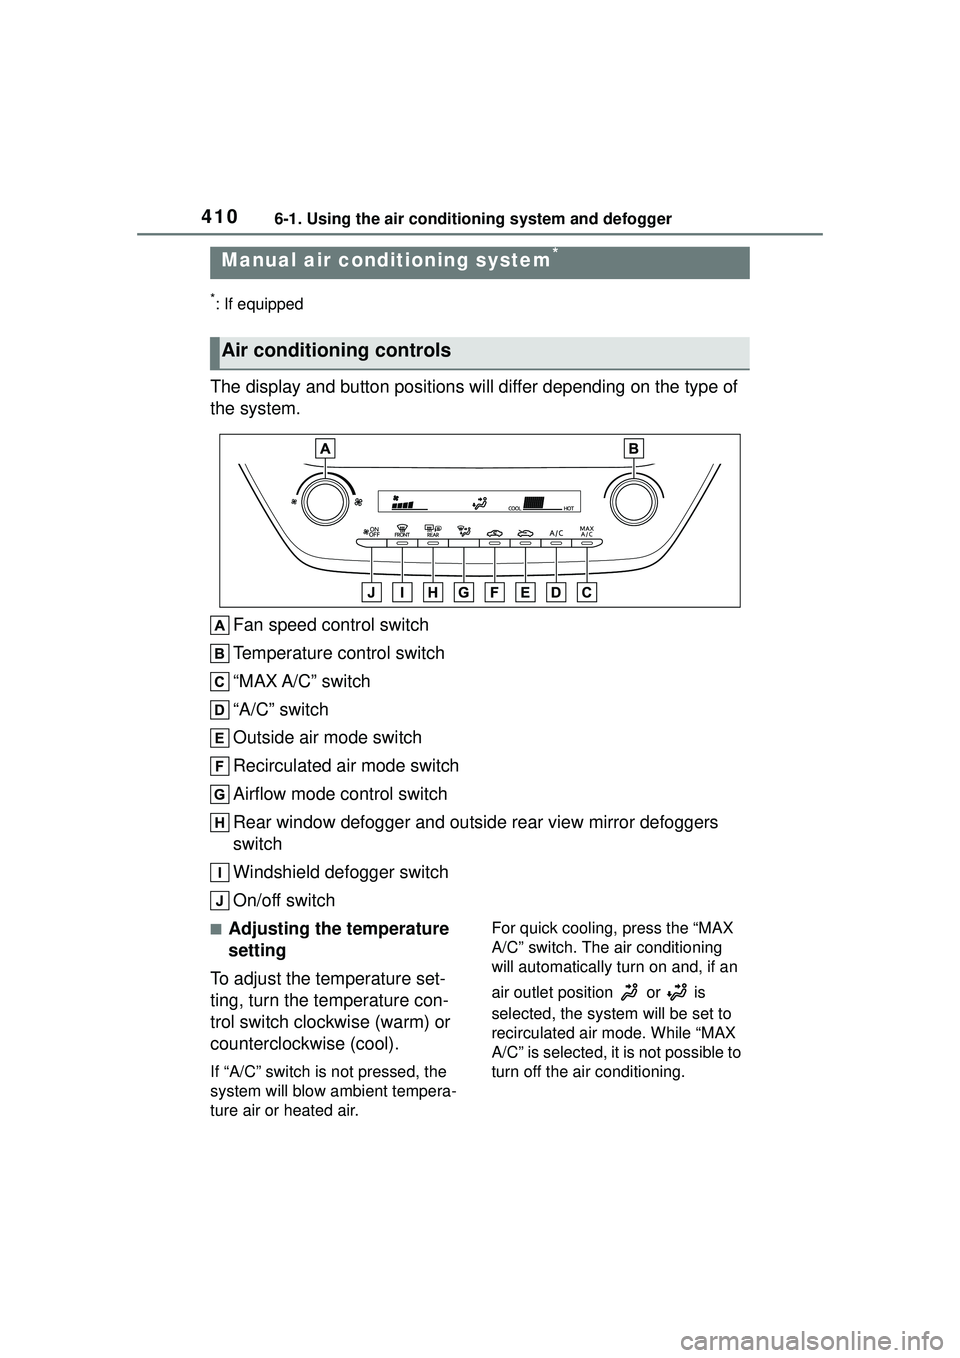
The display and button positions will differ depending on the type of
the system.
Fan speed control switch
Temperature control switch
“MAX A/C” switch
“A/C” switch
Outside air mode switch
Recirculated air mode switch
Airflow mode control switch
Rear window defogger and outside rear view mirror defoggers
switch
Windshield defogger switch
On/off switch
■Adjusting the temperature
setting
To adjust the temperature set-
ting, turn the temperature con-
trol switch clockwise (warm) or
counterclockwise (cool).
If “A/C” switch is not pressed, the
system will blow ambient tempera-
ture air or heated air. For quick cooling, press the “MAX
A/C” switch. The air conditioning
will automatically turn on and, if an
air outlet position or is
selected, the system will be set to
recirculated air mode. While “MAX
A/C” is selected, it is not possible to
turn off the air conditioning.
Manual air condi
tioning system*
Air conditioning controls
Page 416 of 612
4166-1. Using the air conditioning system and defogger
*: If equipped
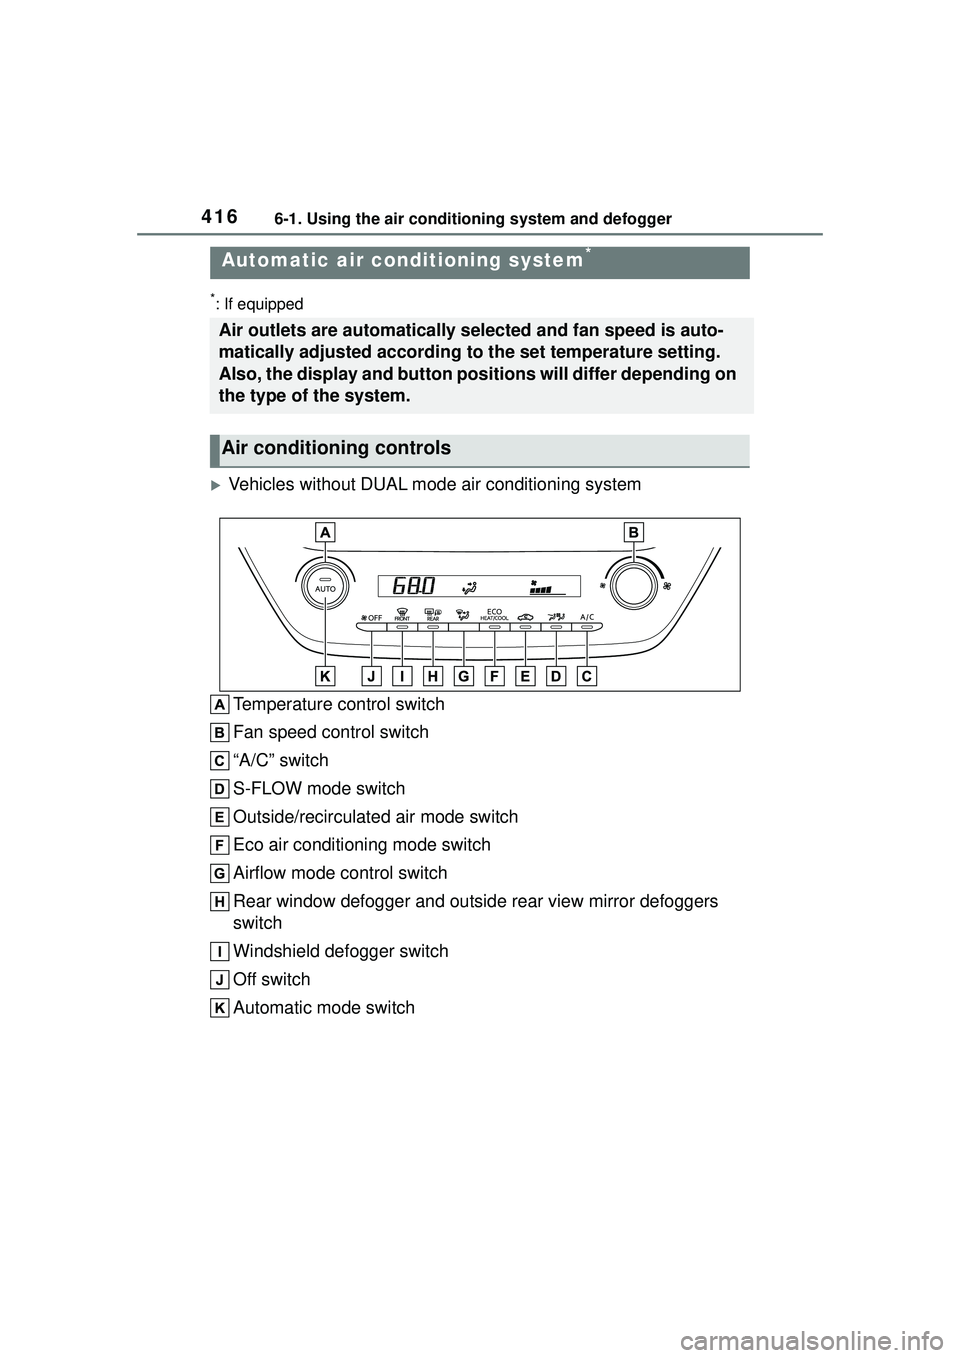
Vehicles without DUAL mode air conditioning systemTemperature control switch
Fan speed control switch
“A/C” switch
S-FLOW mode switch
Outside/recirculated air mode switch
Eco air conditioning mode switch
Airflow mode control switch
Rear window defogger and outside rear view mirror defoggers
switch
Windshield defogger switch
Off switch
Automatic mode switch
Automatic air conditioning system*
Air outlets are automatically selected and fan speed is auto-
matically adjusted according to the set temperature setting.
Also, the display and button positions will differ depending on
the type of the system.
Air conditioning controls
Page 453 of 612
4537-2. Maintenance
7
Maintenance and care
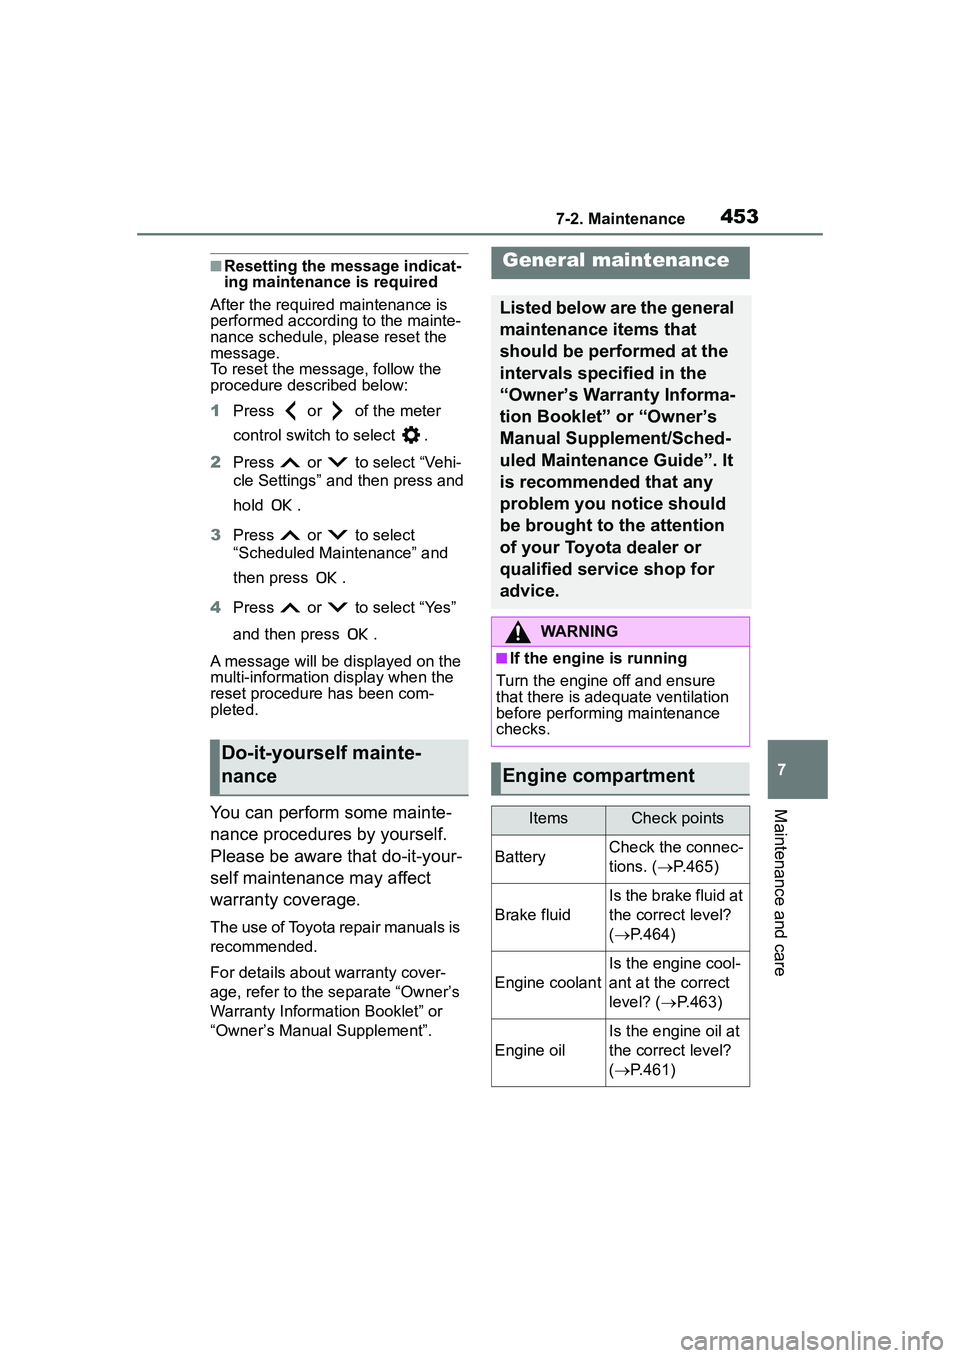
■Resetting the message indicat-
ing maintenance is required
After the required maintenance is
performed according to the mainte-
nance schedule, please reset the
message.
To reset the message, follow the
procedure described below:
1 Press or of the meter
control switch to select .
2 Press or to select “Vehi-
cle Settings” and then press and
hold .
3 Press or to select
“Scheduled Maintenance” and
then press .
4 Press or to select “Yes”
and then press .
A message will be displayed on the
multi-information display when the
reset procedure has been com-
pleted.
You can perform some mainte-
nance procedures by yourself.
Please be aware that do-it-your-
self maintenance may affect
warranty coverage.
The use of Toyota repair manuals is
recommended.
For details about warranty cover-
age, refer to the separate “Owner’s
Warranty Information Booklet” or
“Owner’s Manual Supplement”.
Do-it-yourself mainte-
nance
General maintenance
Listed below are the general
maintenance items that
should be performed at the
intervals specified in the
“Owner’s Warranty Informa-
tion Booklet” or “Owner’s
Manual Supplement/Sched-
uled Maintenance Guide”. It
is recommended that any
problem you notice should
be brought to the attention
of your Toyota dealer or
qualified service shop for
advice.
WARNING
■If the engine is running
Turn the engine off and ensure
that there is adequate ventilation
before performing maintenance
checks.
Engine compartment
ItemsCheck points
BatteryCheck the connec-
tions. ( P.465)
Brake fluid
Is the brake fluid at
the correct level?
( P.464)
Engine coolant
Is the engine cool-
ant at the correct
level? ( P.463)
Engine oil
Is the engine oil at
the correct level?
( P.461)
Page 467 of 612
4677-3. Do-it-yourself maintenance
7
Maintenance and care
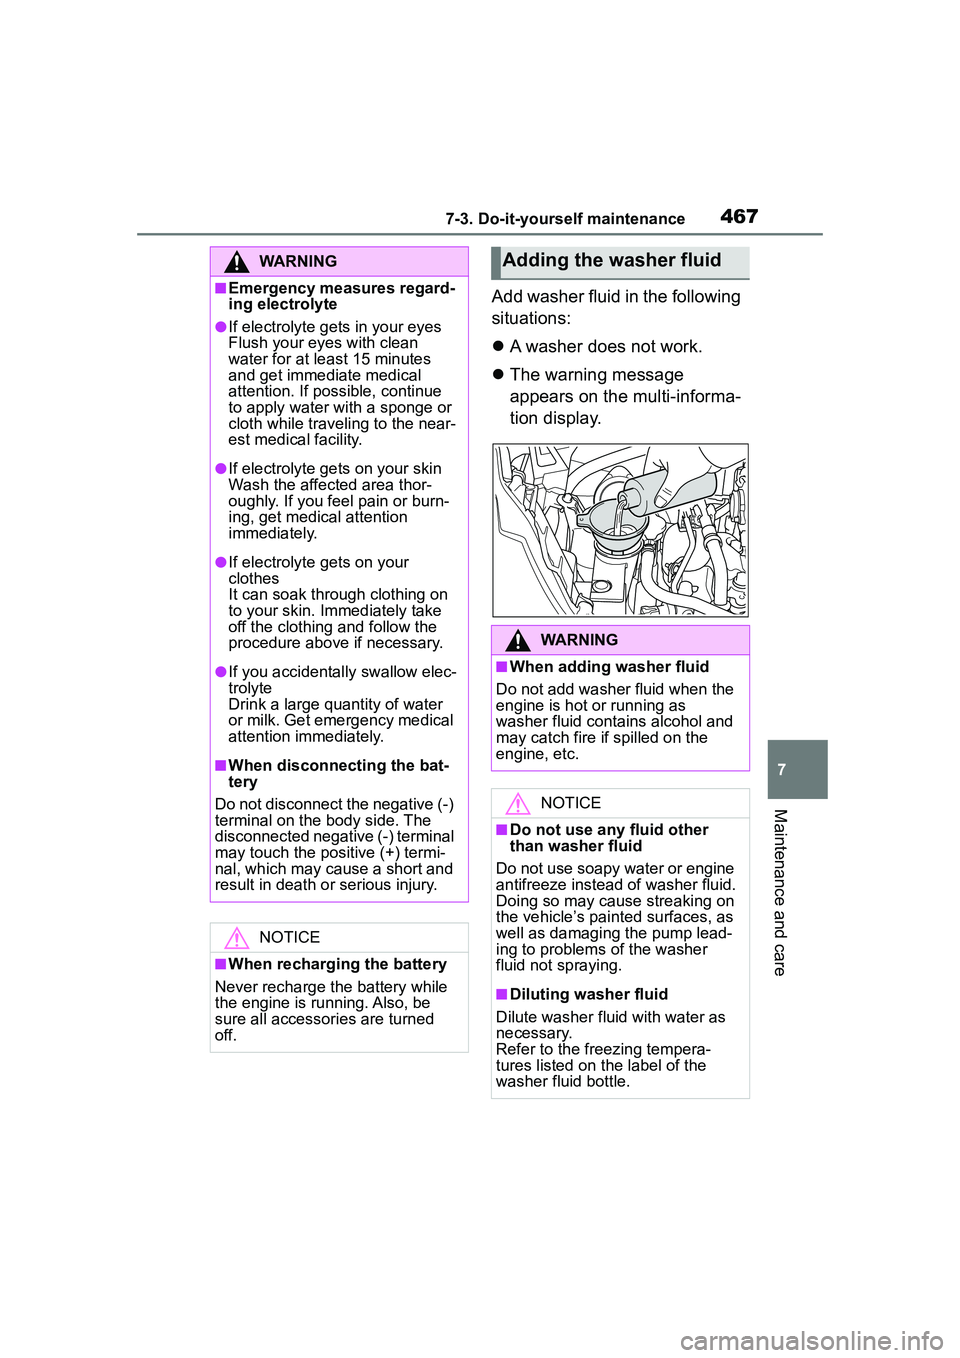
Add washer fluid in the following
situations:
A washer does not work.
The warning message
appears on the multi-informa-
tion display.
WARNING
■Emergency measures regard-
ing electrolyte
●If electrolyte gets in your eyes
Flush your eyes with clean
water for at least 15 minutes
and get immediate medical
attention. If possible, continue
to apply water with a sponge or
cloth while traveling to the near-
est medical facility.
●If electrolyte gets on your skin
Wash the affected area thor-
oughly. If you feel pain or burn-
ing, get medical attention
immediately.
●If electrolyte gets on your
clothes
It can soak through clothing on
to your skin. Immediately take
off the clothing and follow the
procedure above if necessary.
●If you accidentally swallow elec-
trolyte
Drink a large quantity of water
or milk. Get emergency medical
attention immediately.
■When disconnecting the bat-
tery
Do not disconnect the negative (-)
terminal on the body side. The
disconnected negative (-) terminal
may touch the positive (+) termi-
nal, which may cause a short and
result in death or serious injury.
NOTICE
■When recharging the battery
Never recharge the battery while
the engine is running. Also, be
sure all accessori es are turned
off.
Adding the washer fluid
WARNING
■When adding washer fluid
Do not add washer fluid when the
engine is hot or running as
washer fluid contains alcohol and
may catch fire if spilled on the
engine, etc.
NOTICE
■Do not use any fluid other
than washer fluid
Do not use soapy water or engine
antifreeze instead of washer fluid.
Doing so may cause streaking on
the vehicle’s painted surfaces, as
well as damaging the pump lead-
ing to problems of the washer
fluid not spraying.
■Diluting washer fluid
Dilute washer fluid with water as
necessary.
Refer to the freezing tempera-
tures listed on the label of the
washer fluid bottle.
Page 470 of 612
4707-3. Do-it-yourself maintenance
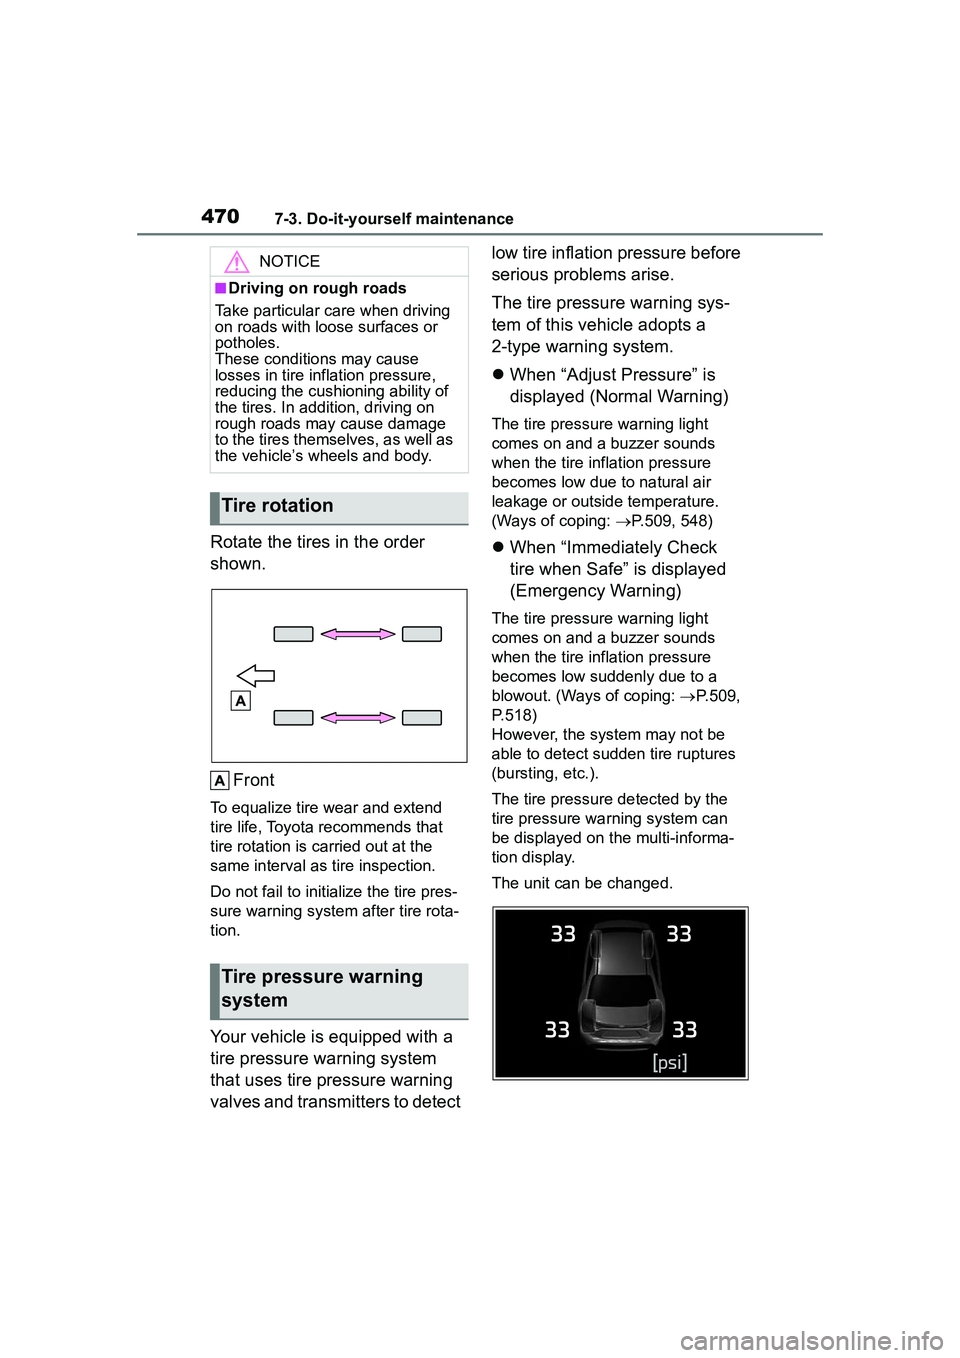
Rotate the tires in the order
shown.Front
To equalize tire wear and extend
tire life, Toyota recommends that
tire rotation is carried out at the
same interval as tire inspection.
Do not fail to initialize the tire pres-
sure warning system after tire rota-
tion.
Your vehicle is equipped with a
tire pressure warning system
that uses tire pressure warning
valves and transmitters to detect low tire inflation pressure before
serious problems arise.
The tire pressure warning sys-
tem of this vehicle adopts a
2-type warning system.
When “Adjust Pressure” is
displayed (Normal Warning)
The tire pressure warning light
comes on and a buzzer sounds
when the tire inflation pressure
becomes low due to natural air
leakage or outside temperature.
(Ways of coping: P.509, 548)
When “Immediately Check
tire when Safe” is displayed
(Emergency Warning)
The tire pressure warning light
comes on and a buzzer sounds
when the tire inflation pressure
becomes low suddenly due to a
blowout. (Ways of coping: P.509,
P.518)
However, the system may not be
able to detect sudden tire ruptures
(bursting, etc.).
The tire pressure detected by the
tire pressure wa rning system can
be displayed on the multi-informa-
tion display.
The unit can be changed.
NOTICE
■Driving on rough roads
Take particular care when driving
on roads with loose surfaces or
potholes.
These conditions may cause
losses in tire inflation pressure,
reducing the cushioning ability of
the tires. In addition, driving on
rough roads may cause damage
to the tires themselves, as well as
the vehicle’s wheels and body.
Tire rotation
Tire pressure warning
system
Page 471 of 612
4717-3. Do-it-yourself maintenance
7
Maintenance and care
■How to change the unit
1 Park the vehicle in a safe
place and turn the engine
switch off.
Changing the unit cannot be per-
formed while the vehicle is moving.
2Turn the engine switch to
ON.
3 Press or of the meter
control switch to select .
4 Press or to select
“Vehicle Settings” and then
press and hold .
5 Press or to select
“TPWS setting” and then
press .
6 Press or to select
“Setting Unit”.
7 Press or to select the
desired unit and then press
.
■Routine tire inflation pressure
checks
The tire pressure warning system
does not replace routine tire inflation
pressure checks. Make sure to
check tire inflation pressure as part
of your routine of daily vehicle
checks.
■Tire inflation pressure
●It may take a few minutes to dis-
play the tire inflation pressure
after the engine switch is turned to
ON. It may also take a few min-
utes to display the tire inflation
pressure after inflation pressure
has been adjusted.
●Tire inflation pressure changes
with temperature.
The displayed values may also be
different from the values mea-
sured using a tire pressure gauge.
■Situations in which the tire
pressure warning system may
not operate properly
●In the following cases, the tire
pressure warning system may not
operate properly.
• If non-genuine Toyota wheels are
used.
• A tire has been replaced with a tire that is not an OE (Original
Equipment) tire.
• A tire has been replaced with a tire that is not of the specified size.
• Tire chains, etc. are equipped.
• An auxiliary-sup ported run-flat tire
is equipped.
• If a window tint that affects the radio wave signals is installed.
• If there is a lot of snow or ice on
the vehicle, particularly around the
wheels or wheel housings.
• If the tire inflation pressure is
extremely higher than the speci-
fied level.
• If wheel without tire pressure
warning valves and transmitters
are used.
• If the ID code on the tire pressure
warning valves and transmitters is
not registered in the tire pressure
warning computer.
●Performance may be affected in
the following situations.
• Near a TV tower, electric power plant, gas station, radio station,
large display, airport or other facil-
ity that generates strong radio
waves or electrical noise
• When carrying a portable radio,
cellular phone, cordless phone or
other wireless communication
device
●If tire position information is not
correctly displayed due to the
radio wave conditions, the display
may be corrected by driving and
changing the radio wave condi-
Page 473 of 612
4737-3. Do-it-yourself maintenance
7
Maintenance and care
■The tire pressure warning
system must be initialized
in the following circum-
stances:
When rotating the tires.
When changing the tire.
After registering the ID codes.
( P.475)
When changing between two
registered wheel sets.
When the tire pressure warning
system is initialized, the current
tire inflation pressure is set as
the benchmark pressure.
■How to initialize the tire
pressure warning system
1 Park the vehicle in a safe
place and stop the engine for
20 minutes or more.
Initialization cannot be performed
while the vehicle is moving.
2Adjust the tire inflation pres-
sure to the specified cold tire
inflation pressure level.
( P.548)
Make sure to adjust the tire pres-
sure to the specified cold tire infla-
tion pressure level. The tire
pressure warning system will oper-
ate based on this pressure level.
3Start the engine.
4 Press or of the meter
control switch to select . 5
Press or to select
“Vehicle Settings” and then
press and hold .
6 Press or to select
“TPWS setting” and then
press .
7 Press or to select
“Setting Pressure”. Then
press and hold .
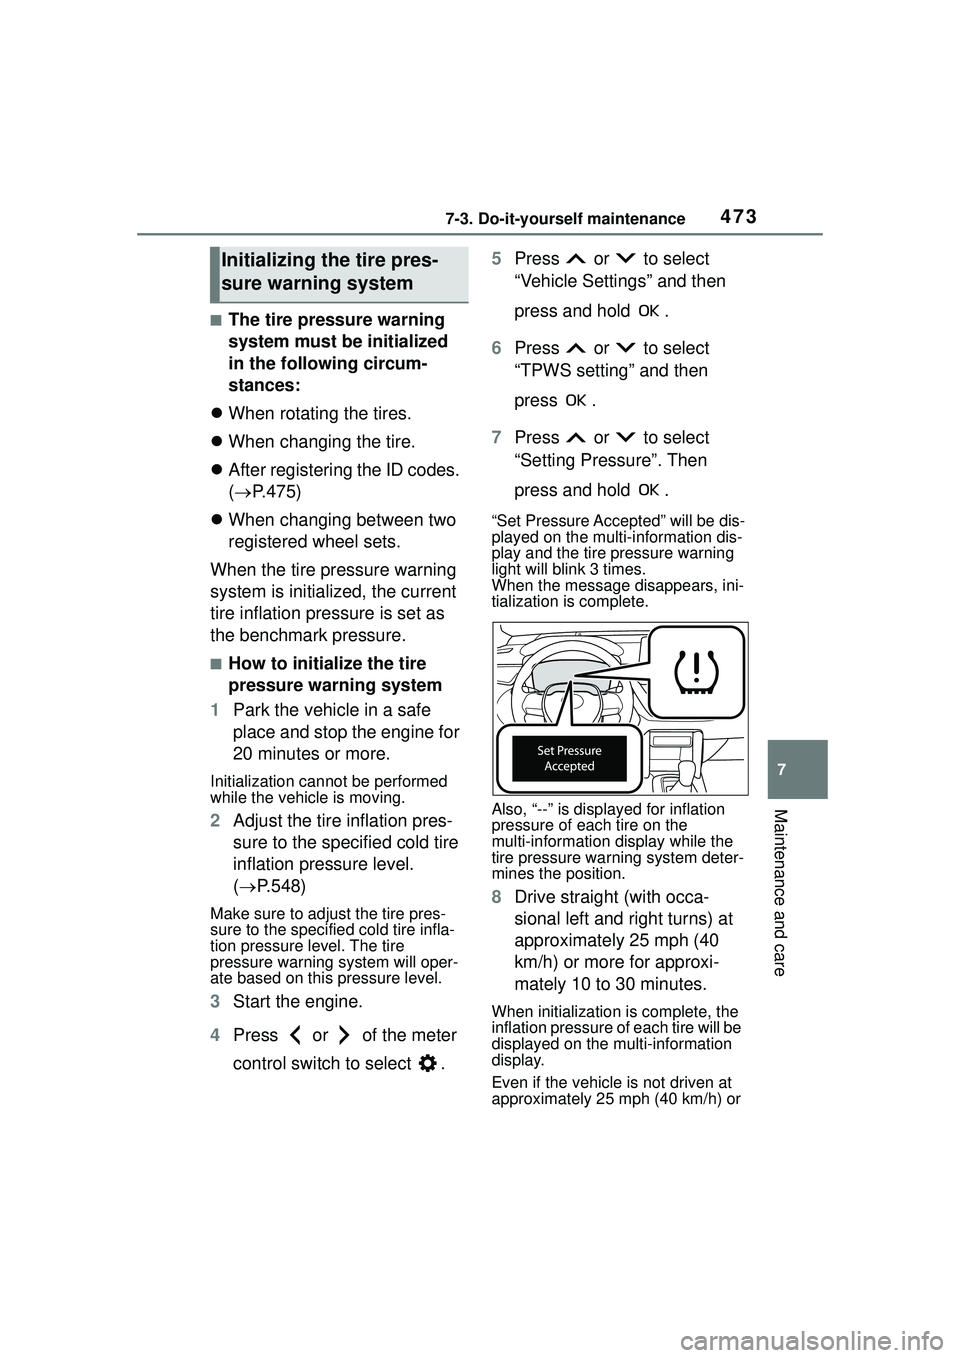
“Set Pressure Accepted” will be dis-
played on the multi-information dis-
play and the tire pressure warning
light will blink 3 times.
When the message disappears, ini-
tialization is complete.
Also, “--” is disp layed for inflation
pressure of each tire on the
multi-information display while the
tire pressure wa rning system deter-
mines the position.
8 Drive straight (with occa-
sional left and right turns) at
approximately 25 mph (40
km/h) or more for approxi-
mately 10 to 30 minutes.
When initialization is complete, the
inflation pressure of each tire will be
displayed on the multi-information
display.
Even if the vehicle is not driven at
approximately 25 mph (40 km/h) or
Initializing the tire pres-
sure warning system