light TOYOTA COROLLA HATCHBACK 2020 Owners Manual (in English)
[x] Cancel search | Manufacturer: TOYOTA, Model Year: 2020, Model line: COROLLA HATCHBACK, Model: TOYOTA COROLLA HATCHBACK 2020Pages: 572, PDF Size: 13.8 MB
Page 434 of 572
4347-3. Do-it-yourself maintenance
COROLLA H/B_U
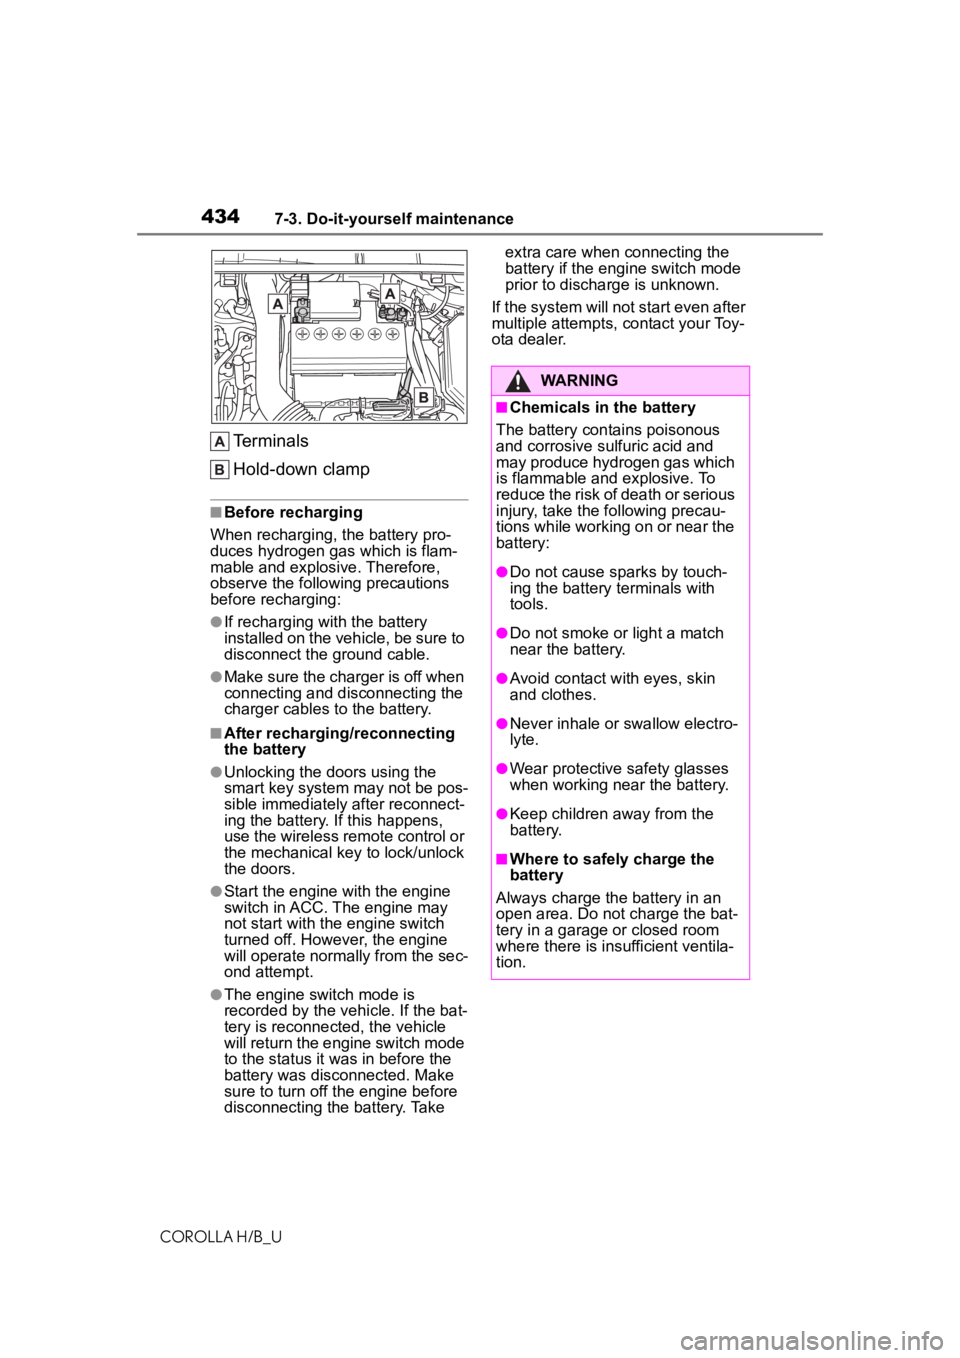
Terminals
Hold-down clamp
■Before recharging
When recharging, t he battery pro-
duces hydrogen ga s which is flam-
mable and explosive. Therefore,
observe the following precautions
before recharging:
●If recharging wi th the battery
installed on the vehicle, be sure to
disconnect the ground cable.
●Make sure the charger is off when
connecting and disconnecting the
charger cables to the battery.
■After recharging/reconnecting
the battery
●Unlocking the doors using the
smart key system may not be pos-
sible immediately after reconnect-
ing the battery. If this happens,
use the wireless remote control or
the mechanical key to lock/unlock
the doors.
●Start the engine with the engine
switch in ACC. The engine may
not start with the engine switch
turned off. However, the engine
will operate normally from the sec-
ond attempt.
●The engine switch mode is
recorded by the vehicle. If the bat-
tery is reconnected, the vehicle
will return the engi ne switch mode
to the status it was in before the
battery was disconnected. Make
sure to turn off the engine before
disconnecting the battery. Take extra care when connecting the
battery if the engine switch mode
prior to discharge is unknown.
If the system will not start even after
multiple attempts, contact your Toy-
ota dealer.
WARNING
■Chemicals in the battery
The battery contains poisonous
and corrosive sulfuric acid and
may produce hydrogen gas which
is flammable and explosive. To
reduce the risk of death or serious
injury, take the following precau-
tions while working on or near the
battery:
●Do not cause sparks by touch-
ing the battery terminals with
tools.
●Do not smoke or light a match
near the battery.
●Avoid contact with eyes, skin
and clothes.
●Never inhale or swallow electro-
lyte.
●Wear protective safety glasses
when working near the battery.
●Keep children away from the
battery.
■Where to safely charge the
battery
Always charge the battery in an
open area. Do not charge the bat-
tery in a garage or closed room
where there is ins ufficient ventila-
tion.
Page 439 of 572
4397-3. Do-it-yourself maintenance
COROLLA H/B_U
7
Maintenance and care
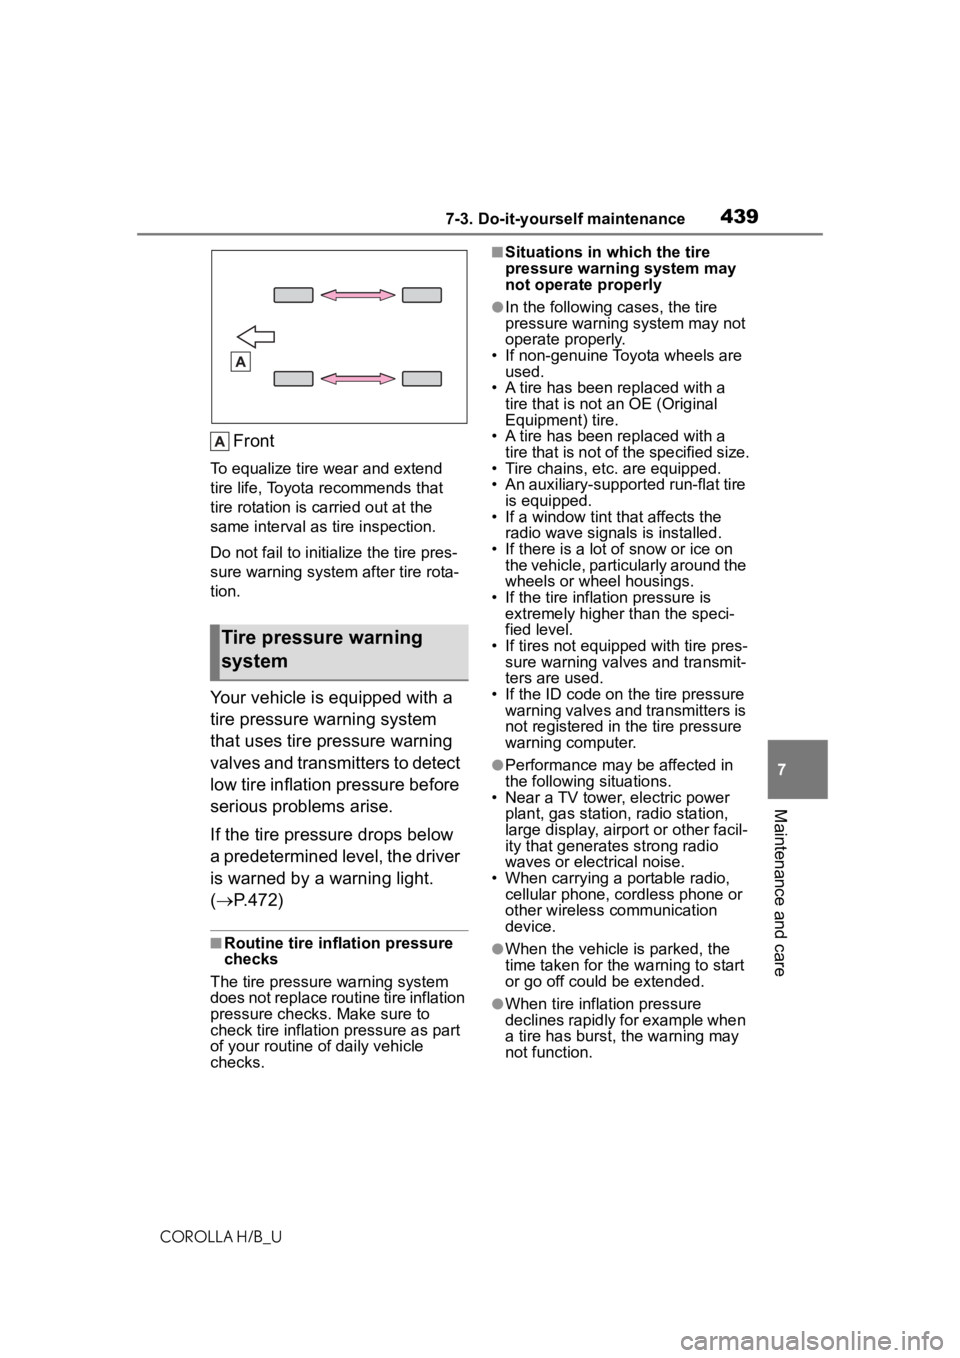
Front
To equalize tire wear and extend
tire life, Toyota recommends that
tire rotation is c arried out at the
same interval as tire inspection.
Do not fail to initialize the tire pres-
sure warning system after tire rota-
tion.
Your vehicle is equipped with a
tire pressure warning system
that uses tire pressure warning
valves and transmitters to detect
low tire inflation pressure before
serious problems arise.
If the tire pressure drops below
a predetermined level, the driver
is warned by a warning light.
( P.472)
■Routine tire inflation pressure
checks
The tire pressure warning system
does not replace routine tire inflation
pressure checks. Make sure to
check tire inflation pressure as part
of your routine of daily vehicle
checks.
■Situations in which the tire
pressure warning system may
not operate properly
●In the following cases, the tire
pressure warning system may not
operate properly.
• If non-genuine Toyota wheels are used.
• A tire has been replaced with a
tire that is not an OE (Original
Equipment) tire.
• A tire has been replaced with a
tire that is not of the specified size.
• Tire chains, etc. are equipped.
• An auxiliary-support ed run-flat tire
is equipped.
• If a window tint that affects the
radio wave signals is installed.
• If there is a lot of snow or ice on the vehicle, particularly around the
wheels or wheel housings.
• If the tire inflation pressure is extremely higher than the speci-
fied level.
• If tires not equipped with tire pres- sure warning valves and transmit-
ters are used.
• If the ID code on the tire pressure warning valves and transmitters is
not registered in the tire pressure
warning computer.
●Performance may be affected in
the following situations.
• Near a TV tower, electric power
plant, gas station, radio station,
large display, airpo rt or other facil-
ity that generates strong radio
waves or electrical noise.
• When carrying a portable radio, cellular phone, cordless phone or
other wireless communication
device.
●When the vehicle is parked, the
time taken for the warning to start
or go off could be extended.
●When tire inflation pressure
declines rapidly for example when
a tire has burst, the warning may
not function.
Tire pressure warning
system
Page 441 of 572
4417-3. Do-it-yourself maintenance
COROLLA H/B_U
7
Maintenance and care
For vehicles sold in Canada
When replacing tires or wheels,
tire pressure warning valves and
transmitters must also be
installed.
When new tire pressure warning
valves and transmitters are
installed, new ID codes must be
registered in the tire pressure
warning computer and the tire
pressure warning system must
be initialized. Have tire pressure
warning valves and transmitter
ID codes registered by your Toy-
ota dealer. ( P.443)
■Replacing tires and wheels
If the ID code of the tire pressure warning valve and tr
ansmitter is not
registered, the tire pressure warning
system will not work properly. After
driving for about 20 minutes, the tire
pressure warning light blinks for 1
minute and stays on to indicate a
system malfunction.
Installing tire pressure
warning valves and trans-
mitters
NOTICE
■Repairing or replacing tires,
wheels, tire pressure warn-
ing valves, transmitters and
tire valve caps
●When removing or fitting the
wheels, tires or the tire pressure
warning valves and transmit-
ters, contact your Toyota dealer
as the tire pressure warning
valves and transmitters may be
damaged if not handled cor-
rectly.
Page 443 of 572
4437-3. Do-it-yourself maintenance
COROLLA H/B_U
7
Maintenance and care
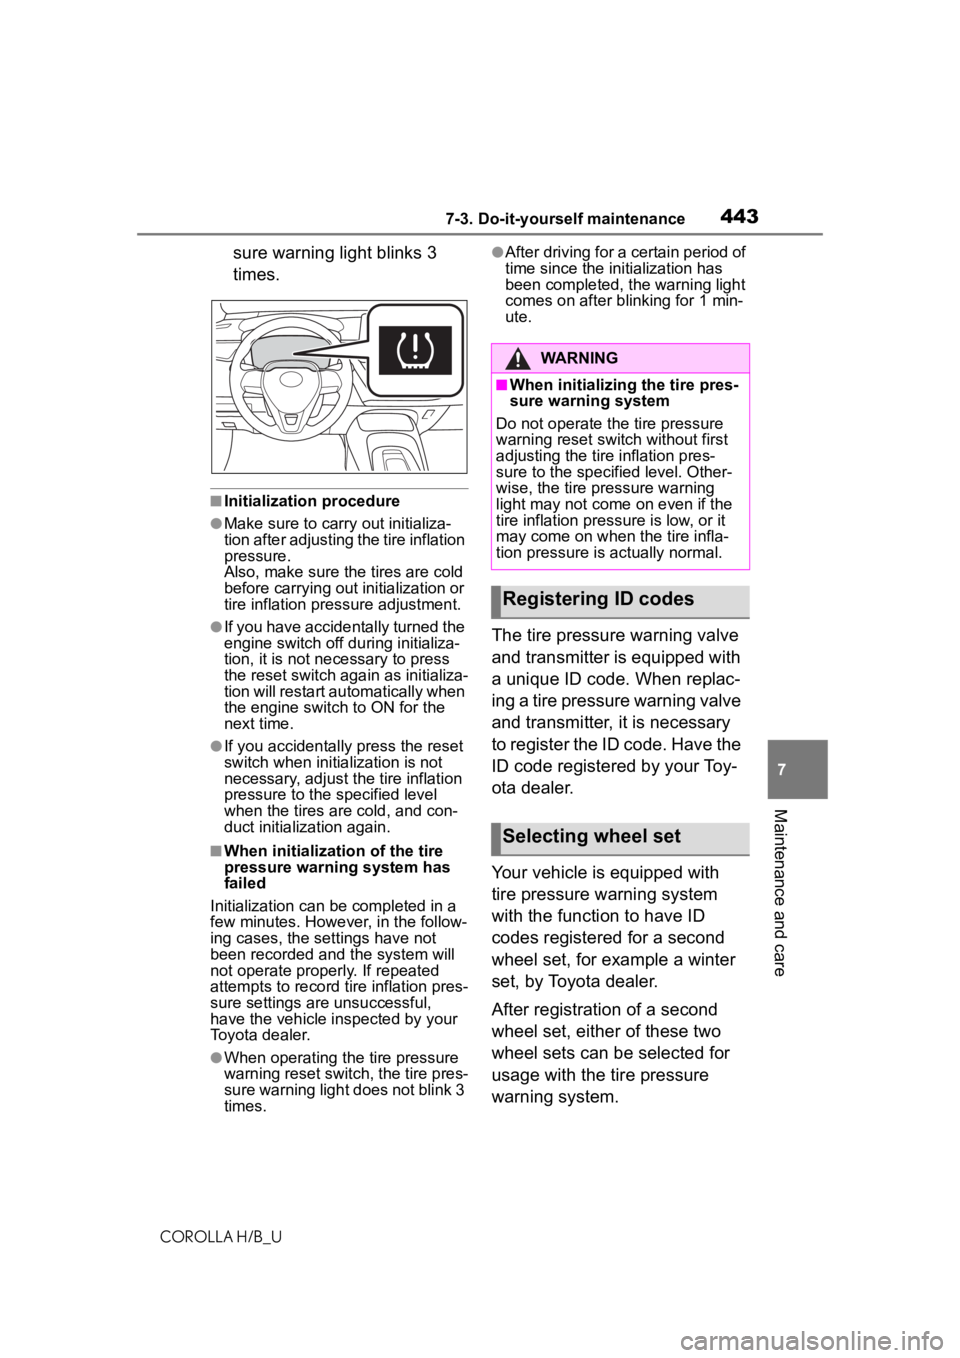
sure warning light blinks 3
times.
■Initialization procedure
●Make sure to carry out initializa-
tion after adjusting the tire inflation
pressure.
Also, make sure the tires are cold
before carrying out initialization or
tire inflation pressure adjustment.
●If you have accidentally turned the
engine switch off during initializa-
tion, it is not necessary to press
the reset switch again as initializa-
tion will restart aut omatically when
the engine switch to ON for the
next time.
●If you accidentally press the reset
switch when initialization is not
necessary, adjust the tire inflation
pressure to the specified level
when the tires are cold, and con-
duct initialization again.
■When initialization of the tire
pressure warning system has
failed
Initialization can be completed in a
few minutes. However, in the follow-
ing cases, the set tings have not
been recorded an d the system will
not operate properly. If repeated
attempts to record tire inflation pres-
sure settings are unsuccessful,
have the vehicle inspected by your
Toyota dealer.
●When operating the tire pressure
warning reset swit ch, the tire pres-
sure warning light does not blink 3
times.
●After driving for a certain period of
time since the initialization has
been completed, the warning light
comes on after bl inking for 1 min-
ute.
The tire pressure warning valve
and transmitter is equipped with
a unique ID code. When replac-
ing a tire pressure warning valve
and transmitter, it is necessary
to register the ID code. Have the
ID code registered by your Toy-
ota dealer.
Your vehicle is equipped with
tire pressure warning system
with the function to have ID
codes registered for a second
wheel set, for example a winter
set, by Toyota dealer.
After registration of a second
wheel set, either of these two
wheel sets can be selected for
usage with the tire pressure
warning system.
WARNING
■When initializing the tire pres-
sure warning system
Do not operate the tire pressure
warning reset switch without first
adjusting the tire inflation pres-
sure to the specif ied level. Other-
wise, the tire pressure warning
light may not come on even if the
tire inflation press ure is low, or it
may come on when the tire infla-
tion pressure is actually normal.
Registering ID codes
Selecting wheel set
Page 444 of 572
4447-3. Do-it-yourself maintenance
COROLLA H/B_U
■Operating conditions for
the function
This function will perform the
change of wheel set only if a
second wheel set has been
registered. If no second wheel
set has been registered, no
change will be made when
selecting this function in the
menu.
Only a change between both
registered wheel set is possi-
ble, mixing between these
wheel sets is not supported.
■How to change between
wheel sets
1 Have the vehicle fitted with
the preferred wheel set.
2 Press or of the meter
control switch to select .
3 Press or to select
“Vehicle Settings” and then
press .
4 Press or to select
“TPWS” and then press .
5 Press or to select
“Change Wheel”. Then press
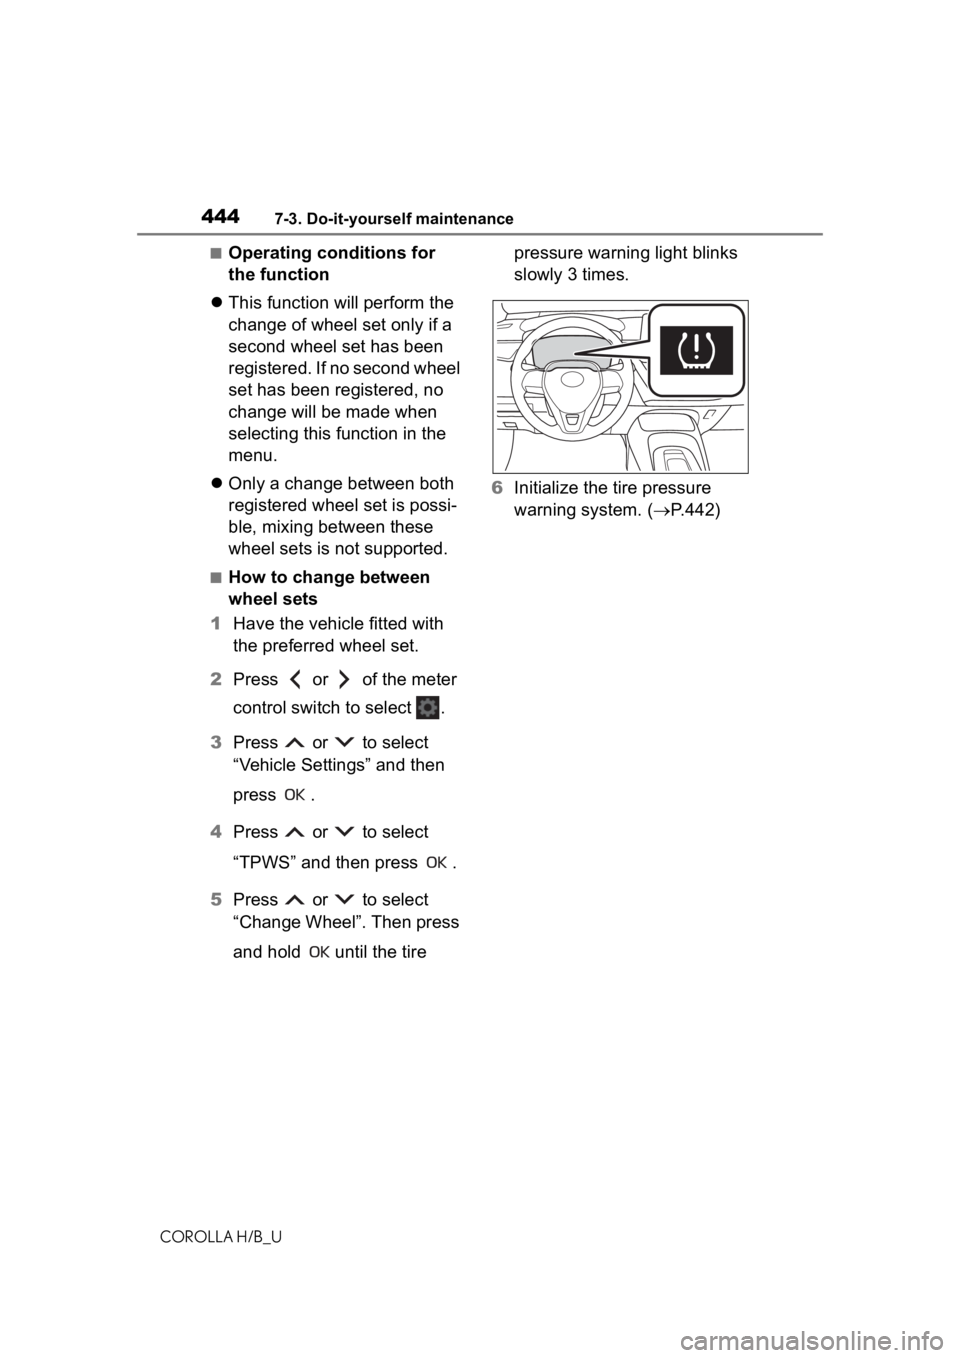
and hold until the tire pressure warning light blinks
slowly 3 times.
6 Initialize the tire pressure
warning system. ( P.442)
Page 454 of 572
4547-3. Do-it-yourself maintenance
COROLLA H/B_U
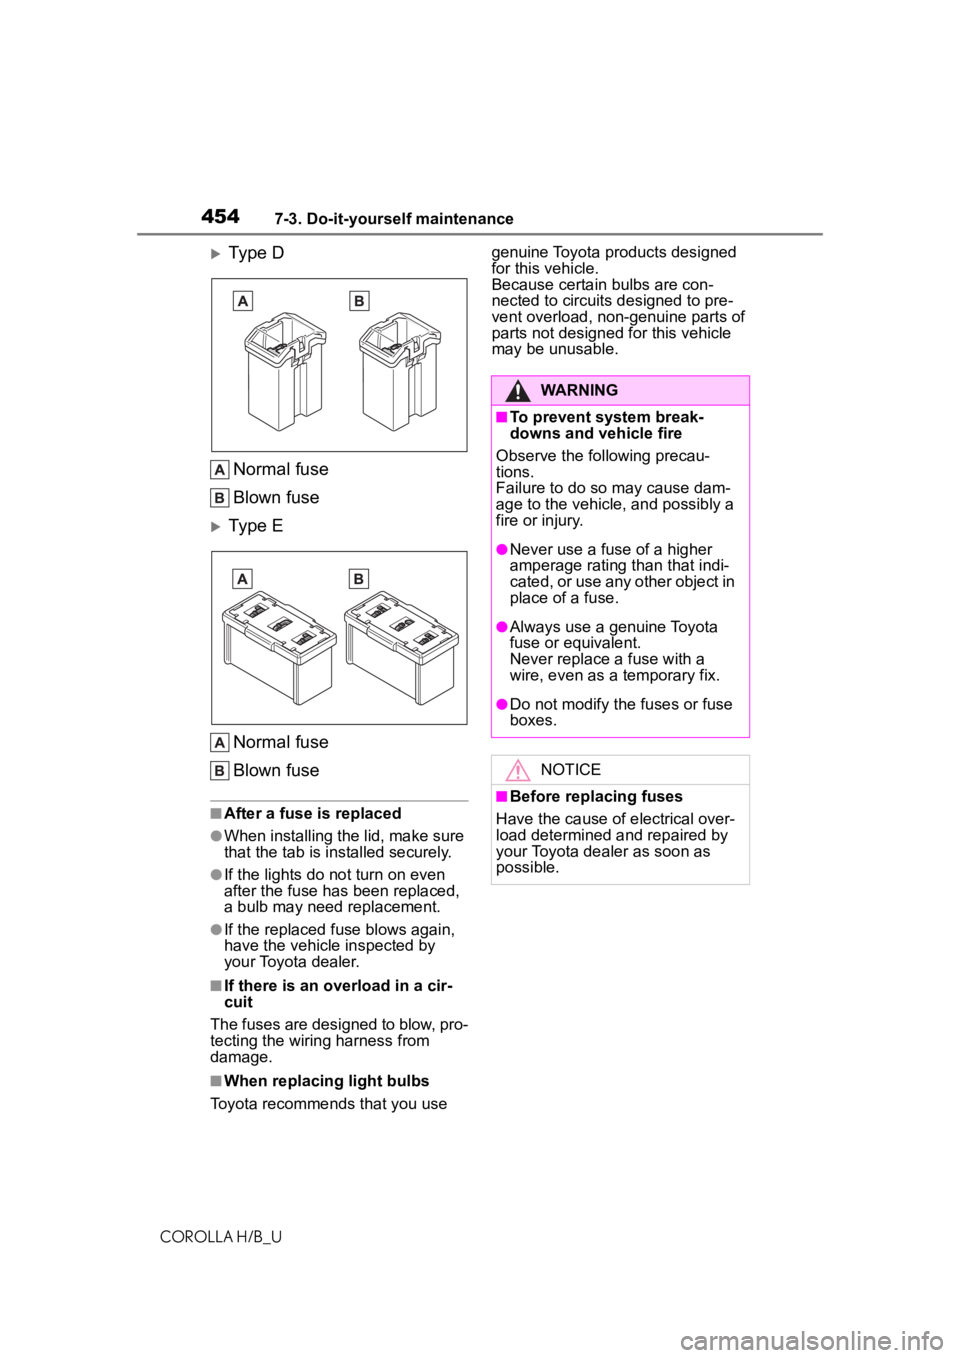
Type D
Normal fuse
Blown fuse
Type E
Normal fuse
Blown fuse
■After a fuse is replaced
●When installing the lid, make sure
that the tab is installed securely.
●If the lights do n ot turn on even
after the fuse has been replaced,
a bulb may need replacement.
●If the replaced fuse blows again,
have the vehicle inspected by
your Toyota dealer.
■If there is an overload in a cir-
cuit
The fuses are designed to blow, pro-
tecting the wiring harness from
damage.
■When replacing light bulbs
Toyota recommends that you use genuine Toyota pr
oducts designed
for this vehicle.
Because certain bulbs are con-
nected to circuits designed to pre-
vent overload, non-genuine parts of
parts not designed for this vehicle
may be unusable.
WARNING
■To prevent system break-
downs and vehicle fire
Observe the following precau-
tions.
Failure to do so may cause dam-
age to the vehicle, and possibly a
fire or injury.
●Never use a fuse of a higher
amperage rating than that indi-
cated, or use any other object in
place of a fuse.
●Always use a genuine Toyota
fuse or equivalent.
Never replace a fuse with a
wire, even as a temporary fix.
●Do not modify the fuses or fuse
boxes.
NOTICE
■Before replacing fuses
Have the cause of electrical over-
load determined and repaired by
your Toyota dealer as soon as
possible.
Page 455 of 572
4557-3. Do-it-yourself maintenance
COROLLA H/B_U
7
Maintenance and care
Check the wattage of the light
bulb to be replaced. ( P.516)
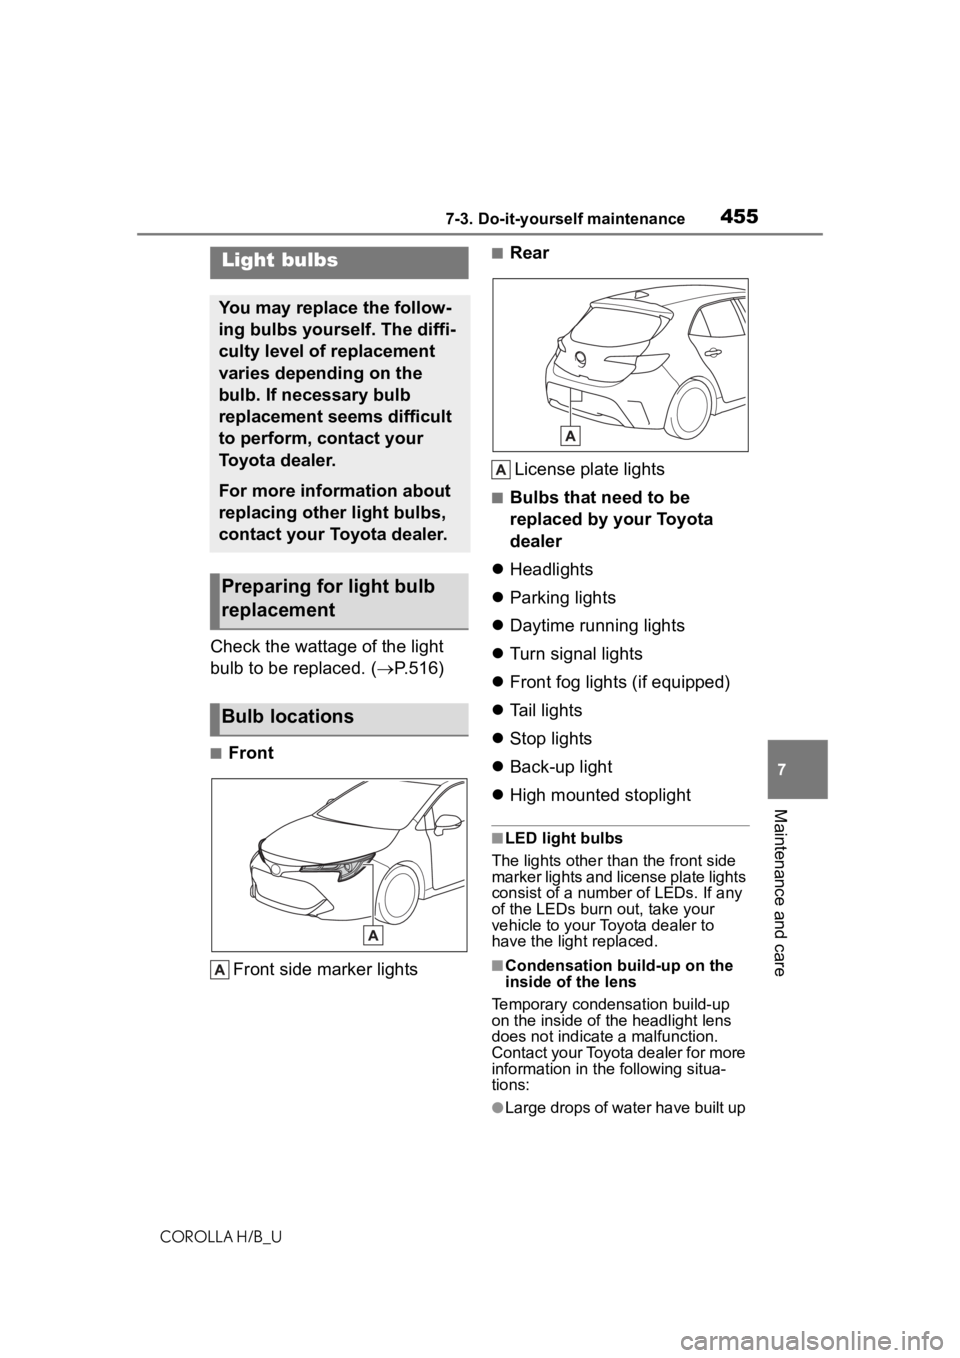
■Front
Front side marker lights
■RearLicense plate lights
■Bulbs that need to be
replaced by your Toyota
dealer
Headlights
Parking lights
Daytime running lights
Turn signal lights
Front fog lights (if equipped)
Tail lights
Stop lights
Back-up light
High mounted stoplight
■LED light bulbs
The lights other than the front side
marker lights and license plate lights
consist of a numbe r of LEDs. If any
of the LEDs burn out, take your
vehicle to your Toyota dealer to
have the light replaced.
■Condensation build-up on the
inside of the lens
Temporary condensation build-up
on the inside of t he headlight lens
does not indicate a malfunction.
Contact your Toyota dealer for more
information in t he following situa-
tions:
●Large drops of water have built up
Light bulbs
You may replace the follow-
ing bulbs yourself. The diffi-
culty level of replacement
varies depending on the
bulb. If necessary bulb
replacement seems difficult
to perform, contact your
Toyota dealer.
For more information about
replacing other light bulbs,
contact your Toyota dealer.
Preparing for light bulb
replacement
Bulb locations
Page 456 of 572
4567-3. Do-it-yourself maintenance
COROLLA H/B_Uon the inside of the lens.
●Water has built up inside the
headlight.
■When replacing light bulbs
P. 4 5 4
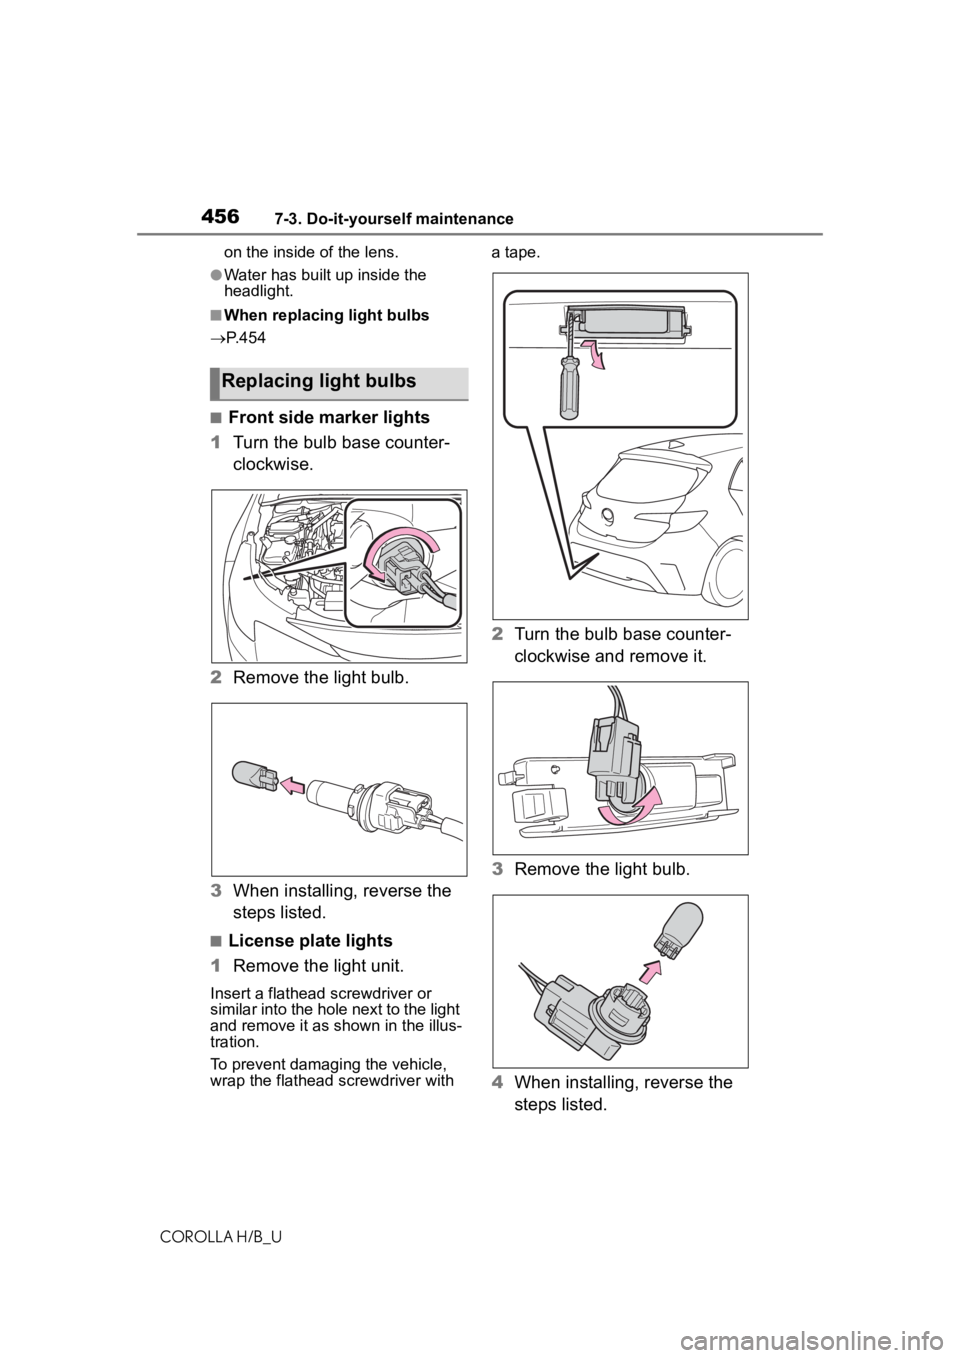
■Front side marker lights
1 Turn the bulb base counter-
clockwise.
2 Remove the light bulb.
3 When installing, reverse the
steps listed.
■License plate lights
1 Remove the light unit.
Insert a flathead screwdriver or
similar into the hole next to the light
and remove it as shown in the illus-
tration.
To prevent damagin g the vehicle,
wrap the flathead screwdriver with a tape.
2
Turn the bulb base counter-
clockwise and remove it.
3 Remove the light bulb.
4 When installing, reverse the
steps listed.
Replacing light bulbs
Page 457 of 572
4577-3. Do-it-yourself maintenance
COROLLA H/B_U
7
Maintenance and care
WARNING
■Replacing light bulbs
●Turn off the lights. Do not
attempt to replace the bulb
immediately after turning off the
lights. The bulbs become very
hot and may cause burns.
●Do not touch the glass portion
of the light bulb with bare
hands. When it is unavoidable
to hold the glass portion, use
and hold with a clean dry cloth
to avoid getting moisture and
oils on the bulb. Also, if the bulb
is scratched or dropped, it may
blow out or crack.
●Fully install light bulbs and any
parts used to secure them. Fail-
ure to do so may result in heat
damage, fire, or water entering
the light unit. This may damage
the lights or cause condensa-
tion to build up on the lens.
■To prevent damage or fire
Make sure bulbs are fully seated
and locked.
Page 459 of 572

459
COROLLA H/B_U
8
8
When trouble arises
When trouble arises
.8-1. Essential informationEmergency flashers .... 460
If your vehicle has to be stopped in an emergency.................................. 460
If the vehicle is trapped in rising water ................ 461
8-2. Steps to take in an emer- gency
If your vehicle needs to be towed......................... 463
If you think something is wrong ........................ 466
Fuel pump shut off system .................................. 467
If a warning light turns on or a warning buzzer sounds.................................. 468
If a warning message is dis- played........................ 477
If you have a flat tire (vehi- cles without spare tire).................................. 479
If you have a flat tire (vehi- cles with a spare tire)
.................................. 490
If the engine will not start .................................. 498
If you lose your keys ... 500
If the electronic key does not operate properly .. 500
If the vehicle battery is dis- charged ..................... 502If your vehicle overheats
.................................. 506
If the vehicle becomes stuck .................................. 508