change wheel TOYOTA COROLLA HATCHBACK 2022 (in English) Owner's Manual
[x] Cancel search | Manufacturer: TOYOTA, Model Year: 2022, Model line: COROLLA HATCHBACK, Model: TOYOTA COROLLA HATCHBACK 2022Pages: 758, PDF Size: 155.26 MB
Page 338 of 758
3364-5. Using the driving support systems
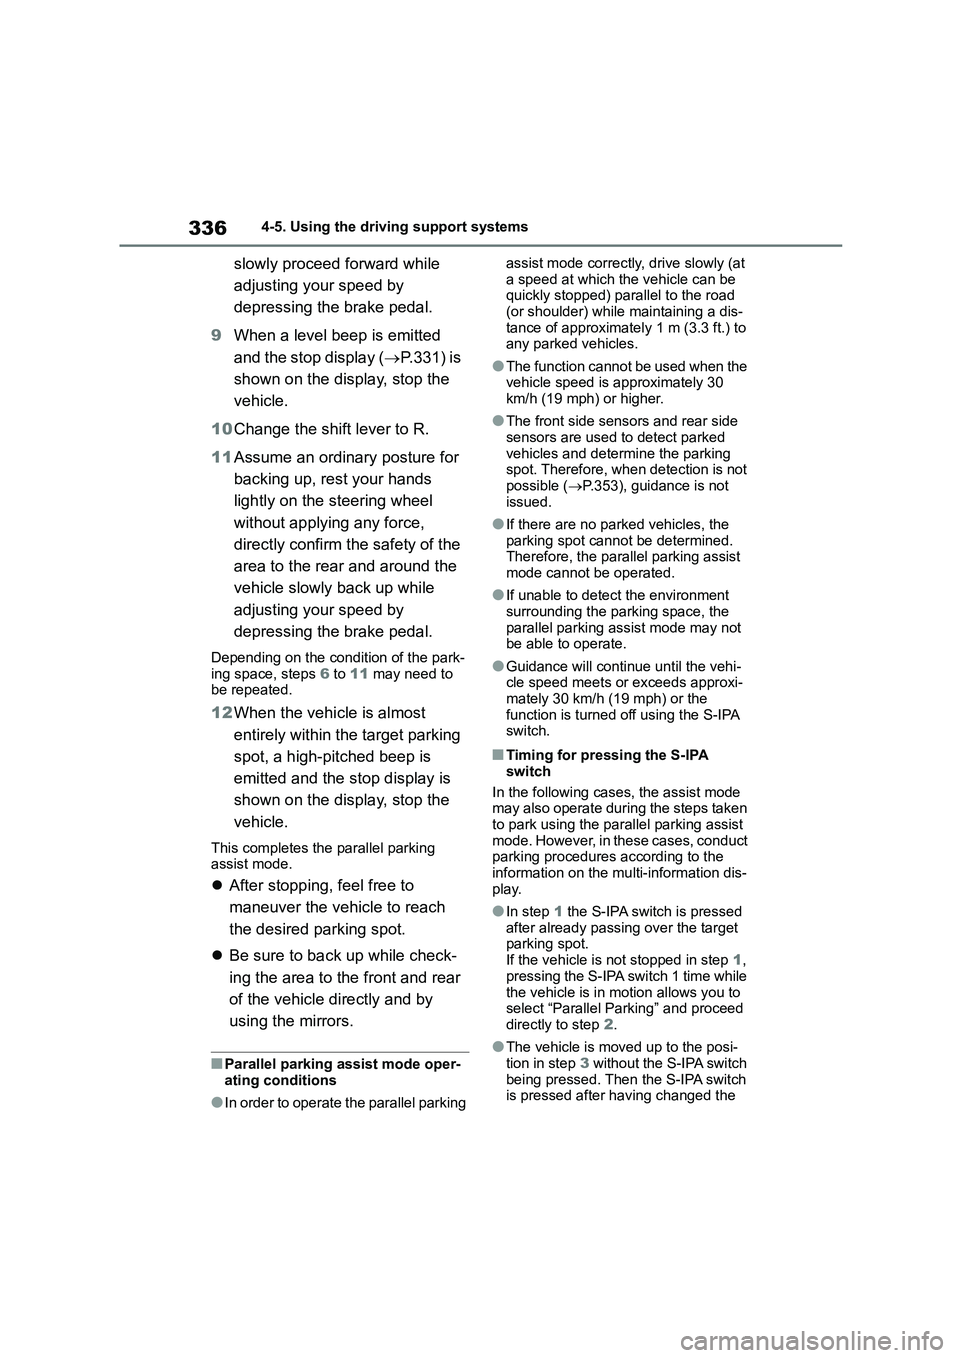
slowly proceed forward while
adjusting your speed by
depressing the brake pedal.
9 When a level beep is emitted
and the stop display ( P.331) is
shown on the display, stop the
vehicle.
10 Change the shift lever to R.
11 Assume an ordinary posture for
backing up, rest your hands
lightly on the steering wheel
without applying any force,
directly confirm the safety of the
area to the rear and around the
vehicle slowly back up while
adjusting your speed by
depressing the brake pedal.
Depending on the condition of the park-
ing space, steps 6 to 11 may need to be repeated.
12 When the vehicle is almost
entirely within the target parking
spot, a high-pitched beep is
emitted and the stop display is
shown on the display, stop the
vehicle.
This completes th e parallel parking assist mode.
After stopping, feel free to
maneuver the vehicle to reach
the desired parking spot.
Be sure to back up while check-
ing the area to the front and rear
of the vehicle directly and by
using the mirrors.
■Parallel parking assist mode oper-
ating conditions
●In order to operate the parallel parking
assist mode correctly, drive slowly (at
a speed at which the vehicle can be quickly stopped) parallel to the road
(or shoulder) while maintaining a dis-
tance of approximately 1 m (3.3 ft.) to any parked vehicles.
●The function cannot be used when the vehicle speed is approximately 30
km/h (19 mph) or higher.
●The front side sensors and rear side
sensors are used to detect parked
vehicles and determine the parking spot. Therefore, when detection is not
possible ( P.353), guidance is not
issued.
●If there are no parked vehicles, the
parking spot cannot be determined. Therefore, the parallel parking assist
mode cannot be operated.
●If unable to detect the environment
surrounding the parking space, the
parallel parking assist mode may not be able to operate.
●Guidance will continue until the vehi-cle speed meets or exceeds approxi-
mately 30 km/h (19 mph) or the
function is turned off using the S-IPA switch.
■Timing for pressing the S-IPA
switch
In the following cases, the assist mode may also operate during the steps taken
to park using the parallel parking assist
mode. However, in th ese cases, conduct parking procedures according to the
information on the mu lti-information dis-
play.
●In step 1 the S-IPA switch is pressed
after already passing over the target parking spot.
If the vehicle is not stopped in step 1,
pressing the S-IPA switch 1 time while
the vehicle is in motion allows you to select “Parallel Parking” and proceed
directly to step 2.
●The vehicle is moved up to the posi-
tion in step 3 without the S-IPA switch
being pressed. Then the S-IPA switch is pressed after having changed the
Page 340 of 758
3384-5. Using the driving support systems
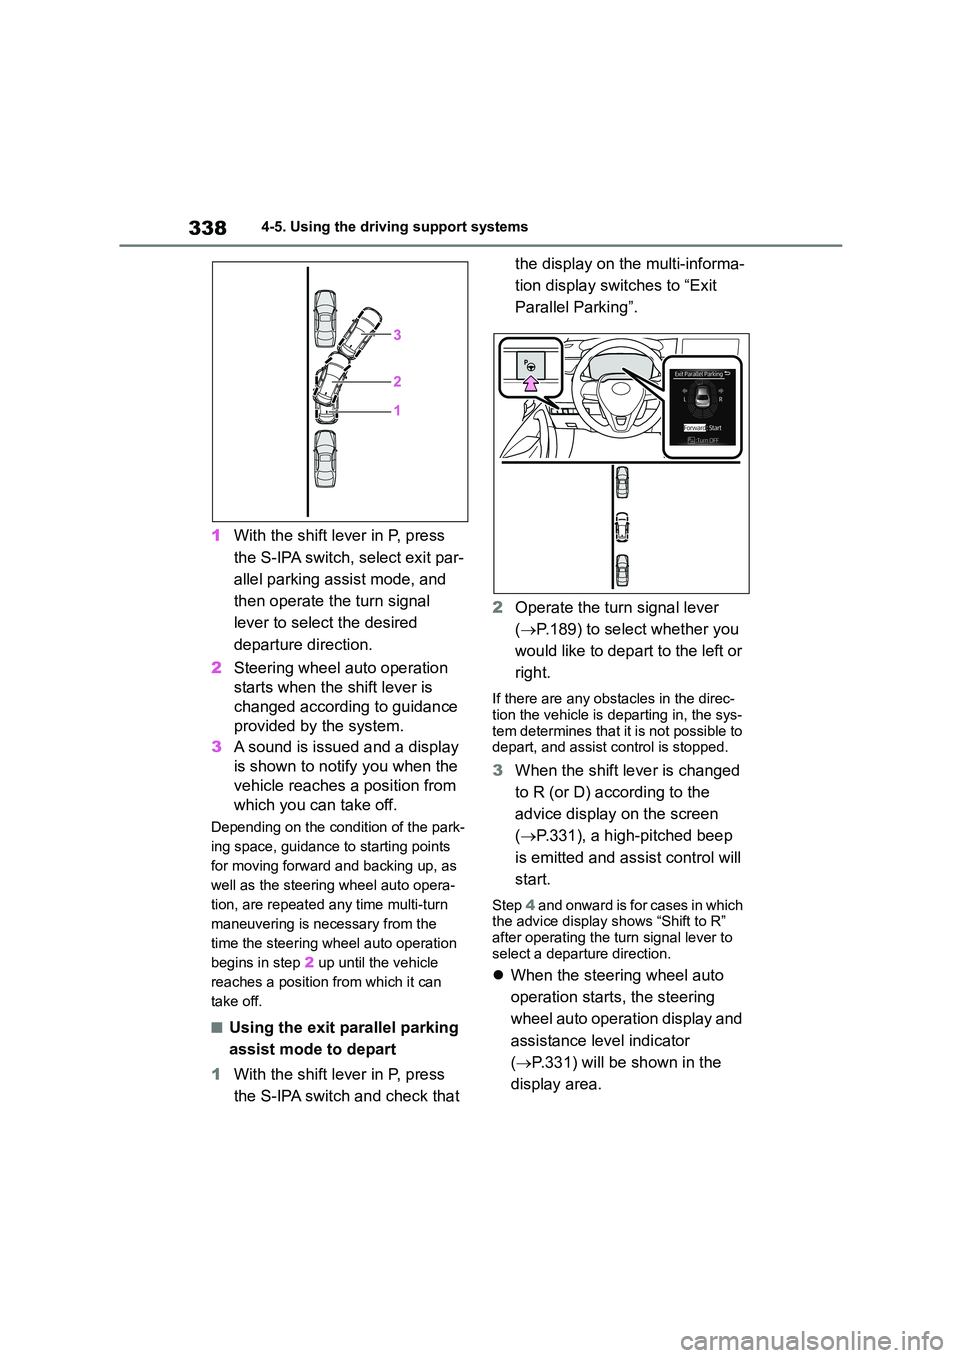
1With the shift lever in P, press
the S-IPA switch, select exit par-
allel parking assist mode, and
then operate the turn signal
lever to select the desired
departure direction.
2 Steering wheel auto operation
starts when the shift lever is
changed accordin g to guidance
provided by the system.
3 A sound is issued and a display
is shown to notify you when the
vehicle reaches a position from
which you can take off.
Depending on the condition of the park-
ing space, guidance to starting points
for moving forward and backing up, as
well as the steering wheel auto opera-
tion, are repeated any time multi-turn
maneuvering is necessary from the
time the steering wheel auto operation
begins in step 2 up until the vehicle
reaches a position from which it can
take off.
■Using the exit parallel parking
assist mode to depart
1 With the shift lever in P, press
the S-IPA switch and check that
the display on the multi-informa-
tion display switches to “Exit
Parallel Parking”.
2 Operate the turn signal lever
( P.189) to select whether you
would like to depart to the left or
right.
If there are any obstacles in the direc-
tion the vehicle is departing in, the sys-
tem determines that it is not possible to depart, and assist control is stopped.
3 When the shift lever is changed
to R (or D) according to the
advice display on the screen
( P.331), a high-pitched beep
is emitted and assist control will
start.
Step 4 and onward is for cases in which the advice display shows “Shift to R”
after operating the turn signal lever to
select a departure direction.
When the steering wheel auto
operation starts, the steering
wheel auto operation display and
assistance level indicator
( P.331) will be shown in the
display area.
Page 341 of 758
339
4
4-5. Using the driving support systems
Driving
To stop assist control, press the
S-IPA switch.
4 Assume an ordinary posture for
backing up, rest your hands
lightly on the steering wheel
without applying any force,
directly confirm the safety of the
area to the rear and around the
vehicle and slowly back up while
adjusting your speed by
depressing the brake pedal.
When backing up too quickly, a
sharp beeping sound is emitted
and assist control is stopped.
( P.332).
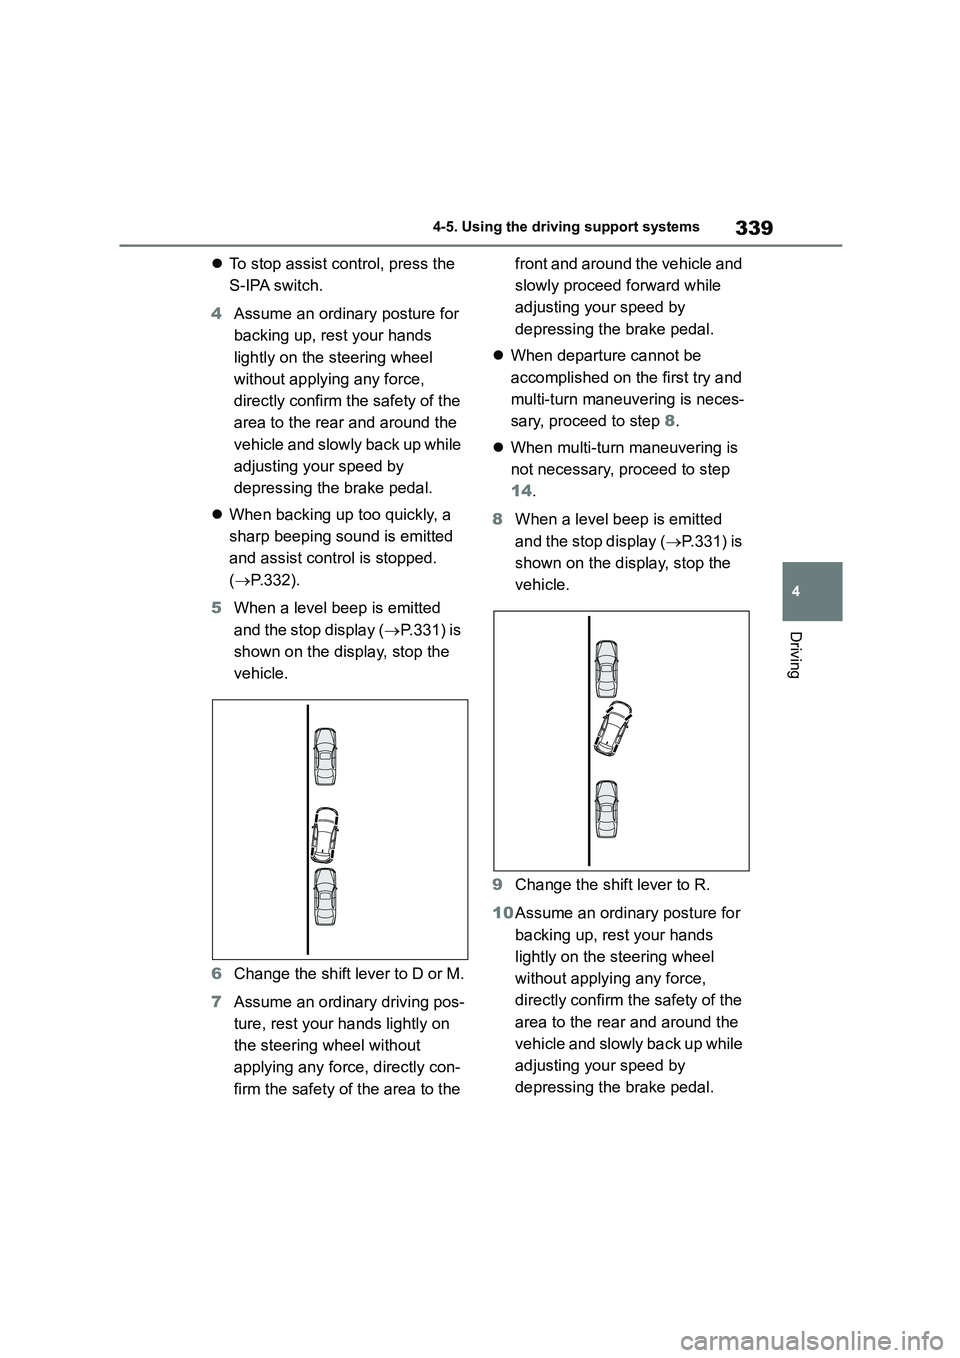
5 When a level beep is emitted
and the stop display ( P.331) is
shown on the display, stop the
vehicle.
6 Change the shift lever to D or M.
7 Assume an ordinary driving pos-
ture, rest your hands lightly on
the steering wheel without
applying any force, directly con-
firm the safety of the area to the
front and around the vehicle and
slowly proceed forward while
adjusting your speed by
depressing the brake pedal.
When departure cannot be
accomplished on the first try and
multi-turn maneuvering is neces-
sary, proceed to step 8.
When multi-turn maneuvering is
not necessary, proceed to step
14 .
8 When a level beep is emitted
and the stop display ( P.331) is
shown on the display, stop the
vehicle.
9 Change the shift lever to R.
10 Assume an ordinary posture for
backing up, rest your hands
lightly on the steering wheel
without applying any force,
directly confirm the safety of the
area to the rear and around the
vehicle and slowly back up while
adjusting your speed by
depressing the brake pedal.
Page 342 of 758
3404-5. Using the driving support systems
Depending on the condition of the park-
ing space, steps 5 to 10 may need to be repeated.
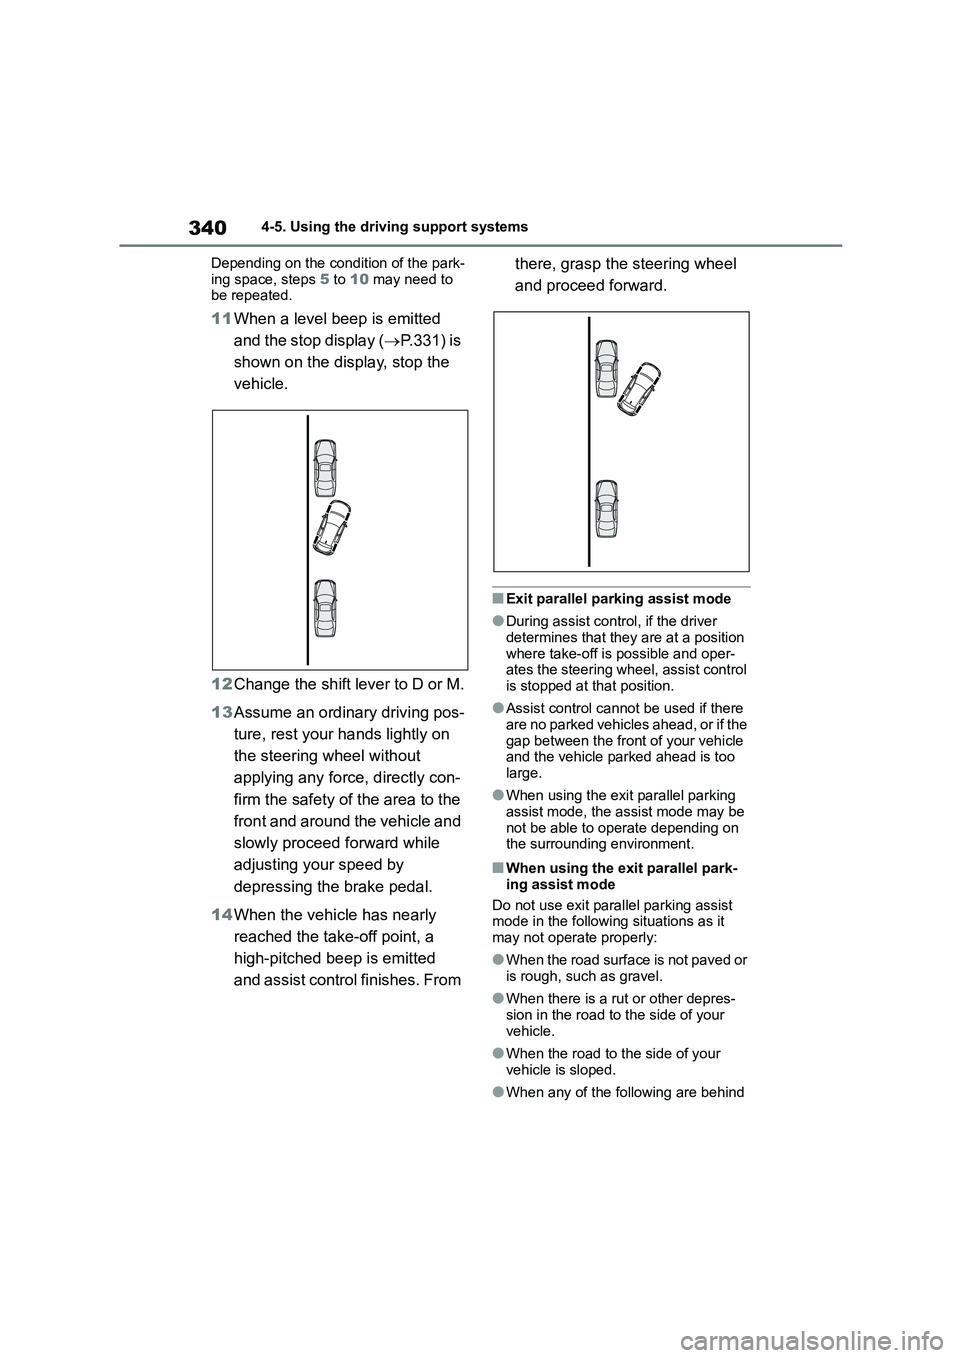
11 When a level beep is emitted
and the stop display ( P.331) is
shown on the display, stop the
vehicle.
12 Change the shift lever to D or M.
13 Assume an ordinary driving pos-
ture, rest your hands lightly on
the steering wheel without
applying any force, directly con-
firm the safety of the area to the
front and around the vehicle and
slowly proceed forward while
adjusting your speed by
depressing the brake pedal.
14 When the vehicle has nearly
reached the take-off point, a
high-pitched beep is emitted
and assist control finishes. From
there, grasp the steering wheel
and proceed forward.
■Exit parallel parking assist mode
●During assist control, if the driver
determines that they are at a position
where take-off is possible and oper- ates the steering wheel, assist control
is stopped at that position.
●Assist control cannot be used if there
are no parked vehicles ahead, or if the
gap between the front of your vehicle and the vehicle parked ahead is too
large.
●When using the exit parallel parking
assist mode, the assist mode may be
not be able to operate depending on the surrounding environment.
■When using the exit parallel park-
ing assist mode
Do not use exit parallel parking assist mode in the following situations as it
may not operate properly:
●When the road surface is not paved or
is rough, such as gravel.
●When there is a rut or other depres-
sion in the road to the side of your
vehicle.
●When the road to the side of your
vehicle is sloped.
●When any of the following are behind
Page 345 of 758
343
4
4-5. Using the driving support systems
Driving
can be operated to select
whether you would like to park to
the left or right.
The system cannot be used
when the parking space is nar-
row or there is not a sufficient
enough area for assist control to
operate. Please refer to the infor-
mation shown on the multi-infor-
mation display to use a different
parking space.
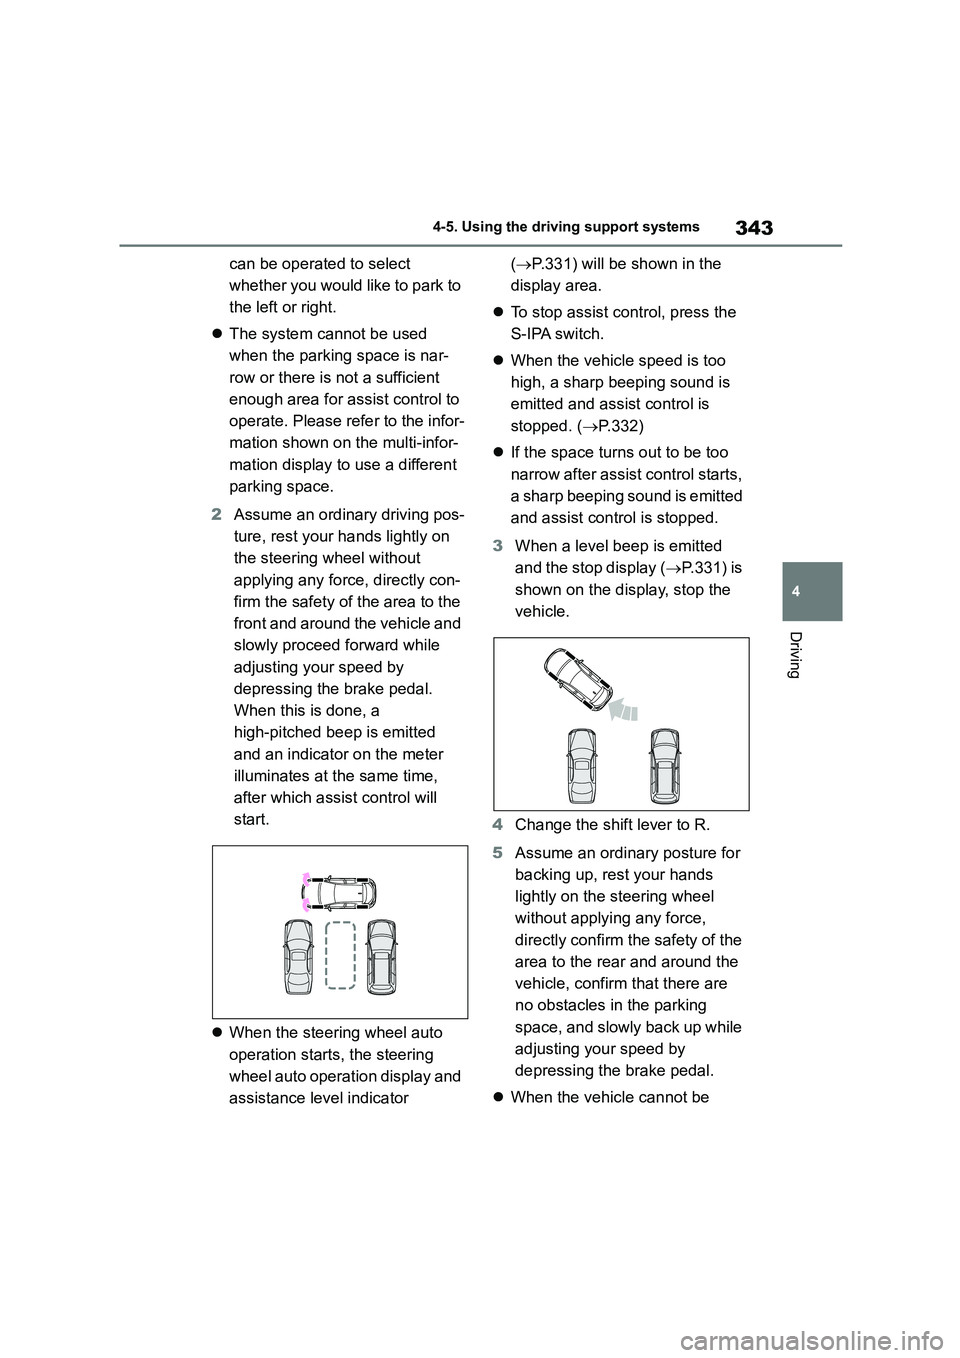
2 Assume an ordinary driving pos-
ture, rest your hands lightly on
the steering wheel without
applying any force, directly con-
firm the safety of the area to the
front and around the vehicle and
slowly proceed forward while
adjusting your speed by
depressing the brake pedal.
When this is done, a
high-pitched beep is emitted
and an indicator on the meter
illuminates at the same time,
after which assist control will
start.
When the steering wheel auto
operation starts, the steering
wheel auto operation display and
assistance level indicator
( P.331) will be shown in the
display area.
To stop assist control, press the
S-IPA switch.
When the vehicle speed is too
high, a sharp beeping sound is
emitted and assist control is
stopped. ( P.332)
If the space turns out to be too
narrow after assist control starts,
a sharp beeping sound is emitted
and assist control is stopped.
3 When a level beep is emitted
and the stop display ( P.331) is
shown on the display, stop the
vehicle.
4 Change the shift lever to R.
5 Assume an ordinary posture for
backing up, rest your hands
lightly on the steering wheel
without applying any force,
directly confirm the safety of the
area to the rear and around the
vehicle, confirm that there are
no obstacles in the parking
space, and slowly back up while
adjusting your speed by
depressing the brake pedal.
When the vehicle cannot be
Page 346 of 758
3444-5. Using the driving support systems
cleanly entered within the target
parking spot on the first try and
multi-turn maneuvering is neces-
sary, proceed to step 6.
When multi-turn maneuvering is
not necessary, proceed to step
12 .
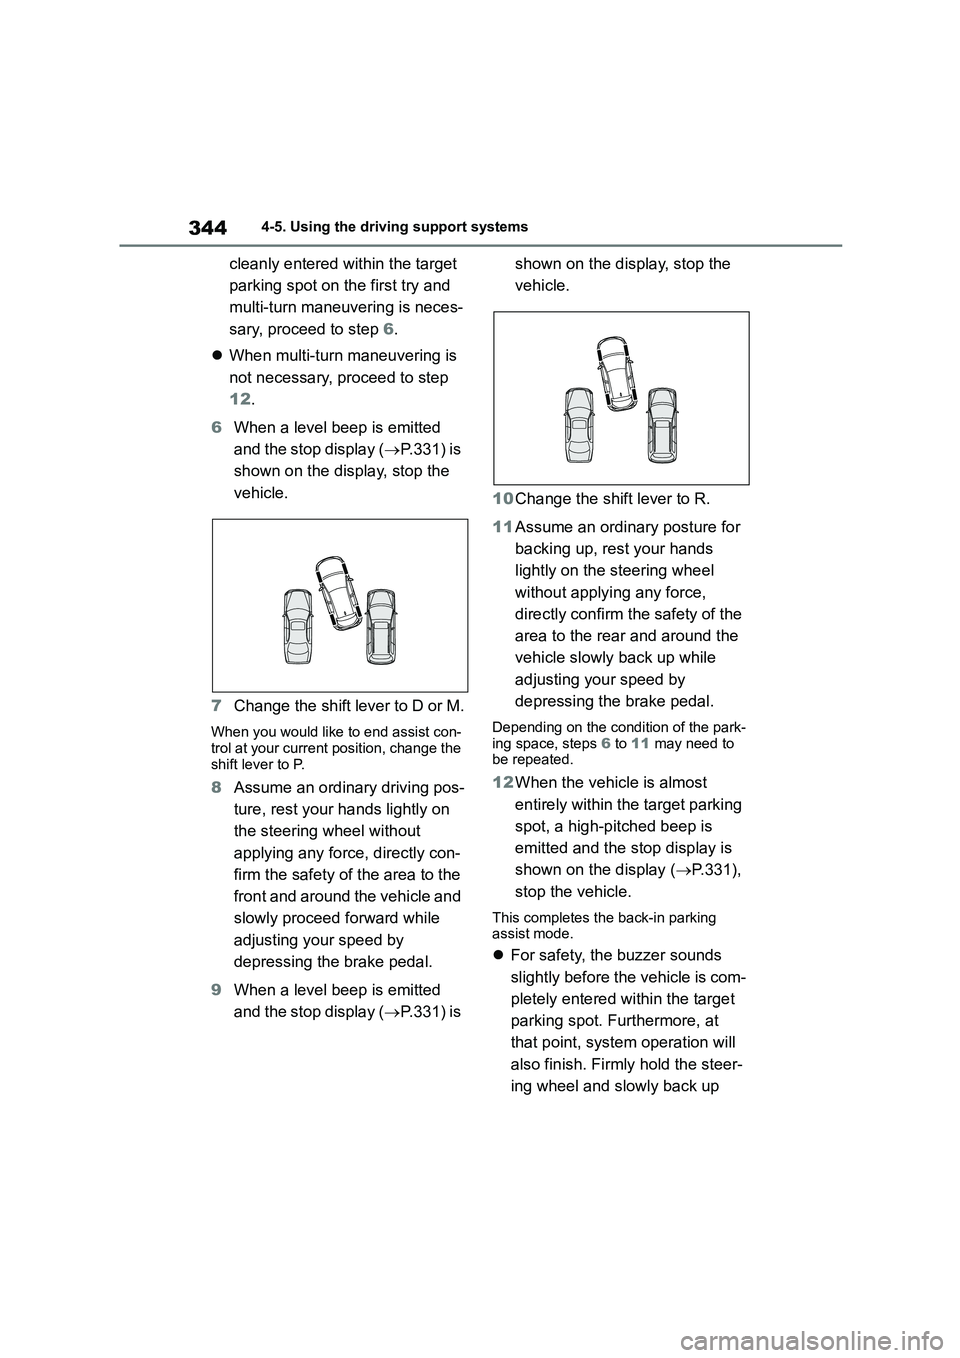
6 When a level beep is emitted
and the stop display ( P.331) is
shown on the display, stop the
vehicle.
7 Change the shift lever to D or M.
When you would like to end assist con-
trol at your current position, change the
shift lever to P.
8 Assume an ordinary driving pos-
ture, rest your hands lightly on
the steering wheel without
applying any force, directly con-
firm the safety of the area to the
front and around the vehicle and
slowly proceed forward while
adjusting your speed by
depressing the brake pedal.
9 When a level beep is emitted
and the stop display ( P.331) is
shown on the display, stop the
vehicle.
10 Change the shift lever to R.
11 Assume an ordinary posture for
backing up, rest your hands
lightly on the steering wheel
without applying any force,
directly confirm the safety of the
area to the rear and around the
vehicle slowly back up while
adjusting your speed by
depressing the brake pedal.
Depending on the condition of the park-
ing space, steps 6 to 11 may need to
be repeated.
12 When the vehicle is almost
entirely within the target parking
spot, a high-pitched beep is
emitted and the stop display is
shown on the display ( P.331),
stop the vehicle.
This completes the back-in parking
assist mode.
For safety, the buzzer sounds
slightly before the vehicle is com-
pletely entered within the target
parking spot. Furthermore, at
that point, system operation will
also finish. Firmly hold the steer-
ing wheel and slowly back up
Page 351 of 758
349
4
4-5. Using the driving support systems
Driving
■When the operation is canceled
“Pressure Applied to Steering
Wheel”
Assist control is started while the steering
wheel is held.
Rest your hands on the steering wheel
without applying any force. Assist con-
trol will start.
“Stop the Vehicle”
The vehicle is moved and assist control is
started while the steering wheel is held.
Stop the vehicle and follow the guidance
provided by the system to start assist
control.
MessageSituation/Handling method
“Park Assist Cancelled”
While assist control is operating, the driver
changes the shift lever to P or operates the
S-IPA switch.
“Excessive Speed”
The vehicle speed exceeds 30 km/h (16 mph)
when searching for a parallel parking assist
mode space.
“Narrow Space”Assist control is started in an area with narrow
parking spaces.
“No Exit Direction Specified”
The shift lever is changed without having used
the turn signal lever to select a departure direc-
tion when using the exit parallel parking assist
mode.
Follow the guidance provided by the sys-
tem.
MessageSituation/Handling method
Page 371 of 758
369
5
5-1. Basic Operations
Audio system
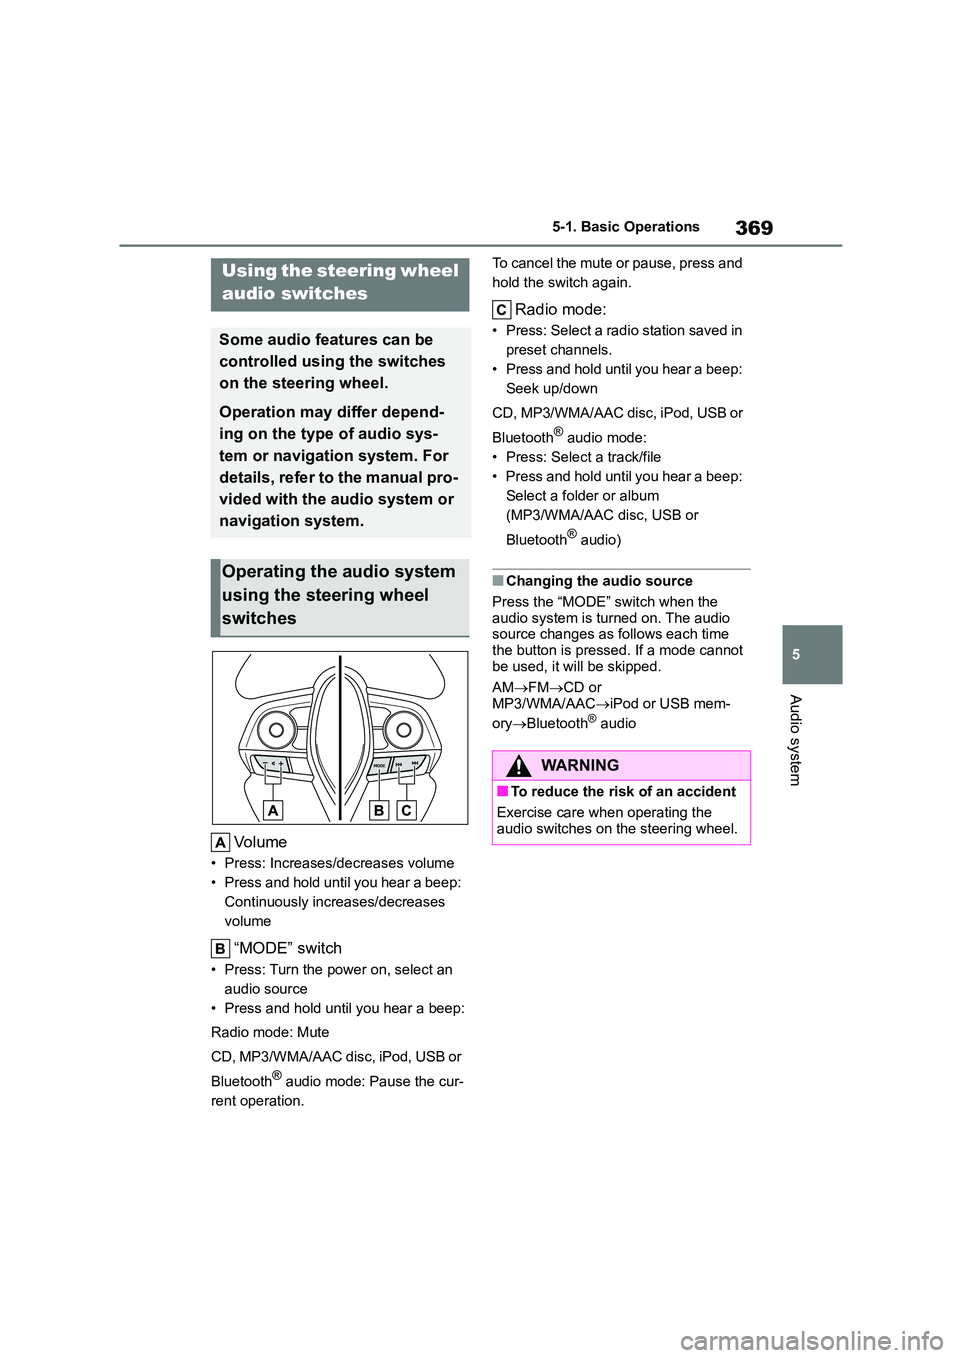
Volume
• Press: Increases/decreases volume
• Press and hold until you hear a beep:
Continuously increases/decreases
volume
“MODE” switch
• Press: Turn the power on, select an
audio source
• Press and hold until you hear a beep:
Radio mode: Mute
CD, MP3/WMA/AAC disc, iPod, USB or
Bluetooth® audio mode: Pause the cur-
rent operation.
To cancel the mute or pause, press and
hold the switch again.
Radio mode:
• Press: Select a radi o station saved in
preset channels.
• Press and hold until you hear a beep:
Seek up/down
CD, MP3/WMA/AAC disc, iPod, USB or
Bluetooth® audio mode:
• Press: Select a track/file
• Press and hold until you hear a beep:
Select a folder or album
(MP3/WMA/AAC disc, USB or
Bluetooth® audio)
■Changing the audio source
Press the “MODE” switch when the
audio system is turned on. The audio source changes as follows each time
the button is pressed. If a mode cannot
be used, it will be skipped.
AM FMCD or
MP3/WMA/AAC iPod or USB mem-
ory Bluetooth® audio
Using the steering wheel
audio switches
Some audio features can be
controlled using the switches
on the steering wheel.
Operation may differ depend-
ing on the type of audio sys-
tem or navigation system. For
details, refer to the manual pro-
vided with the audio system or
navigation system.
Operating the audio system
using the steering wheel
switches
WA R N I N G
■To reduce the risk of an accident
Exercise care when operating the
audio switches on the steering wheel.
Page 483 of 758
481
7
7-3. Do-it-yourself maintenance
Maintenance and care
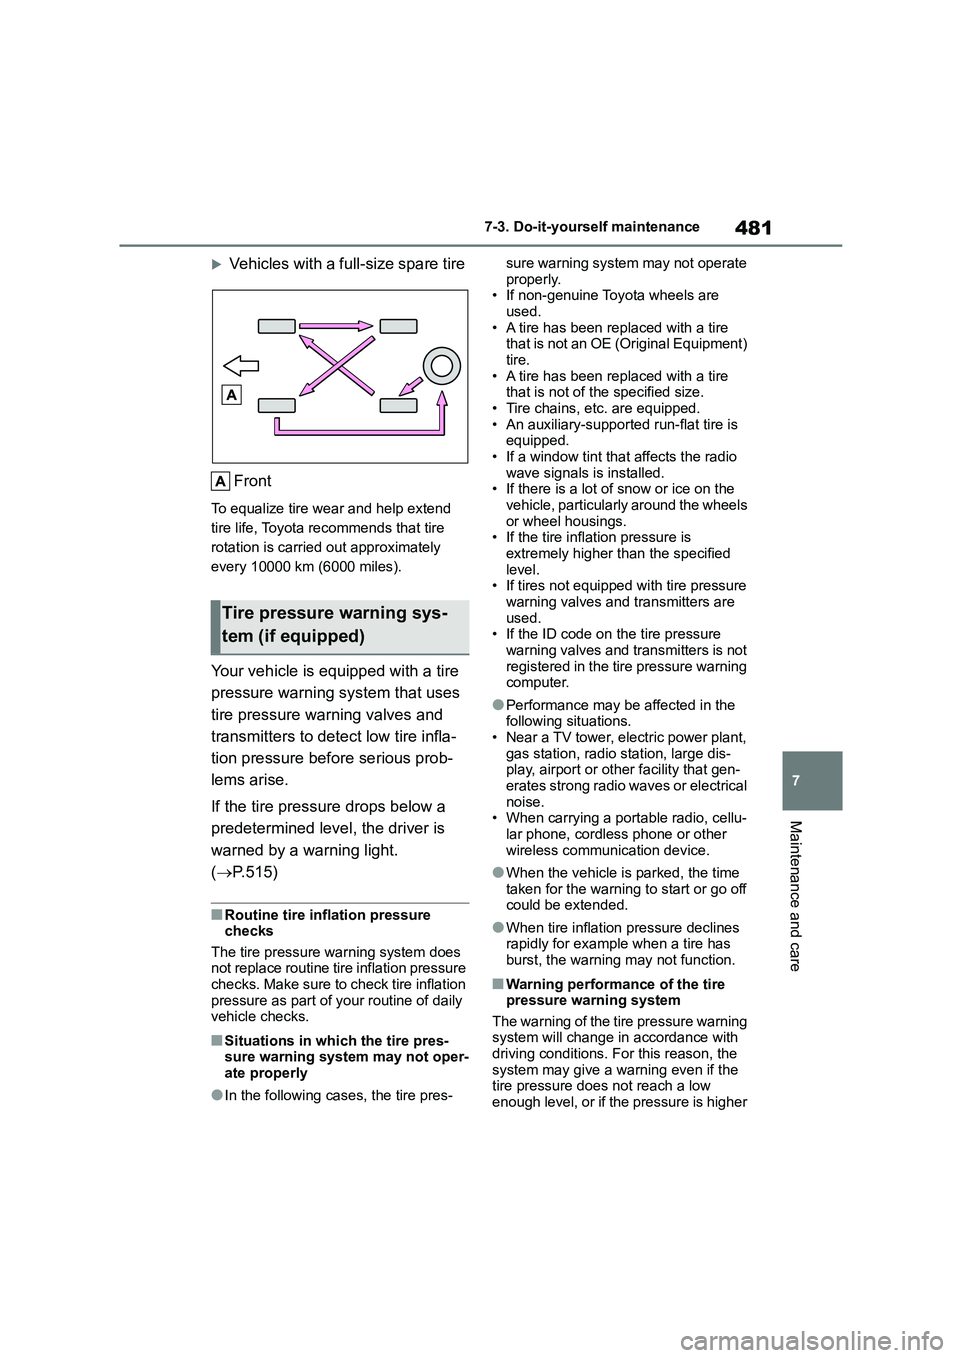
Vehicles with a full-size spare tire
Front
To equalize tire wear and help extend
tire life, Toyota recommends that tire
rotation is carried out approximately
every 10000 km (6000 miles).
Your vehicle is equipped with a tire
pressure warning system that uses
tire pressure warning valves and
transmitters to detect low tire infla-
tion pressure before serious prob-
lems arise.
If the tire pressure drops below a
predetermined level, the driver is
warned by a warning light.
( P.515)
■Routine tire inflation pressure
checks
The tire pressure warning system does not replace routine tire inflation pressure
checks. Make sure to check tire inflation
pressure as part of your routine of daily vehicle checks.
■Situations in which the tire pres-
sure warning system may not oper-
ate properly
●In the following cases, the tire pres-
sure warning system may not operate
properly. • If non-genuine Toyota wheels are
used.
• A tire has been replaced with a tire that is not an OE (Original Equipment)
tire.
• A tire has been replaced with a tire that is not of the specified size.
• Tire chains, etc. are equipped.
• An auxiliary-supported run-flat tire is equipped.
• If a window tint that affects the radio
wave signals is installed. • If there is a lot of snow or ice on the
vehicle, particularly around the wheels
or wheel housings. • If the tire inflation pressure is
extremely higher than the specified
level. • If tires not equipped with tire pressure
warning valves and transmitters are
used. • If the ID code on the tire pressure
warning valves and transmitters is not
registered in the tire pressure warning computer.
●Performance may be affected in the following situations.
• Near a TV tower, electric power plant,
gas station, radio station, large dis- play, airport or other facility that gen-
erates strong radio waves or electrical
noise. • When carrying a portable radio, cellu-
lar phone, cordless phone or other
wireless communication device.
●When the vehicle is parked, the time
taken for the warning to start or go off could be extended.
●When tire inflation pressure declines rapidly for example when a tire has
burst, the warning may not function.
■Warning performance of the tire
pressure warning system
The warning of the tire pressure warning system will change in accordance with
driving conditions. For this reason, the
system may give a warning even if the tire pressure does not reach a low
enough level, or if the pressure is higher
Tire pressure warning sys-
tem (if equipped)
Page 485 of 758
483
7
7-3. Do-it-yourself maintenance
Maintenance and care
■The tire pressure warning sys-
tem must be init ialized in the
following circumstances:
When rotating front and rear tires
which have different tire inflation
pressures.
When changing the tire size.
When the tire inflation pressure
is changed such as when chang-
ing traveling speed or load
weight.
When changing between two
registered wheel sets.
When the tire pressure warning
system is initialized , the current tire
inflation pressure is set as the
benchmark pressure.
■How to initialize the tire pres-
sure warning system
1 Park the vehicle in a safe place
and turn the engine switch off.
Initialization cannot be performed while the vehicle is moving.
2 Adjust the tire inflation pressure
to the specified co ld tire inflation
pressure level. ( P.573)
Make sure to adjust the tire pressure to
the specified cold tire inflation pressure level. The tire pre ssure warning system
will operate based on this pressure
level.
3 Turn the engine switch to ON.
4 Press or of the meter
control switch to select .
5 Press or to select “Vehi-
cle Settings” and then press and
hold .
6 Press or to select
“TPWS” and then press .
7 Press or to select “Set
Pressure”. Then press and hold
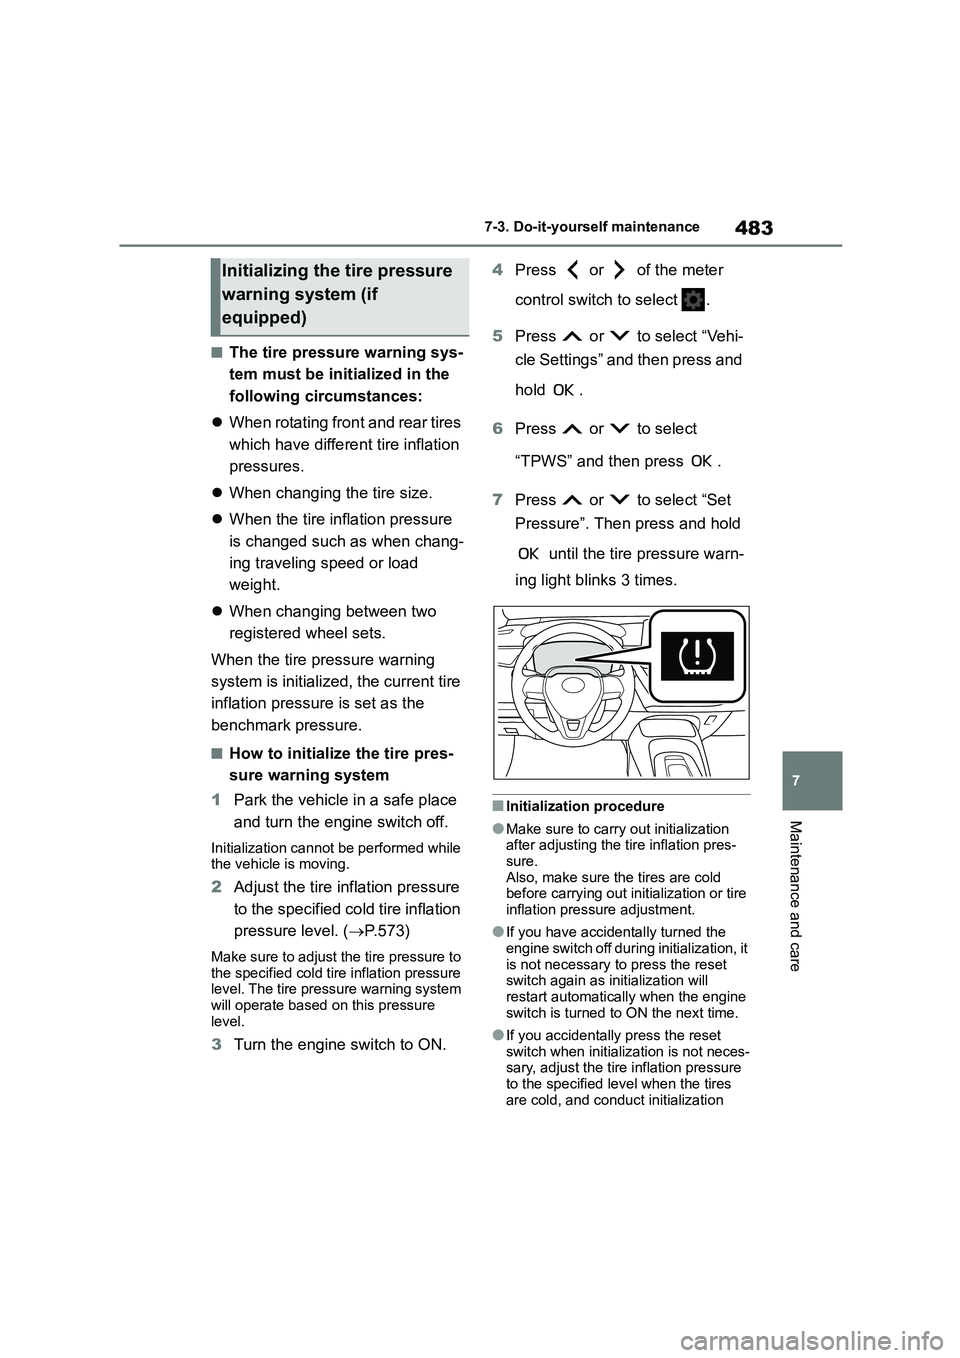
until the tire pressure warn-
ing light blinks 3 times.
■Initialization procedure
●Make sure to carry out initialization after adjusting the tire inflation pres-
sure.
Also, make sure the tires are cold before carrying out initialization or tire
inflation pressure adjustment.
●If you have accidentally turned the
engine switch off during initialization, it
is not necessary to press the reset switch again as initialization will
restart automatically when the engine
switch is turned to ON the next time.
●If you accidentally press the reset
switch when initialization is not neces- sary, adjust the tire inflation pressure
to the specified level when the tires
are cold, and conduct initialization
Initializing the tire pressure
warning system (if
equipped)