lights TOYOTA FJ CRUISER 2010 1.G Owner's Manual
[x] Cancel search | Manufacturer: TOYOTA, Model Year: 2010, Model line: FJ CRUISER, Model: TOYOTA FJ CRUISER 2010 1.GPages: 439, PDF Size: 11.02 MB
Page 148 of 439
148 2-3. Operating the lights and wipers
■The windshield wiper and washer can be operated when
The engine switch must be in the ON position.
■If no windshield washer fluid sprays
Check that the washer nozzles are not blocked and if there is washer fluid in
the windshield washer fluid reservoir.
NOTICE
■When the windshield is dry
Do not use the wipers, as they may damage the windshield.
■When there is no washer fluid spray from the nozzle
Damage to the washer fluid pump may be caused if the lever is pulled
toward you and held continually.
■When a nozzle becomes blocked
In this case, contact your Toyota dealer immediately.
Do not try to clear it with a pin or other object. The nozzle will be damaged.
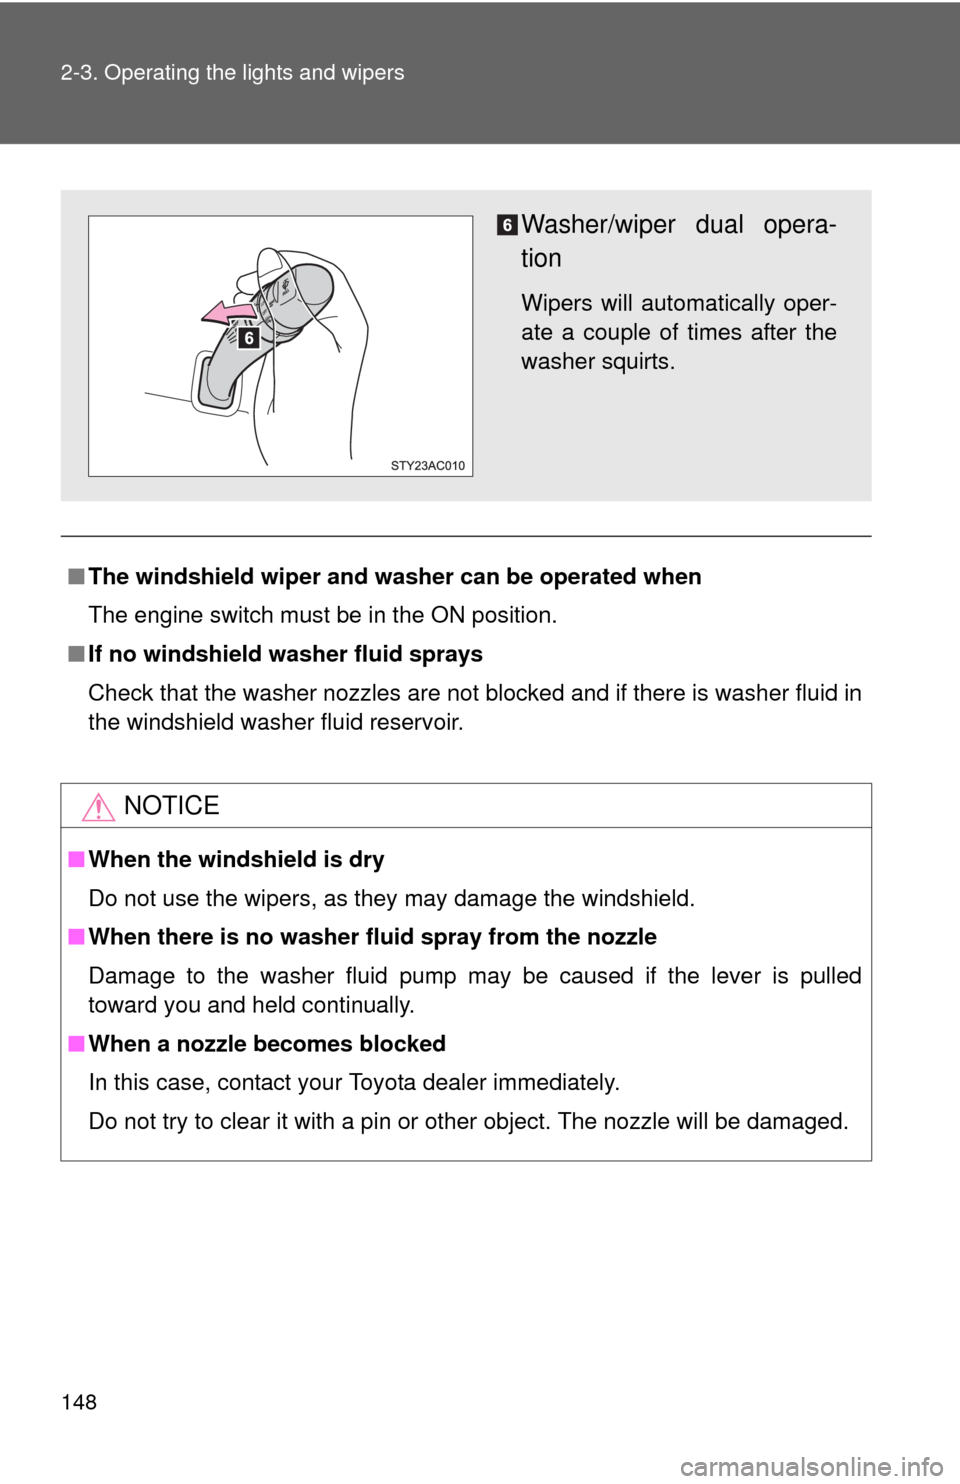
Washer/wiper dual opera-
tion
Wipers will automatically oper-
ate a couple of times after the
washer squirts.
Page 149 of 439
149
2-3. Operating the lights and wipers
2
When driving
Rear window wiper and washer
: If equipped
■The rear window wiper and washer can be operated when
●The engine switch must be in the ON position.
●The glass hatch is closed.
NOTICE
■When the rear window is dry
Do not use the wipers, as they may damage the rear window.
■When there is no washer fluid spray from the nozzle
Damage to the washer fluid pump may be caused if the knob is continuously
twisted upward or downward as far as it will go.
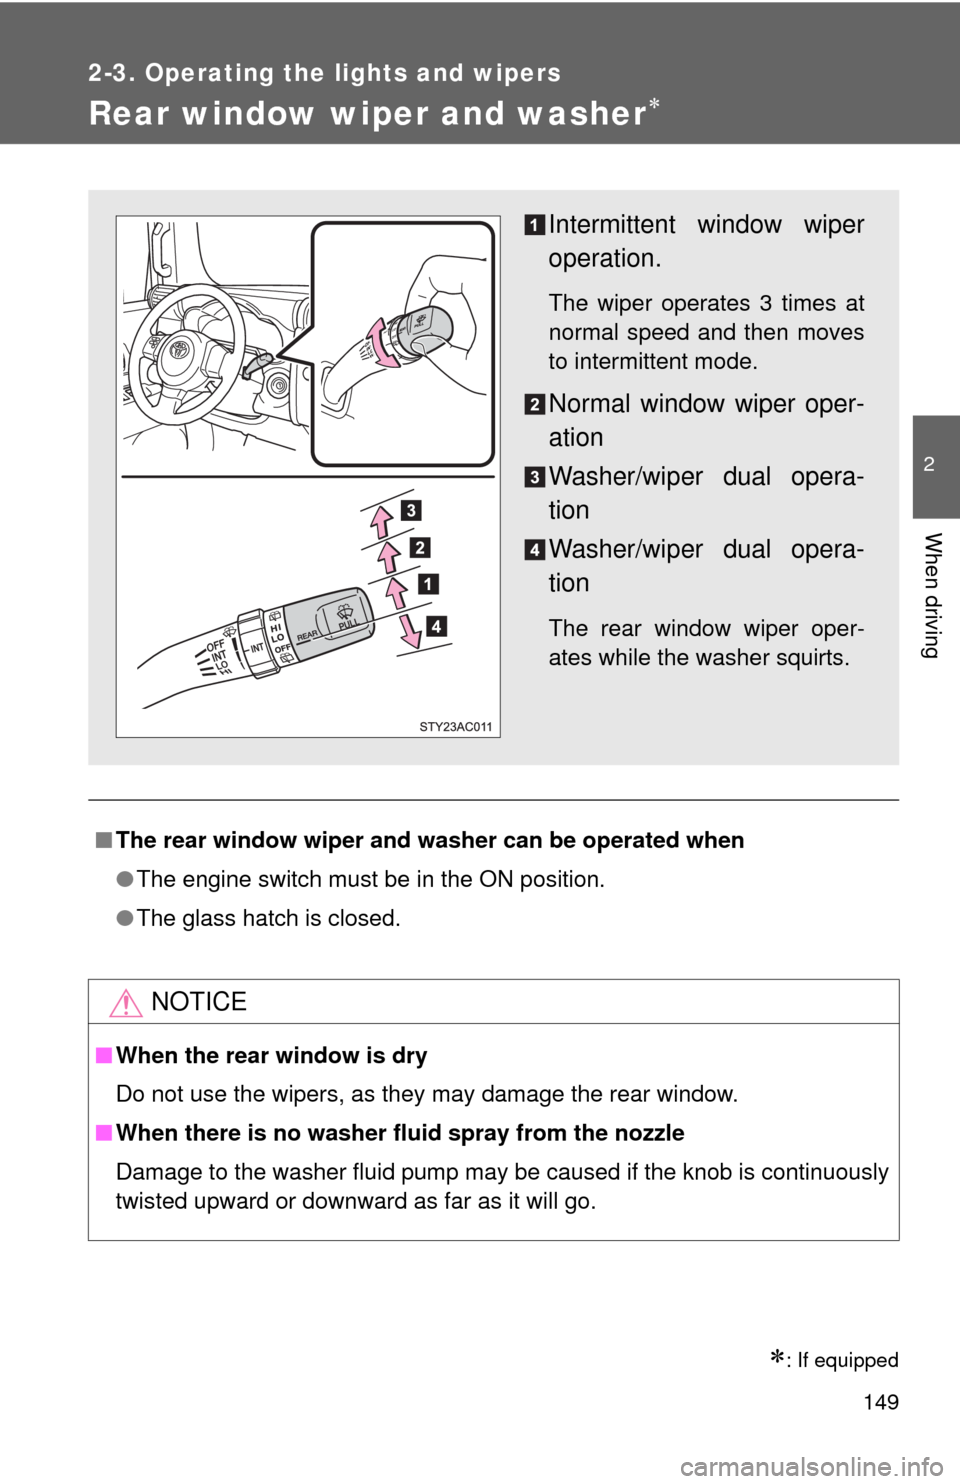
Intermittent window wiper
operation.
The wiper operates 3 times at
normal speed and then moves
to intermittent mode.
Normal window wiper oper-
ation
Washer/wiper dual opera-
tion
Washer/wiper dual opera-
tion
The rear window wiper oper-
ates while the washer squirts.
Page 160 of 439
160 2-4. Using other driving systems
■Rear view monitor system camera
■Smear effect
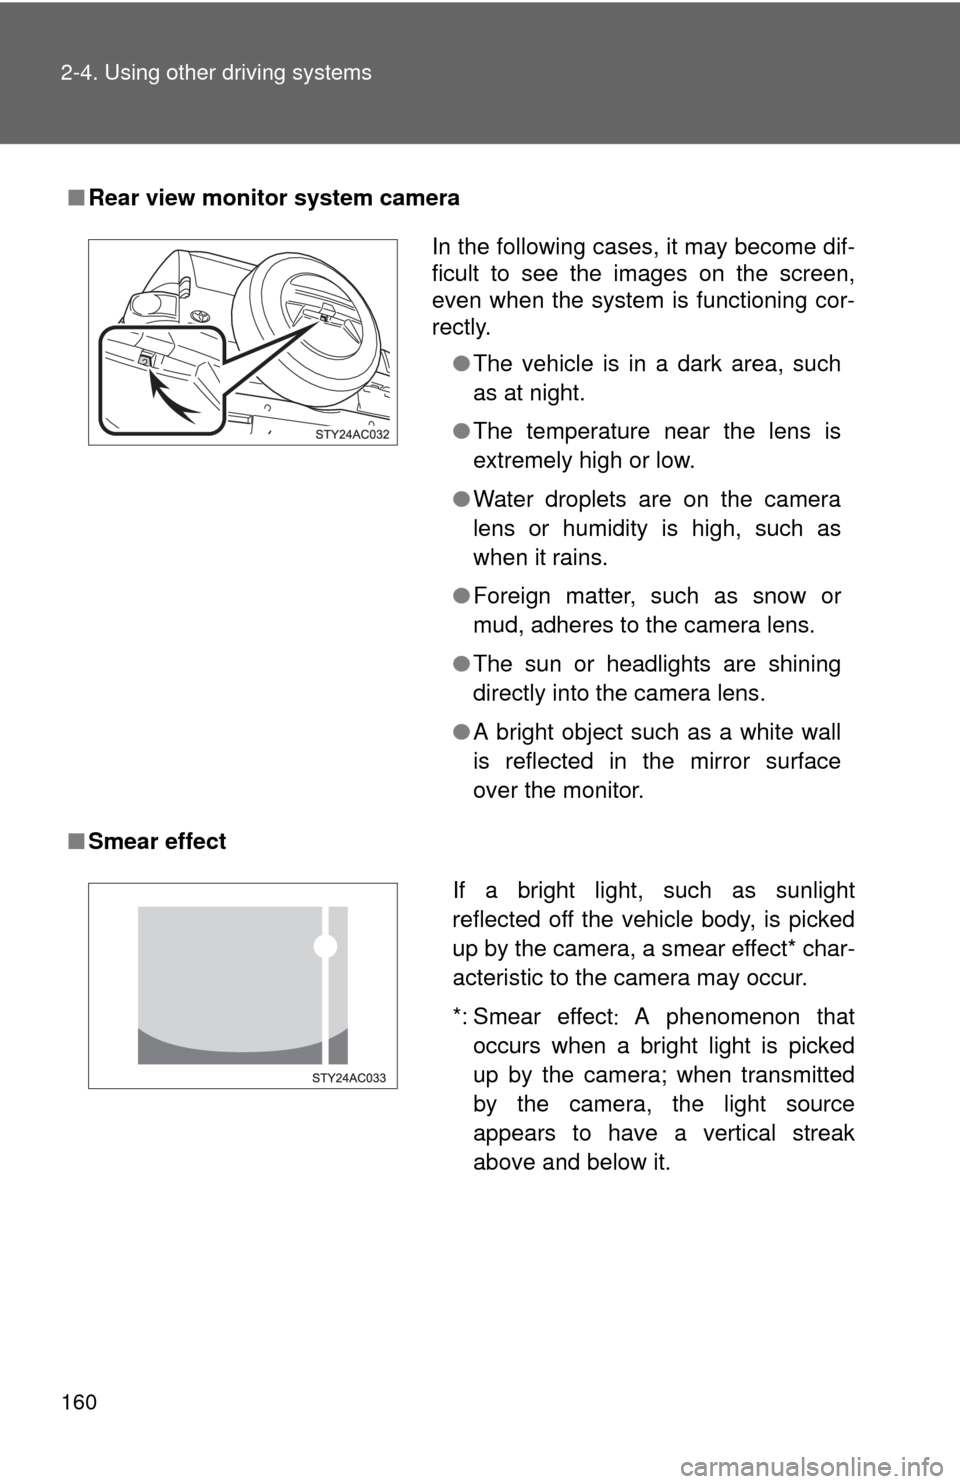
In the following cases, it may become dif-
ficult to see the images on the screen,
even when the system is functioning cor-
rectly.
●The vehicle is in a dark area, such
as at night.
●The temperature near the lens is
extremely high or low.
●Water droplets are on the camera
lens or humidity is high, such as
when it rains.
●Foreign matter, such as snow or
mud, adheres to the camera lens.
●The sun or headlights are shining
directly into the camera lens.
●A bright object such as a white wall
is reflected in the mirror surface
over the monitor.
If a bright light, such as sunlight
reflected off the vehicle body, is picked
up by the camera, a smear effect* char-
acteristic to the camera may occur.
*: Smear effectA phenomenon that
occurs when a bright light is picked
up by the camera; when transmitted
by the camera, the light source
appears to have a vertical streak
above and below it.
Page 193 of 439
193 2-5. Driving information
2
When driving
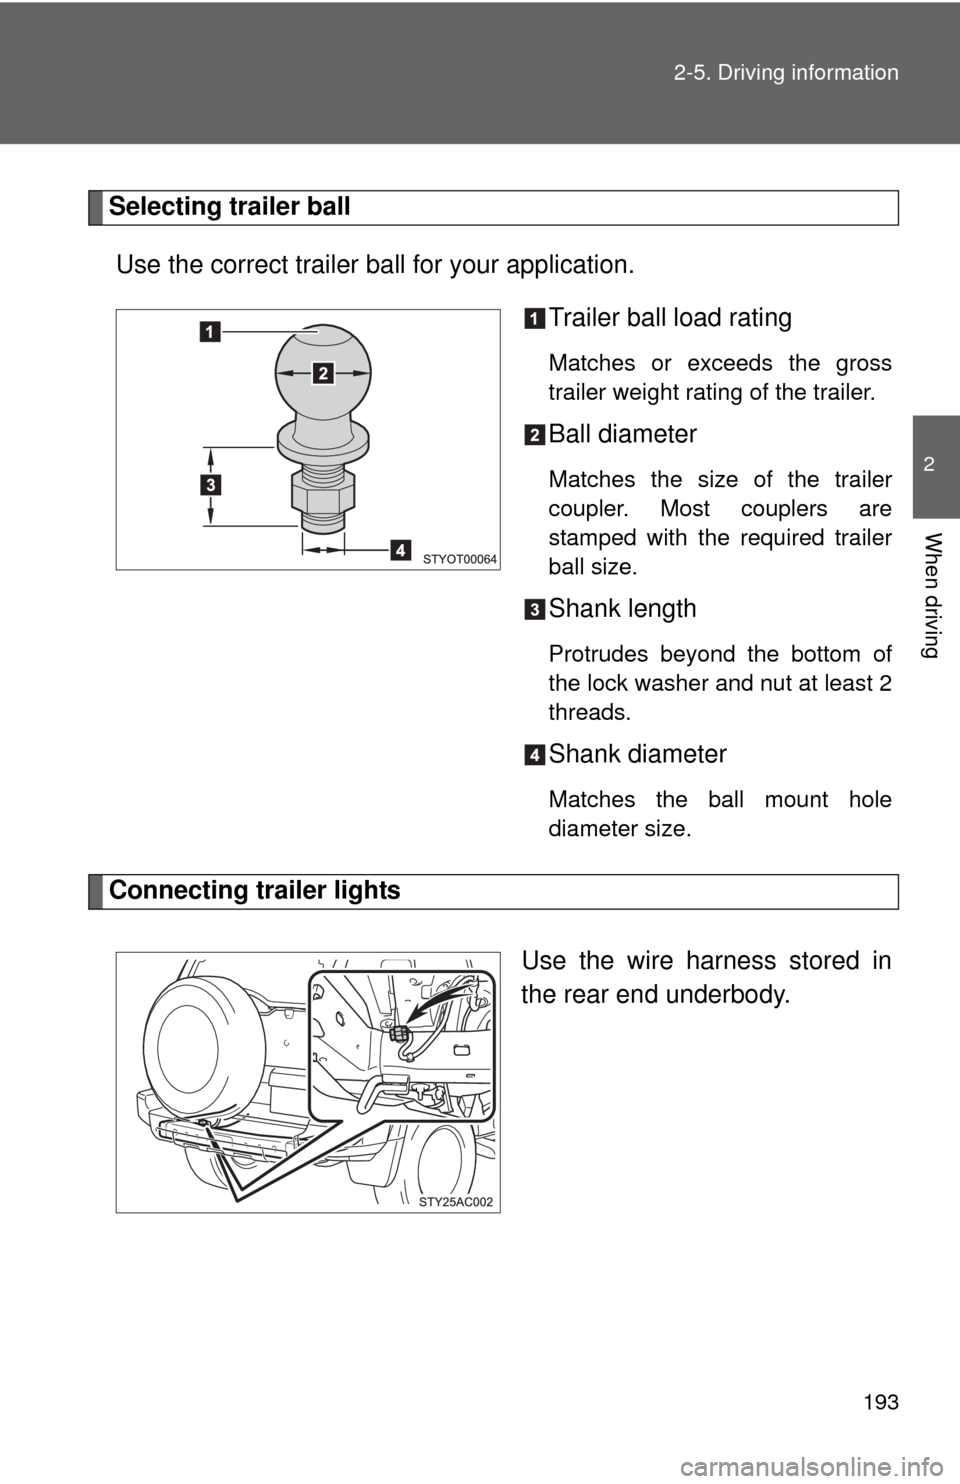
Selecting trailer ball
Use the correct trailer ball for your application.
Trailer ball load rating
Matches or exceeds the gross
trailer weight rating of the trailer.
Ball diameter
Matches the size of the trailer
coupler. Most couplers are
stamped with the required trailer
ball size.
Shank length
Protrudes beyond the bottom of
the lock washer and nut at least 2
threads.
Shank diameter
Matches the ball mount hole
diameter size.
Connecting trailer lights
Use the wire harness stored in
the rear end underbody.
Page 194 of 439

194 2-5. Driving information
■Before towing
Check that the following conditions are met:
●Ensure that your vehicle’s tires are properly inflated. (P. 396)
●Trailer tires should be inflated according to the trailer manufacturer’s rec-
ommendation.
●All trailer lights work to be legal.
●Confirm all lights work each time you connect them.
●The trailer ball is set up at the proper height for the coupler on the trailer.
●Check that your vehicle remains level when a loaded or unloaded trailer
is hitched. Do not drive if the vehicle is not level, and check for improper
tongue load, overloading, worn suspension, or other possible causes.
●Make sure the trailer cargo is securely loaded.
●Check that your rear view mirrors conform to any federal, state/provincial
or local regulations. If they do not, install rear view mirrors appropriate for
towing purposes.
■Break-in schedule
●Toyota recommends that you do not use a new vehicle or a vehicle with
any new power train components (engine, transmission, differential,
wheel bearings, etc.) to tow a trailer for the first 500 miles (800 km) of
driving.
■Maintenance
●If you tow a trailer, your vehicle will require more frequent maintenance
due to the additional load. (See “Scheduled Maintenance Guide” or
“Owner’s Manual Supplement”.)
●Retighten the fixing bolts of the towing ball and bracket after approxi-
mately 600 miles (1000 km).
Page 196 of 439
196 2-5. Driving information
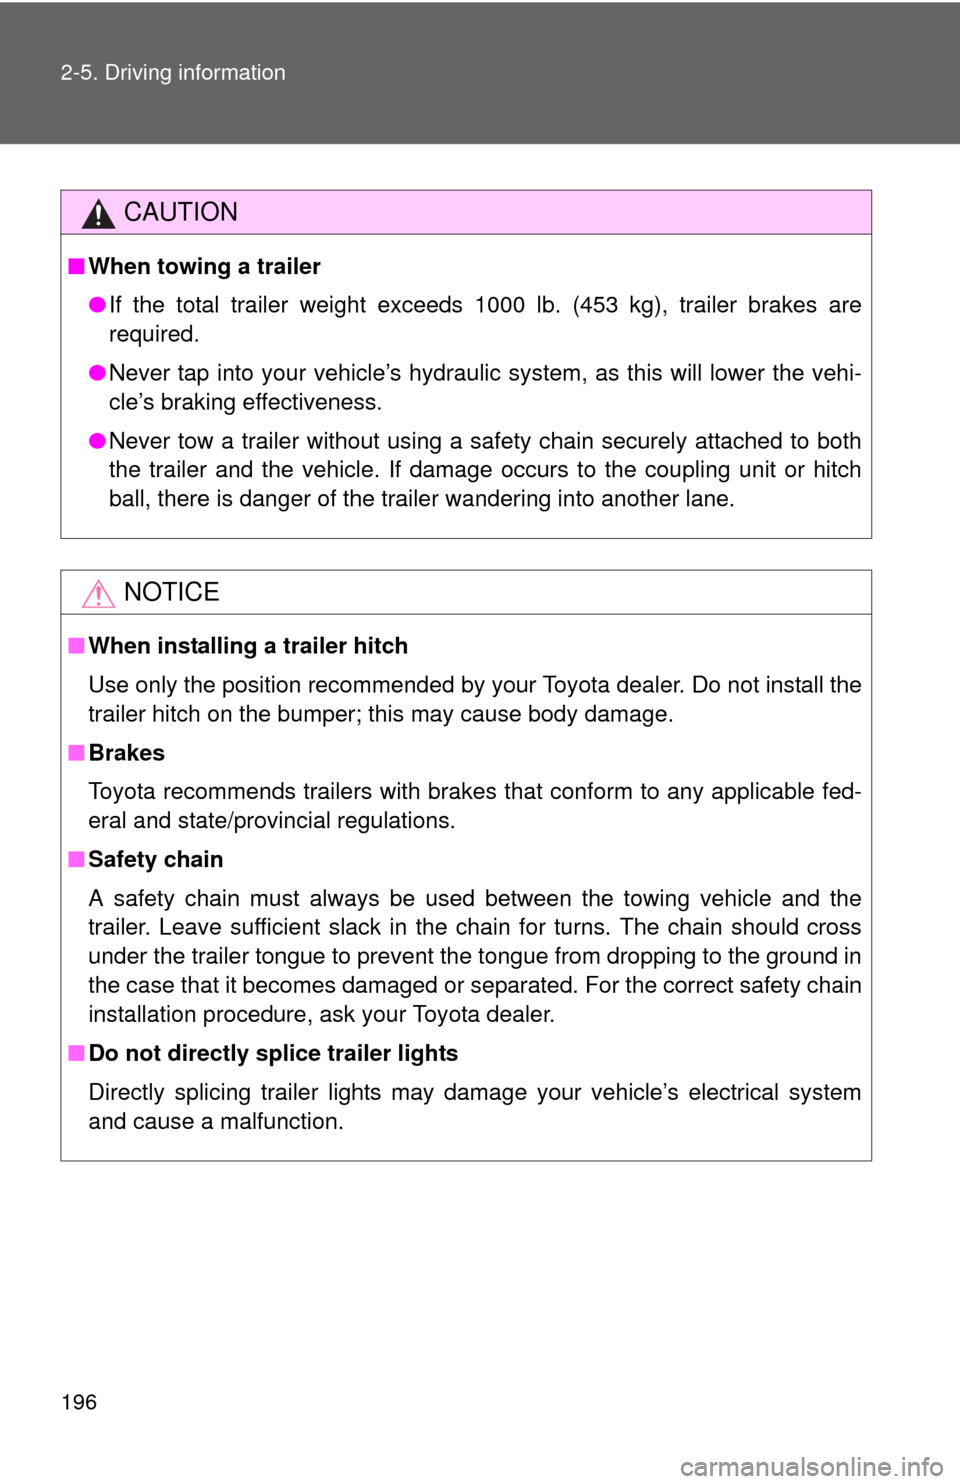
CAUTION
■When towing a trailer
●If the total trailer weight exceeds 1000 lb. (453 kg), trailer brakes are
required.
●Never tap into your vehicle’s hydraulic system, as this will lower the vehi-
cle’s braking effectiveness.
●Never tow a trailer without using a safety chain securely attached to both
the trailer and the vehicle. If damage occurs to the coupling unit or hitch
ball, there is danger of the trailer wandering into another lane.
NOTICE
■When installing a trailer hitch
Use only the position recommended by your Toyota dealer. Do not install the
trailer hitch on the bumper; this may cause body damage.
■Brakes
Toyota recommends trailers with brakes that conform to any applicable fed-
eral and state/provincial regulations.
■Safety chain
A safety chain must always be used between the towing vehicle and the
trailer. Leave sufficient slack in the chain for turns. The chain should cross
under the trailer tongue to prevent the tongue from dropping to the ground in
the case that it becomes damaged or separated. For the correct safety chain
installation procedure, ask your Toyota dealer.
■Do not directly splice trailer lights
Directly splicing trailer lights may damage your vehicle’s electrical system
and cause a malfunction.
Page 203 of 439
Interior features3
203
3-1. Using the air conditioning
system and defogger
Air conditioning system .... 204
Rear window defogger ..... 210
3-2. Using the audio system
Audio system types .......... 211
Using the radio ................. 214
Using the CD player ......... 220
Playing back MP3 and
WMA discs ..................... 227
Optimal use of the audio
system ........................... 235
Operating the sub
woofer ............................ 238
Changing display color
(type B only)................... 239
Using the AUX adapter .... 240
Using the steering wheel
audio switches ............... 242
3-3. Using the interior lights
Interior lights list ............... 244
• Interior lights .................. 245
• Personal lights ............... 2463-4. Using the storage features
List of storage features .... 247
• Glove box....................... 247
• Cup holders (front) ......... 248
• Cup holders (rear) .......... 251
• Bottle holders ................. 252
• Auxiliary box .................. 253
3-5. Other interior features
Sun visors ........................ 254
Vanity mirrors ................... 255
Clock ................................ 256
Outside temperature
display............................ 257
Power outlet (12V DC) ..... 258
Power outlet (115V AC) ... 259
Armrest ............................ 265
Floor mat .......................... 266
Luggage storage box
(vehicles without sub
woofer) ........................... 267
Luggage compartment
features .......................... 268
Compass .......................... 271
Page 244 of 439
244
3-3. Using the interior lights
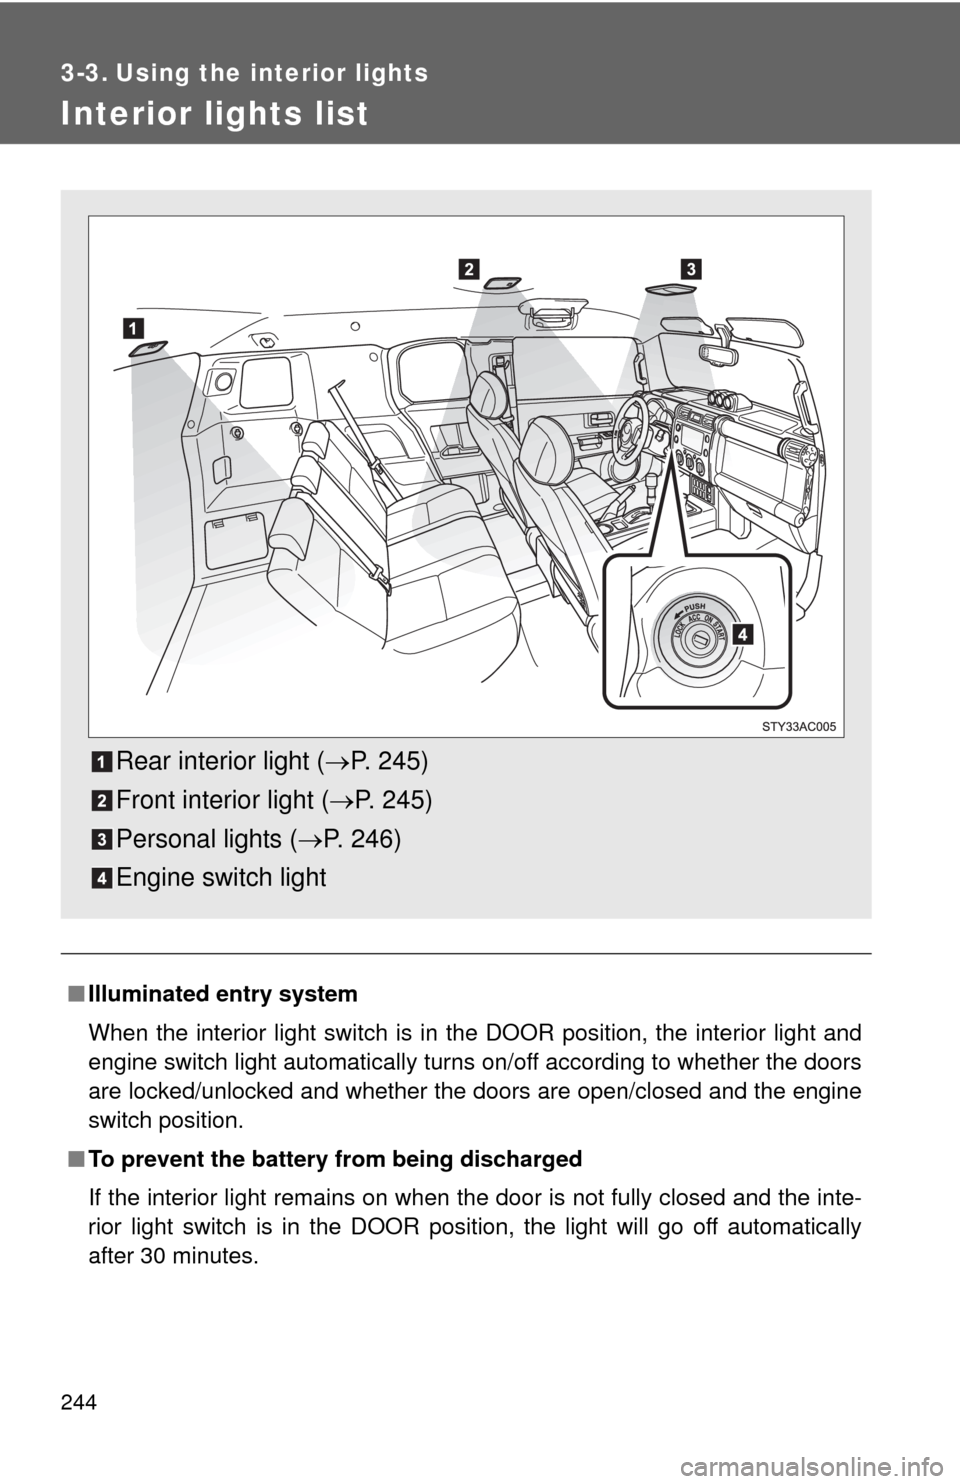
Interior lights list
■Illuminated entry system
When the interior light switch is in the DOOR position, the interior light and
engine switch light automatically turns on/off according to whether the doors
are locked/unlocked and whether the doors are open/closed and the engine
switch position.
■To prevent the battery from being discharged
If the interior light remains on when the door is not fully closed and the inte-
rior light switch is in the DOOR position, the light will go off automatically
after 30 minutes.
Rear interior light (P. 245)
Front interior light (P. 245)
Personal lights (P. 246)
Engine switch light
Page 245 of 439
245 3-3. Using the hand-free phone system (for cellular system
3
Interior features
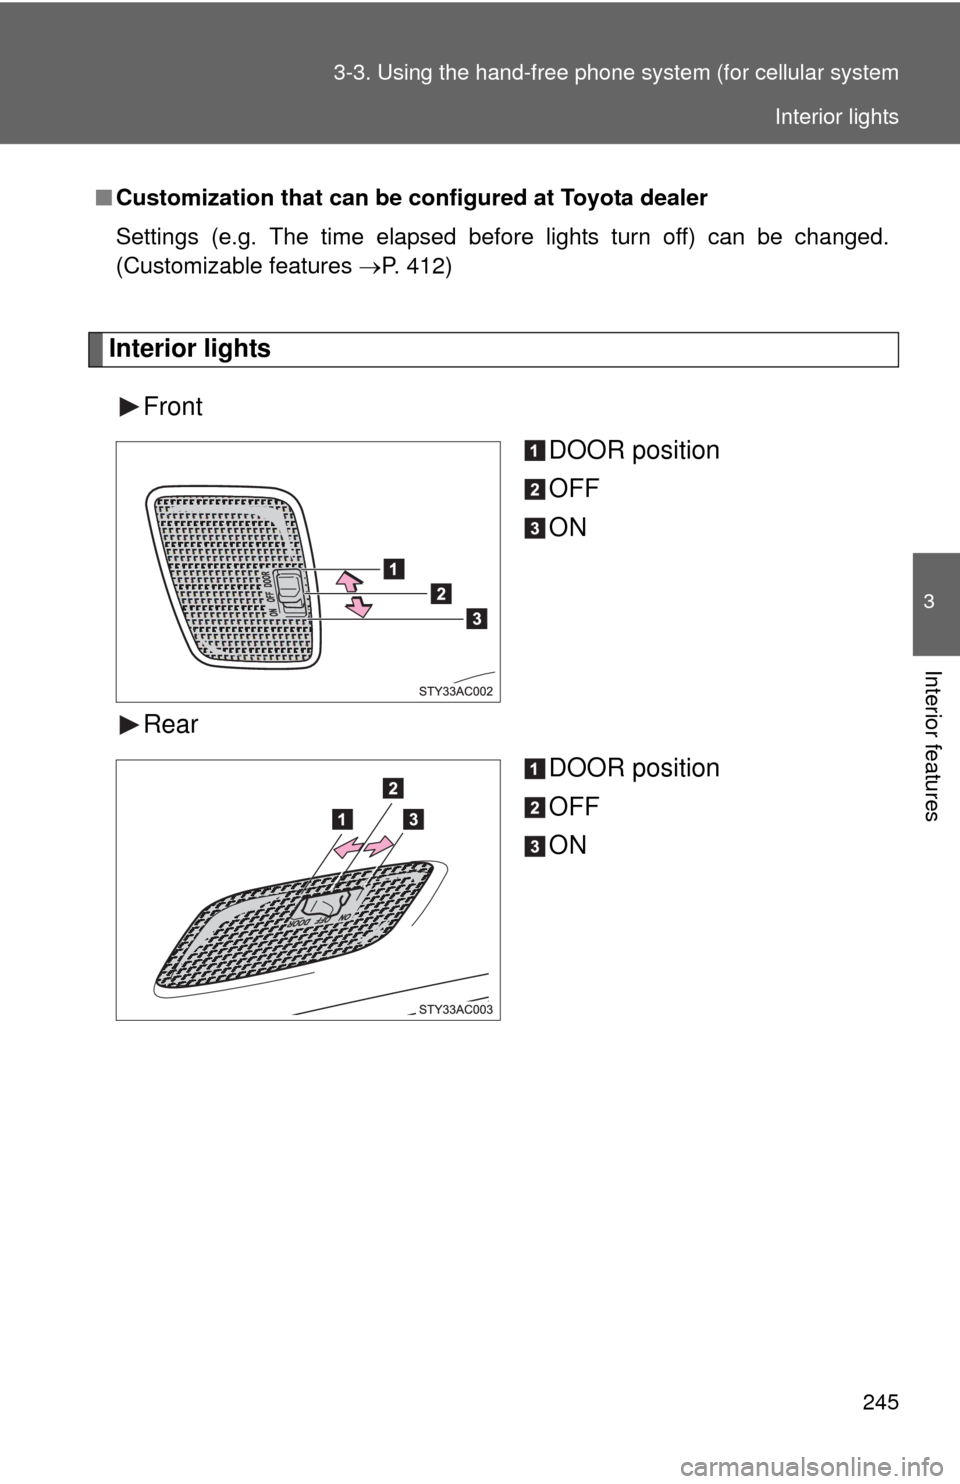
Interior lights
Front
DOOR position
OFF
ON
Rear
DOOR position
OFF
ON
■Customization that can be configured at Toyota dealer
Settings (e.g. The time elapsed before lights turn off) can be changed.
(Customizable features P. 412)
Interior lights
Page 246 of 439
246 3-3. Using the hands-free phone system (for cellular phone)
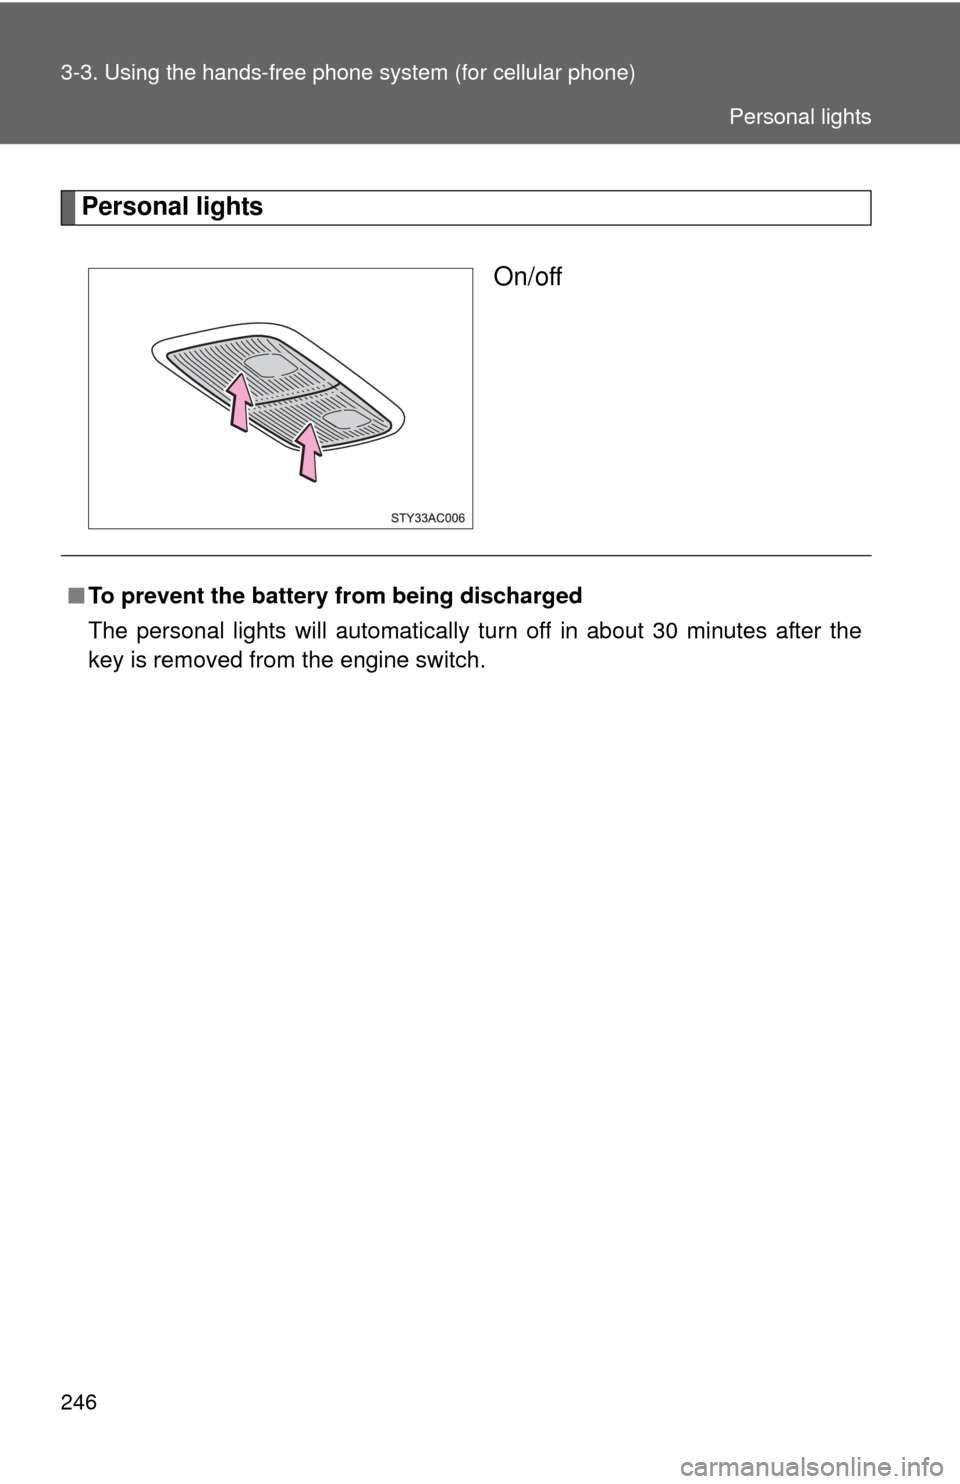
Personal lights
On/off
■To prevent the battery from being discharged
The personal lights will automatically turn off in about 30 minutes after the
key is removed from the engine switch.
Personal lights