high beam TOYOTA FR-S 2015 Owners Manual (in English)
[x] Cancel search | Manufacturer: TOYOTA, Model Year: 2015, Model line: FR-S, Model: TOYOTA FR-S 2015Pages: 452, PDF Size: 9.97 MB
Page 180 of 452
180 2-2. Instrument cluster
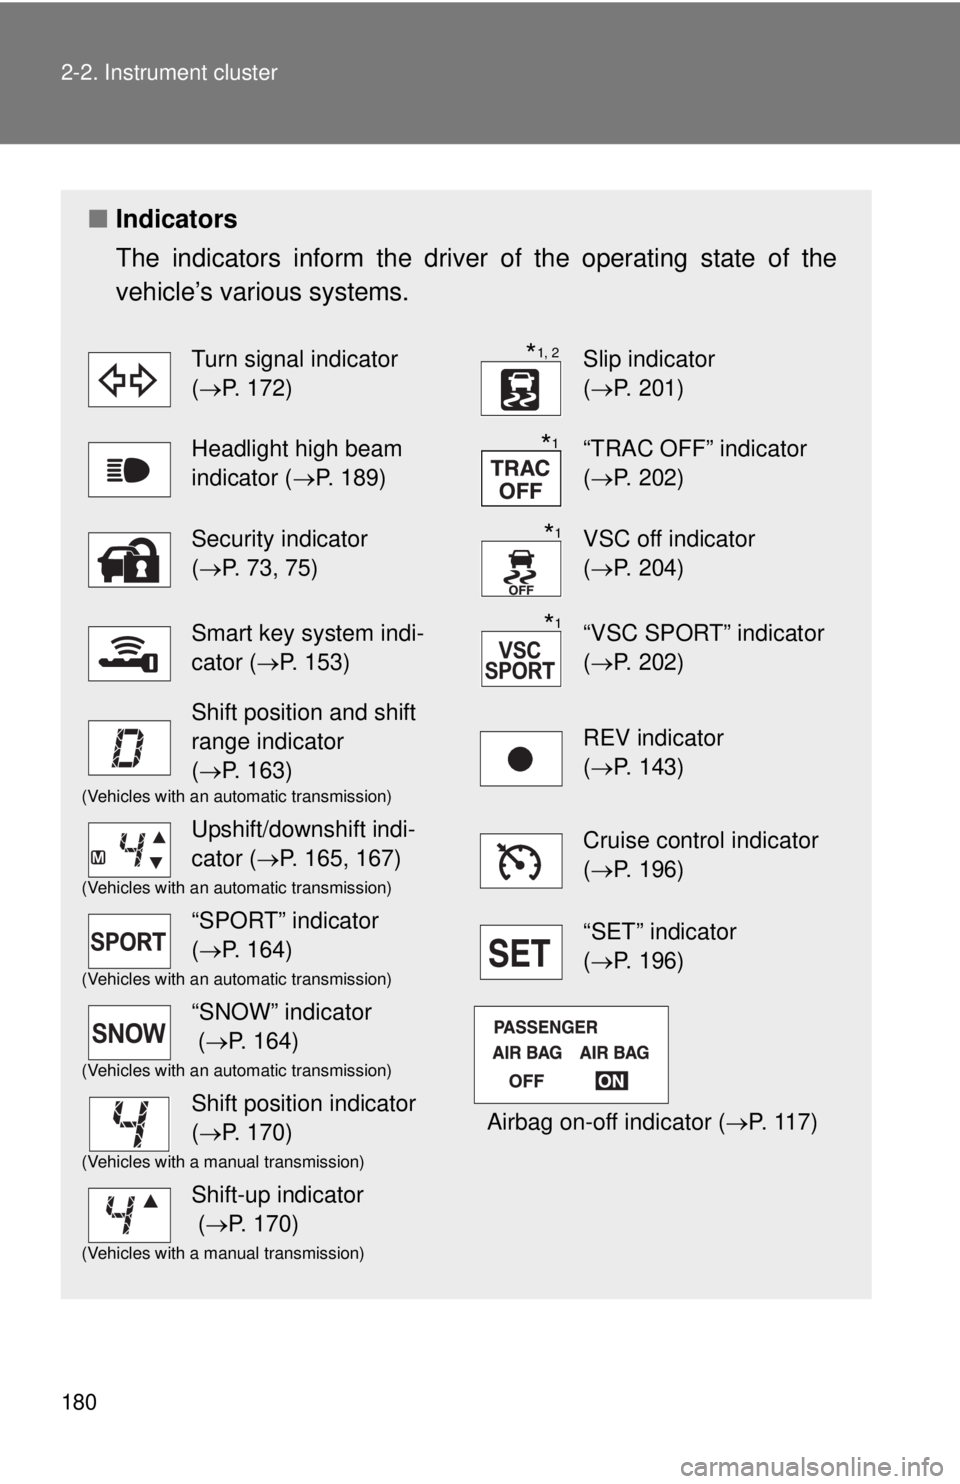
■Indicators
The indicators inform the driver of the operating state of the
vehicle’s various systems.
Turn signal indicator
(P. 172)Slip indicator
(P. 201)
Headlight high beam
indicator (P. 189)“TRAC OFF” indicator
(P. 202)
Security indicator
(P. 73, 75)VSC off indicator
(P. 204)
Smart key system indi-
cator (P. 153)“VSC SPORT” indicator
(P. 202)
Shift position and shift
range indicator
(P. 163)
REV indicator
(P. 143)
(Vehicles with an automatic transmission)
Upshift/downshift indi-
cator (P. 165, 167)Cruise control indicator
(P. 196)
(Vehicles with an automatic transmission)
“SPORT” indicator
(P. 164)“SET” indicator
(P. 196)
(Vehicles with an automatic transmission)
“SNOW” indicator
(P. 164)
Airbag on-off indicator (P. 117)
(Vehicles with an automatic transmission)
Shift position indicator
(P. 170)
(Vehicles with a manual transmission)
Shift-up indicator
(P. 170)
(Vehicles with a manual transmission)
*1, 2
*1
*1
*1
Page 189 of 452
189 2-3. Operating the lights and windshield wipers
2
When driving
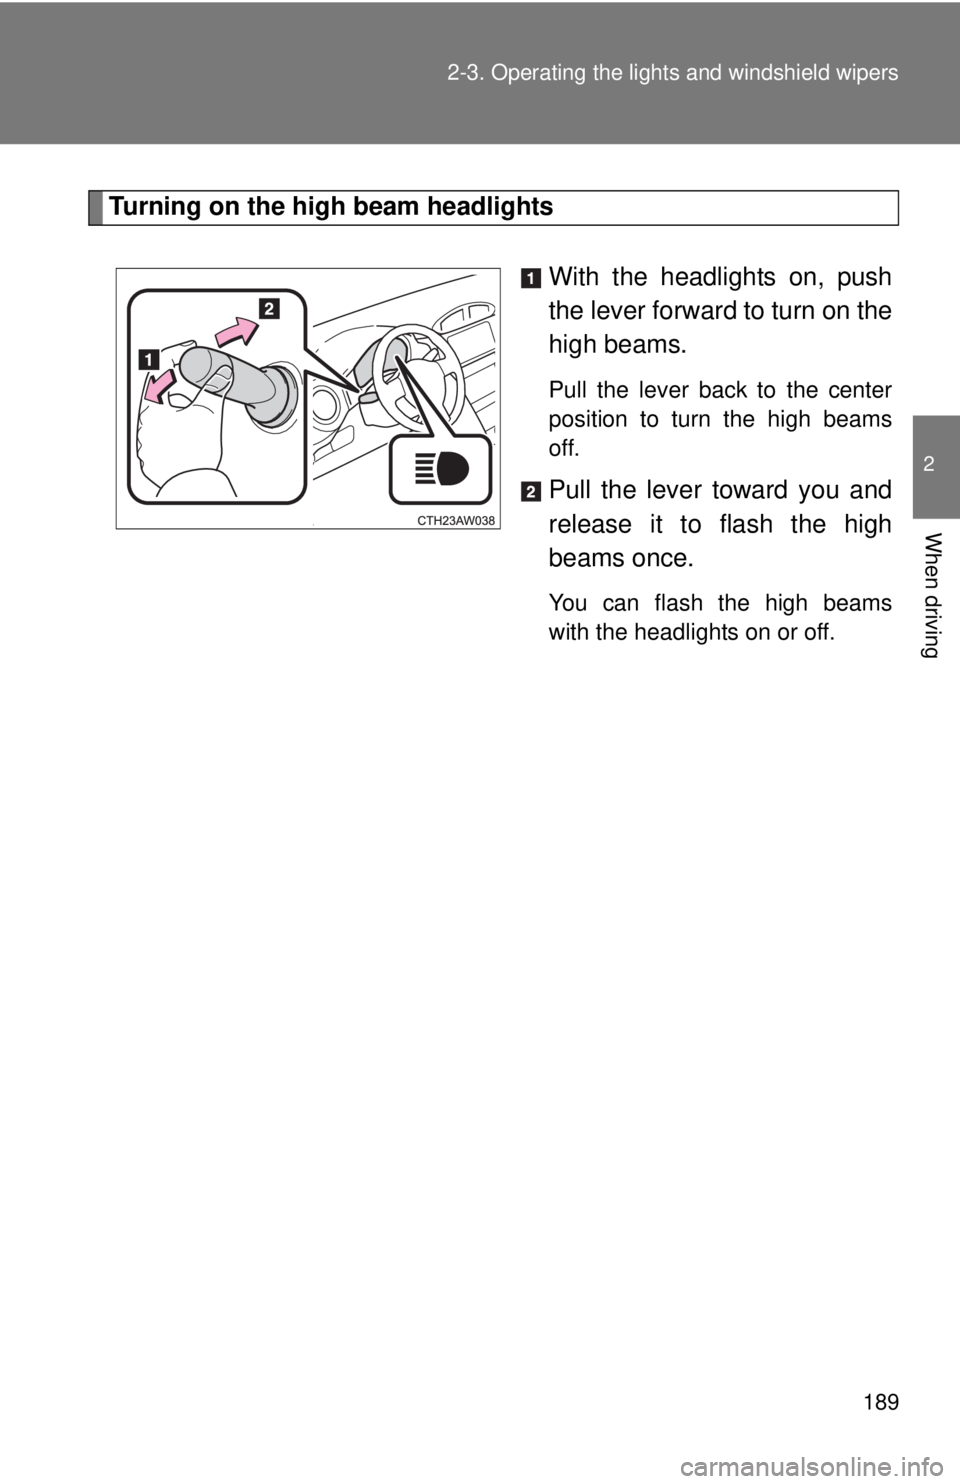
Turning on the high beam headlights
With the headlights on, push
the lever forward to turn on the
high beams.
Pull the lever back to the center
position to turn the high beams
off.
Pull the lever toward you and
release it to flash the high
beams once.
You can flash the high beams
with the headlights on or off.
Page 308 of 452
308 4-3. Do-it-yourself maintenance
Note
One of each of the following spare fuses are provided: 7.5 A, 10 A, 15
A, 20 A, 25 A, 30 A.
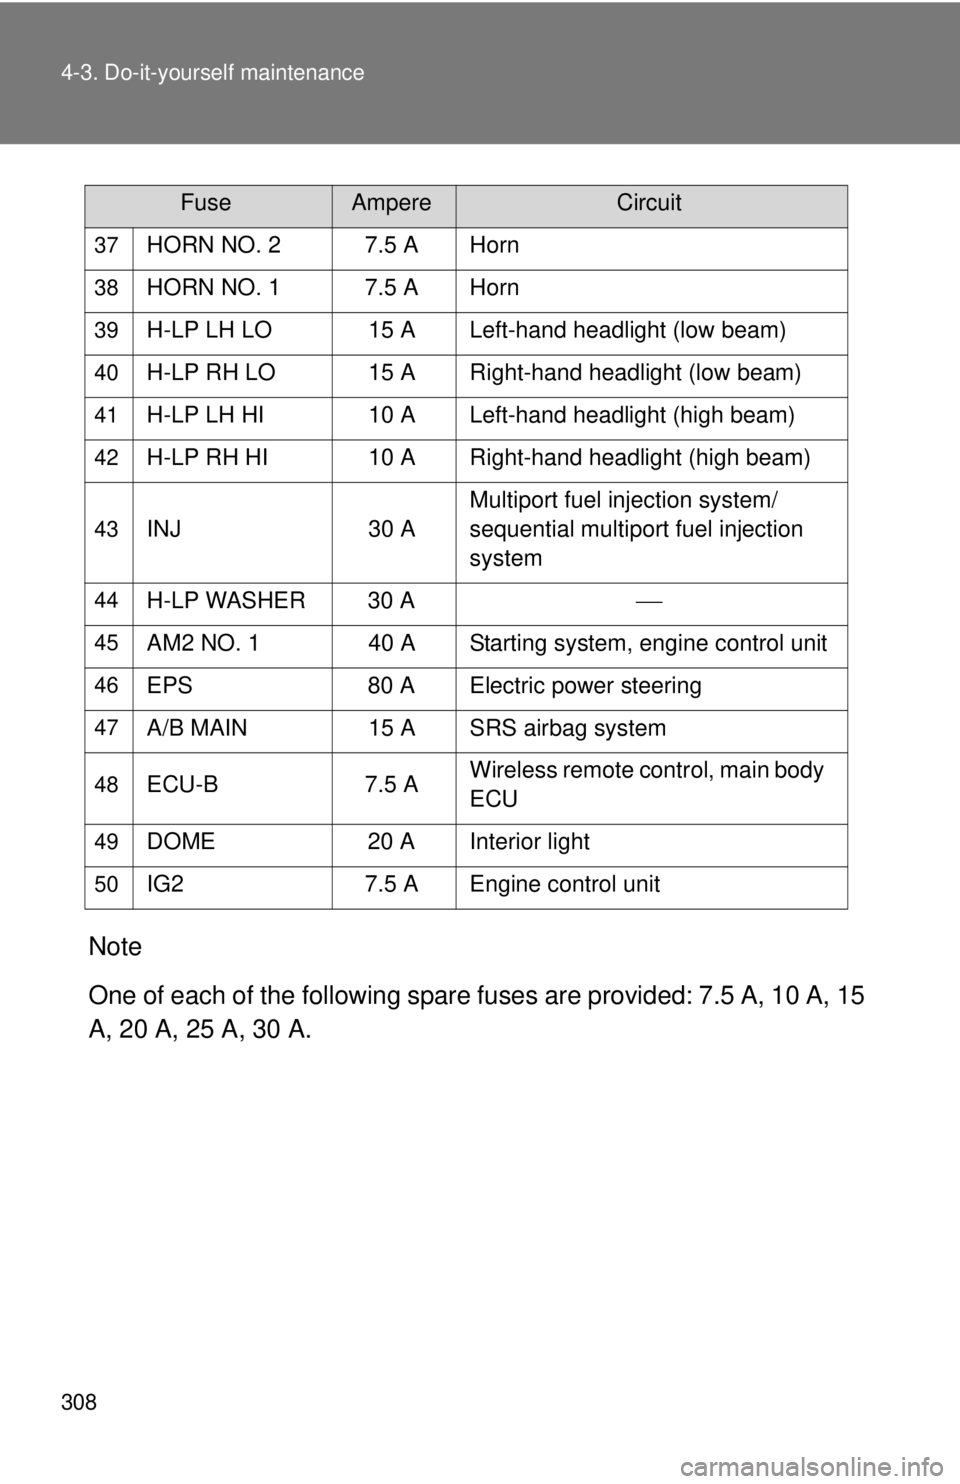
37HORN NO. 2 7.5 A Horn
38HORN NO. 1 7.5 A Horn
39H-LP LH LO 15 A Left-hand headlight (low beam)
40H-LP RH LO 15 A Right-hand headlight (low beam)
41H-LP LH HI 10 A Left-hand headlight (high beam)
42H-LP RH HI 10 A Right-hand headlight (high beam)
43INJ 30 AMultiport fuel injection system/
sequential multiport fuel injection
system
44H-LP WASHER 30 A
45AM2 NO. 1 40 A Starting system, engine control unit
46EPS 80 A Electric power steering
47A/B MAIN 15 A SRS airbag system
48ECU-B 7.5 AWireless remote control, main body
ECU
49DOME 20 A Interior light
50IG2 7.5 A Engine control unit
FuseAmpereCircuit
Page 318 of 452
318 4-3. Do-it-yourself maintenance
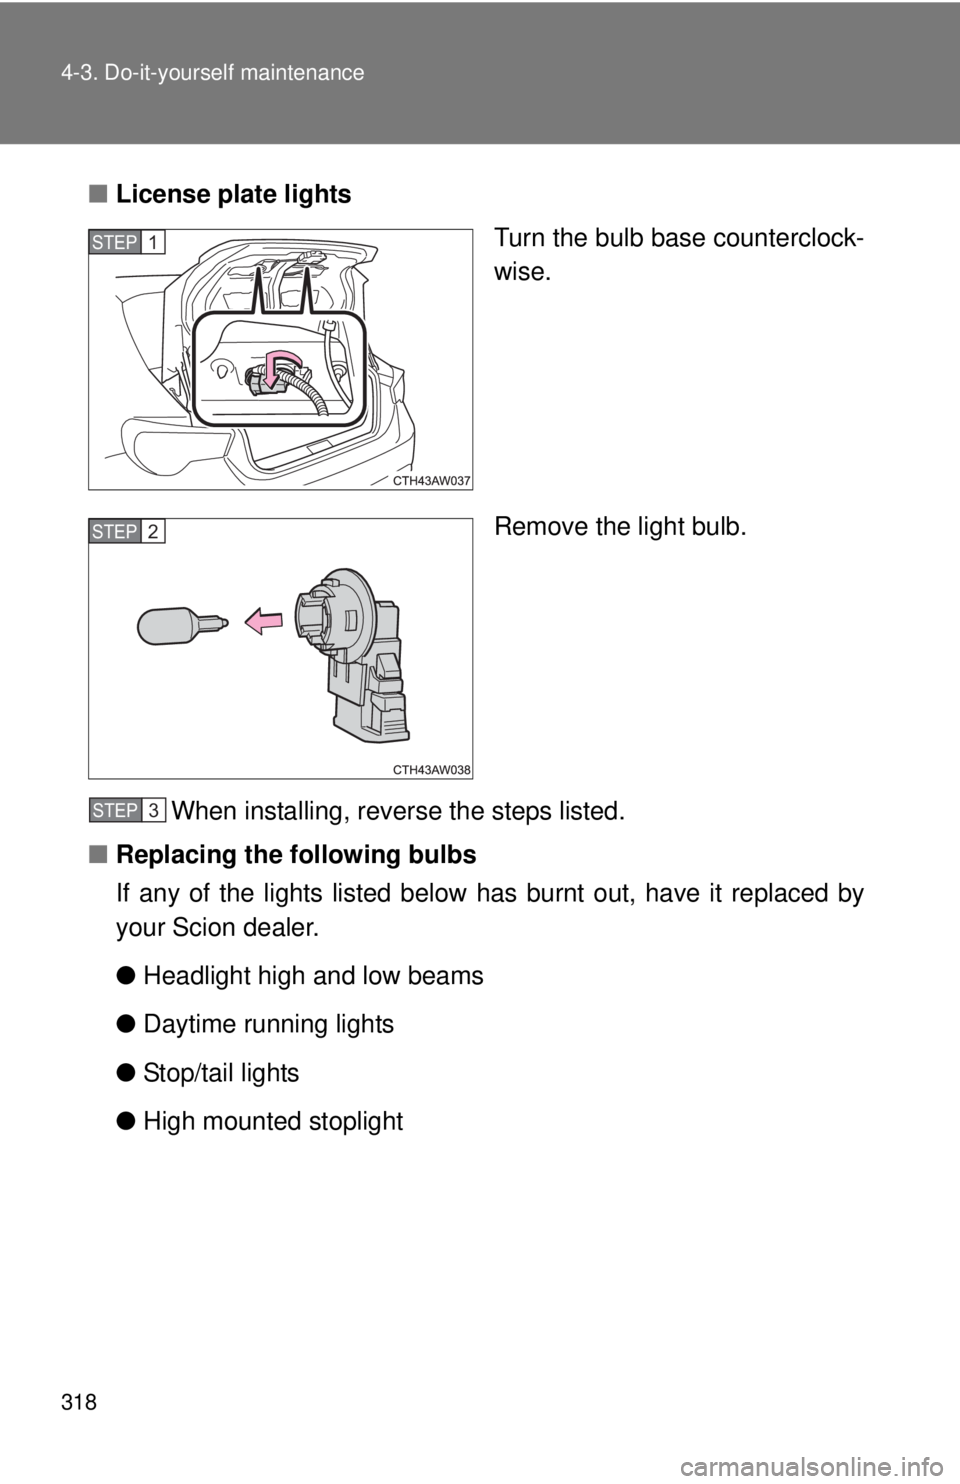
■License plate lights
Turn the bulb base counterclock-
wise.
Remove the light bulb.
When installing, reverse the steps listed.
■Replacing the following bulbs
If any of the lights listed below has burnt out, have it replaced by
your Scion dealer.
●Headlight high and low beams
●Daytime running lights
●Stop/tail lights
●High mounted stoplight
STEP 1
STEP 2
STEP 3
Page 320 of 452
320 4-3. Do-it-yourself maintenance
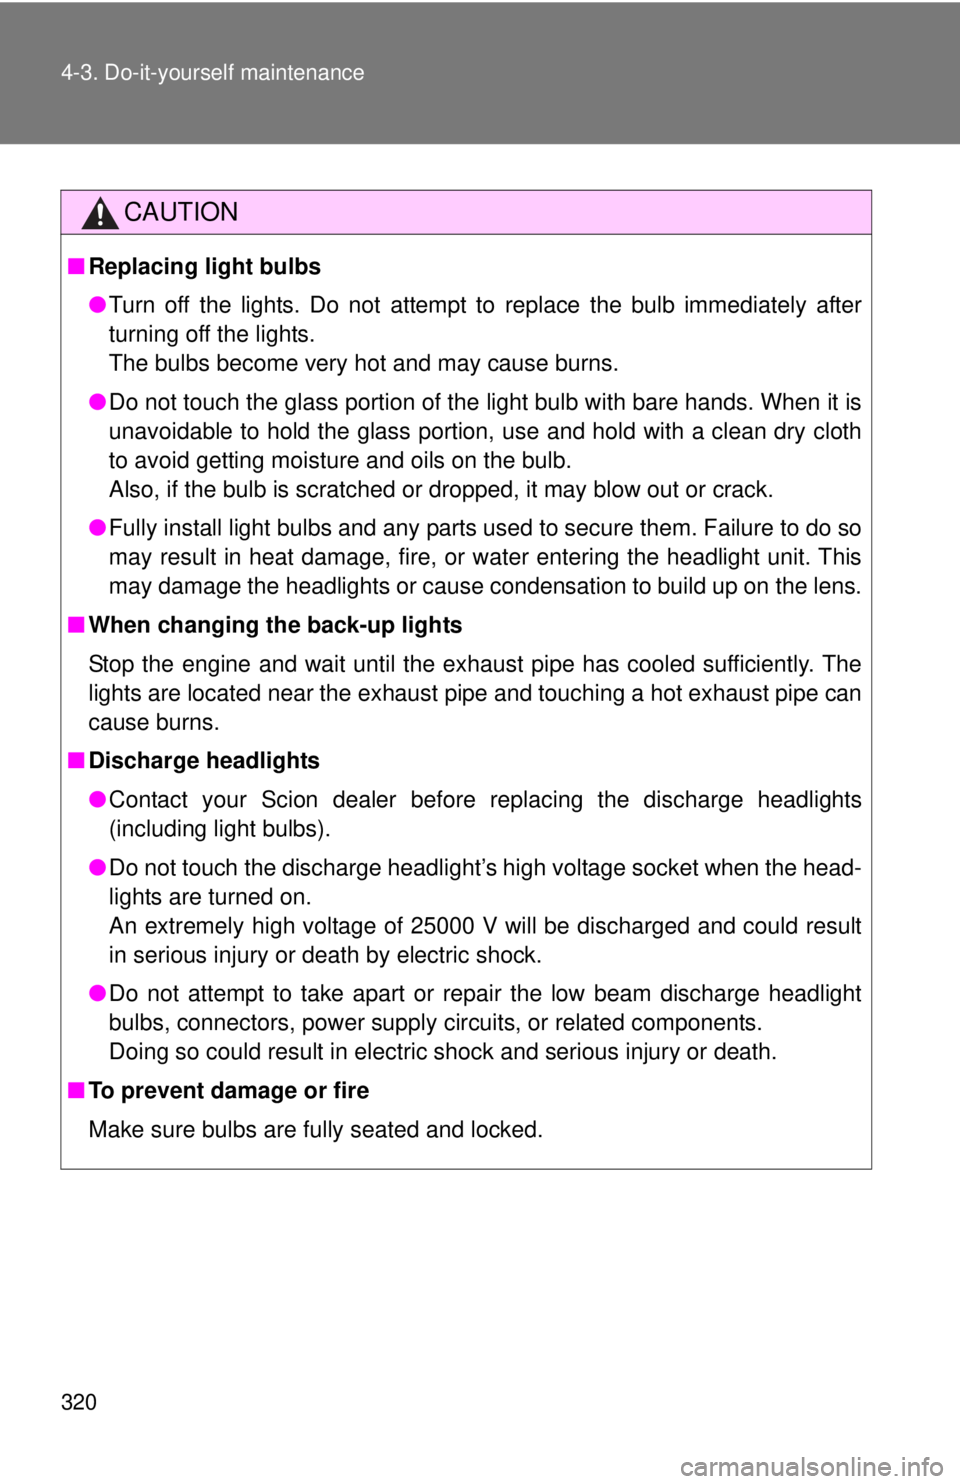
CAUTION
■Replacing light bulbs
●Turn off the lights. Do not attempt to replace the bulb immediately after
turning off the lights.
The bulbs become very hot and may cause burns.
●Do not touch the glass portion of the light bulb with bare hands. When it is
unavoidable to hold the glass portion, use and hold with a clean dry cloth
to avoid getting moisture and oils on the bulb.
Also, if the bulb is scratched or dropped, it may blow out or crack.
●Fully install light bulbs and any parts used to secure them. Failure to do so
may result in heat damage, fire, or water entering the headlight unit. This
may damage the headlights or cause condensation to build up on the lens.
■When changing the back-up lights
Stop the engine and wait until the exhaust pipe has cooled sufficiently. The
lights are located near the exhaust pipe and touching a hot exhaust pipe can
cause burns.
■Discharge headlights
●Contact your Scion dealer before replacing the discharge headlights
(including light bulbs).
●Do not touch the discharge headlight’s high voltage socket when the head-
lights are turned on.
An extremely high voltage of 25000 V will be discharged and could result
in serious injury or death by electric shock.
●Do not attempt to take apart or repair the low beam discharge headlight
bulbs, connectors, power supply circuits, or related components.
Doing so could result in electric shock and serious injury or death.
■To prevent damage or fire
Make sure bulbs are fully seated and locked.
Page 389 of 452
389 6-1. Specifications
6
Vehicle specifications
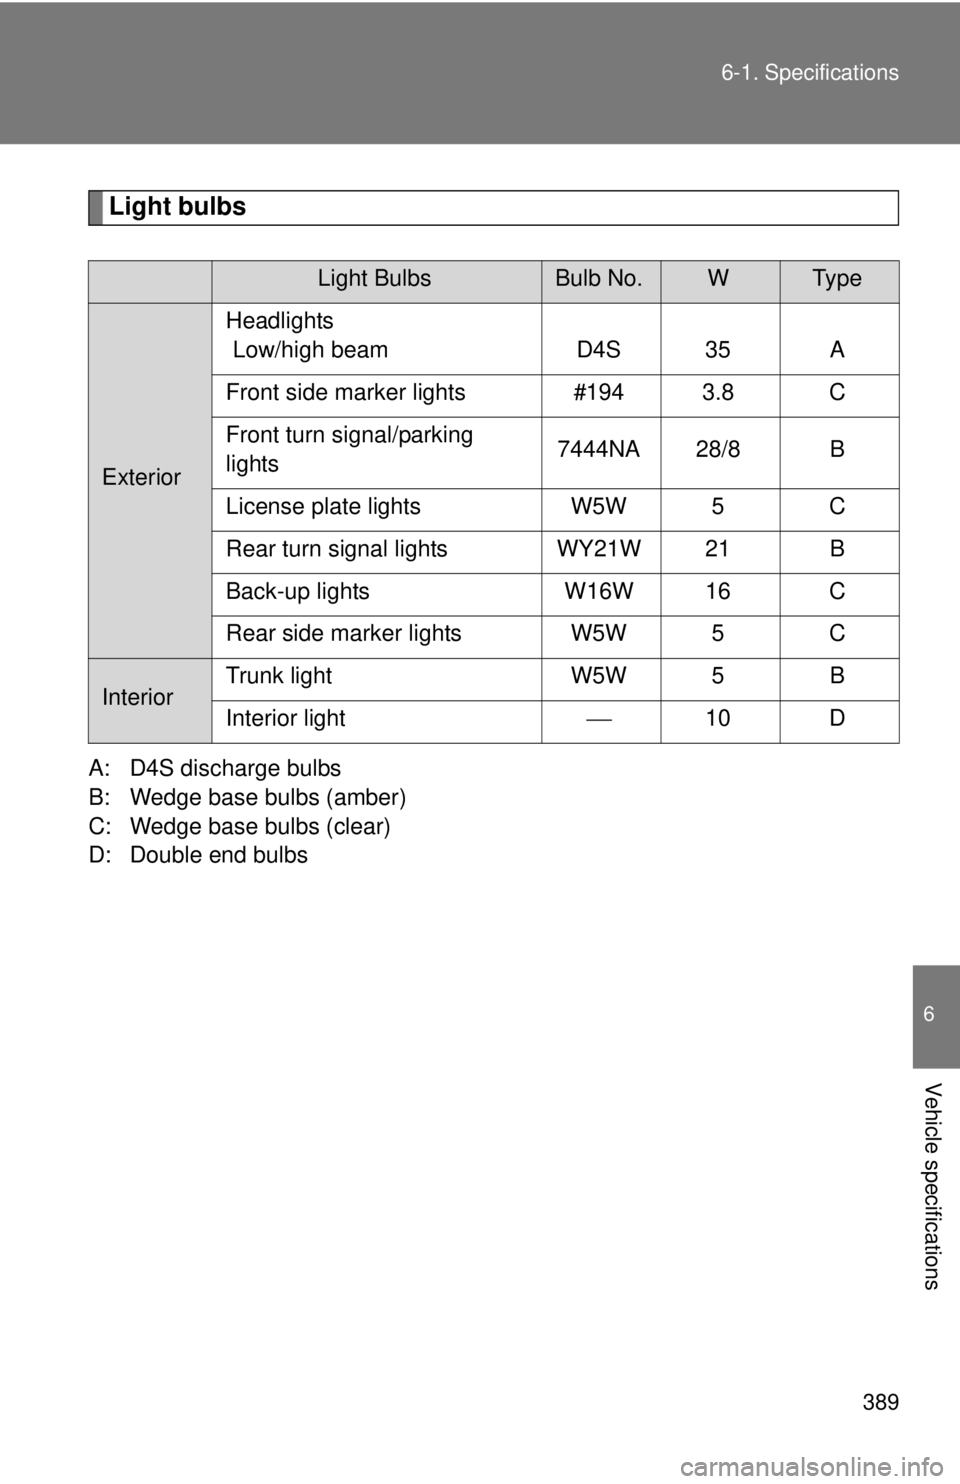
Light bulbs
A: D4S discharge bulbs
B: Wedge base bulbs (amber)
C: Wedge base bulbs (clear)
D: Double end bulbs
Light BulbsBulb No.WTy p e
ExteriorHeadlights
Low/high beam D4S 35 A
Front side marker lights #194 3.8 C
Front turn signal/parking
lights7444NA 28/8 B
License plate lights W5W 5 C
Rear turn signal lights WY21W 21 B
Back-up lights W16W 16 C
Rear side marker lights W5W 5 C
InteriorTrunk light W5W 5 B
Interior light10 D