check engine TOYOTA GR SUPRA 2022 User Guide
[x] Cancel search | Manufacturer: TOYOTA, Model Year: 2022, Model line: GR SUPRA, Model: TOYOTA GR SUPRA 2022Pages: 356, PDF Size: 39.14 MB
Page 294 of 356
2945-1. MOBILITY
2.0 models
Toyota recommends AKI 91.
3.0 and 3.0 Premium models
Toyota recommends AKI 93.
Refuel with this gasoline to achieve the rated performance
and consumption values.
Toyota recommends AKI 89.
If you use gasoline with this min-
imum AKI Rating, the engine
may produce knocking sounds
when starting at high external
temperatures. This has no effect
on the engine life.
This chapter describes all stan-
dard, country-specific and
optional features offered with
the series. It also describes fea-
tures that are not necessarily
available in your vehicle, for
instance, due to the selected
options or country versions. This
also applies to safety-related
functions and systems. When
using these functions and sys-
tems, the applicable laws and
regulations must be observed.
The engine oil consumption is
dependent on your driving style
and driving conditions.
Therefore, regularly check the
engine oil level after refueling by
taking a detailed measurement.
NOTICE
Even small quantities of the
wrong fuel or wrong fuel additives
can damage the fuel system and
engine. Furthermore, the catalytic
converter is permanently dam-
aged. There is a risk of damage to
property. Do not refuel or add the
following in the case of gasoline
engines:
• Leaded gasoline.
• Metallic additives, for instance
manganese or iron.
Do not press the Start/Stop button
after refueling with the wrong fuel.
Contact your Toyota dealer.
NOTICE
Incorrect fuels can damage the
fuel system and the engine. There
is a risk of damage to property. Do
not use fuels with a higher per-
centage of ethanol than recom-
mended. Do not refuel with fuels
containing methanol, e.g. M5 to
M100.
NOTICE
Fuel that does not comply with the
minimum quality can compromise
engine function or cause engine
damage. There is a risk of dam-
age to property. Do not fill with
fuel that does not comply with the
minimum quality.
Recommended fuel grade
Minimum fuel grade
Engine oil
Vehicle features and
options
General information
Page 296 of 356
2965-1. MOBILITY
sured value. In this case, the
measured value for the last, suf-
ficiently long trip is displayed.
■Concept
The engine oil level is checked
when the vehicle is stationary
and displayed via a scale.
If the engine oil level is outside
its permissible operating range,
a vehicle message is displayed.
■General information
During the measurement, the
idle speed is increased some-
what.
■Functional requirements
• Vehicle is parked in a horizon- tal position.
• Selector lever in selector lever position N or P and accelera-
tor pedal not depressed.
• Engine is running and is at operating temperature.
■Performing a detailed mea-
surement
Via Toyota Supra Command:
1 "My Vehicle"
2 "Vehicle status"
3 "Engine oil level"
4 "Measure engine oil level"
5 "Start measurement"
The engine oil level is checked
and displayed via a scale. Only add engine oil when the
message is displayed in the
instrument cluster. The quantity
to be added is indicated in the
message shown on the Control
Display.
Only add suitable types of
engine oil, refer to page 297.
Safely park the vehicle and
switch off drive-ready state
before adding engine oil.
Take care not to add too much
engine oil.
Detailed measurement
Adding engine oil
General information
Safety information
WARNING
Operating materials, for instance
oils, greases, coolants, fuels, can
contain harmful ingredients.
There is a risk of injuries or dan-
ger to life. Follow the instructions
on the containers. Avoid the con-
tact of articles of clothing, skin or
eyes with operating materials. Do
not refill operating materials into
different bottles. Store operating
materials out of reach of children.
NOTICE
An engine oil level that is too low
causes engine damage. There is
a risk of damage to property.
Immediately add engine oil.
Page 299 of 356
2995-1. MOBILITY
5
MOBILITY
ervoirs in the engine compart-
ment. Check and top up the
coolant levels on a regular
basis.
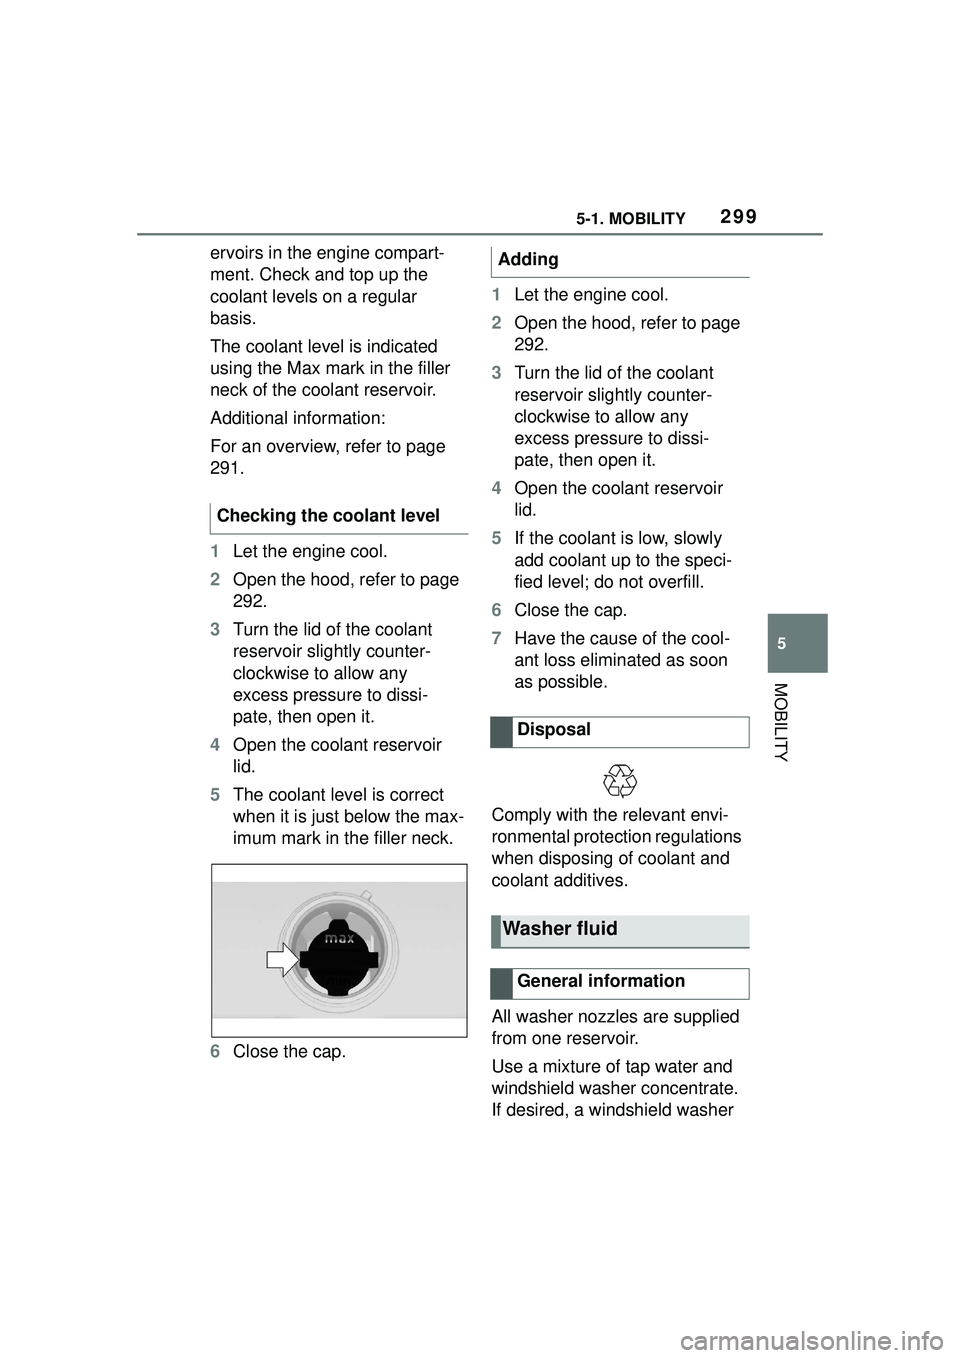
The coolant level is indicated
using the Max mark in the filler
neck of the coolant reservoir.
Additional information:
For an overview, refer to page
291.
1Let the engine cool.
2 Open the hood, refer to page
292.
3 Turn the lid of the coolant
reservoir slightly counter-
clockwise to allow any
excess pressure to dissi-
pate, then open it.
4 Open the coolant reservoir
lid.
5 The coolant level is correct
when it is just below the max-
imum mark in the filler neck.
6 Close the cap. 1
Let the engine cool.
2 Open the hood, refer to page
292.
3 Turn the lid of the coolant
reservoir slightly counter-
clockwise to allow any
excess pressure to dissi-
pate, then open it.
4 Open the coolant reservoir
lid.
5 If the coolant is low, slowly
add coolant up to the speci-
fied level; do not overfill.
6 Close the cap.
7 Have the cause of the cool-
ant loss eliminated as soon
as possible.
Comply with the relevant envi-
ronmental protection regulations
when disposing of coolant and
coolant additives.
All washer nozzles are supplied
from one reservoir.
Use a mixture of tap water and
windshield washer concentrate.
If desired, a windshield washer
Checking the coolant levelAdding
Disposal
Washer fluid
General information
Page 301 of 356
3015-1. MOBILITY
5
MOBILITY
This chapter describes all stan-
dard, country-specific and
optional features offered with
the series. It also describes fea-
tures and functions that are not
necessarily available in your
vehicle, e.g., due to the selected
options or country versions. This
also applies to safety-related
functions and systems. When
using these functions and sys-
tems, the applicable laws and
regulations must be observed.
The maintenance system pro-
vides service notifications and
thereby provides support in
maintaining road safety and the
operational reliability of the vehi-
cle.
In some cases, scopes and
intervals of the maintenance
system may vary according to
the country version. Replace-
ment work, spare parts, fuels
and lubricants, and wear materi-
als are calculated separately.
Further information is available
from a Toyota dealer.Sensors and special algorithms
take into account the driving
conditions of the vehicle. CBS
uses these to calculate the need
for maintenance.
The system makes it possible to
adapt the amount of mainte-
nance corresponding to your
user profile.
Information on service notifica-
tions, refer to page 141, can be
displayed on the Control Dis-
play.
Storage periods during which
the vehicle battery was discon-
nected are not taken into
account.
If this occurs, have a Toyota
dealer update the time-depen-
dent maintenance procedures,
such as checking brake fluid
and, if necessary, changing the
engine oil and the microfil-
ter/activated-charcoal filter.
Maintenance
Vehicle features and
options
Maintenance system
Condition Based Service
CBS
Concept
General information
Storage periods
Page 303 of 356
3035-1. MOBILITY
5
MOBILITY
This chapter describes all stan-
dard, country-specific and
optional features offered with
the series. It also describes fea-
tures and functions that are not
necessarily available in your
vehicle, e.g., due to the selected
options or country versions. This
also applies to safety-related
functions and systems. When
using these functions and sys-
tems, the applicable laws and
regulations must be observed.
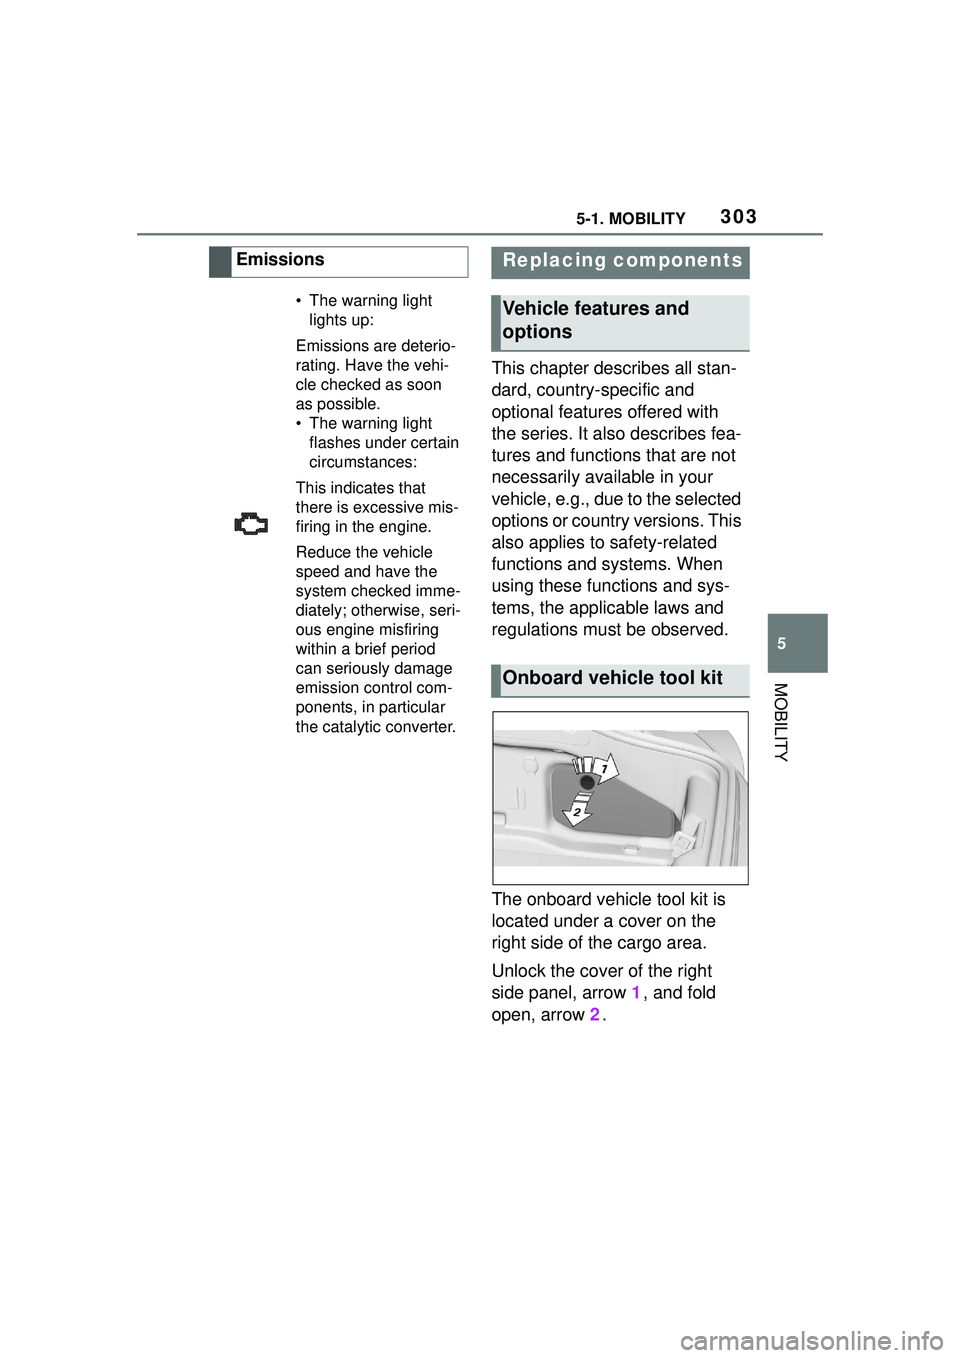
The onboard vehicle tool kit is
located under a cover on the
right side of the cargo area.
Unlock the cover of the right
side panel, arrow 1, and fold
open, arrow 2.
Emissions
• The warning light
lights up:
Emissions are deterio-
rating. Have the vehi-
cle checked as soon
as possible.
• The warning light flashes under certain
circumstances:
This indicates that
there is excessive mis-
firing in the engine.
Reduce the vehicle
speed and have the
system checked imme-
diately; otherwise, seri-
ous engine misfiring
within a brief period
can seriously damage
emission control com-
ponents, in particular
the catalytic converter.
Replacing components
Vehicle features and
options
Onboard vehicle tool kit
Page 314 of 356
3145-1. MOBILITY
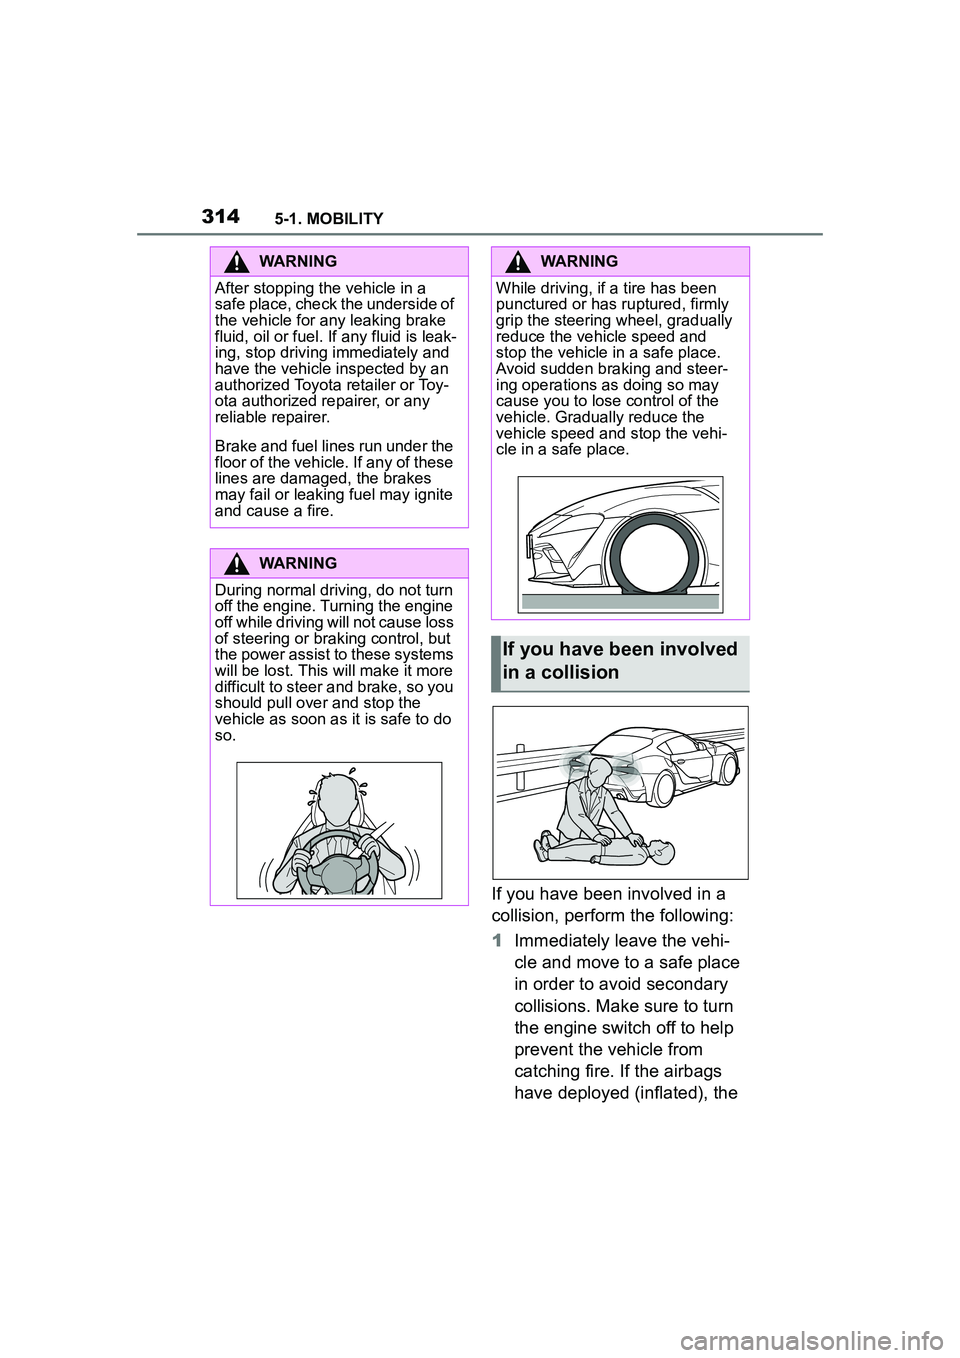
If you have been involved in a
collision, perform the following:
1Immediately leave the vehi-
cle and move to a safe place
in order to avoid secondary
collisions. Make sure to turn
the engine switch off to help
prevent the vehicle from
catching fire. If the airbags
have deployed (inflated), the
WARNING
After stopping the vehicle in a
safe place, check the underside of
the vehicle for any leaking brake
fluid, oil or fuel. If any fluid is leak-
ing, stop driving immediately and
have the vehicle inspected by an
authorized Toyota retailer or Toy-
ota authorized repairer, or any
reliable repairer.
Brake and fuel lines run under the
floor of the vehicle. If any of these
lines are damaged, the brakes
may fail or leaking fuel may ignite
and cause a fire.
WARNING
During normal driving, do not turn
off the engine. Turning the engine
off while driving will not cause loss
of steering or braking control, but
the power assist to these systems
will be lost. This will make it more
difficult to steer and brake, so you
should pull over and stop the
vehicle as soon as it is safe to do
so.
WARNING
While driving, if a tire has been
punctured or has ruptured, firmly
grip the steering wheel, gradually
reduce the vehicle speed and
stop the vehicle in a safe place.
Avoid sudden braking and steer-
ing operations as doing so may
cause you to lose control of the
vehicle. Gradually reduce the
vehicle speed and stop the vehi-
cle in a safe place.
If you have been involved
in a collision
Page 318 of 356
3185-1. MOBILITY
1Check whether the battery of
the other vehicle has a volt-
age of 12 volts. The voltage
information can be found on
the battery.
2 Switch off the engine of the
assisting vehicle.
3 Switch off any electronic sys-
tems/power consumers in
both vehicles.
The starting aid terminal in the
engine compartment acts as the
positive battery terminal.
A special connection on the
body in the engine compartment
acts as the negative battery ter-
minal.
Additional information:
Overview of engine compart-
ment, refer topage 291.
Open the cover of the positive
battery terminal.
Before you begin, switch off all
unnecessary electronic sys-
tems/power consumers, such as
the radio, on the assisting and
receiving vehicle.
1 Open the cover of the starting
aid terminal. 2
Attach one terminal clamp of
the positive jumper cable to
the positive terminal of the
battery, or to the correspond-
ing starting aid terminal of the
vehicle providing assistance.
3 Attach the terminal clamp on
the other end of the cable to
the positive terminal of the
battery, or to the correspond-
ing starting aid terminal of the
vehicle to be started.
4 Attach one terminal clamp of
the negative jumper cable to
the negative terminal of the
battery, or to the correspond-
ing engine or body ground of
assisting vehicle.
5 Attach the second terminal
clamp to the negative termi-
nal of the battery, or to the
corresponding engine or
body ground of the vehicle to
be started.
Never use spray fluids to start
the engine.
1 Start the engine of the assist-
ing vehicle and let it run for
several minutes at an
increased idle speed.
2 Start the engine of the vehicle
that is to be started in the
usual way.
If the first starting attempt is not
successful, wait a few minutes
before making another attempt in
Preparation
Starting aid terminals
Connecting the cables
Starting the engine
Page 319 of 356
3195-1. MOBILITY
5
MOBILITY
order to allow the discharged bat-
tery to recharge.
3Let both engines run for sev-
eral minutes.
4 Disconnect the jumper
cables in the reverse order.
Check the battery and recharge,
if needed.
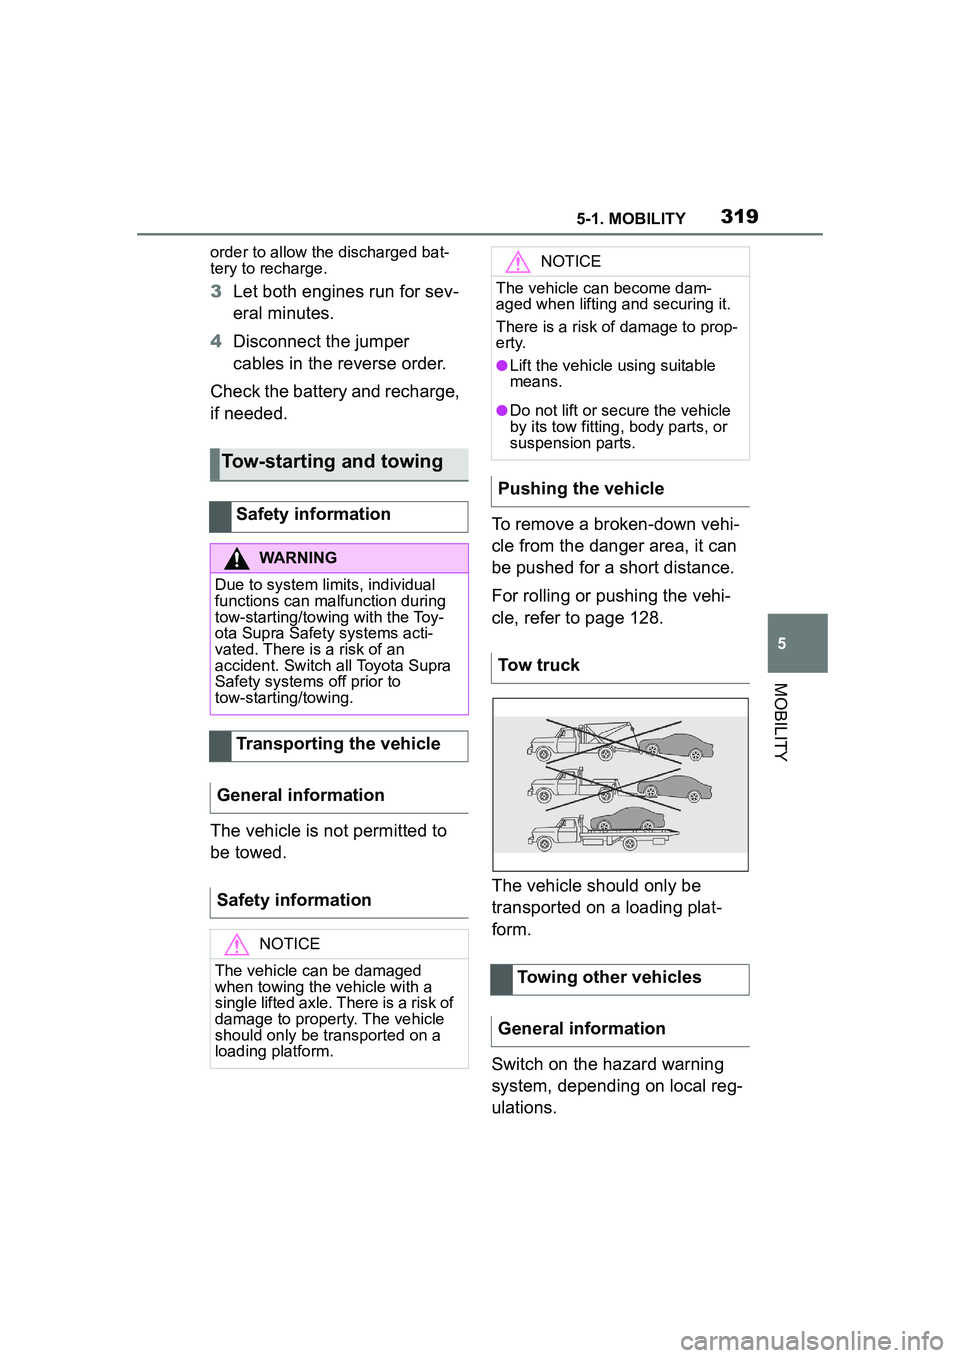
The vehicle is not permitted to
be towed. To remove a broken-down vehi-
cle from the danger area, it can
be pushed for a short distance.
For rolling or pushing the vehi-
cle, refer to page 128.
The vehicle should only be
transported on a loading plat-
form.
Switch on the hazard warning
system, depending on local reg-
ulations.
Tow-starting and towing
Safety information
WARNING
Due to system limits, individual
functions can malfunction during
tow-starting/towing with the Toy-
ota Supra Safety systems acti-
vated. There is a risk of an
accident. Switch all Toyota Supra
Safety systems off prior to
tow-starting/towing.
Transporting the vehicle
General information
Safety information
NOTICE
The vehicle can be damaged
when towing the vehicle with a
single lifted axle. There is a risk of
damage to property. The vehicle
should only be transported on a
loading platform.
NOTICE
The vehicle can become dam-
aged when lifting and securing it.
There is a risk of damage to prop-
erty.
●Lift the vehicle using suitable
means.
●Do not lift or secure the vehicle
by its tow fitting, body parts, or
suspension parts.
Pushing the vehicle
Tow truck
Towing other vehicles
General information
Page 321 of 356
3215-1. MOBILITY
5
MOBILITY
The tow fitting is found in the
onboard vehicle tool kit, refer to
page 303.
Observe the following notes
when using the tow fitting:
Use only the tow fitting pro-
vided with the vehicle.
Turn the tow fitting at least 5
turns clockwise and screw it
in as far as it will go. If neces-
sary, tighten with a suitable
object.
After use, unscrew the tow fit-
ting counter clockwise.
Use the tow fitting for towing
on paved roads only.
Avoid lateral loading of the
tow fitting, for instance do not
lift the vehicle by the tow fit-
ting.
Check the attachment of the
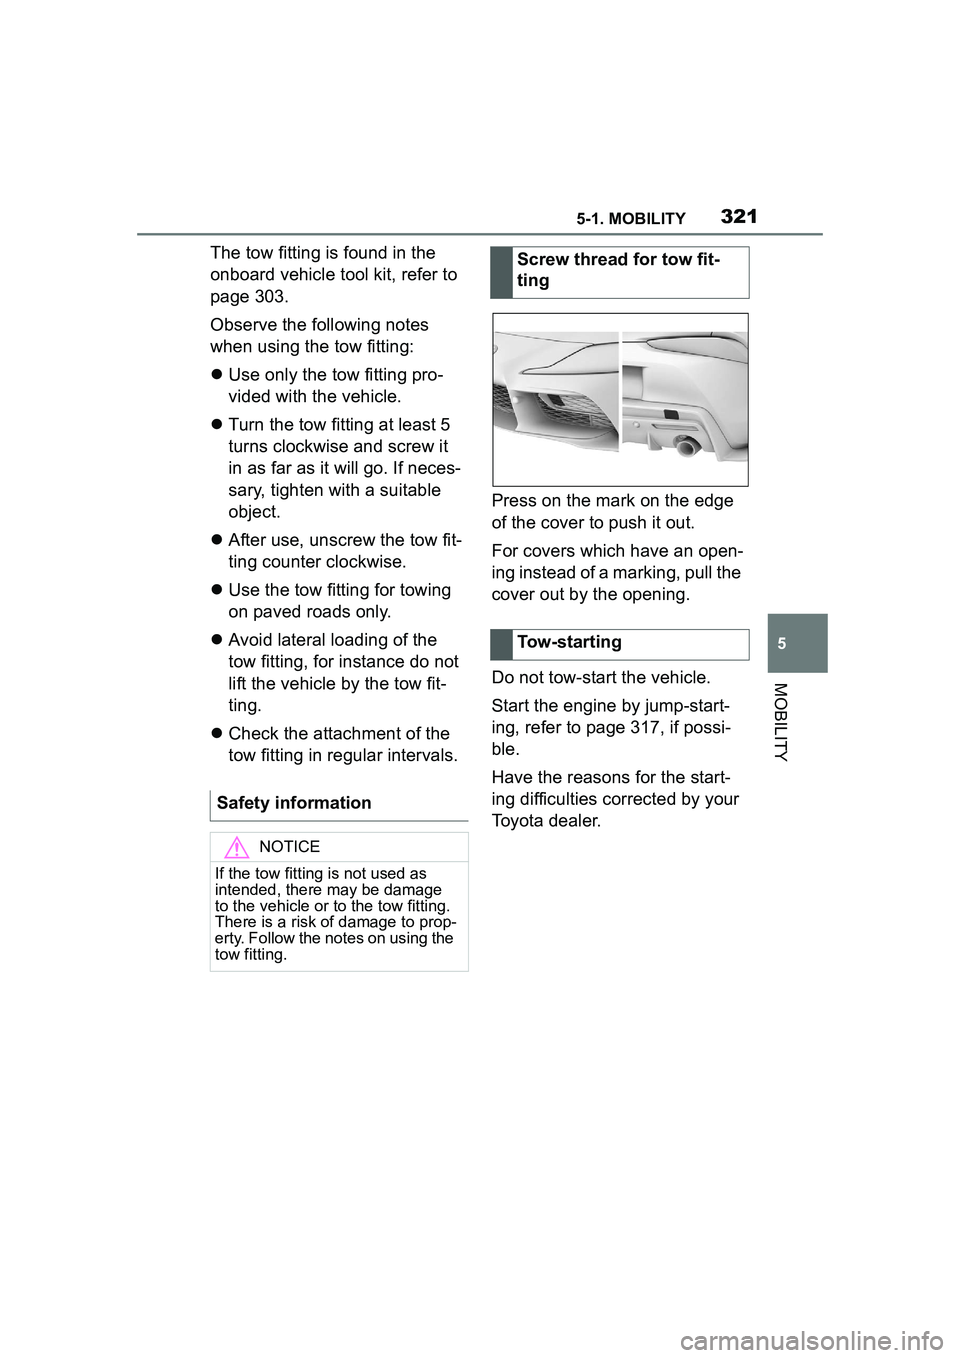
tow fitting in regular intervals. Press on the mark on the edge
of the cover to push it out.
For covers which have an open-
ing instead of a marking, pull the
cover out by the opening.
Do not tow-start the vehicle.
Start the engine by jump-start-
ing, refer to page 317, if possi-
ble.
Have the reasons for the start-
ing difficulties corrected by your
Toyota dealer.
Safety information
NOTICE
If the tow fitting is not used as
intended, there may be damage
to the vehicle or to the tow fitting.
There is a risk of damage to prop-
erty. Follow the notes on using the
tow fitting.
Screw thread for tow fit-
ting
Tow-starting
Page 346 of 356
346Alphabetical Index
Changing parts ....................... 303
Changing wheels .................... 289
Changing wheels/tires ........... 272
Chassis number, see Vehicle identification number............. 12
Checking the engine oil level electronically ........................ 295
Checking the oil level electroni- cally ....................................... 295
Child restraint systems, mount- ing .......................................... 112
Child restraint systems, see Transporting ch ildren safely 111
Child seat, mount ing .............. 112
Child seats, see Transporting children safely ...................... 111
Children, seating position ..... 111
Children, transporting safely 111
Chrome surfaces, care .......... 326
Chrome-plated surfaces, care326
Cleaning displays, screens ... 328
Cleaning, Head-up Display .... 328
Climate control ....................... 226
Combination switch, see Turn signals ................................... 121
Combination switch, see Washer/wiper system........... 122
Comfort entry ........................... 85
Comparison of entries, see Entry comparison ............................. 46
Compartments in the doors .. 245
Compressor ............................ 276
Condensation water under the parked vehicle ...................... 257
Condensation, removing from the windows.......................... 230
Condition Based Service CBS ............................................... 301
Confirmation signal from the vehicle ..................................... 91
Connecting electr ical devices,
see Sockets .......................... 238 Connections, Screen Mirroring74
Control Display .........................49
Control Display, settings .........60
Control systems, driving stability
...............................................194
Controller ..................................49
Convenient closing with the remote control . .......................80
Convenient opening with the remote control . .......................79
Coolant ....................................298
Coolant level ...........................298
Coolant temperature ..............140
Cooling system .......................298
Cooling, maximum .................228
Corrosion on brake discs ......256
Cosmetic mirror ......................238
Cruise control .........................199
Cruise control with distance con- trol, see Dynami c radar cruise
control with full-speed range ...............................................203
Cruise control without distance control, see Cruise control ..199
Cruise control, active with Stop & Go .......................................203
Cruising range ........................141
Cup holder...............................245
Curtain shield airbag ..............160
Customize Settings, see Driver profiles.....................................65
Customize Settings, see Sport mode switch ..........................131
D
Damage, tires ..... .....................271
Data memory ...............................7
Data protection, settings .........63
Data, see Deleting personal data in the vehicle ...........................64
Data, technical ........................330
Date ............................................61