stop start TOYOTA HIGHLANDER 2009 XU40 / 2.G Owner's Guide
[x] Cancel search | Manufacturer: TOYOTA, Model Year: 2009, Model line: HIGHLANDER, Model: TOYOTA HIGHLANDER 2009 XU40 / 2.GPages: 608, PDF Size: 11.73 MB
Page 204 of 608
204 2-3. Operating the lights and wipers
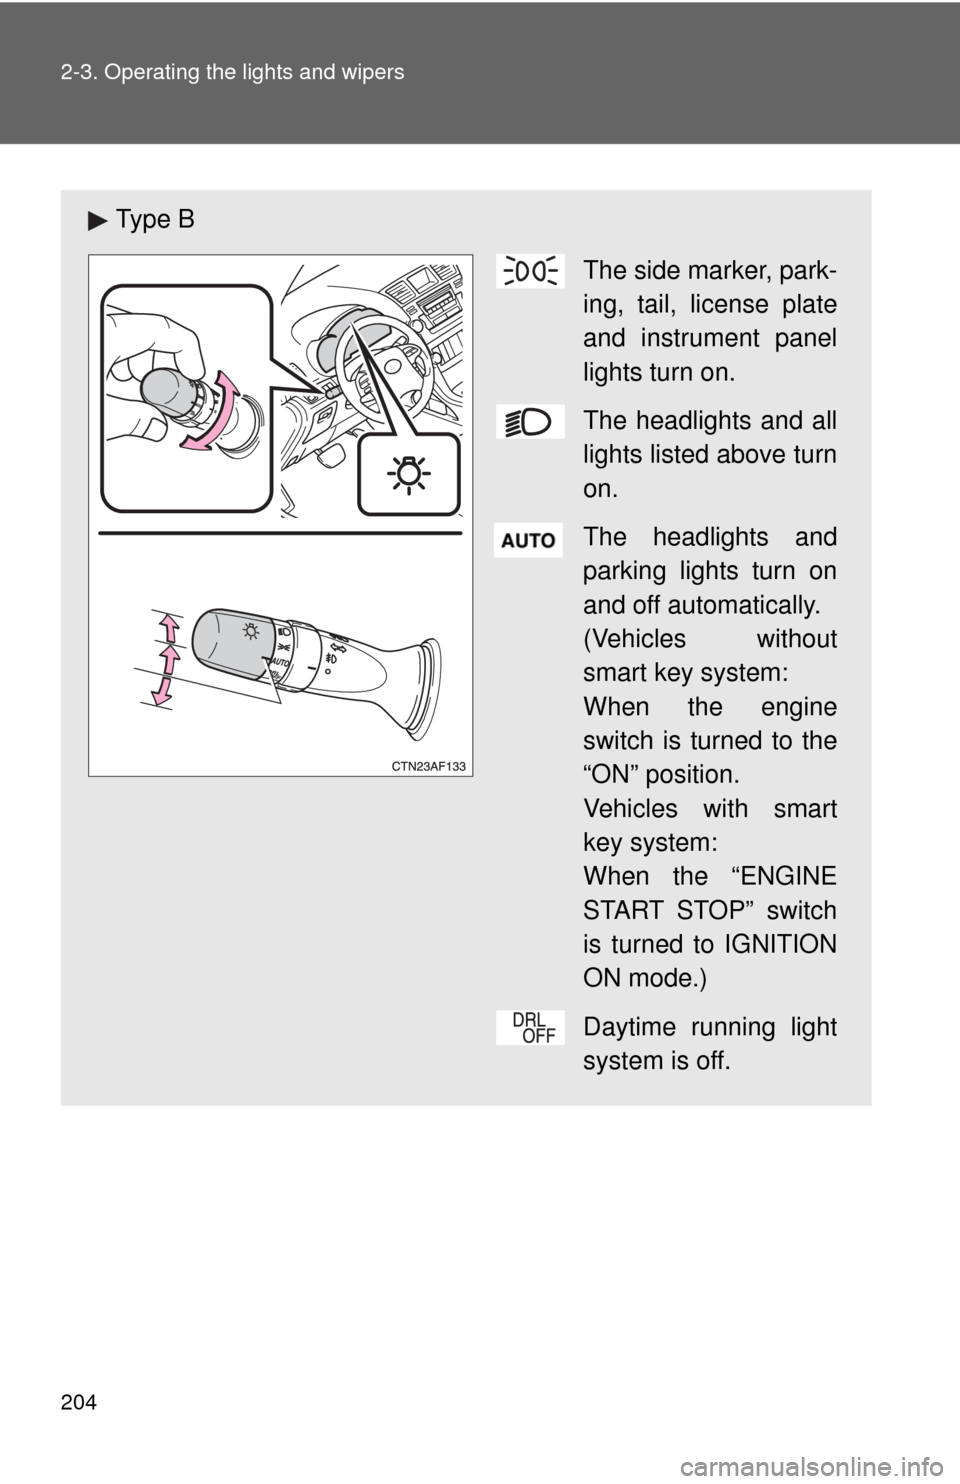
Ty p e BThe side marker, park-
ing, tail, license plate
and instrument panel
lights turn on.
The headlights and all
lights listed above turn
on.
The headlights and
parking lights turn on
and off automatically.
(Vehicles without
smart key system:
When the engine
switch is turned to the
“ON” position.
Vehicles with smart
key system:
When the “ENGINE
START STOP” switch
is turned to IGNITION
ON mode.)
Daytime running light
system is off.
Page 206 of 608
206 2-3. Operating the lights and wipers
■Automatic light off system
Vehicles without smart key system
The headlights and tail lights turn off 30 seconds after drivers door is opened
and closed if the engine switch has been turned to the “ACC” or “LOCK”
position.
To turn the lights on again, turn the engine switch to the “ON” position, or
turn the headlight switch off and then back to or .
Vehicles with smart key system
The headlights and tail lights turn off 30 seconds after drivers door is opened
and closed if the “ENGINE START STOP” switch has been turned to
ACCESSORY mode or turned to OFF.
To turn the lights on again, turn the “ENGINE START STOP” switch to IGNI-
TION ON mode, or turn the headlight switch off and then back to or .
■ Customization that can be configured at Toyota dealer
Settings (e.g. daytime running light system) can be changed.
(Customizable features →P. 582)
NOTICE
■To prevent battery discharge
Do not leave the lights on longer than necessary when the engine is not run-
ning.
Page 209 of 608
209
2-3. Operating the lights and wipers
2
When driving
■
The windshield wipers and washer can be operated when
Vehicles without smart key system
The engine switch is in
the“ON” position.
Vehicles with smart key system
The “ENGINE START STOP” switch is in IGNITION ON mode.
■ If no windshield washer fluid sprays
Check that the washer nozzles are not blocked and if there is washer fluid in
the windshield washer fluid reservoir.
NOTICE
■When the windshield is dry
Do not use the wipers, as they may damage the windshield.
■ When there is no washer fluid spray from the nozzle
Damage to the washer fluid pump may be caused if the lever is pulled
toward you and held continually.
■ When a nozzle is blocked
Do not try to clear it with a pin or other object. The nozzle will be damaged.
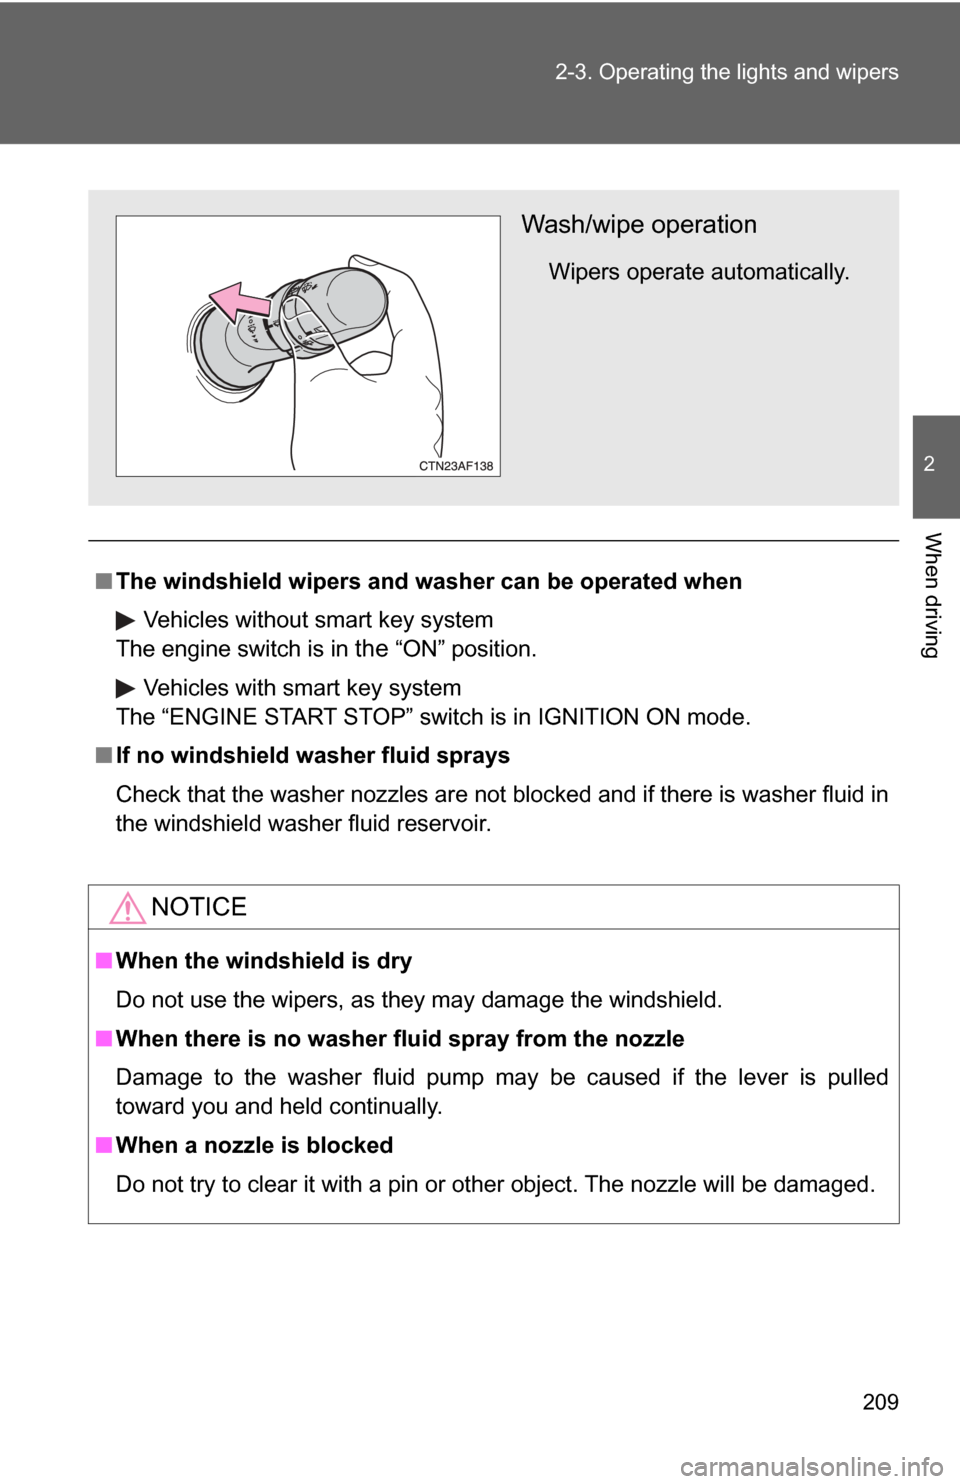
Wash/wipe operation
Wipers operate automatically.
Page 210 of 608
210
2-3. Operating the lights and wipers
Rear window wiper and washer
■The rear window wiper and washer can be operated when
Vehicles without smart key system
The engine switch is in
the“ON” position.
Vehicles with smart key system
The “ENGINE START STOP” switch is in IGNITION ON mode.
NOTICE
■ When the rear window is dry
Do not use the wipers, as they may damage the rear window.
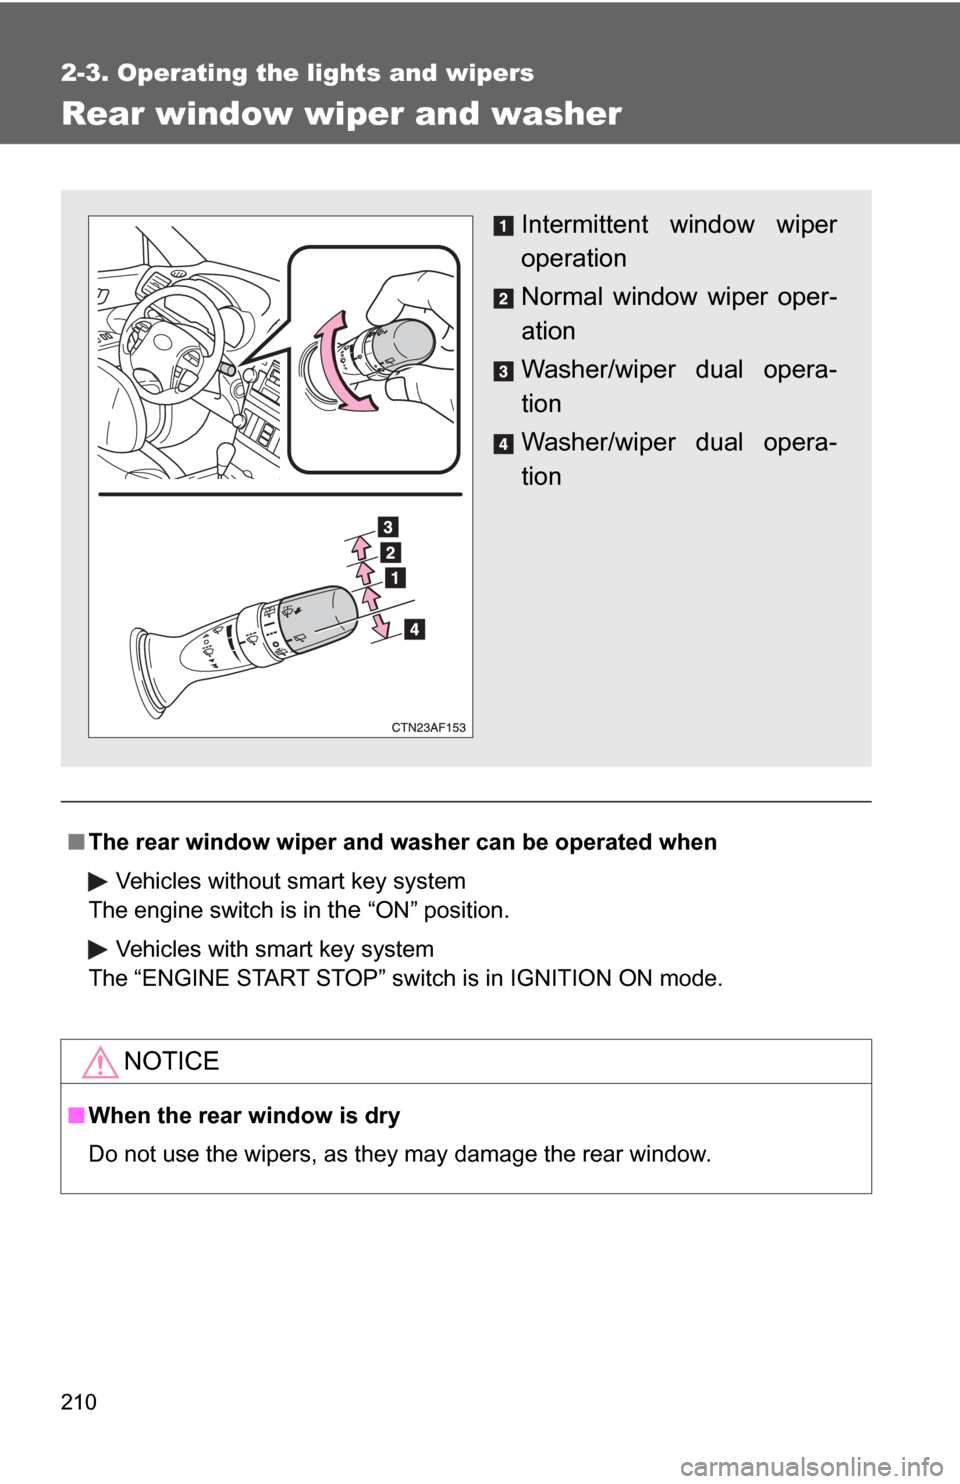
Intermittent window wiper
operation
Normal window wiper oper-
ation
Washer/wiper dual opera-
tion
Washer/wiper dual opera-
tion
Page 218 of 608
218
2-4. Using other driving systems
Driving assist systems
To help enhance driving safety and performance, the following sys-
tems operate automatically in res ponse to various driving situations.
Be aware, however, that these systems are supplementary and
should not be relied upon too h eavily when operating the vehicle.
■ABS (Anti-lock Brake System)
Helps to prevent wheel lock when the brakes are applied suddenly, or if
the brakes are applied while driving on a slippery road surface.
■Brake assist
Generates an increased level of braking force after the brake pedal is
depressed when the system detects a panic stop situation.
■Enhanced VSC (Enhanced Vehicle Stability Control)
Helps the driver to control skidding when swerving suddenly or turning
on slippery road surfaces.
■TRAC (Traction Control)
Maintains drive power and prevents the front wheels (2WD models) or
four wheels (4WD models) from sp inning when starting the vehicle or
accelerating on slippery roads.
■ Hill-start assist control
→P. 223
■Downhill assist control system (4WD models only)
→P. 225
■EPS (Electric Power Steering)
Employs an electric motor to reduce the amount of effort needed to turn
the steering wheel.
Page 220 of 608
220 2-4. Using other driving systems
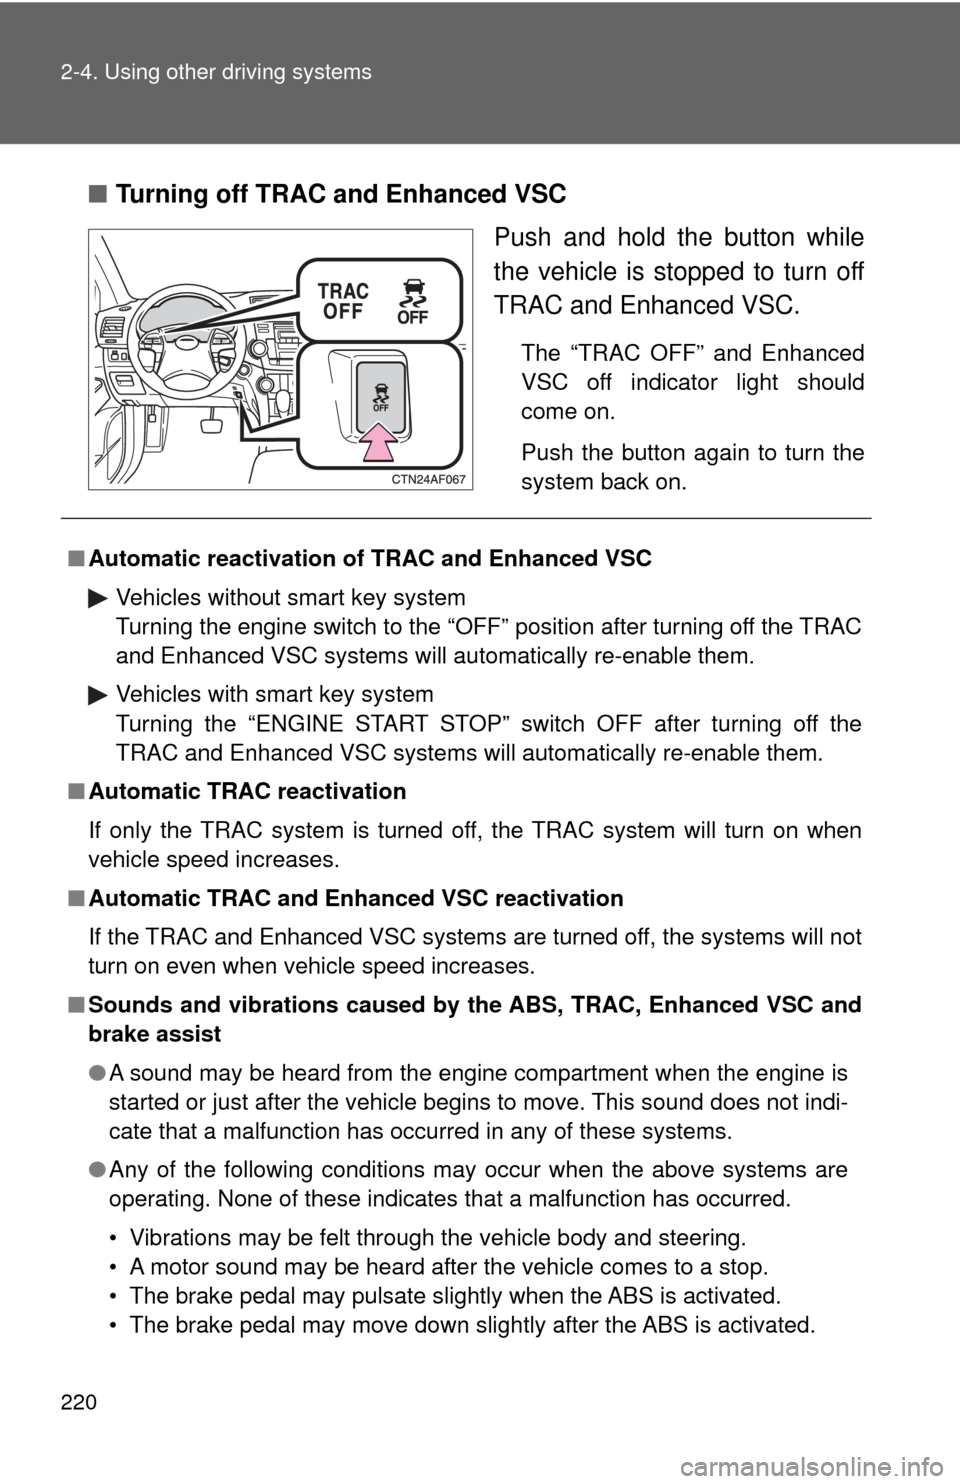
■Turning off TRAC and Enhanced VSC
Push and hold the button while
the vehicle is stopped to turn off
TRAC and Enhanced VSC.
The “TRAC OFF” and Enhanced
VSC off indicator light should
come on.
Push the button again to turn the
system back on.
■Automatic reactivation of TRAC and Enhanced VSC
Vehicles without smart key system
Turning the engine switch to the “OFF” position after turning off the TRAC
and Enhanced VSC systems will automatically re-enable them.
Vehicles with smart key system
Turning the “ENGINE START STOP” switch OFF after turning off the
TRAC and Enhanced VSC systems will automatically re-enable them.
■ Automatic TRAC reactivation
If only the TRAC system is turned off, the TRAC system will turn on when
vehicle speed increases.
■ Automatic TRAC and Enha nced VSC reactivation
If the TRAC and Enhanced VSC systems are turned off, the systems will not
turn on even when vehicle speed increases.
■ Sounds and vibrations caused by the ABS, TRAC, Enhanced VSC and
brake assist
● A sound may be heard from the engine compartment when the engine is
started or just after the vehicle begins to move. This sound does not indi-
cate that a malfunction has occurred in any of these systems.
● Any of the following conditions may occur when the above systems are
operating. None of these indicates that a malfunction has occurred.
• Vibrations may be felt through the vehicle body and steering.
• A motor sound may be heard after the vehicle comes to a stop.
• The brake pedal may pulsate slightly when the ABS is activated.
• The brake pedal may move down slightly after the ABS is activated.
Page 223 of 608
223
2-4. Using other driving systems
2
When driving
Hill-start assist control
■Hill-start assist cont rol operating conditions
The system operates in the following situations:
• The shift lever is in a position other than P.
• The parking brake is not applied.
• The accelerator pedal is not depressed.
■ Hill-start assist control
●While hill-start assist control is operating, the brakes remain automati-
cally applied after the driver releases the brake pedal. The stop lights and
the high mounted stoplight turn on.
● Hill-start assist control operates for about 2 seconds after the brake pedal
is released.
● If the slip indicator does not flash and the buzzer does not sound when
the brake pedal is further depressed, slightly reduce the pressure on the
brake pedal (do not allow the vehicl e to roll backward) and then firmly
depress it again. If the system still does not operate, check that the oper-
ating conditions explained above have been met.
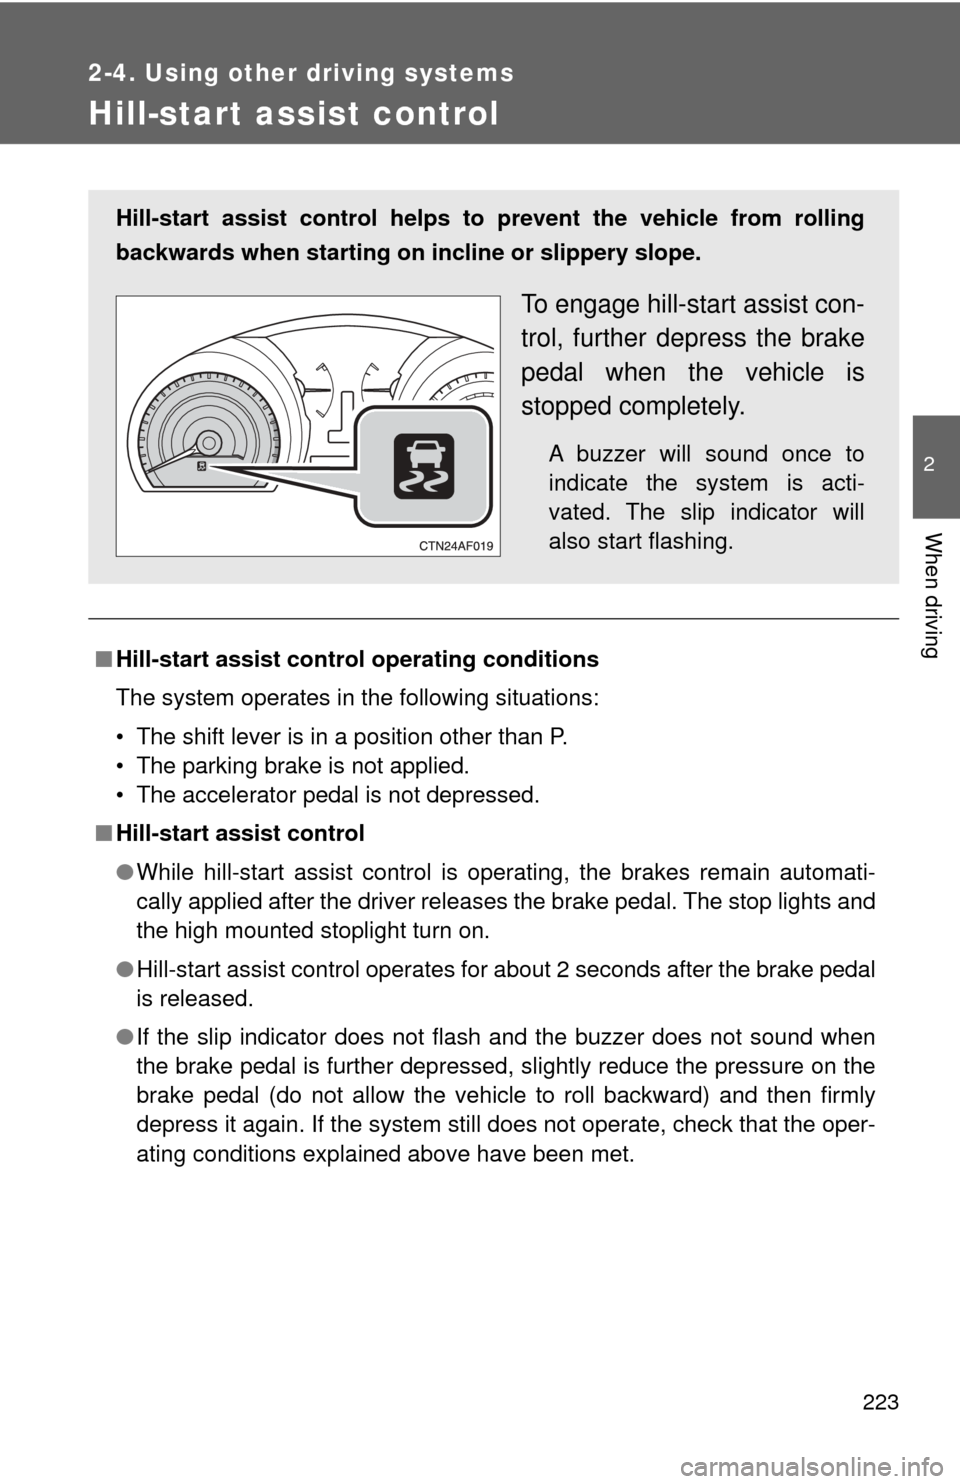
Hill-start assist control helps to prevent the vehicle from rolling
backwards when starting on incline or slippery slope.
To engage hill-start assist con-
trol, further depress the brake
pedal when the vehicle is
stopped completely.
A buzzer will sound once to
indicate the system is acti-
vated. The slip indicator will
also start flashing.
Page 224 of 608
224 2-4. Using other driving systems
■Hill-start assist control buzzer
●When hill-start assist control is activated, the buzzer will sound once.
● In the following situations, hill-start assist control will be canceled and the
buzzer will sound twice.
• No attempt is made to drive the vehicle within approximately 2 seconds
of releasing the brake pedal.
• The shift lever is moved to P.
• The parking brake is applied.
• The brake pedal is depressed again.
■ If the slip indicator comes on...
It may indicate a malfunction in the system. Contact your Toyota dealer.
CAUTION
■Hill-start assist control
●Hill-start assist control may not operate effectively on extremely steep
inclines or roads covered in ice.
● Do not use hill-start assist control to stop or park the vehicle on an incline.
Page 226 of 608

226 2-4. Using other driving systems
■Conditions in which the downhill assi st control system does not oper-
ate
● In the following situations, the downhill assist control system indicator
flashes and the downhill assist control system does not operate or will
stop operating:
• The shift lever is not in 1 range of S mode or R.
• The vehicle speed is higher than 15 mph (25 km/h).
● If the accelerate or brake pedal is depressed, the downhill assist control
system will stop operating with the downhill assist control system indica-
tor stayed on.
■ If the “DAC” switch is turned off during operat ion of the downhill assist
control system
The downhill assist control system gradually ceases operation. The downhill
assist control system indicator will flash during the canceling operation, and
then go off when the system is fully off.
■ Downhill assist control system operation sound
●A sound may be heard from the engine compartment during operation of
the downhill assist control system. This sound does not indicate a mal-
function.
● If the accelerator or brake pedal is depressed during operation of the
downhill assist control system, a sound caused by the release of system
operation may be heard, or you may feel the brake pedal push-back. This
does not indicate a malfunction.
■ When the downhill assist contro l system operates continuously
The brake actuator may overheat. In that case, the downhill assist control
system will stop operating, a buzzer will sound and the downhill assist con-
trol system indicator will start flashing. Refrain from using the system until
the downhill assist control system indicator stays on. (There is no problem
with continuing driving normally.)
■ If the slip indicator comes on...
It may indicate a malfunction in the system. Contact your Toyota dealer.
Page 236 of 608
236 2-5. Driving information
CAUTION
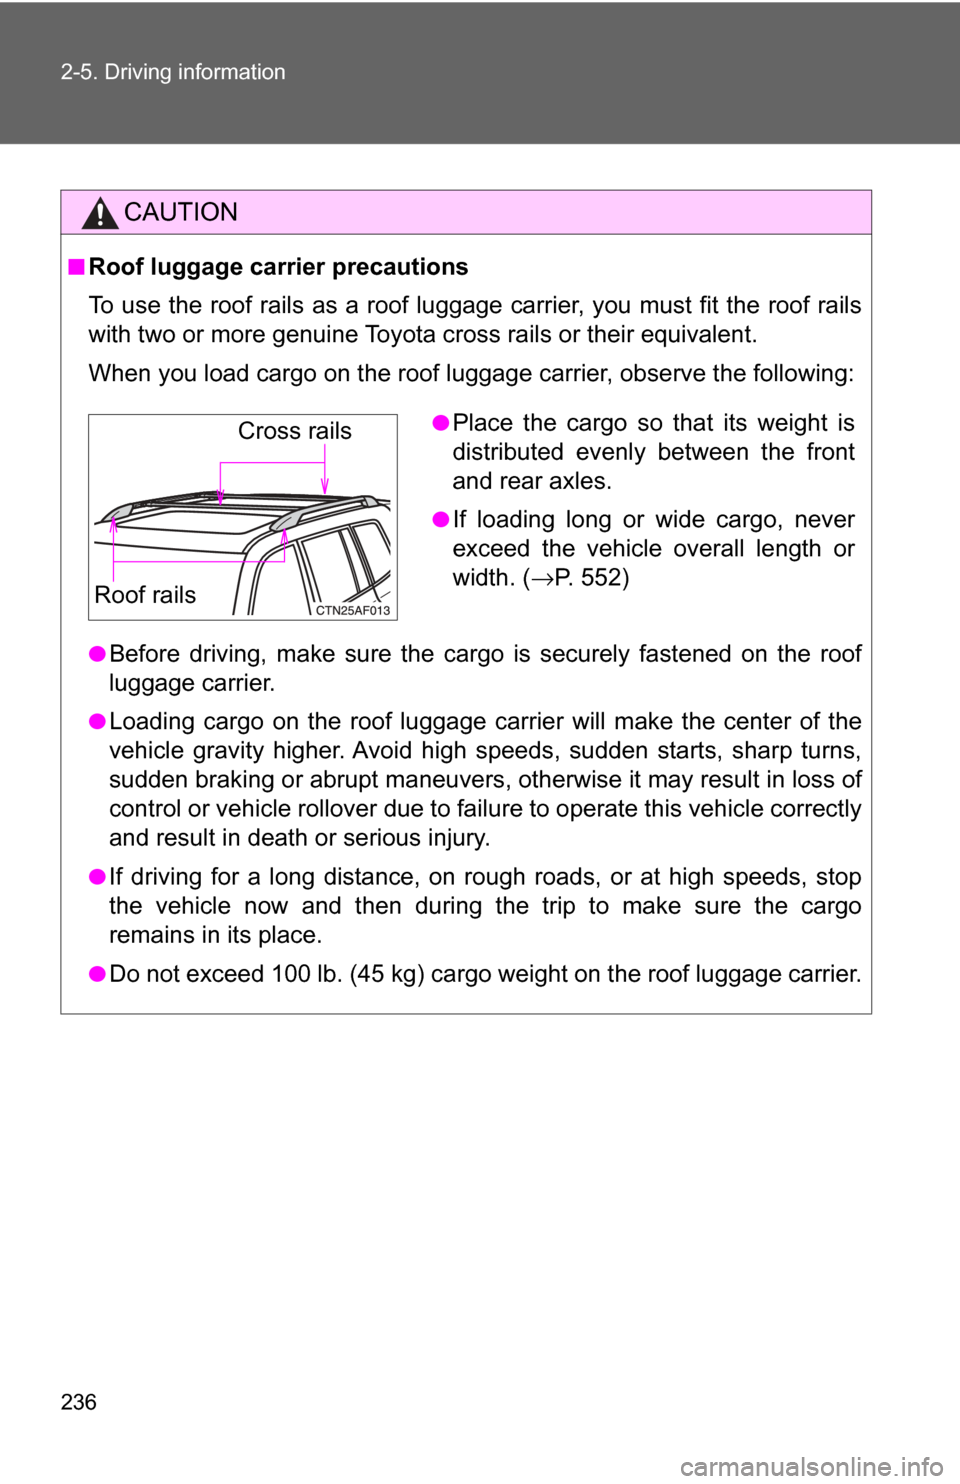
■Roof luggage carrier precautions
To use the roof rails as a roof luggage carrier, you must fit the roof rails
with two or more genuine Toyota cross rails or their equivalent.
When you load cargo on the roof luggage carrier, observe the following:
●Before driving, make sure the cargo is securely fastened on the roof
luggage carrier.
●Loading cargo on the r oof luggage carrier will make the center of the
vehicle gravity higher. Avoid high speeds, sudden starts, sharp turns,
sudden braking or abrupt maneuvers, otherwise it may result in loss of
control or vehicle rollover due to failure to operate this vehicle correctly
and result in death or serious injury.
●If driving for a long distance, on rough roads, or at high speeds, stop
the vehicle now and then during the trip to make sure the cargo
remains in its place.
●Do not exceed 100 lb. (45 kg) cargo weight on the roof luggage carrier.
●Place the cargo so that its weight is
distributed evenly between the front
and rear axles.
●If loading long or wide cargo, never
exceed the vehicle overall length or
width. ( →P. 552)
Cross rails
Roof rails