TOYOTA HIGHLANDER 2012 XU40 / 2.G Owners Manual
HIGHLANDER 2012 XU40 / 2.G
TOYOTA
TOYOTA
https://www.carmanualsonline.info/img/14/6410/w960_6410-0.png
TOYOTA HIGHLANDER 2012 XU40 / 2.G Owners Manual
Trending: tire type, fuel type, display, coolant temperature, engine coolant, weight, jump cable
Page 421 of 636
421
3-7. Other interior features
3
Interior features
CAUTION
■
Burns
●Use caution when seating the following persons in a seat with the seat
heater on to avoid the possibility of burns:
• Babies, small children, the elderly, the sick and the disabled
• Persons with sensitive skin
• Persons who are fatigued
• Persons who have taken alcohol or drugs that induce sleep (sleeping
drugs, cold remedies, etc.)
● Do not cover the seat with anything when using the seat heater.
Using the seat heater with a blanket or cushion increases the temperature
of the seat and may lead to overheating.
NOTICE
■To prevent seat heater damage
Do not put unevenly weighted objects on the seat and do not stick sharp
objects (needles, nails, etc.) into the seat.
■ To prevent battery discharge
Turn the switches off when the engine is not running.
Page 422 of 636
422
3-7. Other interior features
Armrests
NOTICE
■To prevent damage to the armrest
Do not place too much strain on the armrest.
Pull the armrest down for use.
Page 423 of 636
423
3-7. Other interior features
3
Interior features
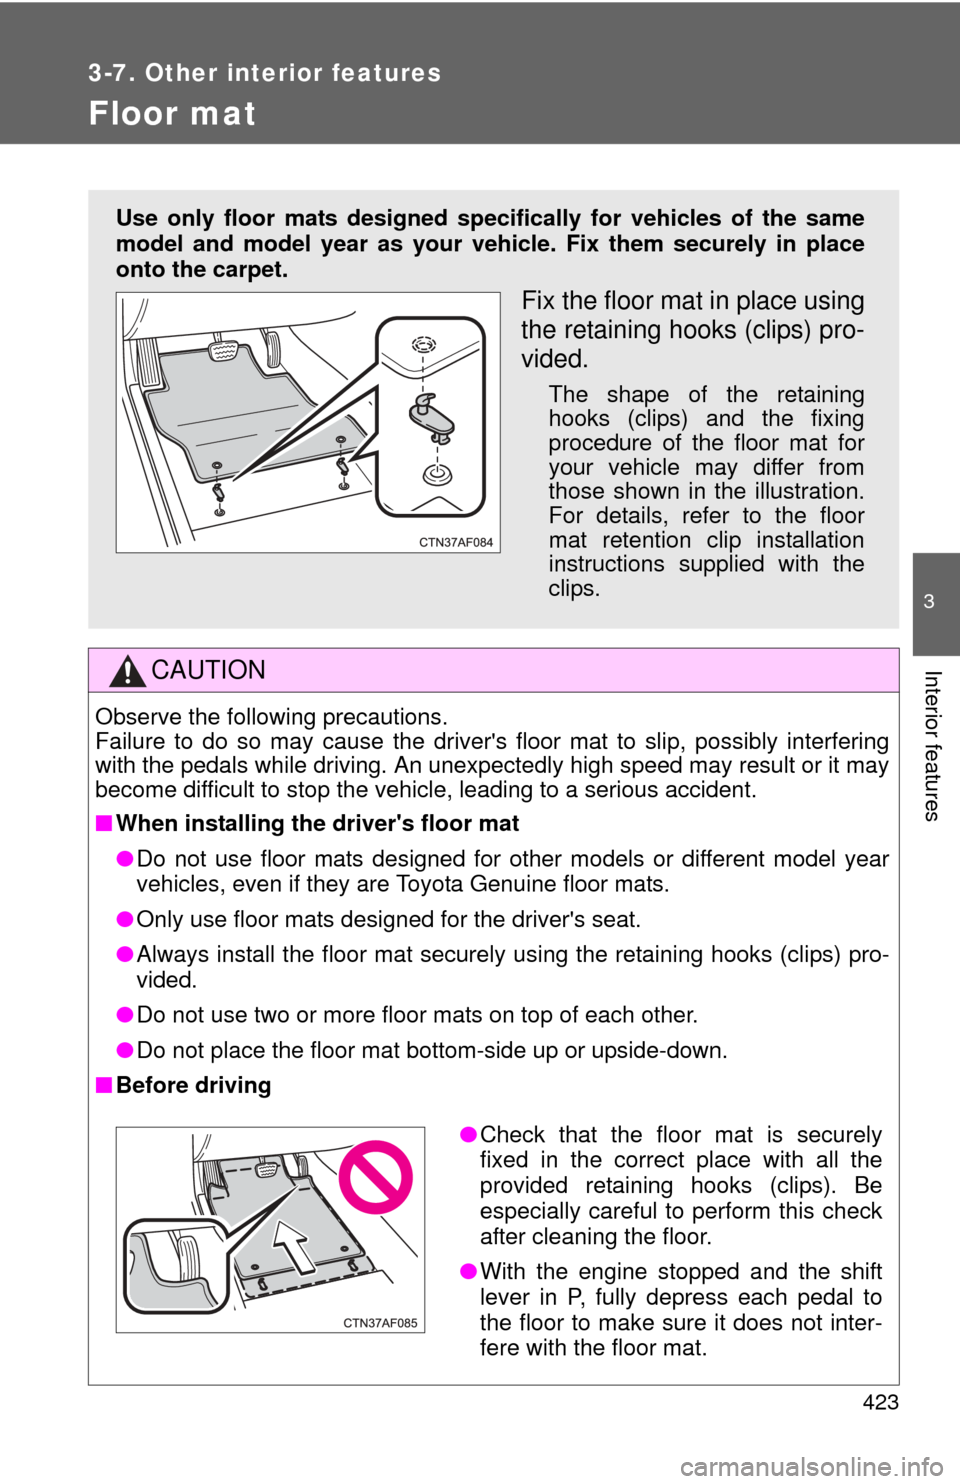
Floor mat
CAUTION
Observe the following precautions.
Failure to do so may cause the driver's floor mat to slip, possibly interfering
with the pedals while driving. An unexpectedly high speed may result or it may
become difficult to stop the vehicle, leading to a serious accident.
■When installing the driver's floor mat
●Do not use floor mats designed for other models or different model year
vehicles, even if they are Toyota Genuine floor mats.
● Only use floor mats designed for the driver's seat.
● Always install the floor mat securely using the retaining hooks (clips) pro-
vided.
● Do not use two or more floor mats on top of each other.
● Do not place the floor mat bottom-side up or upside-down.
■ Before driving
Use only floor mats designed specifically for vehicles of the same
model and model year as your vehic le. Fix them securely in place
onto the carpet.
Fix the floor mat in place using
the retaining hooks (clips) pro-
vided.
The shape of the retaining
hooks (clips) and the fixing
procedure of the floor mat for
your vehicle may differ from
those shown in the illustration.
For details, refer to the floor
mat retention clip installation
instructions supplied with the
clips.
● Check that the floor mat is securely
fixed in the correct place with all the
provided retaining hooks (clips). Be
especially careful to perform this check
after cleaning the floor.
● With the engine stopped and the shift
lever in P, fully depress each pedal to
the floor to make sure it does not inter-
fere with the floor mat.
Page 424 of 636
424
3-7. Other interior features
Luggage compartment features
■Cargo hooks
Cargo hooks are provided for
securing loose items.
■ Grocery bag hooks
■ Auxiliary box
Lift the center deck board.
Page 425 of 636
425
3-7. Other interior features
3
Interior features
■
Separating the luggage compartment
The center deck board can be
used to separate the luggage
compartment.
Remove the center deck
board and insert it upright into
the groove.
The board cannot be inserted
when the luggage cover is
stowed.
■Luggage cover (vehicles with luggage cover)
Hang the hooks on the hook
brackets on the second seat
seatback.
When using the luggage cover,
the third seat must be folded
down. (P. 80)
STEP1
Page 426 of 636
426 3-7. Other interior features
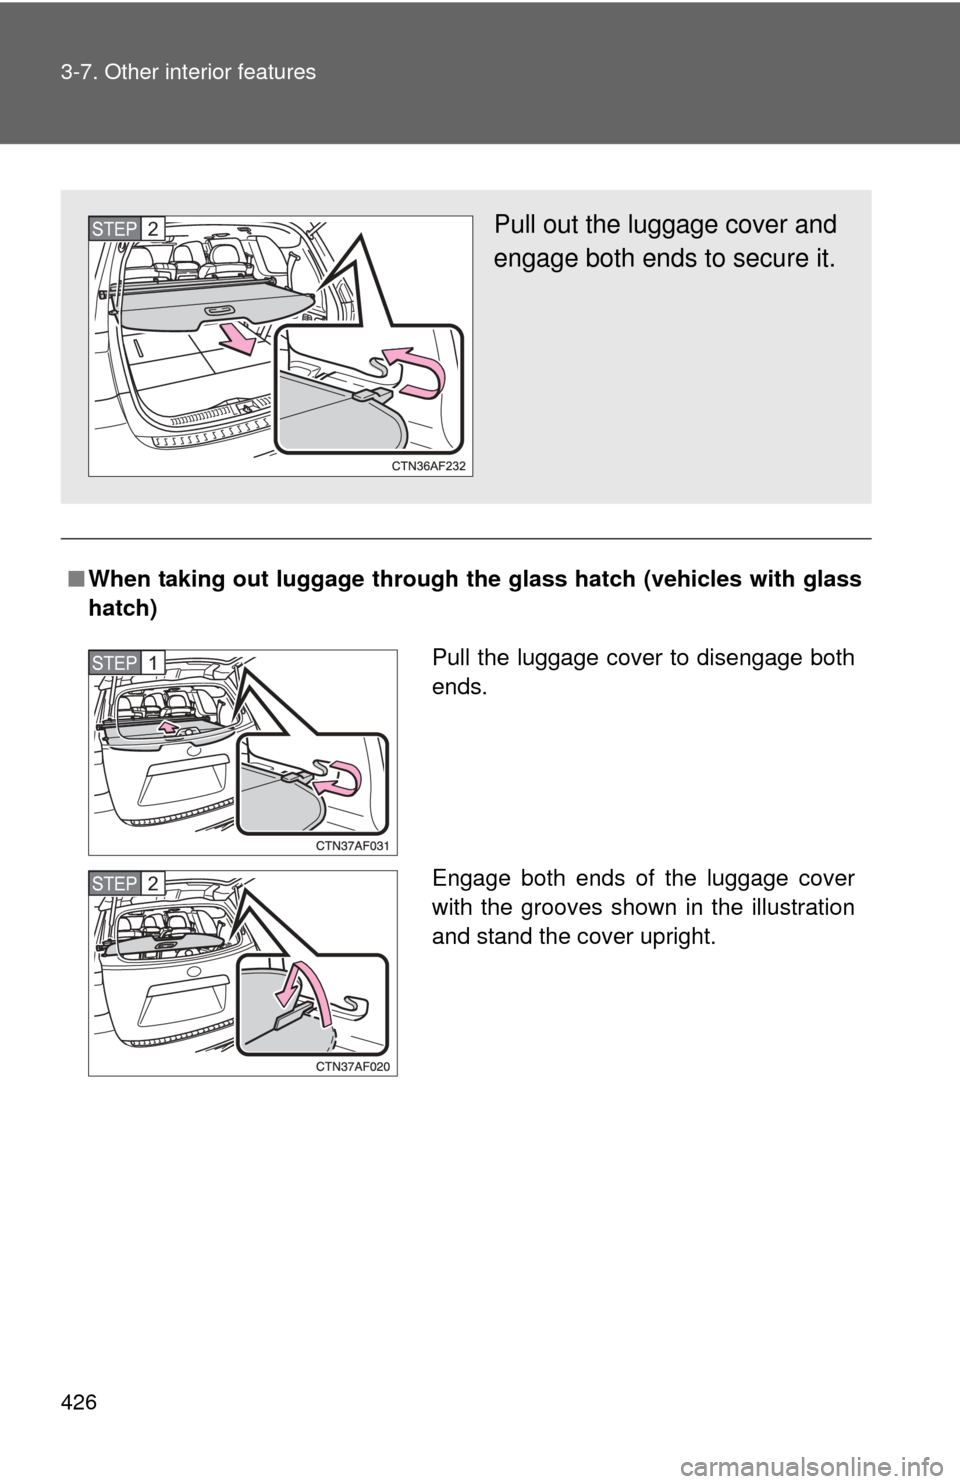
■When taking out luggage through the glass hatch (vehicles with glass
hatch)
Pull out the luggage cover and
engage both ends to secure it.STEP2
Pull the luggage cover to disengage both
ends.
Engage both ends of the luggage cover
with the grooves shown in the illustration
and stand the cover upright.STEP1
STEP2
Page 427 of 636
427
3-7. Other interior features
3
Interior features
■
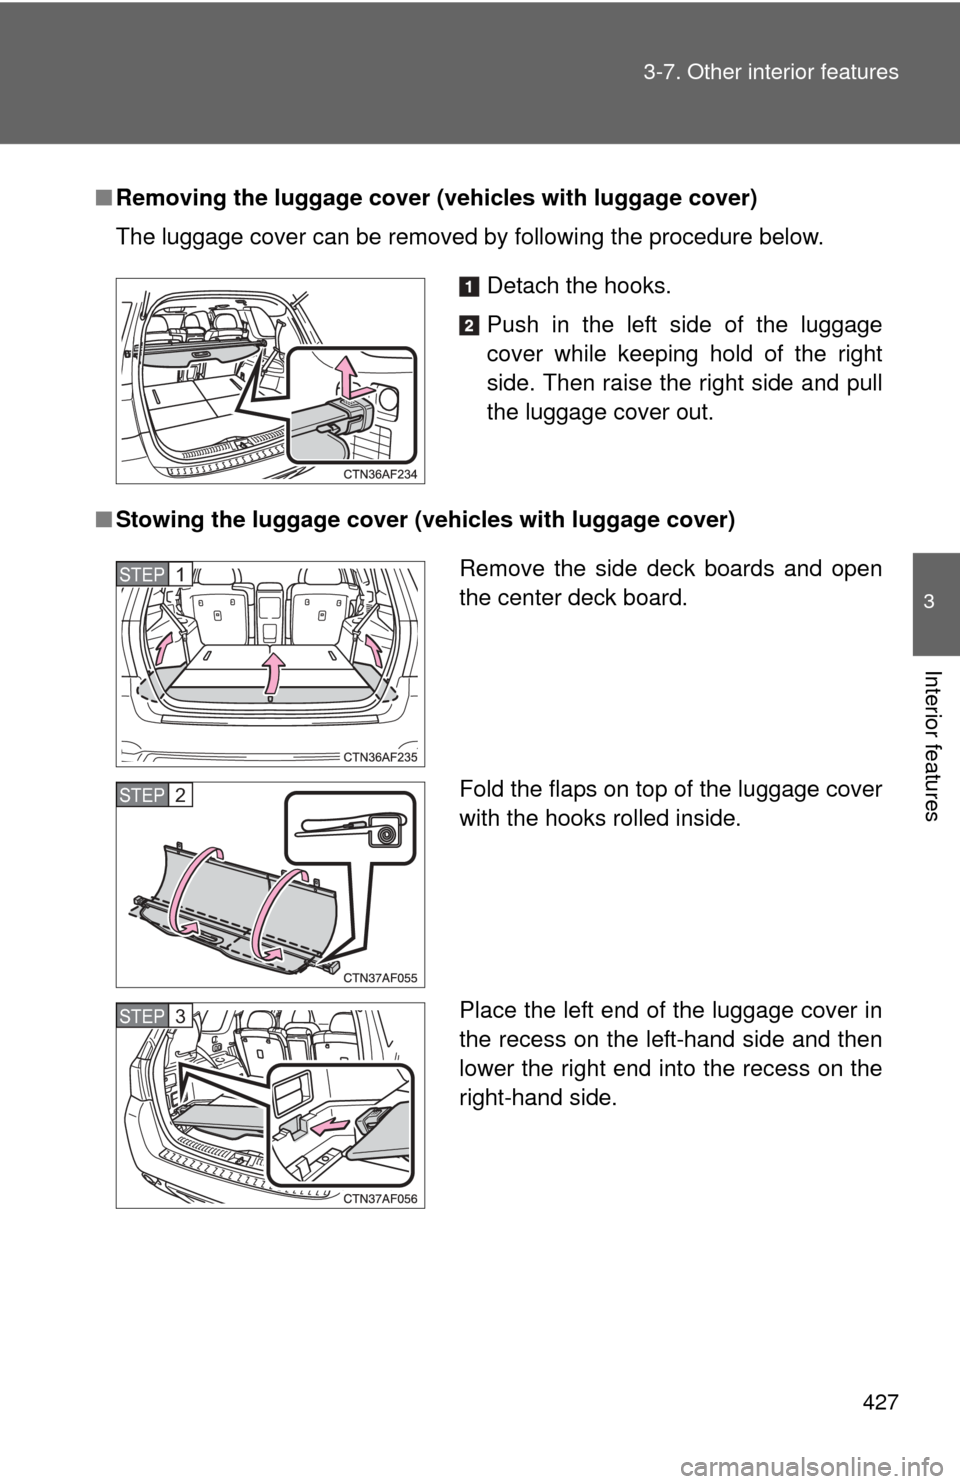
Removing the luggage cover ( vehicles with luggage cover)
The luggage cover can be removed by following the procedure below.
■ Stowing the luggage cover (vehicles with luggage cover)
Detach the hooks.
Push in the left side of the luggage
cover while keeping hold of the right
side. Then raise the right side and pull
the luggage cover out.
Remove the side deck boards and open
the center deck board.
Fold the flaps on top of the luggage cover
with the hooks rolled inside.
Place the left end of the luggage cover in
the recess on the left-hand side and then
lower the right end into the recess on the
right-hand side.STEP1
STEP2
STEP3
Page 428 of 636
428 3-7. Other interior features
CAUTION
■When the cargo hooks are not in use
To avoid injury, always return the cargo hooks to their positions when they
are not in use.
■ Caution while driving
Do not drive with any of the deck boards opened. Items may fall out and
cause injury.
NOTICE
■Shopping bag hook weight capacity
Do not hang any object heavier than 4 lb. (2 kg) on shopping bag hooks.
■ While driving
Do not drive with the luggage cover standing upright in the grooves as the
luggage cover may fall down.
■ Before inserting the center deck boa rd into the luggage compartment
Make sure the luggage cover is not stowed.
Page 429 of 636
429
3-7. Other interior features
3
Interior features
Garage door opener
The garage door opener (HomeLink Universal Transceiver) is manufac-
tured under license from HomeLink.
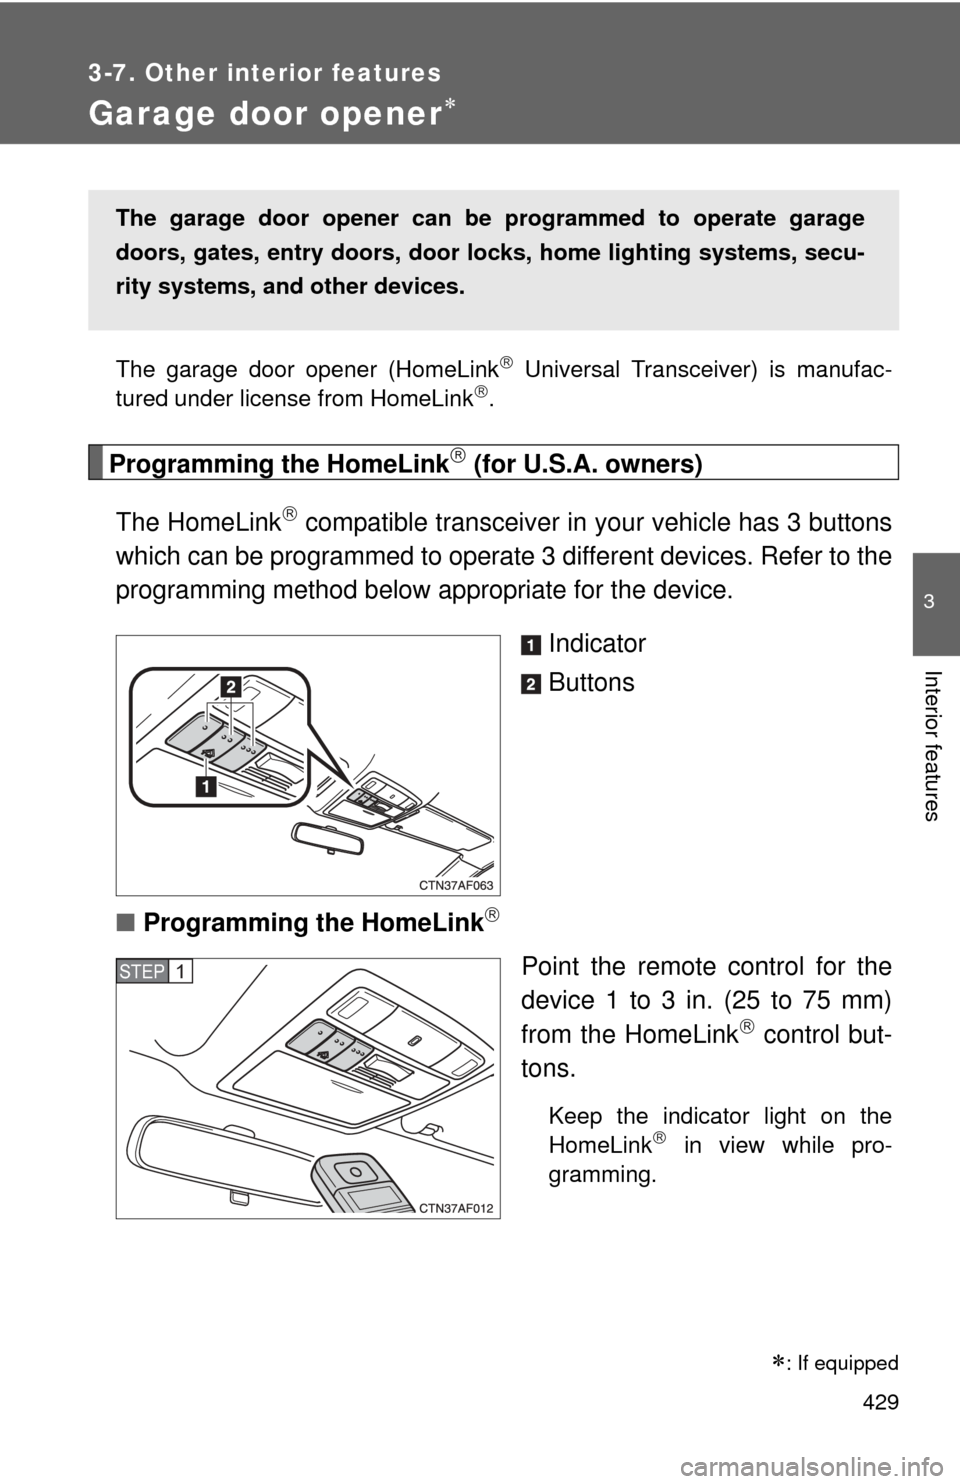
Programming the HomeLink (for U.S.A. owners)
The HomeLink
compatible transceiver in your vehicle has 3 buttons
which can be programmed to operate 3 different devices. Refer to the
programming method below appropriate for the device.
Indicator
Buttons
■ Programming the HomeLink
Point the remote control for the
device 1 to 3 in. (25 to 75 mm)
from the HomeLink
control but-
tons.
Keep the indicator light on the
HomeLink in view while pro-
gramming.
The garage door opener can be programmed to operate garage
doors, gates, entry do ors, door locks, home lighting systems, secu-
rity systems, and other devices.
STEP1
: If equipped
Page 430 of 636
430 3-7. Other interior features
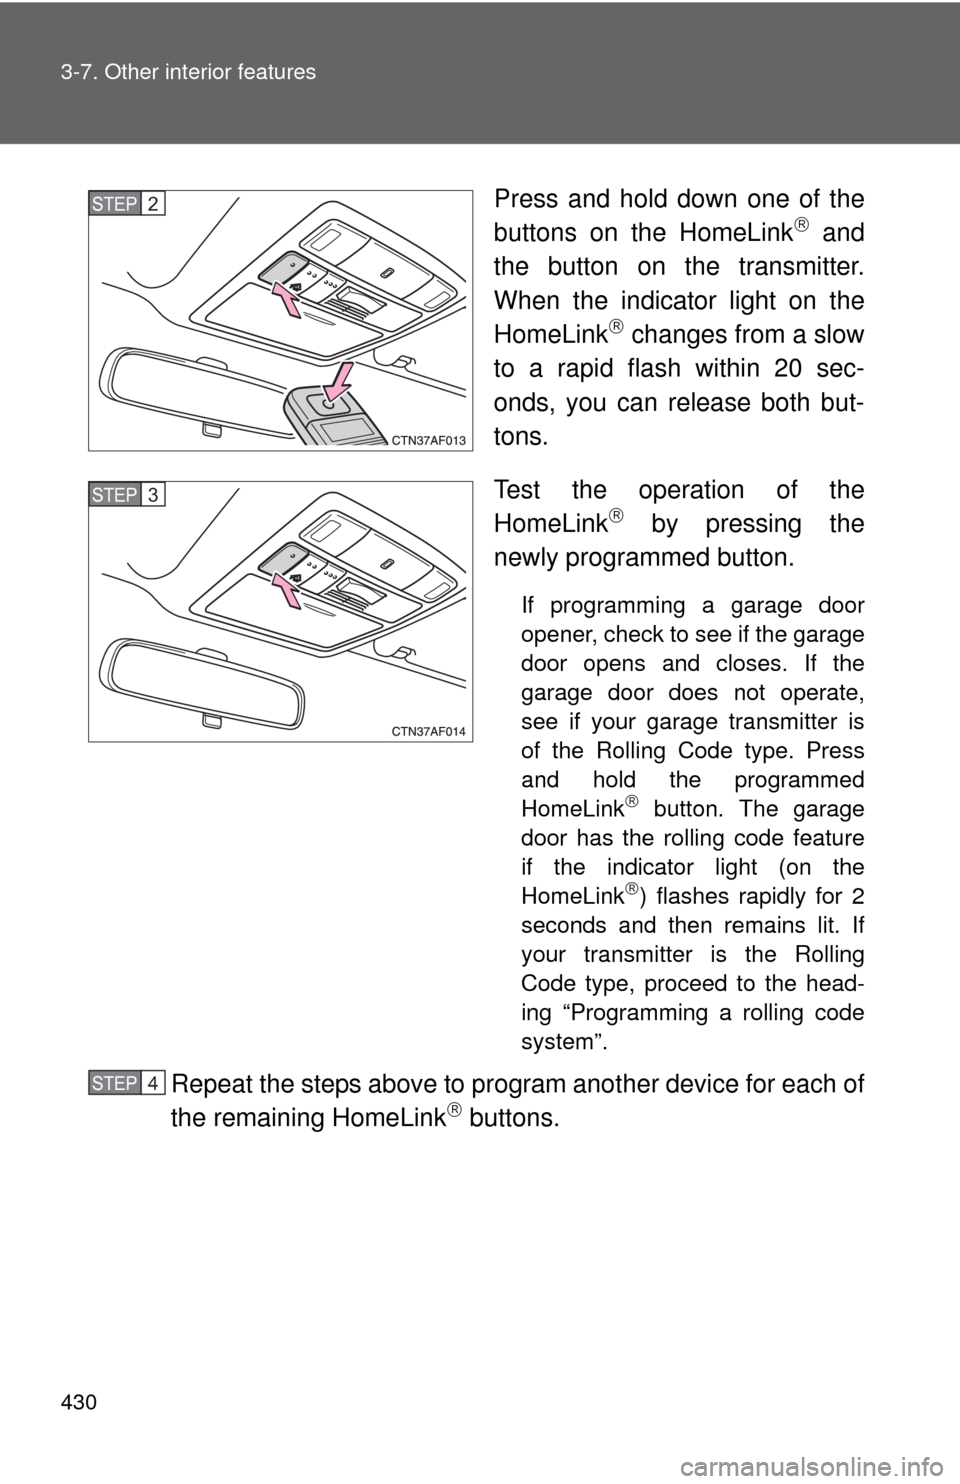
Press and hold down one of the
buttons on the HomeLink and
the button on the transmitter.
When the indicator light on the
HomeLink
changes from a slow
to a rapid flash within 20 sec-
onds, you can release both but-
tons.
Test the operation of the
HomeLink
by pressing the
newly programmed button.
If programming a garage door
opener, check to see if the garage
door opens and closes. If the
garage door does not operate,
see if your garage transmitter is
of the Rolling Code type. Press
and hold the programmed
HomeLink
button. The garage
door has the rolling code feature
if the indicator light (on the
HomeLink
) flashes rapidly for 2
seconds and then remains lit. If
your transmitter is the Rolling
Code type, proceed to the head-
ing “Programming a rolling code
system”.
Repeat the steps above to program another device for each of
the remaining HomeLink buttons.
STEP2
STEP3
STEP4
Trending: deactivate passenger airbag, remove seats, differential, cruise control, length, jump start, octane
