tow TOYOTA HIGHLANDER 2022 Owners Manual
[x] Cancel search | Manufacturer: TOYOTA, Model Year: 2022, Model line: HIGHLANDER, Model: TOYOTA HIGHLANDER 2022Pages: 568, PDF Size: 13.73 MB
Page 2 of 568
2TABLE OF CONTENTS
For your information ........................6
Reading this manual ...................... 11
How to search ................................ 12
Pictorial index ................................ 13
1-1. For safe use Before driving ........................ 24
For safe driving ..................... 25
Seat belts .............................. 27
SRS airbags .......................... 34
Front passenger occupant clas- sification system.................. 43
Exhaust gas precautions....... 48
1-2. Child safety Riding with children ............... 49
Child restraint systems .......... 50
1-3. Emergency assistance Safety Connect ..................... 65
1-4. Theft deterrent system Engine immobilizer system ... 71
Alarm ..................................... 73
2-1. Instrument cluster Warning lights and indicators............................................ 76
Gauges and meters .............. 81
Multi-information display (4.2-inch display)................. 84
Multi-information display (7-inch display)................................ 93
Head-up display ................. 103
Fuel consumption information ......................................... 1083-1. Key information
Keys ................................... 114
3-2. Opening, closing and locking the doors
Side doors .......................... 117
Back door ........................... 121
Smart key system .............. 133
3-3. Adjusting the seats Front seats ......................... 141
Rear seats.......................... 142
Driving position memory .... 147
Head restraints................... 150
3-4. Adjusting the steering wheel and mirrors
Steering wheel ................... 153
Inside rear view mirror ....... 154
Digital Rearview Mirror....... 155
Outside rear view mirrors ... 165
3-5. Opening, closing the win- dows and moon roof
Power windows .................. 167
Moon roof ........................... 170
Panoramic moon roof......... 173
4-1. Before driving Driving the vehicle.............. 179
Cargo and luggage ............ 186
Vehicle load limits .............. 189
Trailer towing...................... 190
Dinghy towing .................... 201
4-2. Driving procedures Engine
(ignition) switch ...... 202
Automatic transmission ...... 206
Turn signal lever................. 209
Parking brake ..................... 210
1For safety and security
2Vehicle status information
and indicators
3Before driving
4Driving
Page 4 of 568
4TABLE OF CONTENTS
Emission inspection and mainte-nance (I/M) programs....... 404
6-3. Do-it-yourself maintenance Do-it-yourself service precau-tions ................................. 406
Hood .................................. 408
Positioning a floor jack ....... 409
Engine compartment .......... 410
Tires ................................... 417
Tire inflation pressure......... 429
Wheels ............................... 431
Air conditioning filter ........... 432
Electronic key battery ......... 434
Checking and replacing fuses ......................................... 436
Headlight aim ..................... 438
Light bulbs .......................... 439
7-1. Essential information Emergency flashers ........... 448
If your vehicle has to be stopped in an emergency .............. 448
If the vehicle is submerged or water on the road is rising......................................... 449
7-2. Steps to take in an emergency If your vehicle needs to be towed......................................... 451
If you think something is wrong ......................................... 454
Fuel pump shut off system ......................................... 455
If a warning light turns on or a warning buzzer sounds .... 456
If a warning message is dis- played .............................. 467
If you have a flat tire ........... 471
If the engine will not start ... 485
If you lose your keys .......... 486If the fuel filler door cannot be
opened ............................. 487
If the electronic key does not operate properly............... 488
If the vehicle battery is dis- charged ............................ 490
If your vehicle overheats .... 494
If the vehicle becomes stuck ......................................... 496
8-1. Specifications Maintenance data (fuel, oil level, etc.) .................................. 500
Fuel information ................. 509
Tire information .................. 511
8-2. Customization Customizable features ....... 521
8-3. Initialization Items to initialize ................ 533
9-1. For owners Reporting safety defects for U.S. owners ............................. 536
Reporting safety defects for Canadian owners ............. 536
Seat belt instructions for Cana- dian owners (in French) ... 537
SRS airbag instructions for Canadian owners (in French)........ ................................. 538
Headlight aim instructions for Canadian owners (in French)........
................................. 545
7When trouble arises
8Vehicle specifications
9For owners
Page 16 of 568

16Pictorial index
■Instrument panel
Engine switch ..................................................................... P.202
Starting the engine/changing the modes ......................... .... P.202
Emergency stop of the engin e ............................................. P.448
When the engine will not start ................................. ............. P.485
Warning messages ............................................... ............... P.467
Shift lever.................................................... ........................ P.206
Changing the shift position.................................... ............... P.207
Precautions for towing .. ....................................... ................ P.451
When the shift lever does not move............................. ........ P.207
Meters ......................................................... .......................... P.81
Reading the meters/adjusting the instrument panel light . P.81, 8 3
Warning lights/indicator lights ................................ ................ P.76
When a warning light turns on .................................. ........... P.456
Multi-information display . ............................................. P.84, 93
Display ........................................................ ..................... P.84, 93
When the warning messages are displayed ........................ P. 4 6 7
Page 31 of 568
311-1. For safe use
1
For safety and security
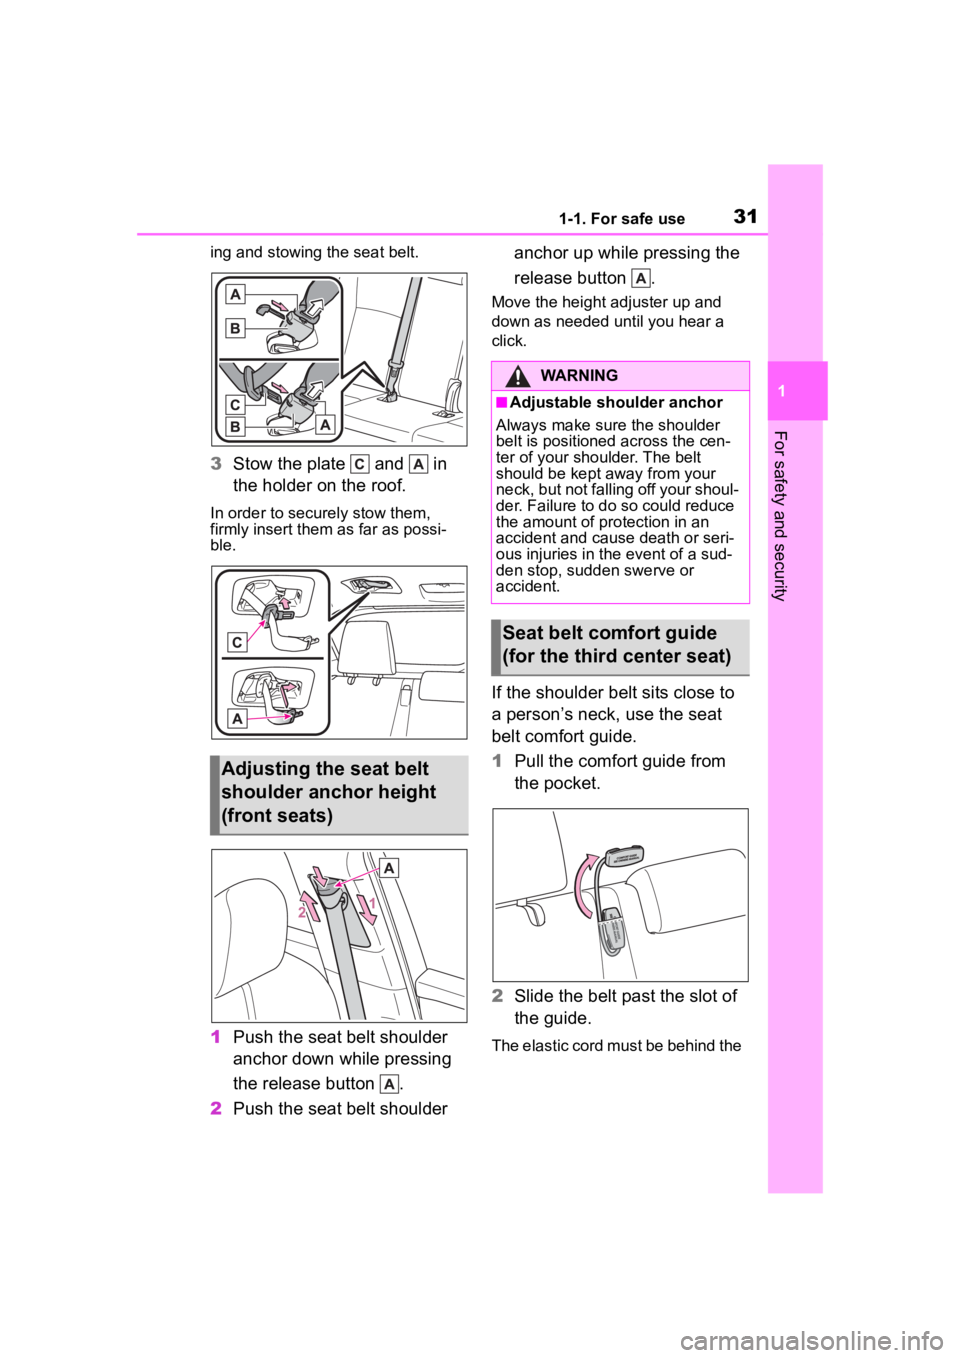
ing and stowing the seat belt.
3Stow the plate and in
the holder on the roof.
In order to securely stow them,
firmly insert them as far as possi-
ble.
1Push the seat belt shoulder
anchor down while pressing
the release button .
2 Push the seat belt shoulder anchor up while pressing the
release button .
Move the height adjuster up and
down as needed until you hear a
click.
If the shoulder belt sits close to
a person’s neck, use the seat
belt comfort guide.
1
Pull the comfort guide from
the pocket.
2 Slide the belt past the slot of
the guide.
The elastic cord must be behind the
Adjusting the seat belt
shoulder anchor height
(front seats)
WARNING
■Adjustable shoulder anchor
Always make sure the shoulder
belt is positioned across the cen-
ter of your shoulder. The belt
should be kept away from your
neck, but not falling off your shoul-
der. Failure to do so could reduce
the amount of protection in an
accident and cause death or seri-
ous injuries in the event of a sud-
den stop, sudden swerve or
accident.
Seat belt comfort guide
(for the third center seat)
Page 40 of 568
401-1. For safe use
WARNING
• Slightly recline the back of the seat.
Although vehicle designs vary,
many drivers can achieve the
10 in. (250 mm) distance, even
with the driver seat all the way
forward, simply by reclining the
back of the seat somewhat. If
reclining the back of your seat
makes it hard to see the road,
raise yourself by using a firm,
non-slippery cushion, or raise
the seat if your vehicle has that
feature.
• If your steering wheel is adjust- able, tilt it downward. This
points the airbag toward your
chest instead of your head and
neck.
The seat should be adjusted as
recommended by NHTSA above,
while still maintaining control of
the foot pedals, steering wheel,
and your view of the instrument
panel controls.
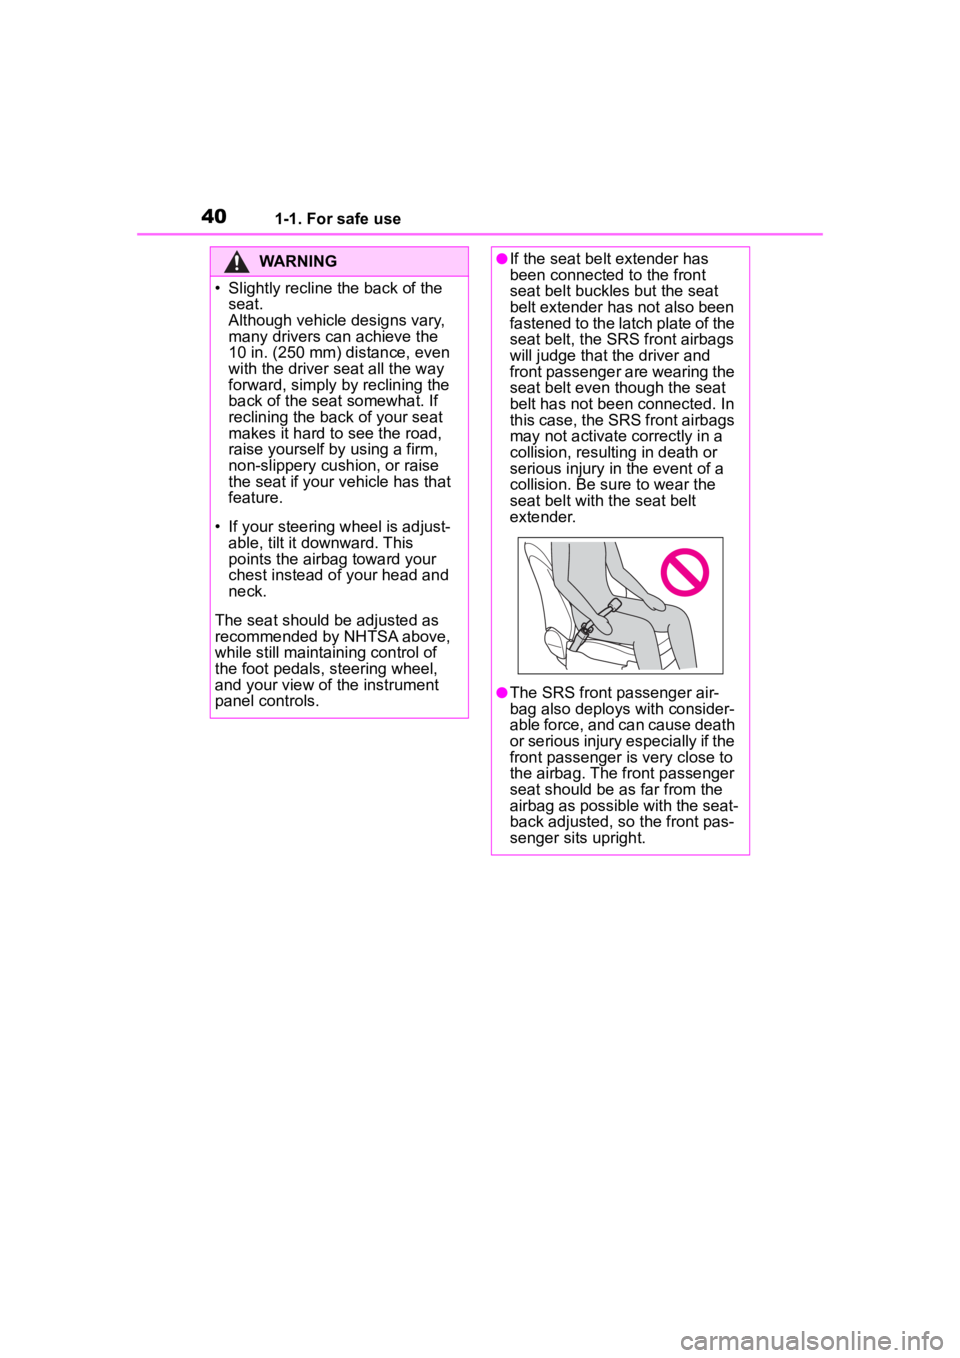
●If the seat belt extender has
been connected to the front
seat belt buckles but the seat
belt extender has not also been
fastened to the latch plate of the
seat belt, the SRS front airbags
will judge that the driver and
front passenger are wearing the
seat belt even though the seat
belt has not been connected. In
this case, the SRS front airbags
may not activate correctly in a
collision, resulting in death or
serious injury in the event of a
collision. Be su re to wear the
seat belt with the seat belt
extender.
●The SRS front passenger air-
bag also deploys with consider-
able force, and can cause death
or serious injury especially if the
front passenger is very close to
the airbag. The front passenger
seat should be as far from the
airbag as possible with the seat-
back adjusted, so the front pas-
senger sits upright.
Page 41 of 568
411-1. For safe use
1
For safety and security
WARNING
●Improperly seated and/or
restrained infants and children
can be killed or seriously injured
by a deploying airbag. An infant
or child who is too small to use
a seat belt should be properly
secured using a child restraint
system. Toyota strongly recom-
mends that all infants and chil-
dren be placed in the rear seats
of the vehicle and properly
restrained. The rear seats are
safer for infants and children
than the front passenger seat.
(
P. 5 0 )
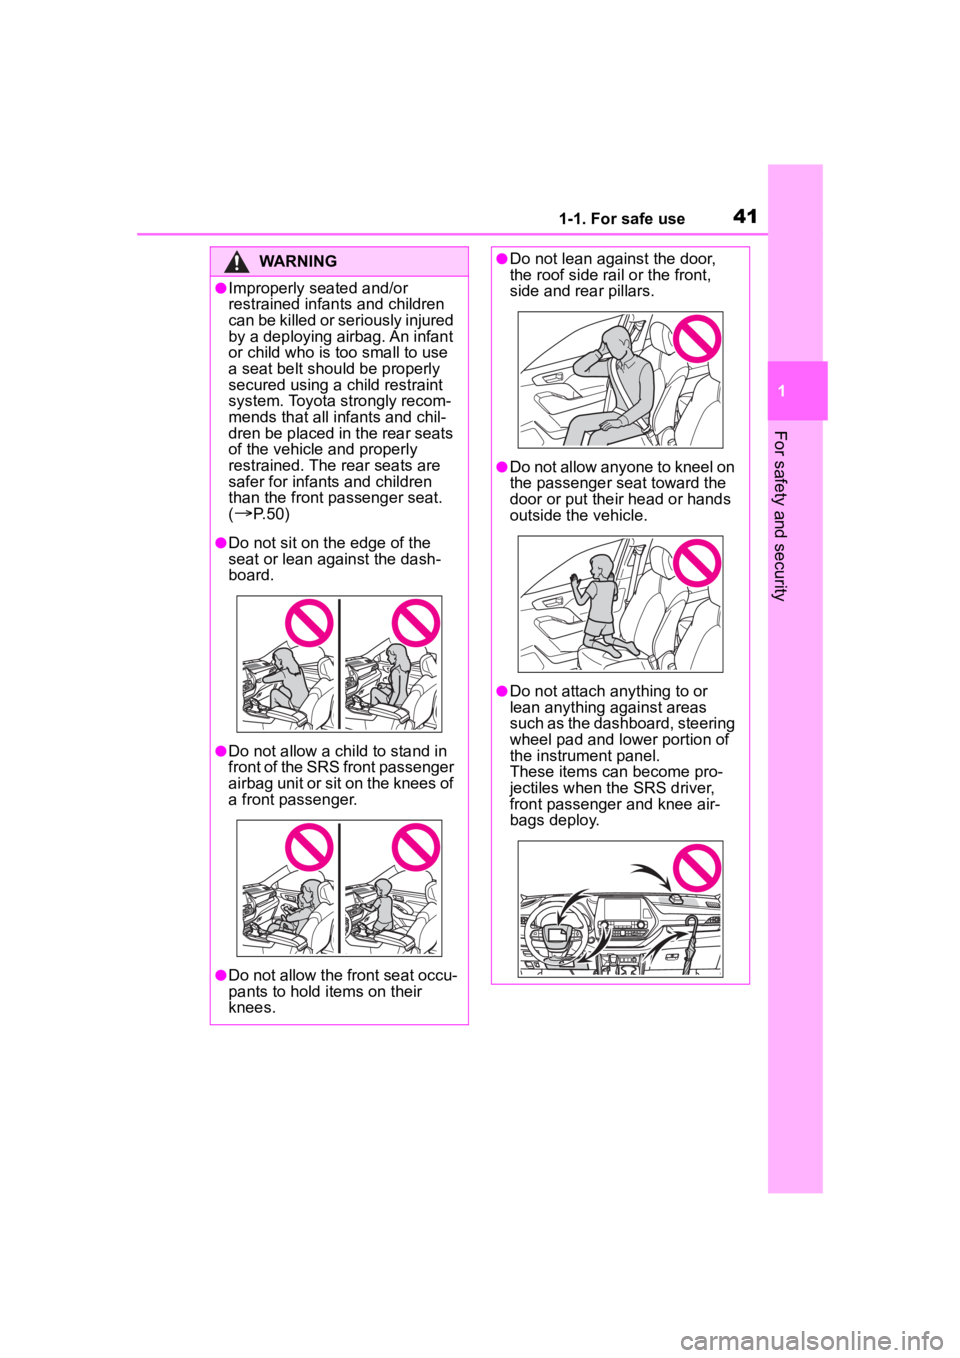
●Do not sit on the edge of the
seat or lean against the dash-
board.
●Do not allow a child to stand in
front of the SRS front passenger
airbag unit or sit on the knees of
a front passenger.
●Do not allow the front seat occu-
pants to hold items on their
knees.
●Do not lean against the door,
the roof side rail or the front,
side and rear pillars.
●Do not allow anyone to kneel on
the passenger seat toward the
door or put their head or hands
outside the vehicle.
●Do not attach anything to or
lean anything against areas
such as the dashboard, steering
wheel pad and lower portion of
the instrument panel.
These items can become pro-
jectiles when th e SRS driver,
front passenger and knee air-
bags deploy.
Page 59 of 568
591-2. Child safety
1
For safety and security
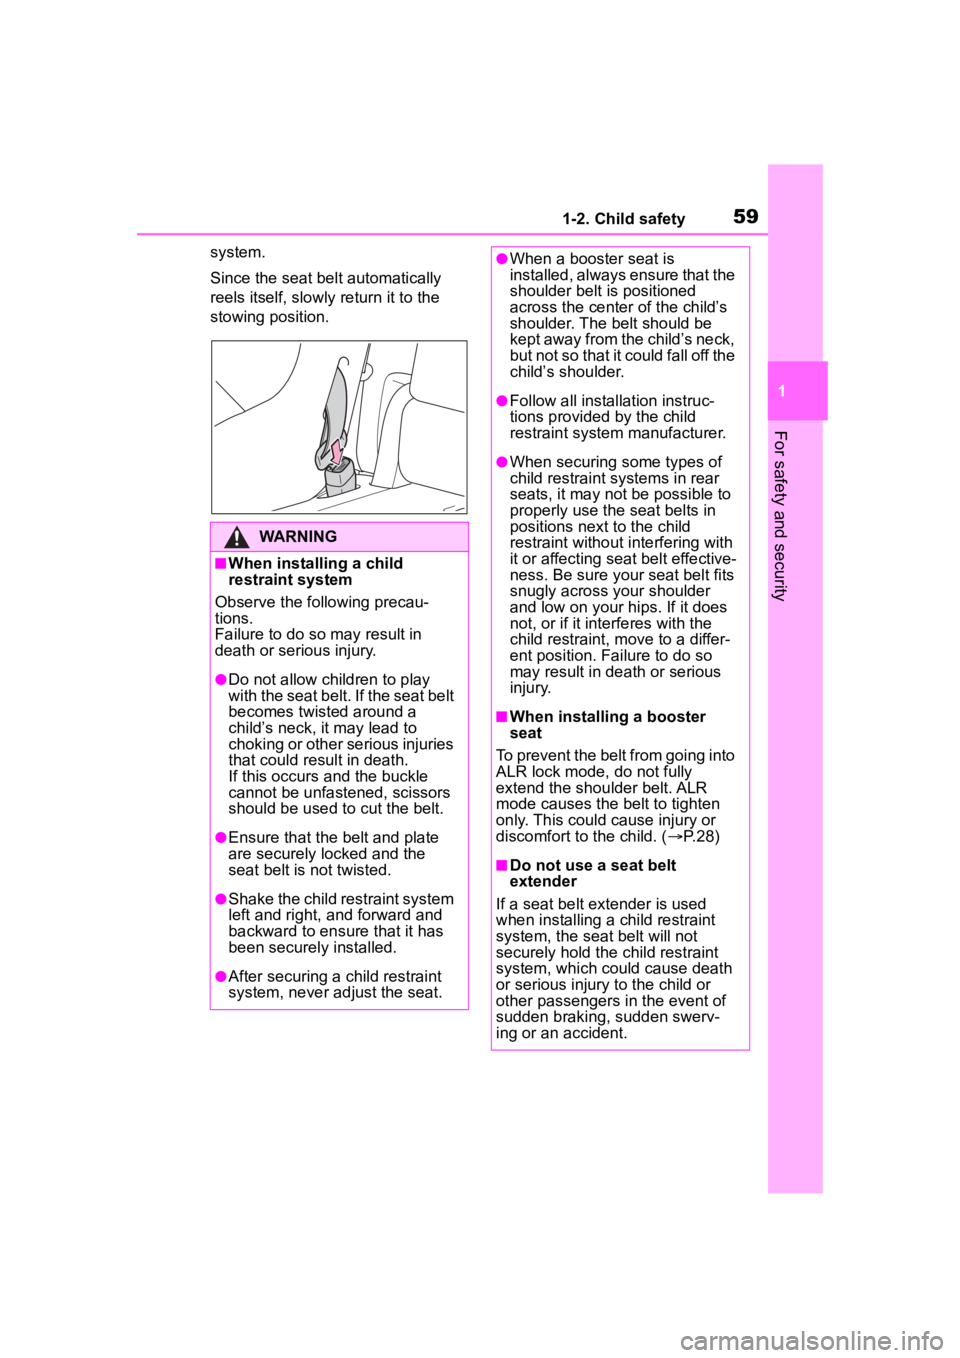
system.
Since the seat belt automatically
reels itself, slowly return it to the
stowing position.
WARNING
■When installing a child
restraint system
Observe the following precau-
tions.
Failure to do so m ay result in
death or serious injury.
●Do not allow children to play
with the seat belt. If the seat belt
becomes twisted around a
child’s neck, it may lead to
choking or other serious injuries
that could result in death.
If this occurs and the buckle
cannot be unfastened, scissors
should be used to cut the belt.
●Ensure that the belt and plate
are securely locked and the
seat belt is not twisted.
●Shake the child restraint system
left and right, and forward and
backward to ensure that it has
been securely installed.
●After securing a child restraint
system, never adjust the seat.
●When a booster seat is
installed, always ensure that the
shoulder belt is positioned
across the center of the child’s
shoulder. The belt should be
kept away from the child’s neck,
but not so that it could fall off the
child’s shoulder.
●Follow all installation instruc-
tions provided by the child
restraint system manufacturer.
●When securing some types of
child restraint systems in rear
seats, it may not be possible to
properly use the seat belts in
positions next to the child
restraint without interfering with
it or affecting seat belt effective-
ness. Be sure your seat belt fits
snugly across your shoulder
and low on your hips. If it does
not, or if it interferes with the
child restraint, move to a differ-
ent position. Fa ilure to do so
may result in death or serious
injury.
■When installing a booster
seat
To prevent the belt from going into
ALR lock mode, do not fully
extend the shoulder belt. ALR
mode causes the belt to tighten
only. This could cause injury or
discomfort to the child. ( P. 2 8 )
■Do not use a seat belt
extender
If a seat belt extender is used
when installing a child restraint
system, the seat belt will not
securely hold the child restraint
system, which could cause death
or serious injury to the child or
other passengers in the event of
sudden braking, sudden swerv-
ing or an accident.
Page 69 of 568
691-3. Emergency assistance
1
For safety and security
■Emergency Assistance But-
ton (“SOS”)
In the event of an emergency on
the road, push the “SOS” button
to reach the Safety Connect
response center. The answer-
ing agent will determine your
vehicle’s location, assess the
emergency, and dispatch the
necessary assistance required.
If you accidentally press the “SOS”
button, tell the response-center
agent that you are not experiencing
an emergency.
■Enhanced Roadside Assis-
tance
Enhanced Roadside Assistance
adds GPS data to the already
included warranty-based Toyota
roadside service.
Subscribers can press the
“SOS” button to reach a Safety
Connect response-center agent,
who can help with a wide range
of needs, such as: towing, flat
tire, fuel delivery, etc. For a
description of the Enhanced
Roadside Assistance services
and their limitations, please see
the Safety Connect Terms and
Conditions, which are available
at Toyota.com in the United
States, Toyotapr.com in Puerto
Rico and Toyota.ca in Canada.
Important! Read this informa- tion before using Safety Con-
nect.
■Exposure to radio fre-
quency signals
The Safety Connect system
installed in your vehicle is a
low-power radio transmitter and
receiver. It receives and also
sends out radio frequency (RF)
signals.
In August 1996, the Federal
Communications Commission
(FCC) adopted RF exposure
guidelines with safety levels for
mobile wireless phones. Those
guidelines are consistent with
the safety standards previously
set by the following U.S. and
international standards bodies.
ANSI (American National
Standards Institute) C95.1
[1992]
NCRP (National Council on
Radiation Protection and
Measurement) Report 86
[1986]
ICNIRP (International Com-
mission on Non-Ionizing Radi-
ation Protection) [1996]
Those standards were based on
comprehensive and periodic
evaluations of the relevant sci-
entific literature. Over 120 scien-
tists, engineers, and physicians
from universities, and govern-
ment health agencies and
industries reviewed the avail-
able body of research to
Safety information for
Safety Connect
Page 125 of 568
1253-2. Opening, closing and locking the doors
3
Before driving
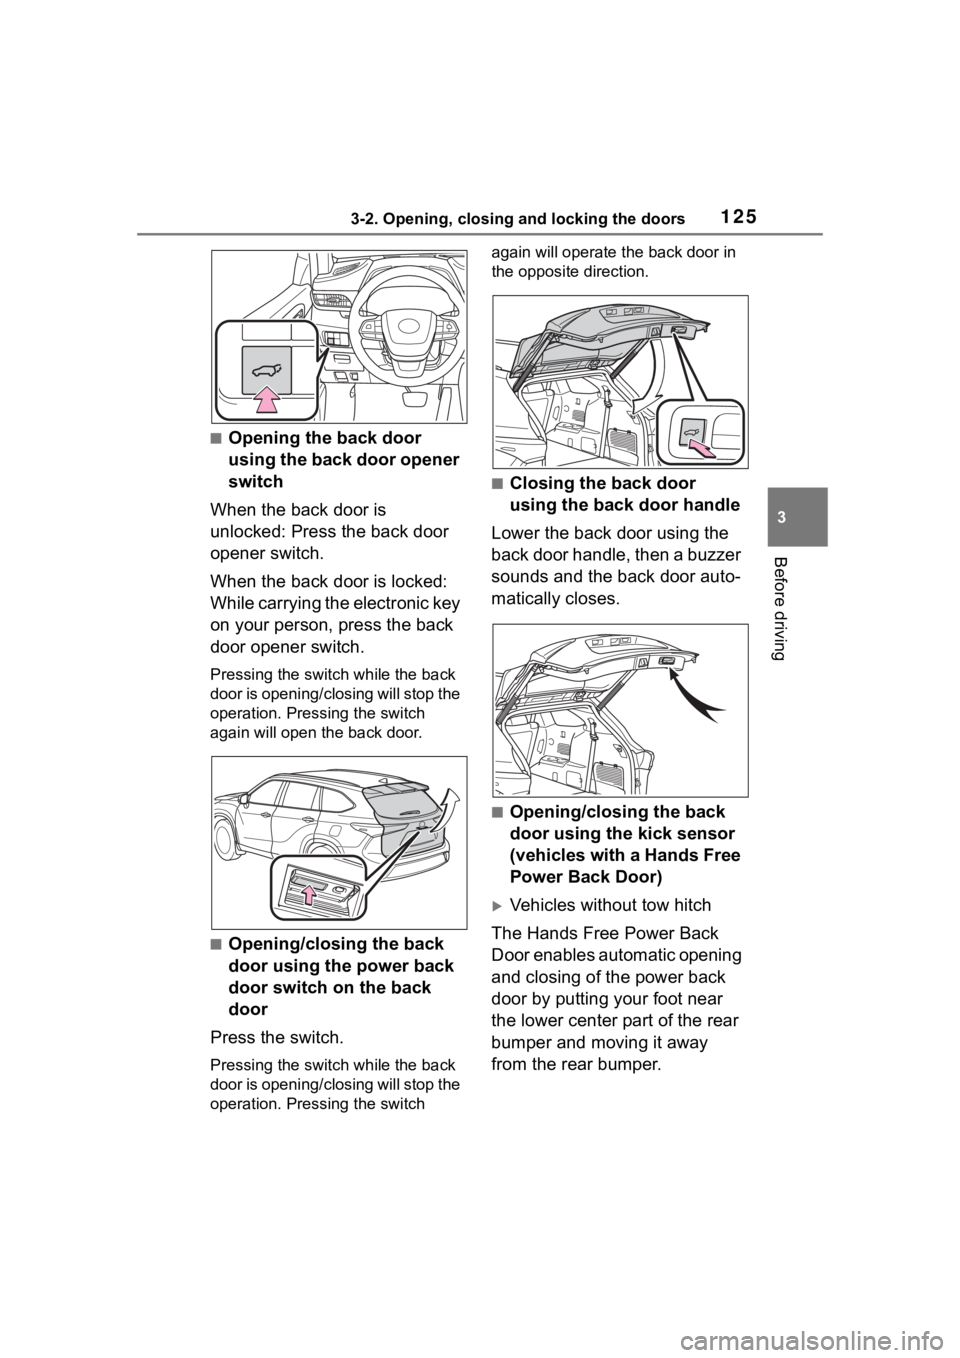
■Opening the back door
using the back door opener
switch
When the back door is
unlocked: Press the back door
opener switch.
When the back door is locked:
While carrying the electronic key
on your person, press the back
door opener switch.
Pressing the switch while the back
door is opening/closing will stop the
operation. Pressing the switch
again will open the back door.
■Opening/closing the back
door using the power back
door switch on the back
door
Press the switch.
Pressing the switch while the back
door is opening/closing will stop the
operation. Pressing the switch again will operate the back door in
the opposite direction.
■Closing the back door
using the back door handle
Lower the back door using the
back door handle, then a buzzer
sounds and the back door auto-
matically closes.
■Opening/closing the back
door using the kick sensor
(vehicles with a Hands Free
Power Back Door)
Vehicles without tow hitch
The Hands Free Power Back
Door enables automatic opening
and closing of the power back
door by putting your foot near
the lower center part of the rear
bumper and moving it away
from the rear bumper.
Page 126 of 568
1263-2. Opening, closing and locking the doors
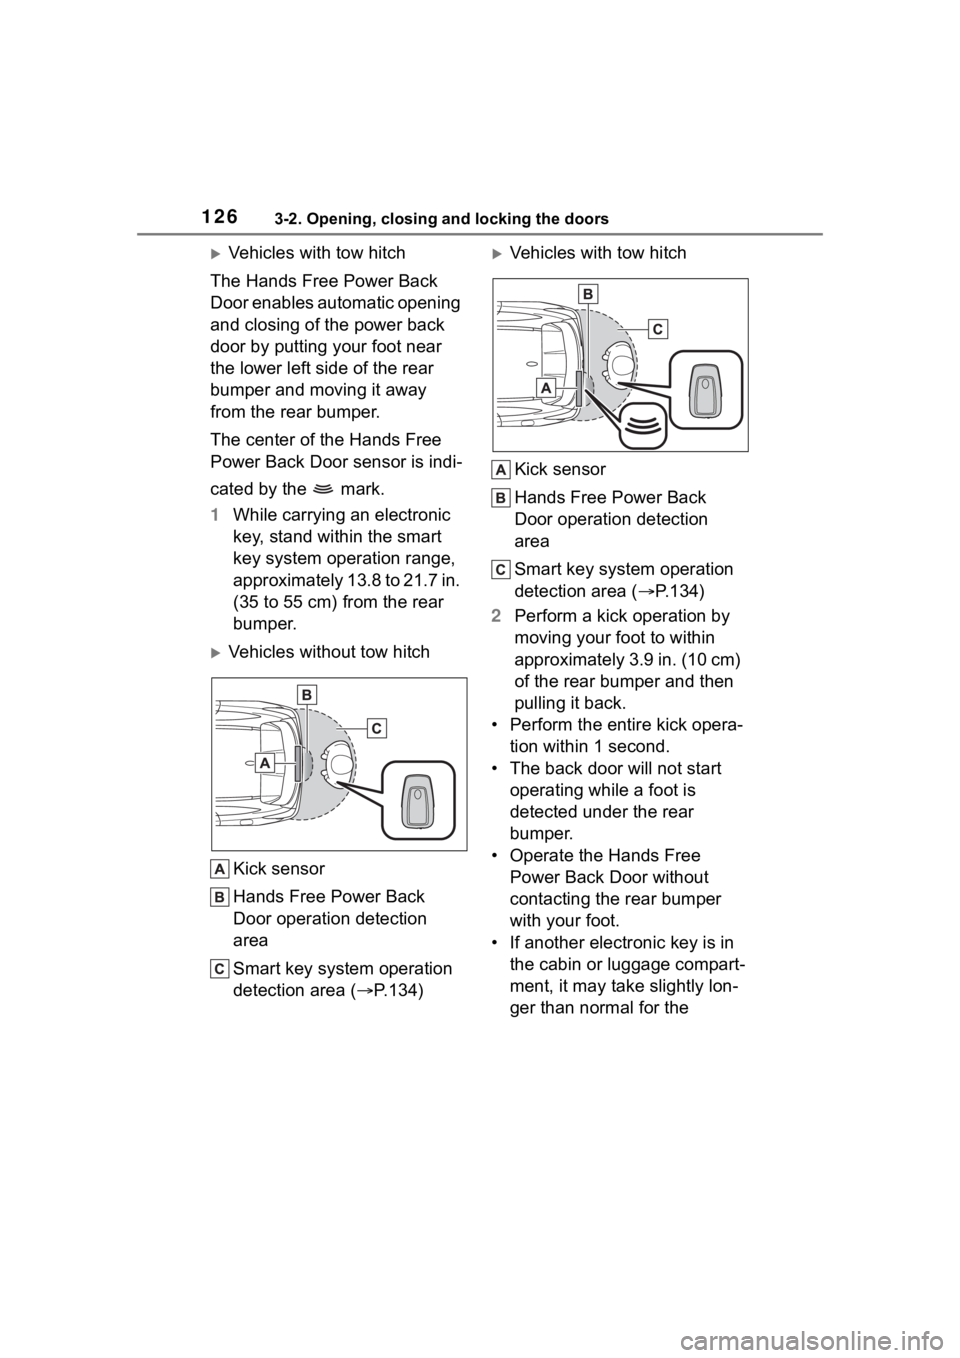
Vehicles with tow hitch
The Hands Free Power Back
Door enables automatic opening
and closing of the power back
door by putting your foot near
the lower left side of the rear
bumper and moving it away
from the rear bumper.
The center of the Hands Free
Power Back Door sensor is indi-
cated by the mark.
1 While carrying an electronic
key, stand within the smart
key system operation range,
approximately 13.8 to 21.7 in.
(35 to 55 cm) from the rear
bumper.
Vehicles without tow hitch
Kick sensor
Hands Free Power Back
Door operation detection
area
Smart key system operation
detection area ( P.134)
Vehicles with tow hitch
Kick sensor
Hands Free Power Back
Door operation detection
area
Smart key system operation
detection area ( P.134)
2 Perform a kick operation by
moving your foot to within
approximately 3.9 in. (10 cm)
of the rear bumper and then
pulling it back.
• Perform the entire kick opera- tion within 1 second.
• The back door will not start operating while a foot is
detected under the rear
bumper.
• Operate the Hands Free Power Back Door without
contacting the rear bumper
with your foot.
• If another electronic key is in the cabin or luggage compart-
ment, it may take slightly lon-
ger than normal for the