wheel TOYOTA HIGHLANDER 2023 User Guide
[x] Cancel search | Manufacturer: TOYOTA, Model Year: 2023, Model line: HIGHLANDER, Model: TOYOTA HIGHLANDER 2023Pages: 552, PDF Size: 13.36 MB
Page 42 of 552
421-1. For safe use
WARNING
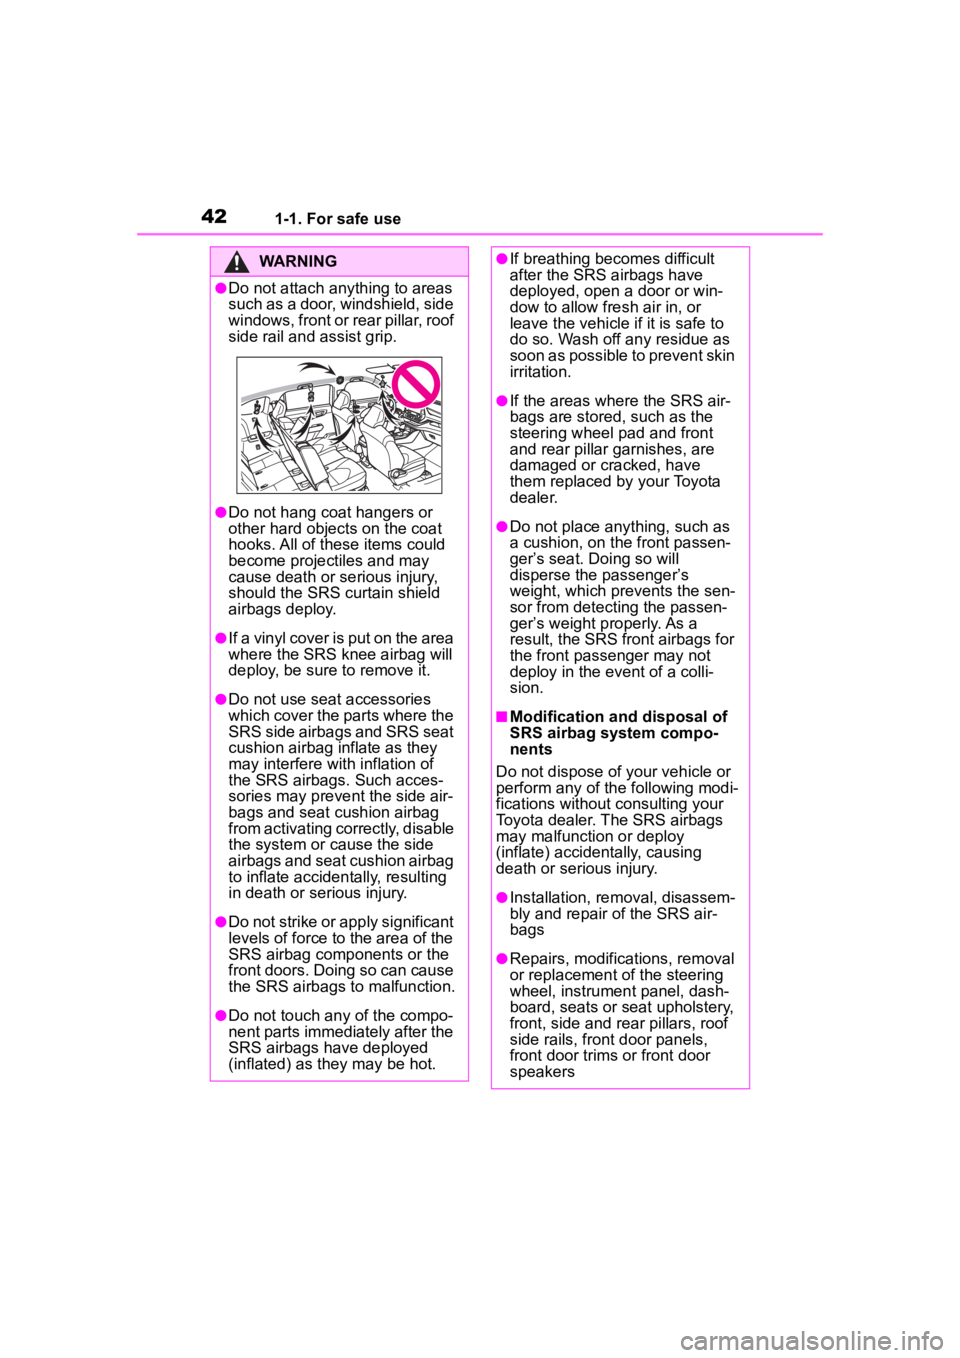
●Do not attach anything to areas
such as a door, windshield, side
windows, front or rear pillar, roof
side rail and assist grip.
●Do not hang coat hangers or
other hard objects on the coat
hooks. All of these items could
become projectiles and may
cause death or serious injury,
should the SRS curtain shield
airbags deploy.
●If a vinyl cover is put on the area
where the SRS knee airbag will
deploy, be sure to remove it.
●Do not use seat accessories
which cover the parts where the
SRS side airbags and SRS seat
cushion airbag inflate as they
may interfere with inflation of
the SRS airbags. Such acces-
sories may prevent the side air-
bags and seat cushion airbag
from activating correctly, disable
the system or cause the side
airbags and seat cushion airbag
to inflate accidentally, resulting
in death or serious injury.
●Do not strike or apply significant
levels of force to the area of the
SRS airbag components or the
front doors. Doing so can cause
the SRS airbags to malfunction.
●Do not touch any of the compo-
nent parts immediately after the
SRS airbags have deployed
(inflated) as they may be hot.
●If breathing becomes difficult
after the SRS airbags have
deployed, open a door or win-
dow to allow fresh air in, or
leave the vehicle if it is safe to
do so. Wash off any residue as
soon as possible to prevent skin
irritation.
●If the areas where the SRS air-
bags are stored, such as the
steering wheel pad and front
and rear pillar garnishes, are
damaged or cracked, have
them replaced by your Toyota
dealer.
●Do not place anything, such as
a cushion, on the front passen-
ger’s seat. Doing so will
disperse the passenger’s
weight, which prevents the sen-
sor from detecting the passen-
ger’s weight properly. As a
result, the SRS front airbags for
the front passenger may not
deploy in the event of a colli-
sion.
■Modification and disposal of
SRS airbag system compo-
nents
Do not dispose of your vehicle or
perform any of the following modi-
fications without consulting your
Toyota dealer. The SRS airbags
may malfunction or deploy
(inflate) accidentally, causing
death or serious injury.
●Installation, re moval, disassem-
bly and repair of the SRS air-
bags
●Repairs, modific ations, removal
or replacement of the steering
wheel, instrument panel, dash-
board, seats or seat upholstery,
front, side and rear pillars, roof
side rails, front door panels,
front door trims or front door
speakers
Page 91 of 552
912-1. Instrument cluster
2
Vehicle status information and indicators
■Navigation system-linked
display (if equipped)
Select to display the following
navigation system-linked infor-
mation:
Route guidance to destination
Compass display (head-
ing-up display)
Select to enable selection of an
audio source or track on the
meter using the meter control
switches.
This menu icon can be set to be
displayed/not displayed in .
■Tire pressure
P. 3 9 6
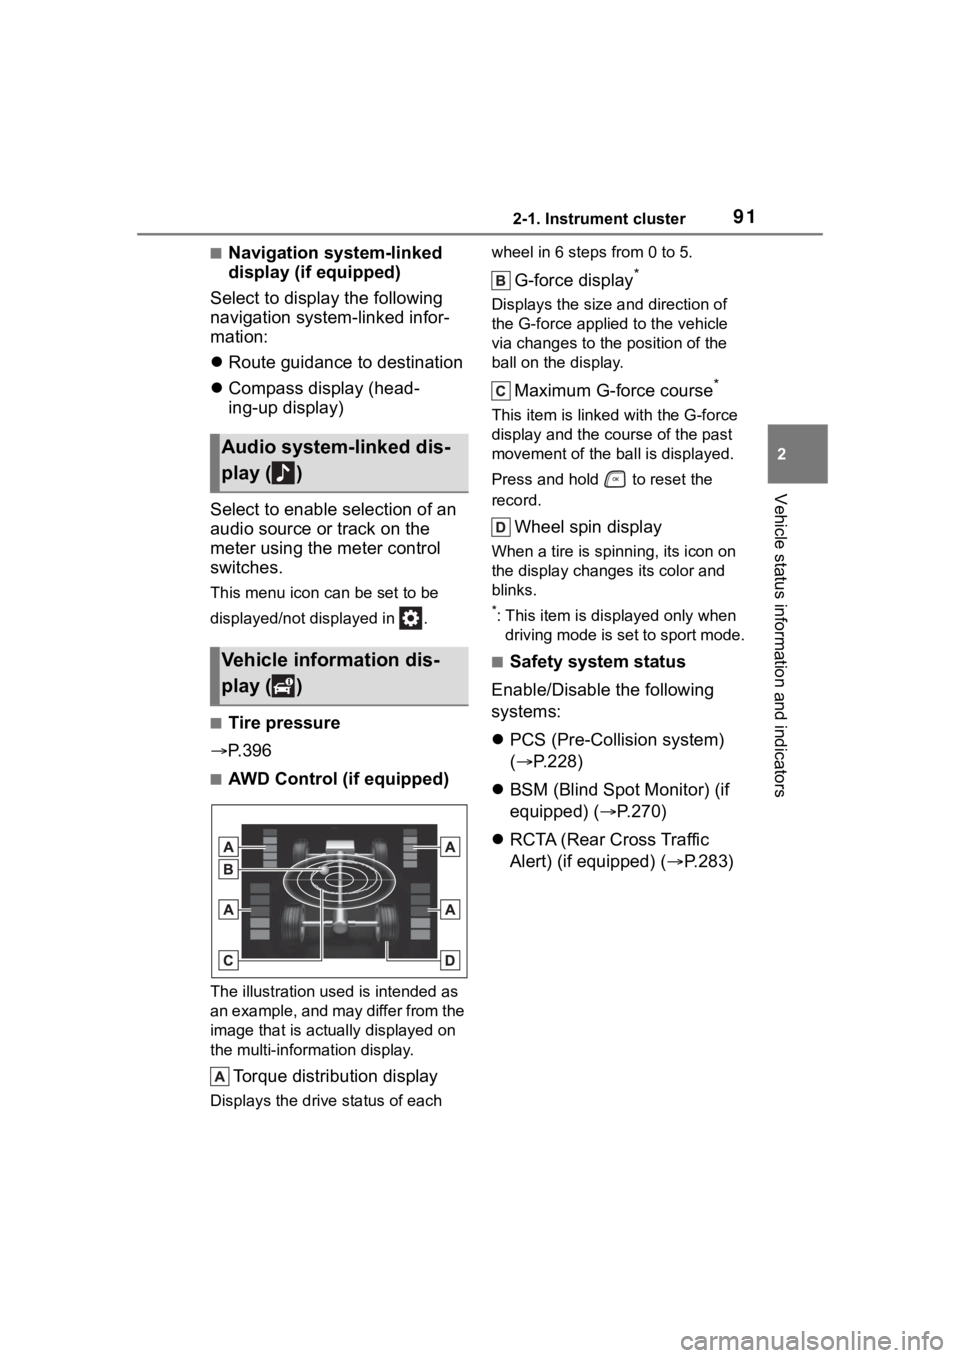
■AWD Control (if equipped)
The illustration used is intended as
an example, and may differ from the
image that is actually displayed on
the multi-information display.
Torque distribution display
Displays the drive status of each wheel in 6 steps from 0 to 5.
G-force display*
Displays the size a
nd direction of
the G-force applied to the vehicle
via changes to the position of the
ball on the display.
Maximum G-force course*
This item is linke d with the G-force
display and the co urse of the past
movement of the ball is displayed.
Press and hold to reset the
record.
Wheel spin display
When a tire is spi nning, its icon on
the display changes its color and
blinks.
*: This item is displayed only when driving mode is set to sport mode.
■Safety system status
Enable/Disable the following
systems:
PCS (Pre-Colli sion system)
( P.228)
BSM (Blind Spot Monitor) (if
equipped) ( P.270)
RCTA (Rear Cross Traffic
Alert) (if equipped) ( P.283)
Audio system-linked dis-
play ( )
Vehicle information dis-
play ( )
Page 92 of 552
922-1. Instrument cluster
■Tire pressure
• It may take a few minutes to dis- play the tire inflation pressure
after the engine switch is turned to
ON. It may also take a few min-
utes to display the tire inflation
pressure after inflation pressure
has been adjusted.
• “---” may be disp layed if the tire
position information cannot be
determined due to unfavorable
radio wave conditions.
• Tire inflation pressure changes with temperature. The displayed
values may also be different from
the values measured using a tire
pressure gauge.
■Changing settings
Use the meter control switches
on the steering wheel to change
settings.
1 Press or of the meter
control switch to select .
2 Press or of the meter
control switch to select the
desired item to be custom-
ized.
3 Press or press and hold .
The available settings will differ
depending on if is pressed or
pressed and held. Follow the
instructions on the display.
■Setting items
LTA (Lane Tracing Assist)
( P.239)
Press and hold to change the
settings of the following items: • “Lane Center”
Select to enable
/disable the lane
centering function.
• “Sensitivity”
Select to set the warning sensitivity.
• “Sway Warning”
Select to enable/disable the vehicle
sway warning.
• “Sway Sensitivity”
Select to set the vehicle sway warn-
ing sensitivity.
PCS (Pre-Collision Sys-
tem) ( P.228)
Press to enable/disable the
pre-collision system.
• PCS (Pre-Collision System)
on/off
Select to enable/disable the
pre-collision system.
Press and hold to change the
settings of the following item:
• “Sensitivity”
Select to change the pre-collision
warning timing.
DRCC (Dynamic Radar
Cruise Control with full-speed
range) ( P.249)
Press and hold to change the
settings of the following items:
• “Curve Speed Reduction”
( P.256)
Select to set the curve speed
reduction function strength.
Settings display ( )
Page 94 of 552

942-1. Instrument cluster
(Stop & Start) (if
equipped) ( P.264)
Select to set the length of time the
Stop & Start system will operate
when the “A/C” switch of the air
conditioning system is on.
“TPWS” (Tire Pressure Warn-
ing System) ( P.396)
• “Set Pressure” (tire pressure
warning system initialization)
Select to initialize the tire pressure
warning system.
• “Change Wheel” (register tire pressure warning system sensor
ID codes)
Select to register the ID codes of
the tire pressure s ensors to the tire
pressure warning system.
“Rear Seat Reminder”
( P. 1 1 7 )
Select to enable/disable the rear
seat reminder.
“Scheduled Maintenance”
( P.377)
Select to reset the scheduled main-
tenance information (maintenance
required message and distance
until maintenance necessary) after
all maintenance is performed.
“Oil Maintenance” ( P.386)
Select to reset the oil maintenance
information (maintenance required
message and distance until mainte-
nance necessary) after an oil
change is performed.
■ Meter settings
Press and hold to change
the settings of the following
items:
Language
Select to change the language dis-
played.
Units
Select to change the units of mea-
sure displayed.
Eco Driving Indicator Light
( P.89)
Select to enable/disable the Eco
Driving Indi cator Light.
Speedometer display (digital
speed)
Select to enable/disable the speed-
ometer display.
Gadget content
Select to turn the display of a gad-
get.
Fuel economy type
Select to change the average fuel
consumption display and an item to
be displayed as gadget.
Pop-up display
Select to enable/disable pop-up
displays for each relevant system.
Multi-information display off
Displays a blank screen.
Default setting
Select to reset the meter display
settings to the default setting.
Page 101 of 552
1012-1. Instrument cluster
2
Vehicle status information and indicators
Trip time: Displays the
elapsed time since engine
start
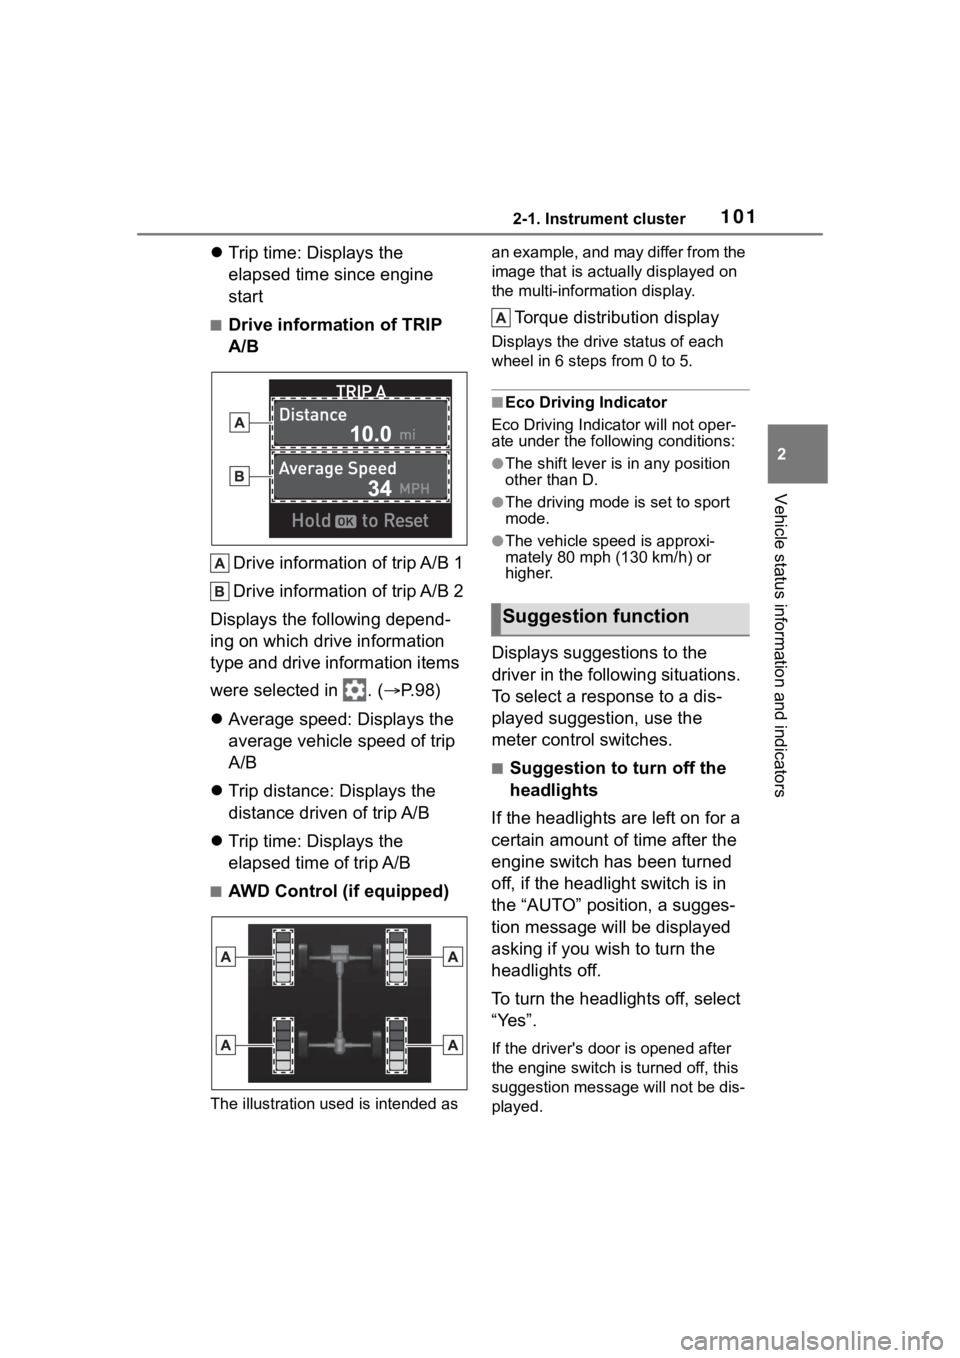
■Drive information of TRIP
A/B
Drive information of trip A/B 1
Drive information of trip A/B 2
Displays the following depend-
ing on which drive information
type and drive information items
were selected in . ( P.98)
Average speed: Displays the
average vehicle speed of trip
A/B
Trip distance: Displays the
distance driven of trip A/B
Trip time: Displays the
elapsed time of trip A/B
■AWD Control (if equipped)
The illustration used is intended as an example, and may differ from the
image that is actually displayed on
the multi-information display.
Torque distribution display
Displays the drive status of each
wheel in 6 steps from 0 to 5.
■Eco Driving Indicator
Eco Driving Indicator will not oper-
ate under the following conditions:
●The shift lever is in any position
other than D.
●The driving mode is set to sport
mode.
●The vehicle spe ed is approxi-
mately 80 mph (130 km/h) or
higher.
Displays suggestions to the
driver in the following situations.
To select a response to a dis-
played suggestion, use the
meter control switches.
■Suggestion to turn off the
headlights
If the headlights are left on for a
certain amount of time after the
engine switch has been turned
off, if the headlight switch is in
the “AUTO” position, a sugges-
tion message will be displayed
asking if you wish to turn the
headlights off.
To turn the headlights off, select
“Yes”.
If the driver's door is opened after
the engine switch is turned off, this
suggestion message will not be dis-
played.
Suggestion function
Page 111 of 552
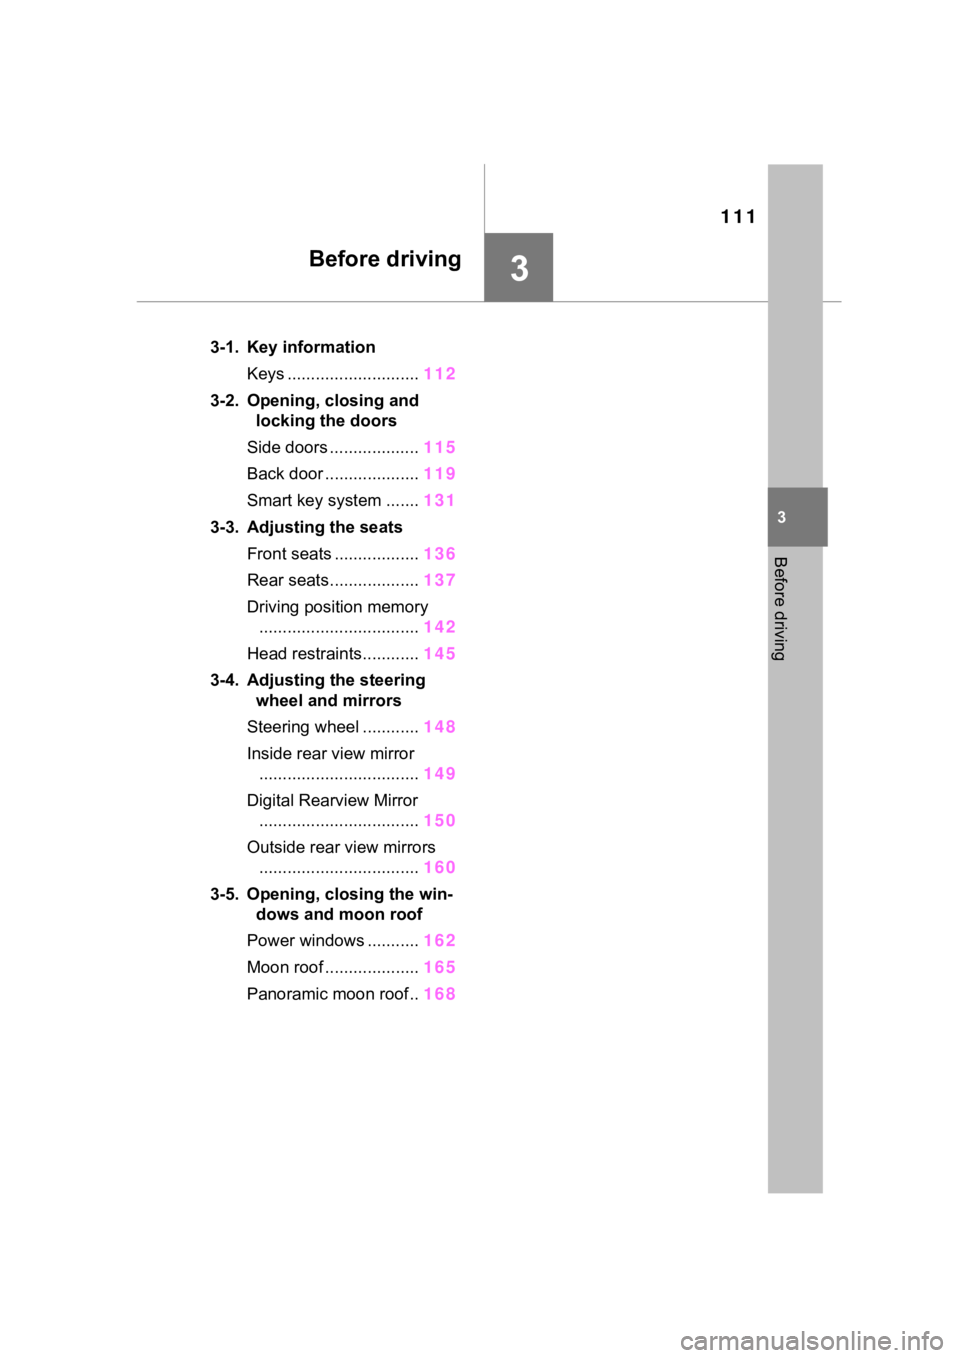
111
3
3
Before driving
Before driving
.3-1. Key informationKeys ............................ 112
3-2. Opening, closing and locking the doors
Side doors ................... 115
Back door .................... 119
Smart key system ....... 131
3-3. Adjusting the seats Front seats .................. 136
Rear seats................... 137
Driving position memory .................................. 142
Head restraints............ 145
3-4. Adjusting the steering wheel and mirrors
Steering wheel ............ 148
Inside rear view mirror .................................. 149
Digital Rearview Mirror .................................. 150
Outside rear view mirrors .................................. 160
3-5. Opening, closing the win- dows and moon roof
Power windows ........... 162
Moon roof .................... 165
Panoramic moon roof.. 168
Page 143 of 552

1433-3. Adjusting the seats
3
Before driving
ten.
■Seat positions that can be
memorized
The adjusted positions other than
the position adjusted by lumbar sup-
port switch can be recorded.
■In order to correctly use the
driving position memory func-
tion
If a seat position is already in the
furthest possible position and the
seat is operated in the same direc-
tion, the recorded position may be
slightly different w hen it is recalled.
1Check that the shift lever is in
P.
2 Turn the engine switch to
ON.
3 Press one of the buttons for
the driving position you want to recall until the buzzer
sounds.
■To stop the position recall oper-
ation part-way through
Perform any of the following opera-
tions:
●Press the “SET” button.
●Press button “1” or “2”.
●Operate any of t he seat adjust-
ment switches (only cancels seat
position recall).
■Operating the driving position
memory after turning the
engine switch off
Recorded seat positions can be
activated up to 180 seconds after
the driver’s door is opened and
another 60 seconds after it is closed
again.
■When the recorded seat posi-
tion cannot be recalled
The seat position may not be
recalled in some situations when the
seat position is recorded in a certain
range. For details, contact your Toy-
ota dealer.
■Registering procedure
Record your driving position to
WARNING
■Seat adjustment caution
Take care during seat adjustment
so that the seat d oes not strike
the rear passenger or squeeze
your body again st the steering
wheel.
Recalling a driving posi-
tion
Registering/cancel-
ing/recall a driving posi-
tion to an electronic key
(memory recall function)
Page 148 of 552

1483-4. Adjusting the steering wheel and mirrors
3-4.Adjusting the steering wheel and mirrors
1Hold the steering wheel and
push the lever down.
2 Adjust to the ideal position by
moving the steering wheel
horizontally and vertically.
After adjustment, pull the lever up
to secure the steering wheel.
Press on or close to the
mark.
Steering wheel
Adjustment procedure
WARNING
■Caution while driving
Do not adjust the steering wheel
while driving.
Doing so may cause the driver to
mishandle the vehicle and cause
an accident, resul ting in death or
serious injury.
■After adjusting the steering
wheel
Make sure that the steering wheel
is securely locked.
Otherwise, the steering wheel
may move suddenly, possibly
causing an accident, and resulting
in death or serious injury. Also,
the horn may not sound if the
steering wheel is not securely
locked.
Sounding the horn
Page 149 of 552

1493-4. Adjusting the steering wheel and mirrors
3
Before driving
*: If equipped
The height of the rear view mir-
ror can be adjusted to suit your
driving posture.
Adjust the height of the rear
view mirror by moving it up and
down.
Manual anti-glare inside rear
view mirror
Reflected light from the head-
lights of vehicles behind can be
reduced by operating the lever.
Normal position
Anti-glare position
Auto anti-glare inside rear
view mirror
Responding to the level of
brightness of the headlights of
vehicles behind, the reflected
light is automatically reduced.
Turn the automatic anti-glare
function mode on/off
When the automatic anti-glare func-
tion is in ON mode, the indicator
illuminates. The func tion will set to
ON mode each time the engine
switch is turned to ON.
Pressing the button turns the func-
tion to OFF mode. (The indicator
also turns off.)
Inside rear view mir-
ror*
The rear view mirror’s posi-
tion can be adjusted to
enable sufficient confirma-
tion of the rear view.
Adjusting the height of
rear view mirror
WARNING
■Caution while driving
Do not adjust the position of the
mirror while driving.
Doing so may lead to mishandling
of the vehicle and cause an acci-
dent, resulting in death or serious
injury.
Anti-glare function
Page 150 of 552

1503-4. Adjusting the steering wheel and mirrors
■To prevent sensor error (vehi-
cles with auto anti-glare inside
rear view mirror)
To ensure that the sensors operate
properly, do not touch or cover
them.
*: If equipped
Digital Rear view Mir-
ror*
The Digital Rearview Mirror
is a system that uses the
camera on the rear of the
vehicle and displays its
image on the display of the
Digital Rearview Mirror.
The Digital Rearview Mirror
can be changed between
optical mirror mode and dig-
ital mirror mode by operat-
ing the lever.
The Digital Rearview Mirror
allows the driver to see the
rear view despite obstruc-
tions, such as the head
restraints or luggage, ensur-
ing rear visibility. Also, the
rear seats are not displayed
and privacy of the passen-
gers is enhanced.
WARNING
Observe the following precau-
tions.
Failure to do so may result in
death or serious injury.
■Before using the Digital Rear-
view Mirror
●Make sure to adjust the mirror
before driving. ( P.152)
• Change to optical mirror mode and adjust the position of the
Digital Rearview Mirror so that
the area behind your vehicle
can be viewed properly.