Rear window TOYOTA HIGHLANDER 2023 Owners Manual
[x] Cancel search | Manufacturer: TOYOTA, Model Year: 2023, Model line: HIGHLANDER, Model: TOYOTA HIGHLANDER 2023Pages: 552, PDF Size: 13.36 MB
Page 2 of 552
2TABLE OF CONTENTS
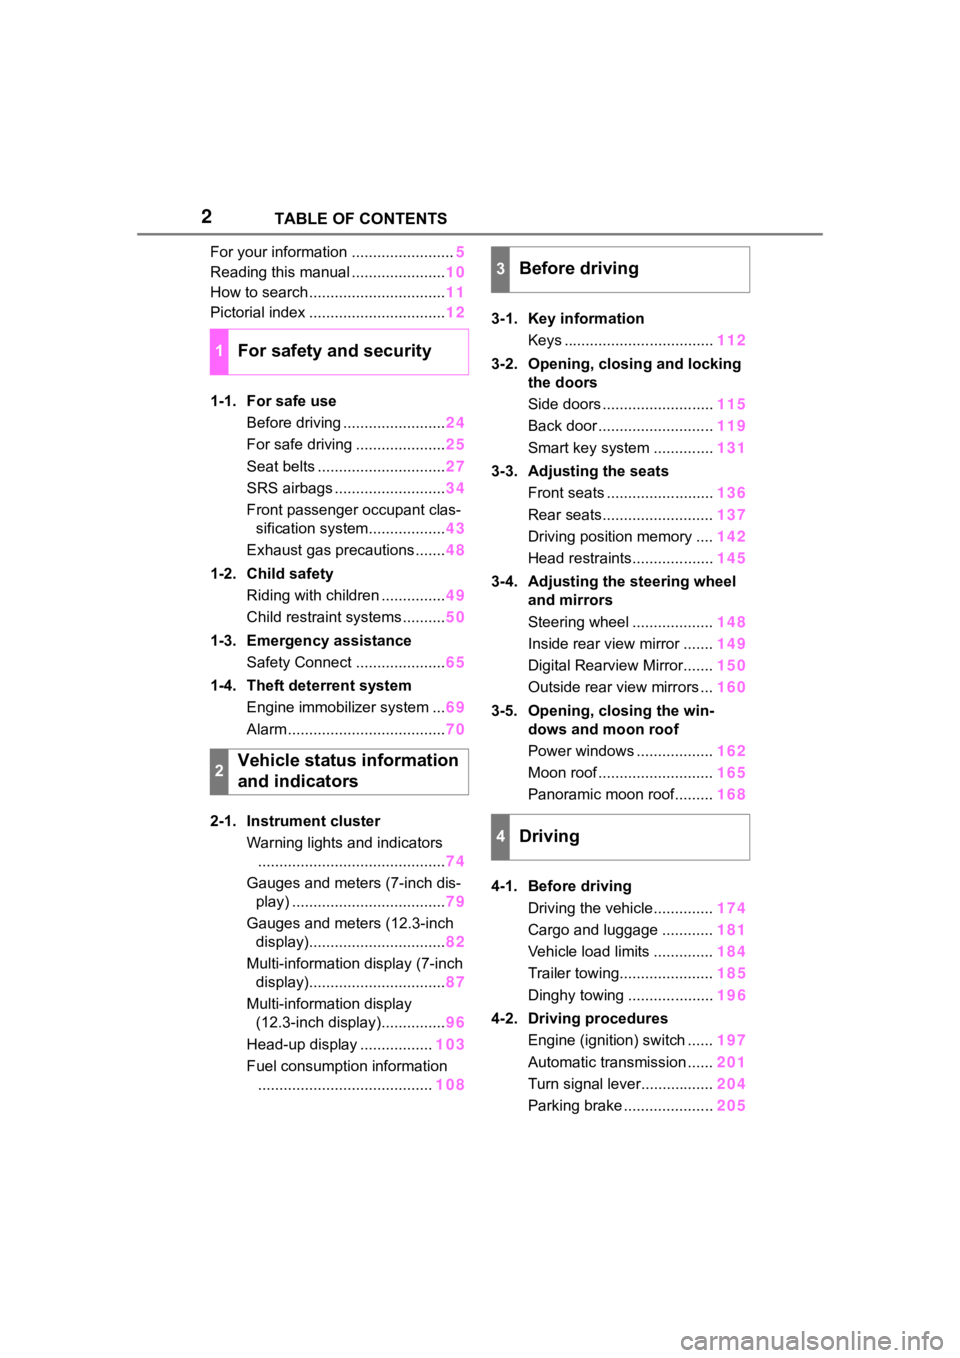
For your information ........................5
Reading this manual ...................... 10
How to search ................................ 11
Pictorial index ................................ 12
1-1. For safe use Before driving ........................ 24
For safe driving ..................... 25
Seat belts .............................. 27
SRS airbags .......................... 34
Front passenger occupant clas- sification system.................. 43
Exhaust gas precautions....... 48
1-2. Child safety Riding with children ............... 49
Child restraint systems .......... 50
1-3. Emergency assistance Safety Connect ..................... 65
1-4. Theft deterrent system Engine immobilizer system ... 69
Alarm ..................................... 70
2-1. Instrument cluster Warning lights and indicators............................................ 74
Gauges and meters (7-inch dis- play) .................................... 79
Gauges and meters (12.3-inch display)................................ 82
Multi-information display (7-inch display)................................ 87
Multi-information display (12.3-inch display)............... 96
Head-up display ................. 103
Fuel consumption information ......................................... 1083-1. Key information
Keys ................................... 112
3-2. Opening, closing and locking the doors
Side doors .......................... 115
Back door ........................... 119
Smart key system .............. 131
3-3. Adjusting the seats Front seats ......................... 136
Rear seats.......................... 137
Driving position memory .... 142
Head restraints................... 145
3-4. Adjusting the steering wheel and mirrors
Steering wheel ................... 148
Inside rear view mirror ....... 149
Digital Rearview Mirror....... 150
Outside rear view mirrors ... 160
3-5. Opening, closing the win- dows and moon roof
Power windows .................. 162
Moon roof ........................... 165
Panoramic moon roof......... 168
4-1. Before driving Driving the vehicle.............. 174
Cargo and luggage ............ 181
Vehicle load limits .............. 184
Trailer towing...................... 18
5
Dinghy towing ....................19
6
4-2. Driving procedures Engine (ignition) switch ...... 197
Automatic transmission ...... 201
Turn signal lever................. 204
Parking brake ..................... 205
1For safety and security
2Vehicle status information
and indicators
3Before driving
4Driving
Page 12 of 552
12Pictorial index
Pictorial index
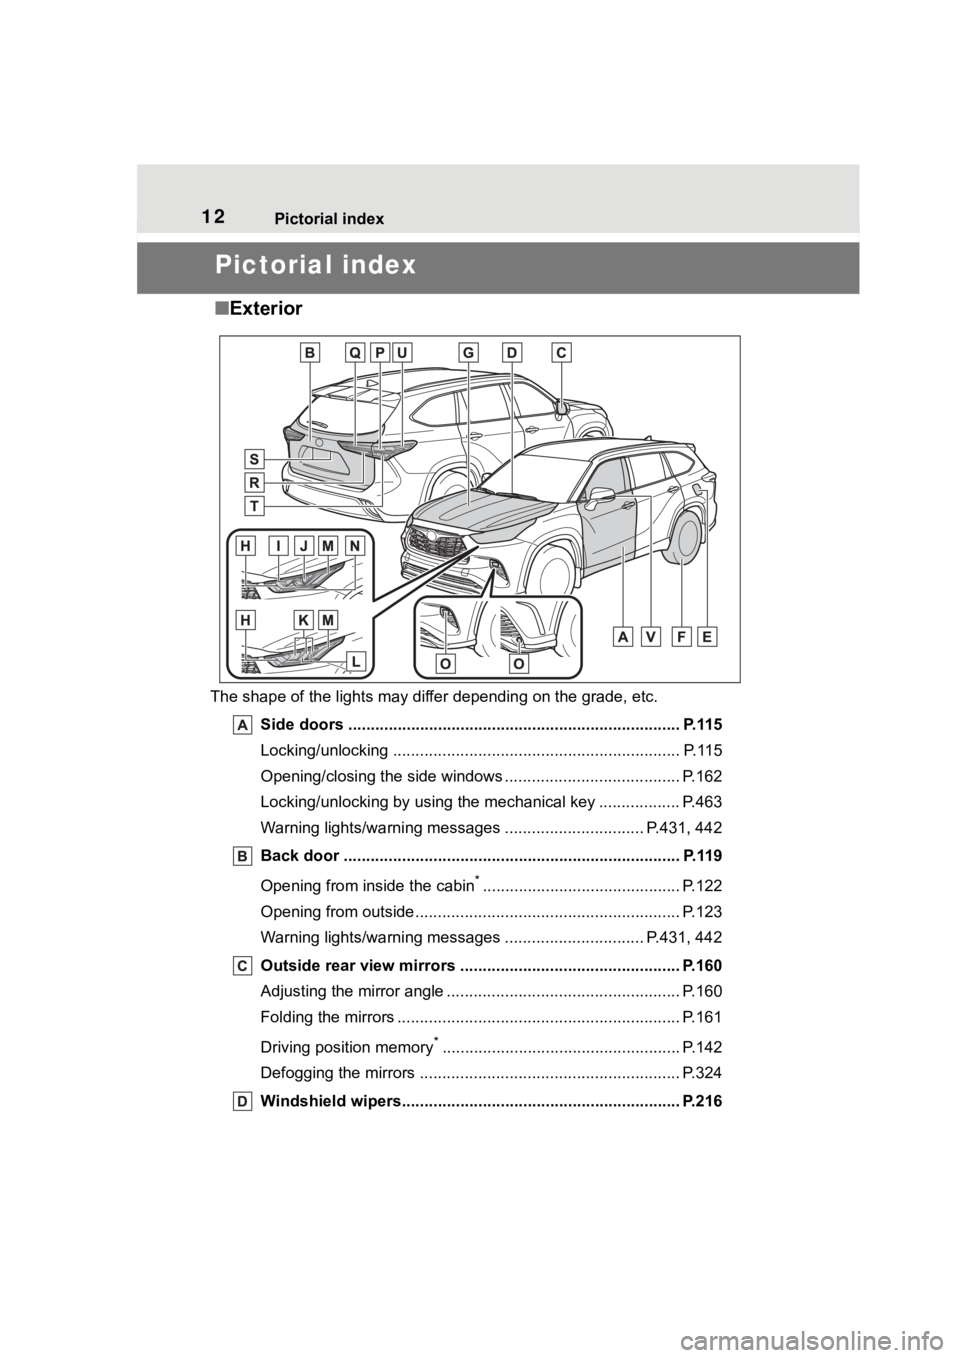
■Exterior
The shape of the lights may diff er depending on the grade, etc.
Side doors ......... ................................. ................................ P.115
Locking/unlocking .............................................. .................. P.115
Opening/closing the side windows ............................... ........ P.162
Locking/unlocking by using the mechanical key .................. P. 4 6 3
Warning lights/warning messages ............................... P .431, 442
Back door ...................................................... ..................... P.119
Opening from inside the cabin
*............................................ P.122
Opening from outside........................................... ................ P.123
Warning lights/warning messages ............................... P .431, 442
Outside rear view mirrors ................................................. P.160
Adjusting the mirror angle ..................................... ............... P.160
Folding the mirrors ............................................ ................... P.161
Driving position memory
*..................................................... P.142
Defogging the mirrors .......................................... ................ P.324
Windshield wipers.............................................. ................ P.216
Page 16 of 552

16Pictorial index
Turn signal lever................................................................. P.204
Headlight switch ............................................... ................. P.210
Headlights/side marker lights/pa rking lights/tail lights/license plate
lights/daytime running lights .................................. ............... P.210
Front fog lights
*1............................................................... .... P.216
Windshield wiper and washer sw itch....................... P.216, 219
Usage.......................................................... ................. P.216, 219
Adding washer fluid .............................................................. P.392
Warning messages ............................................... ............... P.442
Emergency flasher switch ....................................... .......... P.424
Hood lock release lever ........................................ ............. P.384
Tilt and telescopic steering lock release lever ................P. 1 4 8
Adjustment ..................................................... ...................... P.148
Air conditioning system ............................. ....................... P.322
Usage................................................................................... P.322
Rear window defogger ........................................... .............. P.324
Windshield wiper de-icer
*1................................................... P.324
Audio system
*2
Fuel filler door opener swi tch ........................................... P.221
*1: If equipped
*2: Refer to “MULTIMEDIA OWNER’S MANUAL”.
Page 17 of 552
17Pictorial index
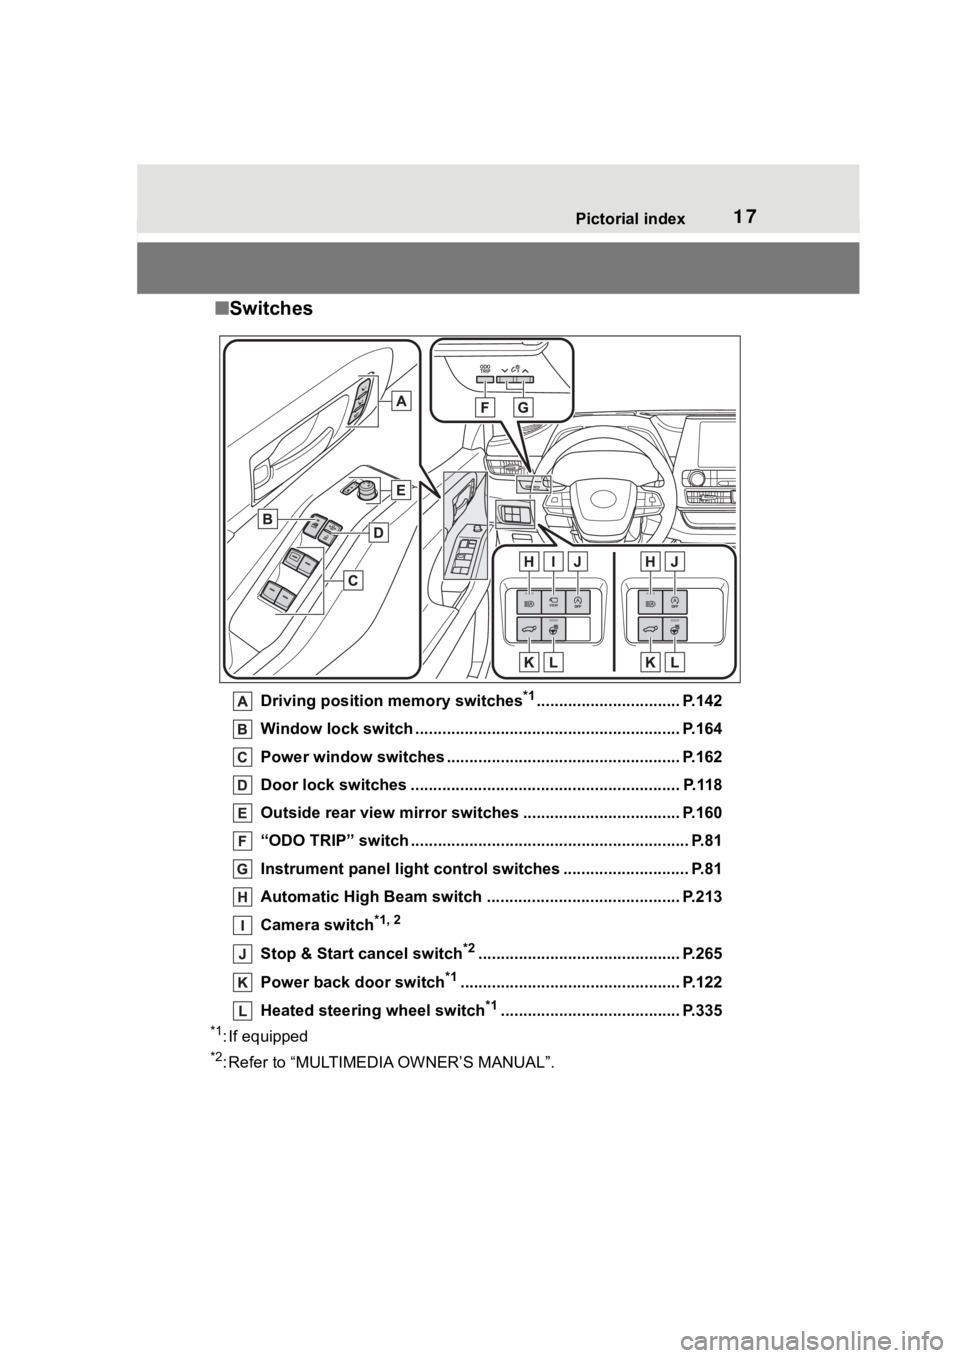
■Switches
Driving position memory switches*1................................ P.142
Window lock switch ............................................. .............. P.164
Power window switches ....... ............................................. P.162
Door lock switches ............................................................ P.118
Outside rear view mirror swi tches ................................... P.160
“ODO TRIP” switch .............................................. ................ P.81
Instrument panel light control switches ........................ .... P.81
Automatic High Beam switch ..................................... ...... P.213
Camera switch
*1, 2
Stop & Start cancel switch*2............................................. P.265
Power back door switch
*1................................................. P.122
Heated steering wheel switch
*1........................................ P.335
*1: If equipped
*2: Refer to “MULTIMEDIA OWNER’S MANUAL”.
Page 42 of 552
421-1. For safe use
WARNING
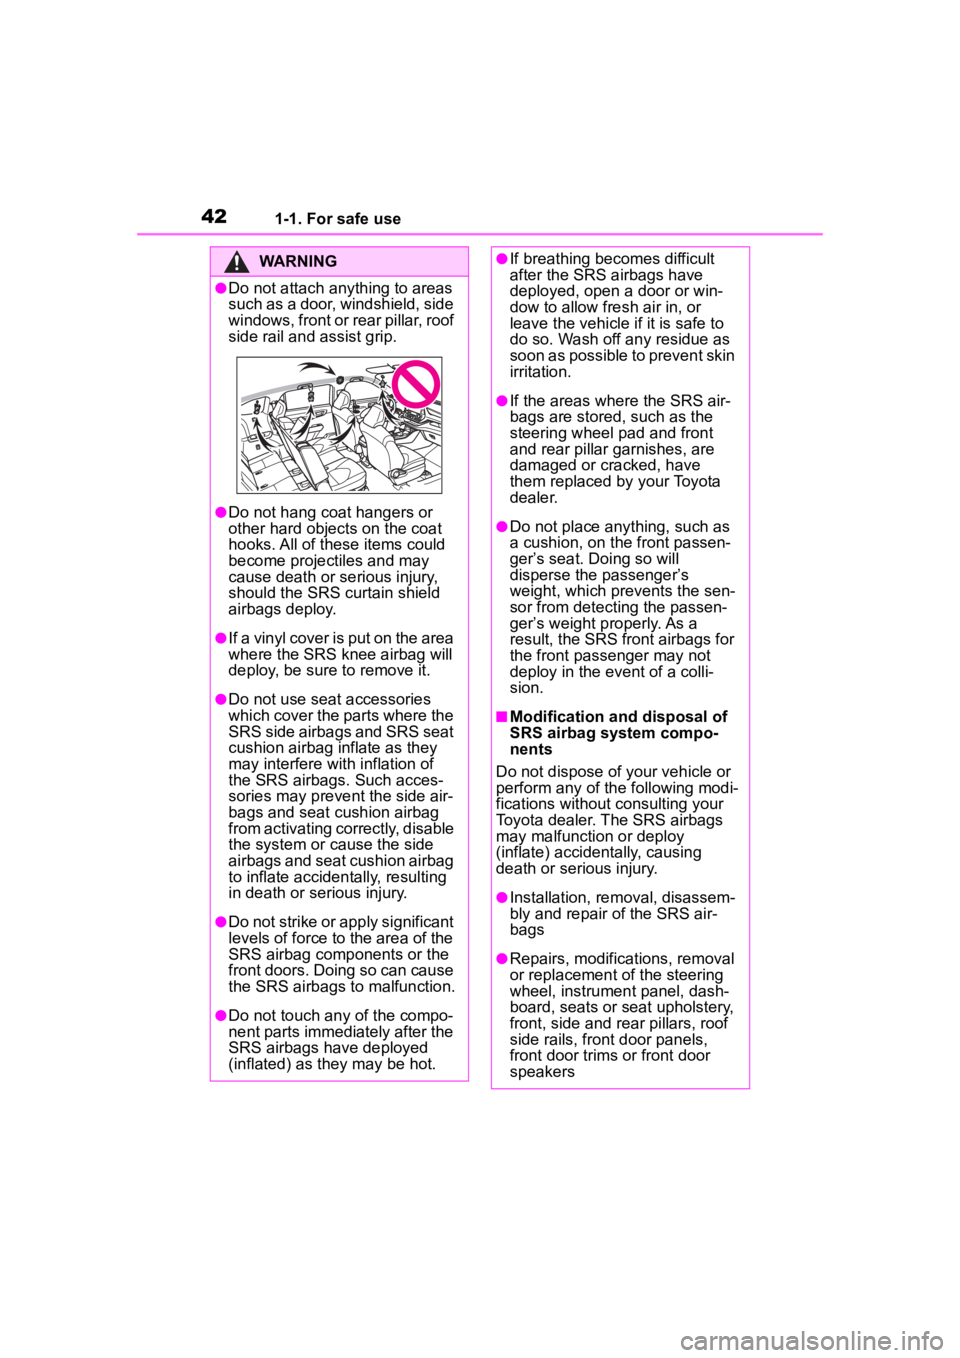
●Do not attach anything to areas
such as a door, windshield, side
windows, front or rear pillar, roof
side rail and assist grip.
●Do not hang coat hangers or
other hard objects on the coat
hooks. All of these items could
become projectiles and may
cause death or serious injury,
should the SRS curtain shield
airbags deploy.
●If a vinyl cover is put on the area
where the SRS knee airbag will
deploy, be sure to remove it.
●Do not use seat accessories
which cover the parts where the
SRS side airbags and SRS seat
cushion airbag inflate as they
may interfere with inflation of
the SRS airbags. Such acces-
sories may prevent the side air-
bags and seat cushion airbag
from activating correctly, disable
the system or cause the side
airbags and seat cushion airbag
to inflate accidentally, resulting
in death or serious injury.
●Do not strike or apply significant
levels of force to the area of the
SRS airbag components or the
front doors. Doing so can cause
the SRS airbags to malfunction.
●Do not touch any of the compo-
nent parts immediately after the
SRS airbags have deployed
(inflated) as they may be hot.
●If breathing becomes difficult
after the SRS airbags have
deployed, open a door or win-
dow to allow fresh air in, or
leave the vehicle if it is safe to
do so. Wash off any residue as
soon as possible to prevent skin
irritation.
●If the areas where the SRS air-
bags are stored, such as the
steering wheel pad and front
and rear pillar garnishes, are
damaged or cracked, have
them replaced by your Toyota
dealer.
●Do not place anything, such as
a cushion, on the front passen-
ger’s seat. Doing so will
disperse the passenger’s
weight, which prevents the sen-
sor from detecting the passen-
ger’s weight properly. As a
result, the SRS front airbags for
the front passenger may not
deploy in the event of a colli-
sion.
■Modification and disposal of
SRS airbag system compo-
nents
Do not dispose of your vehicle or
perform any of the following modi-
fications without consulting your
Toyota dealer. The SRS airbags
may malfunction or deploy
(inflate) accidentally, causing
death or serious injury.
●Installation, re moval, disassem-
bly and repair of the SRS air-
bags
●Repairs, modific ations, removal
or replacement of the steering
wheel, instrument panel, dash-
board, seats or seat upholstery,
front, side and rear pillars, roof
side rails, front door panels,
front door trims or front door
speakers
Page 49 of 552
491-2. Child safety
1
For safety and security
1-2.Child safety
Riding with children
Observe the following pre-
cautions when children are
in the vehicle.
Use a child restraint system
appropriate for the child,
until the child becomes
large enough to properly
wear the vehicle’s seat belt.
It is recommended that chil-
dren sit in the rear seats to
avoid accidental contact
with the shift lever, wiper
switch, etc.
Use the rear door child-pro-
tector lock or the window
lock switch to avoid children
opening the door while driv-
ing or operating the power
window accidentally.
( P.118, 164)
Do not let small children
operate equipment which
may catch or pinch body
parts, such as the power
window, hood, back door,
seats etc.
WARNING
■When children are in the vehi-
cle
Never leave children unattended
in the vehicle, and never allow
children to have or use the key.
Children may be able to start the
vehicle or shift the vehicle into
neutral. There is also a danger
that children ma y injure them-
selves by playing with the win-
dows, the moon roof or panoramic
moon roof, or other features of the
vehicle. In addition, heat build-up
or extremely cold temperatures
inside the vehicle can be fatal to
children.
Page 111 of 552
111
3
3
Before driving
Before driving
.3-1. Key informationKeys ............................ 112
3-2. Opening, closing and locking the doors
Side doors ................... 115
Back door .................... 119
Smart key system ....... 131
3-3. Adjusting the seats Front seats .................. 136
Rear seats................... 137
Driving position memory .................................. 142
Head restraints............ 145
3-4. Adjusting the steering wheel and mirrors
Steering wheel ............ 148
Inside rear view mirror .................................. 149
Digital Rearview Mirror .................................. 150
Outside rear view mirrors .................................. 160
3-5. Opening, closing the win- dows and moon roof
Power windows ........... 162
Moon roof .................... 165
Panoramic moon roof.. 168
Page 133 of 552
1333-2. Opening, closing and locking the doors
3
Before driving
wireless remote control or the
mechanical key, to unlock the
doors.
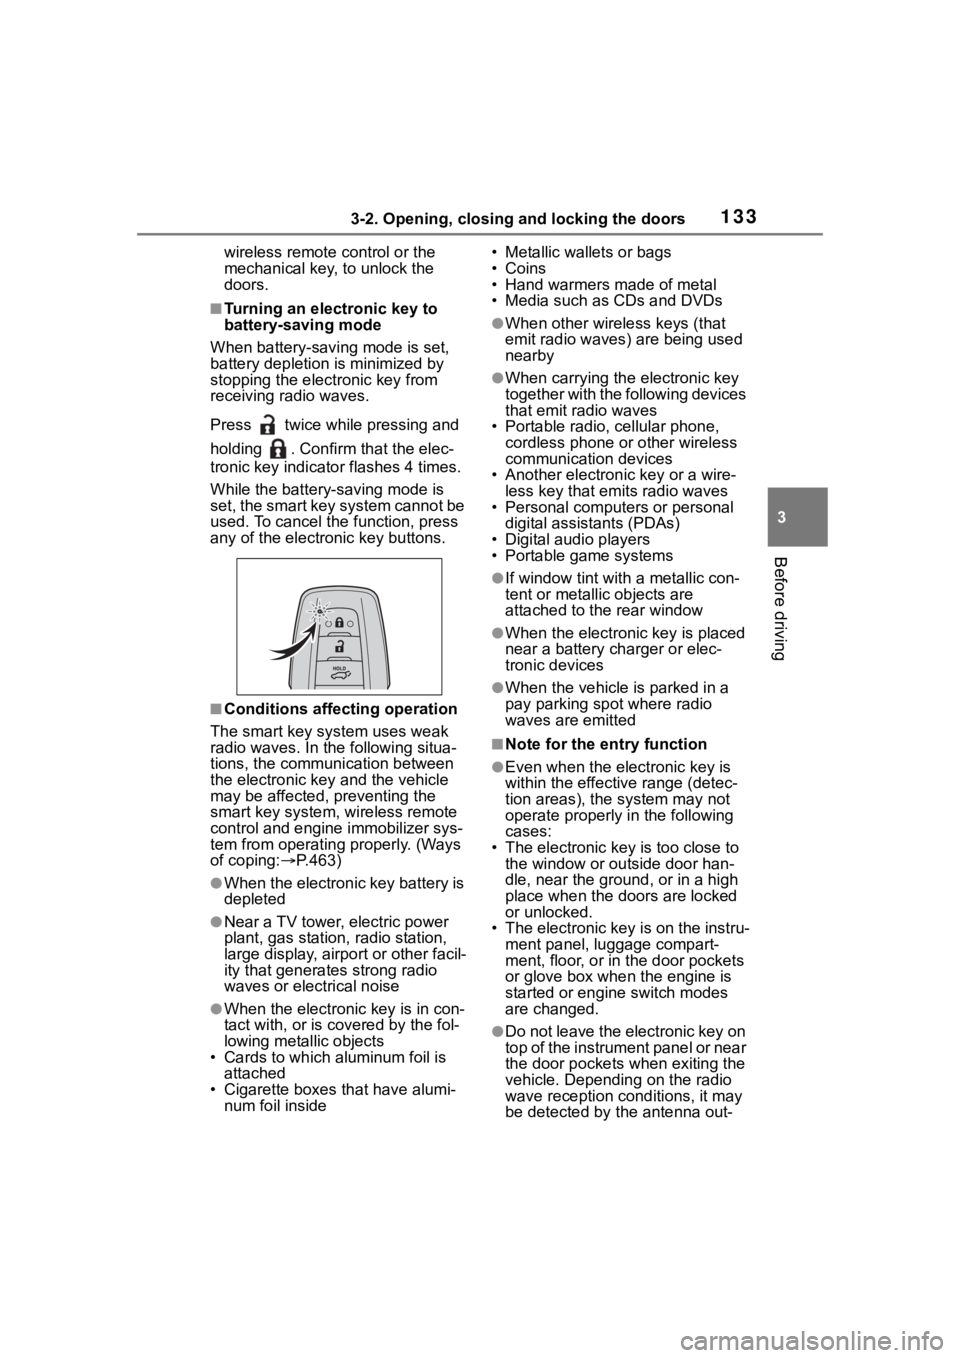
■Turning an electronic key to
battery-saving mode
When battery-savi ng mode is set,
battery depletion is minimized by
stopping the electronic key from
receiving radio waves.
Press twice while pressing and
holding . Confirm that the elec-
tronic key indicator flashes 4 times.
While the battery-saving mode is
set, the smart key system cannot be
used. To cancel the function, press
any of the electronic key buttons.
■Conditions affecting operation
The smart key system uses weak
radio waves. In the following situa-
tions, the communication between
the electronic key and the vehicle
may be affected, preventing the
smart key system, wireless remote
control and engine immobilizer sys-
tem from operating properly. (Ways
of coping: P.463)
●When the electronic key battery is
depleted
●Near a TV tower, electric power
plant, gas station , radio station,
large display, airpo rt or other facil-
ity that generates strong radio
waves or electrical noise
●When the electronic key is in con-
tact with, or is covered by the fol-
lowing metallic objects
• Cards to which al uminum foil is
attached
• Cigarette boxes that have alumi- num foil inside • Metallic wallets or bags
•Coins
• Hand warmers made of metal
• Media such as CDs and DVDs
●When other wirel
ess keys (that
emit radio waves) are being used
nearby
●When carrying the electronic key
together with the following devices
that emit radio waves
• Portable radio, cellular phone, cordless phone or other wireless
communication devices
• Another electronic key or a wire- less key that emits radio waves
• Personal computers or personal
digital assistants (PDAs)
• Digital audio players
• Portable game systems
●If window tint wit h a metallic con-
tent or metallic objects are
attached to the rear window
●When the electronic key is placed
near a battery charger or elec-
tronic devices
●When the vehicle is parked in a
pay parking spot where radio
waves are emitted
■Note for the entry function
●Even when the electronic key is
within the effective range (detec-
tion areas), the system may not
operate properly in the following
cases:
• The electronic key is too close to the window or outside door han-
dle, near the ground, or in a high
place when the doors are locked
or unlocked.
• The electronic key is on the instru-
ment panel, luggage compart-
ment, floor, or in the door pockets
or glove box when the engine is
started or engine switch modes
are changed.
●Do not leave the electronic key on
top of the instrument panel or near
the door pockets when exiting the
vehicle. Depending on the radio
wave reception conditions, it may
be detected by the antenna out-
Page 155 of 552
1553-4. Adjusting the steering wheel and mirrors
3
Before driving
■Cleaning the mirror surface
If the mirror surface is dirty, the
image on the display may be dif-
ficult to see.
Clean the mirror surface gently
using a soft dry cloth.
■Cleaning the camera
If the camera lens is dirty or cov-
ered with foreign matter, such as
water droplets, snow, mud, etc.,
the displayed image may not be
clear. In this case, rinse the
camera lens with a large quan-
tity of water and then wipe it
clean with a soft cloth damp-
ened with water.
Dirt on the camera lens can be
cleaned by operating the dedi-
cated camera cleaning washer.
( P.219)
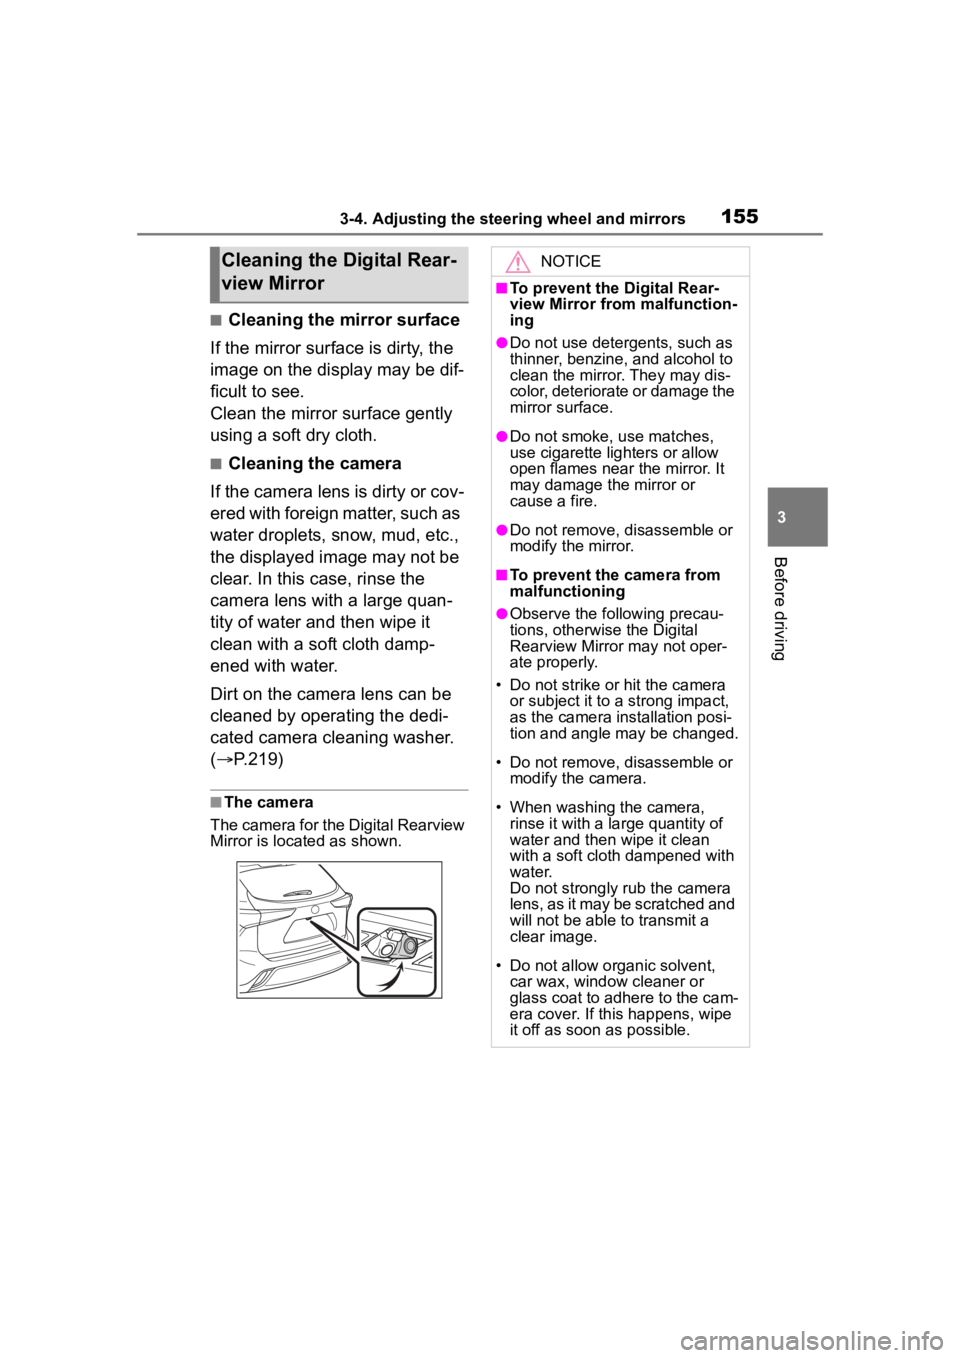
■The camera
The camera for the Digital Rearview
Mirror is located as shown.
Cleaning the D igital Rear-
view MirrorNOTICE
■To prevent the Digital Rear-
view Mirror from malfunction-
ing
●Do not use detergents, such as
thinner, benzine, and alcohol to
clean the mirror. They may dis-
color, deteriorate or damage the
mirror surface.
●Do not smoke, use matches,
use cigarette lighters or allow
open flames near the mirror. It
may damage the mirror or
cause a fire.
●Do not remove, d isassemble or
modify the mirror.
■To prevent the camera from
malfunctioning
●Observe the fo llowing precau-
tions, otherwise the Digital
Rearview Mirror may not oper-
ate properly.
• Do not strike or hit the camera or subject it to a strong impact,
as the camera installation posi-
tion and angle may be changed.
• Do not remove, disassemble or modify the camera.
• When washing the camera, rinse it with a la rge quantity of
water and then wipe it clean
with a soft cloth dampened with
water.
Do not strongly rub the camera
lens, as it may be scratched and
will not be able to transmit a
clear image.
• Do not allow organic solvent, car wax, window cleaner or
glass coat to adhere to the cam-
era cover. If this happens, wipe
it off as soon as possible.
Page 160 of 552
1603-4. Adjusting the steering wheel and mirrors
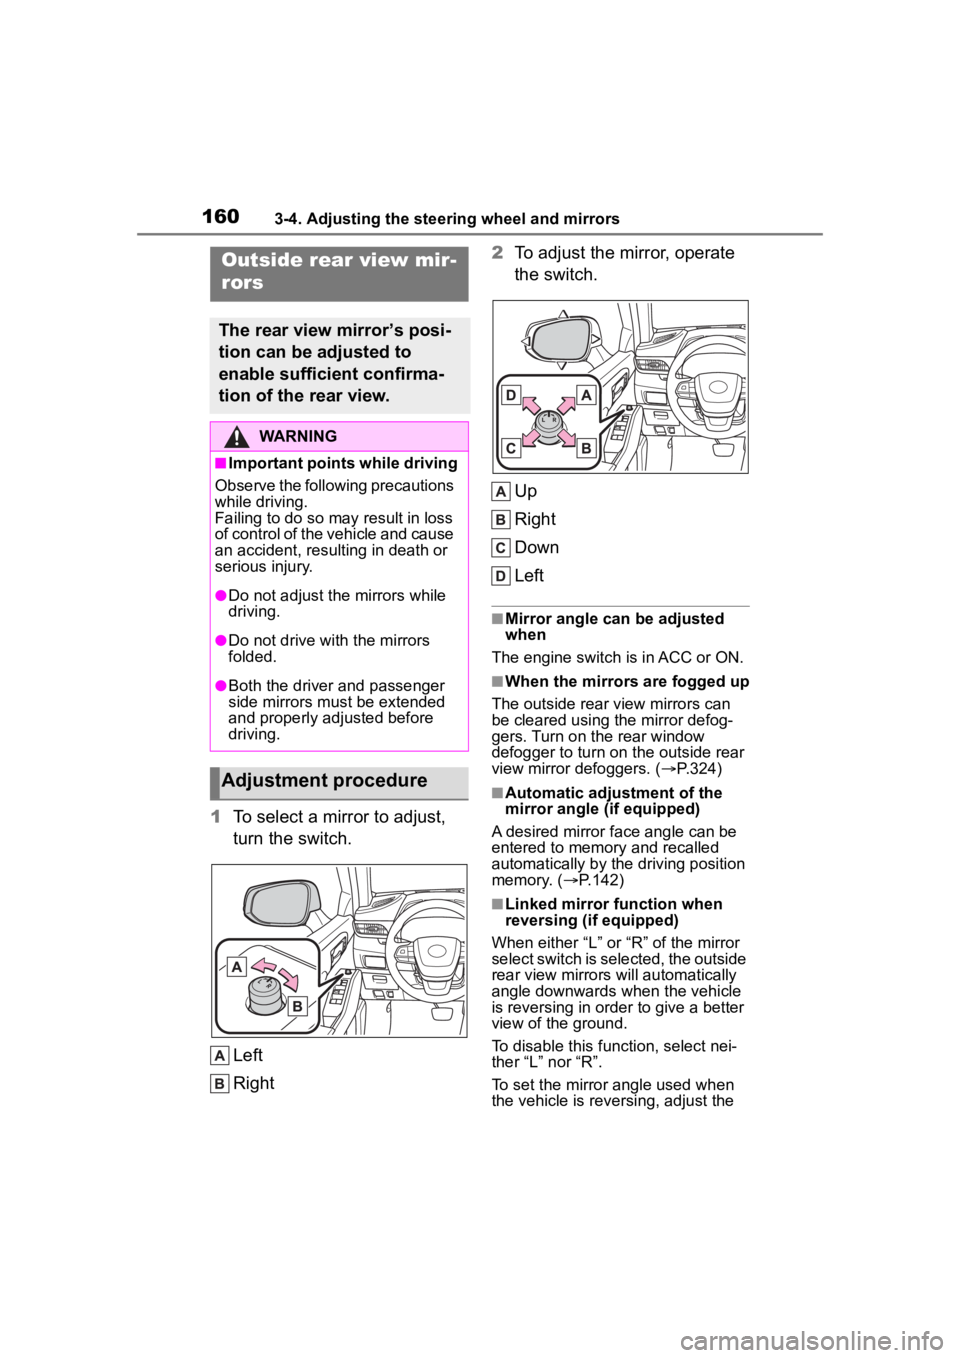
1To select a mirror to adjust,
turn the switch.
Left
Right 2
To adjust the mirror, operate
the switch.
Up
Right
Down
Left
■Mirror angle can be adjusted
when
The engine switch i s in ACC or ON.
■When the mirrors are fogged up
The outside rear view mirrors can
be cleared using the mirror defog-
gers. Turn on the rear window
defogger to turn on the outside rear
view mirror defoggers. ( P.324)
■Automatic adjustment of the
mirror angle (if equipped)
A desired mirror face angle can be
entered to memory and recalled
automatically by the driving position
memory. ( P.142)
■Linked mirror function when
reversing (if equipped)
When either “L” or “R” of the mirror
select switch is selected, the outside
rear view mirrors will automatically
angle downwards when the vehicle
is reversing in order to give a better
view of the ground.
To disable this function, select nei-
ther “L” nor “R”.
To set the mirror angle used when
the vehicle is reversing, adjust the
Outside rear view mir-
rors
The rear view mirror’s posi-
tion can be adjusted to
enable sufficient confirma-
tion of the rear view.
WARNING
■Important points while driving
Observe the following precautions
while driving.
Failing to do so may result in loss
of control of the vehicle and cause
an accident, resul ting in death or
serious injury.
●Do not adjust the mirrors while
driving.
●Do not drive with the mirrors
folded.
●Both the driver and passenger
side mirrors must be extended
and properly adjusted before
driving.
Adjustment procedure