fuel pressure TOYOTA HIGHLANDER 2023 Owners Manual
[x] Cancel search | Manufacturer: TOYOTA, Model Year: 2023, Model line: HIGHLANDER, Model: TOYOTA HIGHLANDER 2023Pages: 552, PDF Size: 13.36 MB
Page 1 of 552
1
2
3
4
5
6
7
8
9
9
HIGHLANDER_U
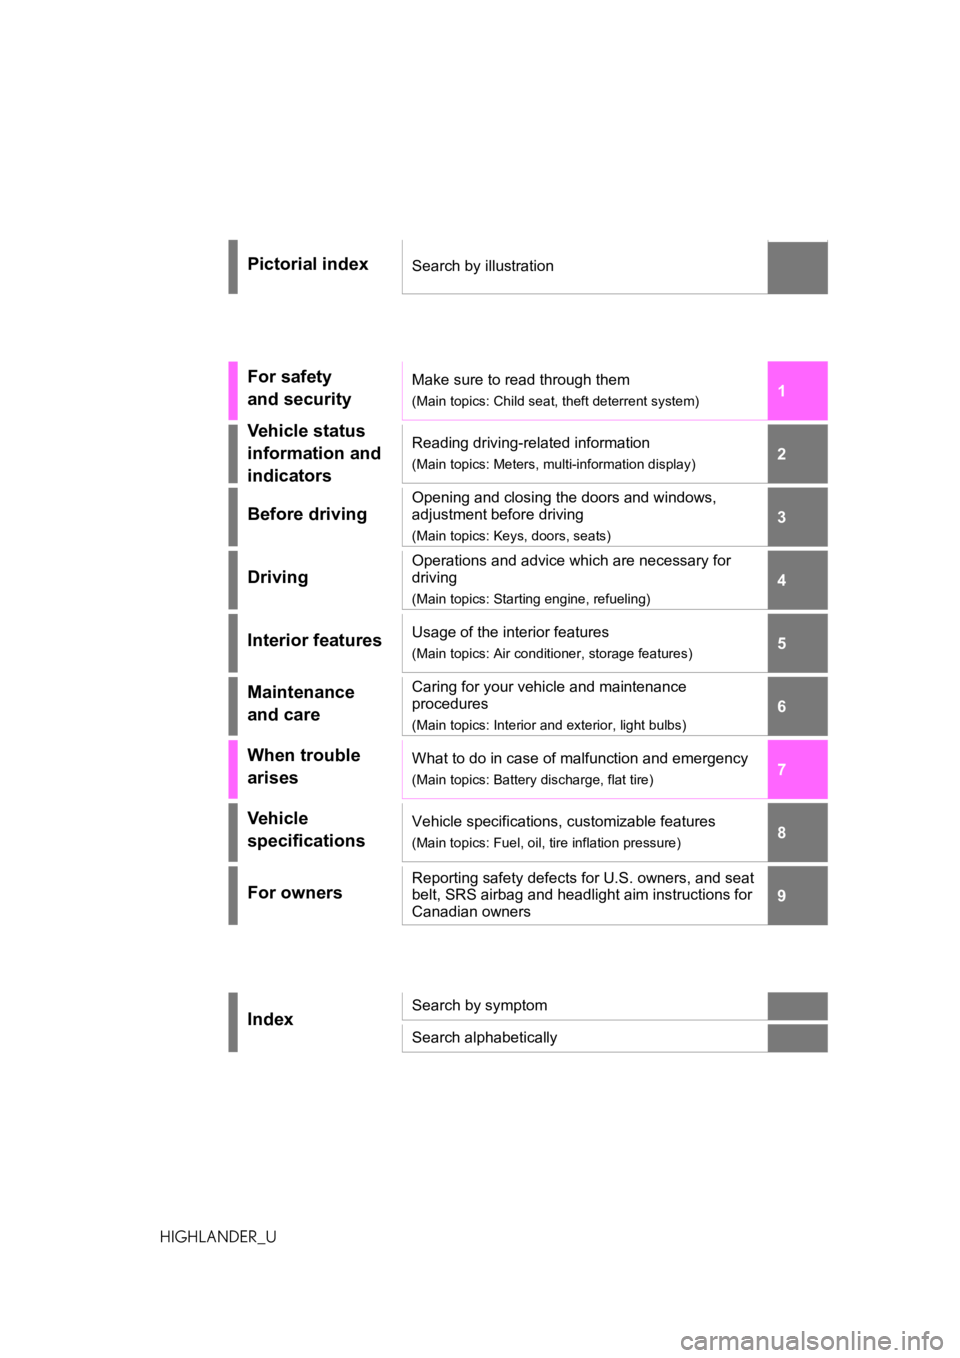
Pictorial indexSearch by illustration
For safety
and securityMake sure to read through them
(Main topics: Child seat, theft deterrent system)
Vehicle status
information and
indicatorsReading driving-related information
(Main topics: Meters, multi-information display)
Before driving
Opening and closing the doors and windows,
adjustment before driving
(Main topics: Keys, doors, seats)
Driving
Operations and advice which are necessary for
driving
(Main topics: Starting engine, refueling)
Interior featuresUsage of the interior features
(Main topics: Air conditioner, storage features)
Maintenance
and careCaring for your vehicle and maintenance
procedures
(Main topics: Interior and exterior, light bulbs)
When trouble
arisesWhat to do in case of malfunction and emergency
(Main topics: Battery discharge, flat tire)
Vehicle
specificationsVehicle specifications, customizable features
(Main topics: Fuel, oil, tire inflation pressure)
For ownersReporting safety defects for U.S. owners, and seat
belt, SRS airbag and headlight aim instructions for
Canadian owners
IndexSearch by symptom
Search alphabetically
Page 4 of 552
4TABLE OF CONTENTS
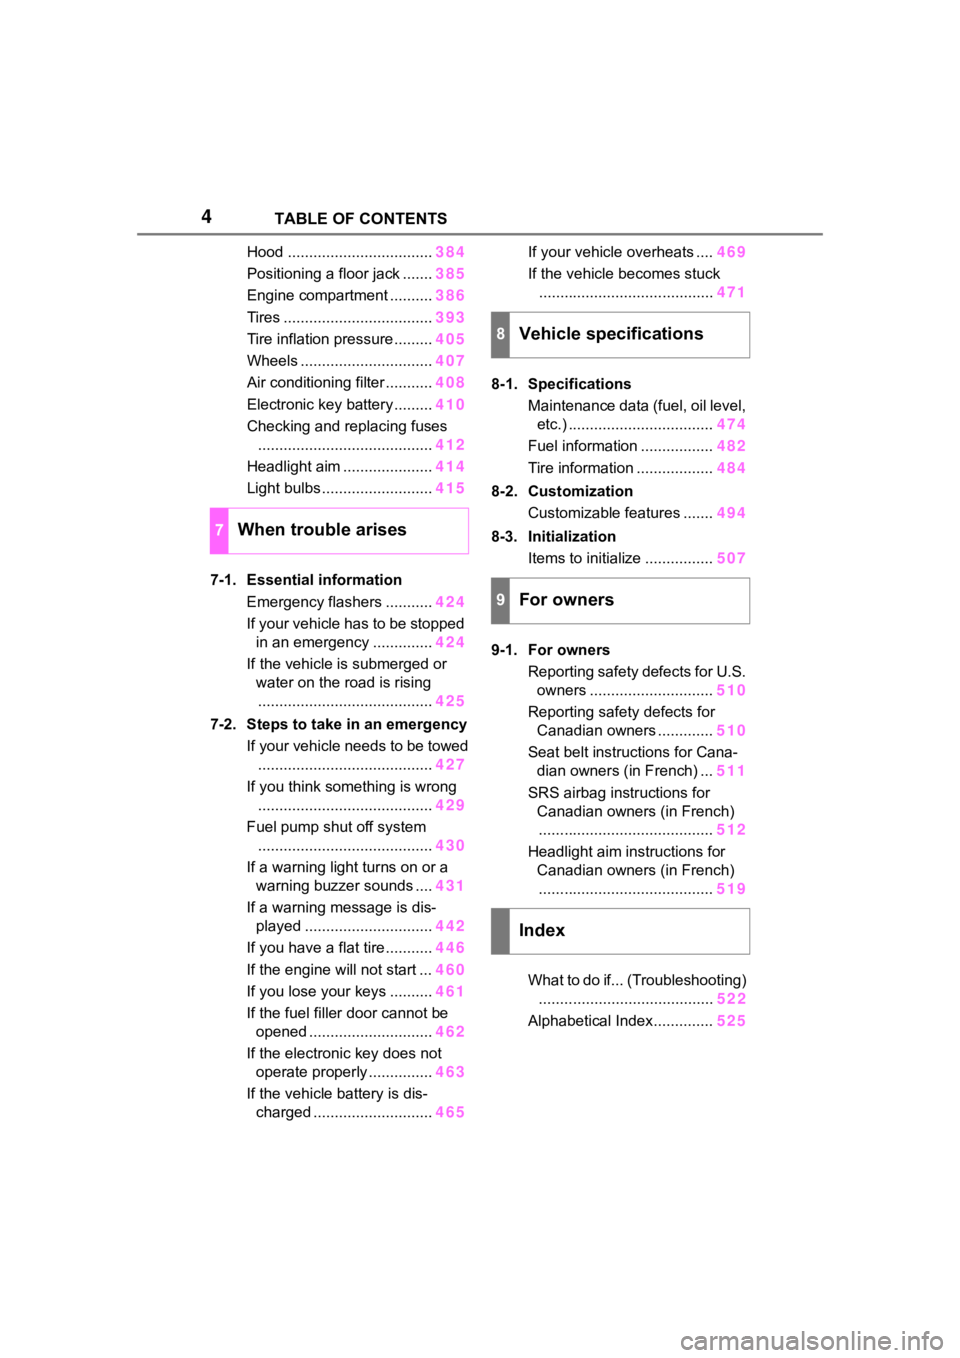
Hood ..................................384
Positioning a floor jack ....... 385
Engine compartment .......... 386
Tires ................................... 393
Tire inflation pressure......... 405
Wheels ............................... 407
Air conditioning filter ........... 408
Electronic key battery ......... 410
Checking and replacing fuses ......................................... 412
Headlight aim ..................... 414
Light bulbs .......................... 415
7-1. Essential information Emergency flashers ........... 424
If your vehicle has to be stopped in an emergency .............. 424
If the vehicle is submerged or water on the road is rising......................................... 425
7-2. Steps to take in an emergency If your vehicle needs to be towed......................................... 427
If you think something is wrong ......................................... 429
Fuel pump shut off system ......................................... 430
If a warning light turns on or a warning buzzer sounds .... 431
If a warning message is dis- played .............................. 442
If you have a flat tire ........... 446
If the engine will not start ... 460
If you lose your keys .......... 461
If the fuel filler door cannot be opened ............................. 462
If the electronic key does not operate properly ............... 463
If the vehicle battery is dis- charged ............................ 465If your vehicle overheats ....
469
If the vehicle becomes stuck ......................................... 471
8-1. Specifications Maintenance data (fuel, oil level, etc.) .................................. 474
Fuel information ................. 482
Tire information .................. 484
8-2. Customization Customizable features ....... 494
8-3. Initialization Items to initialize ................ 507
9-1. For owners Reporting safety defects for U.S. owners ............................. 510
Reporting safety defects for Canadian owners ............. 510
Seat belt instructions for Cana- dian owners (in French) ... 511
SRS airbag instructions for Canadian owners (in French)......................................... 512
Headlight aim instructions for Canadian owners (in French)......................................... 519
What to do if... (Troubleshooting) ........ ................................. 522
Alphab
etical Index.............. 525
7When trouble arises
8Vehicle specifications
9For owners
Index
Page 13 of 552
13Pictorial index
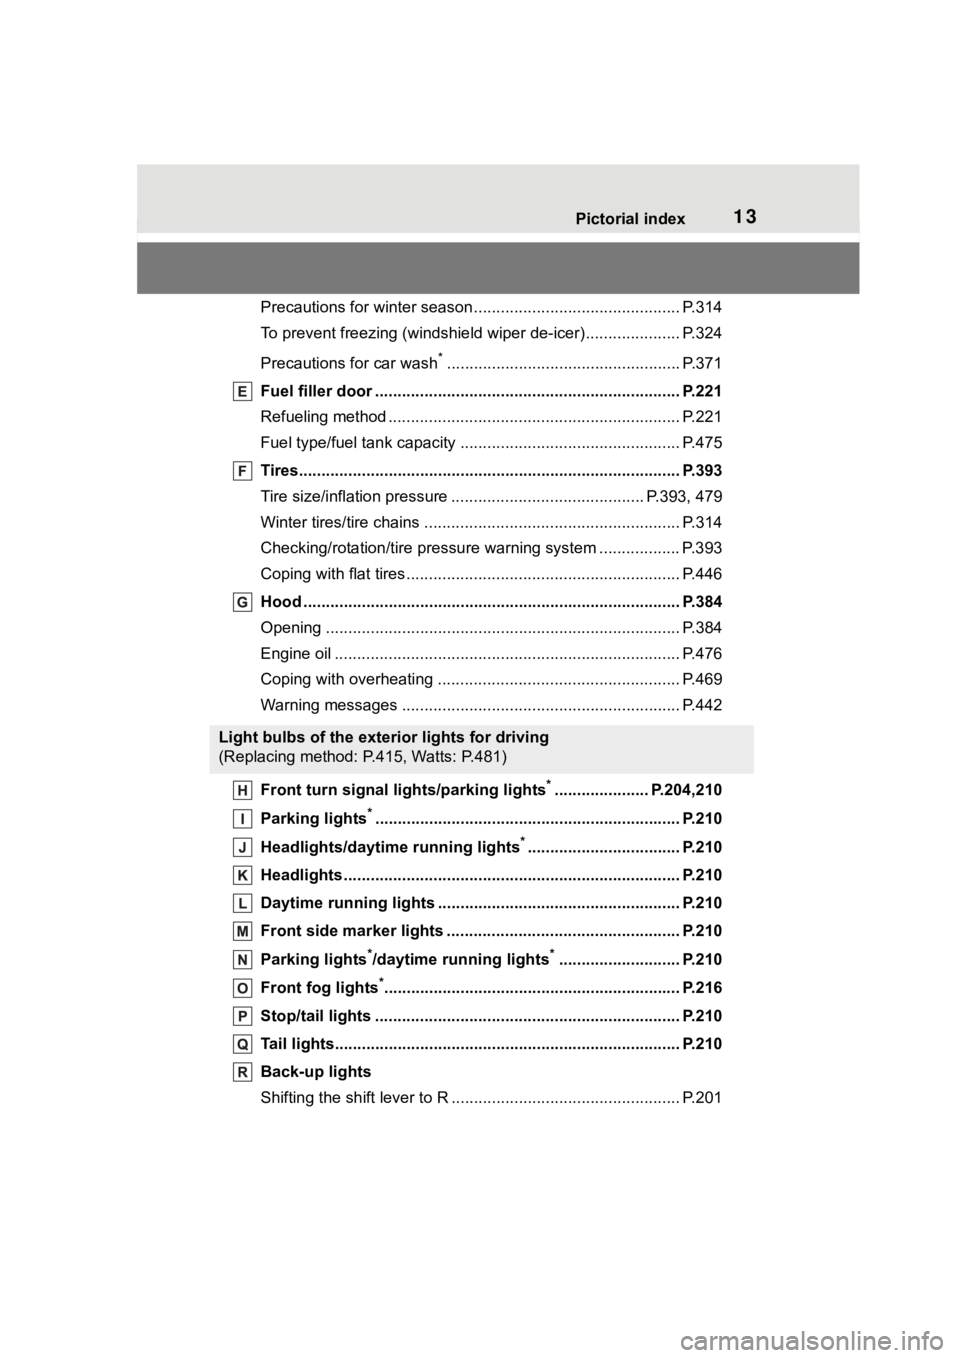
Precautions for winter season.............................................. P.314
To prevent freezing (windshiel d wiper de-icer) ..................... P.324
Precautions for car wash
*.................................................... P.371
Fuel filler door ............................................... ..................... P.221
Refueling method ............................................... .................. P.221
Fuel type/fuel tan k capacity ................................... .............. P.475
Tires.......................................................... ........................... P.393
Tire size/inflation pressure ................................... ........ P.393, 479
Winter tires/tire chains ....................................... .................. P.314
Checking/rotation/tire pressur e warning system ..................P.393
Coping with flat tires......................................... .................... P.446
Hood ........................................................... ......................... P.384
Opening ............................................................................... P.384
Engine oil ..................................................... ........................ P.476
Coping with overheating ...................................................... P.469
Warning messages ............................................... ............... P.442
Front turn signal lights/parking lights
*..................... P.204,210
Parking lights
*............................................................... ..... P.210
Headlights/daytime running lights
*.................................. P.210
Headlights..................................................... ...................... P.210
Daytime running lights .. .................................................... P.210
Front side marker lights ....................................... ............. P.210
Parking lights
*/daytime running lights*........................... P.210
Front fog lights
*............................................................... ... P.216
Stop/tail lights ............................................... ..................... P.210
Tail lights.................................................... ......................... P.210
Back-up lights
Shifting the shift lever to R ................................................... P.201
Light bulbs of the exterior lights for driving
(Replacing method: P.415, Watts: P.481)
Page 75 of 552

752-1. Instrument cluster
2
Vehicle status information and indicators
12.3-inch display
The units used on the meters and some indicators may differ
depending on the target region.
Warning lights inform the driver
of malfunctions in the indicated
vehicle’s systems.
Warning lights
(U.S.A.)
Brake system warning
light
*1 ( P.431)
(red)
(Canada)
Brake system warning
light
*1 ( P.431)
(yellow)
Brake system warning
light
*1 ( P.431)
High coolant temperature
warning light
*2 ( P.431)
Charging system warning
light
*3 ( P.432)
Low engine oil pressure
warning light
*2 ( P.432)
(U.S.A.)
Malfunction indicator
lamp
*1 ( P.432)
(Canada)
Malfunction indicator
lamp
*1 ( P.432)
SRS warning light
*1
( P.432)
(U.S.A.)
ABS warning light*1
( P.433)
(Canada)
ABS warning light*1
( P.433)
Inappropriate pedal opera-
tion warning light
*2
( P.433)
(red/yel-
low)
Electric power steering
system warning light
( P.433)
Low fuel leve l warning
light
*1( P.434)
Driver’s and front passen-
ger’s seat belt reminder
light ( P.434)
Page 94 of 552

942-1. Instrument cluster
(Stop & Start) (if
equipped) ( P.264)
Select to set the length of time the
Stop & Start system will operate
when the “A/C” switch of the air
conditioning system is on.
“TPWS” (Tire Pressure Warn-
ing System) ( P.396)
• “Set Pressure” (tire pressure
warning system initialization)
Select to initialize the tire pressure
warning system.
• “Change Wheel” (register tire pressure warning system sensor
ID codes)
Select to register the ID codes of
the tire pressure s ensors to the tire
pressure warning system.
“Rear Seat Reminder”
( P. 1 1 7 )
Select to enable/disable the rear
seat reminder.
“Scheduled Maintenance”
( P.377)
Select to reset the scheduled main-
tenance information (maintenance
required message and distance
until maintenance necessary) after
all maintenance is performed.
“Oil Maintenance” ( P.386)
Select to reset the oil maintenance
information (maintenance required
message and distance until mainte-
nance necessary) after an oil
change is performed.
■ Meter settings
Press and hold to change
the settings of the following
items:
Language
Select to change the language dis-
played.
Units
Select to change the units of mea-
sure displayed.
Eco Driving Indicator Light
( P.89)
Select to enable/disable the Eco
Driving Indi cator Light.
Speedometer display (digital
speed)
Select to enable/disable the speed-
ometer display.
Gadget content
Select to turn the display of a gad-
get.
Fuel economy type
Select to change the average fuel
consumption display and an item to
be displayed as gadget.
Pop-up display
Select to enable/disable pop-up
displays for each relevant system.
Multi-information display off
Displays a blank screen.
Default setting
Select to reset the meter display
settings to the default setting.
Page 99 of 552
992-1. Instrument cluster
2
Vehicle status information and indicators
Drive information
Drive information of Trip A/B
Tire Pressure ( P.396)
AWD Control (if equipped)
Changing items to be displayed
on the side multi-information
displays. ( P. 9 9 )
■Changing contents in a
page
P. 9 7
■Changing contents to be
displayed on the side
multi-information displays
1 Press the or meter
control switch to select a
page.
2 To enable page edit, press
and hold the meter con-
trol switch.
3 Press the or meter
control switch to select the
desired side multi-information
display to be changed.
4 Press the or meter
control switch for the side
that is displayed to move
to a content list screen that
enables to select display/not
display each items.
5 Press or control
switch to select a content and
select to set for dis-
play/not display the item.
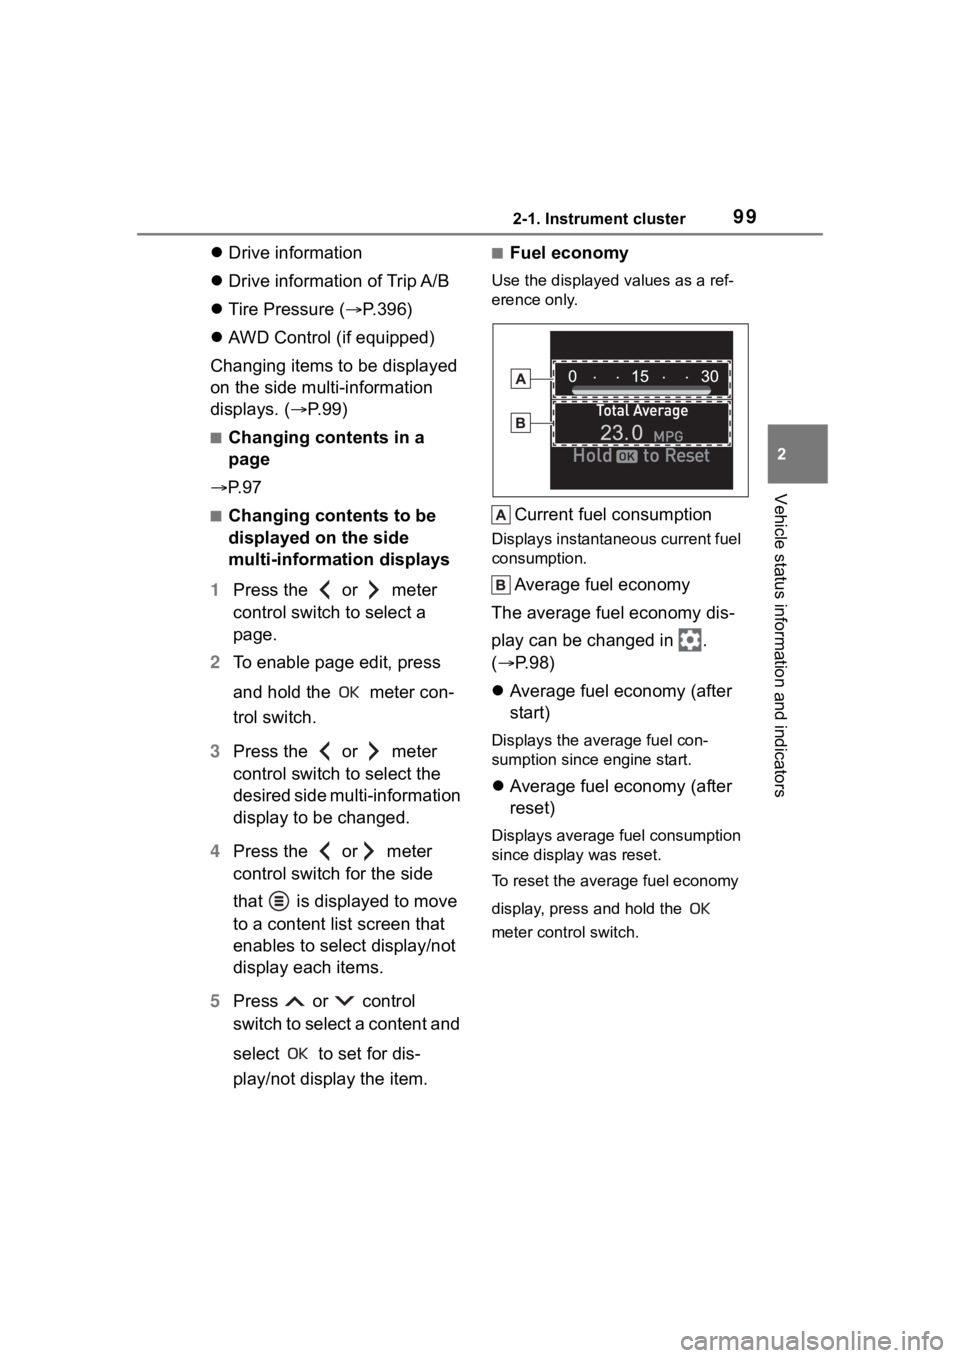
■Fuel economy
Use the displayed values as a ref-
erence only.
Current fuel consumption
Displays instantaneous current fuel
consumption.
Average fuel economy
The average fuel economy dis-
play can be changed in .
( P.98)
Average fuel economy (after
start)
Displays the average fuel con-
sumption since engine start.
Average fuel economy (after
reset)
Displays average fuel consumption
since display was reset.
To reset the average fuel economy
display, press and hold the
meter control switch.
Page 380 of 552
3806-2. Maintenance
The OBD system determines
that a problem exists some-
where in the emission control
system. Your vehicle may not
pass the I/M test and may need
to be repaired. Contact your
Toyota dealer to service the
vehicle.
When the battery is discon-
nected or discharged
Readiness codes that are set
during ordinary driving are erased.
Also, depending on your driving
habits, the readiness codes may
not be completely set.
When the fuel tank cap is
loose
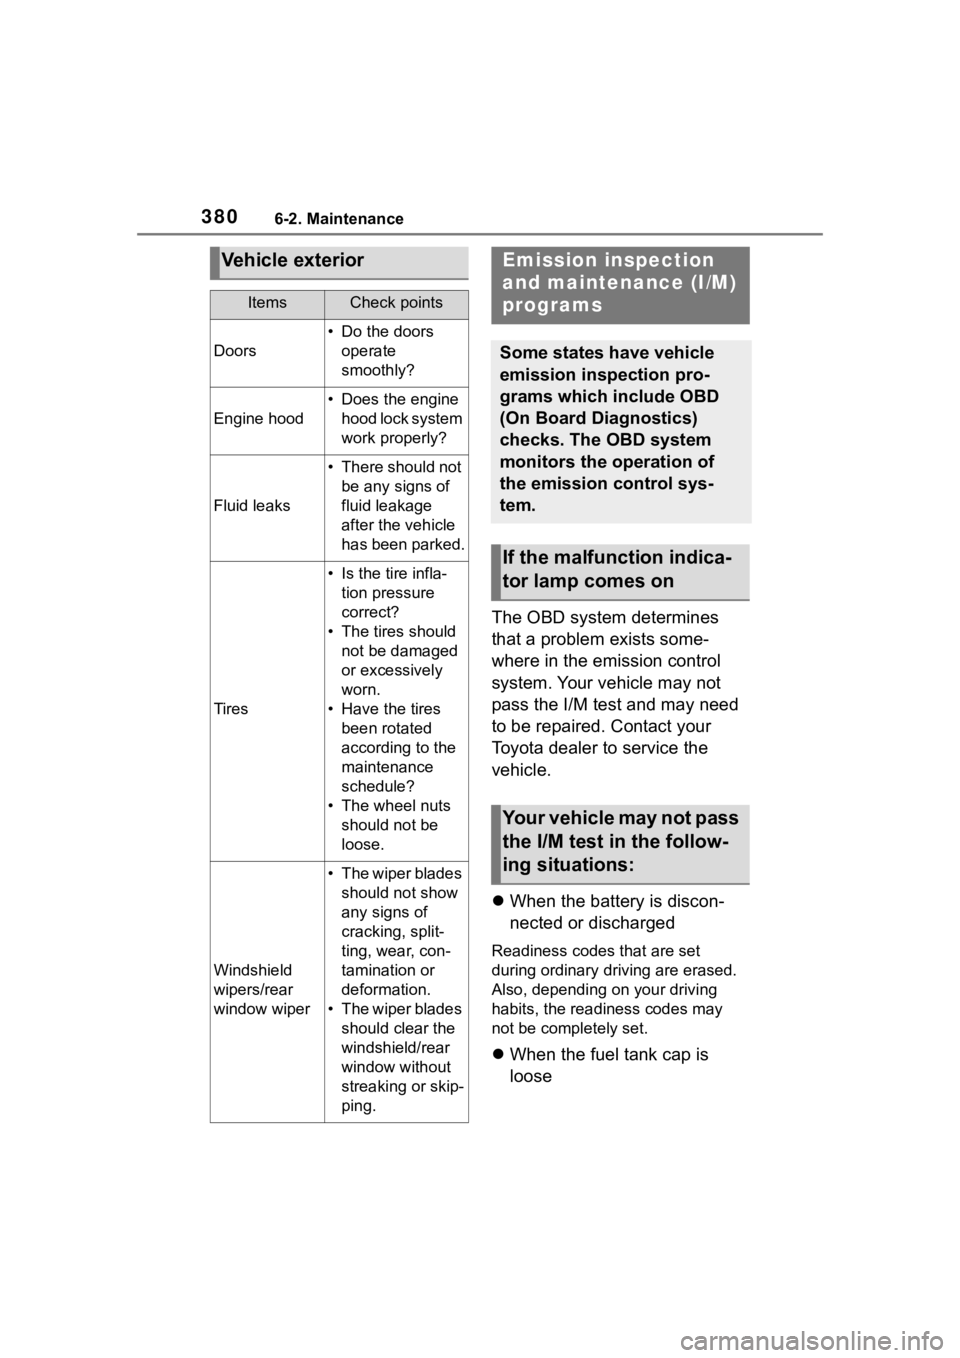
Vehicle exterior
ItemsCheck points
Doors
• Do the doors
operate
smoothly?
Engine hood
• Does the engine hood lock system
work properly?
Fluid leaks
• There should not be any signs of
fluid leakage
after the vehicle
has been parked.
Tires
• Is the tire infla-tion pressure
correct?
• The tires should not be damaged
or excessively
worn.
• Have the tires been rotated
according to the
maintenance
schedule?
• The wheel nuts should not be
loose.
Windshield
wipers/rear
window wiper
• The wiper blades should not show
any signs of
cracking, split-
ting, wear, con-
tamination or
deformation.
• The wiper blades should clear the
windshield/rear
window without
streaking or skip-
ping.
Emission inspection
and maintenance (I/M)
programs
Some states have vehicle
emission inspection pro-
grams which include OBD
(On Board Diagnostics)
checks. The OBD system
monitors the operation of
the emission control sys-
tem.
If the malfunction indica-
tor lamp comes on
Your vehicle may not pass
the I/M test in the follow-
ing situations:
Page 383 of 552
3836-3. Do-it-yourself maintenance
6
Maintenance and care
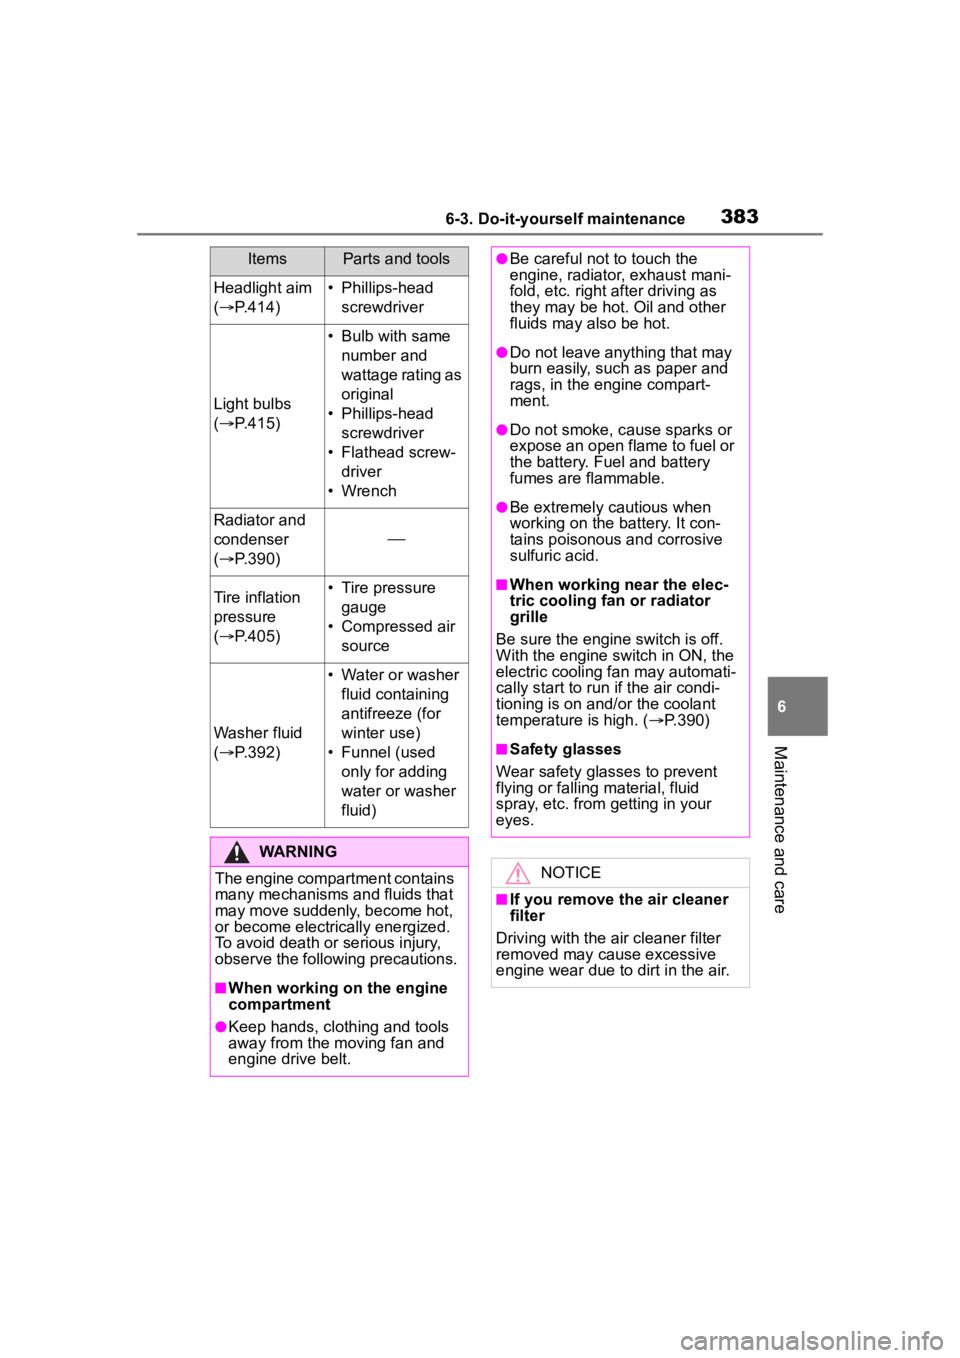
Headlight aim
( P.414)• Phillips-head
screwdriver
Light bulbs
( P.415)
• Bulb with same
number and
wattage rating as
original
• Phillips-head screwdriver
• Flathead screw- driver
• Wrench
Radiator and
condenser
( P.390)
Tire inflation
pressure
( P.405)• Tire pressure
gauge
• Compressed air source
Washer fluid
( P.392)
• Water or washer
fluid containing
antifreeze (for
winter use)
• Funnel (used only for adding
water or washer
fluid)
WARNING
The engine compartment contains
many mechanisms and fluids that
may move suddenly, become hot,
or become electrically energized.
To avoid death or serious injury,
observe the following precautions.
■When working on the engine
compartment
●Keep hands, clothing and tools
away from the moving fan and
engine drive belt.
ItemsParts and tools●Be careful not to touch the
engine, radiator, exhaust mani-
fold, etc. right a fter driving as
they may be hot. Oil and other
fluids may also be hot.
●Do not leave anything that may
burn easily, such as paper and
rags, in the engine compart-
ment.
●Do not smoke, cause sparks or
expose an open flame to fuel or
the battery. Fuel and battery
fumes are flammable.
●Be extremely cautious when
working on the battery. It con-
tains poisonous and corrosive
sulfuric acid.
■When working near the elec-
tric cooling fan or radiator
grille
Be sure the engine switch is off.
With the engine switch in ON, the
electric cooling fa n may automati-
cally start to run if the air condi-
tioning is on and/or the coolant
temperature is high. ( P.390)
■Safety glasses
Wear safety glasses to prevent
flying or falling material, fluid
spray, etc. from getting in your
eyes.
NOTICE
■If you remove the air cleaner
filter
Driving with the air cleaner filter
removed may cause excessive
engine wear due to dirt in the air.
Page 405 of 552
4056-3. Do-it-yourself maintenance
6
Maintenance and care
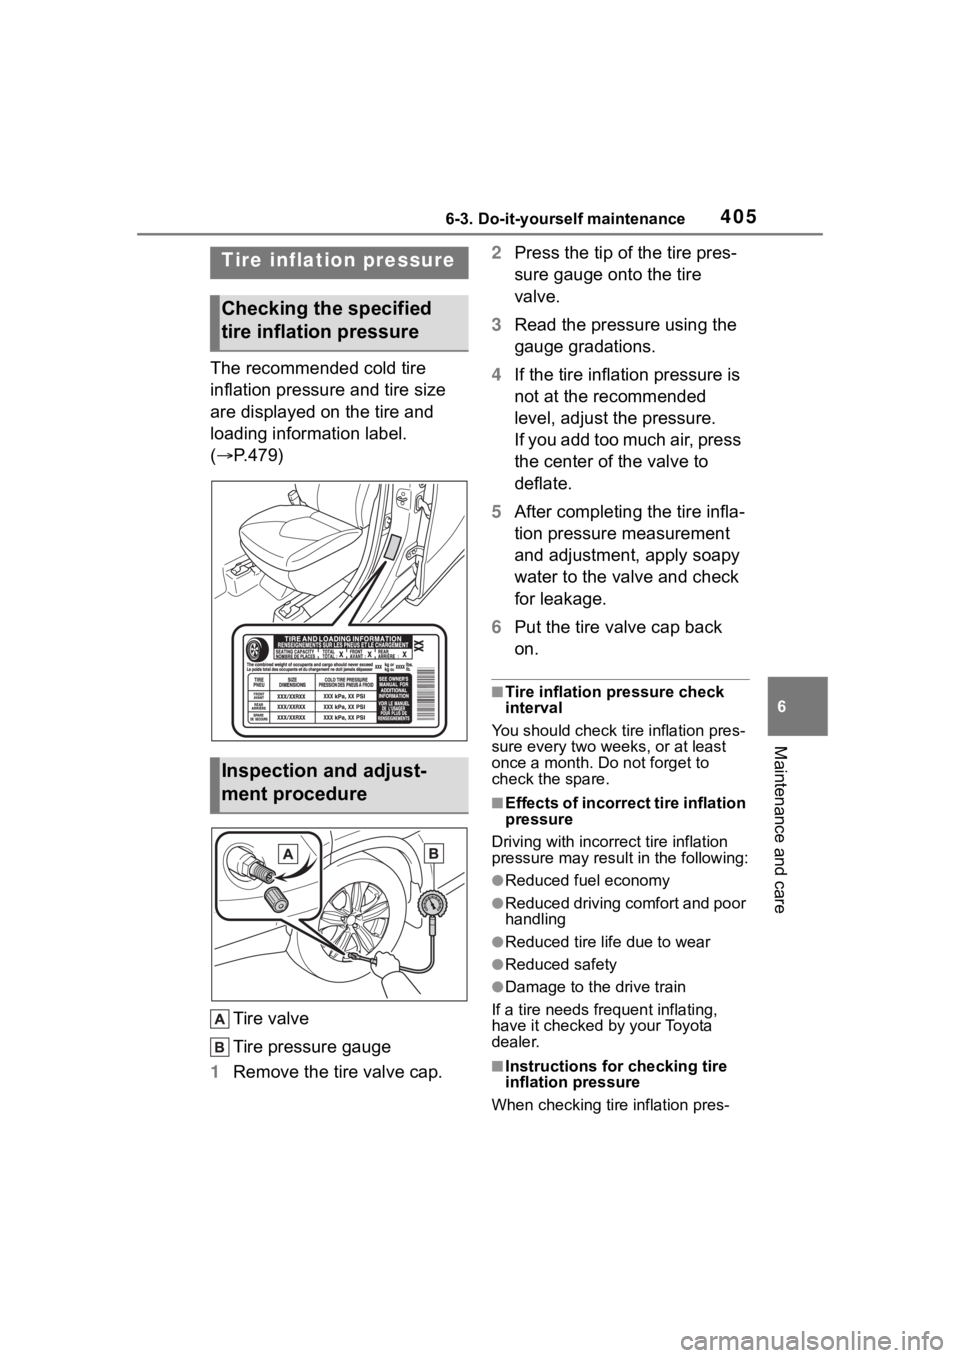
The recommended cold tire
inflation pressure and tire size
are displayed on the tire and
loading information label.
(P.479)
Tire valve
Tire pressure gauge
1 Remove the tire valve cap. 2
Press the tip of the tire pres-
sure gauge onto the tire
valve.
3 Read the pressure using the
gauge gradations.
4 If the tire inflation pressure is
not at the recommended
level, adjust the pressure.
If you add too much air, press
the center of the valve to
deflate.
5 After completing the tire infla-
tion pressure measurement
and adjustment, apply soapy
water to the valve and check
for leakage.
6 Put the tire valve cap back
on.
■Tire inflation pressure check
interval
You should check ti re inflation pres-
sure every two week s, or at least
once a month. Do not forget to
check the spare.
■Effects of incorrect tire inflation
pressure
Driving with incorrec t tire inflation
pressure may resul t in the following:
●Reduced fuel economy
●Reduced driving comfort and poor
handling
●Reduced tire life due to wear
●Reduced safety
●Damage to the drive train
If a tire needs frequent inflating,
have it checked by your Toyota
dealer.
■Instructions for checking tire
inflation pressure
When checking tire inflation pres-
Tire inflation pressure
Checking the specified
tire inflation pressure
Inspection and adjust-
ment procedure
Page 439 of 552
4397-2. Steps to take in an emergency
7
When trouble arises
ger detection sensor may cause
the warning light to flash and the
warning buzzer to sound even if a
passenger is not sitting in the
seat.
●If a cushion is placed on the seat,
the sensor may not detect a pas-
senger, and the warning light may
not operate properly.
■SRS warning light
This warning light system monitors
the airbag sensor assembly, front
impact sensors, side impact sensors
(front), side impact sensors (front
door), side impact sensors (rear),
driver’s seat position sensor,
driver’s seat belt buckle switch, front
passenger occupant classification
system (ECU and sensors), “PASS
AIR BAG ON” indicator light, “PASS
AIR BAG OFF” indicator light, front
passenger’s seat belt buckle switch,
driver’s seat belt pretensioner, front
passenger’s seat be lt pretensioner
and force limiter, airbags, intercon-
necting wiring and power sources.
( P.34)
■If the malfunction indicator
lamp comes on while driving
First check the following:
●Is the fuel t ank empty?
If it is, fill the f uel tank immediately.
●Is the fuel tank cap loose?
If it is, tighten it securely.
The light will go o ff after several
driving trips.
If the light does not go off even after
several trips, contact your Toyota
dealer as soon as possible.
■Electric power steering system
warning light (warning buzzer)
When the battery charge becomes
insufficient or the voltage temporar-
ily drops, the electric power steering
system warning light may come on
and the warning buzzer may sound.
■When the tire pressure warning
light comes on
Inspect the tires to check if a tire is
punctured.
If a tire is punctured: P. 4 4 6
If none of the tires are punctured:
Turn the engine switch off then turn
it to ON. Check if the tire pressure
warning light com es on or blinks.
If the tire pressure warning light
blinks for 1 minute then stays on
There may be a malfunction in the
tire pressure warning system. Have
the vehicle inspected by your Toyota
dealer immediately.
If the tire pressur e warning light
comes on
1 After the temperature of the tires
has lowered sufficiently, check
the inflation pressure of each tire
and adjust them to the specified
level.
2 If the warning light does not turn
off even after several minutes
have elapsed, check that the
inflation pressure of each tire is
at the specified level and perform
initialization. ( P.399)
If the warning light d oes not turn off
several minutes af ter the initializa-
tion has been performed, have the
vehicle inspected by your Toyota
dealer immediately.
■The tire pressure warning light
may come on due to natural
causes
The tire pressure warning light may
come on due to natural causes such
as natural air leaks and tire inflation
pressure changes caused by tem-
perature. In this ca se, adjusting the
tire inflation pressure will turn off the
warning ligh t (after a few minutes).
■When a tire is replaced with a
spare tire
Vehicles with a co mpact spare tire:
The compact spare tire is not
equipped with a tire pressure warn-
ing valve and tran smitter. If a tire