TOYOTA HIGHLANDER HYBRID 2009 XU40 / 2.G Owners Manual
Manufacturer: TOYOTA, Model Year: 2009, Model line: HIGHLANDER HYBRID, Model: TOYOTA HIGHLANDER HYBRID 2009 XU40 / 2.GPages: 592, PDF Size: 11.8 MB
Page 361 of 592
361
3-4. Using the hand
s-free phone system (for cellular phone)
3
Interior features
Initialization
Select “Initialize” and then “Confirm” by using .
Select “Confirm” by using again.
■Initialization
●The following data in the system can be initialized:
• Phone book
• Outgoing and incoming history
• Speed dial
• Registered cellular phone data
• Security code
● Once the initialization has been completed, the data cannot be restored
to its original state.
■ When the phone book is locked
The following functions cannot be used:
●Dialing by inputting a name
● Speed dialing
● Dialing a number stored in the call history memory
● Using the phone book
STEP1
STEP2
Page 362 of 592
362
3-4. Using the hands-free phone system (for cellular phone)
Using the phone book
Adding a new phone numberThe following methods can be used to add a new phone number:
● Inputting a phone number by using a voice command
● Transferring data from the cellular phone
● Inputting a phone number by using
● Selecting a phone number from outgoing or incoming history
■ Adding procedure
Select “Add Entry” by using a voice command or .
To enter the menu of each setting, follow the steps below:●Adding a new phone number
1. “Phonebook” → 2. “Add Entry”
● Setting speed dial
1. “Phonebook” → 2. “Set Speed Dial (Speed Dial)”
● Changing a registered name
1. “Phonebook” → 2. “Change Name”
● Deleting registered data
1. “Phonebook” → 2. “Delete Entry”
● Deleting speed dial
1. “Phonebook” → 2. “Delete Speed Dial (Del Spd Dial)”
● Listing the registered data
1. “Phonebook” → 2. “List Names”
STEP1
Page 363 of 592
363
3-4. Using the hand
s-free phone system (for cellular phone)
3
Interior features
Use one of the following methods to input a telephone num-
ber:
Inputting a telephone number by using a voice command
STEP2-1 Select “By Voice” by using a voice command or
.
STEP2-2 Press , say the desired number, and select “Confirm” by using a voice command.
Transferring data from the cellular phone STEP2-1 Select “By Phone” and then “Confirm” by using a
voice command or .
STEP2-2 Transfer the data from the cellular phone.
Refer to the manual that comes with the cellular phone for
the details of transferring data.
STEP2-3 Select the data to be registered by either of the fol- lowing methods:
a. Say “Previous” or “Next” until the desired data isdisplayed, and select “Confirm” by using a voice
command.
b. Select the desired data by using .
STEP2
Page 364 of 592
364 3-4. Using the hands-free phone system (for cellular phone)
Inputting a phone number by using
STEP2-1 Select “Manual Input” by using .
STEP2-2 Input a phone number by using , and press once again.
Input the phone number 1 digit at a time.
Selecting a phone number from outgoing or incoming historySTEP2-1 Select “Call History” by using a voice command or
.
STEP2-2 Select “Outgoing” or “Incoming” by using a voice
command or .
STEP2-3 Select the data to be regi stered by either of the fol-
lowing methods:
a. Say “Previous” or “Go back” until the desired data is displayed, and select “Confirm” by using
a voice command.
b. Select the desired data by using .
Page 365 of 592
365
3-4. Using the hand
s-free phone system (for cellular phone)
3
Interior features
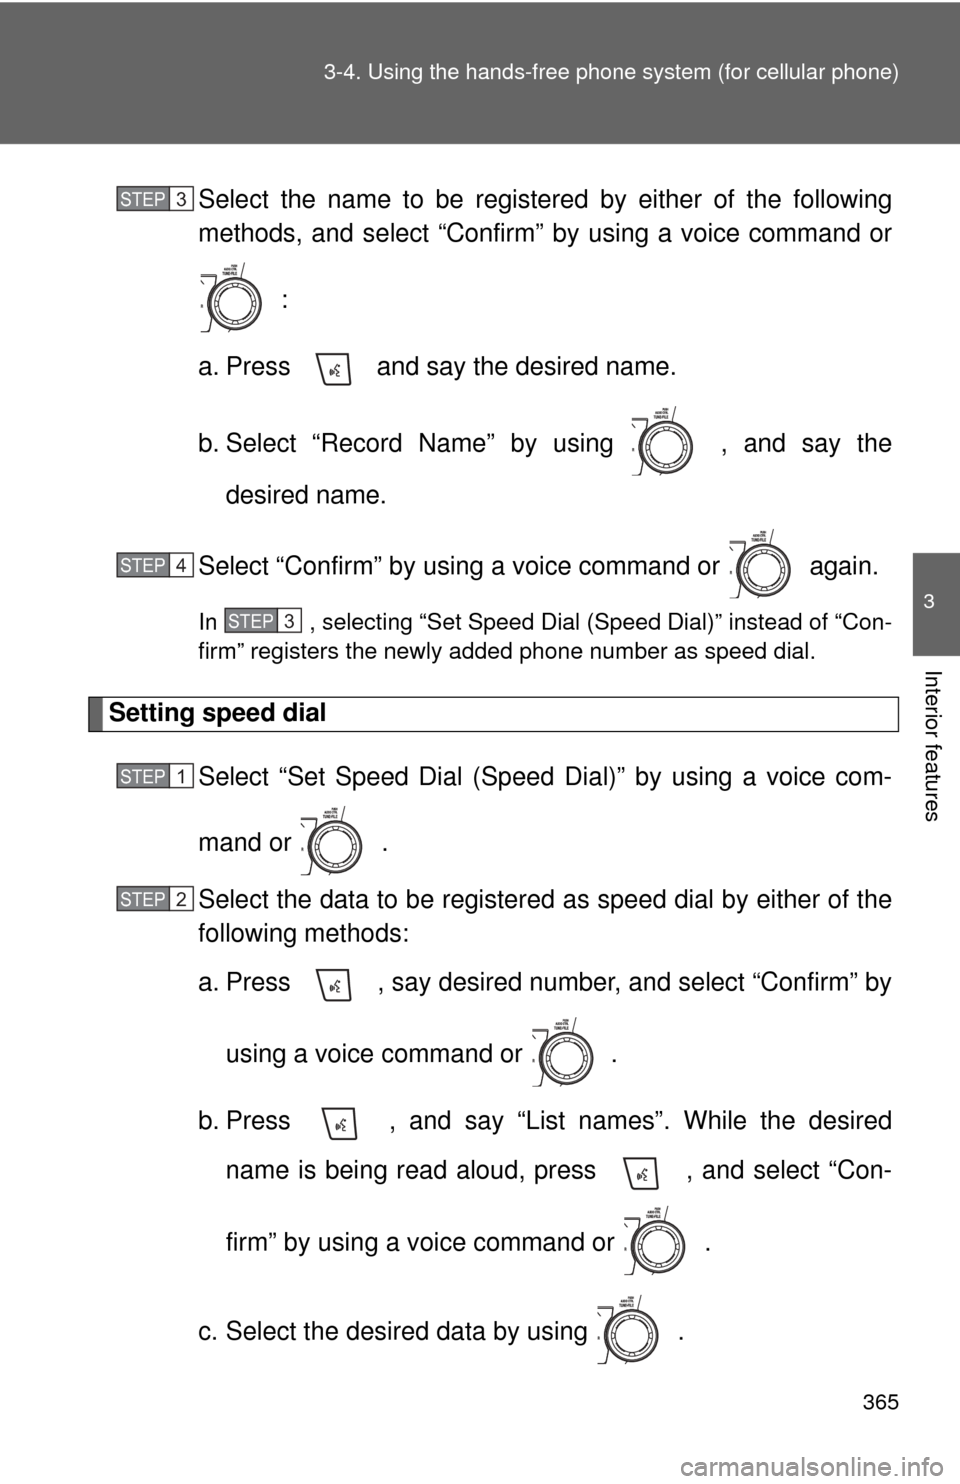
Select the name to be registered by either of the following
methods, and select “Confirm” by using a voice command or
:
a. Press and say the desired name.
b. Select “Record Name” by using , and say the desired name.
Select “Confirm” by using a voice command or again.
In , selecting “Set Speed Dial (Speed Dial)” instead of “Con-
firm” registers the newly added phone number as speed dial.
Setting speed dial Select “Set Speed Dial (Speed Dial)” by using a voice com-
mand or .
Select the data to be registered as speed dial by either of the
following methods:
a. Press , say desired number, and select “Confirm” by
using a voice command or
.
b. Press , and say “List names”. While the desired name is being read aloud, press , and select “Con-
firm” by using a voice command or .
c. Select the desired data by using .
STEP3
STEP4
STEP3
STEP1
STEP2
Page 366 of 592
366 3-4. Using the hands-free phone system (for cellular phone)
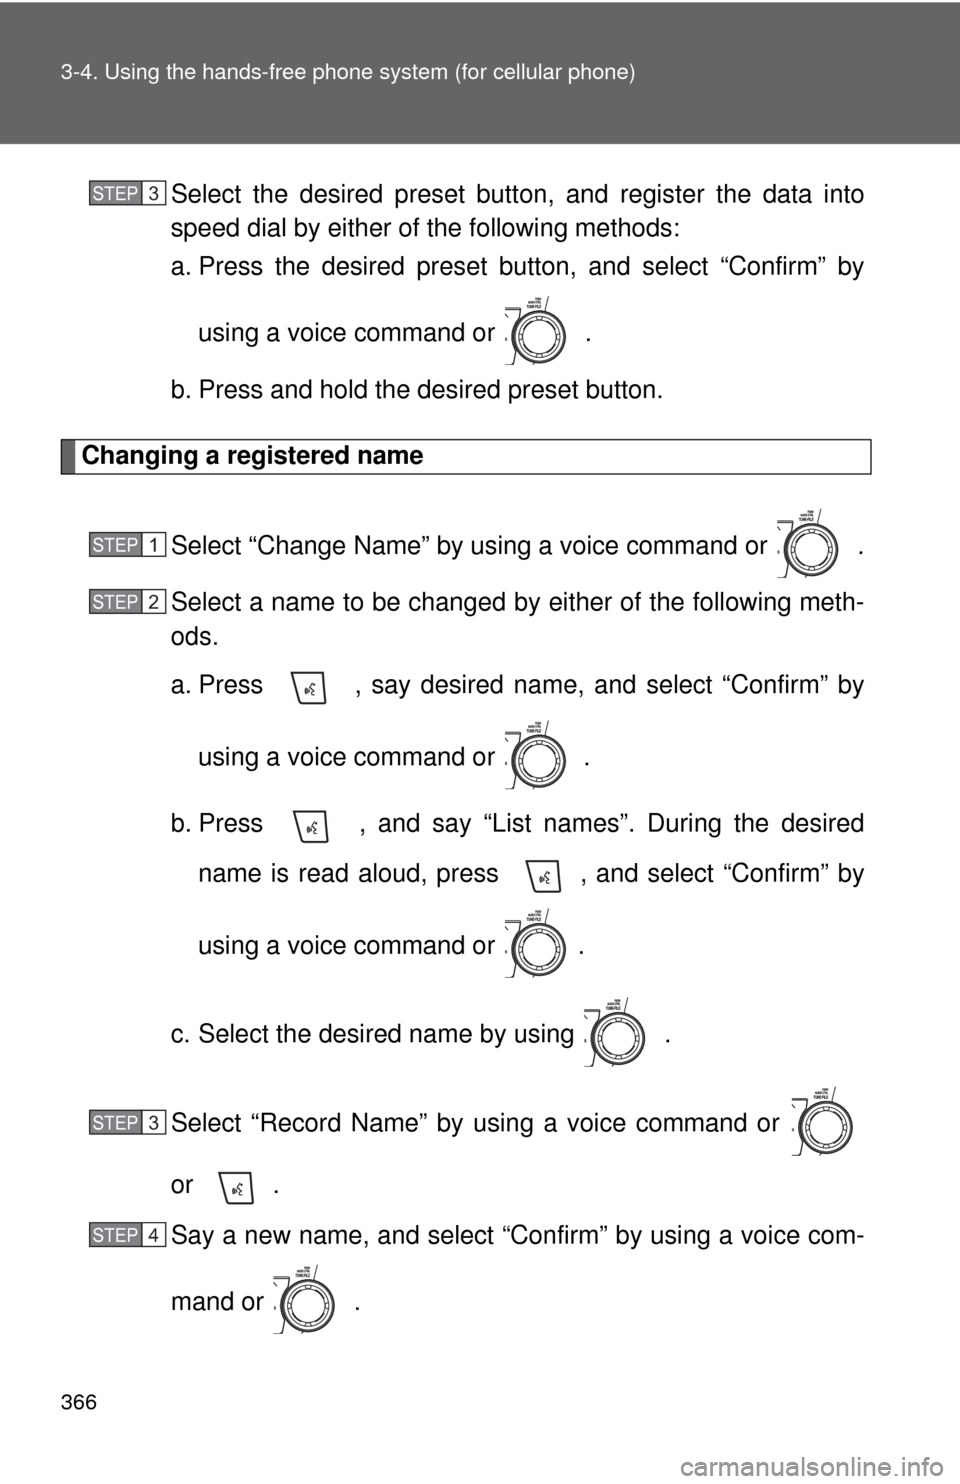
Select the desired preset button, and register the data into
speed dial by either of the following methods:
a. Press the desired preset button, and select “Confirm” by
using a voice command or .
b. Press and hold the desired preset button.
Changing a registered name
Select “Change Name” by using a voice command or .
Select a name to be changed by either of the following meth-
ods.
a. Press , say desired name, and select “Confirm” byusing a voice command or
.
b. Press , and say “List names”. During the desired name is read aloud, press , and select “Confirm” by
using a voice command or .
c. Select the desired name by using .
Select “Record Name” by using a voice command or
or .
Say a new name, and select “Con firm” by using a voice com-
mand or .
STEP3
STEP1
STEP2
STEP3
STEP4
Page 367 of 592
367
3-4. Using the hand
s-free phone system (for cellular phone)
3
Interior features
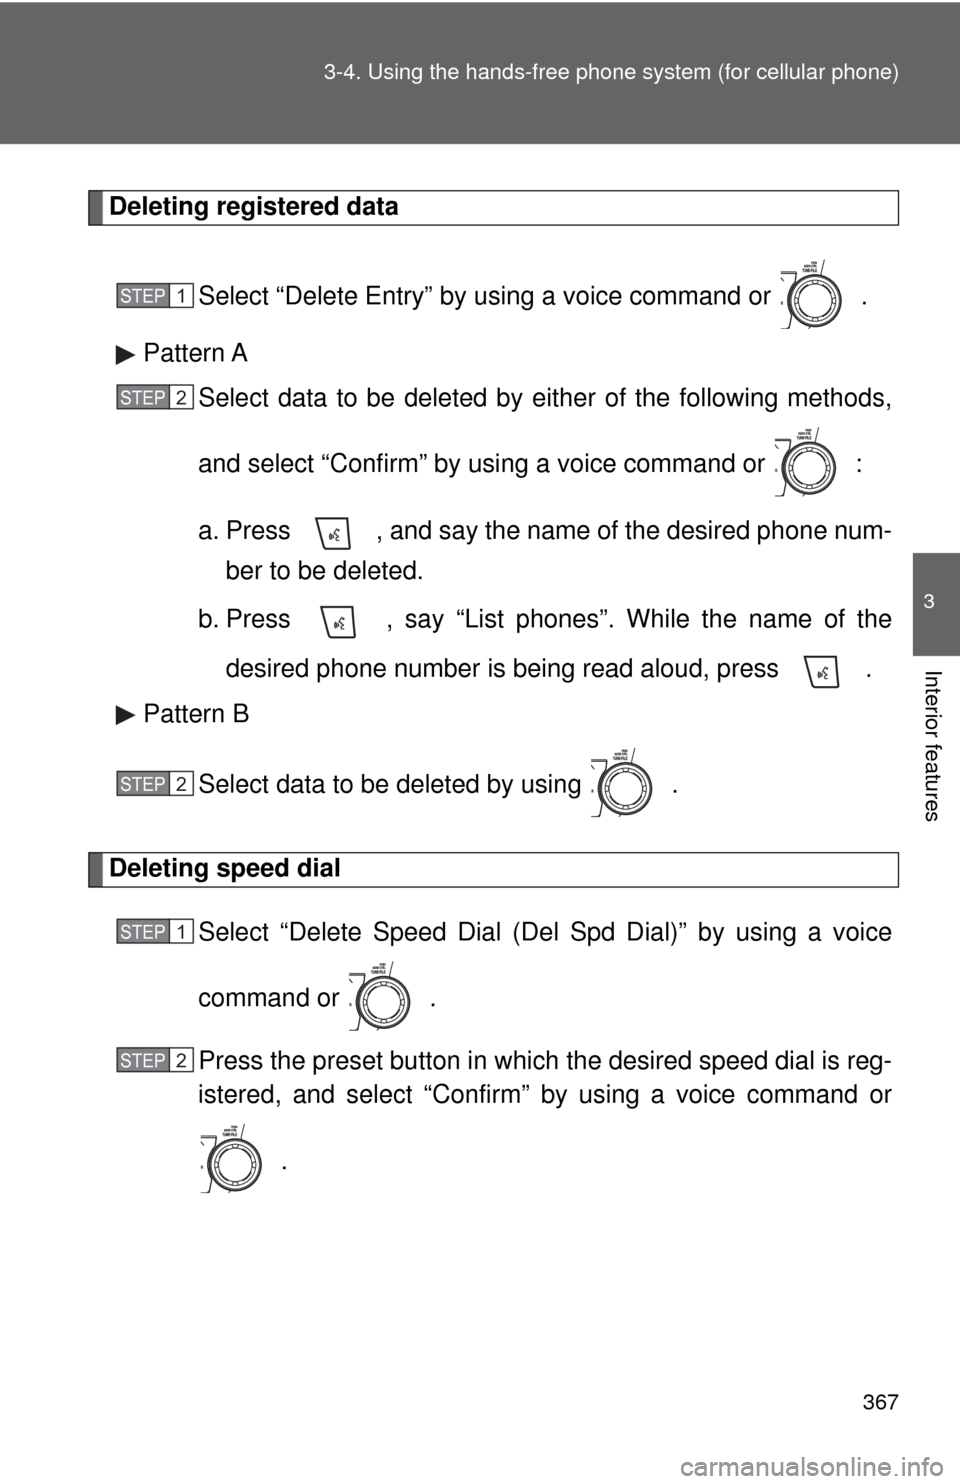
Deleting registered data
Select “Delete Entry” by using a voice command or .
Pattern A Select data to be deleted by either of the following methods,
and select “Confirm” by using a voice command or :
a. Press , and say the name of the desired phone num-ber to be deleted.
b. Press , say “List phones”. While the name of the
desired phone number is being read aloud, press .
Pattern B
Select data to be deleted by using .
Deleting speed dial Select “Delete Speed Dial (Del Spd Dial)” by using a voice
command or .
Press the preset button in which the desired speed dial is reg-
istered, and select “Confirm” by using a voice command or
.
STEP1
STEP2
STEP2
STEP1
STEP2
Page 368 of 592

368 3-4. Using the hands-free phone system (for cellular phone)
Listing the registered data
Selecting “List names” by using a voice command begins reading the
list of the registered data.
When listing is complete, the system returns to “Phonebook”.
Pressing while a data is being read aloud selects the data, and
the following function will be available.
• Dialing: “Dial”
• Changing a registered name: “Change Name”
• Deleting an entry: “Delete Entry”
• Setting speed dial: “Set Speed Dial (Speed Dial)”
■Limitation of number of digits
A phone number that exceeds 24 digits cannot be registered.
Page 369 of 592
369
3
Interior features
3-5. Using the interior lights
Interior lights list
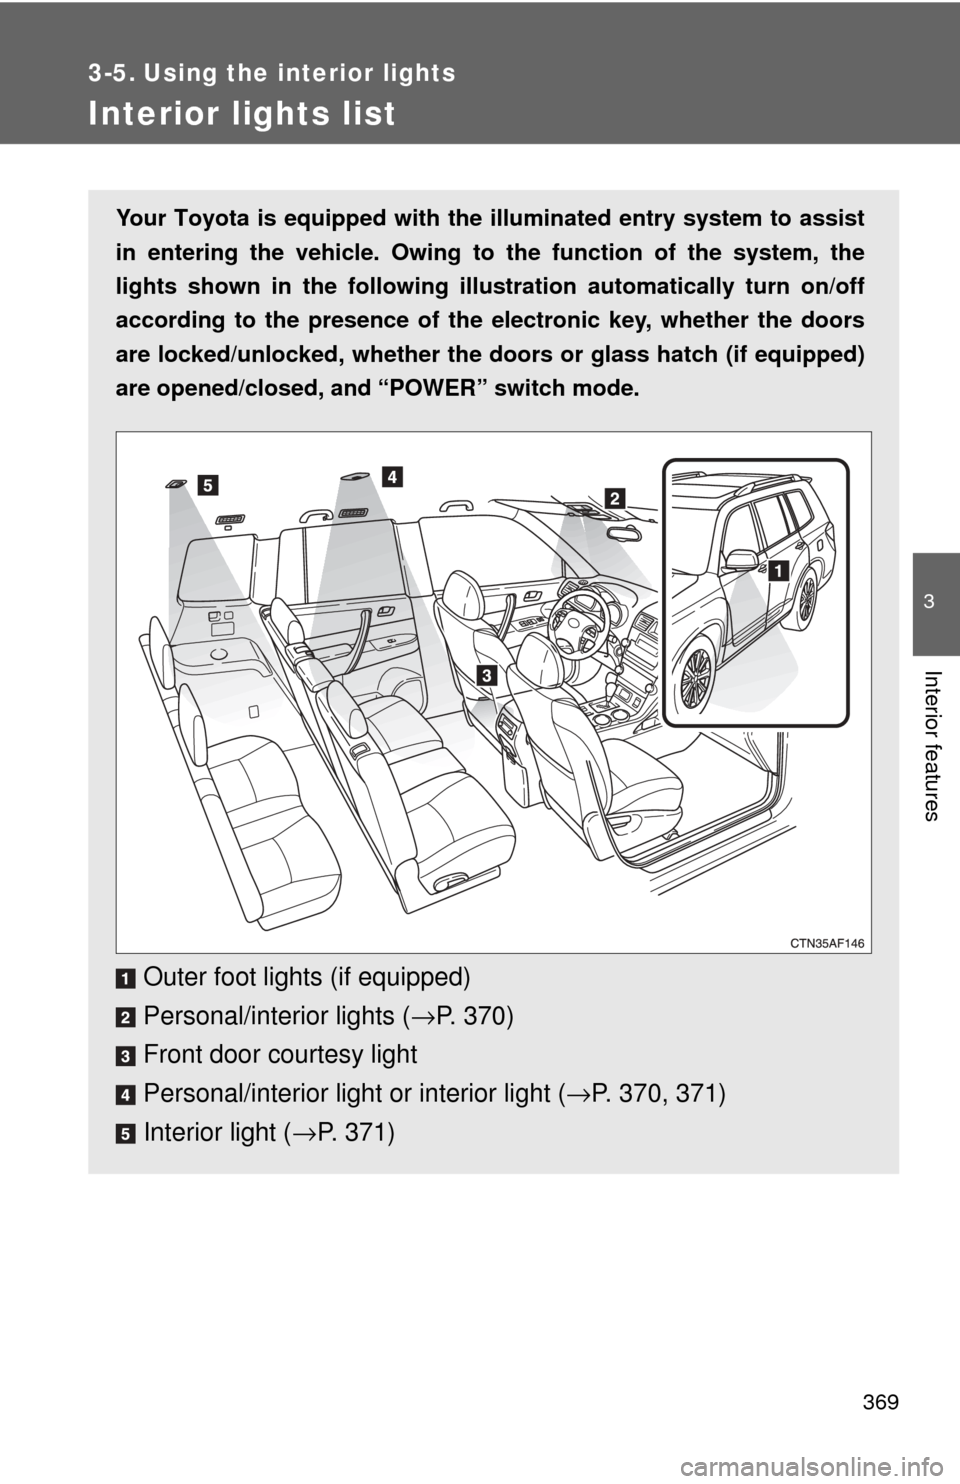
Your Toyota is equipped with the illuminated entry system to assist
in entering the vehicle. Owing to the function of the system, the
lights shown in the following illus tration automatically turn on/off
according to the presence of the el ectronic key, whether the doors
are locked/unlocked, whether the do ors or glass hatch (if equipped)
are opened/closed, and “POWER” switch mode.
Outer foot lights (if equipped)
Personal/interior lights ( →P. 370)
Front door courtesy light
Personal/interior light or interior light ( →P. 370, 371)
Interior light ( →P. 371)
Page 370 of 592
370 3-5. Using the interior lights
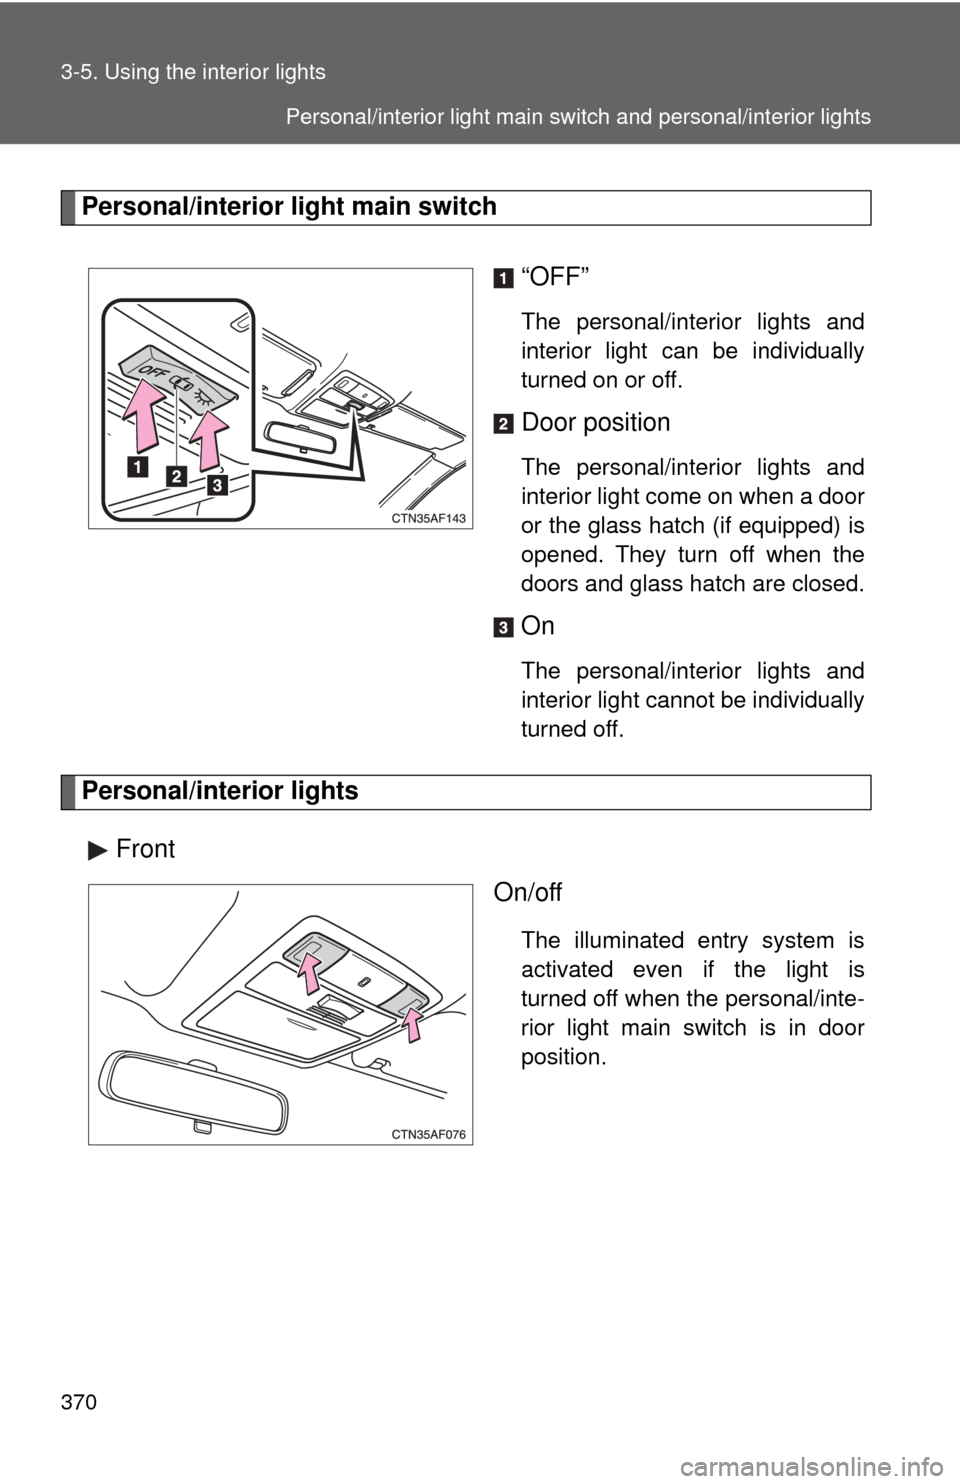
Personal/interior light main switch“OFF”
The personal/interior lights and
interior light can be individually
turned on or off.
Door position
The personal/interior lights and
interior light come on when a door
or the glass hatch (if equipped) is
opened. They turn off when the
doors and glass hatch are closed.
On
The personal/interior lights and
interior light cannot be individually
turned off.
Personal/interior lightsFront On/off
The illuminated entry system is
activated even if the light is
turned off when the personal/inte-
rior light main switch is in door
position.
Personal/interior light main switch and personal/interior lights