display TOYOTA HIGHLANDER HYBRID 2010 XU40 / 2.G Workshop Manual
[x] Cancel search | Manufacturer: TOYOTA, Model Year: 2010, Model line: HIGHLANDER HYBRID, Model: TOYOTA HIGHLANDER HYBRID 2010 XU40 / 2.GPages: 592, PDF Size: 12 MB
Page 304 of 592
304
3-2. Using the audio system
Optimal use of the audio system
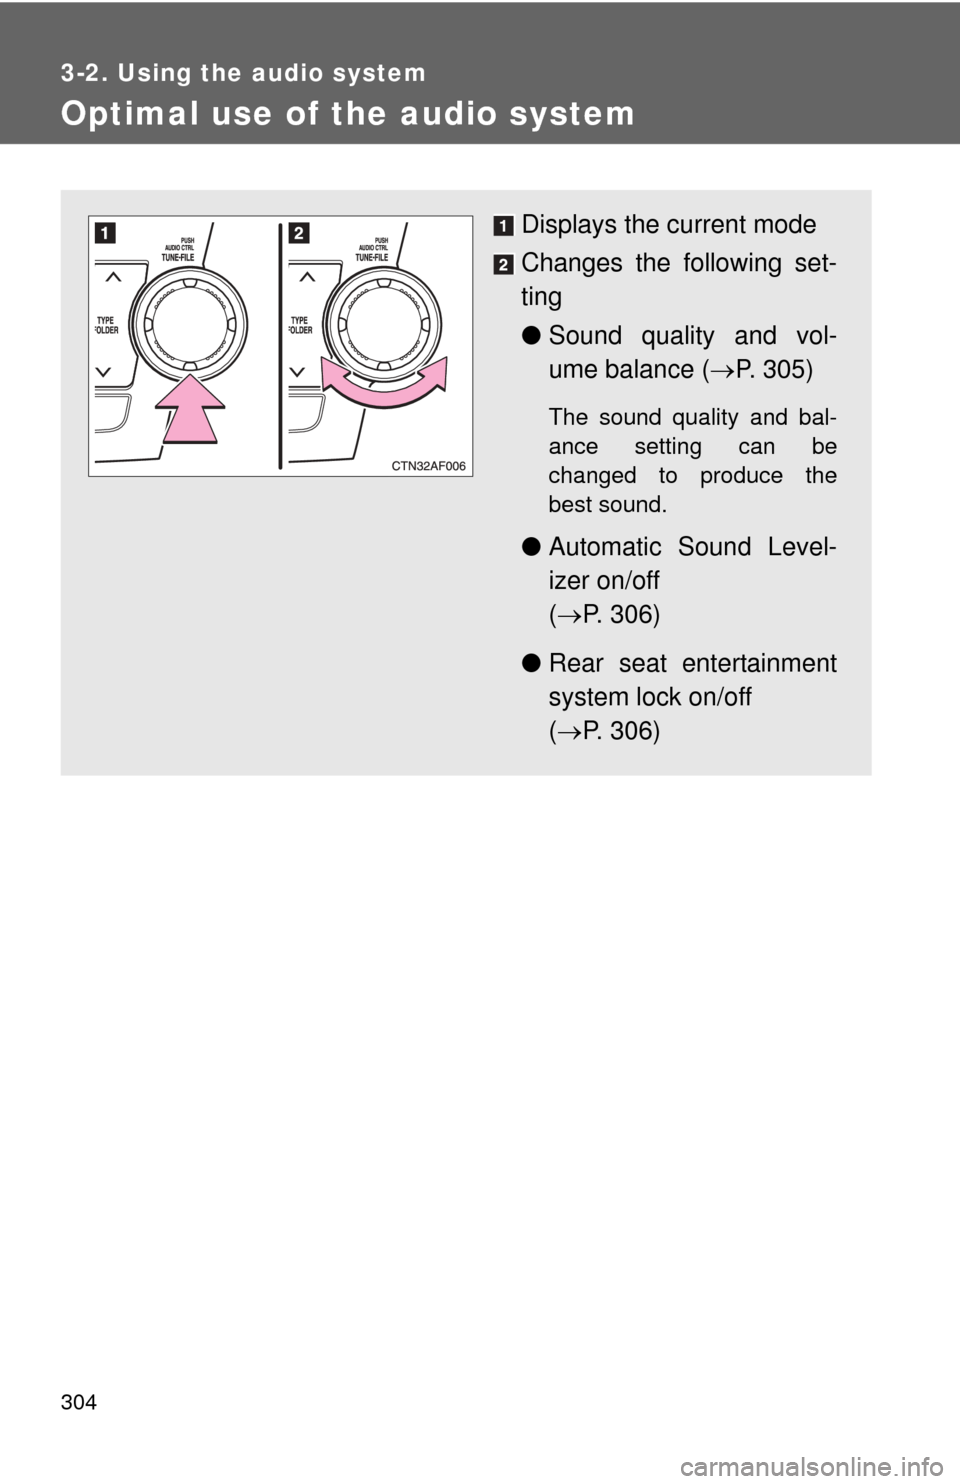
Displays the current mode
Changes the following set-
ting
●Sound quality and vol-
ume balance ( P. 305)
The sound quality and bal-
ance setting can be
changed to produce the
best sound.
● Automatic Sound Level-
izer on/off
( P. 306)
● Rear seat entertainment
system lock on/off
( P. 306)
Page 305 of 592
305
3-2. Using the audio system
3
Interior features
Using the audio control function
■ Changing sound quality modes
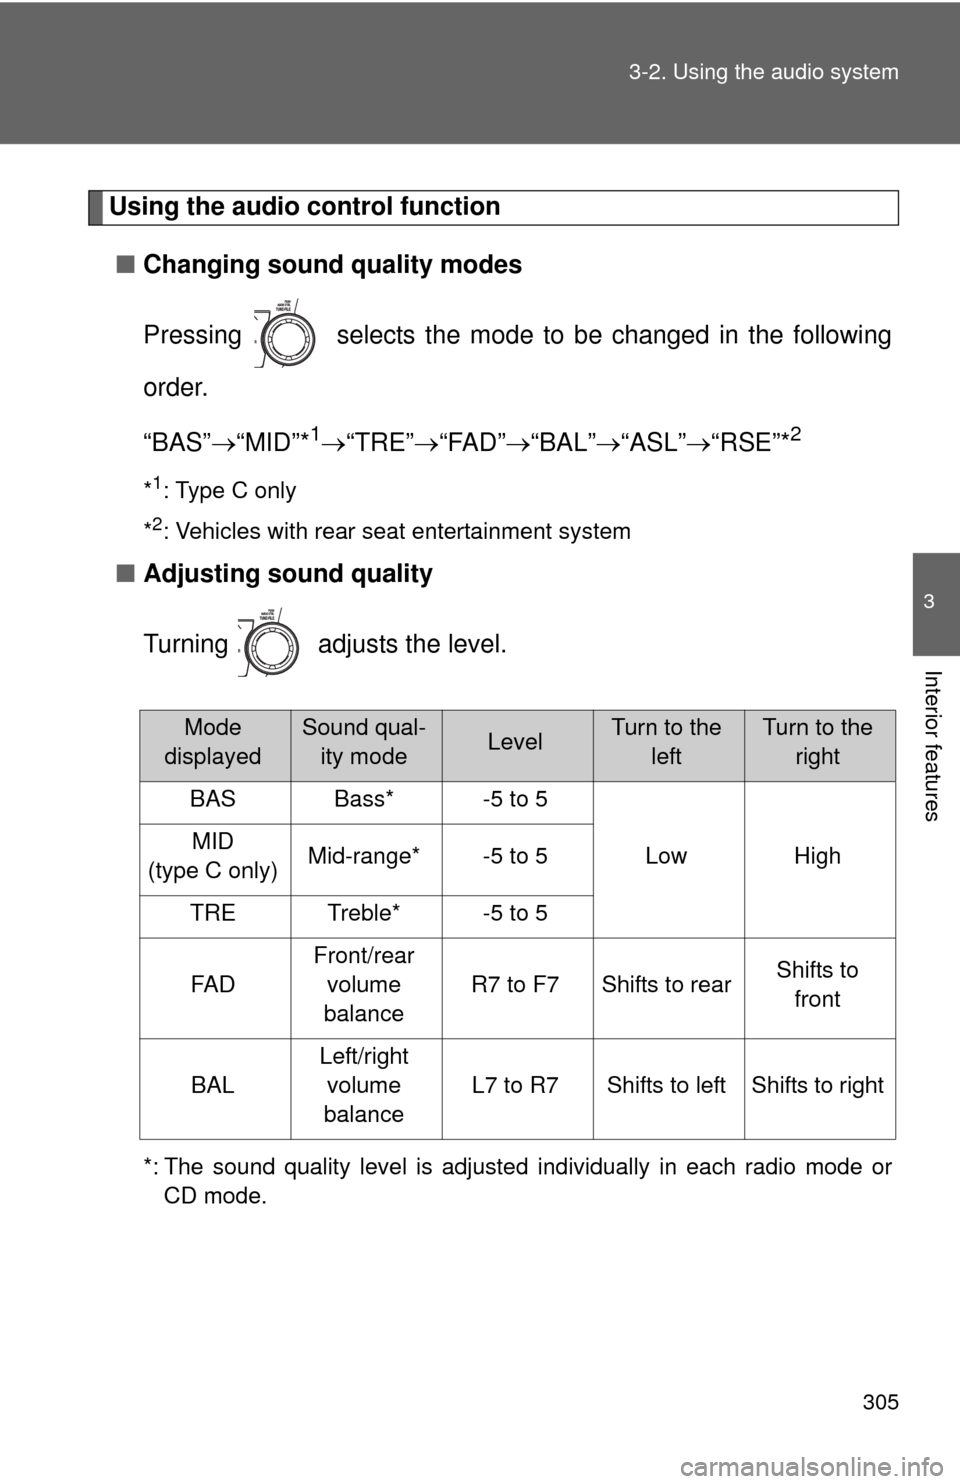
Pressing selects the mode to be changed in the following
order.
“BAS” “MID”*
1 “TRE” “FAD” “BAL” “ASL” “RSE”*2
*1: Type C only
*
2: Vehicles with rear seat entertainment system
■ Adjusting sound quality
Turning adjusts the level.
*: The sound quality level is adjusted individually in each radio mode or
CD mode.
Mode
displayedSound qual- ity modeLevelTurn to the leftTurn to the right
BASBass*-5 to 5
LowHighMID
(type C only)Mid-range*-5 to 5
TRETreble*-5 to 5
FA D
Front/rear volume
balance
R7 to F7Shifts to rearShifts to front
BAL
Left/right volume
balance
L7 to R7Shifts to leftShifts to right
Page 311 of 592
311
3
Interior features
3-3. Using the rear audio system
Rear seat enter tainment system features
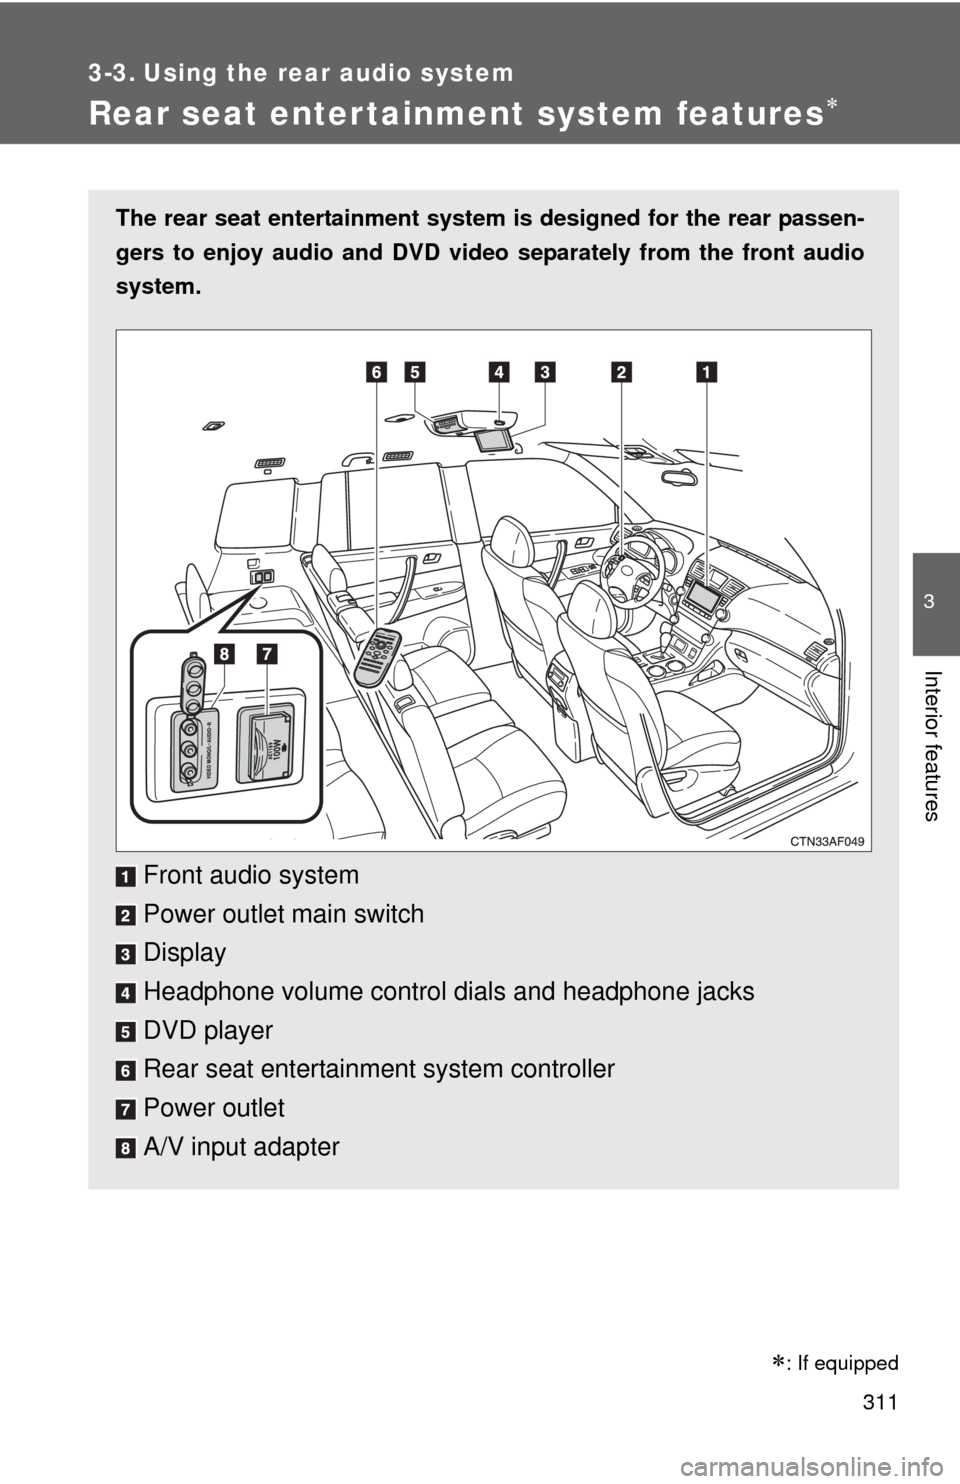
The rear seat entertainment system is designed for the rear passen-
gers to enjoy audio and DVD vide o separately from the front audio
system.
Front audio system
Power outlet main switch
Display
Headphone volume control dials and headphone jacks
DVD player
Rear seat entertainment system controller
Power outlet
A/V input adapter
�
: If equipped
Page 312 of 592
312 3-3. Using the rear audio system
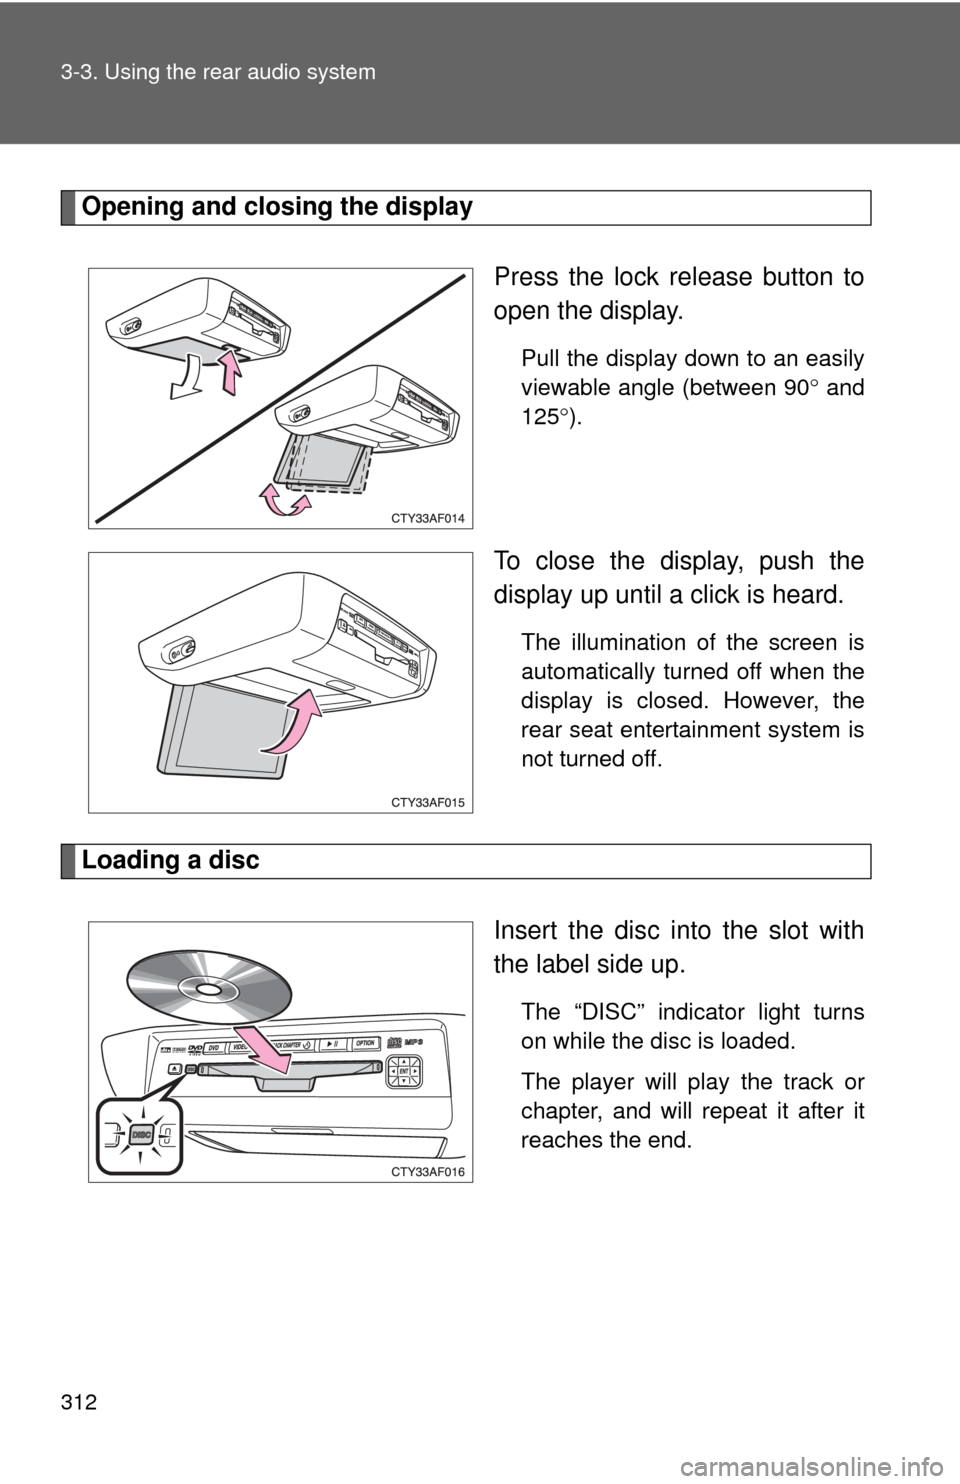
Opening and closing the displayPress the lock release button to
open the display.
Pull the display down to an easily
viewable angle (between 90 and
125 ).
To close the display, push the
display up until a click is heard.
The illumination of the screen is
automatically turned off when the
display is closed. However, the
rear seat entertainment system is
not turned off.
Loading a disc
Insert the disc into the slot with
the label side up.
The “DISC” indicator light turns
on while the disc is loaded.
The player will play the track or
chapter, and will repeat it after it
reaches the end.
Page 316 of 592
316 3-3. Using the rear audio system
■Headphones
With some headphones generally available in the market, it may be difficult
to catch signals properly. Toyota recommends the use of Toyota genuine
wireless headphones.
Please contact your Toyota dealer for further details.
■ Vo l u m e
●Adjust the volume when you connect the headphones to the jack. Loud
sounds may have a significant impact on the human body.
● Conversational speech on some DVDs is recorded at a low volume to
emphasize the impact of sound effects. If you adjust the volume assum-
ing that the conversations represent the maximum volume level that the
DVD will play, you may be startled by louder sound effects or when you
change to a different audio source. Be sure to adjust the volume with this
in mind.
CAUTION
■While driving
Do not use headphones.
Doing so may cause an accident, resulting in death or serious injury.
■ When the rear seat entert ainment system is not used
Keep the display closed.
In the event of an accident or sudden braking, the opened display may hit an
occupant's body, resulting in injury.
■ To prevent accidents and electric shock
Do not disassemble or modify the remote controller.
■ When the remote controller is not used
Stow the remote controller.
Injuries may result in the event of an accident or sudden braking.
■ Removed battery and other parts
Keep away from children.
These parts are small and if swallowed by a child they can cause choking.
Page 319 of 592
319
3-3. Using the rear audio system
3
Interior features
■
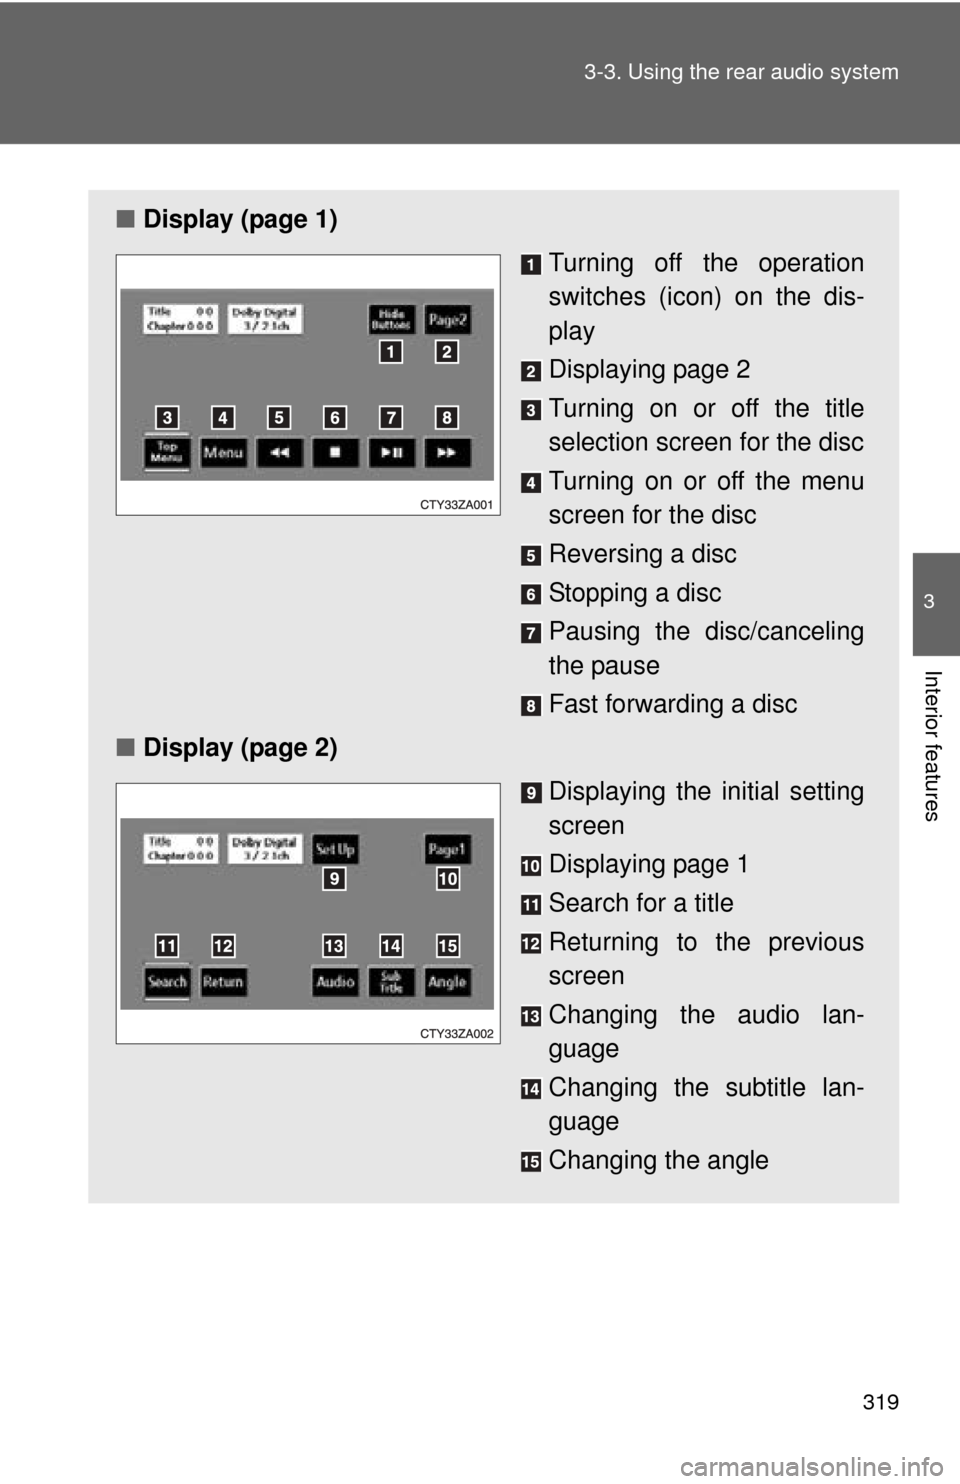
Display (page 1)
Turning off the operation
switches (icon) on the dis-
play
Displaying page 2
Turning on or off the title
selection screen for the disc
Turning on or off the menu
screen for the disc
Reversing a disc
Stopping a disc
Pausing the disc/canceling
the pause
Fast forwarding a disc
■ Display (page 2)
Displaying the initial setting
screen
Displaying page 1
Search for a title
Returning to the previous
screen
Changing the audio lan-
guage
Changing the subtitle lan-
guage
Changing the angle
Page 320 of 592
320 3-3. Using the rear audio system
Turning on or off the operation switchesPress or to turn on the operation switches.
Press or once again or select to turn off the opera-
tion switches.
Turning on the title selection screenPress or select to turn on the title selection screen. For
the operation of the title selectio n screen, see the separate manual
for the DVD disc.
Turning on the menu screen
Press or select to turn on the menu screen. For the oper-
ation of the menu screen, see the separate manual for the DVD disc.
Returning to the previous screen
Select to return to the previous screen. For the operation of the
menu screen, see the separate manual for the DVD disc.
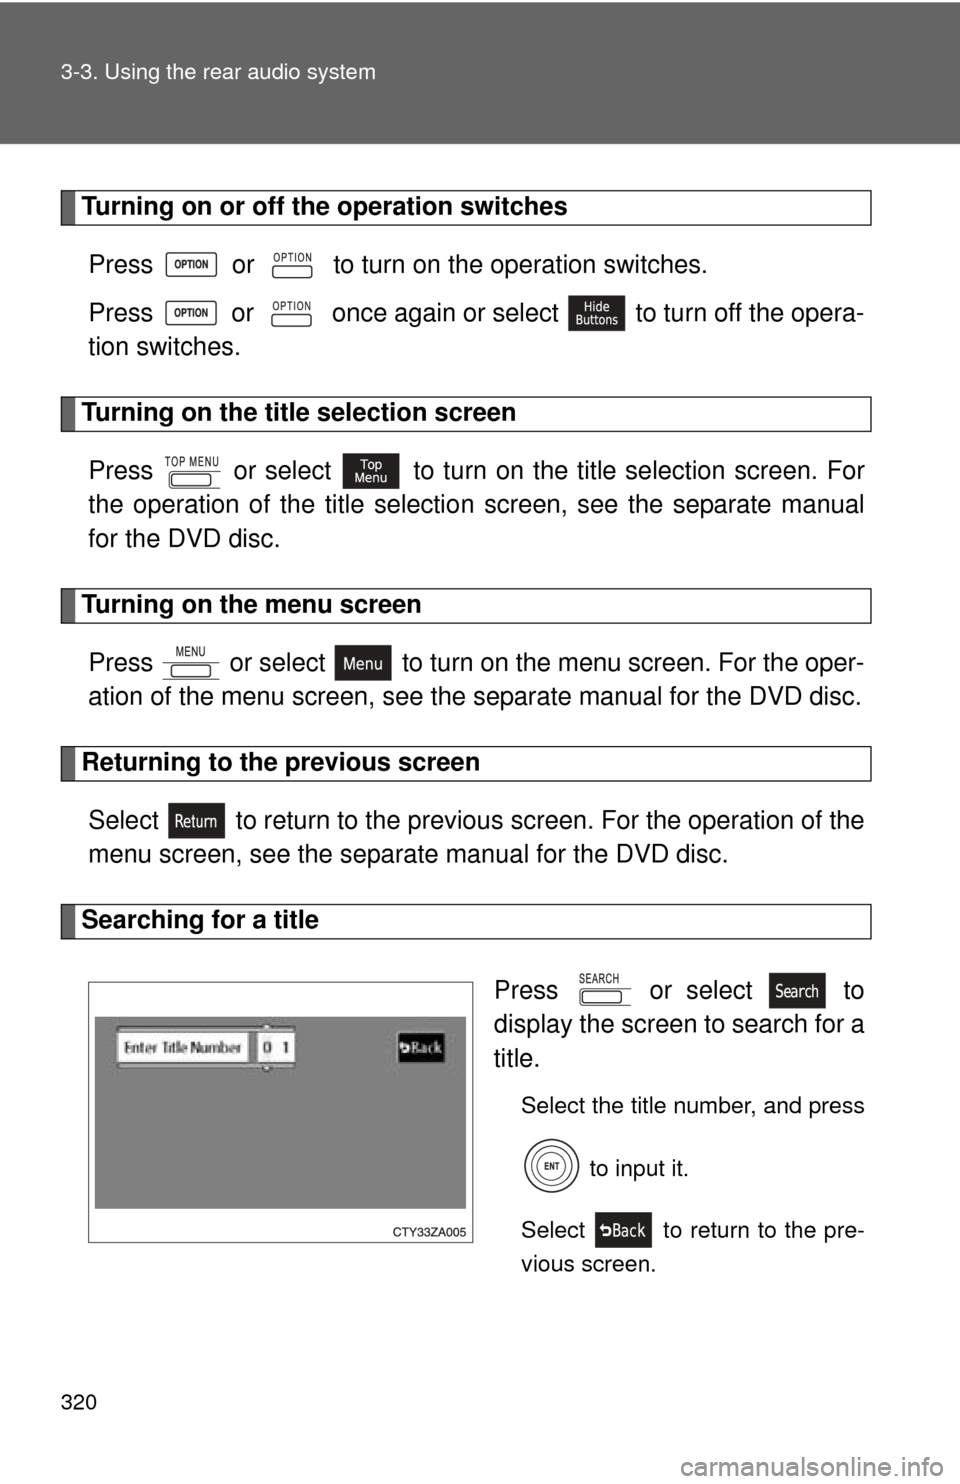
Searching for a title
Press or select to
display the screen to search for a
title.
Select the title number, and press to input it.
Select to return to the pre-
vious screen.
Page 321 of 592
321
3-3. Using the rear audio system
3
Interior features
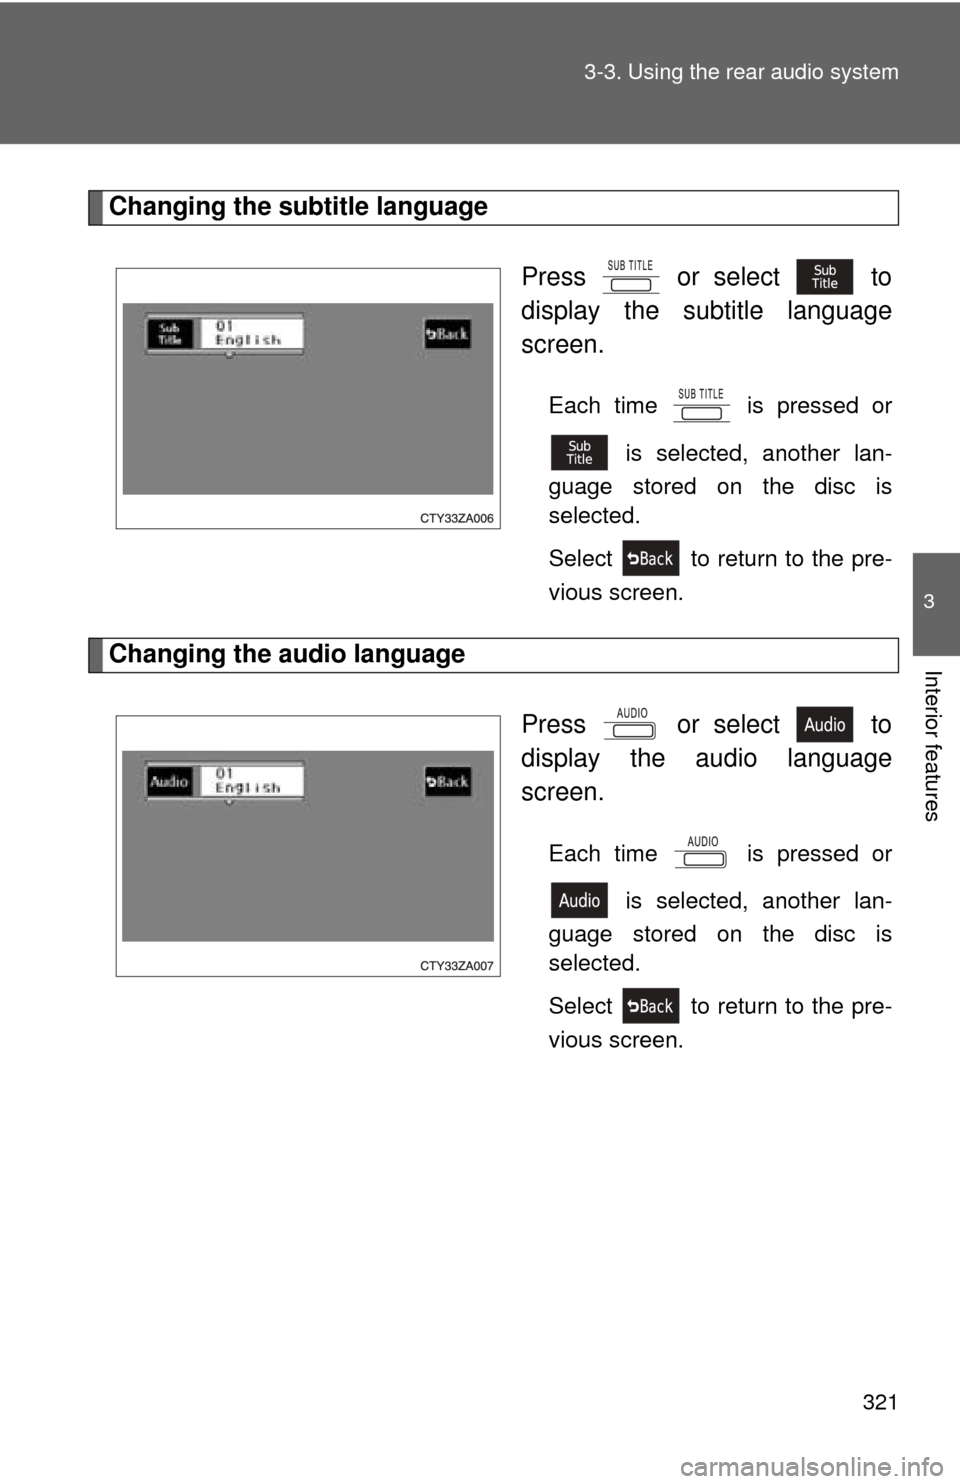
Changing the subtitle language
Press or select to
display the subtitle language
screen.
Each time is pressed or is selected, another lan-
guage stored on the disc is
selected.
Select to return to the pre-
vious screen.
Changing the audio language
Press or select to
display the audio language
screen.
Each time is pressed or is selected, another lan-
guage stored on the disc is
selected.
Select to return to the pre-
vious screen.
Page 322 of 592
322 3-3. Using the rear audio system
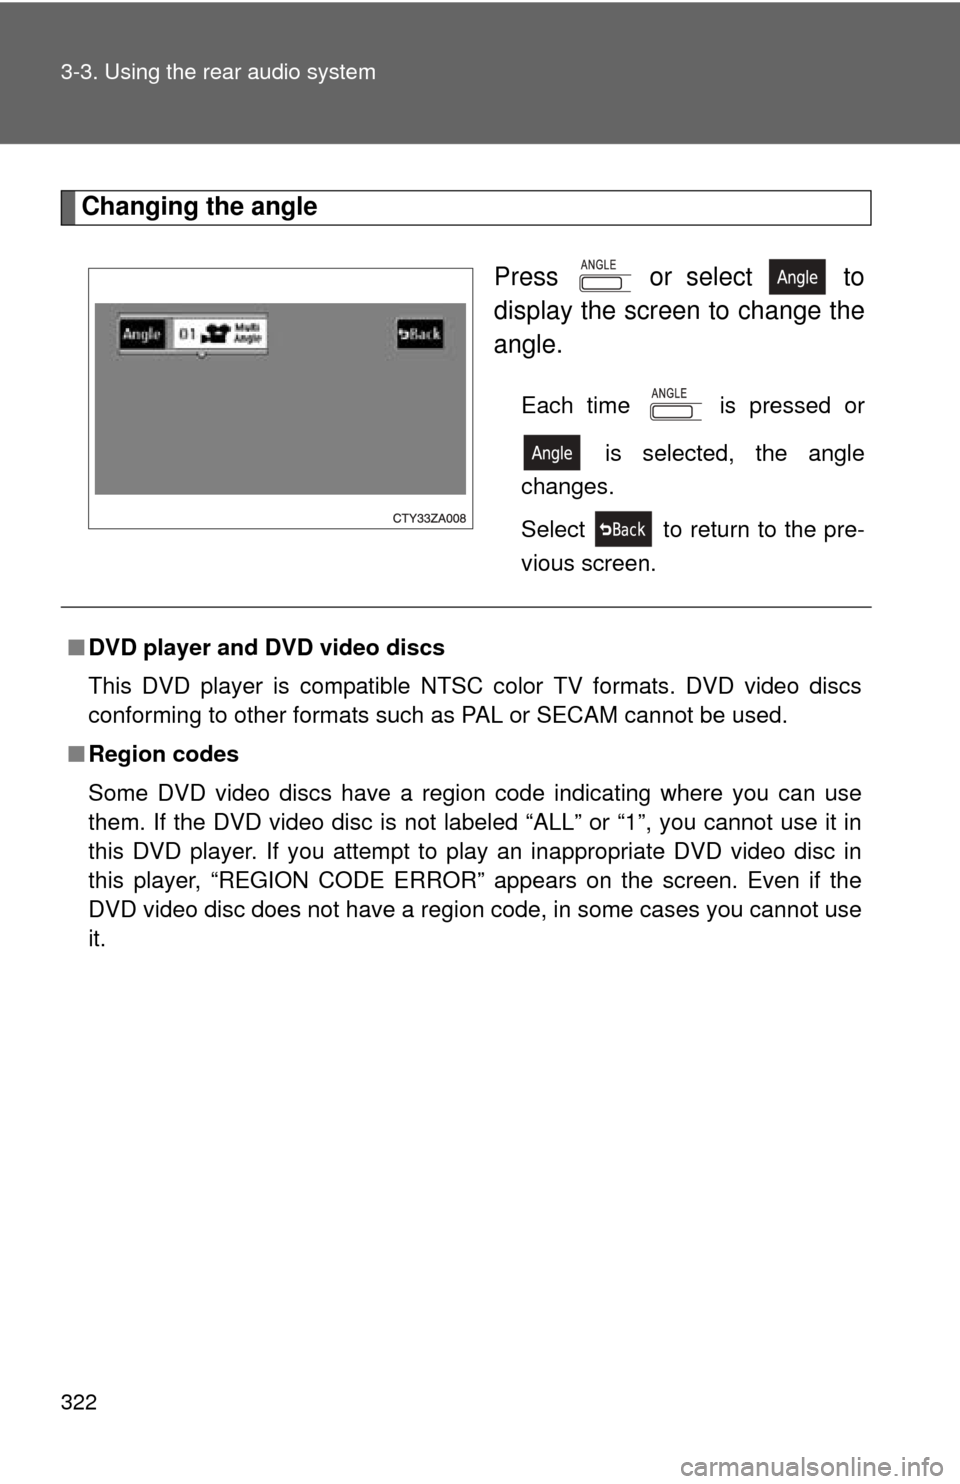
Changing the angle Press or select to
display the screen to change the
angle.
Each time is pressed or is selected, the angle
changes.
Select to return to the pre-
vious screen.
■ DVD player and DVD video discs
This DVD player is compatible NTSC color TV formats. DVD video discs
conforming to other formats such as PAL or SECAM cannot be used.
■ Region codes
Some DVD video discs have a region code indicating where you can use
them. If the DVD video disc is not labeled “ALL” or “1”, you cannot use it in
this DVD player. If you attempt to play an inappropriate DVD video disc in
this player, “REGION CODE ERROR” appears on the screen. Even if the
DVD video disc does not have a region code, in some cases you cannot use
it.
Page 325 of 592
325
3-3. Using the rear audio system
3
Interior features
■
Audio
Manufactured under license from Dolby
Laboratories. “Dolby”, “Pro Logic”,
and are trademarks of Dolby Laboratories. Confidential unpublished
works.
1992-1997 Dolby
Laboratories. All rights reserved.
“dts” is a trademark of Digital Theater Systems, Inc.
NOTICE
■ Cleaning the display
Wipe the display with a dry soft cloth.
If the screen is wiped with a rough cloth, the surface of the screen may be
scratched.
■ To prevent damage to the remote controller
●Keep the remote control away from direct sunlight, temperature heat and
high humidity.
● Do not drop or knock the remote controller against hard objects.
● Do not sit on or place heavy objects on the remote controller.
■ DVD player
Never try to disassemble or oil any part of the DVD player. Do not insert any-
thing other than a disc into the slot.