clock TOYOTA HIGHLANDER HYBRID 2013 XU50 / 3.G Owners Manual
[x] Cancel search | Manufacturer: TOYOTA, Model Year: 2013, Model line: HIGHLANDER HYBRID, Model: TOYOTA HIGHLANDER HYBRID 2013 XU50 / 3.GPages: 676, PDF Size: 12.48 MB
Page 16 of 676
16
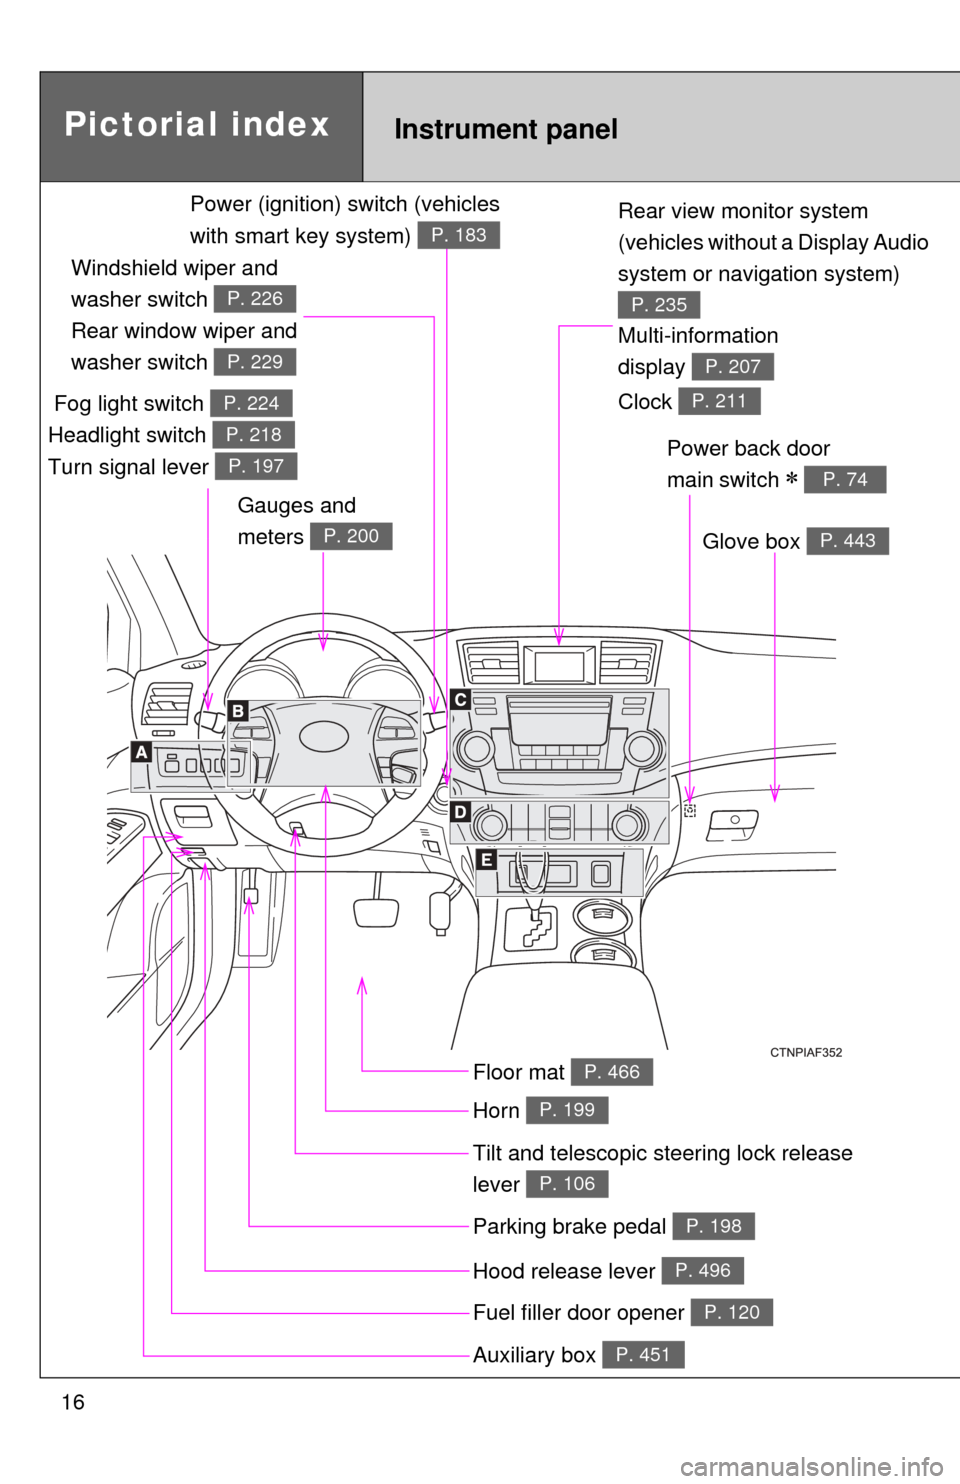
Rear view monitor system
(vehicles without a Display Audio
system or navigation system)
P. 235
Tilt and telescopic steering lock release
lever
P. 106
Glove box P. 443
Pictorial indexInstrument panel
Power back door
main switch
P. 74
Parking brake pedal P. 198
Hood release lever P. 496
Auxiliary box P. 451
Multi-information
display
P. 207
Fuel filler door opener P. 120
Fog light switch
Headlight switch
Turn signal lever P. 224
P. 218
P. 197
Windshield wiper and
washer switch
Rear window wiper and
washer switch
P. 226
P. 229
Gauges and
meters
P. 200
Floor mat P. 466
Horn P. 199
Power (ignition) switch (vehicles
with smart key system)
P. 183
Clock P. 211
Page 207 of 676
207
2-2. Instrument cluster
2
When driving
Multi-information display
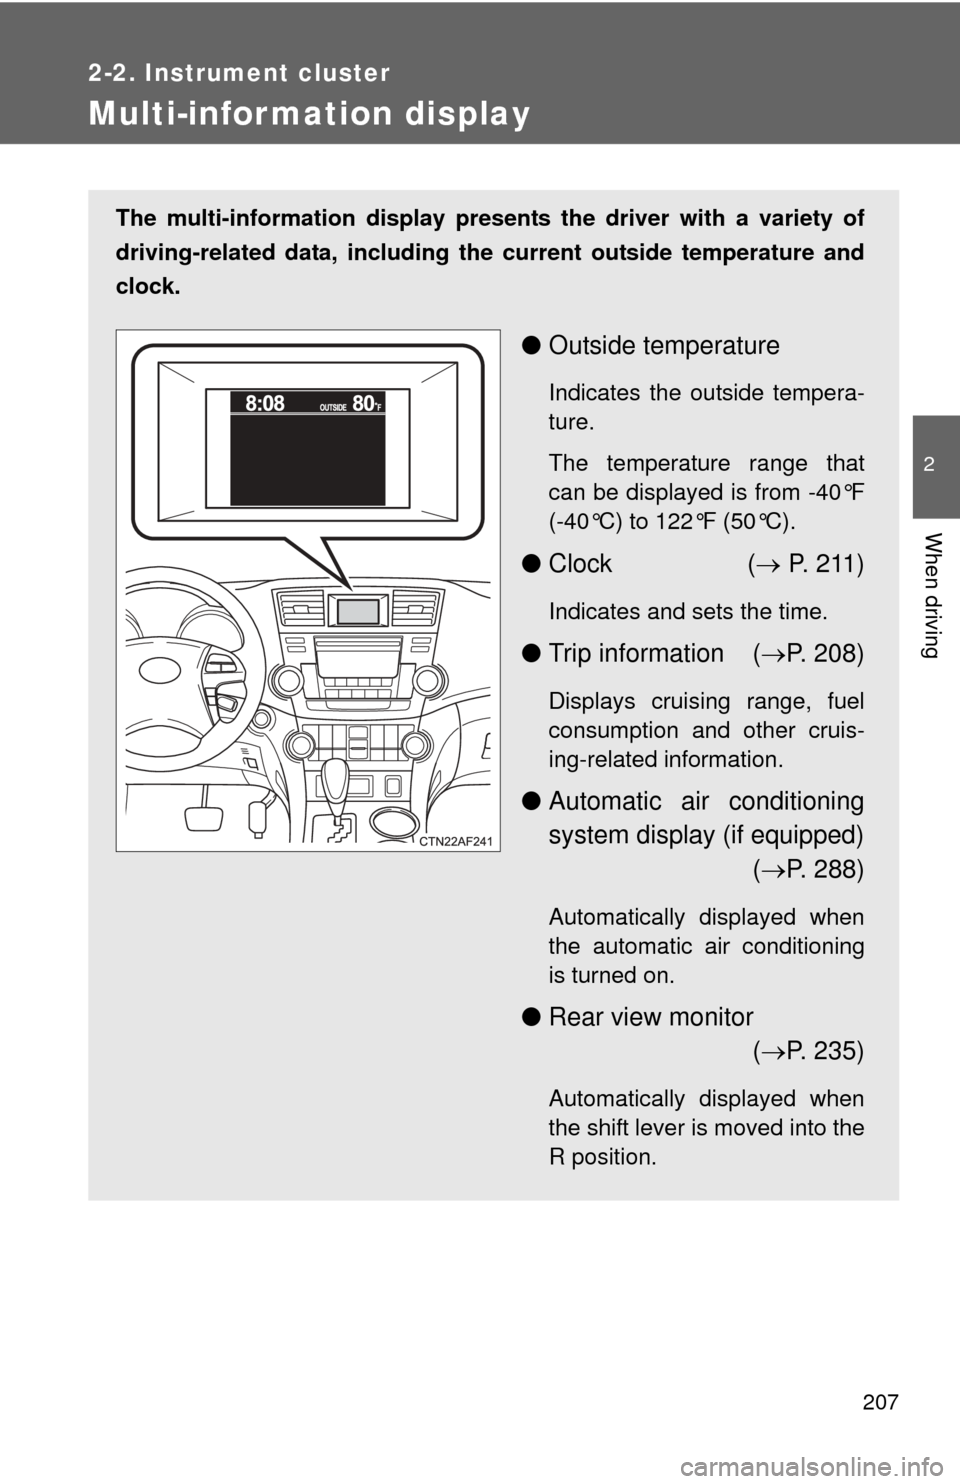
The multi-information display presents the driver with a variety of
driving-related data, including th e current outside temperature and
clock.
● Outside temperature
Indicates the outside tempera-
ture.
The temperature range that
can be displayed is from -40°F
(-40°C) to 122°F (50°C).
●Clock ( P. 2 1 1 )
Indicates and sets the time.
● Trip information ( P. 208)
Displays cruising range, fuel
consumption and other cruis-
ing-related information.
● Automatic air conditioning
system display (if equipped)
( P. 288)
Automatically displayed when
the automatic air conditioning
is turned on.
● Rear view monitor
( P. 235)
Automatically displayed when
the shift lever is moved into the
R position.
Page 211 of 676
211
2-2. Instrument cluster
2
When driving
■
Setting the clock
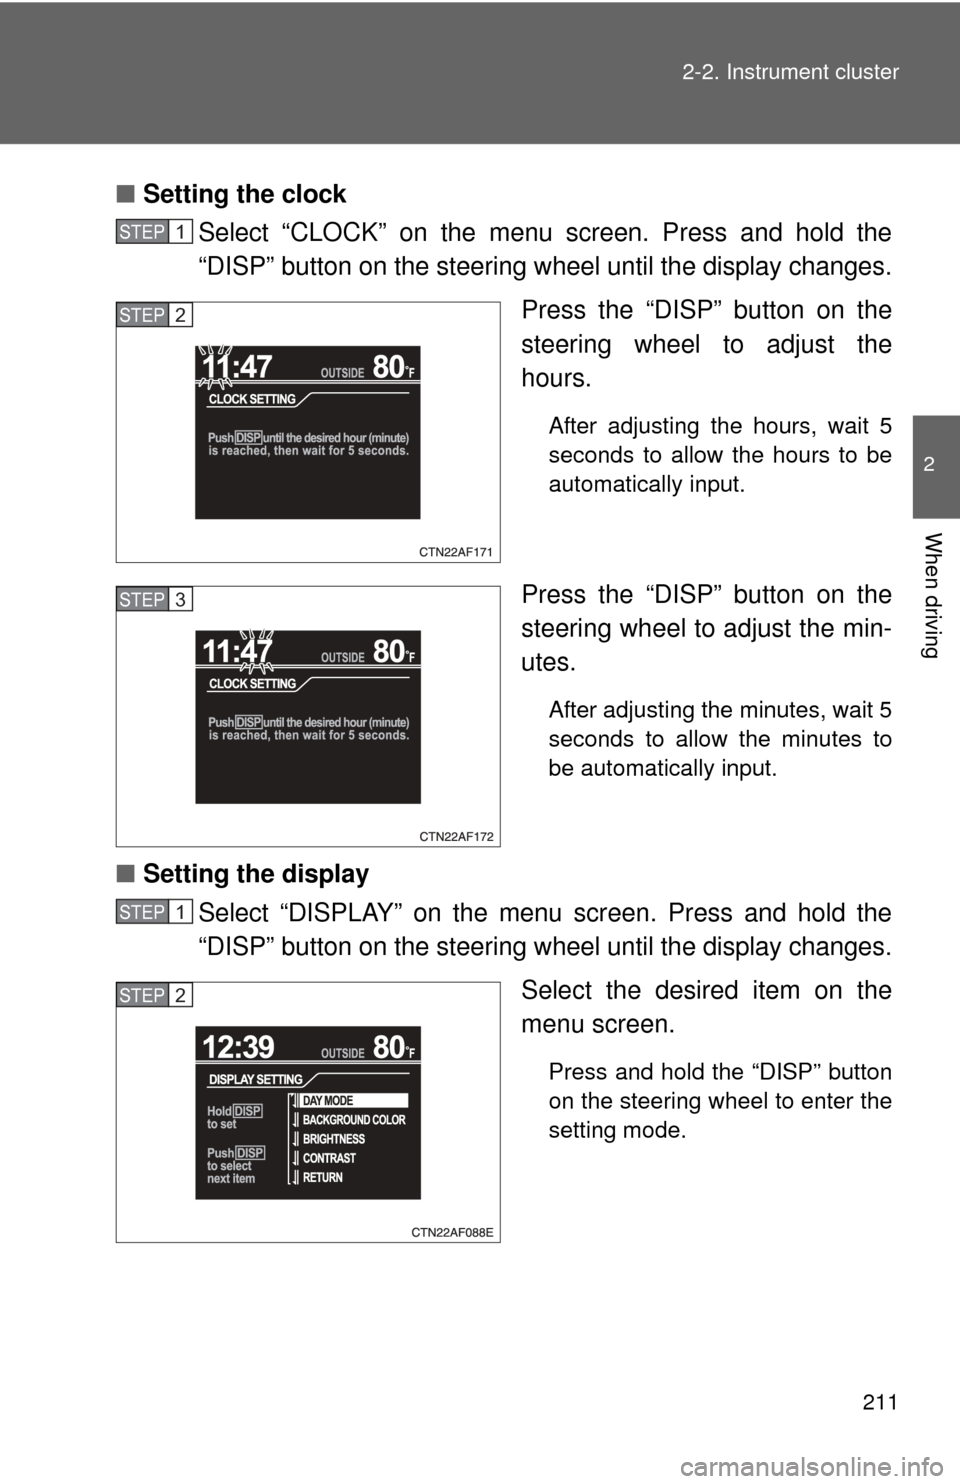
Select “CLOCK” on the menu screen. Press and hold the
“DISP” button on the steering w heel until the display changes.
Press the “DISP” button on the
steering wheel to adjust the
hours.
After adjusting the hours, wait 5
seconds to allow the hours to be
automatically input.
Press the “DISP” button on the
steering wheel to adjust the min-
utes.
After adjusting the minutes, wait 5
seconds to allow the minutes to
be automatically input.
■ Setting the display
Select “DISPLAY” on the menu screen. Press and hold the
“DISP” button on the steering w heel until the display changes.
Select the desired item on the
menu screen.
Press and hold the “DISP” button
on the steering wheel to enter the
setting mode.
STEP1
STEP2
STEP3
STEP1
STEP2
Page 282 of 676
282
3-1. Using the air conditioning system and defogger
Front manual air conditioning system
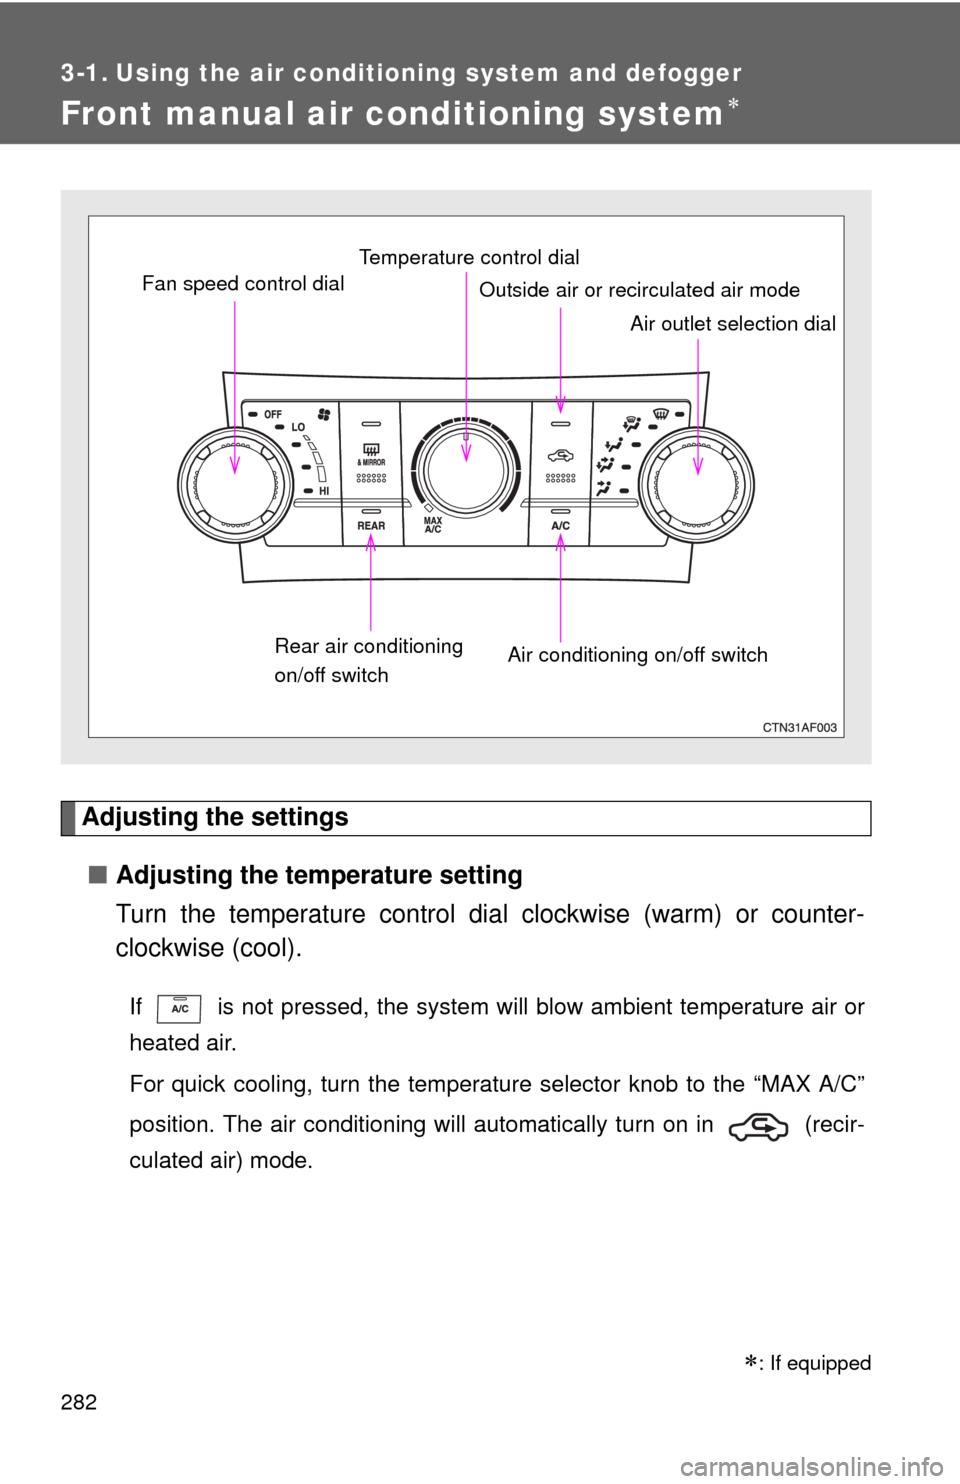
Adjusting the settings■ Adjusting the temperature setting
Turn the temperature control dial clockwise (warm) or counter-
clockwise (cool).
If is not pressed, the system will blow ambient temperature air or
heated air.
For quick cooling, turn the temperature selector knob to the “MAX A/C”
position. The air conditioning will automatically turn on in (recir-
culated air) mode.
Fan speed control dial
Air outlet selection dial
Air conditioning on/off switch
Temperature control dial
Outside air or recirculated air mode
Rear air conditioning
on/off switch
: If equipped
Page 283 of 676
283
3-1. Using the air conditioning system
and defogger
3
Interior features
■Adjusting the fan speed
Turn the fan speed control dial clockwise (increase) or counter-
clockwise (decrease).
Turn the dial to “OFF” to turn the fan off.
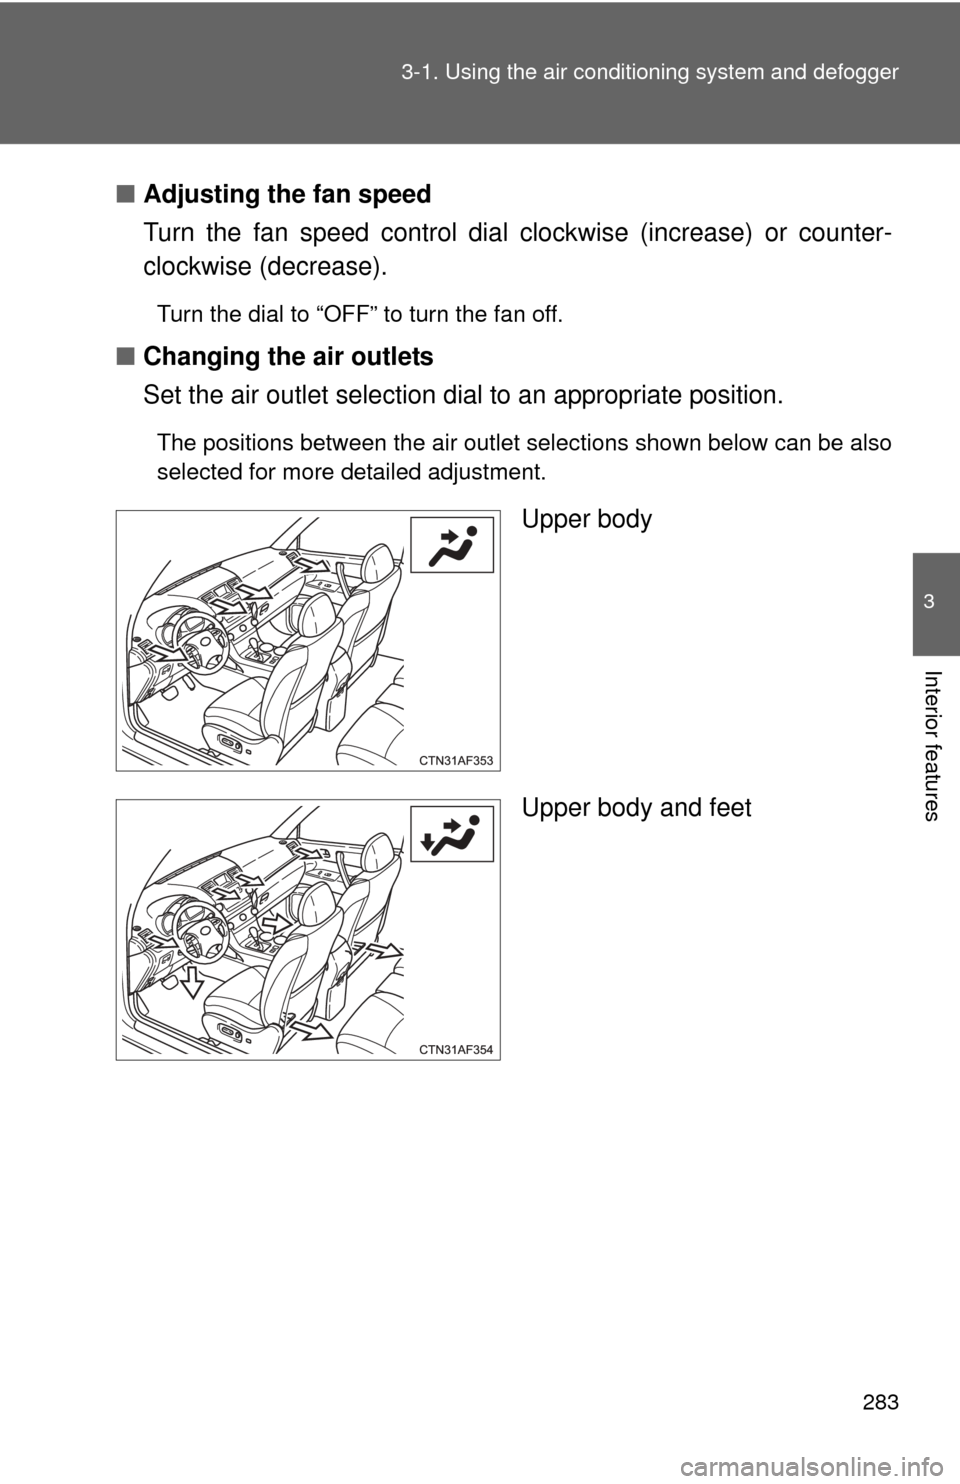
■ Changing the air outlets
Set the air outlet selection di al to an appropriate position.
The positions between the air outlet selections shown below can be also
selected for more detailed adjustment.
Upper body
Upper body and feet
Page 290 of 676
290 3-1. Using the air conditioning system and defogger
Using the automatic mode
Press .The air conditioning system b egins to operate. Air outlets
and fan speed are automatically adjusted according to the
temperature setting.
“AUTO” will be displayed on the multi-information display.
Turn the temperature control dial clockwise (warm) or coun-
terclockwise (cool).
Air outlets and fan speed for the right-hand and left-hand seats may
be set separately depending on the temperature setting.
STEP1
STEP2
Page 291 of 676
291
3-1. Using the air conditioning system
and defogger
3
Interior features
Adjusting the settings
■ Adjusting the temperature setting
Turn the temperature control dial clockwise (warm) or counter-
clockwise (cool).
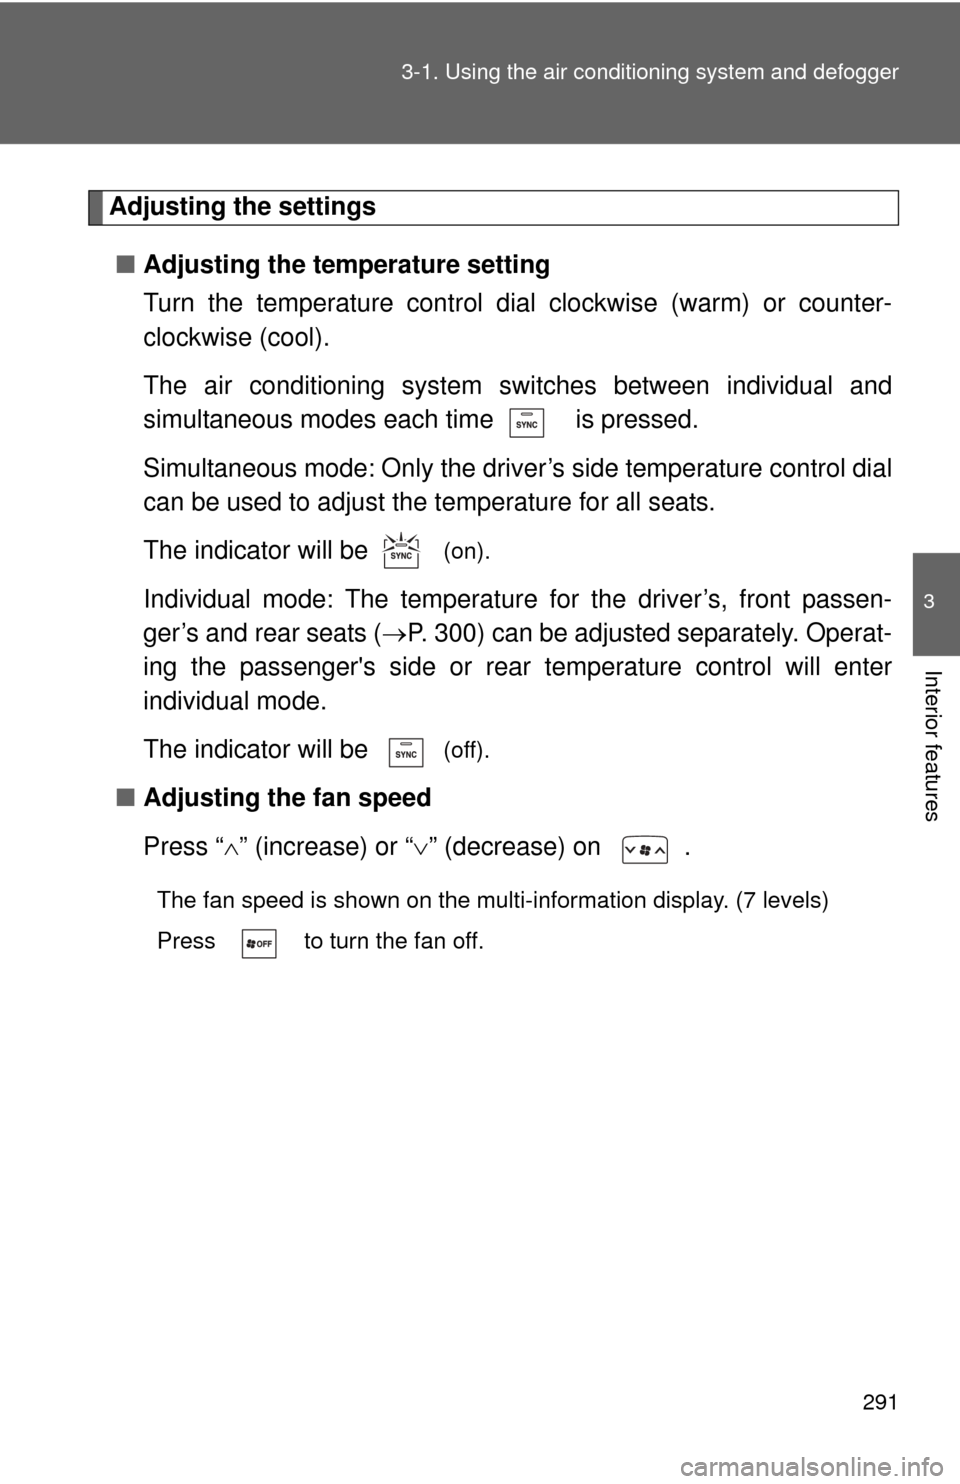
The air conditioning system sw itches between individual and
simultaneous modes each time is pressed.
Simultaneous mode: Only the driver’s side temperature control dial
can be used to adjust the temperature for all seats.
The indicator will be
(on).
Individual mode: The temperatur e for the driver’s, front passen-
ger’s and rear seats ( P. 300) can be adjusted separately. Operat-
ing the passenger's si de or rear temperature control will enter
individual mode.
The indicator will be
(off).
■ Adjusting the fan speed
Press “ ” (increase) or “ ” (decrease) on .
The fan speed is shown on the multi-information display. (7 levels)
Press to turn the fan off.
Page 298 of 676
298 3-1. Using the air conditioning system and defogger
Adjusting the settings
■ Adjusting the temperature setting
Turn the temperature control dial clockwise (warm) or counter-
clockwise (cool).
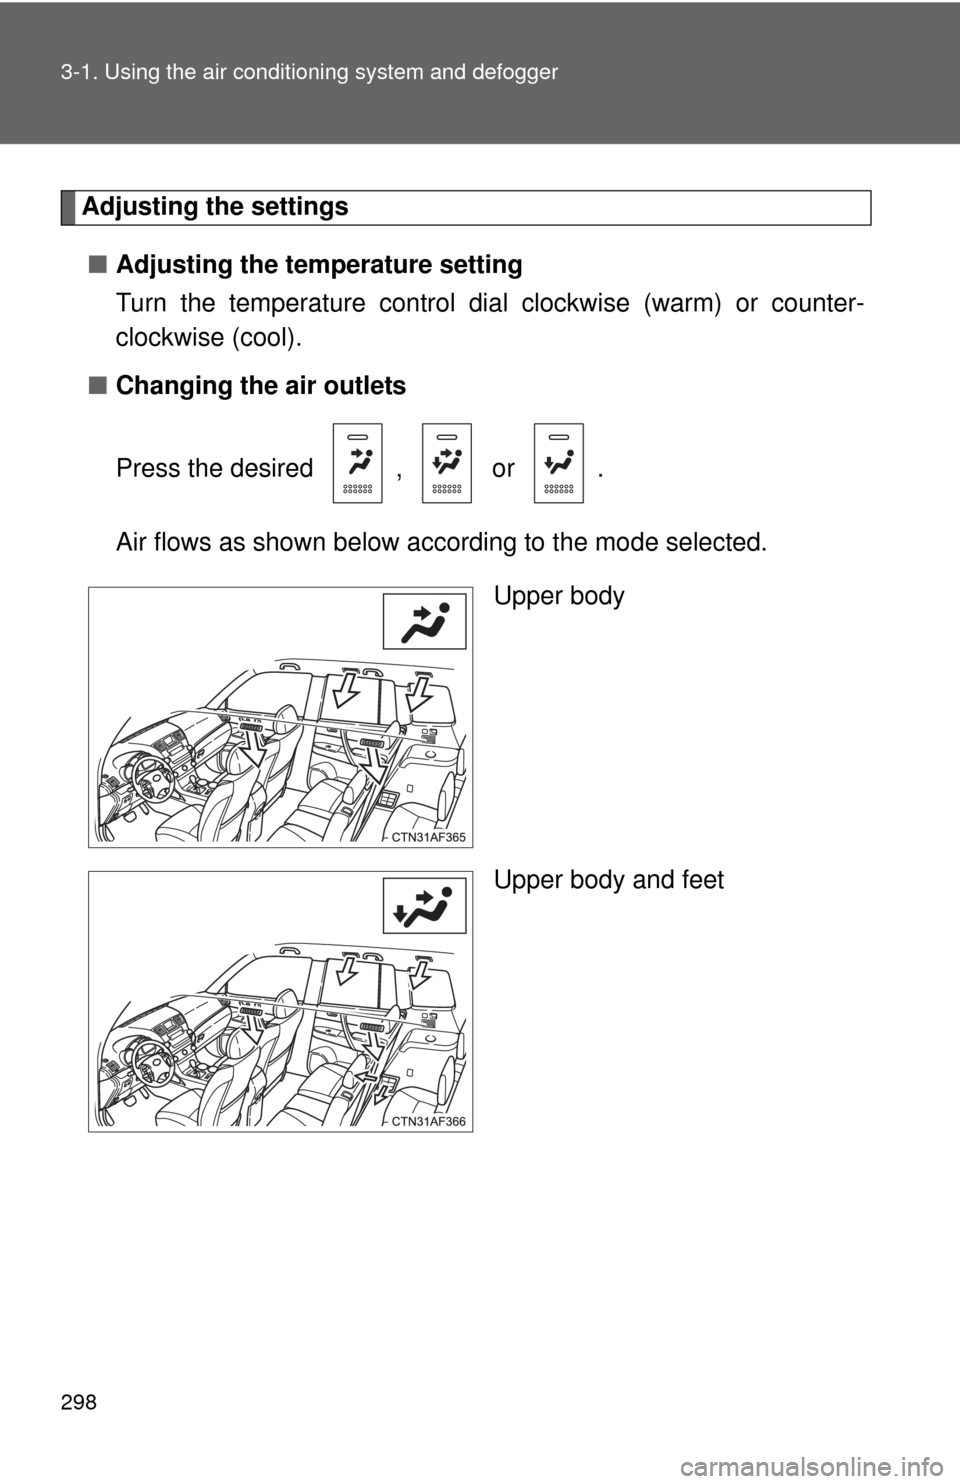
■ Changing the air outlets
Press the desired , or .
Air flows as shown below according to the mode selected.
Upper body
Upper body and feet
Page 299 of 676
299
3-1. Using the air conditioning system
and defogger
3
Interior features
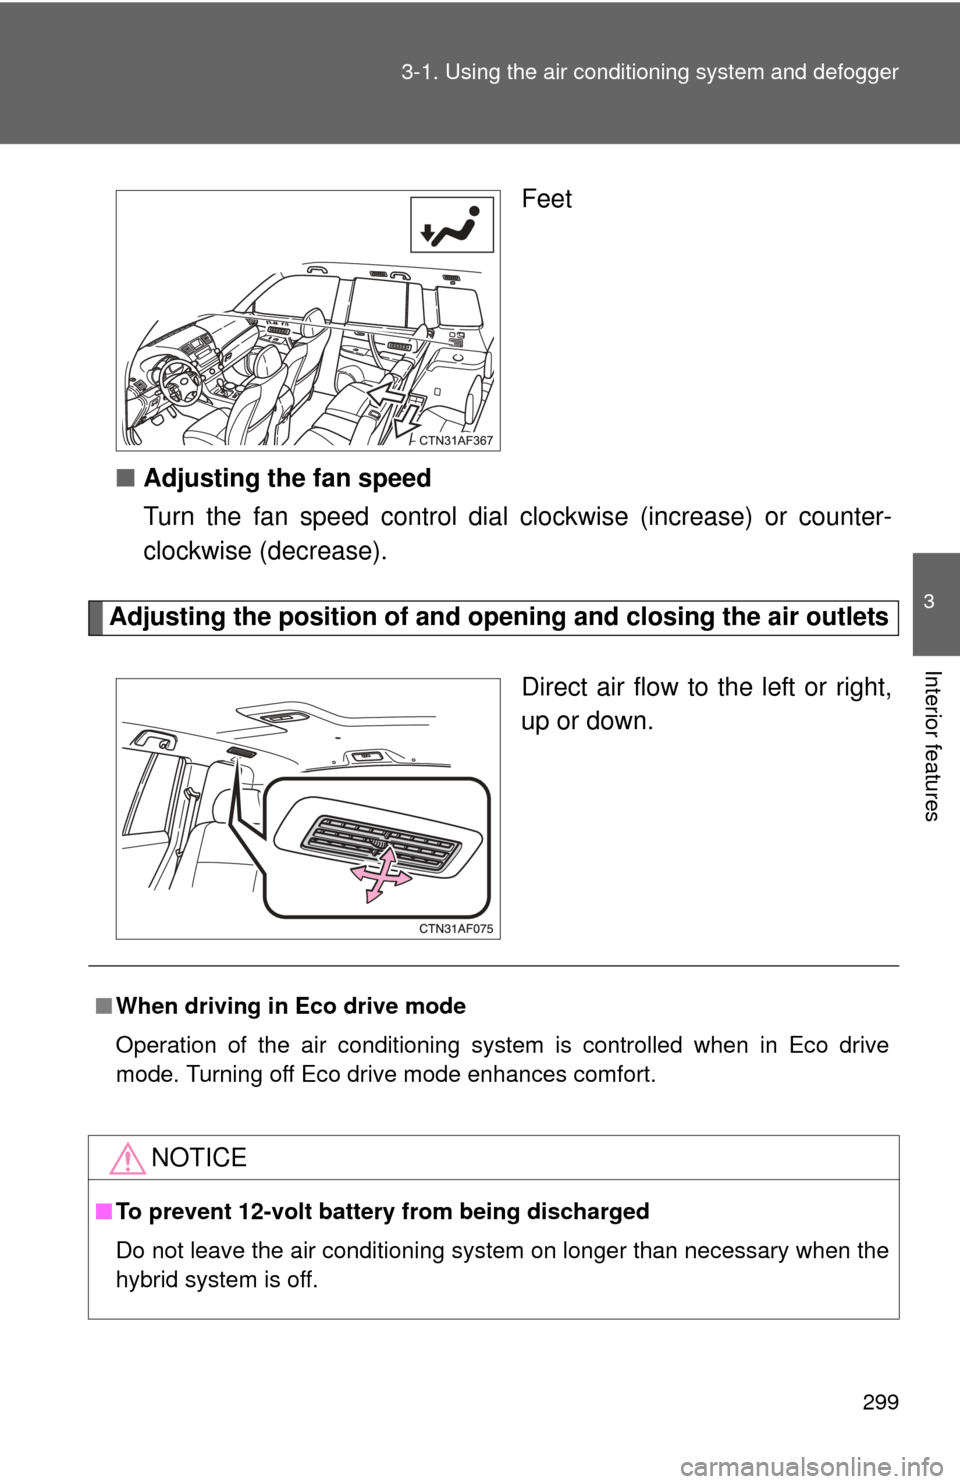
Feet
■ Adjusting the fan speed
Turn the fan speed control dial clockwise (increase) or counter-
clockwise (decrease).
Adjusting the position of and opening and closing the air outlets
Direct air flow to the left or right,
up or down.
■When driving in Eco drive mode
Operation of the air conditioning system is controlled when in Eco drive
mode. Turning off Eco drive mode enhances comfort.
NOTICE
■To prevent 12-volt battery from being discharged
Do not leave the air conditioning system on longer than necessary when the
hybrid system is off.
Page 300 of 676
300
3-1. Using the air conditioning system and defogger
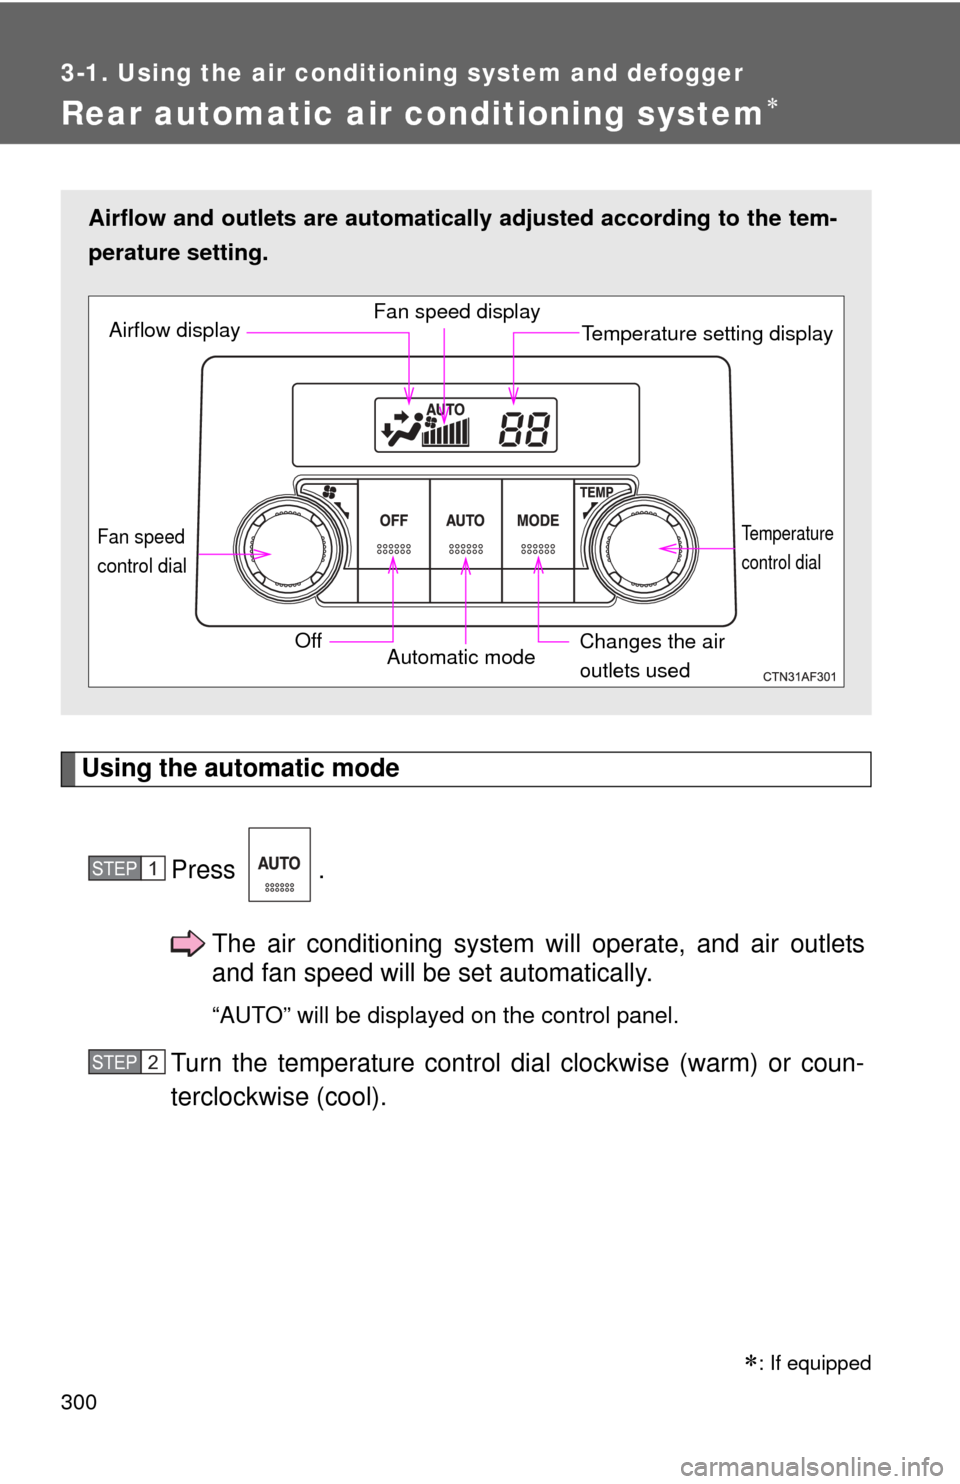
Rear automatic air conditioning system
Using the automatic modePress .The air conditioning system will operate, and air outlets
and fan speed will be set automatically.
“AUTO” will be displayed on the control panel.
Turn the temperature control dial clockwise (warm) or coun-
terclockwise (cool).
Airflow and outlets are automatica lly adjusted according to the tem-
perature setting.
Airflow display Fan speed display
Temperature setting display
Fan speed
control dial
OffAutomatic mode Changes the air
outlets used
Temperature
control dial
STEP1
STEP2
: If equipped