TOYOTA IQ 2012 Owners Manual
Manufacturer: TOYOTA, Model Year: 2012,
Model line: IQ,
Model: TOYOTA IQ 2012
Pages: 476, PDF Size: 23.52 MB
TOYOTA IQ 2012 Owners Manual
IQ 2012
TOYOTA
TOYOTA
https://www.carmanualsonline.info/img/14/60097/w960_60097-0.png
TOYOTA IQ 2012 Owners Manual
Trending: windshield wipers, emergency towing, oil filter, power steering fluid, power steering, ignition, dimensions
Page 321 of 476
321
4-3. Do-it-yourself maintenance
4
Maintenance and care
iQ_WE_74014E
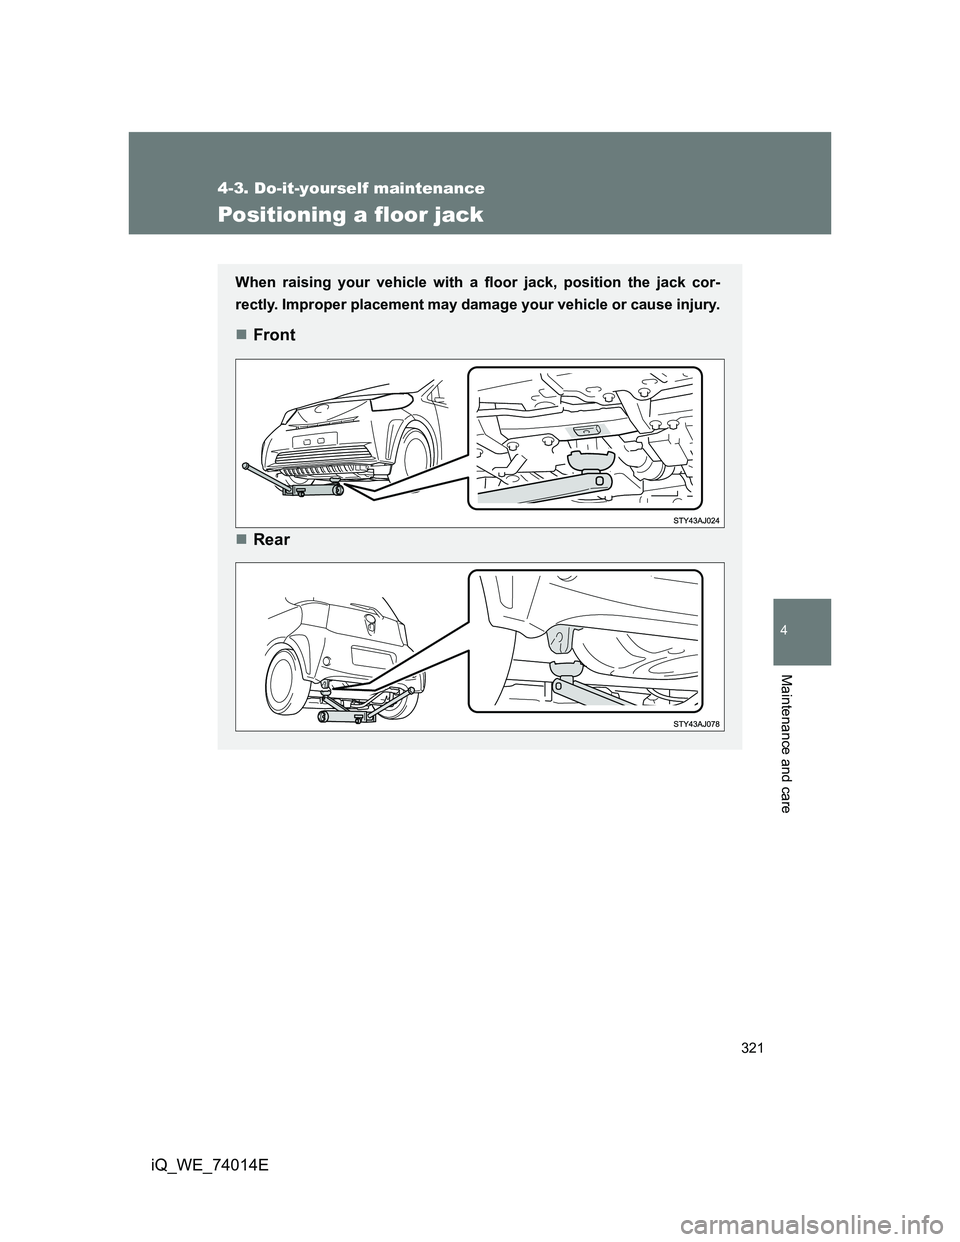
Positioning a floor jack
When raising your vehicle with a floor jack, position the jack cor-
rectly. Improper placement may damage your vehicle or cause injury.
Front
Rear
Page 322 of 476
322 4-3. Do-it-yourself maintenance
iQ_WE_74014E
CAUTION
When raising your vehicle
Make sure to observe the following to reduce the possibility of death or seri-
ous injury.
When using a floor jack, follow the instructions of the manual provided with
the jack.
Do not use the jack that was supplied with your vehicle.
Do not put any part of your body or get underneath the vehicle supported
only by the floor jack.
Always use floor jack and/or automotive jack stands on a solid, flat, level
surface.
Do not start the engine while the vehicle is supported by the floor jack.
Stop the vehicle on level firm ground, firmly set the parking brake and put
the shift lever in P (Multidrive) or R (manual transmission).
Make sure to set the floor jack properly at the jack point.
Raising the vehicle with an improperly positioned floor jack will damage
the vehicle and may cause the vehicle to fall off the floor jack.
Do not raise the vehicle while someone is in the vehicle.
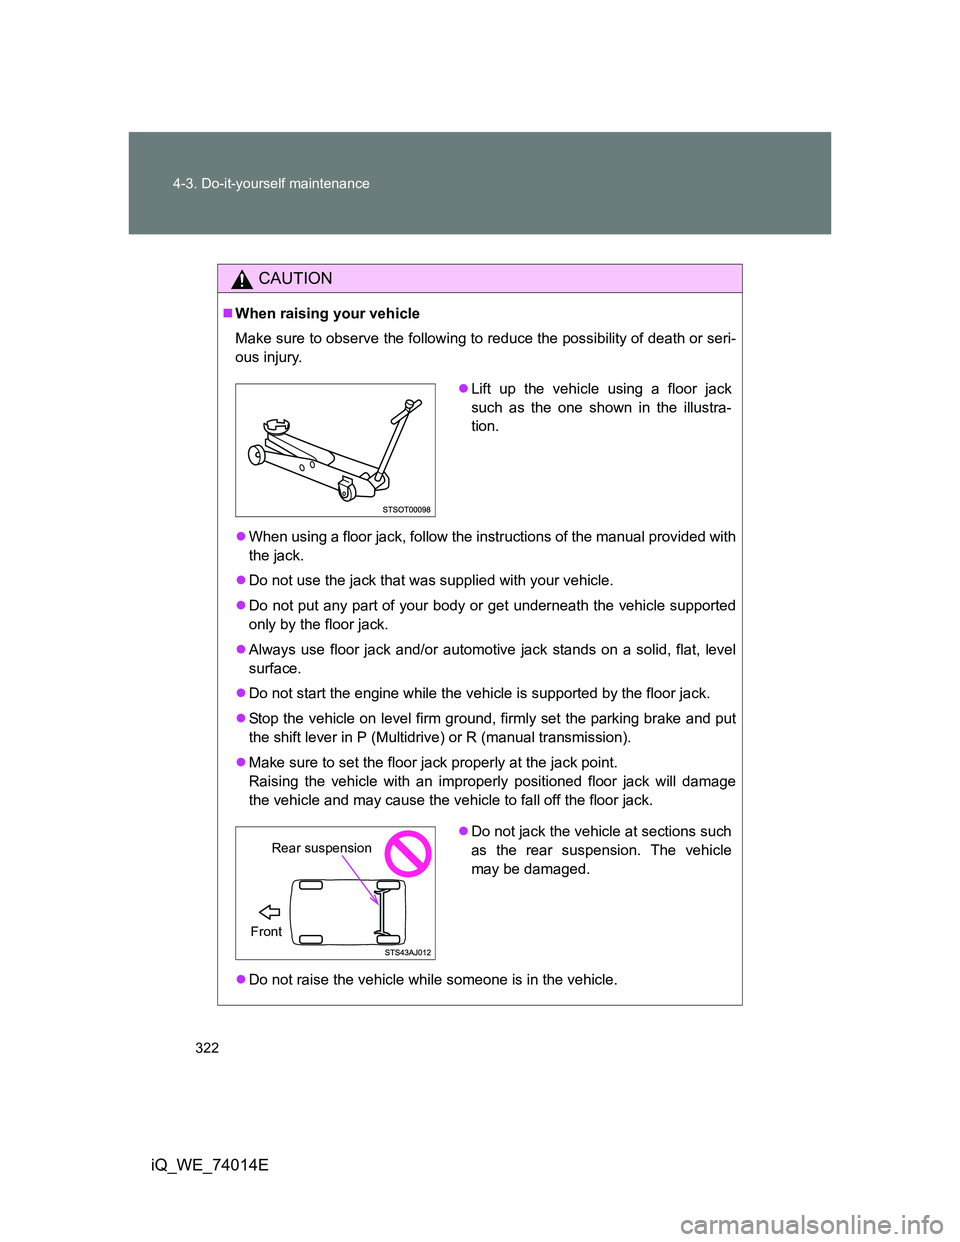
Lift up the vehicle using a floor jack
such as the one shown in the illustra-
tion.
Do not jack the vehicle at sections such
as the rear suspension. The vehicle
may be damaged.
Rear suspension
Front
Page 323 of 476
323 4-3. Do-it-yourself maintenance
4
Maintenance and care
iQ_WE_74014E
CAUTION
When raising your vehicle
When raising the vehicle, do not place any objects on top of or underneath
the floor jack.
Page 324 of 476
324
4-3. Do-it-yourself maintenance
iQ_WE_74014E
Replacing the tire
When raising your vehicle with a jack, position the jack correctly.
Improper placement may damage your vehicle or cause injury.
Before jacking up the vehicle
Stop the vehicle on a hard, flat surface.
Set the parking brake.
Shift the shift lever to P (Multidrive) or R (manual transmis-
sion).
Stop the engine.
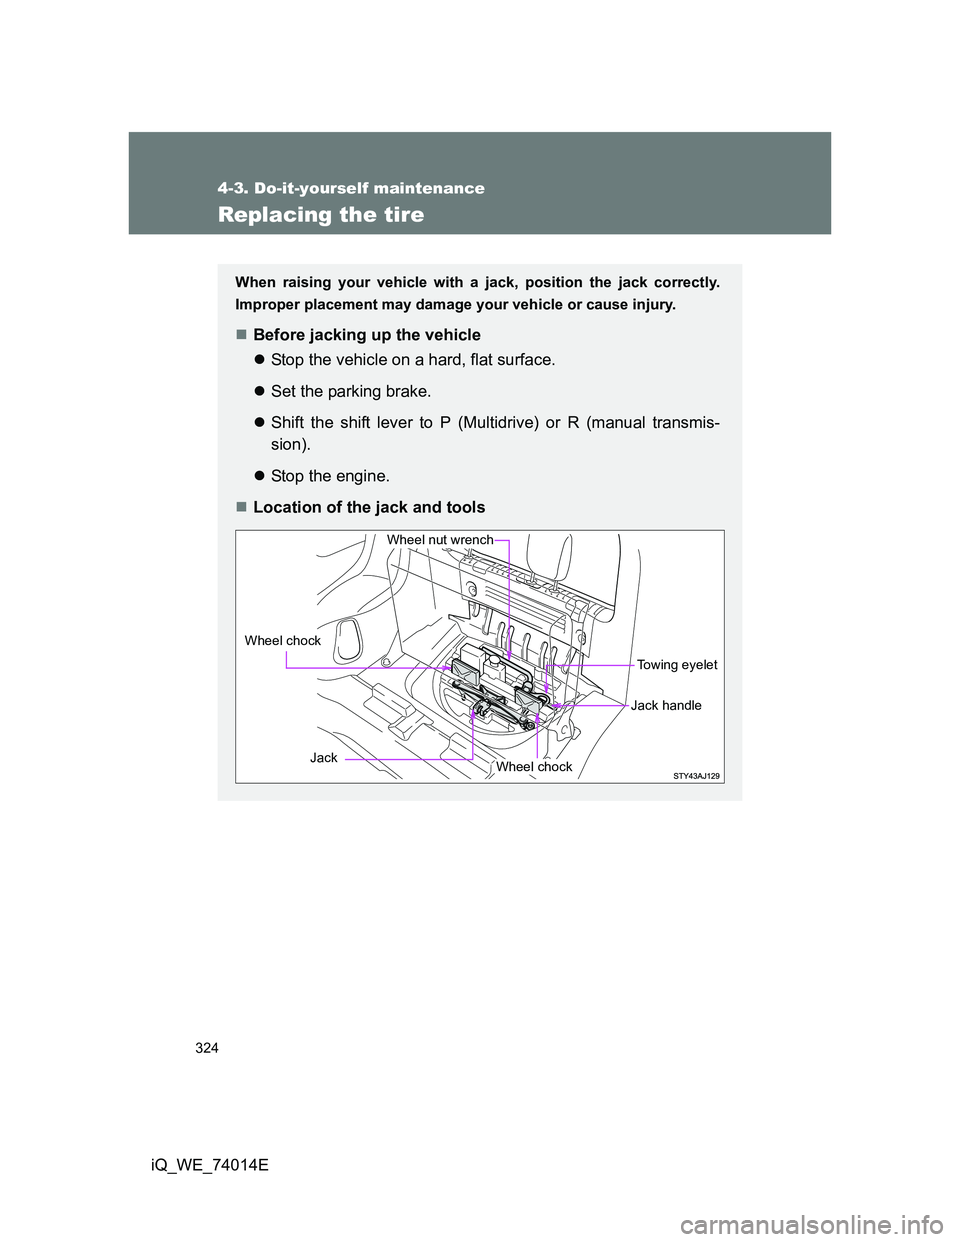
Location of the jack and tools
Towing eyelet
Jack
Wheel nut wrench
Wheel chock
Wheel chock
Jack handle
Page 325 of 476
325 4-3. Do-it-yourself maintenance
4
Maintenance and care
iQ_WE_74014E
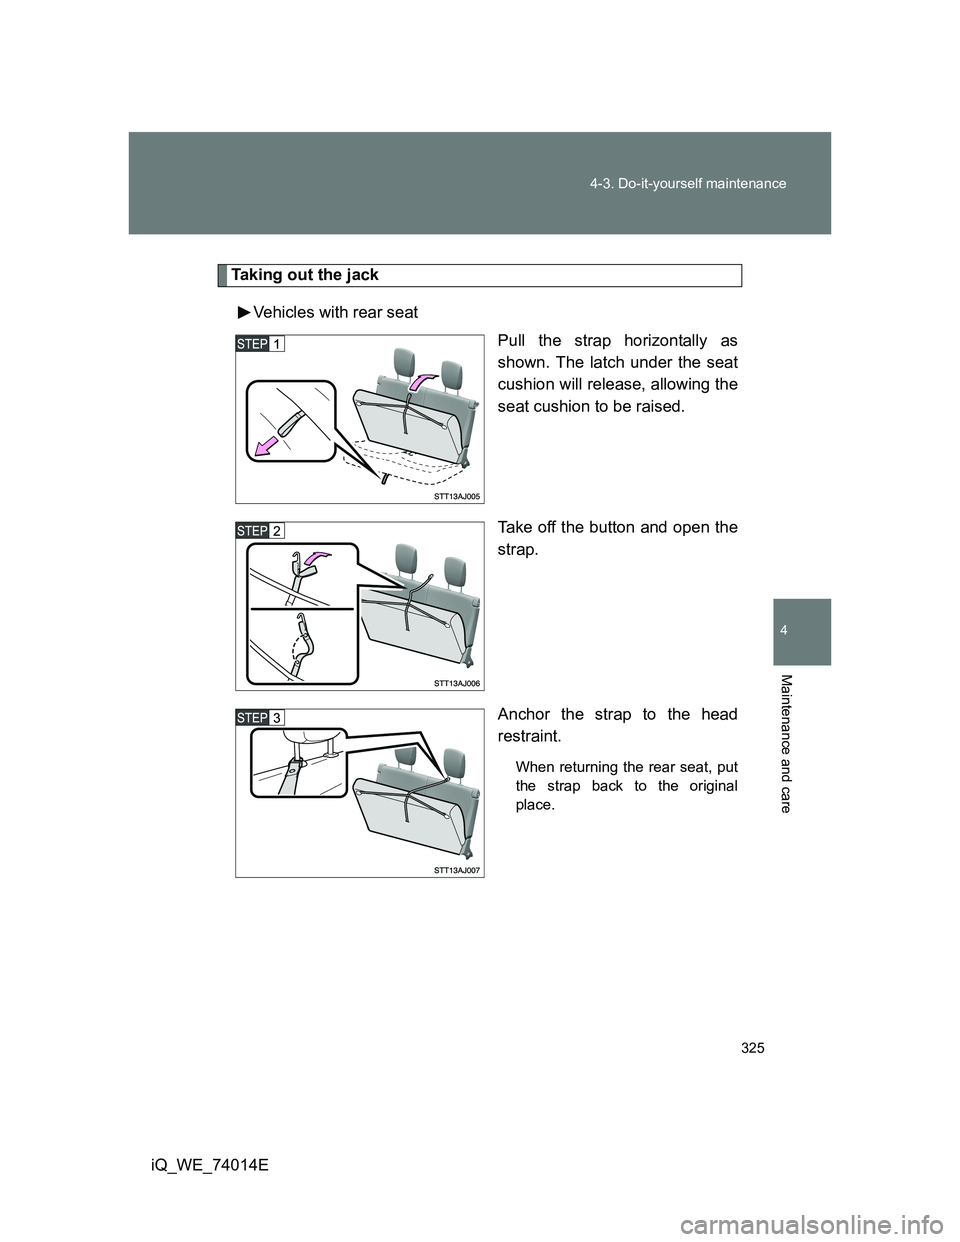
Taking out the jack
Vehicles with rear seat
Pull the strap horizontally as
shown. The latch under the seat
cushion will release, allowing the
seat cushion to be raised.
Take off the button and open the
strap.
Anchor the strap to the head
restraint.
When returning the rear seat, put
the strap back to the original
place.
Page 326 of 476
326 4-3. Do-it-yourself maintenance
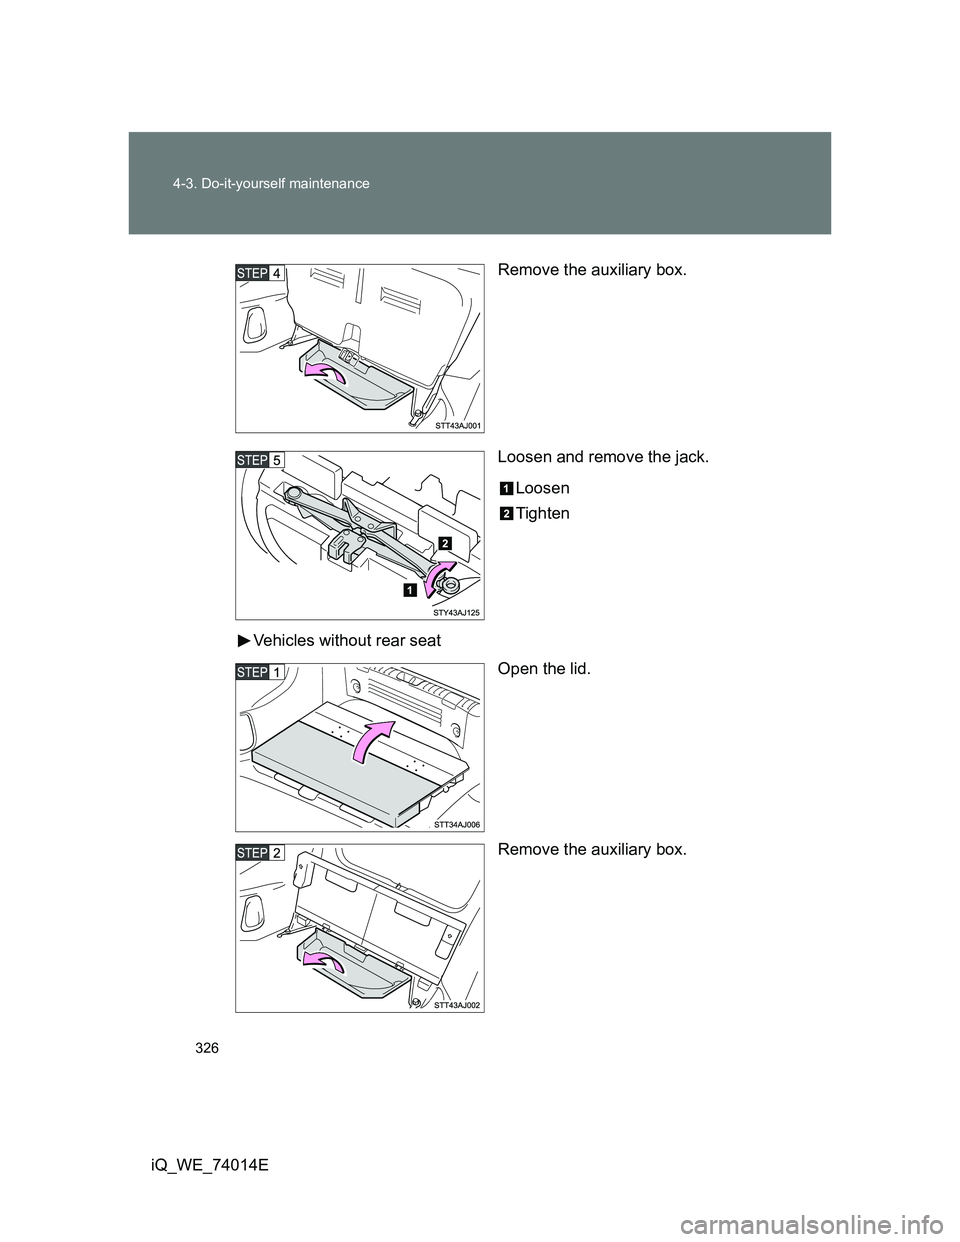
iQ_WE_74014ERemove the auxiliary box.
Loosen and remove the jack.
Loosen
Tighten
Vehicles without rear seat
Open the lid.
Remove the auxiliary box.
Page 327 of 476
327 4-3. Do-it-yourself maintenance
4
Maintenance and care
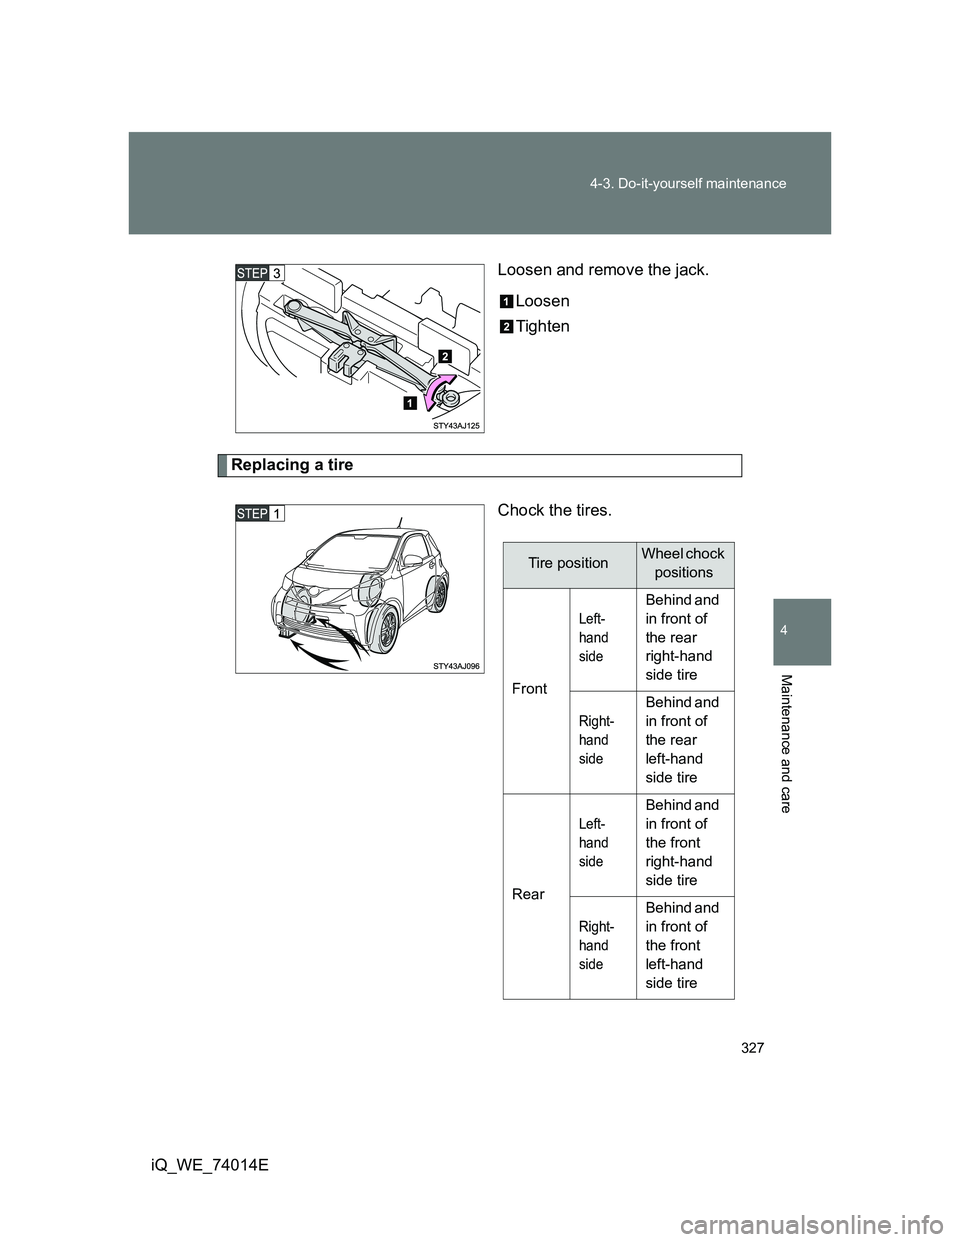
iQ_WE_74014ELoosen and remove the jack.
Loosen
Tighten
Replacing a tire
Chock the tires.
Tire positionWheel chock
positions
Front
Left-
hand
side
Behind and
in front of
the rear
right-hand
side tire
Right-
hand
side
Behind and
in front of
the rear
left-hand
side tire
Rear
Left-
hand
side
Behind and
in front of
the front
right-hand
side tire
Right-
hand
side
Behind and
in front of
the front
left-hand
side tire
Page 328 of 476
328 4-3. Do-it-yourself maintenance
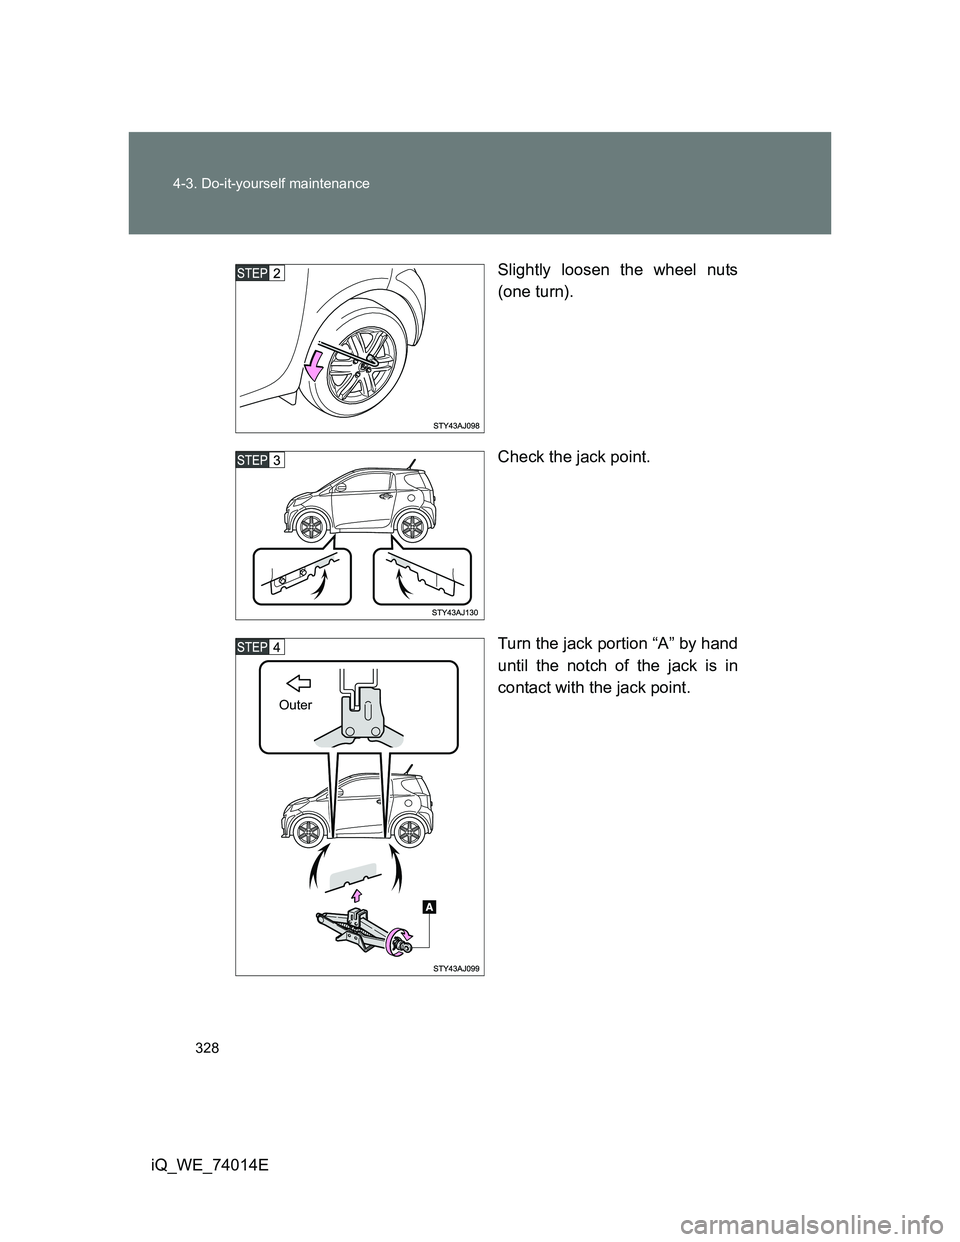
iQ_WE_74014ESlightly loosen the wheel nuts
(one turn).
Check the jack point.
Turn the jack portion “A” by hand
until the notch of the jack is in
contact with the jack point.
Outer
Page 329 of 476
329 4-3. Do-it-yourself maintenance
4
Maintenance and care
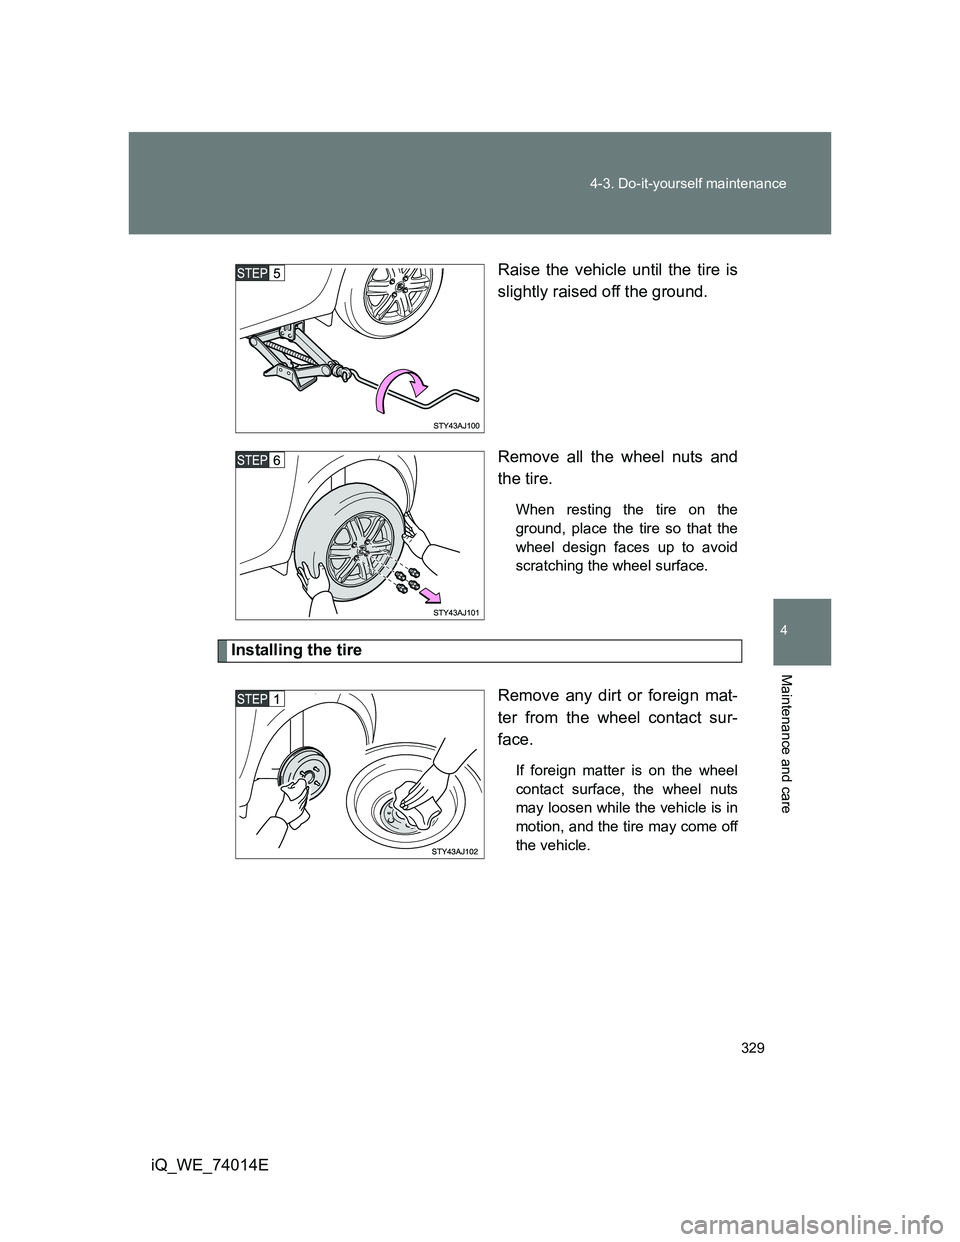
iQ_WE_74014ERaise the vehicle until the tire is
slightly raised off the ground.
Remove all the wheel nuts and
the tire.
When resting the tire on the
ground, place the tire so that the
wheel design faces up to avoid
scratching the wheel surface.
Installing the tire
Remove any dirt or foreign mat-
ter from the wheel contact sur-
face.
If foreign matter is on the wheel
contact surface, the wheel nuts
may loosen while the vehicle is in
motion, and the tire may come off
the vehicle.
Page 330 of 476
330 4-3. Do-it-yourself maintenance
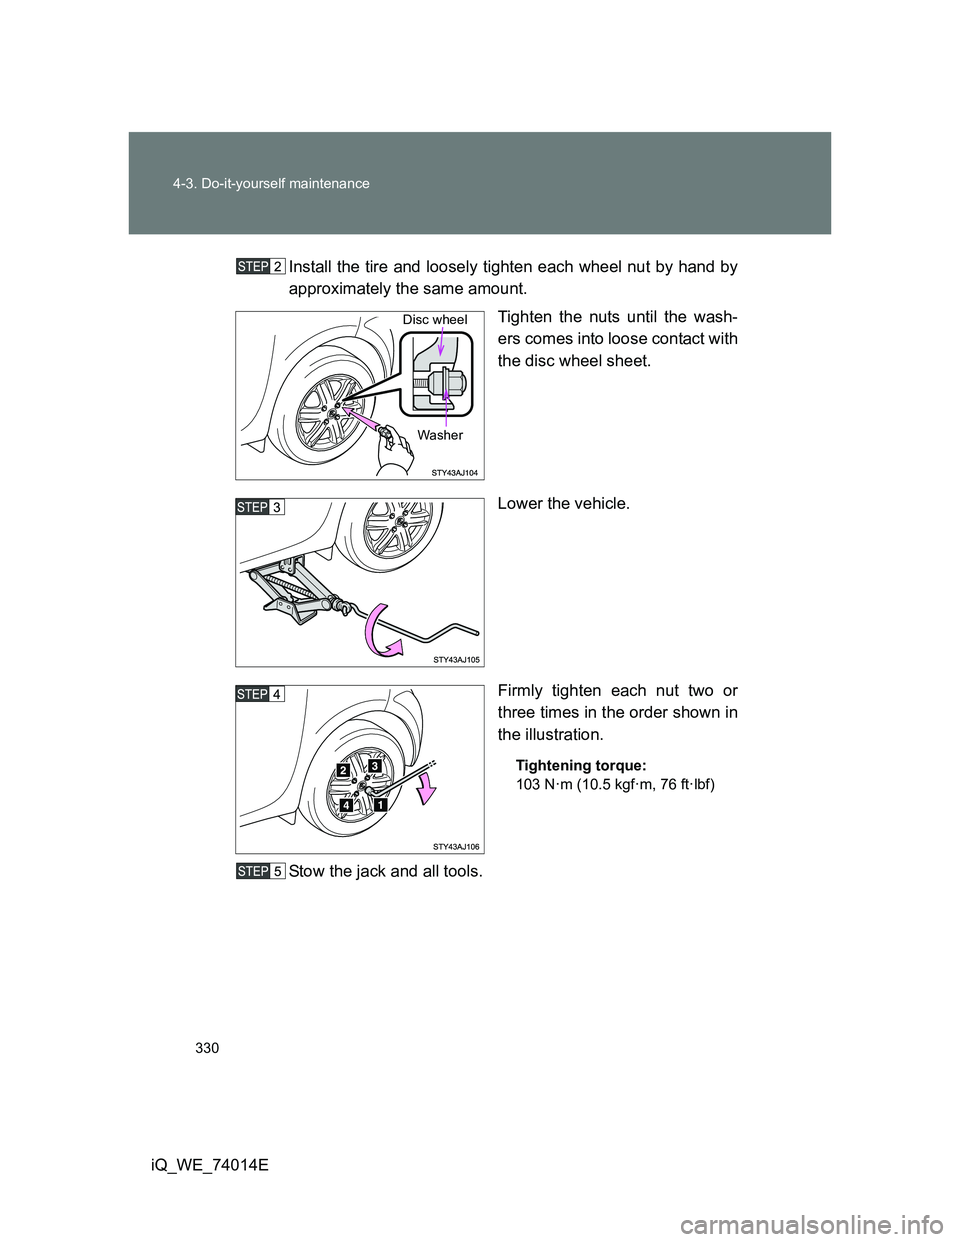
iQ_WE_74014EInstall the tire and loosely tighten each wheel nut by hand by
approximately the same amount.
Tighten the nuts until the wash-
ers comes into loose contact with
the disc wheel sheet.
Lower the vehicle.
Firmly tighten each nut two or
three times in the order shown in
the illustration.
Tightening torque:
103 N·m (10.5 kgf·m, 76 ft·lbf)
Stow the jack and all tools.
Disc wheel
Washer
Trending: brake light, brake fluid, deactivate airbag, low oil pressure, clock, overheating, seat adjustment
