inflation pressure TOYOTA LAND CRUISER 2017 J200 Owners Manual
[x] Cancel search | Manufacturer: TOYOTA, Model Year: 2017, Model line: LAND CRUISER, Model: TOYOTA LAND CRUISER 2017 J200Pages: 608, PDF Size: 15.88 MB
Page 5 of 608

5
1
8 7
6
5
4
3
2
LC200_OM_OM60P24U_(U)
9
6-1. Maintenance and careCleaning and protecting the vehicle exterior .......... 434
Cleaning and protecting the vehicle interior ........... 437
6-2. Maintenance Maintenance requirements ................... 440
General maintenance ........ 443
Emission inspection and maintenance (I/M)
programs ......................... 446
6-3. Do-it-yourself maintenance Do-it-yourself service precautions ..................... 447
Hood.................................. 449
Engine compartment ......... 450
Tires .................................. 463
Tire inflation pressure........ 472
Wheels .............................. 475
Air conditioning filter .......... 477
Electronic key battery ........ 479
Checking and replacing fuses ............................... 481
Headlight aim .................... 485
Light bulbs ......................... 487 7-1. Essential information
Emergency flashers ........... 500
If your vehicle has to be stopped in
an emergency.................. 501
7-2. Steps to take in an emergency
If your vehicle needs to be towed ...................... 502
If you think something is wrong............................... 508
Fuel pump shut off system ............................. 509
If a warning light turns on or a warning buzzer
sounds ............................. 510
If a warning message is displayed ......................... 519
If you have a flat tire .......... 524
If the engine will not start ................................. 538
If the electronic key does not operate properly ........ 540
If the vehicle battery is discharged ....................... 543
If your vehicle overheats.... 546
If the vehicle becomes stuck ................................ 549
6Maintenance and care7When trouble arises
Page 15 of 608
15Pictorial index
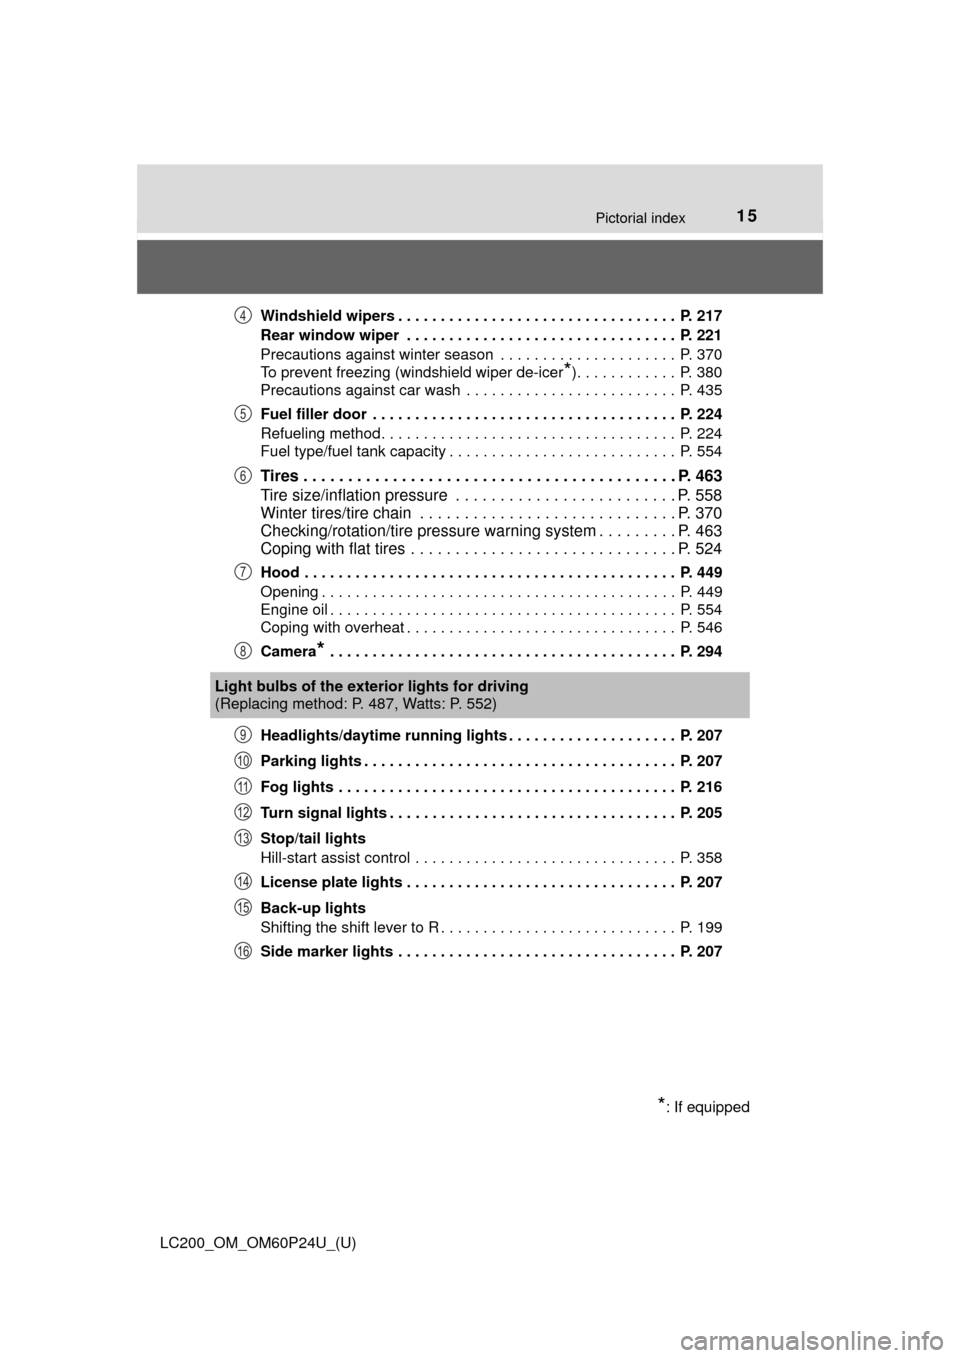
LC200_OM_OM60P24U_(U)Windshield wipers . . . . . . . . . . . . . . . . . . . . . . . . . . . . . . . . . P. 217
Rear window wiper . . . . . . . . . . . . . . . . . . . . . . . . . . . . . . . . P. 221
Precautions against winter season . . . . . . . . . . . . . . . . . . . . . P. 370
To prevent freezing (windshield wiper de-icer
*). . . . . . . . . . . . P. 380
Precautions against car wash . . . . . . . . . . . . . . . . . . . . . . . . . P. 435
Fuel filler door . . . . . . . . . . . . . . . . . . . . . . . . . . . . . . . . . . . . P. 224
Refueling method . . . . . . . . . . . . . . . . . . . . . . . . . . . . . . . . . . . P. 224
Fuel type/fuel tank capacity . . . . . . . . . . . . . . . . . . . . . . . . . . . P. 554
Tires . . . . . . . . . . . . . . . . . . . . . . . . . . . . . . . . . . . . . . . . . . P. 463
Tire size/inflation pressure . . . . . . . . . . . . . . . . . . . . . . . . . P. 558
Winter tires/tire chain . . . . . . . . . . . . . . . . . . . . . . . . . . . . . P. 370
Checking/rotation/tire pressure warning system . . . . . . . . . P. 463
Coping with flat tires . . . . . . . . . . . . . . . . . . . . . . . . . . . . . . P. 524
Hood . . . . . . . . . . . . . . . . . . . . . . . . . . . . . . . . . . . . . . . . . . . . P. 449
Opening . . . . . . . . . . . . . . . . . . . . . . . . . . . . . . . . . . . . . . . . . . P. 449
Engine oil . . . . . . . . . . . . . . . . . . . . . . . . . . . . . . . . . . . . . . . . . P. 554
Coping with overheat . . . . . . . . . . . . . . . . . . . . . . . . . . . . . . . . P. 546
Camera
* . . . . . . . . . . . . . . . . . . . . . . . . . . . . . . . . . . . . . . . . . P. 294
Headlights/daytime running lights . . . . . . . . . . . . . . . . . . . . P. 207
Parking lights . . . . . . . . . . . . . . . . . . . . . . . . . . . . . . . . . . . . . P. 207
Fog lights . . . . . . . . . . . . . . . . . . . . . . . . . . . . . . . . . . . . . . . . P. 216
Turn signal lights . . . . . . . . . . . . . . . . . . . . . . . . . . . . . . . . . . P. 205
Stop/tail lights
Hill-start assist control . . . . . . . . . . . . . . . . . . . . . . . . . . . . . . . P. 358
License plate lights . . . . . . . . . . . . . . . . . . . . . . . . . . . . . . . . P. 207
Back-up lights
Shifting the shift lever to R . . . . . . . . . . . . . . . . . . . . . . . . . . . . P. 199
Side marker lights . . . . . . . . . . . . . . . . . . . . . . . . . . . . . . . . . P. 207
4
5
6
7
8
Light bulbs of the exter ior lights for driving
(Replacing method: P. 487, Watts: P. 552)
*: If equipped
9
10
11
12
13
14
15
16
Page 94 of 608
94
LC200_OM_OM60P24U_(U)
2. Instrument cluster
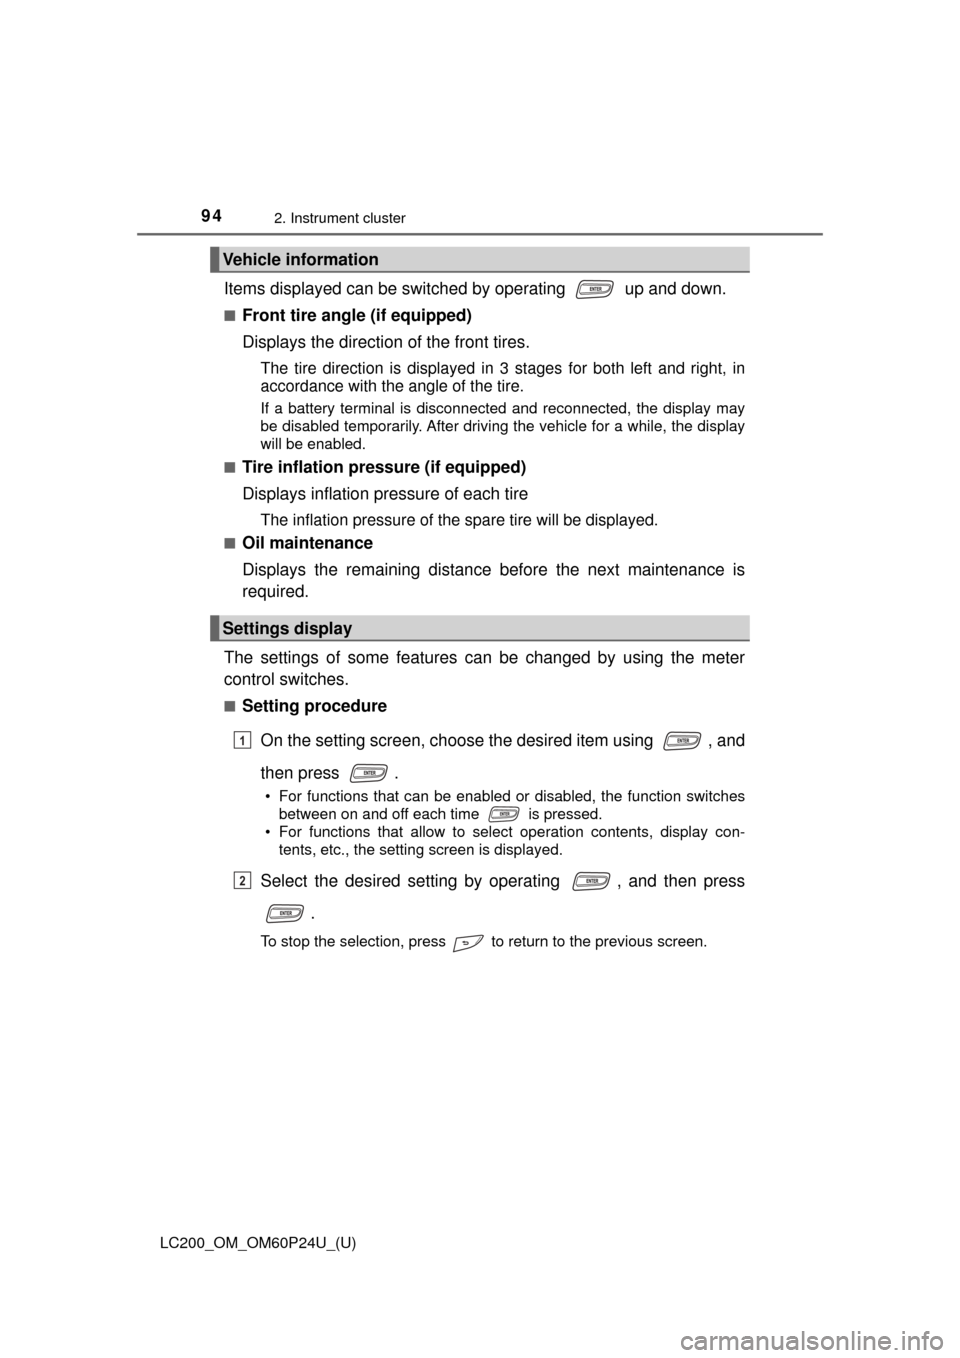
Items displayed can be switched by operating up and down.
■Front tire angle (if equipped)
Displays the direction of the front tires.
The tire direction is displayed in 3 stages for both left and right, in
accordance with the angle of the tire.
If a battery terminal is disconnected and reconnected, the display may
be disabled temporarily. After driving the vehicle for a while, the display
will be enabled.
■
Tire inflation pressure (if equipped)
Displays inflation pressure of each tire
The inflation pressure of the spare tire will be displayed.
■Oil maintenance
Displays the remaining distance before the next maintenance is
required.
The settings of some features can be changed by using the meter
control switches.
■Setting procedure On the setting screen, choose the desired item using , and
then press .
• For functions that can be enabled or disabled, the function switches between on and off each time is pressed.
• For functions that allow to select operation contents, display con-
tents, etc., the setting screen is displayed.
Select the desired setting by operating , and then press
.
To stop the selection, press to return to the previous screen.
Vehicle information
Settings display
1
2
Page 97 of 608

LC200_OM_OM60P24U_(U)
972. Instrument cluster
2
Instrument cluster
■Tire inflation pressure
●It may take a few minutes to display the tire inflation pressure after the
engine switch is turned to IGNITION ON mode. It may also take a few
minutes to display the tire inflation pressure after inflation pressure has
been adjusted.
●“---” may be displayed if the tire information cannot be determined due to
unfavorable radio wave conditions.
●Tire inflation pressure changes with temperature. The displayed values
may also be different from the values measured using a tire pressure
gauge.
■ When setting up the display
Stop the vehicle in a safe place, apply the parking brake, and shift the shift
lever to P
■ Suspension of the settings display
In the following situations, the settings display using the meter control
switches will be suspended.
●When a warning message appears on the multi-information display
● When the vehicle begins to move
■ Liquid crystal display
Small spots or light spots may appear on the display. This phenomenon is
characteristic of liquid crystal displays, and there is no problem continuing to
use the display.
WARNING
■Caution for use while driving
For safety, avoid operating the meter control switch while driving as much
as possible, and do not look continuously at the multi-information display
while driving. Stop the vehicle and operate the meter control switch. Failure
to do so may cause a steering wheel operation error, resulting in an unex-
pected accident.
■ Cautions while setting up the display
As the engine needs to be running during setting up the display, ensure that
the vehicle is parked in a place with adequate ventilation. In a closed area
such as a garage, exhaust gases including harmful carbon monoxide (CO)
may collect and enter the vehicle. This may lead to death or a serious
health hazard.
NOTICE
■While setting up the display
To prevent battery discharge, ensure that the engine is running while setting
up the display features.
Page 246 of 608
246
LC200_OM_OM60P24U_(U)
4-5. Using the driving support systems
• When a very bright light, such as the sun or the headlights of oncoming
traffic, shines directly into the camera sensor
• When the surrounding area is dim, such as at dawn or dusk, or while at night or in a tunnel
• After the engine has started the vehicle has not been driven for a certain amount of time
• While making a left/right turn and for a few seconds after making a left/
right turn
• While driving on a curve and for a few seconds after driving on a curve
• If your vehicle is skidding
• If the wheels are misaligned
• If a wiper blade is blocking the camera sensor
• The vehicle is wobbling.
• The vehicle is being driven at extremely high speeds.
• When driving on a hill
• If the radar sensor or camera sensor is misaligned
● In some situations such as the following, sufficient braking force may not be
obtained, preventing the system from performing properly:
• If the braking functions cannot operate to their full extent, such as when
the brake parts are extremely cold, extremely hot, or wet
• If the vehicle is not properly maintained (brakes or tires are excessively worn, improper tire inflation pressure, etc.)
• When the vehicle is being driven on a gravel road or other slippery sur- face
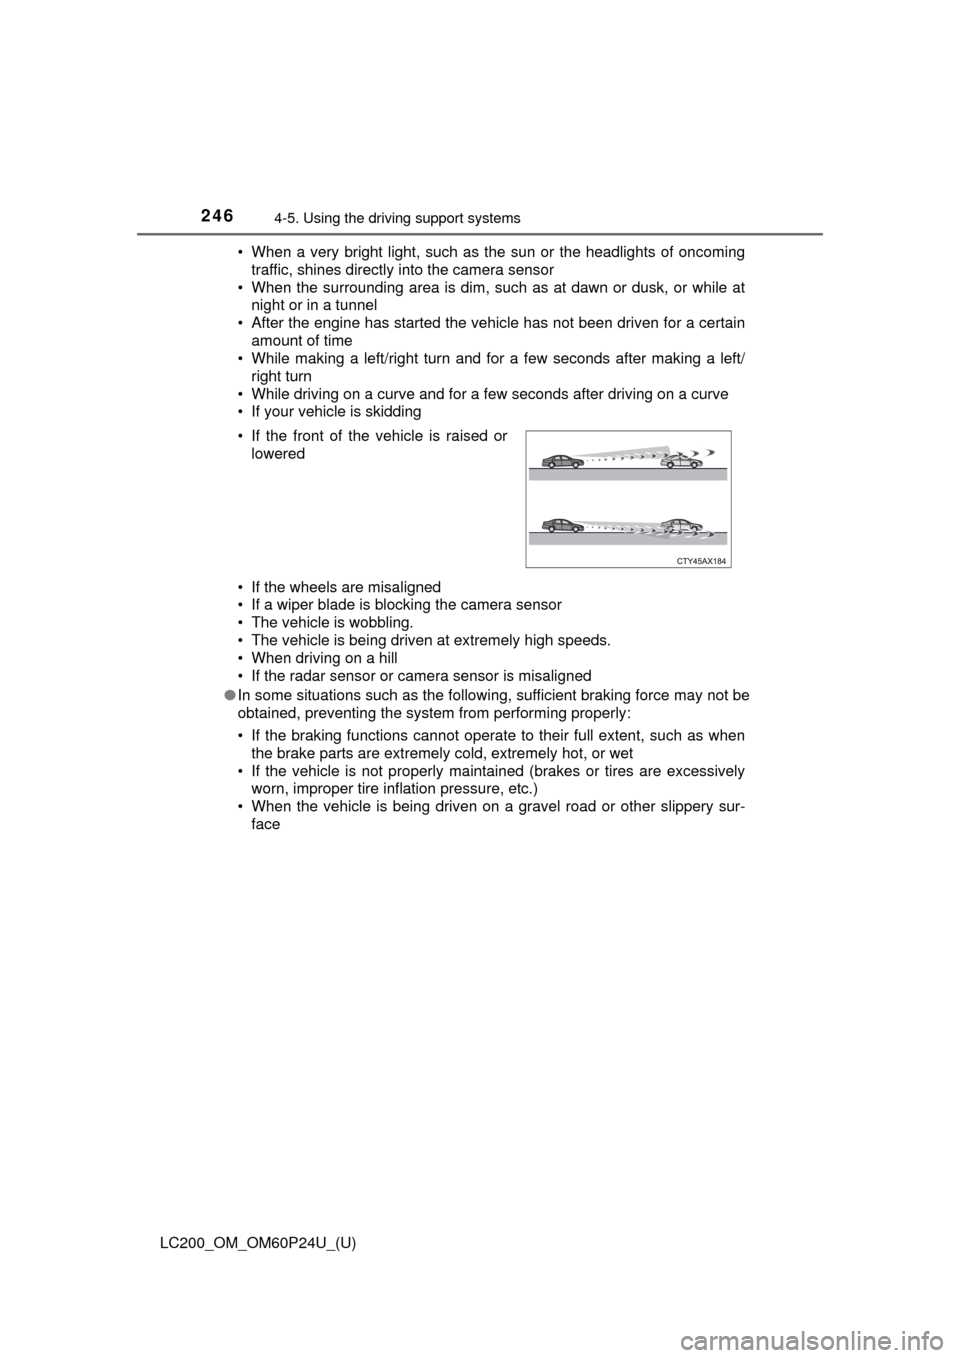
• If the front of the vehicle is raised or
lowered
Page 433 of 608

433
LC200_OM_OM60P24U_(U)
6Maintenance and care
6-1. Maintenance and careCleaning and protecting the vehicle exterior .......... 434
Cleaning and protecting the vehicle interior ........... 437
6-2. Maintenance Maintenance requirements ................... 440
General maintenance........ 443
Emission inspection and maintenance (I/M)
programs......................... 446
6-3. Do-it-yourself maintenance Do-it-yourself service precautions ..................... 447
Hood ................................. 449
Engine compartment ......... 450
Tires .................................. 463
Tire inflation pressure ....... 472
Wheels .............................. 475
Air conditioning filter.......... 477
Electronic key battery........ 479
Checking and replacing fuses ............................... 481
Headlight aim .................... 485
Light bulbs......................... 487
Page 445 of 608
LC200_OM_OM60P24U_(U)
4456-2. Maintenance
6
Maintenance and care
Vehicle exterior
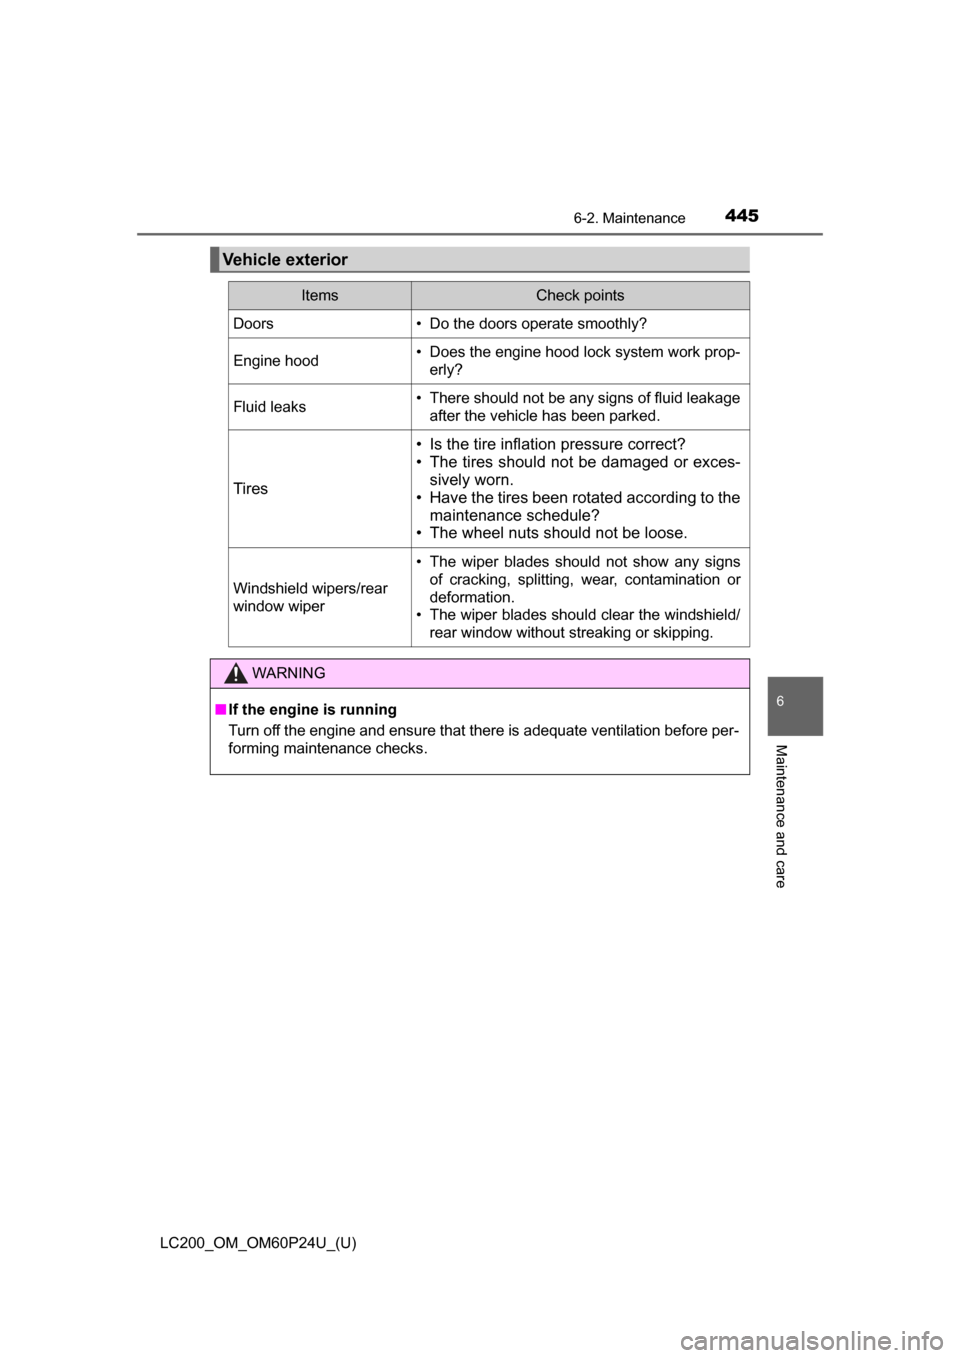
ItemsCheck points
Doors• Do the doors operate smoothly?
Engine hood• Does the engine hood lock system work prop-erly?
Fluid leaks• There should not be any signs of fluid leakageafter the vehicle has been parked.
Tires
• Is the tire inflation pressure correct?
• The tires should not be damaged or exces-sively worn.
• Have the tires been rotated according to the
maintenance schedule?
• The wheel nuts should not be loose.
Windshield wipers/rear
window wiper
• The wiper blades should not show any signs
of cracking, splitting, wear, contamination or
deformation.
• The wiper blades should clear the windshield/
rear window without streaking or skipping.
WARNING
■ If the engine is running
Turn off the engine and ensure that there is adequate ventilation before per-
forming maintenance checks.
Page 447 of 608
447
LC200_OM_OM60P24U_(U)
6-3. Do-it-yourself maintenance
6
Maintenance and care
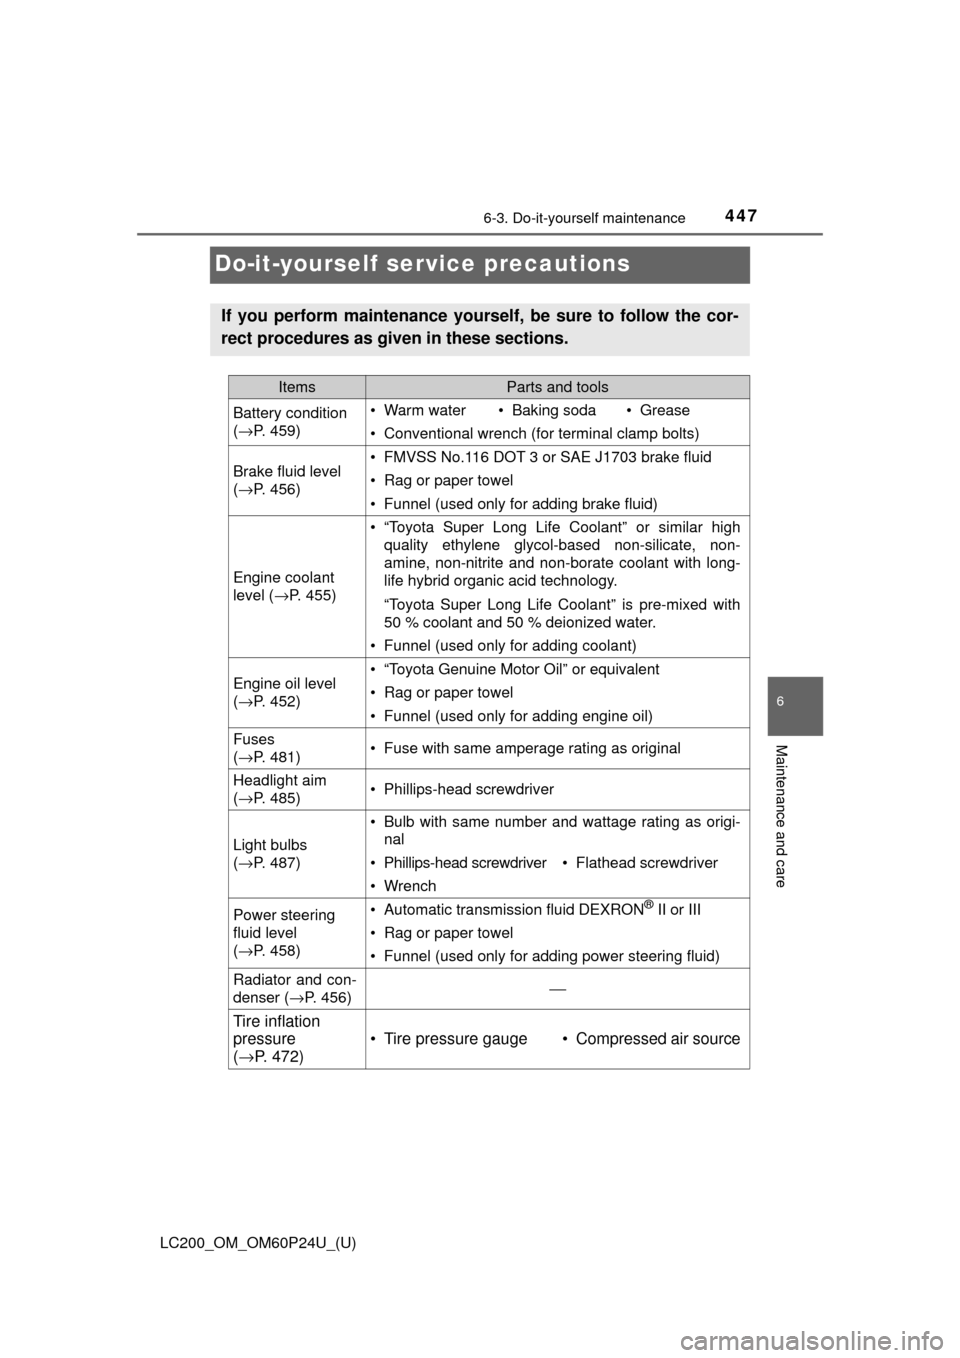
Do-it-yourself service precautions
If you perform maintenance yourself, be sure to follow the cor-
rect procedures as given in these sections.
ItemsParts and tools
Battery condition
(→ P. 459)• Warm water• Baking soda• Grease
• Conventional wrench (for terminal clamp bolts)
Brake fluid level
(→ P. 456)• FMVSS No.116 DOT 3 or SAE J1703 brake fluid
• Rag or paper towel
• Funnel (used only for adding brake fluid)
Engine coolant
level ( →P. 455)
• “Toyota Super Long Life Coolant” or similar high
quality ethylene glycol-based non-silicate, non-
amine, non-nitrite and non-borate coolant with long-
life hybrid organic acid technology.
“Toyota Super Long Life Coolant” is pre-mixed with
50 % coolant and 50 % deionized water.
• Funnel (used only for adding coolant)
Engine oil level
(→ P. 452)• “Toyota Genuine Motor Oil” or equivalent
• Rag or paper towel
• Funnel (used only for adding engine oil)
Fuses
(→ P. 481)• Fuse with same amperage rating as original
Headlight aim
(→ P. 485)• Phillips-head screwdriver
Light bulbs
(→ P. 487)
• Bulb with same number and wattage rating as origi-
nal
• Phillips-head screwdriver• Flathead screwdriver
• Wrench
Power steering
fluid level
(→ P. 458)• Automatic transmission fluid DEXRON® II or III
• Rag or paper towel
• Funnel (used only for adding power steering fluid)
Radiator and con-
denser ( →P. 456)⎯
Tire inflation
pressure
(→ P. 472)
• Tire pressure gauge• Compressed air source
Page 464 of 608
464
LC200_OM_OM60P24U_(U)
6-3. Do-it-yourself maintenance
Your Toyota is equipped with a tire pressure warning system that uses
tire pressure warning valves and transmitters to detect low tire infla-
tion pressure before serious problems arise.
● If the tire pressure drops below a predetermined level, the driver is
warned by a screen display and a warning light. ( →P. 512)
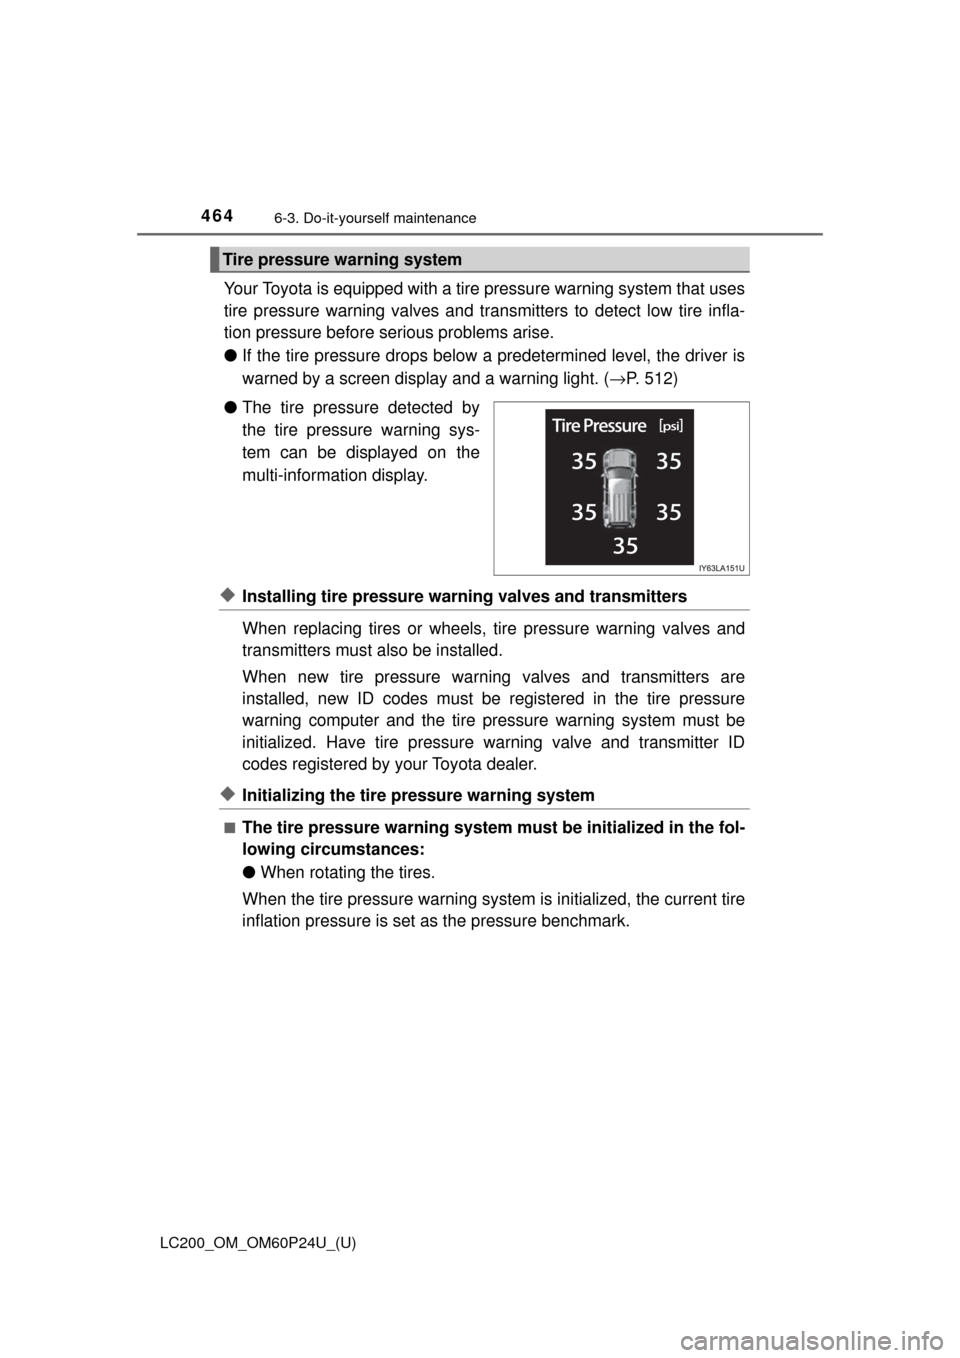
● The tire pressure detected by
the tire pressure warning sys-
tem can be displayed on the
multi-information display.
◆Installing tire pressure warning valves and transmitters
When replacing tires or wheels, tire pressure warning valves and
transmitters must also be installed.
When new tire pressure warning valves and transmitters are
installed, new ID codes must be registered in the tire pressure
warning computer and the tire pr essure warning system must be
initialized. Have tire pressure warning valve and transmitter ID
codes registered by your Toyota dealer.
◆Initializing the tire pressure warning system
■The tire pressure warning system must be initialized in the fol-
lowing circumstances:
● When rotating the tires.
When the tire pressure warning system is initialized, the current tire
inflation pressure is set as the pressure benchmark.
Tire pressure warning system
Page 465 of 608
LC200_OM_OM60P24U_(U)
4656-3. Do-it-yourself maintenance
6
Maintenance and care
■How to initialize the tire pressure warning systemPark the vehicle in safe plac e and turn the engine switch off.
Initialization cannot be performed while the vehicle is moved.
Adjust the tire inflation pressure to the specified cold tire inflation
pressure level. ( →P. 558)
Make sure to adjust the tire pressu re to the specified cold tire infla-
tion pressure level. The tire pressure warning system will operate
based on this pressure level.
Turn the engine switch to IGNITION ON mode.
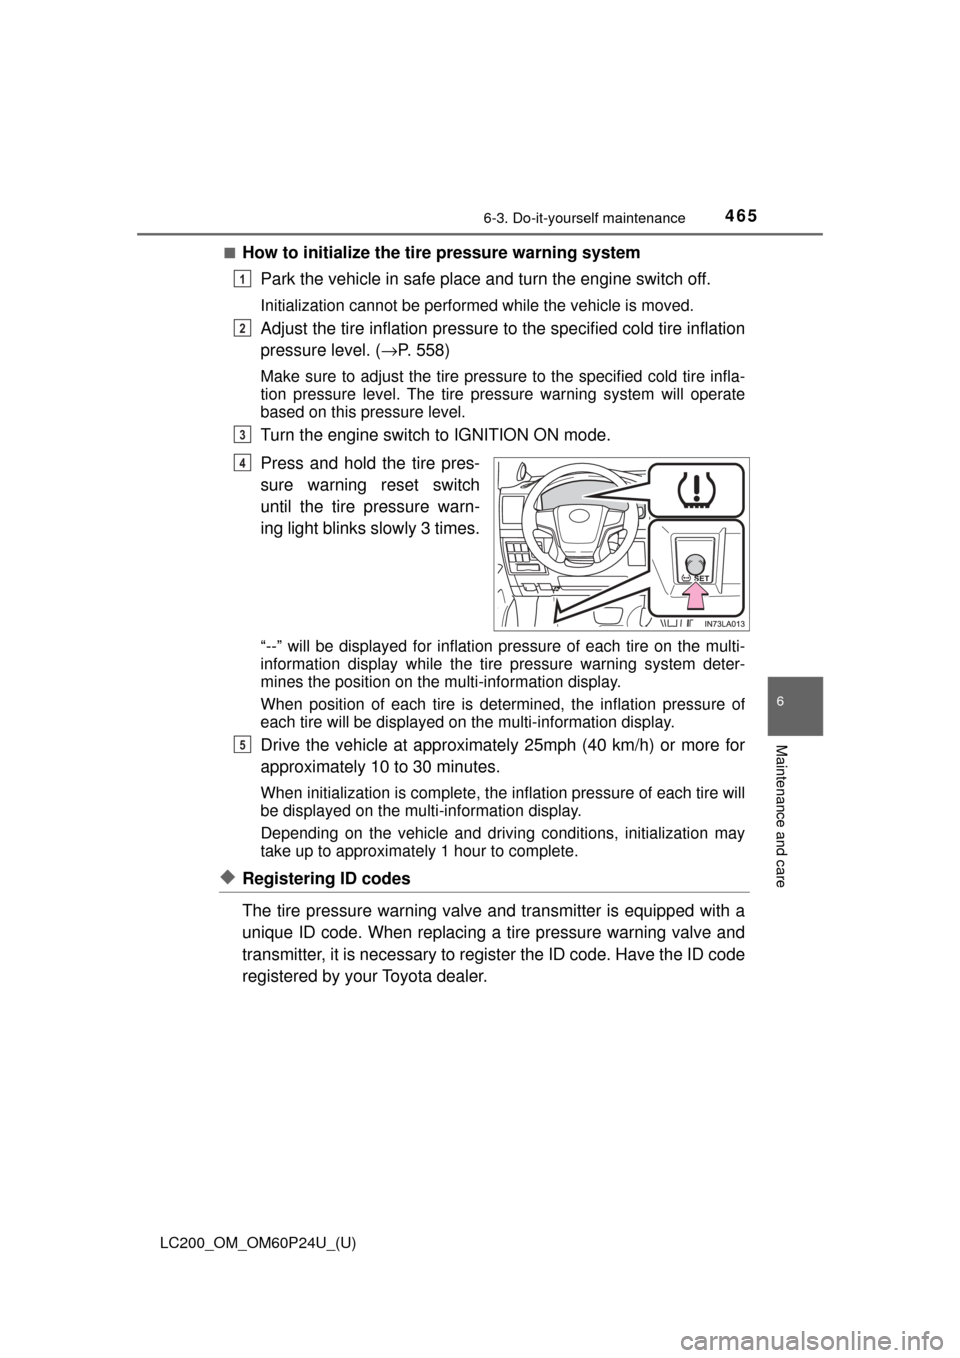
Press and hold the tire pres-
sure warning reset switch
until the tire pressure warn-
ing light blinks slowly 3 times.
“--” will be displayed for inflation pressure of each tire on the multi-
information display while the tire pressure warning system deter-
mines the position on the multi-information display.
When position of each tire is determined, the inflation pressure of
each tire will be displayed on the multi-information display.
Drive the vehicle at approximatel y 25mph (40 km/h) or more for
approximately 10 to 30 minutes.
When initialization is co mplete, the inflation pre ssure of each tire will
be displayed on the multi-information display.
Depending on the vehicle and driving conditions, initialization may
take up to approximately 1 hour to complete.
◆Registering ID codes
The tire pressure warning valve and transmitter is equipped with a
unique ID code. When replacing a tire pressure warning valve and
transmitter, it is necessary to register the ID code. Have the ID code
registered by your Toyota dealer.
1
2
3
4
5