tow TOYOTA LAND CRUISER 2019 Owners Manual (in English)
[x] Cancel search | Manufacturer: TOYOTA, Model Year: 2019, Model line: LAND CRUISER, Model: TOYOTA LAND CRUISER 2019Pages: 624, PDF Size: 12.58 MB
Page 3 of 624
3
1
8 7
6
5
4
3
2
LC200_OM_OM60Q99U_(U)
9
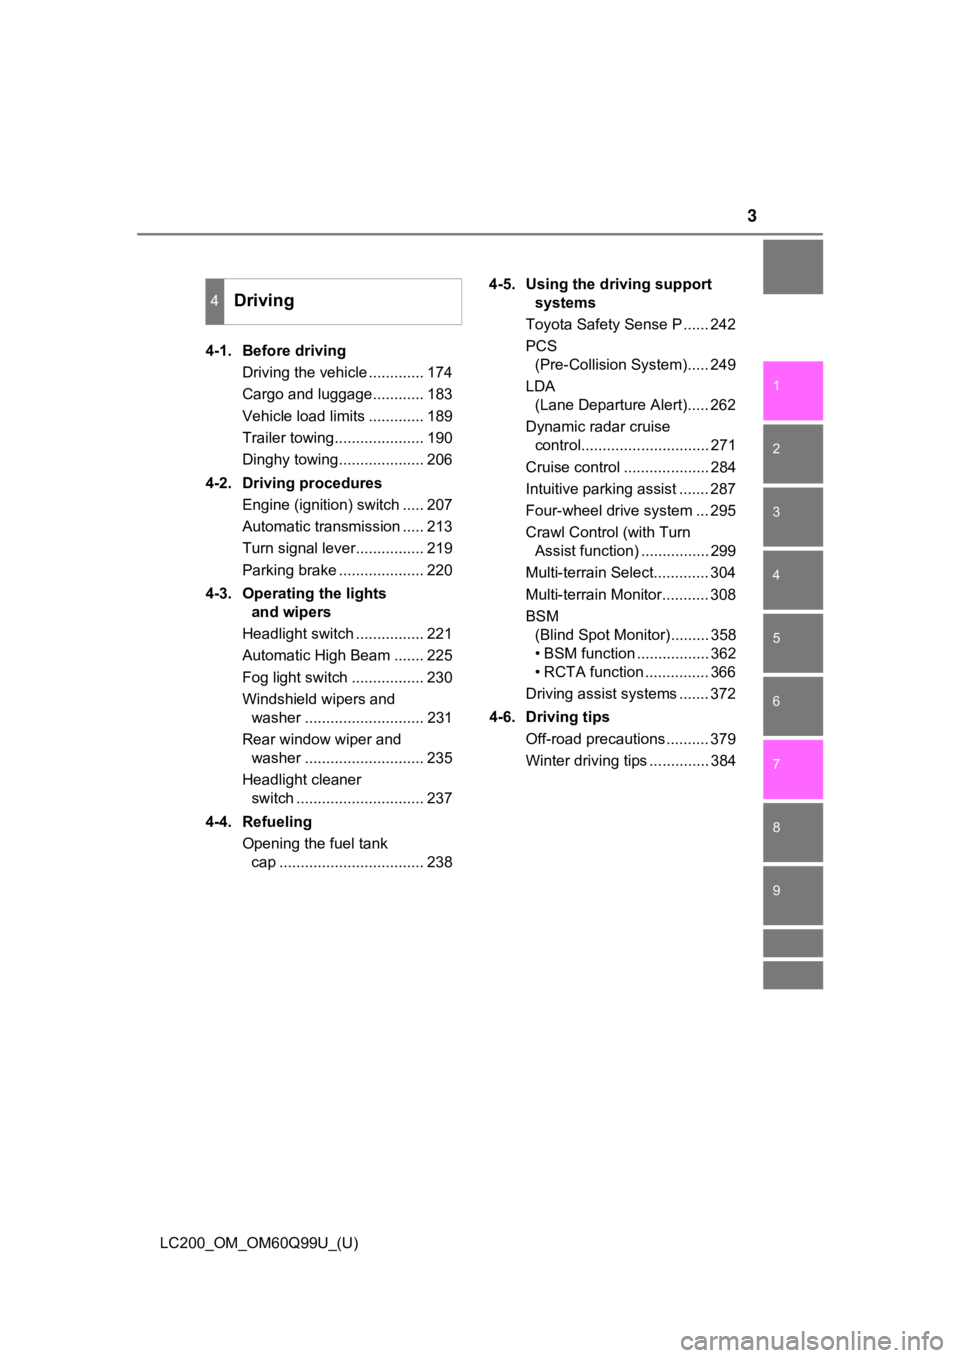
4-1. Before drivingDriving the vehicle ............. 174
Cargo and luggage............ 183
Vehicle load limits ............. 189
Trailer towing..................... 190
Dinghy towing.................... 206
4-2. Driving procedures Engine (ignition) switch ..... 207
Automatic transmission ..... 213
Turn signal lever................ 219
Parking brake .................... 220
4-3. Operating the lights and wipers
Headlight switch ................ 221
Automatic High Beam ....... 225
Fog light switch ................. 230
Windshield wipers and washer ............................ 231
Rear window wiper and washer ............................ 235
Headlight cleaner switch .............................. 237
4-4. Refueling Opening the fuel tank cap .................................. 238 4-5. Using the driving support
systems
Toyota Safety Sense P ...... 242
PCS (Pre-Collision System)..... 249
LDA (Lane Departure Alert)..... 262
Dynamic radar cruise control.............................. 271
Cruise control .................... 284
Intuitive parking assist ....... 287
Four-wheel drive system ... 295
Crawl Control (with Turn Assist function) ................ 299
Multi-terrain Select............. 304
Multi-terrain Monitor........... 308
BSM (Blind Spot Monitor)......... 358
• BSM function ................. 362
• RCTA function ............... 366
Driving assist systems ....... 372
4-6. Driving tips Off-road precautions .......... 379
Winter driving tips .............. 384
4Driving
Page 5 of 624
5
1
8 7
6
5
4
3
2
LC200_OM_OM60Q99U_(U)
9
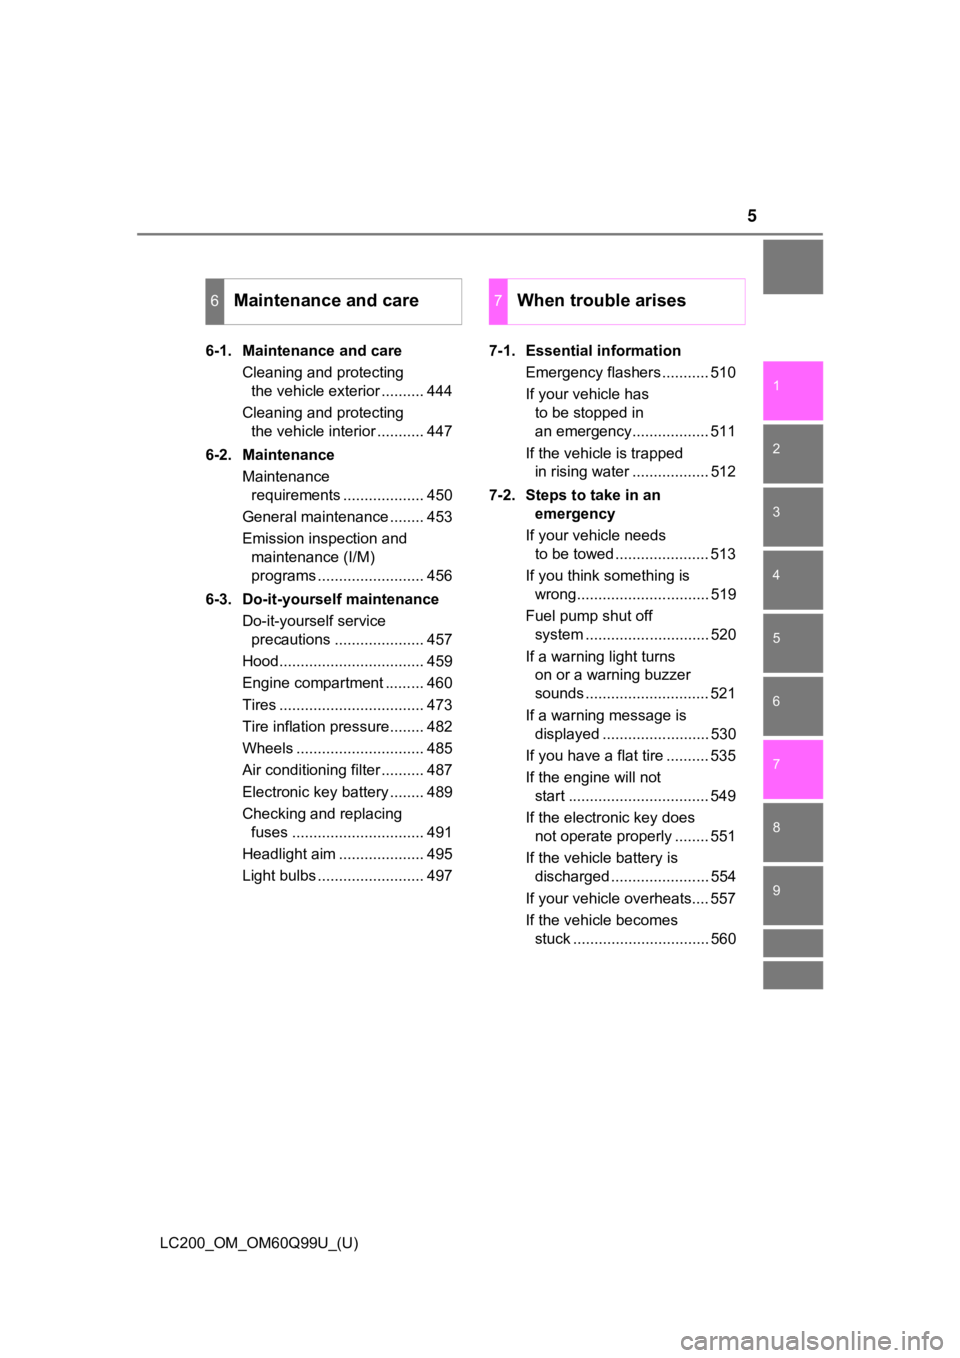
6-1. Maintenance and careCleaning and protecting the vehicle exterior .......... 444
Cleaning and protecting the vehicle interior ........... 447
6-2. Maintenance Maintenance requirements ................... 450
General maintenance ........ 453
Emission inspection and maintenance (I/M)
programs ......................... 456
6-3. Do-it-yourself maintenance Do-it-yourself service precautions ..................... 457
Hood.................................. 459
Engine compartment ......... 460
Tires .................................. 473
Tire inflation pressure........ 482
Wheels .............................. 485
Air conditioning filter .......... 487
Electronic key battery ........ 489
Checking and replacing fuses ............................... 491
Headlight aim .................... 495
Light bulbs ......................... 497 7-1. Essential information
Emergency flashers ........... 510
If your vehicle has to be stopped in
an emergency.................. 511
If the vehicle is trapped in rising water .................. 512
7-2. Steps to take in an emergency
If your vehicle needs to be towed ...................... 513
If you think something is wrong............................... 519
Fuel pump shut off system ............................. 520
If a warning light turns on or a warning buzzer
sounds ............................. 521
If a warning message is displayed ......................... 530
If you have a flat tire .......... 535
If the engine will not start ................................. 549
If the electronic key does not operate properly ........ 551
If the vehicle battery is discharged ....................... 554
If your vehicle overheats.... 557
If the vehicle becomes stuck ................................ 560
6Maintenance and care7When trouble arises
Page 18 of 624

18Pictorial index
LC200_OM_OM60Q99U_(U)
■Instrument panel
Engine switch . . . . . . . . . . . . . . . . . . . . . . . . . . . . . . . . . . . . . P. 207
Starting the engine/changing the modes . . . . . . . . . . . . . . . . . P. 207
Emergency stop of the engine . . . . . . . . . . . . . . . . . . . . . . . . . P. 511
When the engine will not start . . . . . . . . . . . . . . . . . . . . . . . . . P. 549
Warning messages . . . . . . . . . . . . . . . . . . . . . . . . . . . . . . . . . P. 530
Shift lever . . . . . . . . . . . . . . . . . . . . . . . . . . . . . . . . . . . . . . . . P. 213
Changing the shift position . . . . . . . . . . . . . . . . . . . . . . . . . . . P. 213
Precautions against towing . . . . . . . . . . . . . . . . . . . . . . . . . . . P. 513
When the shift lever does not move . . . . . . . . . . . . . . . . . . . . P. 217
Meters . . . . . . . . . . . . . . . . . . . . . . . . . . . . . . . . . . . . . . . . . . . . P. 93
Reading the meters/adjusting the instrument panel light . . . . . . P. 93
Warning lights/indicators . . . . . . . . . . . . . . . . . . . . . . . . . . . . . . P. 88
When the warning lights come on . . . . . . . . . . . . . . . . . . . . . . P. 5211
2
3
Page 33 of 624
331-1. For safe use
LC200_OM_OM60Q99U_(U)
1
For safety and security
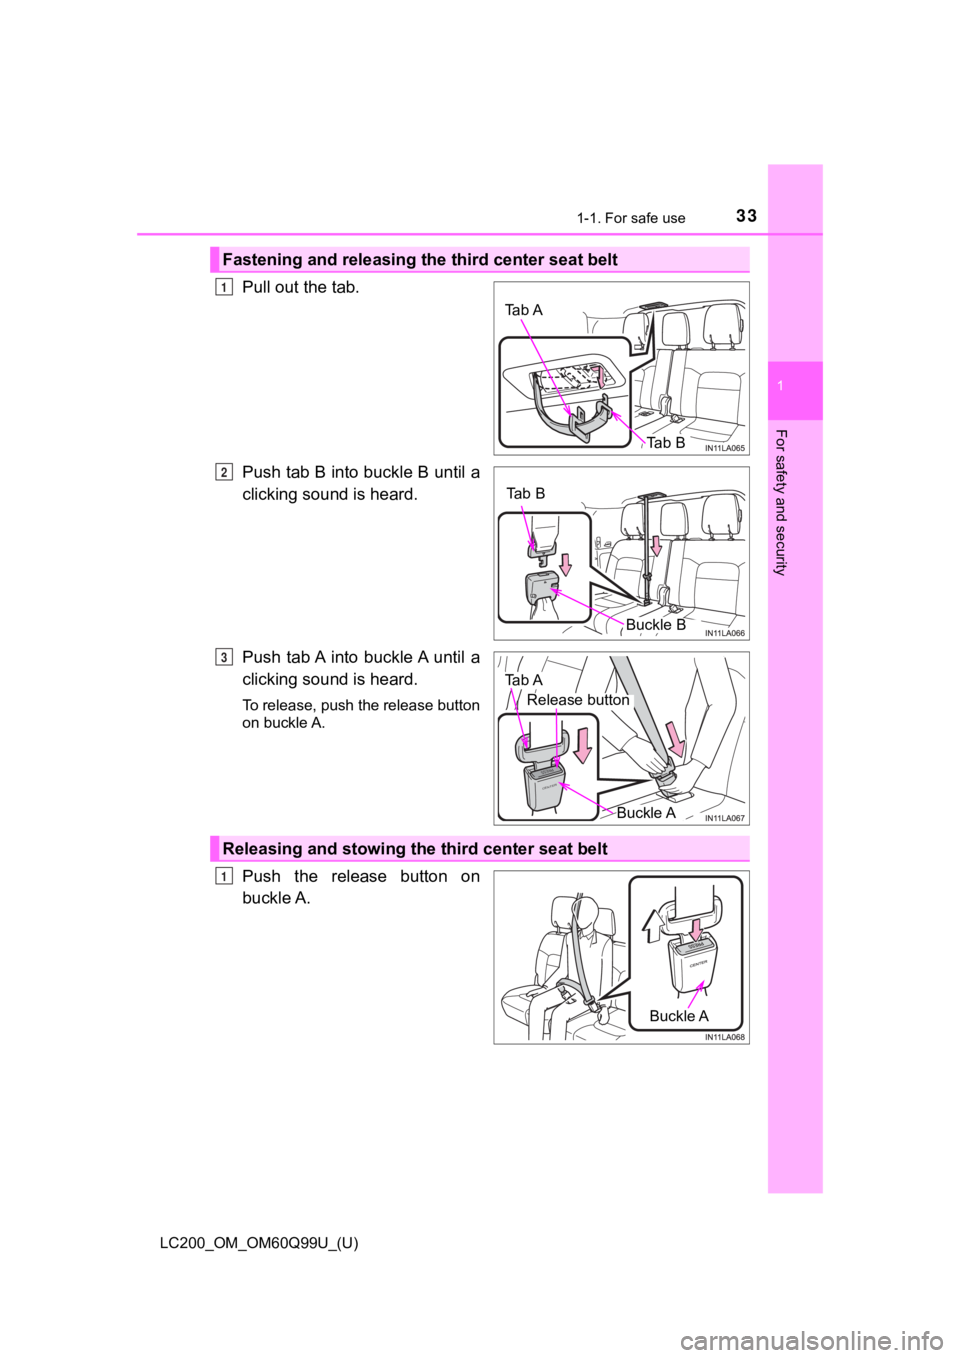
Pull out the tab.
Push tab B into buckle B until a
clicking sound is heard.
Push tab A into buckle A until a
clicking sound is heard.
To release, push the release button
on buckle A.
Push the release button on
buckle A.
Fastening and releasing the third center seat belt
Tab A
Tab B
1
Tab B
Buckle B
O
PRESS
CENTER
Tab A
Buckle A
Release button
3
Releasing and stowing the third center seat belt
Buckle A
1
Page 34 of 624
341-1. For safe use
LC200_OM_OM60Q99U_(U)
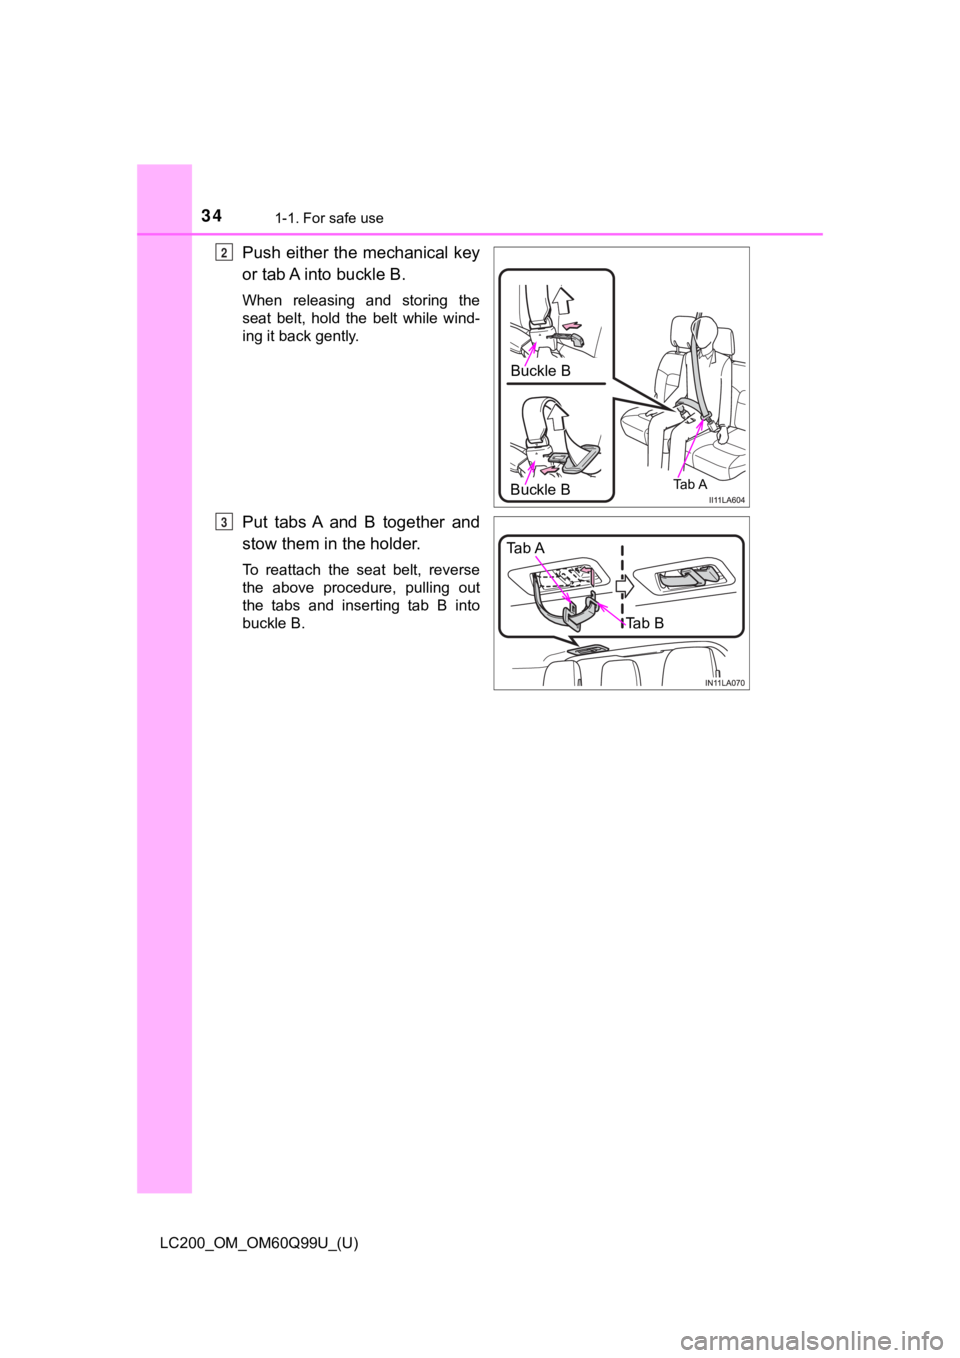
Push either the mechanical key
or tab A into buckle B.
When releasing and storing the
seat belt, hold the belt while wind-
ing it back gently.
Put tabs A and B together and
stow them in the holder.
To reattach the seat belt, reverse
the above procedure, pulling out
the tabs and inserting tab B into
buckle B.
Buckle B
Ta b ABuckle B
2
Tab A
Tab B
P
Page 43 of 624
431-1. For safe use
LC200_OM_OM60Q99U_(U)
1
For safety and security
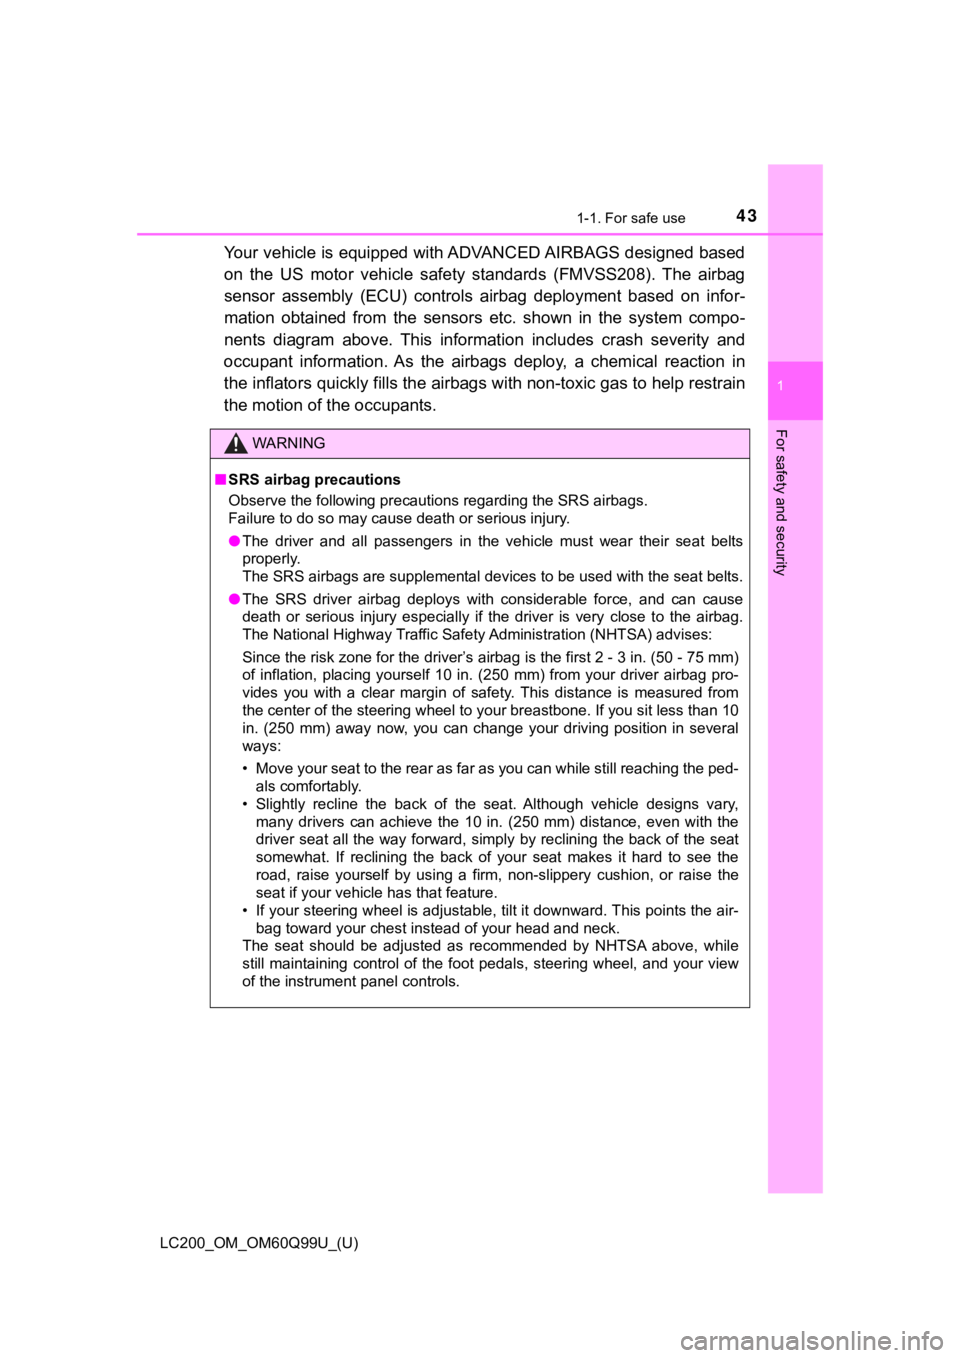
Your vehicle is equipped with ADVANCED AIRBAGS designed based
on the US motor vehicle safety standards (FMVSS208). The airbag
sensor assembly (ECU) controls airbag deployment based on infor-
mation obtained from the sensors etc. shown in the system compo -
nents diagram above. This informat ion includes crash severity and
occupant information. As the airbags deploy, a chemical reactio n in
the inflators quickly fills the airbags with non-toxic gas to h elp restrain
the motion of t he occupants.
WARNING
■SRS airbag precautions
Observe the following precautions regarding the SRS airbags.
Failure to do so may cause death or serious injury.
● The driver and all passengers in the vehicle must wear their se at belts
properly.
The SRS airbags are supplemental devices to be used with the se at belts.
● The SRS driver airbag deploys with considerable force, and can cause
death or serious injury especially if the driver is very close to the airbag.
The National Highway Traffic Safety Administration (NHTSA) advi ses:
Since the risk zone for the driver’s airbag is the first 2 - 3 in. (50 - 75 mm)
of inflation, placing yourself 10 in. (250 mm) from your driver airbag pro-
vides you with a clear margin of safety. This distance is measured from
the center of the steering wheel to your breastbone. If you sit less than 10
in. (250 mm) away now, you can change your driving position in several
ways:
• Move your seat to the rear as far as you can while still reach ing the ped-
als comfortably.
• Slightly recline the back of the seat. Although vehicle design s vary,
many drivers can achieve the 10 in. (250 mm) distance, even wit h the
driver seat all the way forward, simply by reclining the back o f the seat
somewhat. If reclining the back of your seat makes it hard to s ee the
road, raise yourself by using a firm, non-slippery cushion, or raise the
seat if your vehicle has that feature.
• If your steering wheel is adjustable, tilt it downward. This points the air-
bag toward your chest instead of your head and neck.
The seat should be adjusted as recommended by NHTSA above, whil e
still maintaining control of the foot pedals, steering wheel, and your view
of the instrument panel controls.
Page 45 of 624

451-1. For safe use
LC200_OM_OM60Q99U_(U)
1
For safety and security
WARNING
■SRS airbag precautions
● Do not lean against the door, the roof
side rail or the front, side and rear pil-
lars.
● Do not allow anyone to kneel on the
passenger seats toward the door or put
their head or hands outside the vehicle.
● Do not attach anything to or lean any-
thing against areas such as the dash-
board, steering wheel pad and lower
portion of the instrument panel.
These items can become projectiles
when the SRS driver, front passenger
and knee airbags deploy.
Page 78 of 624
781-2. Emergency assistance
LC200_OM_OM60Q99U_(U)■
Automatic Collision Notification
In case of either airbag deployme
nt or severe rear-end collision, the
system is designed to automatically call the response center. T he
responding agent receives the v ehicle’s location and attempts to
speak with the vehicl e occupants to assess the level of emergency.
If the occupants are unable to communicate, the agent automati-
cally treats the call as an emergency, contacts the nearest eme r-
gency services provider to descr ibe the situation, and requests that
assistance be sent to the location.
■Stolen Vehicle Location
If your vehicle is stolen, Safety Connect can work with local author-
ities to assist them in locating and recovering the vehicle. Af ter filing
a police report, call the Safety Connect response center at 1-8 55-
405-6500 in the Unites States, 1-877-855-8377 in Puerto Rico or 1-
888-869-6828 in Canada, and follow the prompts for Safety Con-
nect to initiate this service.
In addition to assisting law enforcement with recovery of a sto len
vehicle, Safety-Connect-equipped vehicle location data may, und er
certain circumstances, be shared with third parties to locate y our
vehicle. Further information is a vailable at Toyota.com in the United
States, Toyotapr.com in Puerto Rico and Toyota.ca in Canada.
■Emergency Assistance Button (“SOS”)
In the event of an emergency on t he road, push the “SOS” button to
reach the Safety Connect respons e center. The answering agent
will determine your vehicle’s loca tion, assess the emergency, and
dispatch the necessary assistanc e required.
If you accidentally press the “SOS” button, tell the response-c enter
agent that you are not experiencing an emergency.
■
Roadside Assistance
Subscribers can press the “SOS” button to reach a Safety Connec t
response-center agent, who can he lp with a wide range of needs,
such as: towing, flat tire, fuel delivery, etc. For a description of the
Roadside Assistance services an d their limitations, please see the
Safety Connect Terms and Conditions, which are available at Toy -
ota.com in the United States, Toy otapr.com in Puerto Rico and Toy-
ota.ca in Canada.
Safety Connect services
Page 136 of 624
136
LC200_OM_OM60Q99U_(U)
3-2. Opening, closing and locking the doors
■Battery-saving function
The battery-saving function will be activated in order to preve nt the electronic
key battery and the battery from being discharged while the veh icle is not in
operation for a long time.
● In the following situations, the smart key system may take some time to
unlock the doors.
• The electronic key has been left in an area of approximately 6 ft. (2 m) of
the outside of the vehicle for 10 minutes or longer.
• The smart key system has not been used for 5 days or longer.
● If the smart key system has not been used for 14 days or longer , the doors
cannot be unlocked at any doors except the driver’s door. In th is case, take
hold of the driver’s door handle, or use the wireless remote co ntrol or the
mechanical key, to unlock the doors.
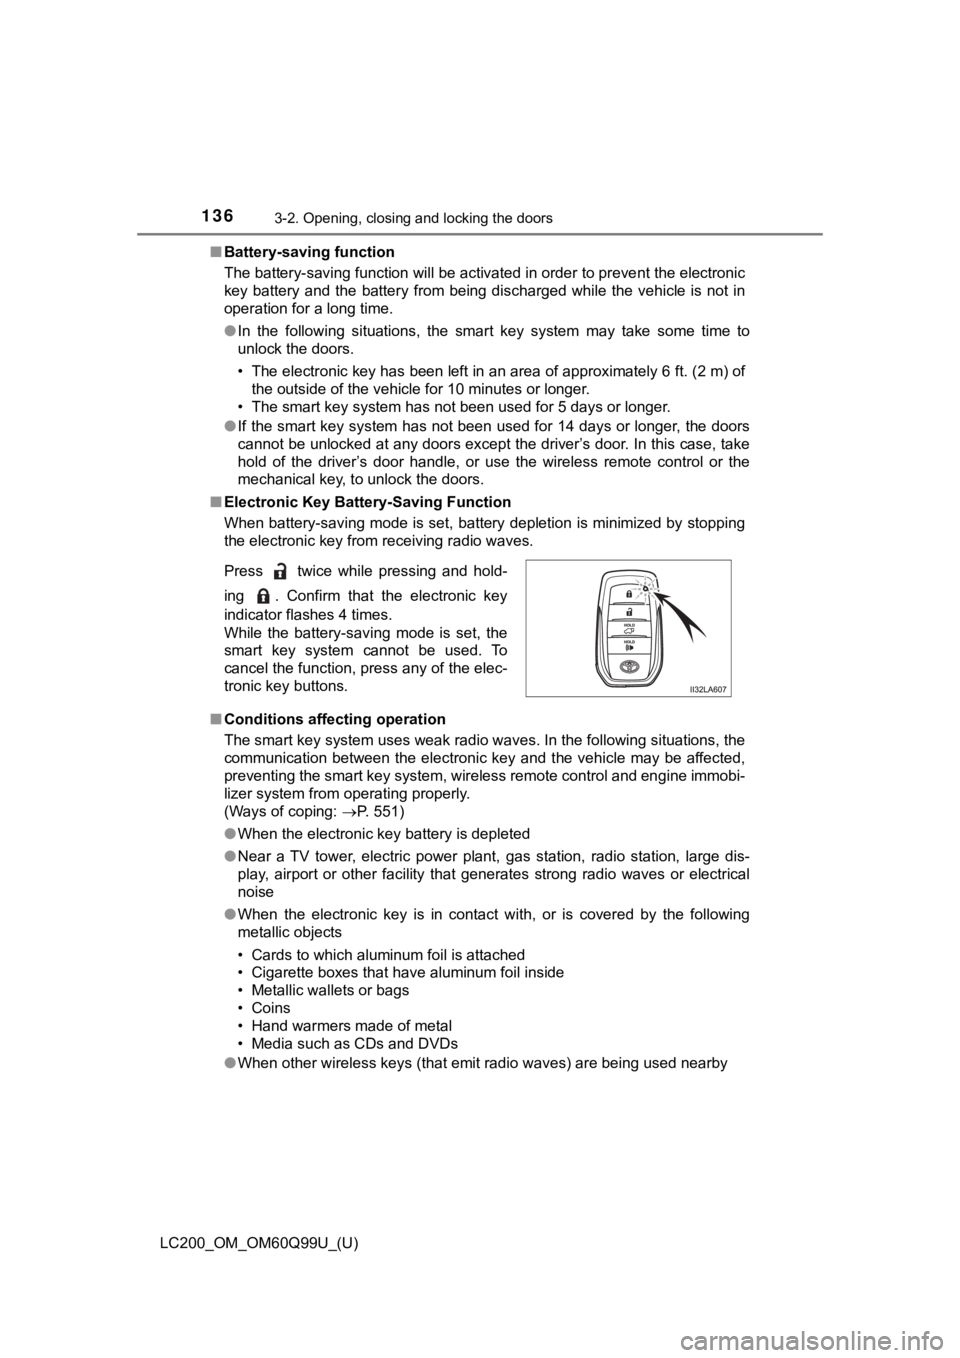
■ Electronic Key Battery-Saving Function
When battery-saving mode is set, battery depletion is minimized by stopping
the electronic key from receiving radio waves.
■ Conditions affecting operation
The smart key system uses weak radio waves. In the following si tuations, the
communication between the electronic key and the vehicle may be affected,
preventing the smart key system, wireless remote control and en gine immobi-
lizer system from operating properly.
(Ways of coping: P. 551)
● When the electronic key battery is depleted
● Near a TV tower, electric power plant, gas station, radio stati on, large dis-
play, airport or other facility that generates strong radio wav es or electrical
noise
● When the electronic key is in contact with, or is covered by the following
metallic objects
• Cards to which aluminum foil is attached
• Cigarette boxes that have aluminum foil inside
• Metallic wallets or bags
• Coins
• Hand warmers made of metal
• Media such as CDs and DVDs
● When other wireless keys (that emit radio waves) are being used nearby
Press twice while pressing and hold-
ing . Confirm that the electronic key
indicator flashes 4 times.
While the battery-saving mode is set, the
smart key system cannot be used. To
cancel the function, press any of the elec-
tronic key buttons.
Page 144 of 624
144
LC200_OM_OM60Q99U_(U)
3-3. Adjusting the seats
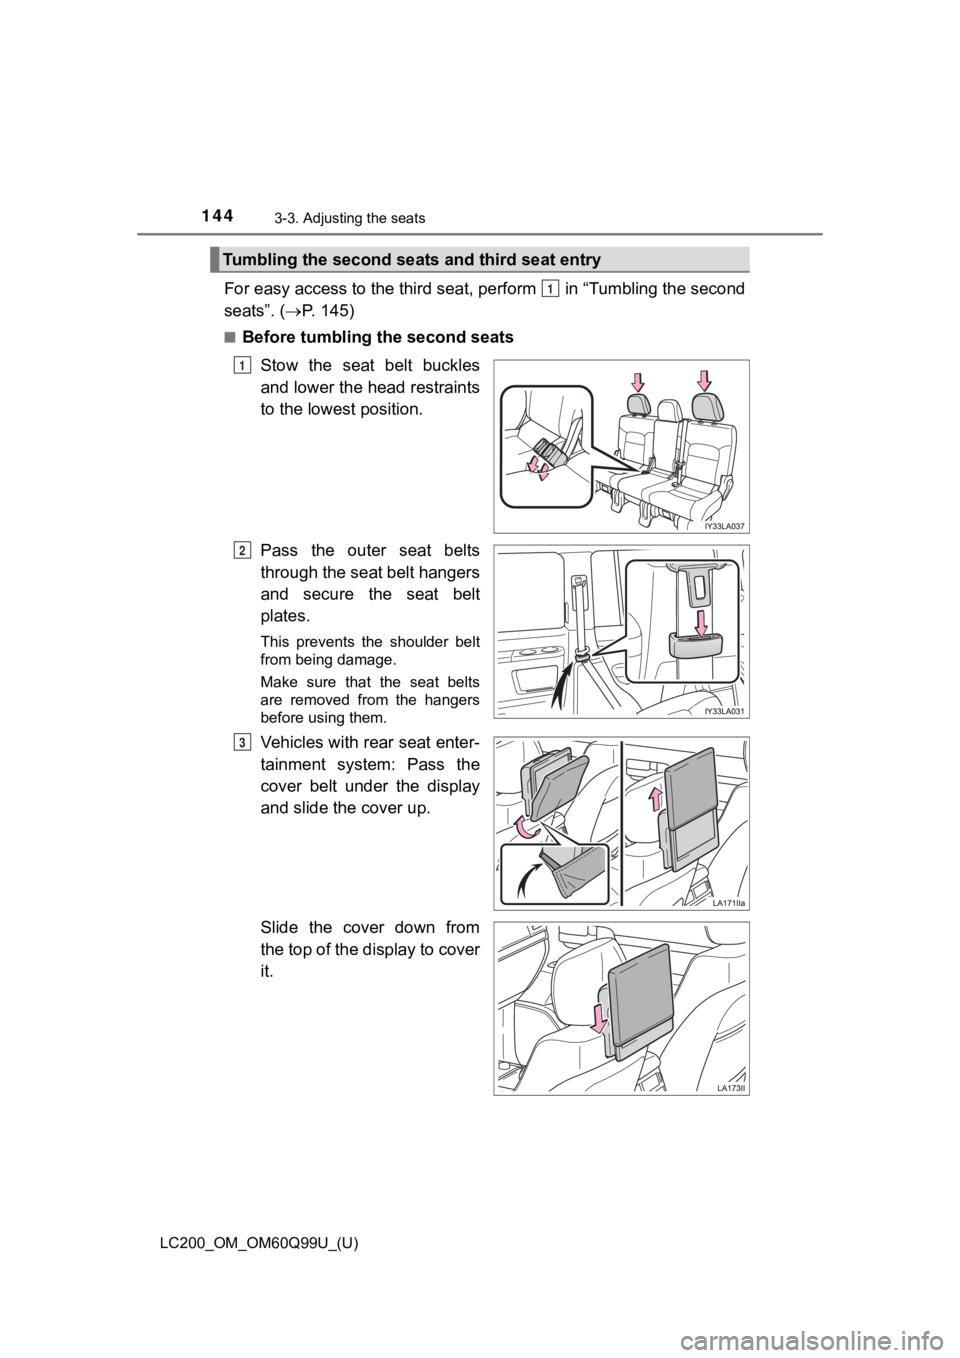
For easy access to the third seat, perform in “Tumbling the se cond
seats”. ( P. 145)
■Before tumbling the second seats
Stow the seat belt buckles
and lower the head restraints
to the lowest position.
Pass the outer seat belts
through the seat belt hangers
and secure the seat belt
plates.
This prevents the shoulder belt
from being damage.
Make sure that the seat belts
are removed from the hangers
before using them.
Vehicles with rear seat enter-
tainment system: Pass the
cover belt under the display
and slide the cover up.
Slide the cover down from
the top of the display to cover
it.
Tumbling the second seats and third seat entry
1
1
2
3