TOYOTA PRIUS 2020 Owners Manual (in English)
PRIUS 2020
TOYOTA
TOYOTA
https://www.carmanualsonline.info/img/14/42650/w960_42650-0.png
TOYOTA PRIUS 2020 Owners Manual (in English)
Trending: width, wheel bolt torque, change key battery, recommended oil, change time, alarm, sat nav
Page 601 of 728
6017-2. Steps to take in an emergency
PRIUS_OM_OM47D44U_(U)
7
When trouble arises
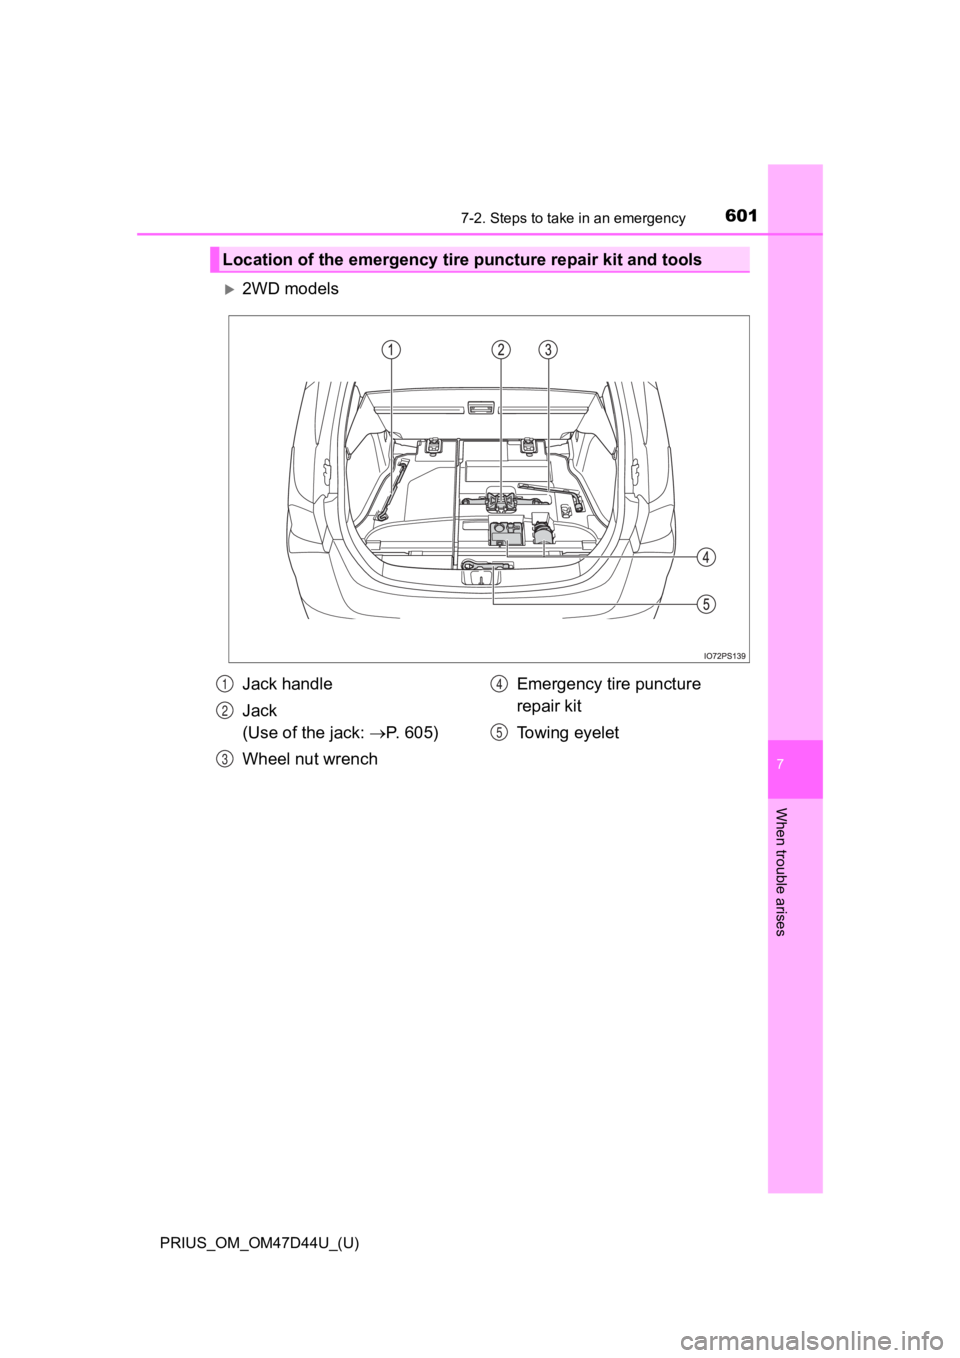
2WD models
Location of the emergency tire puncture repair kit and tools
Jack handle
Jack
(Use of the jack: P. 6 0 5 )
Wheel nut wrench Emergency tire puncture
repair kit
Towing eyelet1
2
3
4
5
Page 602 of 728
6027-2. Steps to take in an emergency
PRIUS_OM_OM47D44U_(U)
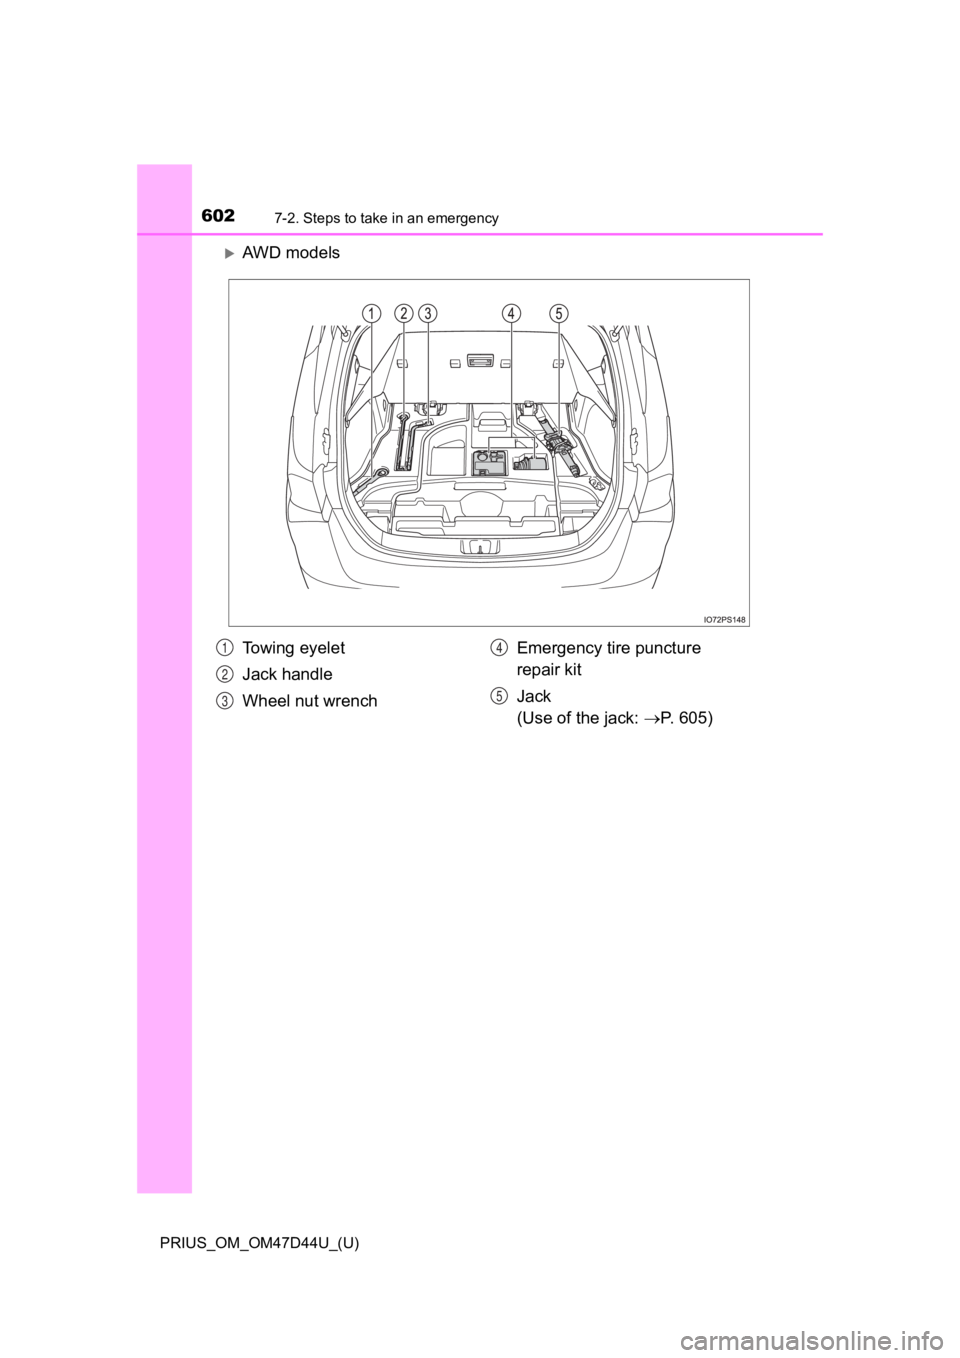
AWD models
To w i n g e y e l e t
Jack handle
Wheel nut wrenchEmergency tire puncture
repair kit
Jack
(Use of the jack:
P. 605)1
2
3
4
5
Page 603 of 728
6037-2. Steps to take in an emergency
PRIUS_OM_OM47D44U_(U)
7
When trouble arises
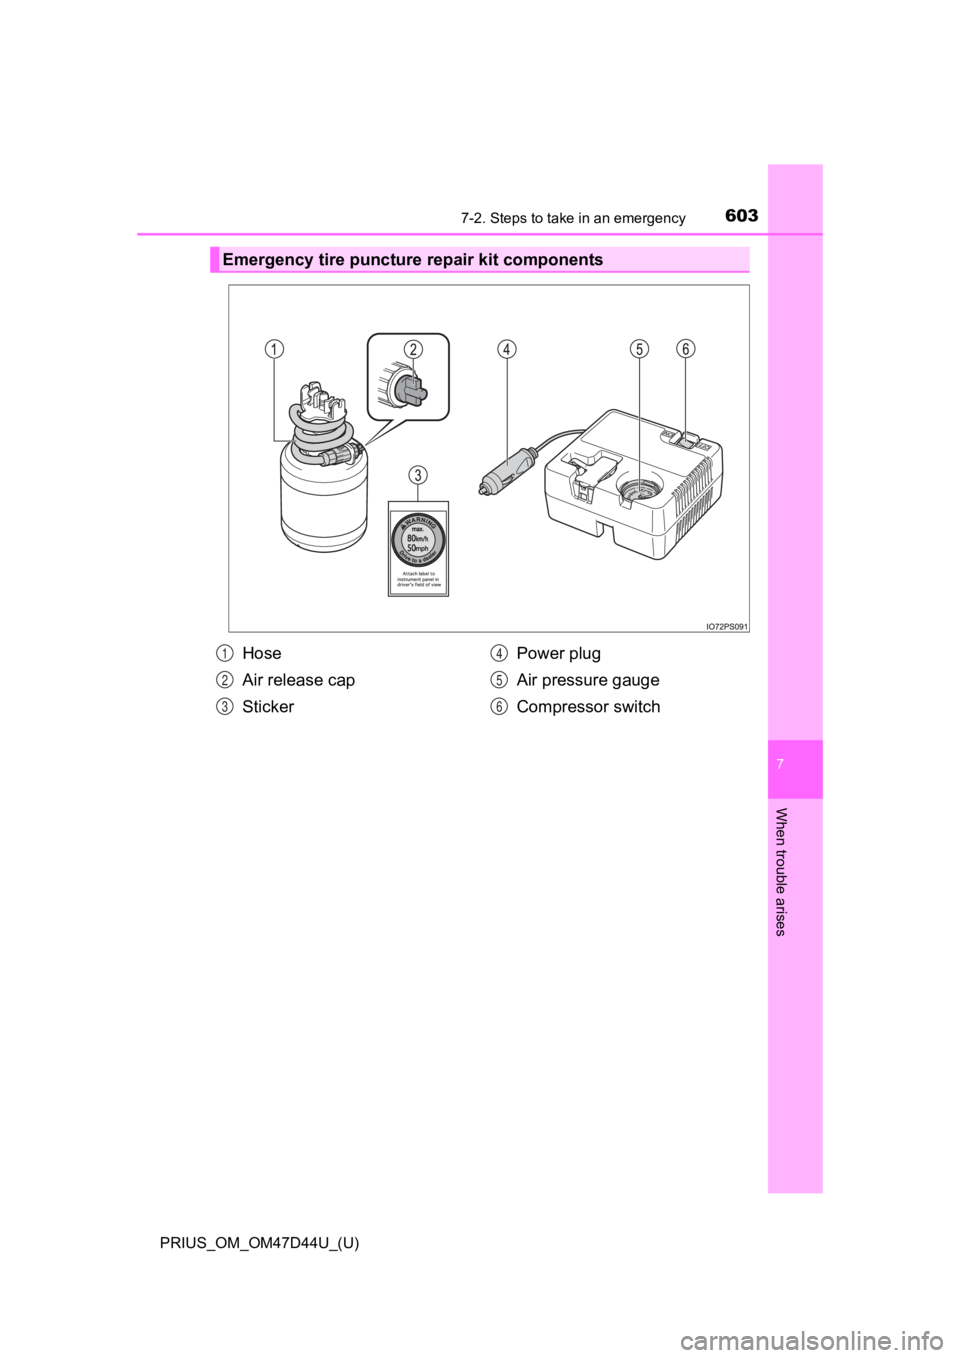
Emergency tire puncture repair kit components
Hose
Air release cap
StickerPower plug
Air pressure gauge
Compressor switch1
2
3
4
5
6
Page 604 of 728
6047-2. Steps to take in an emergency
PRIUS_OM_OM47D44U_(U)
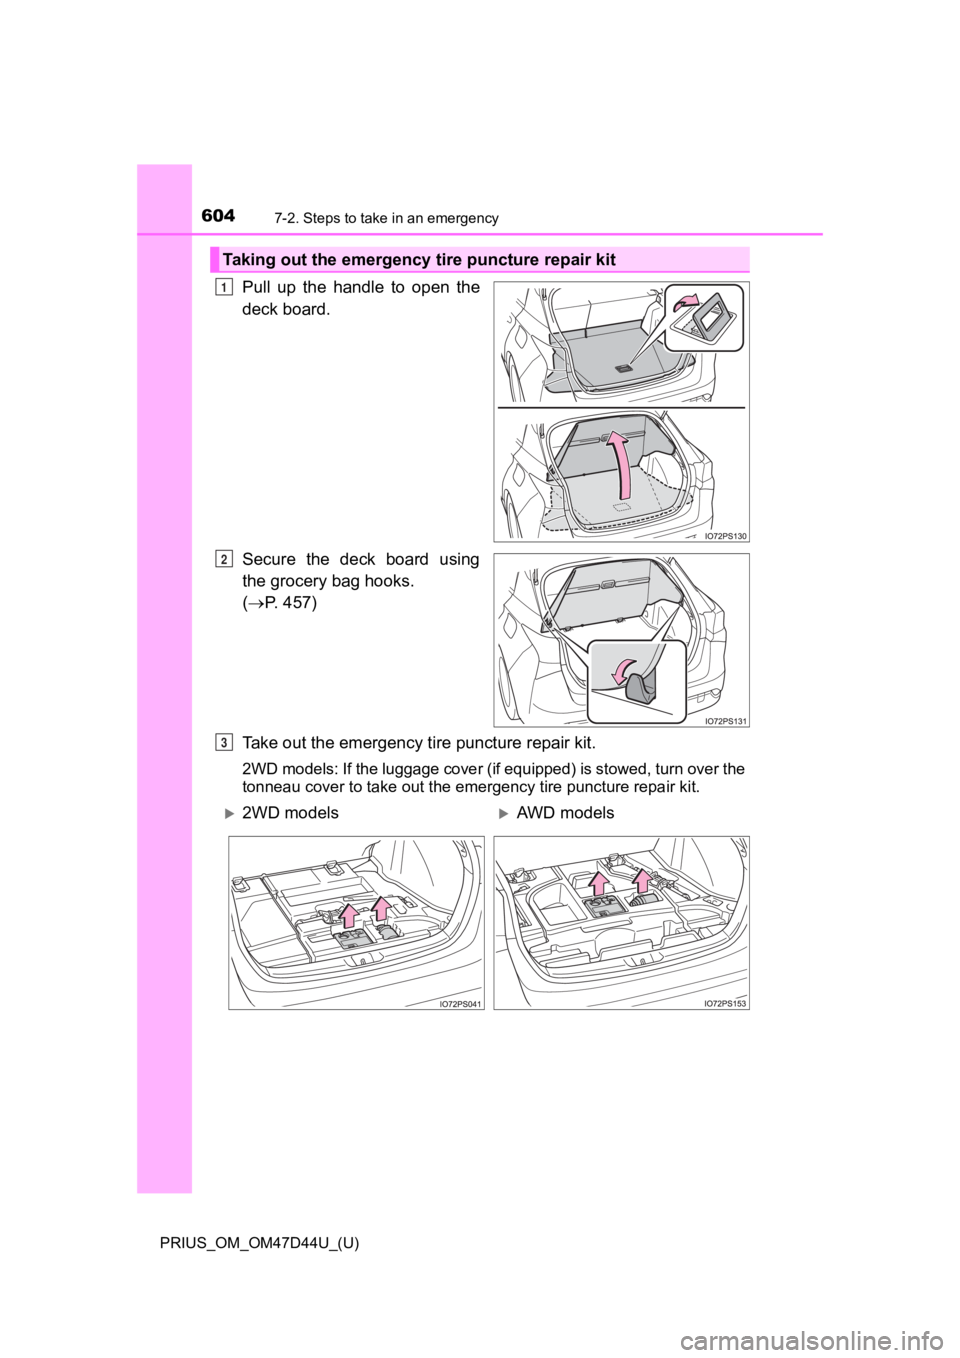
Pull up the handle to open the
deck board.
Secure the deck board using
the grocery bag hooks.
( P. 457)
Take out the emergency t ire puncture repair kit.
2WD models: If the luggage cover (if equipped) is stowed, turn over the
tonneau cover to take out the emergency tire puncture repair ki t.
Taking out the emergency tire puncture repair kit
1
2
3
2WD modelsAWD models
Page 605 of 728
6057-2. Steps to take in an emergency
PRIUS_OM_OM47D44U_(U)
7
When trouble arises
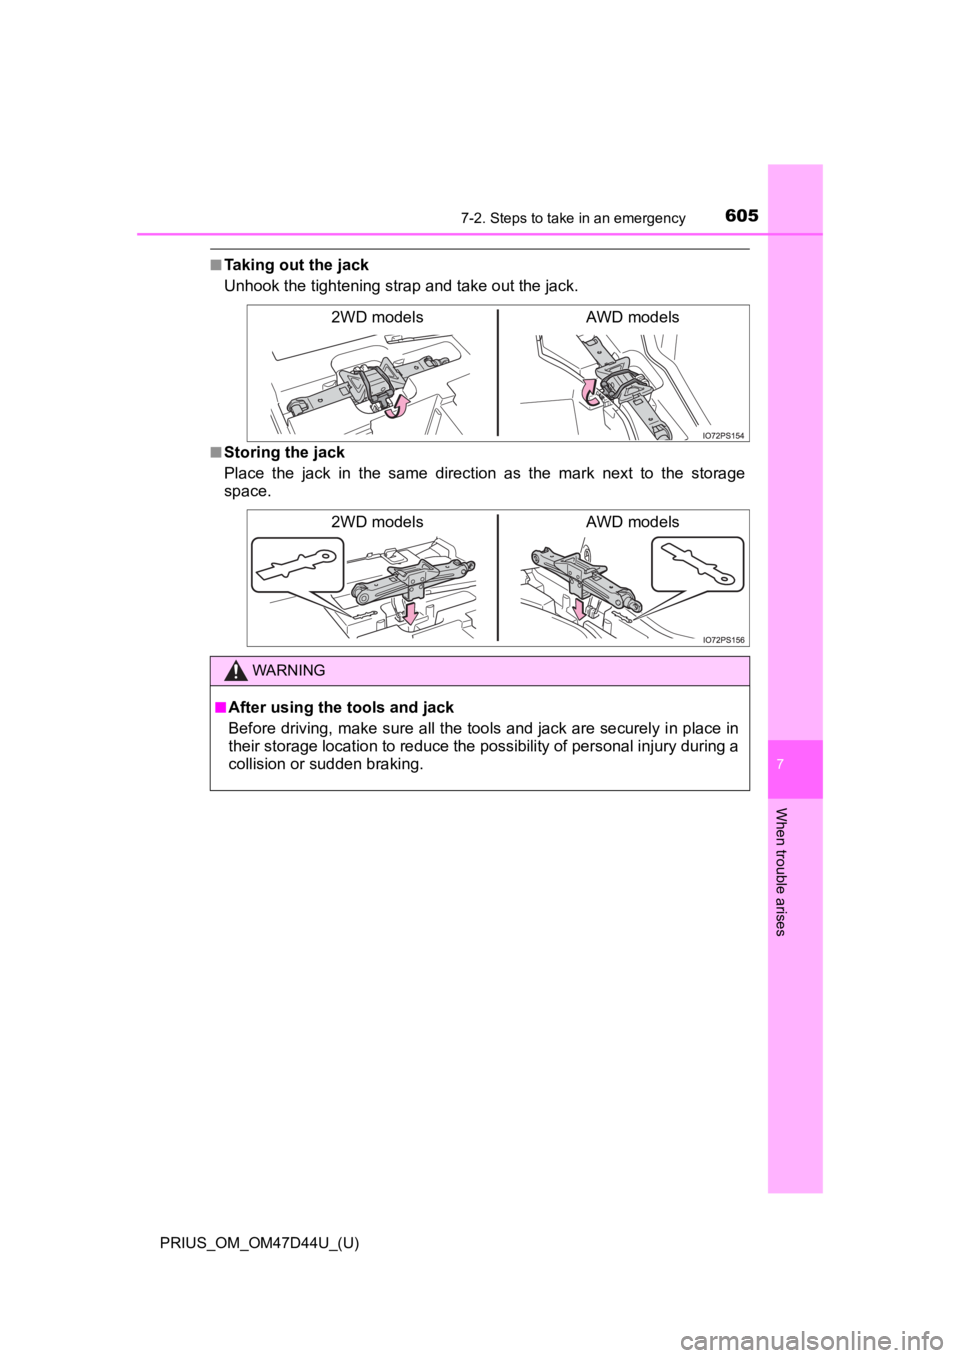
■Taking out the jack
Unhook the tightening strap and take out the jack.
■Storing the jack
Place the jack in the same direction as the mark next to the storage
space.
2WD models AWD models
2WD modelsAWD models
WARNING
■After using the tools and jack
Before driving, make sure all the tools and jack are securely i n place in
their storage location to reduce the possibility of personal in jury during a
collision or sudden braking.
Page 606 of 728
6067-2. Steps to take in an emergency
PRIUS_OM_OM47D44U_(U)
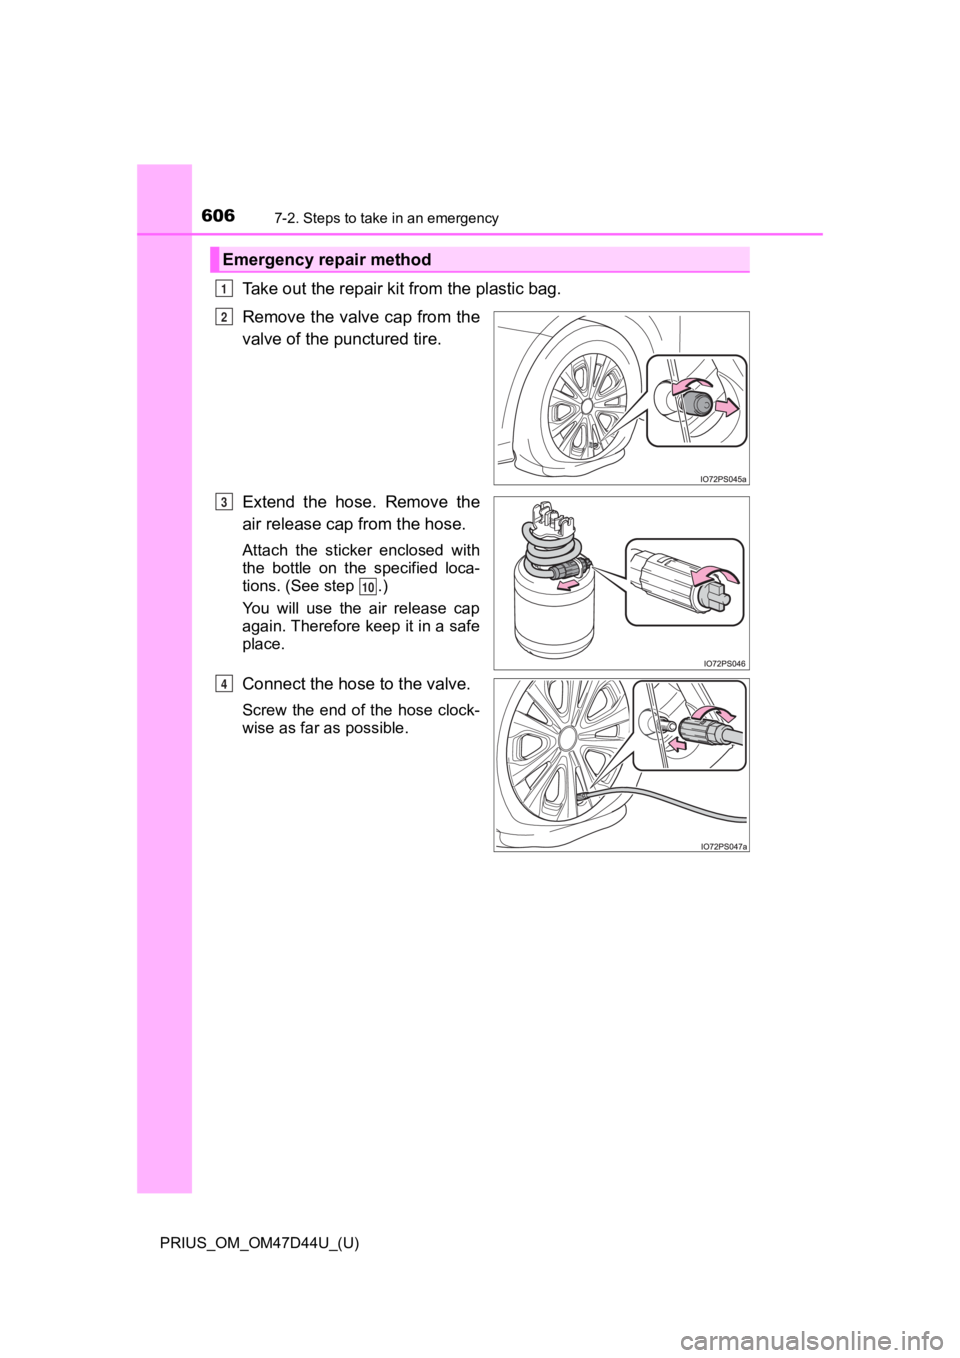
Take out the repair kit from the plastic bag.
Remove the valve cap from the
valve of the punctured tire.
Extend the hose. Remove the
air release cap from the hose.
Attach the sticker enclosed with
the bottle on the specified loca-
tions. (See step .)
You will use the air release cap
again. Therefore keep it in a safe
place.
Connect the hose to the valve.
Screw the end of the hose clock-
wise as far as possible.
Emergency repair method
1
2
3
10
4
Page 607 of 728
6077-2. Steps to take in an emergency
PRIUS_OM_OM47D44U_(U)
7
When trouble arises
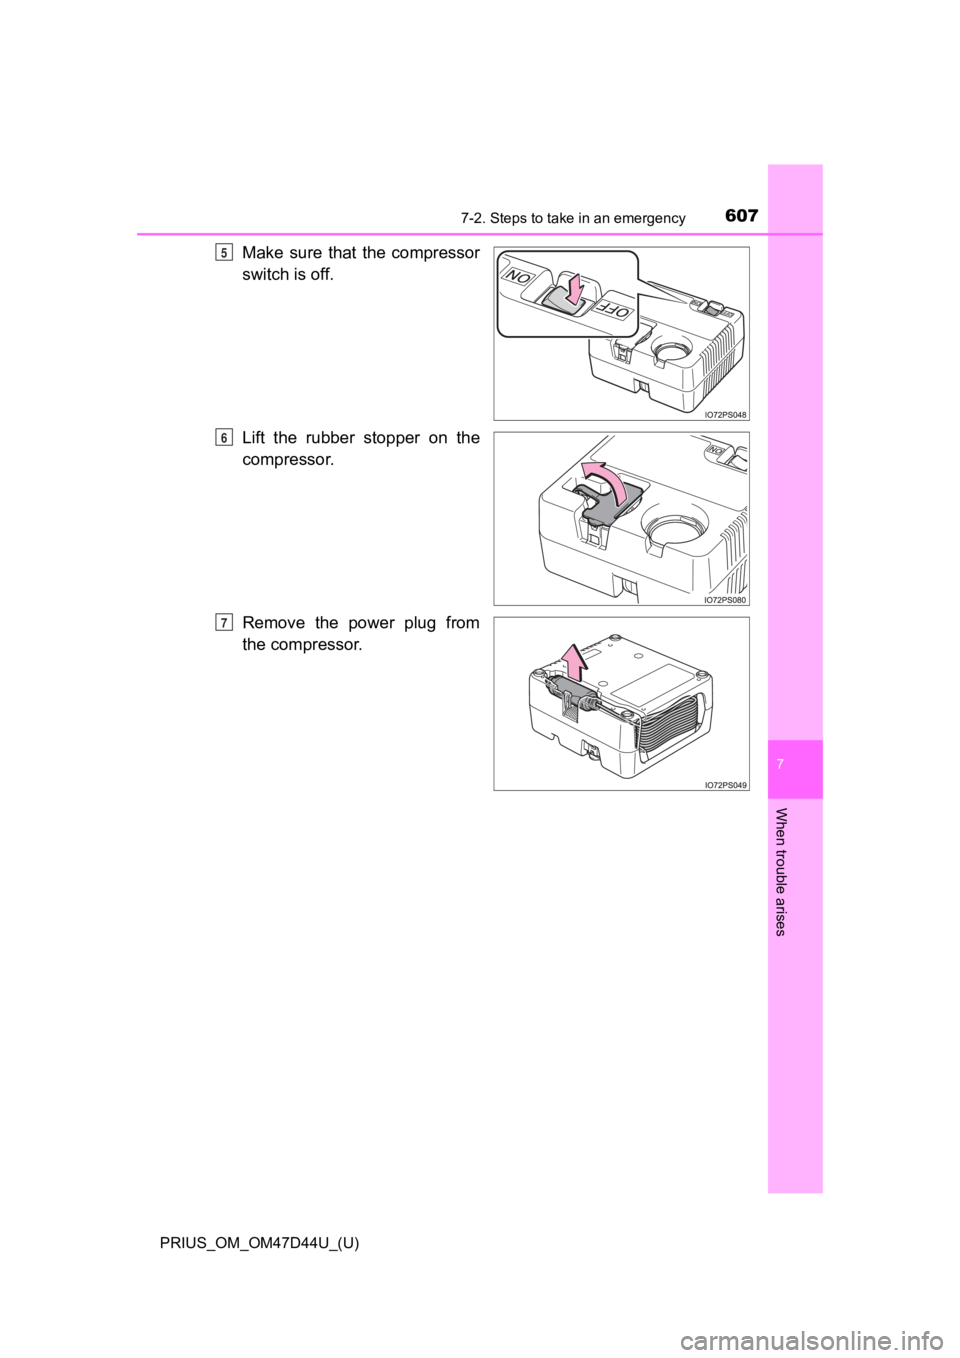
Make sure that the compressor
switch is off.
Lift the rubber stopper on the
compressor.
Remove the power plug from
the compressor.5
6
7
Page 608 of 728
6087-2. Steps to take in an emergency
PRIUS_OM_OM47D44U_(U)
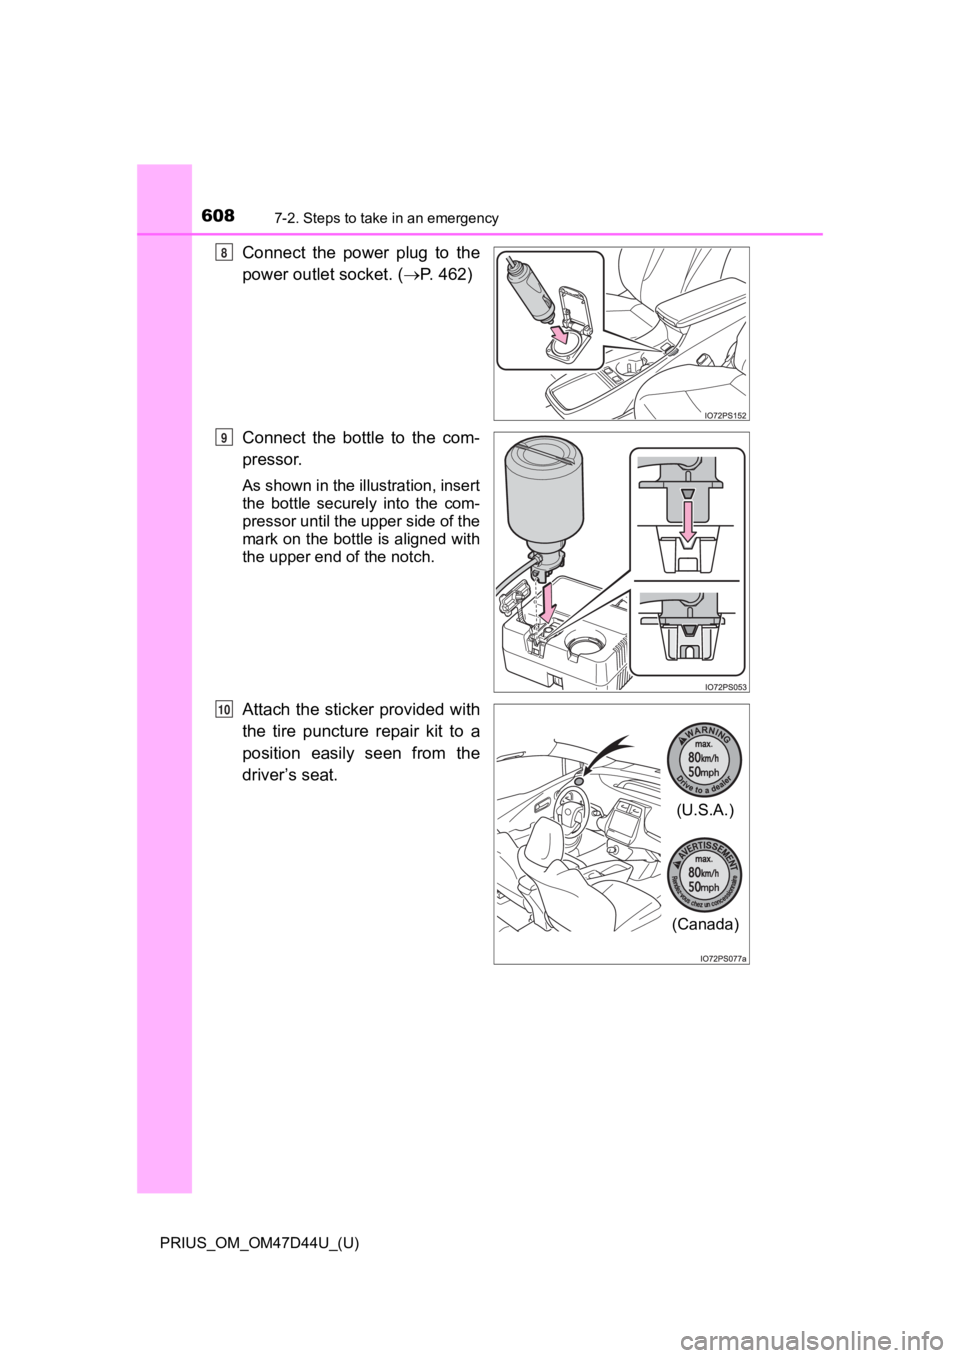
Connect the power plug to the
power outlet socket. (P. 462)
Connect the bottle to the com-
pressor.
As shown in the illustration, insert
the bottle securely into the com-
pressor until the upper side of the
mark on the bottle is aligned with
the upper end of the notch.
Attach the sticker provided with
the tire puncture repair kit to a
position easily seen from the
driver’s seat.
8
9
(U.S.A.)
(Canada)
10
Page 609 of 728
6097-2. Steps to take in an emergency
PRIUS_OM_OM47D44U_(U)
7
When trouble arises
Check the specified tire inflation
pressure.
Tire inflation pressure is specified
on the label on the driver’s side
pillar as shown. (P. 6 6 0 )
Start the hybrid system. ( P. 2 4 1 )
To inject the sealant and inflate
the tire, turn the compressor
switch on.
11
12
13
Page 610 of 728
6107-2. Steps to take in an emergency
PRIUS_OM_OM47D44U_(U)
Inflate the tire until the specified air pressure is reached.The sealant will be injected
and the pressure will spike to
between 44 psi (300 kPa,
3.0 kgf/cm
2 or bar) and
58 psi (400 kPa, 4.0 kgf/cm2
or bar), then gradually
decrease.
The air pressure gauge will
display the actual tire infla-
tion pressure about 1 to 5
minutes after the switch is
turned on.
• Turn the compressor switch off and then check the tire
inflation pressure. Being
careful not to over inflate,
check and repeat the inflation
procedure until the specified
tire inflation pressure is
reached.
• The tire can be inflated for about 5 to 20 minutes (depending on
the outside temperature). If the t ire inflation pressure is still lower
than the specified point after inflation for 25 minutes, the tire is
too damaged to be repaired. Turn the compressor switch off and
contact your Toyota dealer.
• If the tire inflation pressure exceeds the specified air press ure, let
out some air to adjust the tire inflation pressure. ( P. 613, 660)
With the compressor switch off, disconnect the hose from the va lve
on the tire and then pull out the power plug from the power out let
socket.
Some sealant may leak when the hose is removed.
Install the valve cap onto the valve of the emergency repaired tire.
14
1
2
15
16
Trending: check engine, adding oil, keyless, spare wheel, instrument cluster, steering, reset
