TOYOTA PRIUS PLUG-IN 2015 Owners Manual
PRIUS PLUG-IN 2015
TOYOTA
TOYOTA
https://www.carmanualsonline.info/img/14/58479/w960_58479-0.png
TOYOTA PRIUS PLUG-IN 2015 Owners Manual
Trending: dimensions, glove box, sat nav, height adjustment, window, remove seats, climate control
Page 611 of 728
572
5-2. Steps to take in an emergency
PRIUS PHV_OM_OM47A11U_(U)
MessageDetailsCorrection
procedure
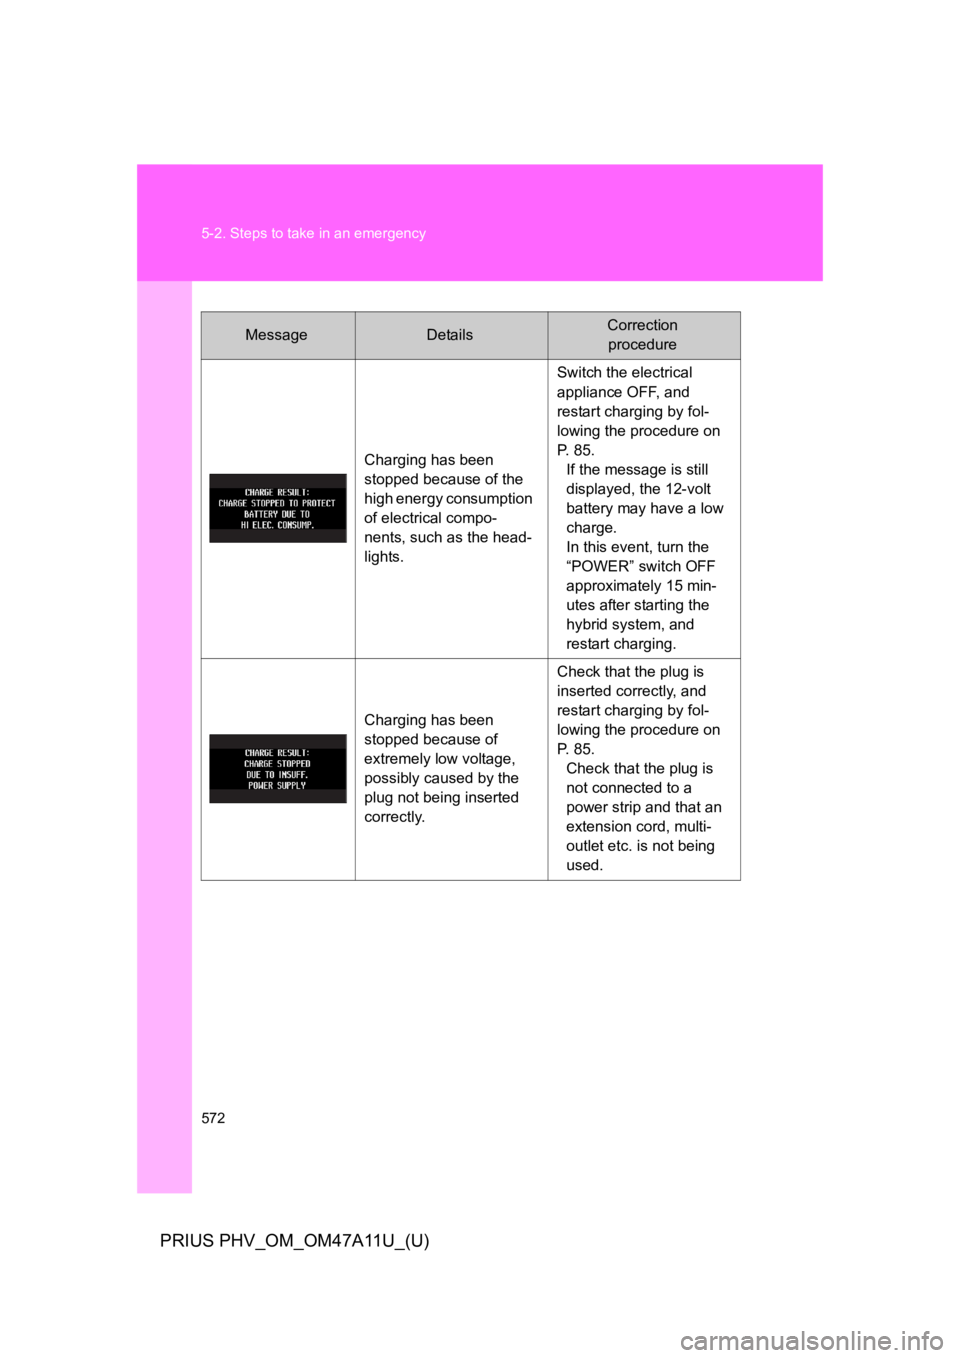
Charging has been
stopped because of the
high energy consumption
of electrical compo-
nents, such as the head-
lights.
Switch the electrical
appliance OFF, and
restart charging by fol-
lowing the procedure on
P. 8 5 .
If the message is still
displayed, the 12-volt
battery may have a low
charge.
In this event, turn the
“POWER” switch OFF
approximately 15 min-
utes after starting the
hybrid system, and
restart charging.
Charging has been
stopped because of
extremely low voltage,
possibly caused by the
plug not being inserted
correctly.
Check that the plug is
inserted correctly, and
restart charging by fol-
lowing the procedure on
P. 8 5 .
Check that the plug is
not connected to a
power strip and that an
extension cord, multi-
outlet etc. is not being
used.
Page 612 of 728
5
When trouble arises
573
5-2. Steps to take in an emergency
PRIUS PHV_OM_OM47A11U_(U)
MessageDetailsCorrection
procedure
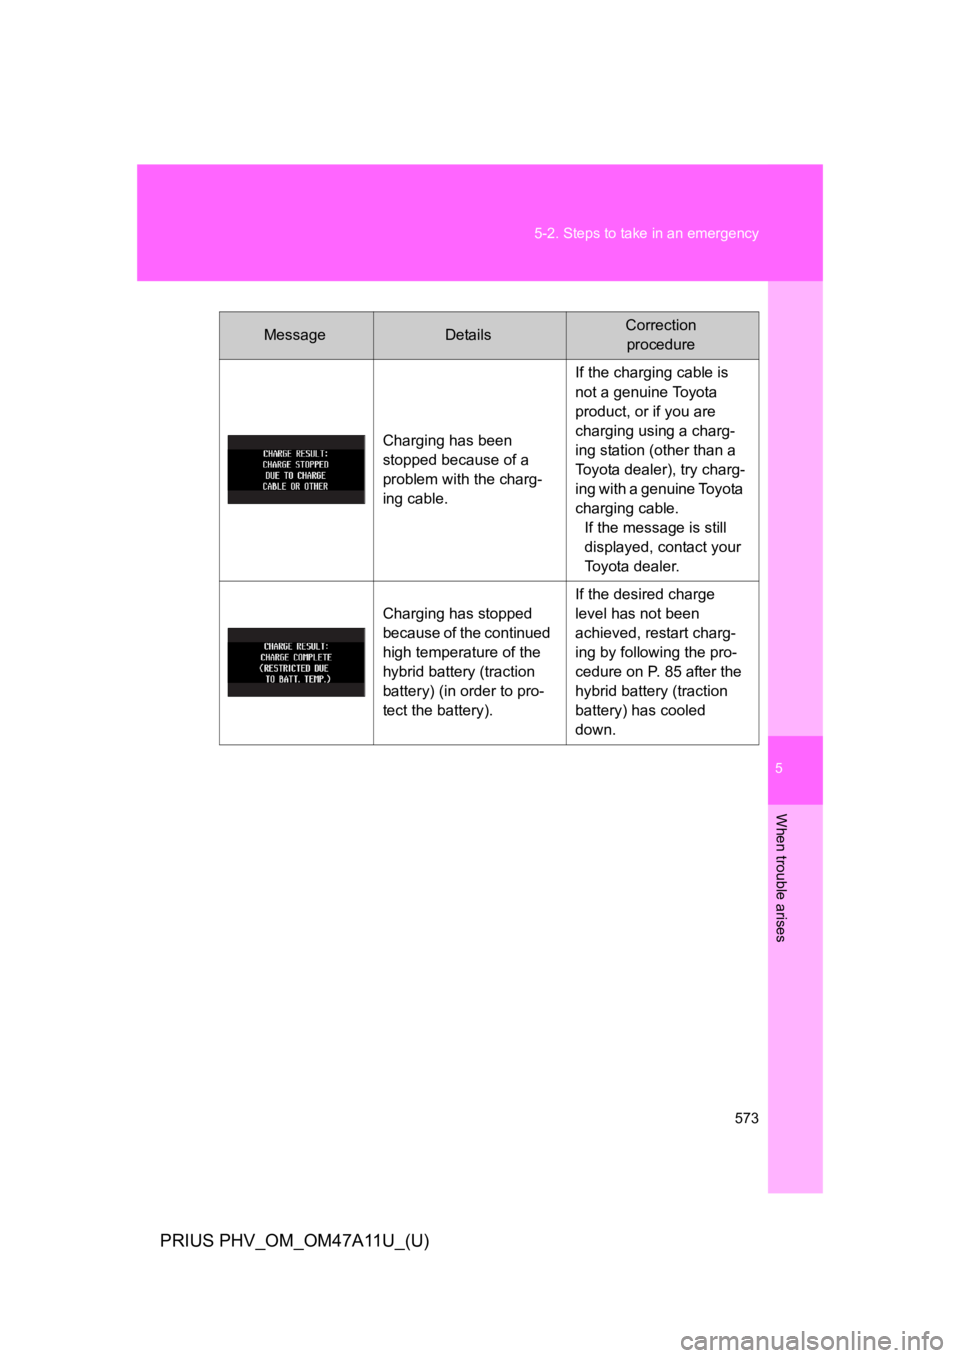
Charging has been
stopped because of a
problem with the charg-
ing cable.
If the charging cable is
not a genuine Toyota
product, or if you are
charging using a charg-
ing station (other than a
To y o t a d e a l e r ) , t r y c h a r g -
ing with a genuine Toyota
charging cable.
If the message is still
displayed, contact your
To y o t a d e a l e r .
Charging has stopped
because of the continued
high temperature of the
hybrid battery (traction
battery) (in order to pro-
tect the battery).
If the desired charge
level has not been
achieved, restart charg-
ing by following the pro-
cedure on P. 85 after the
hybrid battery (traction
battery) has cooled
down.
Page 613 of 728
574
5-2. Steps to take in an emergency
PRIUS PHV_OM_OM47A11U_(U)
If you have a flat tire
Yo u r v e h i c l e i s n o t e q u i p p e d w i t h a s pa r e t i r e , b u t i n s t e a d i s
equipped with an emergency tire puncture repair kit.
A puncture caused by a nail or screw passing through the tire
tread can be repaired temporarily using the emergency tire punc-
ture repair kit. (The kit contains a bottle of sealant. The sealant
can be used only once to temporarily repair one tire without
removing the nail or screw from the tire.) After temporarily repair-
ing the tire with the kit, have the tire repaired or replaced by your
To y o ta d e a l e r.
■Before repairing the tire
●St op the veh i cle in a safe place on a hard, flat surface.
●Set the parking brake.
●Shift the shift position to P.
●St op the hyb rid system.
●Turn on the emergency flashers.
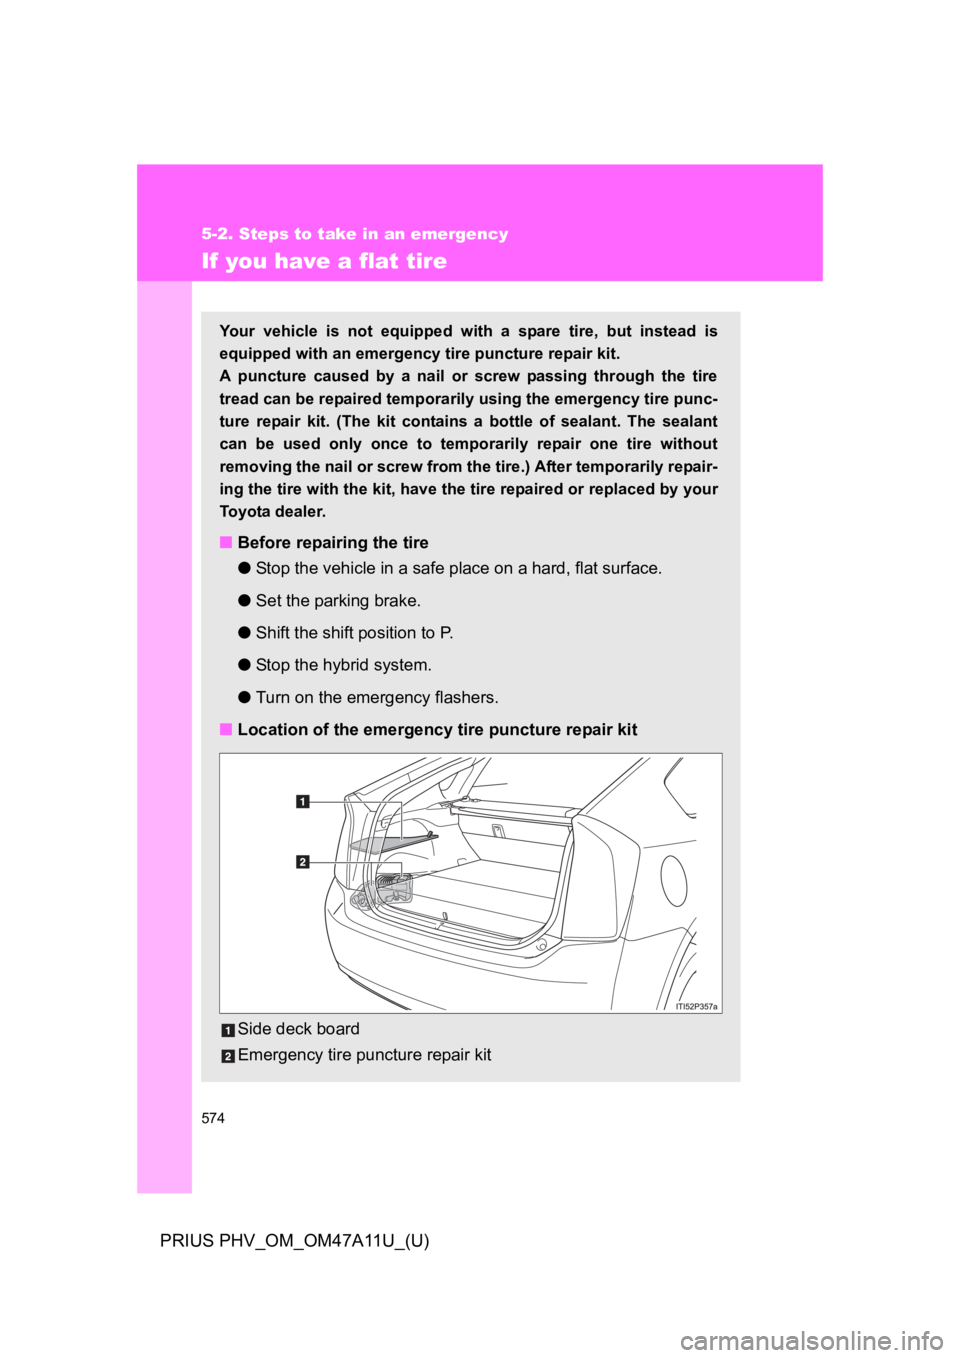
■Location of the emergency tire puncture repair kit
Side deck board
Emergency tire puncture repair kit
Page 614 of 728
5
When trouble arises
575
5-2. Steps to take in an emergency
PRIUS PHV_OM_OM47A11U_(U)
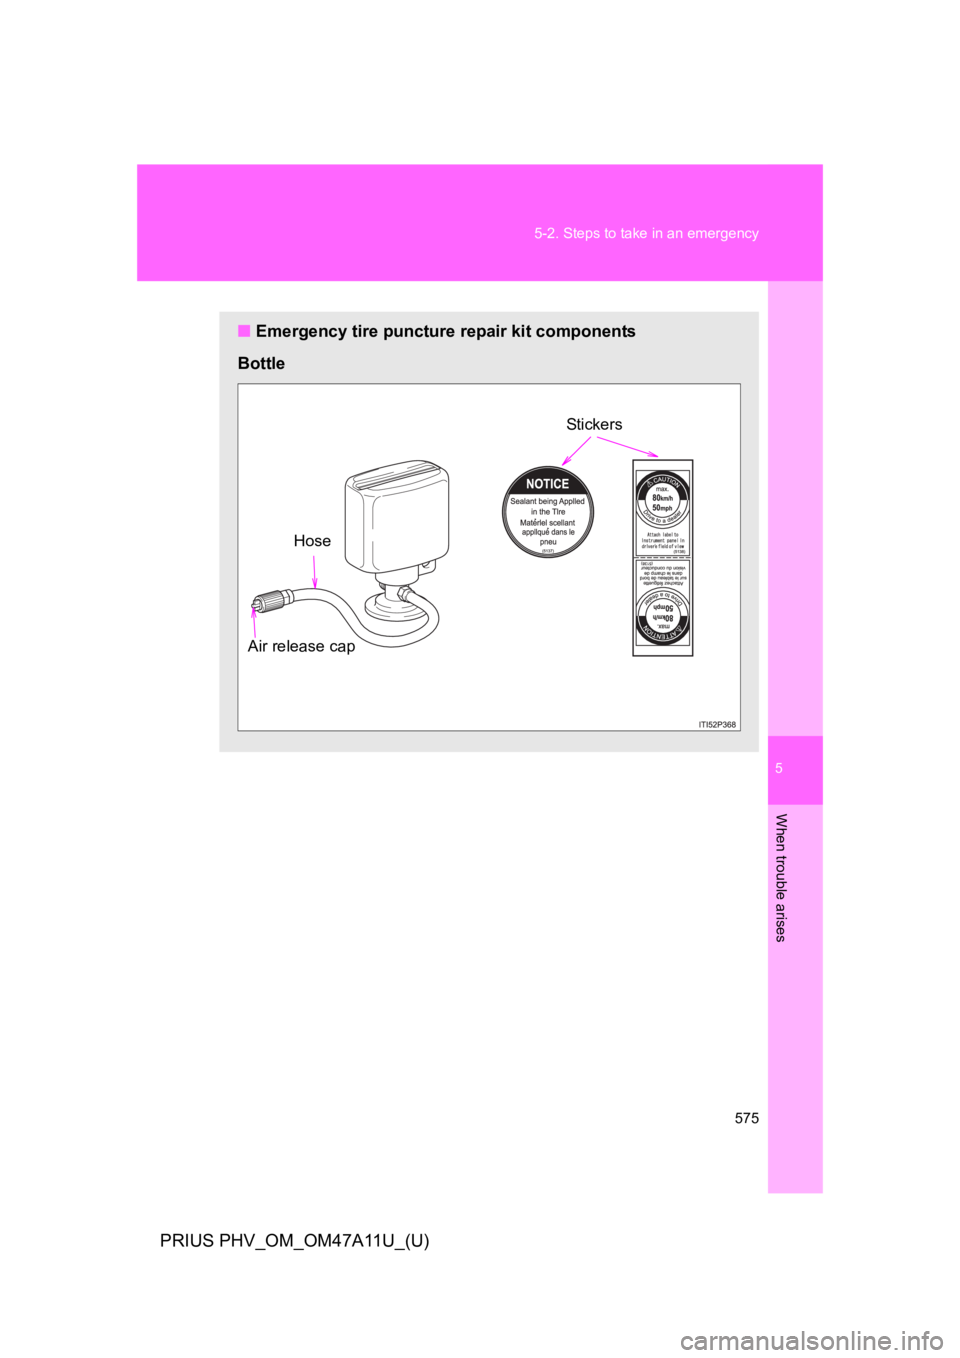
■Emergency tire puncture repair kit components
Bottle
Air release cap
Hose
Stickers
Page 615 of 728
576
5-2. Steps to take in an emergency
PRIUS PHV_OM_OM47A11U_(U)
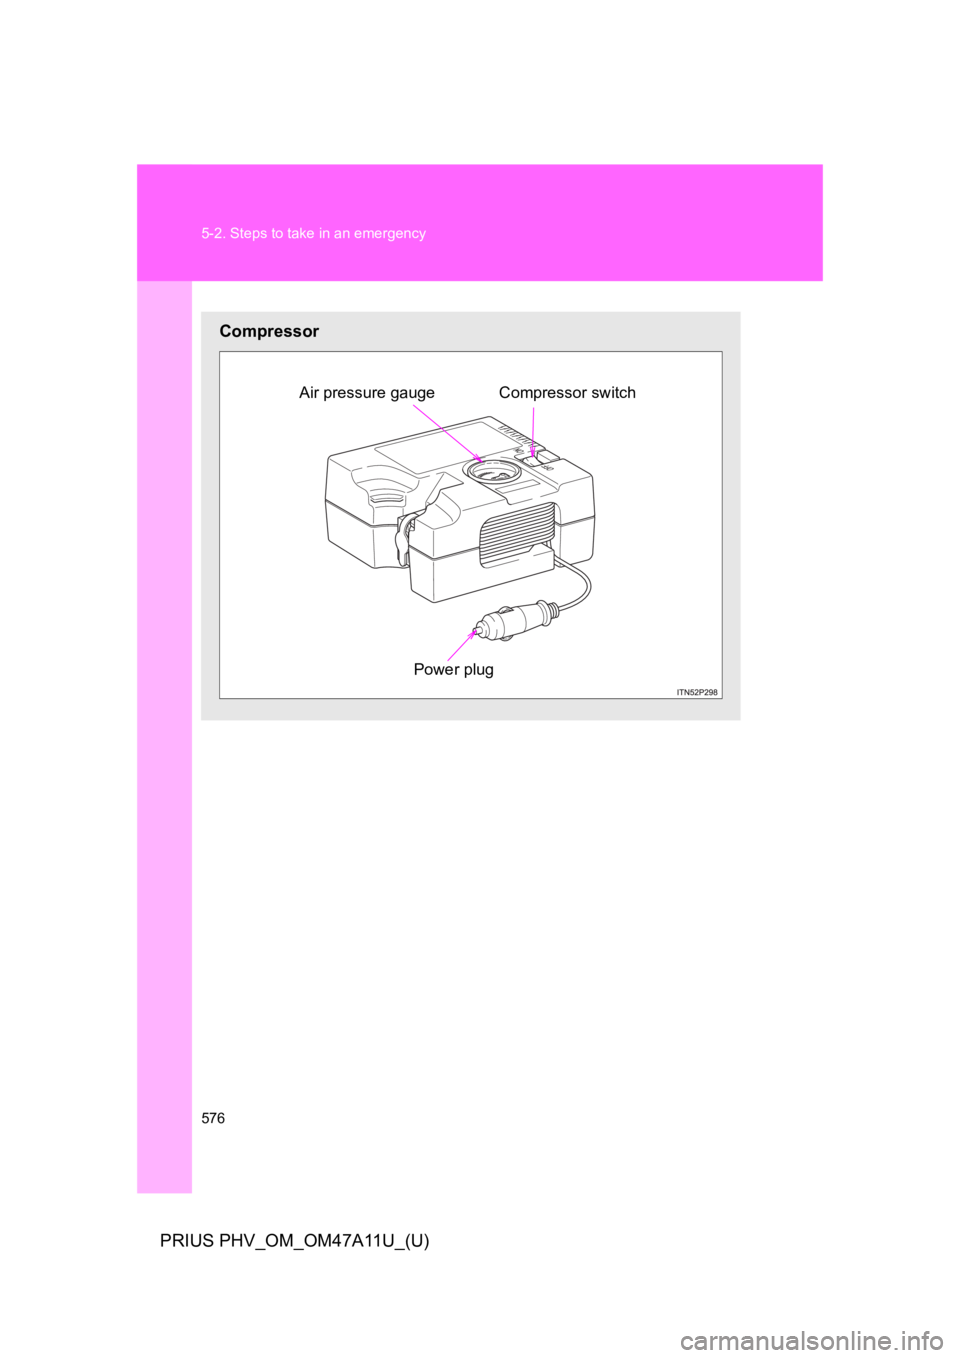
Compressor
Power plug
Air pressure gauge Compressor switch
Page 616 of 728
5
When trouble arises
577
5-2. Steps to take in an emergency
PRIUS PHV_OM_OM47A11U_(U)
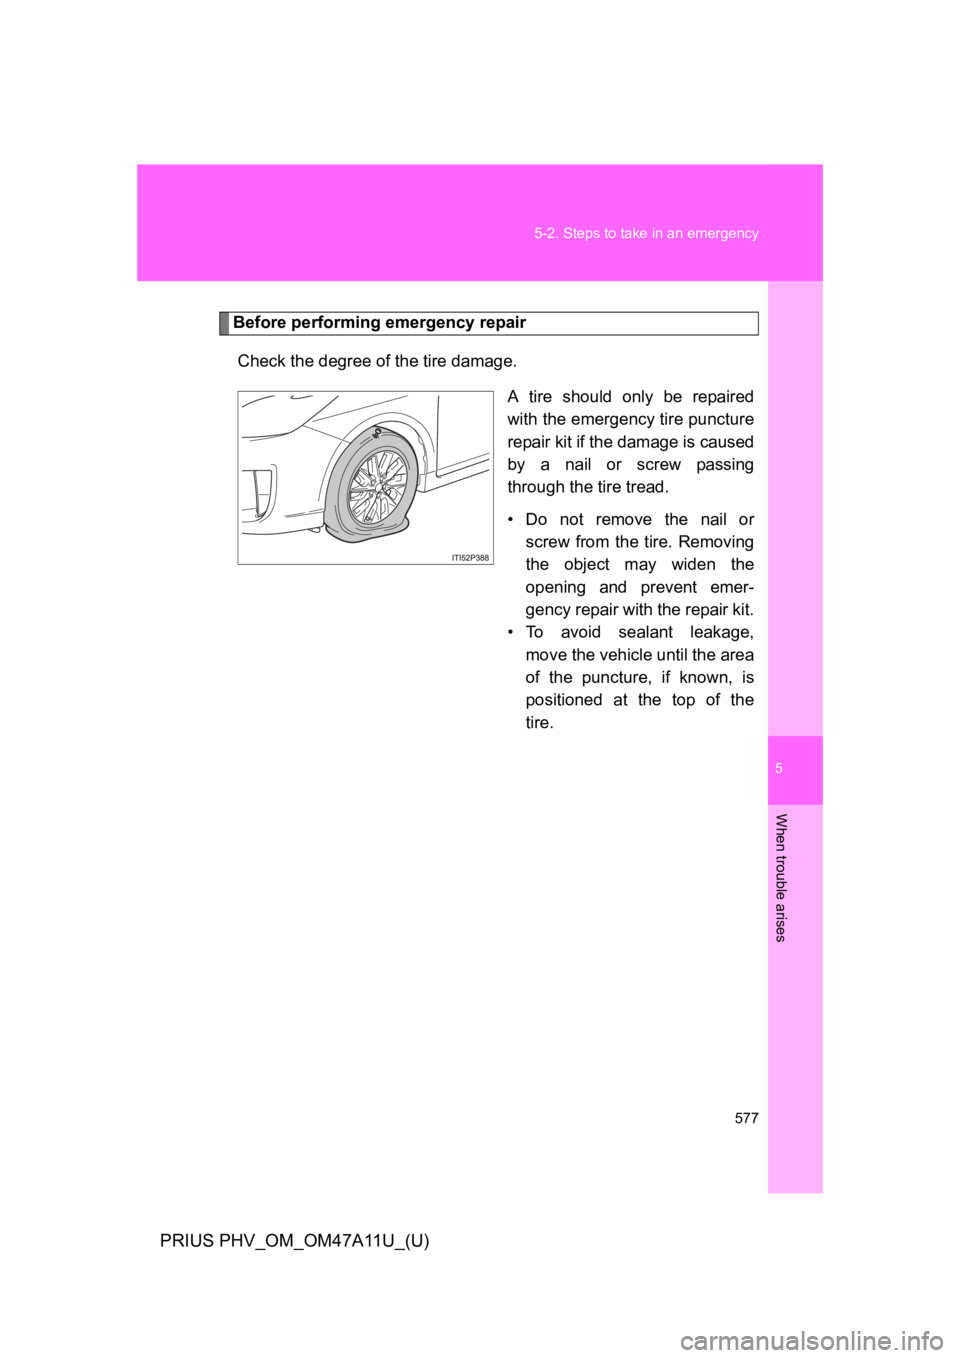
Before performing emergency repair
Check the degree of the tire damage.
A tire should only be repaired
with the emergency tire puncture
repair kit if the damage is caused
by a nail or screw passing
through the tire tread.
•Do not remove the nail or
screw from the tire. Removing
the object may widen the
opening and prevent emer-
gency repair with the repair kit.
•To avoid sealant leakage,
move the vehicle until the area
of the puncture, if known, is
positioned at the top of the
tire.
Page 617 of 728
578
5-2. Steps to take in an emergency
PRIUS PHV_OM_OM47A11U_(U)
■In the following cases, the tire cannot be repaired with the emer-
gency tire puncture repair kit. Contact your Toyota dealer.
●When the tire is damaged due to driving without sufficient air pres-
sure
●When there are any cracks or damage at any location on the tire,
such as on the side wall, except the tread
●When the tire is visibly separated from the wheel
●When the cut or damage to the tread is 0.16 in. (4 mm) long or more
●When the wheel is damaged
●When two or more tires have been punctured
●When more than 2 sharp objects such as nails or screws have
passed through the tread on a single tire
●When the sealant has expired
Page 618 of 728
5
When trouble arises
579
5-2. Steps to take in an emergency
PRIUS PHV_OM_OM47A11U_(U)
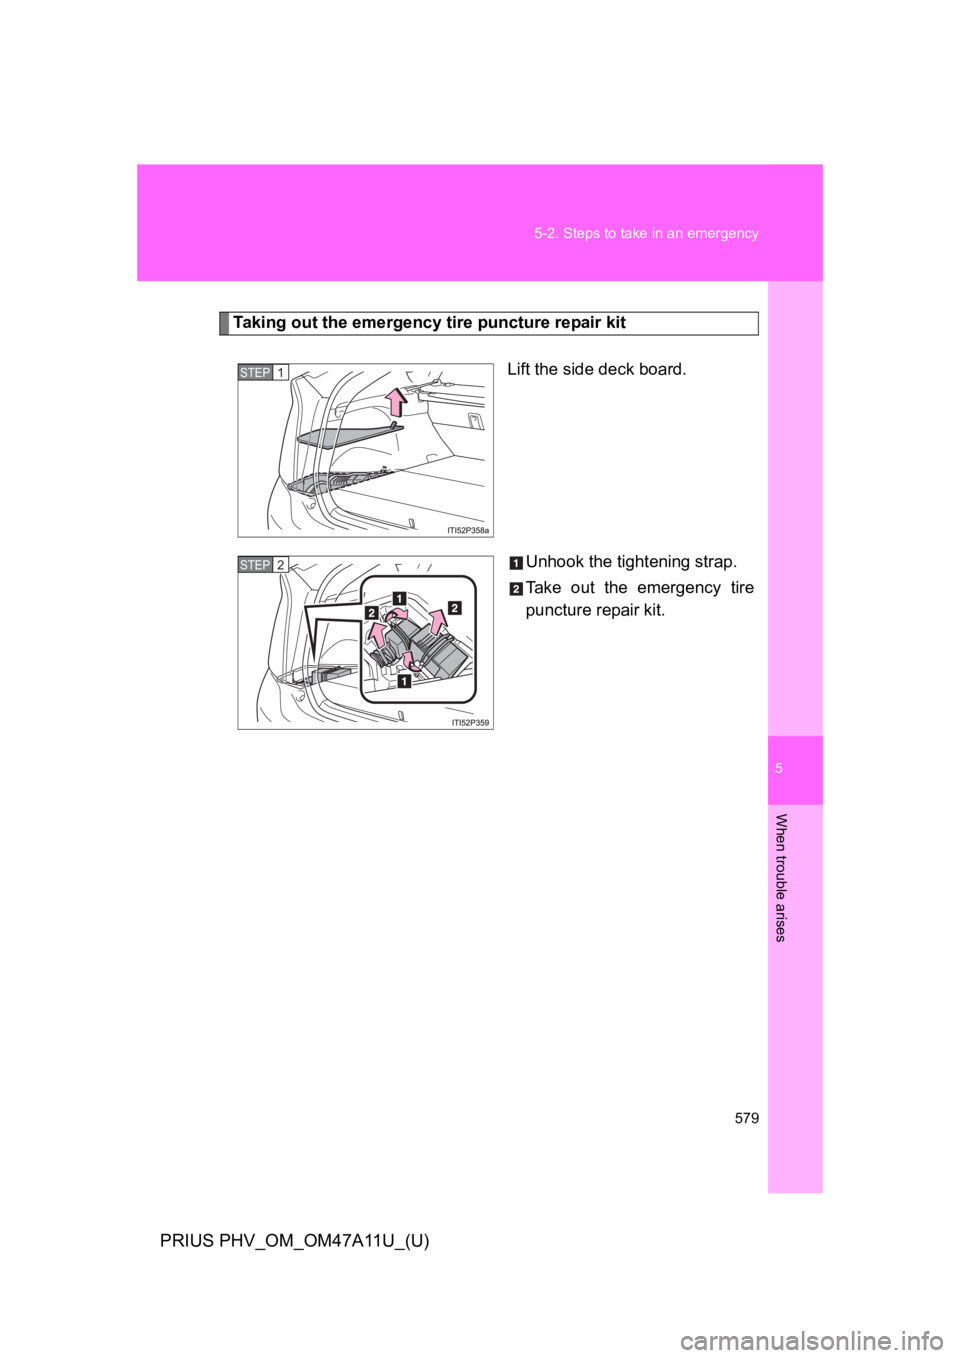
Ta k i n g o u t t h e e m e r g e n c y t i r e p u n c t u r e r e pa i r k i t
Lift the side deck board.
Unhook the tightening strap.
Ta k e o u t t h e e m e r g e n c y t i r e
puncture repair kit.
STEP 1
STEP 2
Page 619 of 728
580
5-2. Steps to take in an emergency
PRIUS PHV_OM_OM47A11U_(U)
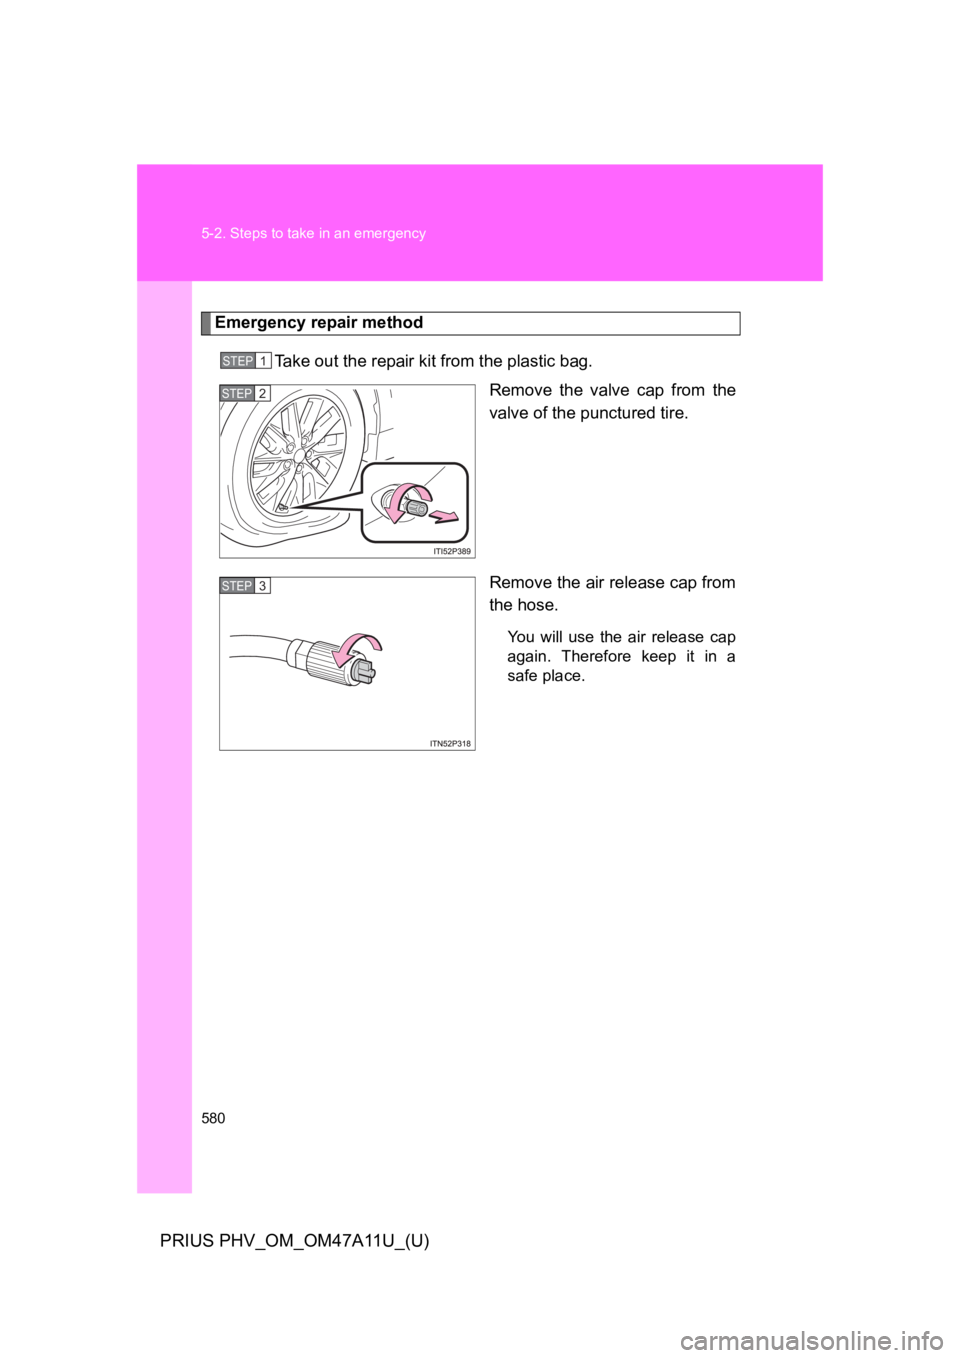
Emergency repair method
Ta k e o u t t h e r e p a i r k i t f r o m t h e p l a s t i c b a g .
Remove the valve cap from the
valve of the punctured tire.
Remove the air release cap from
the hose.
Yo u w i l l u s e t h e a i r r e l e a s e c a p
again. Therefore keep it in a
safe place.
STEP 1
STEP 2
STEP 3
Page 620 of 728
5
When trouble arises
581
5-2. Steps to take in an emergency
PRIUS PHV_OM_OM47A11U_(U)
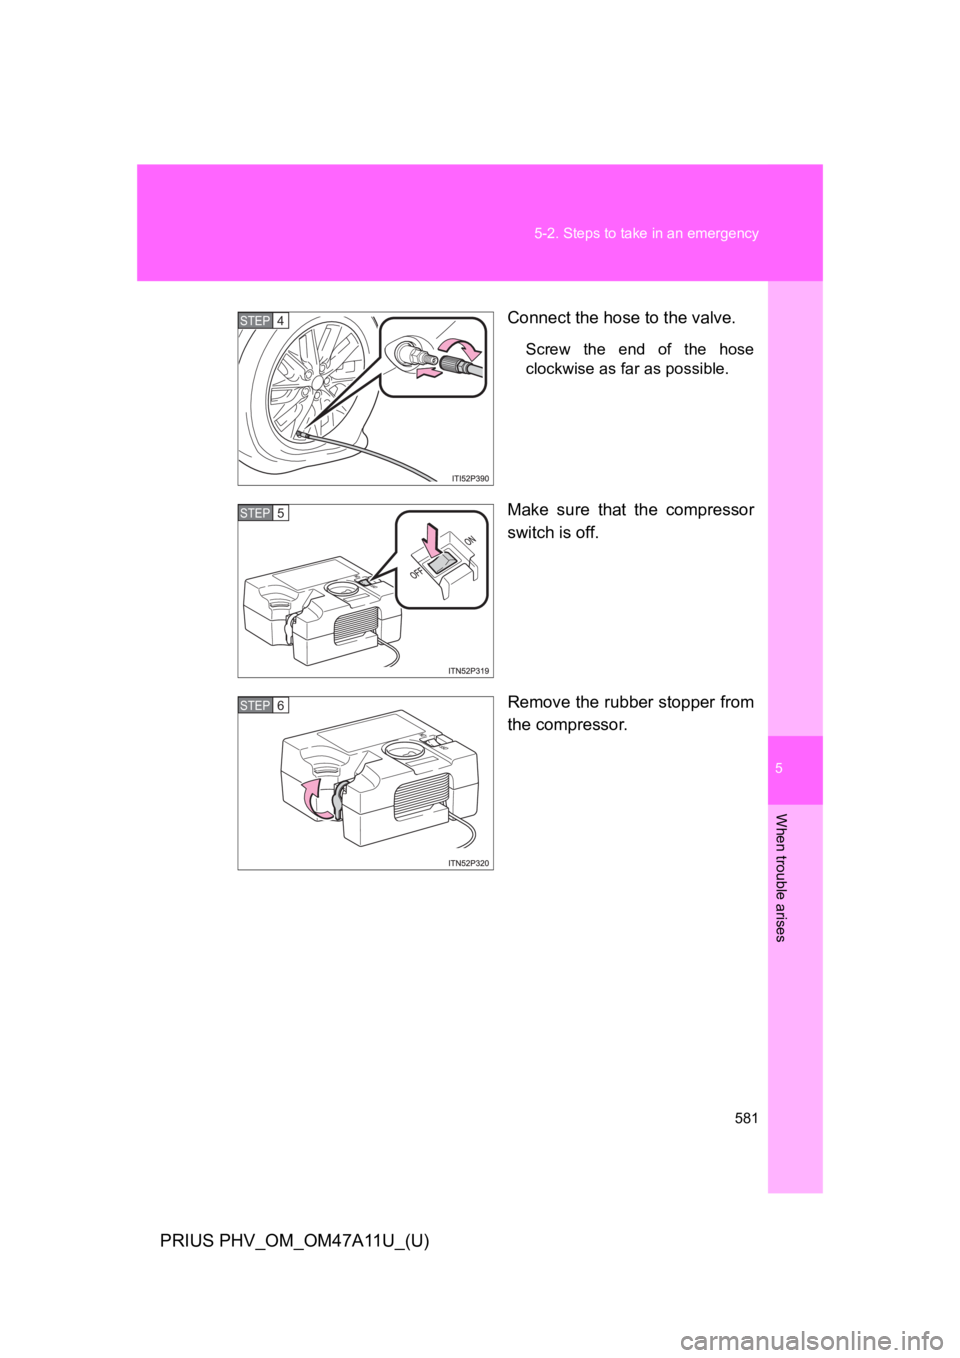
Connect the hose to the valve.
Screw the end of the hose
clockwise as far as possible.
Make sure that the compressor
switch is off.
Remove the rubber stopper from
the compressor.
STEP 4
STEP 5
STEP 6
Trending: fuel tank capacity, fuel cap, recommended oil, navigation system, change language, steering wheel adjustment, 12 v
