fuel cap TOYOTA PRIUS V 2016 ZVW40 / 1.G Owners Manual
[x] Cancel search | Manufacturer: TOYOTA, Model Year: 2016, Model line: PRIUS V, Model: TOYOTA PRIUS V 2016 ZVW40 / 1.GPages: 620, PDF Size: 29.83 MB
Page 3 of 620

3
1
9 8
7
6 4 3
2
PRIUS v_OM_OM47B12U_(U)
10
5
3-4. Adjusting the steering
wheel and mirrors
Steering wheel .................. 147
Inside rear view mirror....... 149
Outside rear view
mirrors ............................. 151
3-5. Opening and closing the
windows
Power windows ................. 153
4-1. Before driving
Driving the vehicle ............. 158
Cargo and luggage............ 167
Vehicle load limits ............. 171
Trailer towing..................... 172
Dinghy towing.................... 173
4-2. Driving procedures
Power (ignition) switch ...... 174
EV drive mode................... 179
Hybrid transmission........... 181
Turn signal lever................ 187
Parking brake .................... 1884-3. Operating the lights
and wipers
Headlight switch ................ 189
Automatic High Beam ........ 194
Fog light switch .................. 200
Windshield wipers and
washer ............................. 202
Rear window wiper and
washer ............................. 205
4-4. Refueling
Opening the fuel tank
cap................................... 207
4-5. Using the driving support
systems
Cruise control .................... 210
Dynamic radar cruise
control.............................. 214
LDA (Lane Departure
Alert) ................................ 227
Rear view monitor
system ............................. 235
Driving mode select
switch .............................. 245
Driving assist systems ....... 246
PCS (Pre-Collision
System) ........................... 253
4-6. Driving tips
Hybrid vehicle driving
tips ................................... 260
Winter driving tips .............. 263
4Driving
Page 17 of 620

17Pictorial index
PRIUS v_OM_OM47B12U_(U)Windshield wipers . . . . . . . . . . . . . . . . . . . . . . . . . . . . . . . . . P. 202
Precautions against winter season . . . . . . . . . . . . . . . . . . . . . P. 263
Fuel filler door . . . . . . . . . . . . . . . . . . . . . . . . . . . . . . . . . . . . P. 207
Refueling method . . . . . . . . . . . . . . . . . . . . . . . . . . . . . . . . . . . P. 207
Fuel type/fuel tank capacity . . . . . . . . . . . . . . . . . . . . . . . . . . . P. 554
Tires . . . . . . . . . . . . . . . . . . . . . . . . . . . . . . . . . . . . . . . . . . P. 443
Tire size/inflation pressure . . . . . . . . . . . . . . . . . . . . . . . . . P. 559
Winter tires/tire chain . . . . . . . . . . . . . . . . . . . . . . . . . . . . . P. 263
Checking/rotation/tire pressure warning system . . . . . . . . . P. 443
Coping with flat tires . . . . . . . . . . . . . . . . . . . . . . . . . . . . . . P. 521
Hood . . . . . . . . . . . . . . . . . . . . . . . . . . . . . . . . . . . . . . . . . . . . P. 421
Opening . . . . . . . . . . . . . . . . . . . . . . . . . . . . . . . . . . . . . . . . . . P. 421
Engine compartment cover . . . . . . . . . . . . . . . . . . . . . . . . . . . P. 426
Engine oil . . . . . . . . . . . . . . . . . . . . . . . . . . . . . . . . . . . . . . . . . P. 555
Coping with overheat . . . . . . . . . . . . . . . . . . . . . . . . . . . . . . . . P. 543
Headlights/parking lights/daytime running lights
*/
side marker lights . . . . . . . . . . . . . . . . . . . . . . . . . . . . . . . . . P. 189
Fog lights
* . . . . . . . . . . . . . . . . . . . . . . . . . . . . . . . . . . . . . . . P. 200
Turn signal lights . . . . . . . . . . . . . . . . . . . . . . . . . . . . . . . . . . P. 187
Stop/tail lights
Hill-start assist control . . . . . . . . . . . . . . . . . . . . . . . . . . . . . . . P. 247
License plate lights . . . . . . . . . . . . . . . . . . . . . . . . . . . . . . . . P. 189
Back-up lights
Shifting the shift lever to R . . . . . . . . . . . . . . . . . . . . . . . . . . . . P. 181
4
5
6
7
Light bulbs of the exterior lights for driving
(Replacing method: P. 466, Watts: P. 560)
*: If equipped
8
9
10
11
12
13
Page 157 of 620

157
PRIUS v_OM_OM47B12U_(U)
4Driving
4-1. Before driving
Driving the vehicle ............. 158
Cargo and luggage ........... 167
Vehicle load limits ............. 171
Trailer towing..................... 172
Dinghy towing ................... 173
4-2. Driving procedures
Power (ignition) switch ...... 174
EV drive mode .................. 179
Hybrid transmission........... 181
Turn signal lever................ 187
Parking brake .................... 188
4-3. Operating the lights
and wipers
Headlight switch ................ 189
Automatic High Beam ....... 194
Fog light switch ................. 200
Windshield wipers and
washer ............................ 202
Rear window wiper and
washer ............................ 2054-4. Refueling
Opening the fuel tank
cap .................................. 207
4-5. Using the driving support
systems
Cruise control .................... 210
Dynamic radar cruise
control ............................. 214
LDA (Lane Departure
Alert) ............................... 227
Rear view monitor
system ............................ 235
Driving mode select
switch .............................. 245
Driving assist systems ...... 246
PCS (Pre-Collision
System)........................... 253
4-6. Driving tips
Hybrid vehicle driving
tips .................................. 260
Winter driving tips ............. 263
Page 207 of 620

207
PRIUS v_OM_OM47B12U_(U)
4-4. Refueling
4
Driving
Opening the fuel tank cap
●Close all the doors and windows, and turn the power switch off.
●Confirm the type of fuel.
■Fuel types
P. 561
■Fuel tank opening for unleaded gasoline
To help prevent incorrect fueling, your vehicle has a fuel tank opening that
only accommodates the special nozzle on unleaded fuel pumps.
Perform the following steps to open the fuel tank cap.
Before refueling the vehicle
WARNING
■When refueling the vehicle
Observe the following precautions while refueling the vehicle. Failure to do
so may result in death or serious injury.
●After exiting the vehicle and before opening the fuel door, touch an
unpainted metal surface to discharge any static electricity. It is important to
discharge static electricity before refueling because sparks resulting from
static electricity can cause fuel vapors to ignite while refueling.
●Always hold the grips on the fuel tank cap and turn it slowly to remove it.
A whooshing sound may be heard when the fuel tank cap is loosened.
Wait until the sound cannot be heard before fully removing the cap. In hot
weather, pressurized fuel may spray out of the filler neck and cause injury.
●Do not allow anyone that has not discharged static electricity from their
body to come close to an open fuel tank.
●Do not inhale vaporized fuel.
Fuel contains substances that are harmful if inhaled.
●Do not smoke while refueling the vehicle.
Doing so may cause the fuel to ignite and cause a fire.
●Do not return to the vehicle or touch any person or object that is statically
charged.
This may cause static electricity to build up, resulting in a possible ignition
hazard.
Page 208 of 620

208
PRIUS v_OM_OM47B12U_(U)
4-4. Refueling
Pull up the opener to open the
fuel filler door.
Turn the fuel tank cap slowly to
open and hang it on the back of
the fuel filler door.
WARNING
■When refueling
Observe the following precautions to prevent fuel overflowing from the fuel
tank:
●Securely insert the fuel nozzle into the fuel filler neck
●Stop filling the tank after the fuel nozzle automatically clicks off
●Do not top off the fuel tank
NOTICE
■Refueling
Do not spill fuel during refueling.
Doing so may damage the vehicle, such as causing the emission control
system to operate abnormally or damaging fuel system components or the
vehicle’s painted surface.
Opening the fuel tank cap
1
2
Page 209 of 620

PRIUS v_OM_OM47B12U_(U)
2094-4. Refueling
4
Driving
After refueling, turn the fuel tank
cap until you hear a click. Once
the cap is released, it will turn
slightly in the opposite direction.
Closing the fuel tank cap
WARNING
■When replacing the fuel cap
Do not use anything but a genuine Toyota fuel tank cap designed for your
vehicle. Doing so may cause a fire or other incident which may result in
death or serious injury.
Page 369 of 620
PRIUS v_OM_OM47B12U_(U)
3696-1. Using the air conditioning system and defogger
6
Interior features
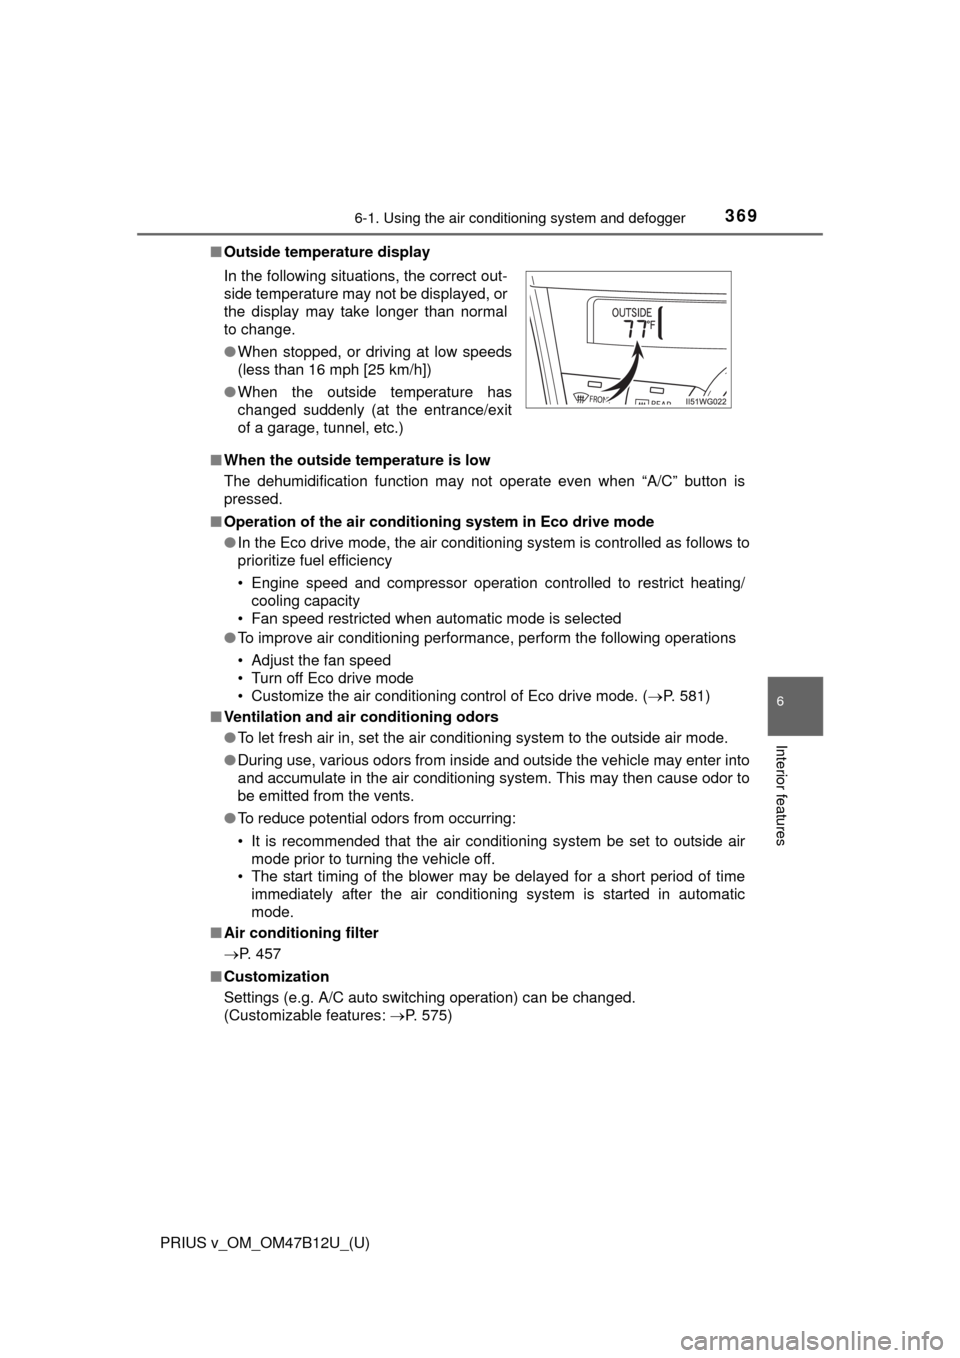
■Outside temperature display
■When the outside temperature is low
The dehumidification function may not operate even when “A/C” button is
pressed.
■Operation of the air conditioning system in Eco drive mode
●In the Eco drive mode, the air conditioning system is controlled as follows to
prioritize fuel efficiency
• Engine speed and compressor operation controlled to restrict heating/
cooling capacity
• Fan speed restricted when automatic mode is selected
●To improve air conditioning performance, perform the following operations
• Adjust the fan speed
• Turn off Eco drive mode
• Customize the air conditioning control of Eco drive mode. (P. 581)
■Ventilation and air conditioning odors
●To let fresh air in, set the air conditioning system to the outside air mode.
●During use, various odors from inside and outside the vehicle may enter into
and accumulate in the air conditioning system. This may then cause odor to
be emitted from the vents.
●To reduce potential odors from occurring:
• It is recommended that the air conditioning system be set to outside air
mode prior to turning the vehicle off.
• The start timing of the blower may be delayed for a short period of time
immediately after the air conditioning system is started in automatic
mode.
■Air conditioning filter
P. 457
■Customization
Settings (e.g. A/C auto switching operation) can be changed.
(Customizable features: P. 575) In the following situations, the correct out-
side temperature may not be displayed, or
the display may take longer than normal
to change.
●When stopped, or driving at low speeds
(less than 16 mph [25 km/h])
●When the outside temperature has
changed suddenly (at the entrance/exit
of a garage, tunnel, etc.)
Page 418 of 620

418
PRIUS v_OM_OM47B12U_(U)
7-2. Maintenance
Emission inspection and maintenance (I/M)
programs
The OBD system determines that a problem exists somewhere in the
emission control system. Your vehicle may not pass the I/M test and
may need to be repaired. Contact your Toyota dealer to service the
vehicle.
●When the 12-volt battery is disconnected or discharged
Readiness codes that are set during ordinary driving are erased.
Also, depending on your driving habits, the readiness codes may
not be completely set.
●When the fuel tank cap is loose
The malfunction indicator lamp comes on indicating a temporary
malfunction and your vehicle may not pass the I/M test.
The error code in the OBD system will not be cleared unless the vehi-
cle is driven 40 or more times.
Contact your Toyota dealer to prepare the vehicle for re-testing.
Some states have vehicle emission inspection programs which
include OBD (On Board Diagnostics) checks. The OBD system
monitors the operation of the emission control system.
If the malfunction indicator lamp comes on
Your vehicle may not pass the I/M test in the following situations:
When the malfunction indicator lamp still remains on after sev-
eral driving trips
If your vehicle does not pass the I/M test
Page 453 of 620

PRIUS v_OM_OM47B12U_(U)
4537-3. Do-it-yourself maintenance
7
Maintenance and care
Tire valve
Tire pressure gauge
Remove the tire valve cap.
Press the tip of the tire pressure gauge onto the tire valve.
Read the pressure using the gauge gradations.
If the tire inflation pressure is not at the recommended level, adjust
the pressure.
If you add too much air, press the center of the valve to deflate.
After completing the tire inflation pressure measurement and
adjustment, apply soapy water to the valve and check for leakage.
Put the tire valve cap back on.
■Tire inflation pressure check interval
You should check tire inflation pressure every two weeks, or at least once
a month.
Do not forget to check the spare.
■Effects of incorrect tire inflation pressure
Driving with incorrect tire inflation pressure may result in the following:
●Reduced fuel economy
●Reduced driving comfort and poor handling
●Reduced tire life due to wear
●Reduced safety
●Damage to the drive train
If a tire needs frequent inflating, have it checked by your Toyota dealer.
Inspection and adjustment procedure
1
2
1
2
3
4
5
6
Page 496 of 620

4968-2. Steps to take in an emergency
PRIUS v_OM_OM47B12U_(U)
■SRS warning light
This warning light system monitors the airbag sensor assembly, front impact
sensors, side impact sensors (front), side impact sensors (front door), side
impact sensors (rear), driver’s seat position sensor, driver’s seat belt buckle
switch, front passenger occupant classification system (ECU and sensors),
“AIR BAG ON” indicator light, “AIR BAG OFF” indicator light, front passen-
ger’s seat belt buckle switch, seat belt pretensioner assemblies, airbags,
interconnecting wiring and power sources. (P. 41)
■Front passenger detection sensor, seat belt reminder and warning
buzzer
●If luggage is placed on the front passenger seat, the front passenger detec-
tion sensor may cause the warning light to flash and the warning buzzer to
sound even if a passenger is not sitting in the seat.
●If a cushion is placed on the seat, the sensor may not detect a passenger,
and the warning light may not operate properly.
■Electric power steering system warning light (warning buzzer)
When the 12-volt battery charge becomes insufficient of the voltage tempo-
rarily drops, the electric power steering system warning light may come on
and the warning buzzer may sound.
■If the malfunction indicator lamp comes on while driving
First check the following:
●Is the fuel tank empty?
If it is, fill the fuel tank immediately.
●Is the fuel tank cap loose?
If it is, tighten it securely.
The malfunction indicator lamp will go off after several driving trips.
If the malfunction indicator lamp does not go off even after several trips, con-
tact your Toyota dealer as soon as possible.