key TOYOTA PROACE 2022 User Guide
[x] Cancel search | Manufacturer: TOYOTA, Model Year: 2022, Model line: PROACE, Model: TOYOTA PROACE 2022Pages: 360, PDF Size: 70.79 MB
Page 39 of 360
39
Access
2
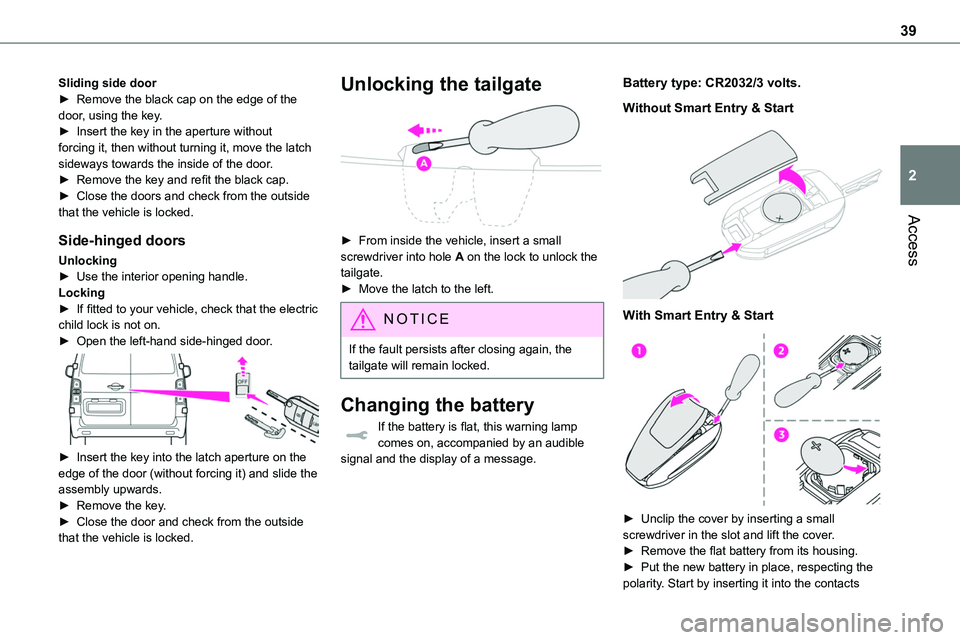
Sliding side door► Remove the black cap on the edge of the door, using the key.► Insert the key in the aperture without forcing it, then without turning it, move the latch sideways towards the inside of the door.► Remove the key and refit the black cap.► Close the doors and check from the outside that the vehicle is locked.
Side-hinged doors
Unlocking► Use the interior opening handle.Locking► If fitted to your vehicle, check that the electric child lock is not on.► Open the left-hand side-hinged door.
► Insert the key into the latch aperture on the edge of the door (without forcing it) and slide the assembly upwards.► Remove the key.► Close the door and check from the outside that the vehicle is locked.
Unlocking the tailgate
► From inside the vehicle, insert a small screwdriver into hole A on the lock to unlock the tailgate.► Move the latch to the left.
NOTIC E
If the fault persists after closing again, the tailgate will remain locked.
Changing the battery
If the battery is flat, this warning lamp
comes on, accompanied by an audible signal and the display of a message.
Battery type: CR2032/3 volts.
Without Smart Entry & Start
With Smart Entry & Start
► Unclip the cover by inserting a small
screwdriver in the slot and lift the cover.► Remove the flat battery from its housing.► Put the new battery in place, respecting the polarity. Start by inserting it into the contacts
Page 40 of 360
40
located in the corner, then clip the cover onto the unit.► Reinitialise the remote control.For more information on Reinitialising the remote control, refer to the corresponding section.
EC O
Do not throw remote control batteries away, as they contain metals that are harmful to the environment. Take them to an approved disposal point.
Reinitialising the remote
control
Following replacement of the battery or in the event of a fault, it may be necessary to reinitialise the remote control.
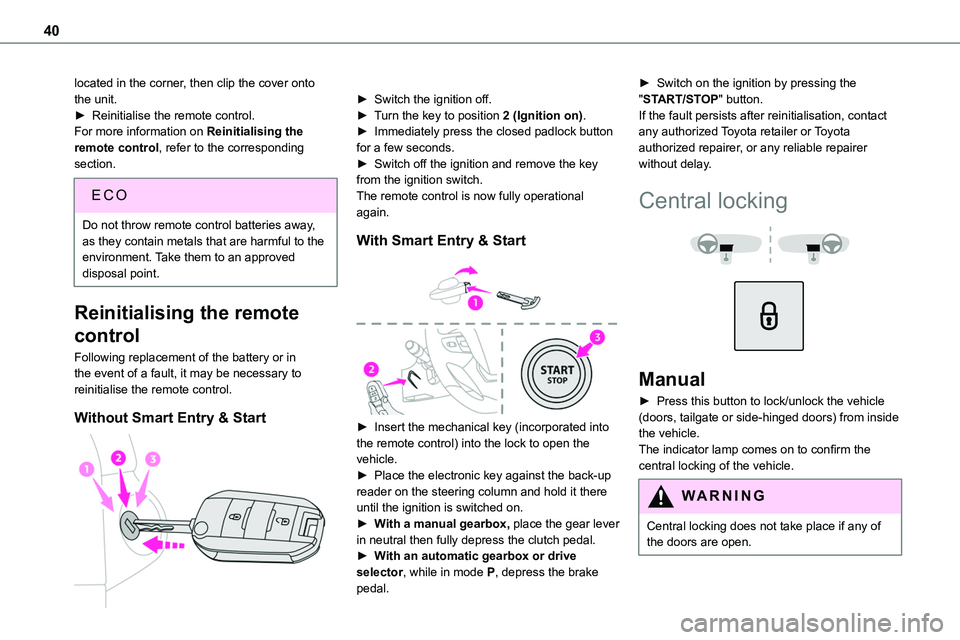
Without Smart Entry & Start
► Switch the ignition off.► Turn the key to position 2 (Ignition on).► Immediately press the closed padlock button for a few seconds.► Switch off the ignition and remove the key from the ignition switch.The remote control is now fully operational again.
With Smart Entry & Start
► Insert the mechanical key (incorporated into the remote control) into the lock to open the vehicle.► Place the electronic key against the back-up reader on the steering column and hold it there until the ignition is switched on.► With a manual gearbox, place the gear lever in neutral then fully depress the clutch pedal.► With an automatic gearbox or drive selector, while in mode P, depress the brake
pedal.
► Switch on the ignition by pressing the "START/STOP" button.If the fault persists after reinitialisation, contact any authorized Toyota retailer or Toyota authorized repairer, or any reliable repairer without delay.
Central locking
Manual
► Press this button to lock/unlock the vehicle (doors, tailgate or side-hinged doors) from inside the vehicle. The indicator lamp comes on to confirm the central locking of the vehicle.
WARNI NG
Central locking does not take place if any of
the doors are open.
Page 41 of 360
41
Access
2
NOTIC E
When locking/deadlocking from the outsideWhen the vehicle is locked or deadlocked from the outside, the indicator lamp flashes and the button is deactivated.► After normal locking, pull one of the interior door controls to unlock the vehicle.
► After deadlocking, you must use the remote control, the "Smart Entry & Start" system or the built-in key to unlock the vehicle.
WARNI NG
Driving with the doors locked makes access for the emergency services more difficult in an emergency.
NOTIC E
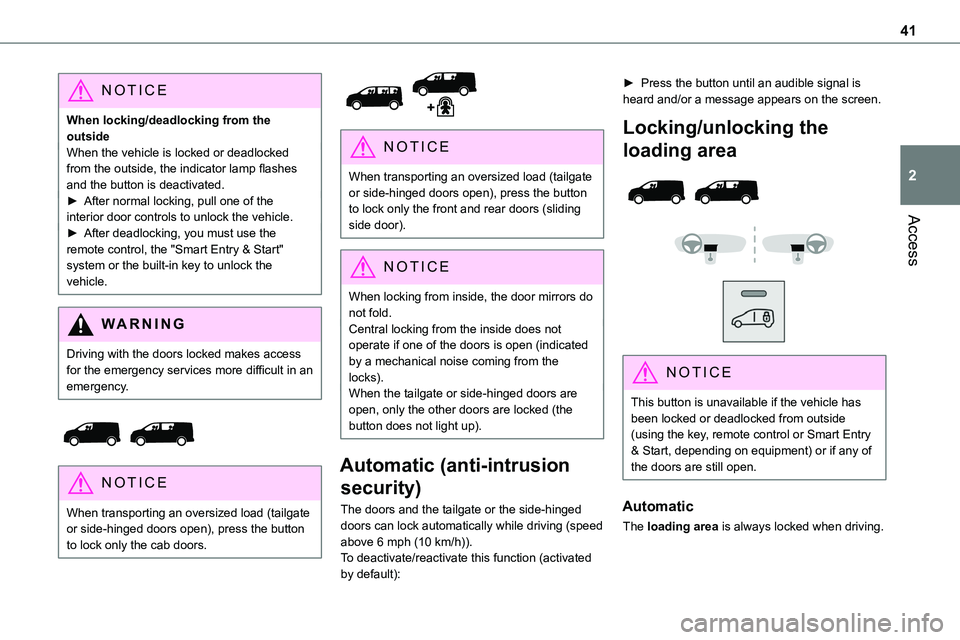
When transporting an oversized load (tailgate or side-hinged doors open), press the button to lock only the cab doors.
NOTIC E
When transporting an oversized load (tailgate or side-hinged doors open), press the button to lock only the front and rear doors (sliding side door).
NOTIC E
When locking from inside, the door mirrors do not fold.Central locking from the inside does not operate if one of the doors is open (indicated by a mechanical noise coming from the locks).When the tailgate or side-hinged doors are open, only the other doors are locked (the button does not light up).
Automatic (anti-intrusion
security)
The doors and the tailgate or the side-hinged doors can lock automatically while driving (speed
above 6 mph (10 km/h)).To deactivate/reactivate this function (activated by default):
► Press the button until an audible signal is heard and/or a message appears on the screen.
Locking/unlocking the
loading area
NOTIC E
This button is unavailable if the vehicle has been locked or deadlocked from outside (using the key, remote control or Smart Entry & Start, depending on equipment) or if any of the doors are still open.
Automatic
The loading area is always locked when driving.
Page 43 of 360
43
Access
2
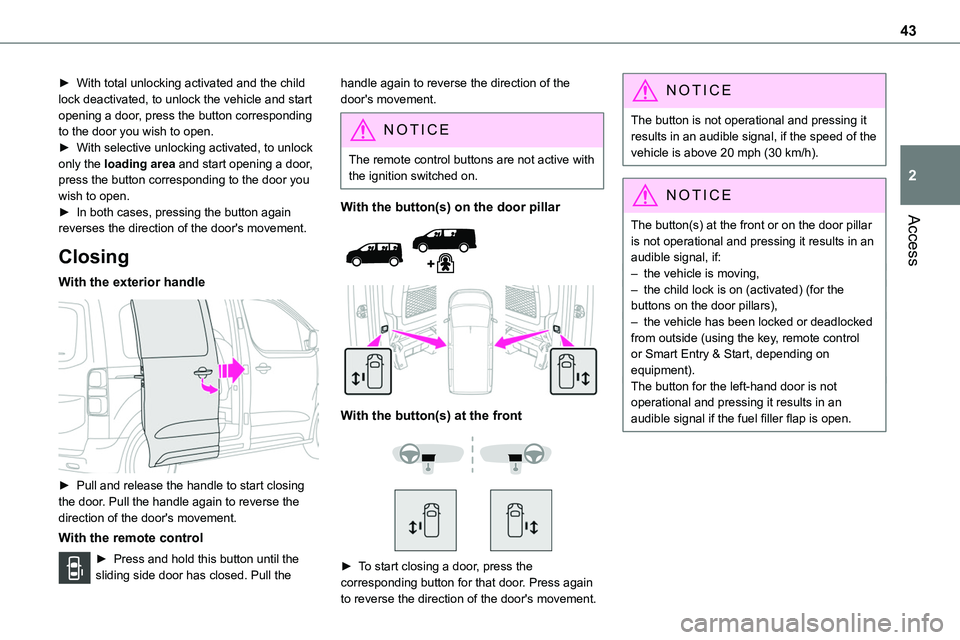
► With total unlocking activated and the child lock deactivated, to unlock the vehicle and start opening a door, press the button corresponding to the door you wish to open.► With selective unlocking activated, to unlock only the loading area and start opening a door, press the button corresponding to the door you wish to open.► In both cases, pressing the button again
reverses the direction of the door's movement.
Closing
With the exterior handle
► Pull and release the handle to start closing the door. Pull the handle again to reverse the direction of the door's movement.
With the remote control
► Press and hold this button until the sliding side door has closed. Pull the
handle again to reverse the direction of the door's movement.
NOTIC E
The remote control buttons are not active with the ignition switched on.
With the button(s) on the door pillar
With the button(s) at the front
► To start closing a door, press the corresponding button for that door. Press again
to reverse the direction of the door's movement.
NOTIC E
The button is not operational and pressing it results in an audible signal, if the speed of the vehicle is above 20 mph (30 km/h).
NOTIC E
The button(s) at the front or on the door pillar is not operational and pressing it results in an audible signal, if:– the vehicle is moving,– the child lock is on (activated) (for the buttons on the door pillars),– the vehicle has been locked or deadlocked from outside (using the key, remote control or Smart Entry & Start, depending on equipment).The button for the left-hand door is not operational and pressing it results in an audible signal if the fuel filler flap is open.
Page 48 of 360
48
– Bicycles are loaded on to or unloaded from the bicycle carrier.– Something is deposited or lifted behind the vehicle.– An animal approaches the bumper,– The vehicle is washed.– The vehicle is being serviced.– A wheel is changed. To avoid any sudden operation, keep the key
away from the detection zone (also from the boot’s interior sides) or deactivate the function in the vehicle configuration menu.
W ARNI NG
Ensure that no person or object might prevent the correct opening or closing of the doors.Be aware of children when operating the doors.
Side-hinged rear doors
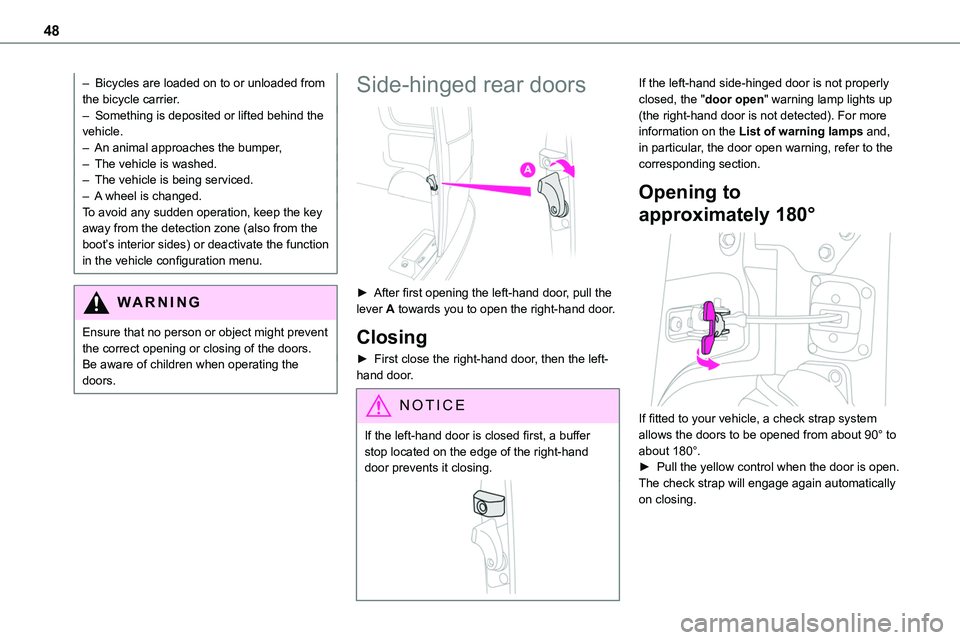
► After first opening the left-hand door, pull the lever A towards you to open the right-hand door.
Closing
► First close the right-hand door, then the left-hand door.
NOTIC E
If the left-hand door is closed first, a buffer stop located on the edge of the right-hand door prevents it closing.
If the left-hand side-hinged door is not properly closed, the "door open" warning lamp lights up (the right-hand door is not detected). For more information on the List of warning lamps and, in particular, the door open warning, refer to the corresponding section.
Opening to
approximately 180°
If fitted to your vehicle, a check strap system allows the doors to be opened from about 90° to about 180°.► Pull the yellow control when the door is open.The check strap will engage again automatically on closing.
Page 51 of 360
51
Access
2
The monitoring system is deactivated: the indicator lamp in the button goes off and the direction indicators flash for about 2 seconds.
NOTIC E
When the vehicle automatically locks itself again (as happens if a door or the boot is not opened within 30 seconds of unlocking), the monitoring system is also reactivated automatically.
Triggering of the alarm
This is indicated by sounding of the siren and flashing of the direction indicators for 30 seconds.The monitoring functions remain active until the alarm has been triggered ten times in succession.When the vehicle is unlocked, rapid flashing of the indicator lamp in the button indicates that the alarm was triggered during your absence. When the ignition is switched on, this flashing stops immediately.
Locking the vehicle
with exterior perimeter
monitoring only
Deactivate the interior volumetric monitoring to avoid the unwanted triggering of the alarm, in certain cases such as:– Slightly open window.– Washing the vehicle.
– Changing a wheel.– Towing the vehicle.– Transport on a ship or ferry.
Deactivating interior volumetric
monitoring
► Switch off the ignition and within 10 seconds press the alarm button until the indicator lamp is on fixed.► Exit the vehicle.► Immediately lock the vehicle using the remote control or the "Smart Entry & Start" system.Only exterior perimeter monitoring is activated; the red indicator lamp in the button flashes every second.To take effect, this deactivation must be performed whenever the ignition is switched off.
Reactivating interior volumetric
monitoring
► Deactivate exterior perimeter monitoring by unlocking the vehicle using the remote control or the "Smart Entry & Start" system.The indicator lamp in the button goes off.► Reactivate the full alarm system by locking the vehicle using the remote control or the "Smart Entry & Start" system.
The red indicator lamp in the button once again flashes every second.
Locking the vehicle without
activating the alarm
► Lock or deadlock the vehicle using the key (integral to the remote control) in the driver's door lock.
Failure of the remote control
To deactivate the monitoring functions:► unlock the vehicle using the key (integral to the remote control) in the driver's door lock,► open the door; the alarm is triggered,► switch on the ignition; the alarm stops; the indicator lamp in the button goes off.
Malfunction
When the ignition is switched on, the fixed lighting of the red indicator lamp in the button indicates a system malfunction.
Page 58 of 360
58
Steering wheel
adjustment
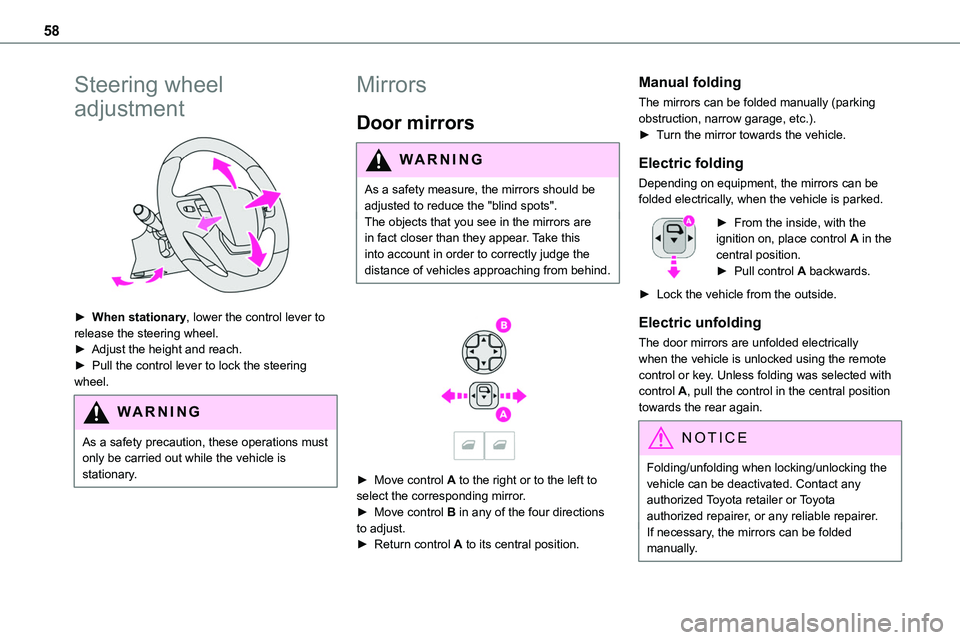
► When stationary, lower the control lever to release the steering wheel.► Adjust the height and reach.► Pull the control lever to lock the steering wheel.
WARNI NG
As a safety precaution, these operations must only be carried out while the vehicle is stationary.
Mirrors
Door mirrors
WARNI NG
As a safety measure, the mirrors should be adjusted to reduce the "blind spots".The objects that you see in the mirrors are
in fact closer than they appear. Take this into account in order to correctly judge the distance of vehicles approaching from behind.
► Move control A to the right or to the left to select the corresponding mirror.► Move control B in any of the four directions to adjust.
► Return control A to its central position.
Manual folding
The mirrors can be folded manually (parking obstruction, narrow garage, etc.).► Turn the mirror towards the vehicle.
Electric folding
Depending on equipment, the mirrors can be folded electrically, when the vehicle is parked.
► From the inside, with the ignition on, place control A in the central position.► Pull control A backwards.
► Lock the vehicle from the outside.
Electric unfolding
The door mirrors are unfolded electrically when the vehicle is unlocked using the remote control or key. Unless folding was selected with control A, pull the control in the central position towards the rear again.
NOTIC E
Folding/unfolding when locking/unlocking the vehicle can be deactivated. Contact any authorized Toyota retailer or Toyota authorized repairer, or any reliable repairer.If necessary, the mirrors can be folded manually.
Page 99 of 360
99
Ease of use and comfort
3
Courtesy lamp(s)
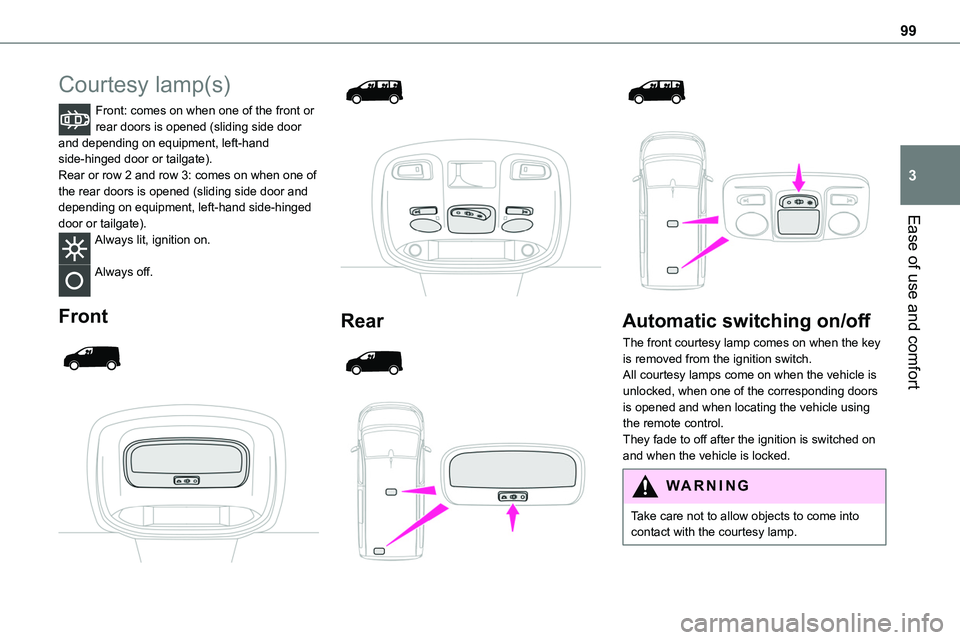
Front: comes on when one of the front or rear doors is opened (sliding side door and depending on equipment, left-hand side-hinged door or tailgate).Rear or row 2 and row 3: comes on when one of the rear doors is opened (sliding side door and depending on equipment, left-hand side-hinged
door or tailgate).Always lit, ignition on.
Always off.
Front
Rear
Automatic switching on/off
The front courtesy lamp comes on when the key is removed from the ignition switch.All courtesy lamps come on when the vehicle is unlocked, when one of the corresponding doors is opened and when locating the vehicle using the remote control.
They fade to off after the ignition is switched on and when the vehicle is locked.
WARNI NG
Take care not to allow objects to come into contact with the courtesy lamp.
Page 126 of 360
126
WARNI NG
Additional protectionsTo prevent accidental opening of the doors and rear windows, use the "Child lock".Take care not to open the rear windows by more than one third.To protect young children from the rays of the sun, fit side blinds on the rear windows.
As a safety precaution, do not leave:– a child alone and unattended in a vehicle,– a child or an animal in a vehicle which is exposed to the sun, with the windows closed,– the keys within reach of children inside the vehicle.
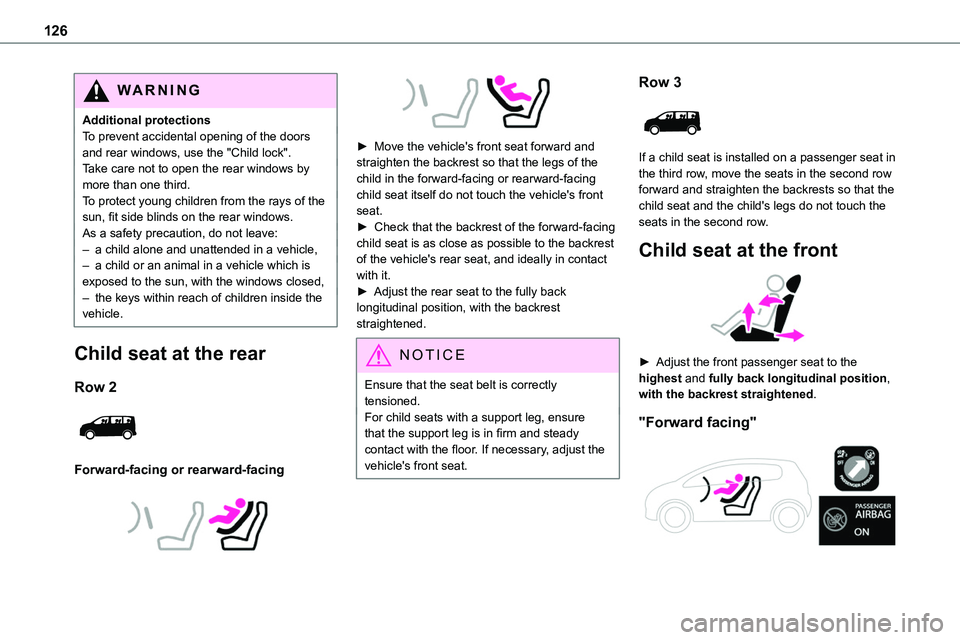
Child seat at the rear
Row 2
Forward-facing or rearward-facing
► Move the vehicle's front seat forward and straighten the backrest so that the legs of the child in the forward-facing or rearward-facing child seat itself do not touch the vehicle's front seat.► Check that the backrest of the forward-facing child seat is as close as possible to the backrest of the vehicle's rear seat, and ideally in contact with it.► Adjust the rear seat to the fully back longitudinal position, with the backrest straightened.
NOTIC E
Ensure that the seat belt is correctly tensioned.For child seats with a support leg, ensure
that the support leg is in firm and steady contact with the floor. If necessary, adjust the vehicle's front seat.
Row 3
If a child seat is installed on a passenger seat in the third row, move the seats in the second row forward and straighten the backrests so that the child seat and the child's legs do not touch the seats in the second row.
Child seat at the front
► Adjust the front passenger seat to the highest and fully back longitudinal position, with the backrest straightened.
"Forward facing"
Page 128 of 360
128
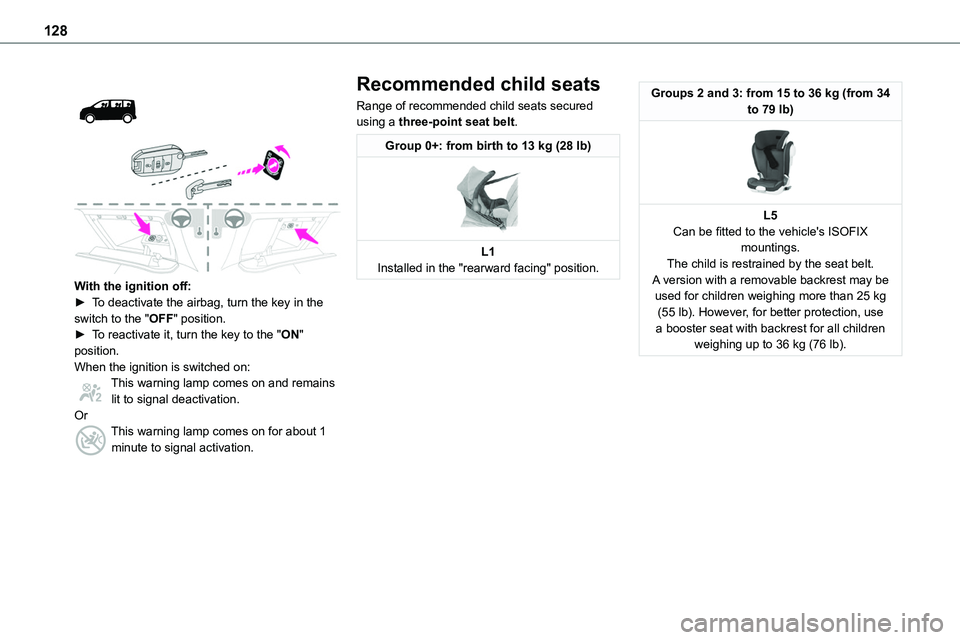
With the ignition off:► To deactivate the airbag, turn the key in the switch to the "OFF" position. ► To reactivate it, turn the key to the "ON" position.When the ignition is switched on:This warning lamp comes on and remains lit to signal deactivation.OrThis warning lamp comes on for about 1 minute to signal activation.
Recommended child seats
Range of recommended child seats secured using a three-point seat belt.
Group 0+: from birth to 13 kg (28 lb)
L1Installed in the "rearward facing" position.
Groups 2 and 3: from 15 to 36 kg (from 34 to 79 lb)
L5Can be fitted to the vehicle's ISOFIX mountings.The child is restrained by the seat belt.A version with a removable backrest may be used for children weighing more than 25 kg (55 lb). However, for better protection, use a booster seat with backrest for all children weighing up to 36 kg (76 lb).