key TOYOTA PROACE 2022 Owner's Guide
[x] Cancel search | Manufacturer: TOYOTA, Model Year: 2022, Model line: PROACE, Model: TOYOTA PROACE 2022Pages: 360, PDF Size: 70.79 MB
Page 199 of 360
199
Practical information
7
Refuelling
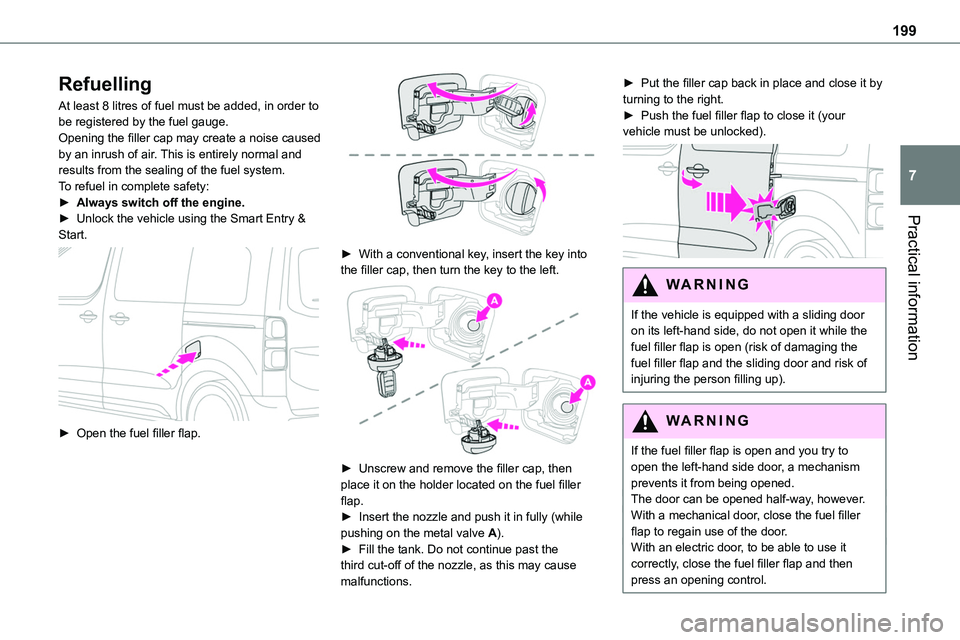
At least 8 litres of fuel must be added, in order to be registered by the fuel gauge.Opening the filler cap may create a noise caused by an inrush of air. This is entirely normal and results from the sealing of the fuel system.To refuel in complete safety:► Always switch off the engine.► Unlock the vehicle using the Smart Entry &
Start.
► Open the fuel filler flap.
► With a conventional key, insert the key into the filler cap, then turn the key to the left.
► Unscrew and remove the filler cap, then place it on the holder located on the fuel filler flap.► Insert the nozzle and push it in fully (while pushing on the metal valve A).► Fill the tank. Do not continue past the third cut-off of the nozzle, as this may cause malfunctions.
► Put the filler cap back in place and close it by turning to the right.► Push the fuel filler flap to close it (your vehicle must be unlocked).
WARNI NG
If the vehicle is equipped with a sliding door on its left-hand side, do not open it while the fuel filler flap is open (risk of damaging the fuel filler flap and the sliding door and risk of injuring the person filling up).
WARNI NG
If the fuel filler flap is open and you try to open the left-hand side door, a mechanism prevents it from being opened.The door can be opened half-way, however.With a mechanical door, close the fuel filler flap to regain use of the door.With an electric door, to be able to use it correctly, close the fuel filler flap and then press an opening control.
Page 205 of 360
205
Practical information
7
3.Always use an electrical socket protected by a circuit-breaker appropriate for the electrical circuit’s current rating.
4.The weight of the control unit must not be borne by the electrical socket, plug and cables.
5.Never use this charging cable if it is defective or in any way damaged.
6.Never attempt to repair or open this
charging cable. It contains no repairable parts - replace the charging cable if it is damaged.
7.Never immerse this charging cable in water.
8.Never use this charging cable with an extension cable, a multi-plug socket, a conversion adaptor or on a damaged electrical socket.
9.Do not unplug the plug from the wall as a means of stopping charging.
10.Immediately stop charging, by locking and then unlocking the vehicle using the remote control key, if the charging cable or wall socket feel burning hot to the touch.
11 .This charging cable includes components liable to cause electrical arcing or sparks. Do not expose to flammable vapours.
12.Only use this charging cable with TOYOTA vehicles.
13.Never plug the cable into the wall socket (or unplug it) with wet hands.
14.Do not force the connector if it is locked into
the vehicle.
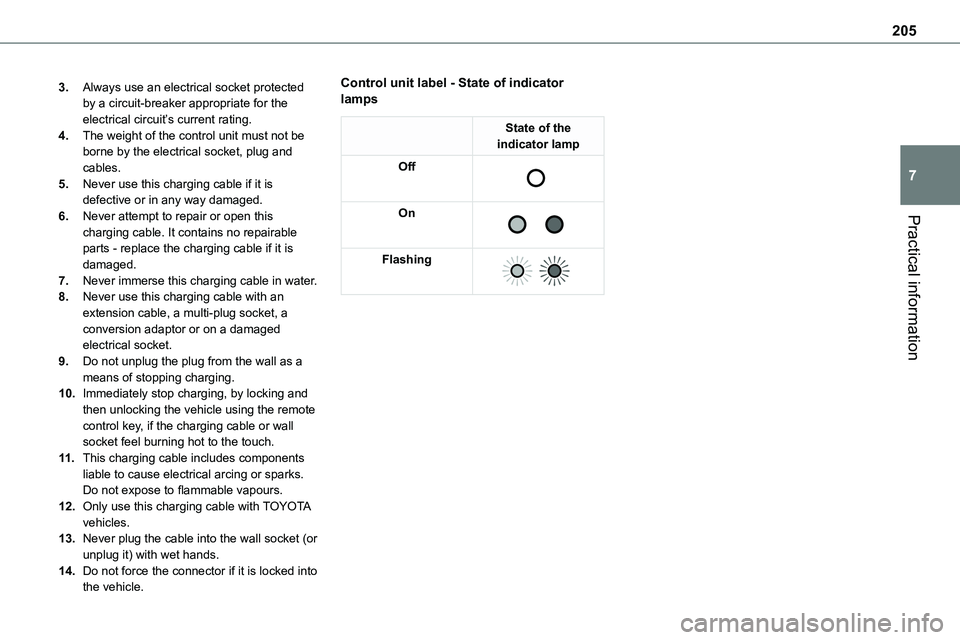
Control unit label - State of indicator lamps
State of the indicator lamp
Off
On
Flashing
Page 224 of 360
224
WARNI NG
If any AdBlue® is splashed, or if there are any spillages on the bodywork, rinse immediately with cold water or wipe with a damp cloth.If the fluid has crystallised, clean it off using a sponge and hot water.
WARNI NG
Important: in the event of a top-up after a breakdown because of a lack of AdBlue, it is essential to wait around 5 minutes before switching on the ignition, without opening the driver’s door, unlocking the vehicle, inserting the key into the ignition switch, or bringing the key for the "Smart Entry & Start" system into the passenger compartment.Switch on the ignition, then wait for 10 seconds before starting the engine.
► Switch off the ignition and remove the key from the switch to switch off the engine.or► With Smart Entry & Start, press the "START/STOP" button to switch off the engine.
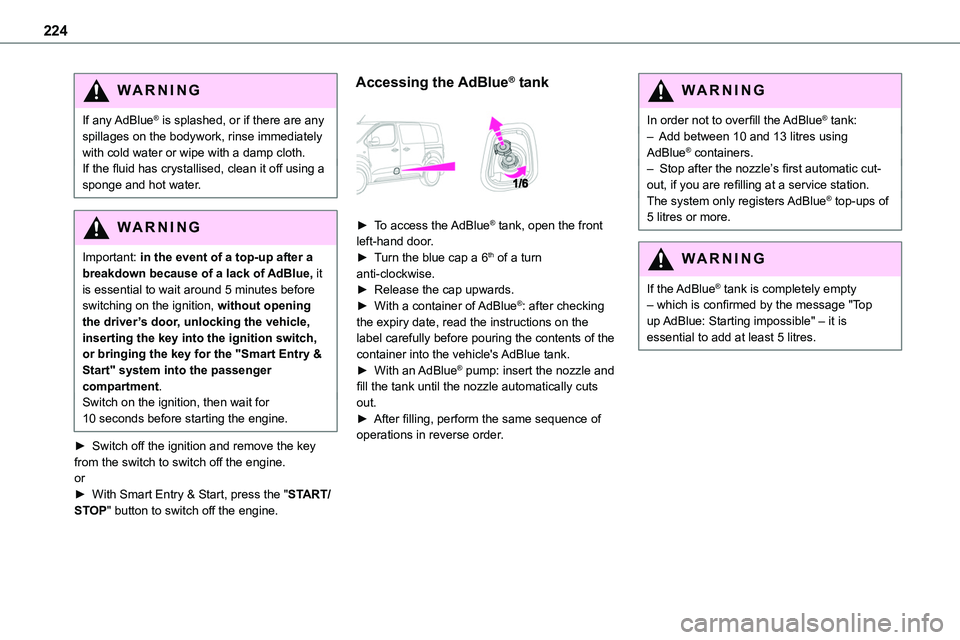
Accessing the AdBlue® tank
► To access the AdBlue® tank, open the front left-hand door.► Turn the blue cap a 6th of a turn anti-clockwise.► Release the cap upwards.► With a container of AdBlue®: after checking the expiry date, read the instructions on the label carefully before pouring the contents of the container into the vehicle's AdBlue tank.► With an AdBlue® pump: insert the nozzle and fill the tank until the nozzle automatically cuts out.► After filling, perform the same sequence of operations in reverse order.
WARNI NG
In order not to overfill the AdBlue® tank:– Add between 10 and 13 litres using AdBlue® containers.– Stop after the nozzle’s first automatic cut-out, if you are refilling at a service station.The system only registers AdBlue® top-ups of 5 litres or more.
WARNI NG
If the AdBlue® tank is completely empty – which is confirmed by the message "Top up AdBlue: Starting impossible" – it is essential to add at least 5 litres.
Page 226 of 360
226
With drive selector (Electric)
and electric parking brake /
Release procedure
► With the vehicle stationary and the engine running, depress the brake pedal and select mode N.
Within 5 seconds:► Depress and hold the brake pedal, then observe this order: switch off the engine (if start with START/STOP, press and hold the button for 2 seconds) and move the push selector forwards or backwards.► Release the brake pedal, then switch on the ignition.► Place your foot on the brake and press the electric parking brake control to release it.► Release the brake pedal, then switch off the ignition.
NOTIC E
Smart Entry & StartYou must not depress the brake pedal while switching the ignition on again, then switching it off. If you do, the engine will start, requiring you to restart the procedure.
WARNI NG
A message is displayed on the instrument panel to confirm the unlocking of the wheels for 15 minutes.When the vehicle is free-wheeling, the audio system cannot be updated (message displayed on the instrument panel).
Reverting to normal operation
► While depressing the brake pedal, restart the engine, then set the gear selector to P.
Advice on care and
maintenance
General recommendations
Observe the following recommendations to avoid damaging the vehicle.
Exterior
WARNI NG
Never use a high-pressure jet wash in the engine compartment - risk of damaging the electrical components!Do not wash the vehicle in bright sunshine or extremely cold conditions.
NOTIC E
When washing the vehicle in an automatic roller-brush car wash, be sure to lock the doors and, depending on version, move the electronic key away and deactivate the “hands-free” function (Hands-Free Access).When using a pressure washer, hold the lance at least 30 cm from the vehicle (particularly when cleaning areas containing chipped paint, sensors or seals).Promptly clean up any stains containing chemicals liable to damage the vehicle's paint (including tree resin, bird droppings, insect
secretions, pollen and tar).
Page 251 of 360
251
In the event of a breakdown
8
Disconnecting the battery
In order to maintain an adequate state of charge for starting the engine, we recommend disconnecting the battery if the vehicle is to be unused for an extended period.Before disconnecting the battery:► Close all openings (doors, tailgate, windows).► Switch off all electricity-consuming devices (audio system, wipers, lamps, etc.).
► Switch off the ignition and wait for 4 minutes.After accessing the battery, it is only necessary to disconnect the (+) terminal.
Quick-release terminal clamp
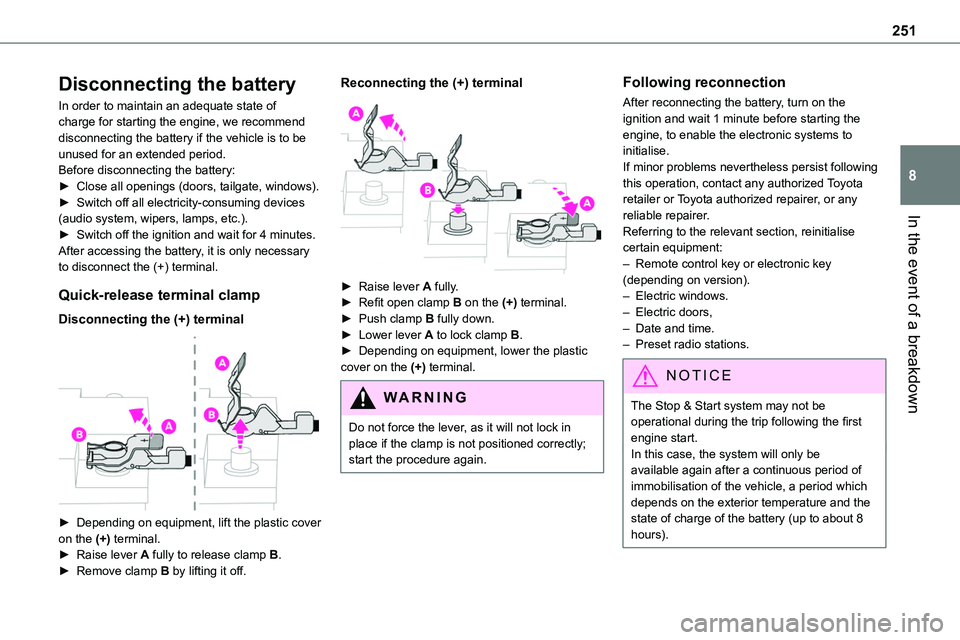
Disconnecting the (+) terminal
► Depending on equipment, lift the plastic cover
on the (+) terminal.► Raise lever A fully to release clamp B.► Remove clamp B by lifting it off.
Reconnecting the (+) terminal
► Raise lever A fully.► Refit open clamp B on the (+) terminal.► Push clamp B fully down.► Lower lever A to lock clamp B.► Depending on equipment, lower the plastic cover on the (+) terminal.
WARNI NG
Do not force the lever, as it will not lock in place if the clamp is not positioned correctly; start the procedure again.
Following reconnection
After reconnecting the battery, turn on the ignition and wait 1 minute before starting the engine, to enable the electronic systems to initialise.If minor problems nevertheless persist following this operation, contact any authorized Toyota retailer or Toyota authorized repairer, or any reliable repairer.
Referring to the relevant section, reinitialise certain equipment:– Remote control key or electronic key (depending on version).– Electric windows.– Electric doors,– Date and time.– Preset radio stations.
NOTIC E
The Stop & Start system may not be operational during the trip following the first engine start.In this case, the system will only be available again after a continuous period of immobilisation of the vehicle, a period which depends on the exterior temperature and the state of charge of the battery (up to about 8 hours).
Page 272 of 360
272
Bluetooth® audio streaming
Streaming allows music files on the telephone to be played via the vehicle's loudspeakers.Connect the telephone.(Refer to the "Pairing a Bluetooth® telephone" section).Activate the streaming source by pressing SOURCE.In certain cases, play of the audio files must be
initiated from the keypad.Audio files can be selected using the buttons on the audio system control panel and the steering mounted controls. The contextual information can be displayed in the screen.If the telephone supports the function. The audio quality depends on the quality of transmission by the telephone.
Connecting Apple® players
Connect the Apple® player to the USB port using a suitable cable (not supplied).Play starts automatically.Control is via the audio system.The classifications available are those of the portable device connected (artists / albums / genres / playlists).The version of software in the audio system may not be compatible with the generation of your Apple® player.
Information and advice
The CD player can play files with “.mp3”, “.wma”, “.wav” and “.aac” file extensions, with a bit rate of 32 to 320 Kbps.It also supports TAG mode (ID3 tag, WMA TAG).No other file types (“.mp”4, etc.) can be read.Files of the ".wma" type should be to the wma 9 standard.The sampling rates supported are 11, 22, 44 and
48 kHz.Via the USB port, the system can play audio files with the extension ".mp3”, “.wma”, “.wav”, “.cbr”, “.vbr" with a bit rate of 32 to 320 Kbps.No other file types (“.mp4”, etc.) can be read.Files of the ".wma" type should be to the wma 9 standard.The sampling rates supported are 11, 22, 44 and 48 kHz.File names should have fewer than 20 characters, avoiding special characters (e.g. « ? ; ù) so as to avoid any reading or display problems.In order to be able to play a burned CDR or CDRW, select standards ISO 9660 level 1, 2, or Joliet, if possible, when burning the CD.If the disc is burned in another format, it may not be played correctly.It is recommended that the same burning standard be always used on an individual disc, with the lowest speed possible (4x maximum) for the best acoustic quality.
In the particular case of a multi-session CD, the Joliet standard is recommended.To protect the system, do not use a USB hub.
WARNI NG
Use only USB memory sticks formatted FAT 32 (File Allocation Table).
NOTIC E
It is recommended that you use genuine Apple® USB cables for correct operation.
Page 275 of 360
275
Bluetooth® audio system
10
Managing calls
During a call, press OK to display the contextual menu.
End call
In the contextual menu, select "Hang up" to end the call.Confirm with OK.
Microphone off
(so that the caller cannot hear)In the contextual menu:
– select "Micro OFF" to switch off the microphone.– deselect "Micro OFF" to switch the microphone on.Confirm with OK.
Telephone mode
In the contextual menu:
– select "Telephone mode" to transfer the call to the telephone (for example, to leave the vehicle while continuing a conversation).– deselect "Telephone mode" to transfer the call to the vehicle.Confirm with OK.
If the contact has been cut off, when you reconnect on returning to the vehicle, the Bluetooth connection will be restored automatically and sound returned to the system (depending on the compatibility of the telephone).In some cases, the Telephone mode must be activated from the telephone.
Interactive voice response
From the contextual menu, select "DTMF tones" and confirm to use the digital keypad to navigate in the interactive voice response menu.Confirm with OK.
Consultation call
From the contextual menu, select "Switch" and validate to return to a call left on hold.Confirm with OK.
Directory
To access the directory, press and hold SRC/TEL.Select "Directory" to see the list of contacts.Confirm with OK.
To modify the contacts saved in the system, press MENU then select "Telephone" and confirm.Select "Directory management" and confirm.You can:– "Consult an entry",– "Delete an entry",– "Delete all entries".The system accesses the telephone's
contacts directory, depending on its compatibility, and while it is connected via Bluetooth.With certain telephones connected by Bluetooth you can send a contact to the directory of the audio system.Contacts imported in this way are saved in a permanent directory visible to all, whatever the telephone connected.The menu for the directory is not accessible if it is empty.
Voice recognition
This function allows you to use your smartphone's voice recognition via the system.To start voice recognition, depending on the type of steering mounted controls:Make a long press on the end of the lighting control stalk.ORPress this button.
Page 282 of 360
282
Press this button to select the display settings for messages.Press this button to search and select a recipient.Select the "Quick messages” tab.
Press this button to select the display settings for messages.Press this button to write a new message.
Press the bin alongside the selected message to delete it.Press this button alongside the selected message to display the secondary page.Press this button to edit and modify the existing text.Press this button to write a new message.
Press the bin to delete the message.
Radio
Selecting a station
Press Radio Media to display the main page.Press one of the buttons to perform an automatic search for radio stations.Or
Move the slider to manually search for frequencies up or down.OrPress the frequency.
Enter the FM and AM waveband values using the virtual keypad.Press "OK" to confirm.
WARNI NG
Radio reception may be affected by the use of electrical equipment not approved by the Brand, such as a USB charger connected to the 12 V socket.The exterior environment (hills, buildings, tunnels, basement car parks, etc.) may block reception, including in RDS mode. This phenomenon is perfectly normal in the
context of radio wave transmission, and in no way indicative of an audio system malfunction.
Changing the waveband
Press Radio Media to display the main page. Press the "OPTIONS" button to access the secondary page.Press "Band" to change waveband.
Press in the shaded area to confirm.
Presetting a station
Select a radio station or frequency.Make a short press on the star outline. If the star is solid, the radio station is already preset.OrSelect a radio station or frequency.Press "Preset".Make a long press on one of the buttons to preset the station.
Activating/Deactivating RDS
RDS, if activated, allows you to continue listening to the same station by automatically retuning to alternative frequencies.Press Radio Media to display the main page.Press the "OPTIONS" button to access the secondary page.Activate/deactivate "RDS".
Page 288 of 360
288
NOTIC E
The profiles compatible with the system are: HFP, OPP, PBAP, A2DP, AVRCP, MAP and PAN.
Visit the Brand's website for more information (compatibility, additional help, etc.).
Automatic reconnection
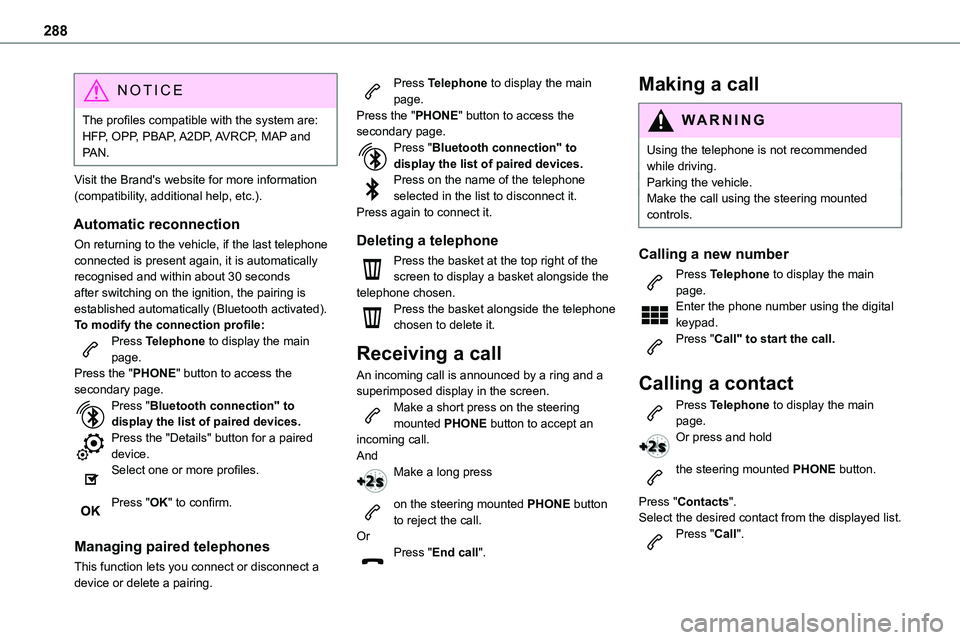
On returning to the vehicle, if the last telephone connected is present again, it is automatically recognised and within about 30 seconds after switching on the ignition, the pairing is established automatically (Bluetooth activated).To modify the connection profile:Press Telephone to display the main page.Press the "PHONE" button to access the secondary page.Press "Bluetooth connection" to display the list of paired devices.Press the "Details" button for a paired device.Select one or more profiles.
Press "OK" to confirm.
Managing paired telephones
This function lets you connect or disconnect a device or delete a pairing.
Press Telephone to display the main page.Press the "PHONE" button to access the secondary page.Press "Bluetooth connection" to display the list of paired devices.Press on the name of the telephone selected in the list to disconnect it.Press again to connect it.
Deleting a telephone
Press the basket at the top right of the screen to display a basket alongside the telephone chosen.Press the basket alongside the telephone chosen to delete it.
Receiving a call
An incoming call is announced by a ring and a superimposed display in the screen.Make a short press on the steering mounted PHONE button to accept an incoming call.AndMake a long press
on the steering mounted PHONE button to reject the call.OrPress "End call".
Making a call
WARNI NG
Using the telephone is not recommended while driving.Parking the vehicle.Make the call using the steering mounted controls.
Calling a new number
Press Telephone to display the main page. Enter the phone number using the digital keypad.Press "Call" to start the call.
Calling a contact
Press Telephone to display the main page. Or press and hold
the steering mounted PHONE button.
Press "Contacts".Select the desired contact from the displayed list.
Press "Call".
Page 289 of 360
289
TOYOTA Pro Touch
11
Calling a recently used
number
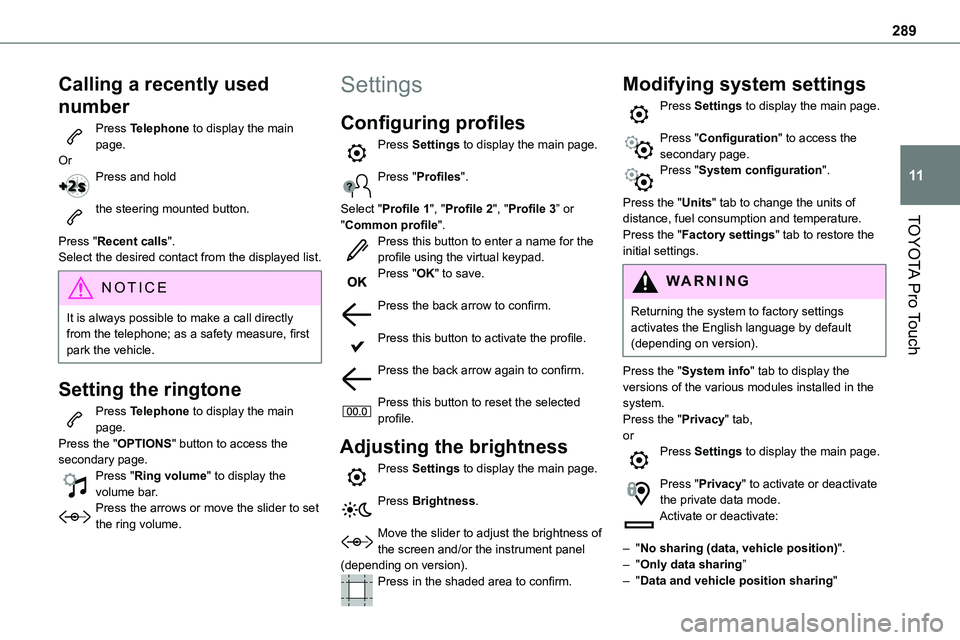
Press Telephone to display the main page.OrPress and hold
the steering mounted button.
Press "Recent calls".Select the desired contact from the displayed list.
NOTIC E
It is always possible to make a call directly from the telephone; as a safety measure, first park the vehicle.
Setting the ringtone
Press Telephone to display the main page. Press the "OPTIONS" button to access the secondary page.Press "Ring volume" to display the volume bar.Press the arrows or move the slider to set the ring volume.
Settings
Configuring profiles
Press Settings to display the main page.
Press "Profiles".
Select "Profile 1", "Profile 2", "Profile 3” or
"Common profile".Press this button to enter a name for the profile using the virtual keypad.Press "OK" to save.
Press the back arrow to confirm.
Press this button to activate the profile.
Press the back arrow again to confirm.
Press this button to reset the selected profile.
Adjusting the brightness
Press Settings to display the main page.
Press Brightness.
Move the slider to adjust the brightness of the screen and/or the instrument panel (depending on version).Press in the shaded area to confirm.
Modifying system settings
Press Settings to display the main page.
Press "Configuration" to access the secondary page.Press "System configuration".
Press the "Units" tab to change the units of distance, fuel consumption and temperature.
Press the "Factory settings" tab to restore the initial settings.
WARNI NG
Returning the system to factory settings activates the English language by default (depending on version).
Press the "System info" tab to display the versions of the various modules installed in the system.Press the "Privacy" tab,orPress Settings to display the main page.
Press "Privacy" to activate or deactivate the private data mode.Activate or deactivate:
– "No sharing (data, vehicle position)".– "Only data sharing”– "Data and vehicle position sharing"