park assist TOYOTA PROACE CITY 2020 Owners Manual
[x] Cancel search | Manufacturer: TOYOTA, Model Year: 2020, Model line: PROACE CITY, Model: TOYOTA PROACE CITY 2020Pages: 272, PDF Size: 61.18 MB
Page 2 of 272
2
■Overview
Labels 4
■Eco-driving
Eco-coaching 8
1Instruments
Instrument Panel 9Warning and indicator lamps 11Indicators 16Trip computer 21Setting the date and time 22
2Access
Electronic key with remote control function and built-in key, 23Back-up procedures 30Central locking / unlocking 32Doors 34General recommendations for the sliding side
doors 35Rear roof flap 36Alarm 37Electric windows 39Tilting rear door windows 40
3Ease of use and comfort
General recommendations for the seats 41Front seats 41
Steering wheel adjustment 44
Mirrors 442-seat front bench seat 45Rear bench seat 47Interior fittings 48Extenso cabin 53Crew cab 55Heating and Ventilation 58Heating 59Manual air conditioning 59Dual-zone automatic air conditioning 60Front demisting - defrosting 62Rear screen and/or door mirrors demisting - defrosting 63Additional heating/ventilation system 63
4Lighting and visibility
Lighting control lever 67Direction indicators 68Automatic illumination of headlamps 68Daytime running lamps / Sidelamps 69Parking lamps 69Automatic headlamp dipping 70
Headlamp beam height adjustment 71Wiper control lever 71Changing a wiper blade 73Automatic wiping 74
5Safety
General safety recommendations 75Emergency or assistance call 75Hazard warning lamps 78
Horn 78Electronic stability control (ESC) 78Advanced Grip Control 80Hill Assist Descent Control 82Seat belts 83Airbags 85Child seats 88Deactivating the front passenger airbag 90Manual child lock 93Electric child lock 93
6Driving
Driving recommendations 95Starting/switching off the engine 97Manual parking brake 100Electric parking brake 101Hill start assist 1045-speed manual gearbox 1046-speed manual gearbox 105Automatic gearbox 105Gear efficiency indicator 109Stop & Start 109
Under-inflation detection 111Head-up display 11 3Driving and manoeuvring aids - General recommendations 11 4Speed Limit Recognition and Recommendation 11 6Speed limiter 11 9Cruise control - particular recommendations 121Programmable cruise control 122
Adaptive Cruise Control 124
Page 3 of 272
3
Contents
Memorising speeds 128Active Safety Brake with Collision Risk Alert and Intelligent emergency braking assistance 128Active Lane Departure Warning System 131Blind Spot Monitoring System 134Active Blind Spot Monitoring System 136Distraction detection 136Parking sensors 137Reversing Camera 139Surround Rear Vision 141
7Practical information
Compatibility of fuels 144Refuelling 144Misfuel prevention (Diesel) 145Snow chains 146Towing device 147Overload indicator 149Energy economy mode 150Roof bars / Roof rack 150Bonnet 151Engine compartment 152
Checking levels 153Speed checks 155AdBlue® (Diesel engines) 157Free-wheeling 159Advice on care and maintenance 160
8In the event of a breakdown
Running out of fuel (Diesel) 162Tool kit 162
Temporary puncture repair kit 163Spare wheel 165Changing a bulb 169Changing a fuse 17412 V battery 176Towing 180
9Technical data
Dimensions 182Engine technical data and towed loads 187Identification markings 190
10Bluetooth® audio system
First steps 191Steering mounted controls 192Menus 193Radio 193DAB (Digital Audio Broadcasting) radio 194Media 195Telephone 198Frequently asked questions 201
11TOYOTA Connect Radio
First steps 204Steering mounted controls 205Menus 206Applications 207Radio 207DAB (Digital Audio Broadcasting) radio 209Media 209
Telephone 2 11
Settings 214Frequently asked questions 216
12TOYOTA Connect Nav
First steps 218Steering mounted controls 219Menus 219Voice commands 221Navigation 225Connected navigation 227Applications 230Radio 233DAB (Digital Audio Broadcasting) radio 234Media 235Telephone 236Settings 239Frequently asked questions 241
■Alphabetical index
Page 6 of 272
6
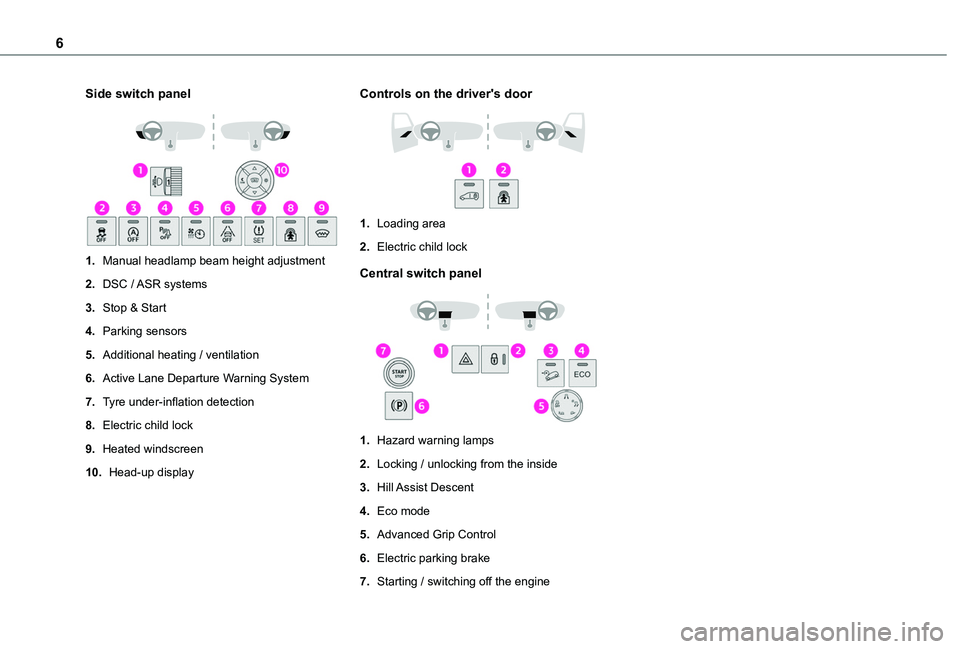
Side switch panel
1.Manual headlamp beam height adjustment
2.DSC / ASR systems
3.Stop & Start
4.Parking sensors
5.Additional heating / ventilation
6.Active Lane Departure Warning System
7.Tyre under-inflation detection
8.Electric child lock
9.Heated windscreen
10.Head-up display
Controls on the driver's door
1.Loading area
2.Electric child lock
Central switch panel
1.Hazard warning lamps
2.Locking / unlocking from the inside
3.Hill Assist Descent
4.Eco mode
5.Advanced Grip Control
6.Electric parking brake
7.Starting / switching off the engine
Page 14 of 272
14
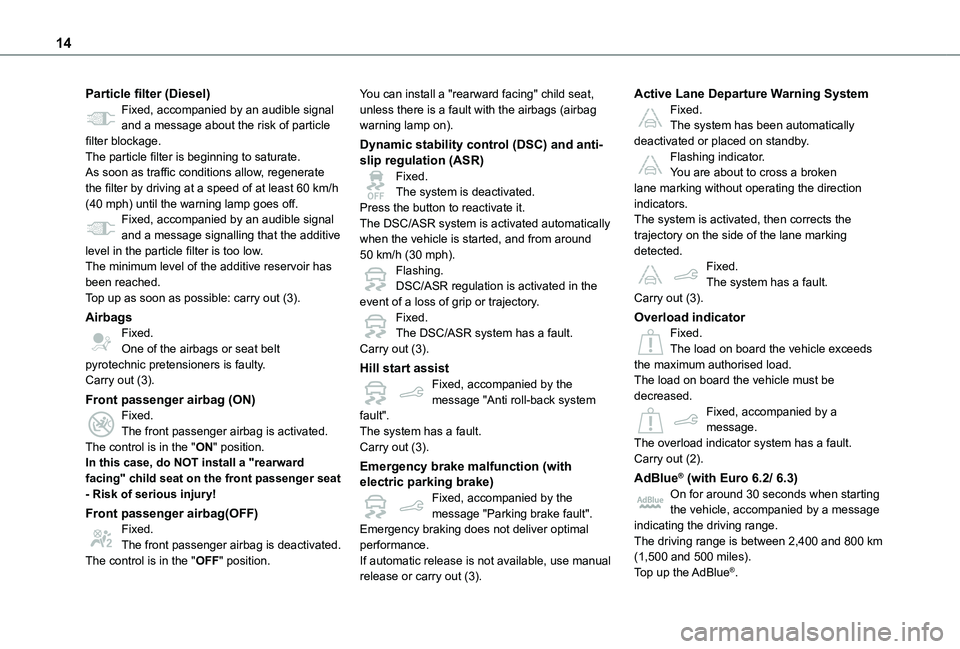
Particle filter (Diesel)Fixed, accompanied by an audible signal and a message about the risk of particle filter blockage.The particle filter is beginning to saturate.As soon as traffic conditions allow, regenerate the filter by driving at a speed of at least 60 km/h (40 mph) until the warning lamp goes off.Fixed, accompanied by an audible signal and a message signalling that the additive level in the particle filter is too low.The minimum level of the additive reservoir has been reached.Top up as soon as possible: carry out (3).
AirbagsFixed.One of the airbags or seat belt pyrotechnic pretensioners is faulty.Carry out (3).
Front passenger airbag (ON)Fixed.The front passenger airbag is activated.
The control is in the "ON" position.In this case, do NOT install a "rearward facing" child seat on the front passenger seat - Risk of serious injury!
Front passenger airbag(OFF)Fixed.The front passenger airbag is deactivated.The control is in the "OFF" position.
You can install a "rearward facing" child seat, unless there is a fault with the airbags (airbag warning lamp on).
Dynamic stability control (DSC) and anti-slip regulation (ASR)Fixed.The system is deactivated.Press the button to reactivate it.The DSC/ASR system is activated automatically when the vehicle is started, and from around 50 km/h (30 mph).Flashing.DSC/ASR regulation is activated in the event of a loss of grip or trajectory.Fixed.The DSC/ASR system has a fault.Carry out (3).
Hill start assistFixed, accompanied by the message "Anti roll-back system fault".The system has a fault.
Carry out (3).
Emergency brake malfunction (with electric parking brake)Fixed, accompanied by the message "Parking brake fault".Emergency braking does not deliver optimal performance.If automatic release is not available, use manual release or carry out (3).
Active Lane Departure Warning SystemFixed.The system has been automatically deactivated or placed on standby.Flashing indicator.You are about to cross a broken lane marking without operating the direction indicators.The system is activated, then corrects the trajectory on the side of the lane marking detected.Fixed.The system has a fault.Carry out (3).
Overload indicatorFixed.The load on board the vehicle exceeds the maximum authorised load.The load on board the vehicle must be decreased.Fixed, accompanied by a message.The overload indicator system has a fault.
Carry out (2).
AdBlue® (with Euro 6.2/ 6.3)On for around 30 seconds when starting the vehicle, accompanied by a message indicating the driving range.The driving range is between 2,400 and 800 km (1,500 and 500 miles).Top up the AdBlue®.
Page 16 of 272
16
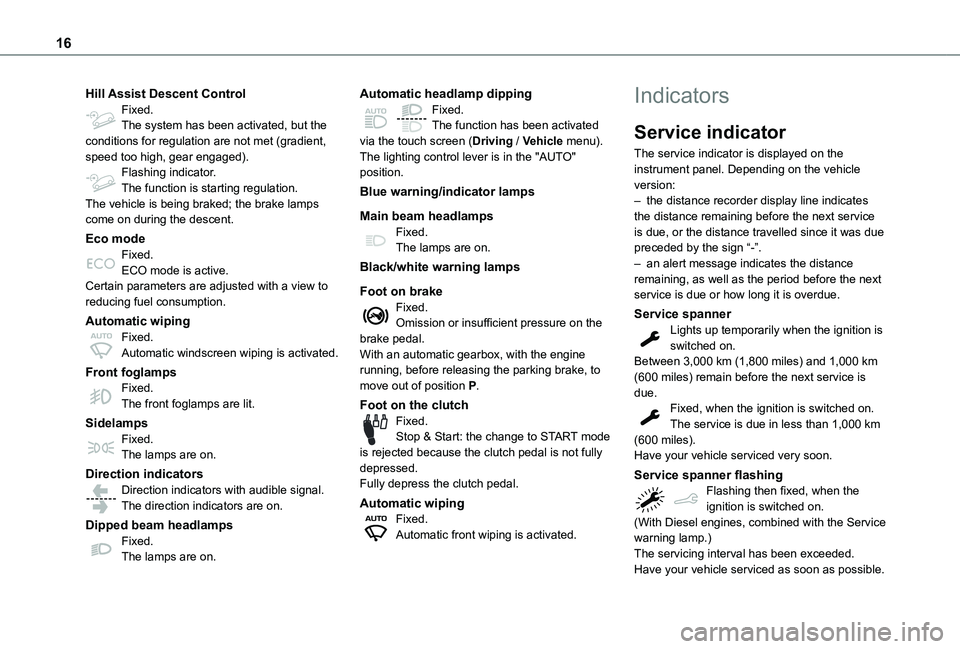
Hill Assist Descent ControlFixed.The system has been activated, but the conditions for regulation are not met (gradient, speed too high, gear engaged).Flashing indicator.The function is starting regulation.The vehicle is being braked; the brake lamps come on during the descent.
Eco modeFixed.ECO mode is active.Certain parameters are adjusted with a view to reducing fuel consumption.
Automatic wipingFixed.Automatic windscreen wiping is activated.
Front foglampsFixed.The front foglamps are lit.
SidelampsFixed.
The lamps are on.
Direction indicatorsDirection indicators with audible signal.The direction indicators are on.
Dipped beam headlampsFixed.The lamps are on.
Automatic headlamp dippingFixed.The function has been activated via the touch screen (Driving / Vehicle menu).The lighting control lever is in the "AUTO" position.
Blue warning/indicator lamps
Main beam headlampsFixed.The lamps are on.
Black/white warning lamps
Foot on brakeFixed.Omission or insufficient pressure on the brake pedal.With an automatic gearbox, with the engine running, before releasing the parking brake, to move out of position P.
Foot on the clutchFixed.Stop & Start: the change to START mode
is rejected because the clutch pedal is not fully depressed.Fully depress the clutch pedal.
Automatic wipingFixed.Automatic front wiping is activated.
Indicators
Service indicator
The service indicator is displayed on the instrument panel. Depending on the vehicle version:– the distance recorder display line indicates the distance remaining before the next service is due, or the distance travelled since it was due preceded by the sign “-”.– an alert message indicates the distance remaining, as well as the period before the next service is due or how long it is overdue.
Service spannerLights up temporarily when the ignition is switched on.Between 3,000 km (1,800 miles) and 1,000 km (600 miles) remain before the next service is due.Fixed, when the ignition is switched on.The service is due in less than 1,000 km (600 miles).
Have your vehicle serviced very soon.
Service spanner flashingFlashing then fixed, when the ignition is switched on.(With Diesel engines, combined with the Service warning lamp.)The servicing interval has been exceeded.Have your vehicle serviced as soon as possible.
Page 99 of 272
99
Driving
6
If the remote control leaves the recognition zone, a message is displayed.Move the remote control into the zone in order to be able to start the engine.
NOTIC E
If one of the starting conditions is not met, a message is displayed in the instrument panel. In some circumstances, it is necessary to turn
the steering wheel while pressing the "START/STOP" button to assist unlocking of the steering column. A message is displayed.
Switching off
► Immobilise the vehicle, with the engine at idle.► With a manual gearbox, ideally put the gear lever into neutral.► With an automatic gearbox, ideally select position P.
With the conventional key/With the
remote control key
► Turn the key all the way to position 1 (Stop) and remove it from the ignition.► To lock the steering column, turn the steering wheel until it locks.
NOTIC E
To facilitate unlocking of the steering column, it is recommended that the wheels be returned to the straight ahead position before switching off the engine.
► Check that the parking brake is correctly applied, particularly on sloping ground.
WARNI NG
Never switch off the ignition before the complete immobilisation of the vehicle. With the engine off, the braking and steering assistance systems are also turned off: risk of loss of control of the vehicle.
NOTIC E
As a safety measure, never leave the vehicle without taking the remote control with you, even for a short time.
NOTIC E
Avoid attaching heavy objects to the key or the remote control, which would weigh down on its blade in the ignition switch and could
cause a malfunction.
Key left in the ignition
NOTIC E
When opening the driver's door, an alert message is displayed, accompanied by an audible signal, to remind you that the key is still in the ignition switch at position 1 (Stop).If the key has been left in the ignition switch at position 2 (Ignition on), the ignition will be
switched off automatically after one hour.To switch the ignition back on, turn the key to position 1 (Stop), then back to position 2 (Ignition on).
With Keyless Entry and Starting
► With the remote control in the recognition zone, press the "START/STOP" button.With a manual gearbox, the engine switches off and the steering column locks.With the EAT8 automatic gearbox, the engine switches off.
NOTIC E
If the vehicle is not immobilised, the engine will not stop.
Page 104 of 272
104
Hill start assist
This system keeps your vehicle briefly stationary (for approximately 2 seconds) when making a hill start, while you transfer your foot from the brake pedal to the accelerator pedal.This system is only active when:– the vehicle is completely stationary, with your foot on the brake pedal,– certain slope conditions are met,– the driver’s door is closed.
WARNI NG
Do not leave the vehicle while it is being held temporarily by hill start assist.If someone needs to get out of the vehicle with the engine running, apply the parking brake manually. After that, ensure that the parking brake indicator lamp and the indicator lamp P in the electric parking brake control lever are on fixed.
WARNI NG
The hill start assist function cannot be deactivated. However, use of the parking brake to immobilise the vehicle interrupts its operation.
Operation
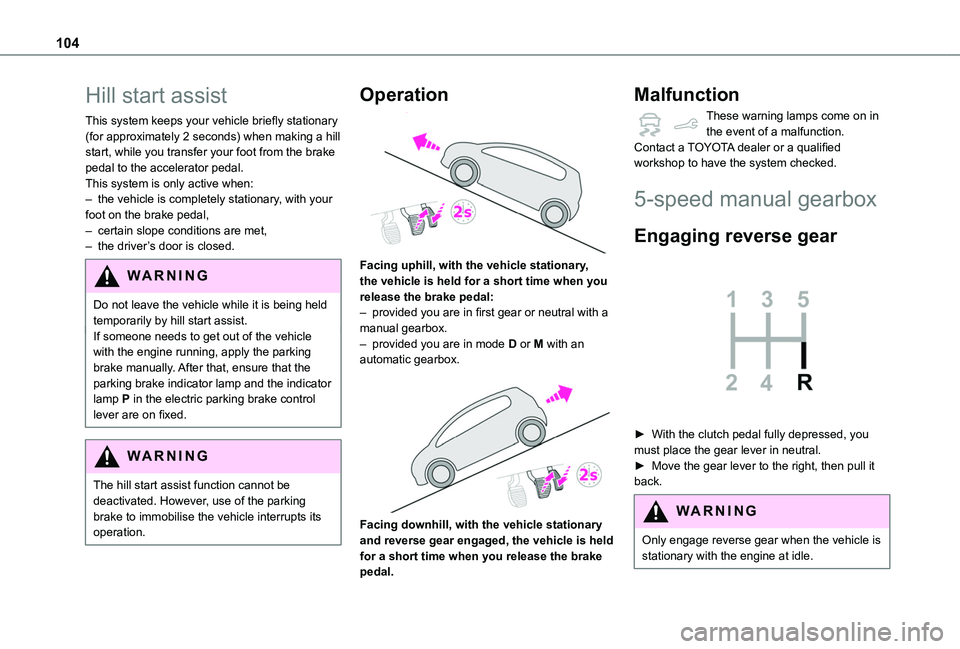
Facing uphill, with the vehicle stationary, the vehicle is held for a short time when you release the brake pedal:– provided you are in first gear or neutral with a manual gearbox.– provided you are in mode D or M with an automatic gearbox.
Facing downhill, with the vehicle stationary and reverse gear engaged, the vehicle is held for a short time when you release the brake pedal.
Malfunction
These warning lamps come on in the event of a malfunction.Contact a TOYOTA dealer or a qualified workshop to have the system checked.
5-speed manual gearbox
Engaging reverse gear
► With the clutch pedal fully depressed, you
must place the gear lever in neutral.► Move the gear lever to the right, then pull it back.
WARNI NG
Only engage reverse gear when the vehicle is
stationary with the engine at idle.
Page 138 of 272
138
Using sensors located in the bumper, this system signals the proximity of obstacles (e.g. pedestrian, vehicle, tree, barrier) present in their field of detection.
Rear parking sensors
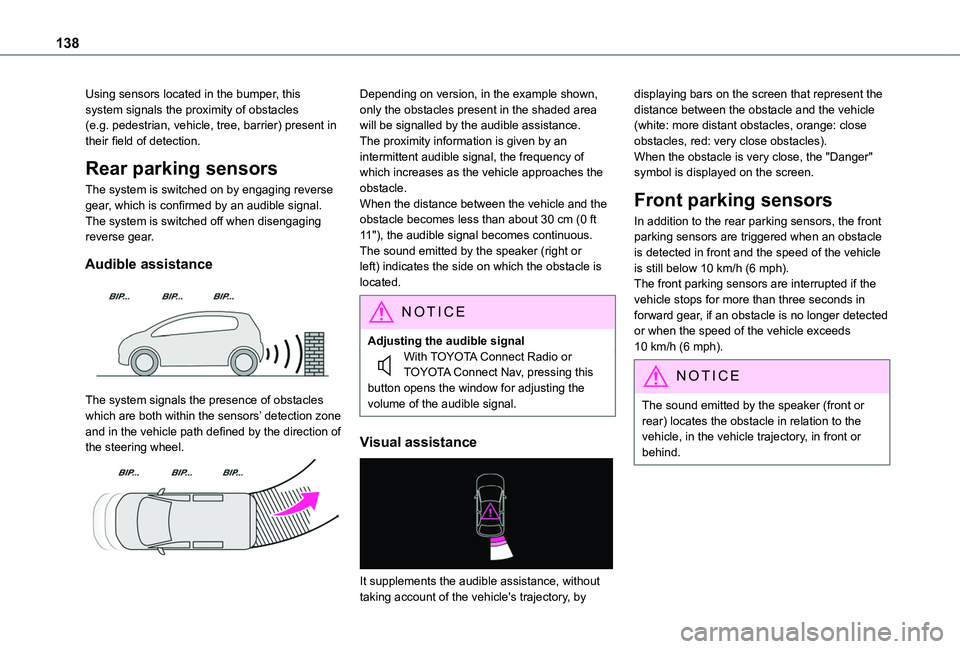
The system is switched on by engaging reverse gear, which is confirmed by an audible signal.The system is switched off when disengaging reverse gear.
Audible assistance
The system signals the presence of obstacles which are both within the sensors’ detection zone and in the vehicle path defined by the direction of the steering wheel.
Depending on version, in the example shown, only the obstacles present in the shaded area will be signalled by the audible assistance.The proximity information is given by an intermittent audible signal, the frequency of which increases as the vehicle approaches the obstacle.When the distance between the vehicle and the obstacle becomes less than about 30 cm (0 ft 11"), the audible signal becomes continuous.The sound emitted by the speaker (right or left) indicates the side on which the obstacle is located.
NOTIC E
Adjusting the audible signalWith TOYOTA Connect Radio or TOYOTA Connect Nav, pressing this button opens the window for adjusting the volume of the audible signal.
Visual assistance
It supplements the audible assistance, without
taking account of the vehicle's trajectory, by
displaying bars on the screen that represent the distance between the obstacle and the vehicle (white: more distant obstacles, orange: close obstacles, red: very close obstacles).When the obstacle is very close, the "Danger" symbol is displayed on the screen.
Front parking sensors
In addition to the rear parking sensors, the front parking sensors are triggered when an obstacle is detected in front and the speed of the vehicle is still below 10 km/h (6 mph).The front parking sensors are interrupted if the vehicle stops for more than three seconds in forward gear, if an obstacle is no longer detected or when the speed of the vehicle exceeds 10 km/h (6 mph).
NOTIC E
The sound emitted by the speaker (front or rear) locates the obstacle in relation to the vehicle, in the vehicle trajectory, in front or behind.
Page 165 of 272
165
In the event of a breakdown
8
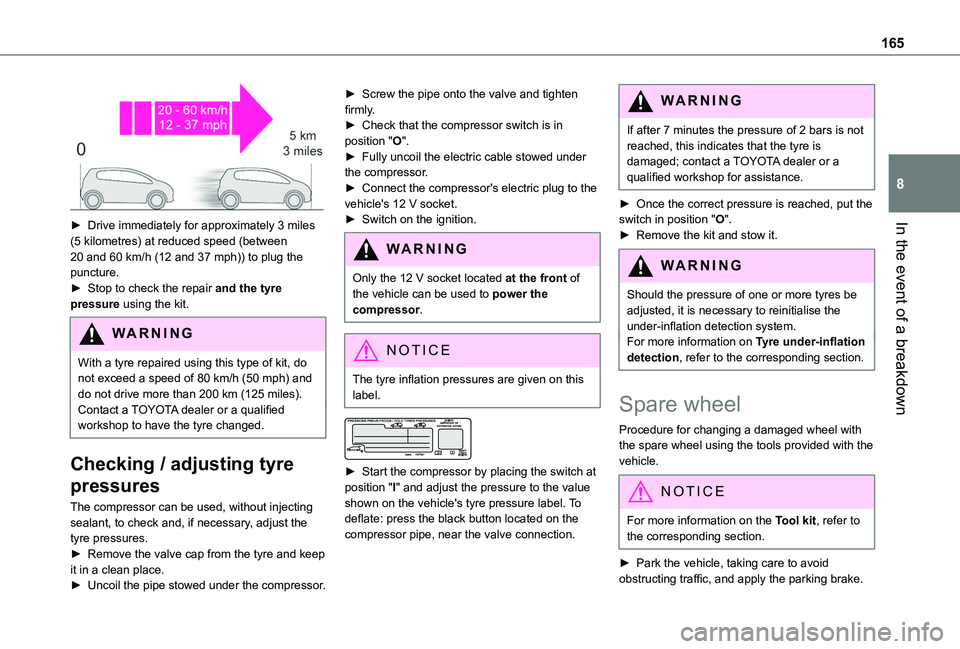
► Drive immediately for approximately 3 miles (5 kilometres) at reduced speed (between 20 and 60 km/h (12 and 37 mph)) to plug the puncture.► Stop to check the repair and the tyre pressure using the kit.
WARNI NG
With a tyre repaired using this type of kit, do not exceed a speed of 80 km/h (50 mph) and do not drive more than 200 km (125 miles).Contact a TOYOTA dealer or a qualified workshop to have the tyre changed.
Checking / adjusting tyre
pressures
The compressor can be used, without injecting sealant, to check and, if necessary, adjust the tyre pressures.► Remove the valve cap from the tyre and keep it in a clean place.► Uncoil the pipe stowed under the compressor.
► Screw the pipe onto the valve and tighten firmly.► Check that the compressor switch is in position "O".► Fully uncoil the electric cable stowed under the compressor.► Connect the compressor's electric plug to the vehicle's 12 V socket.► Switch on the ignition.
WARNI NG
Only the 12 V socket located at the front of the vehicle can be used to power the compressor.
NOTIC E
The tyre inflation pressures are given on this label.
► Start the compressor by placing the switch at position "I" and adjust the pressure to the value shown on the vehicle's tyre pressure label. To deflate: press the black button located on the compressor pipe, near the valve connection.
WARNI NG
If after 7 minutes the pressure of 2 bars is not reached, this indicates that the tyre is damaged; contact a TOYOTA dealer or a qualified workshop for assistance.
► Once the correct pressure is reached, put the switch in position "O".► Remove the kit and stow it.
WARNI NG
Should the pressure of one or more tyres be adjusted, it is necessary to reinitialise the under-inflation detection system.For more information on Tyre under-inflation detection, refer to the corresponding section.
Spare wheel
Procedure for changing a damaged wheel with
the spare wheel using the tools provided with the vehicle.
NOTIC E
For more information on the Tool kit, refer to the corresponding section.
► Park the vehicle, taking care to avoid obstructing traffic, and apply the parking brake.
Page 178 of 272
178
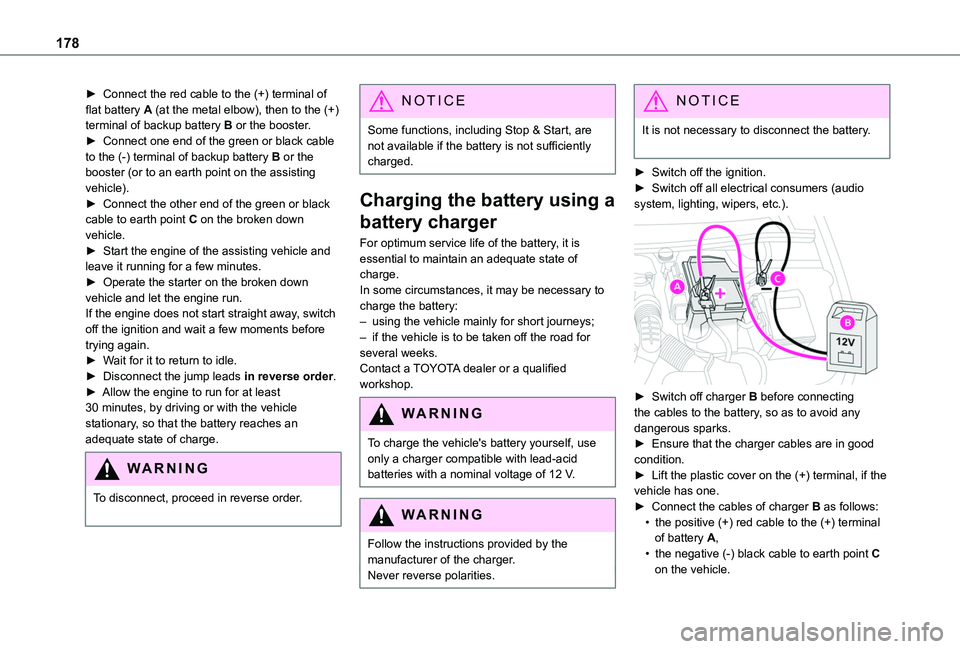
► Connect the red cable to the (+) terminal of flat battery A (at the metal elbow), then to the (+) terminal of backup battery B or the booster.► Connect one end of the green or black cable to the (-) terminal of backup battery B or the booster (or to an earth point on the assisting vehicle).► Connect the other end of the green or black cable to earth point C on the broken down vehicle.► Start the engine of the assisting vehicle and leave it running for a few minutes.► Operate the starter on the broken down vehicle and let the engine run.If the engine does not start straight away, switch off the ignition and wait a few moments before trying again.► Wait for it to return to idle.► Disconnect the jump leads in reverse order.► Allow the engine to run for at least 30 minutes, by driving or with the vehicle stationary, so that the battery reaches an adequate state of charge.
WARNI NG
To disconnect, proceed in reverse order.
NOTIC E
Some functions, including Stop & Start, are not available if the battery is not sufficiently charged.
Charging the battery using a
battery charger
For optimum service life of the battery, it is essential to maintain an adequate state of charge.In some circumstances, it may be necessary to charge the battery:– using the vehicle mainly for short journeys;– if the vehicle is to be taken off the road for several weeks.Contact a TOYOTA dealer or a qualified workshop.
WARNI NG
To charge the vehicle's battery yourself, use only a charger compatible with lead-acid batteries with a nominal voltage of 12 V.
WARNI NG
Follow the instructions provided by the
manufacturer of the charger.Never reverse polarities.
NOTIC E
It is not necessary to disconnect the battery.
► Switch off the ignition.► Switch off all electrical consumers (audio system, lighting, wipers, etc.).
► Switch off charger B before connecting the cables to the battery, so as to avoid any dangerous sparks.► Ensure that the charger cables are in good
condition.► Lift the plastic cover on the (+) terminal, if the vehicle has one.► Connect the cables of charger B as follows:• the positive (+) red cable to the (+) terminal of battery A,• the negative (-) black cable to earth point C on the vehicle.