air conditioning TOYOTA PROACE CITY 2022 User Guide
[x] Cancel search | Manufacturer: TOYOTA, Model Year: 2022, Model line: PROACE CITY, Model: TOYOTA PROACE CITY 2022Pages: 320, PDF Size: 75.81 MB
Page 83 of 320
83
Ease of use and comfort
3
Dual-zone automatic air
conditioning
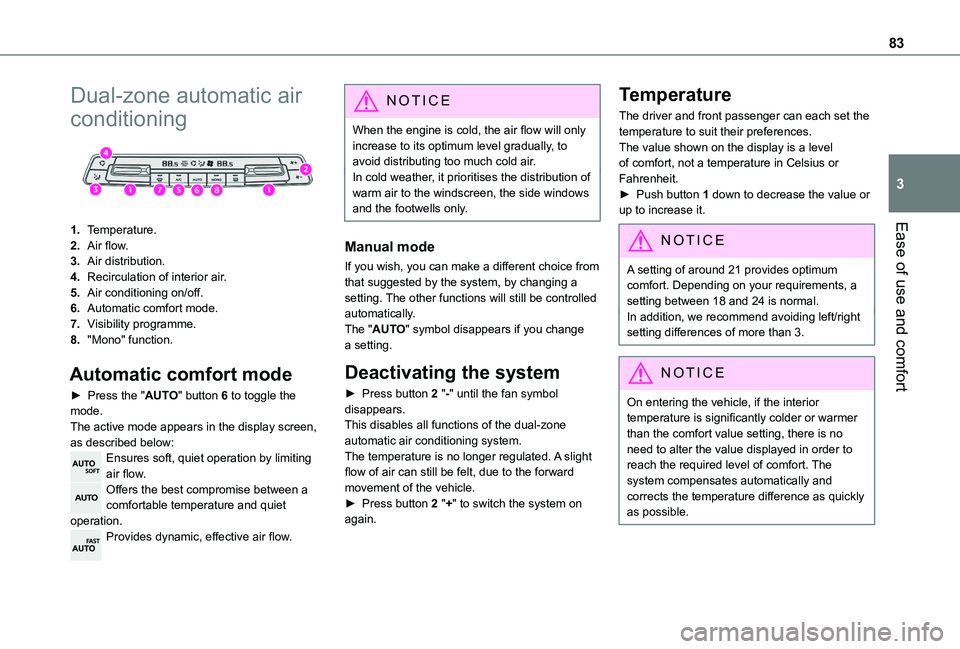
1.Temperature.
2.Air flow.
3.Air distribution.
4.Recirculation of interior air.
5.Air conditioning on/off.
6.Automatic comfort mode.
7.Visibility programme.
8."Mono" function.
Automatic comfort mode
► Press the "AUTO" button 6 to toggle the mode.The active mode appears in the display screen, as described below:Ensures soft, quiet operation by limiting air flow.Offers the best compromise between a comfortable temperature and quiet operation.Provides dynamic, effective air flow.
NOTIC E
When the engine is cold, the air flow will only increase to its optimum level gradually, to avoid distributing too much cold air.In cold weather, it prioritises the distribution of warm air to the windscreen, the side windows and the footwells only.
Manual mode
If you wish, you can make a different choice from that suggested by the system, by changing a setting. The other functions will still be controlled automatically. The "AUTO" symbol disappears if you change a setting.
Deactivating the system
► Press button 2 "-" until the fan symbol disappears.This disables all functions of the dual-zone automatic air conditioning system.
The temperature is no longer regulated. A slight flow of air can still be felt, due to the forward movement of the vehicle.► Press button 2 "+" to switch the system on again.
Temperature
The driver and front passenger can each set the temperature to suit their preferences.The value shown on the display is a level of comfort, not a temperature in Celsius or Fahrenheit.► Push button 1 down to decrease the value or up to increase it.
NOTIC E
A setting of around 21 provides optimum comfort. Depending on your requirements, a setting between 18 and 24 is normal.In addition, we recommend avoiding left/right setting differences of more than 3.
NOTIC E
On entering the vehicle, if the interior temperature is significantly colder or warmer than the comfort value setting, there is no need to alter the value displayed in order to reach the required level of comfort. The system compensates automatically and corrects the temperature difference as quickly as possible.
Page 84 of 320
84
NOTIC E
For maximum cooling or heating of the passenger compartment, it is possible to exceed the minimum value 14 or the maximum value 28.► Push button 1 down until "LO" is displayed or up until "HI" is displayed.
"Mono" function
The comfort setting for the passenger side can be indexed to the driver's comfort setting (mono-zone).► Press the corresponding button 8 to activate/deactivate the function.The indicator lamp in the button comes on when the function is activated.The function is deactivated automatically if a passenger uses the temperature control.
Visibility programme
► Press the “visibility” button 7 to demist or
defrost the windscreen and side windows as quickly as possible. The system automatically manages the air conditioning, air flow and air intake, and provides optimum distribution towards the windscreen and side windows.► Press the “visibility” button 7 again to stop the programme.Or
► Press the “AUTO” button 6 to return to the automatic comfort programme.
Air conditioning
With the engine running, the air conditioning is designed to operate effectively in all seasons, with the windows closed.It enables you to:– lower the temperature in summer,– enhance the effectiveness of the demisting function in winter, above 3°C.
On/Off
► Press button 5 to activate/deactivate the air conditioning system.When the air conditioning is in operation, to cool the air more quickly, you can use interior air recirculation for a few moments by pressing button 4. Then restore the intake of exterior air.
NOTIC E
The air conditioning does not operate when the air flow adjustment is set to off.
WARNI NG
Switching the system off could result in discomfort (humidity, misting).
Air distribution
► Pressing button 3 successively directs the air flow towards:– windscreen, side windows and footwells, – footwells,– central vents, side vents and footwells,– windscreen, side windows, central vents, side vents and footwells,– central and side vents, – windscreen and side windows (demisting or defrosting).
WARNI NG
For optimum comfort (depending on the outside temperature)< 15°C: press button 3 until the air flow to the windscreen and side windows and footwells is activated.15°C - 25°C: press button 3 until the air flow to the central vents, side vents and footwells is activated.> 25°C: press button 3 until the air flow to the
central vents and side vents is activated.
Air flow
► Press the buttons 2 to increase/decrease the air flow.The air flow symbol (a fan) appears. It is filled in or emptied gradually, according to the value set.
Page 85 of 320
85
Ease of use and comfort
3
Recirculation of interior air
The intake of exterior air helps avoid and eliminate misting of the windscreen and side windows.Recirculating the interior air isolates the passenger compartment from polluted air when passing through high-traffic areas or tunnels.
NOTIC E
When required, this function also allows faster heating or cooling of the air in the passenger compartment.
► Press button 4 to recirculate the interior air or allow the intake of exterior air.
WARNI NG
Avoid prolonged use of interior air recirculation in order to guarantee a good renewal of the air and reduce the risk of fogging (especially when there are several people on board, when the atmosphere is cold/humid...).
Front demisting
- defrosting
Heating
For optimal demisting/defrosting in winter, make the following settings:
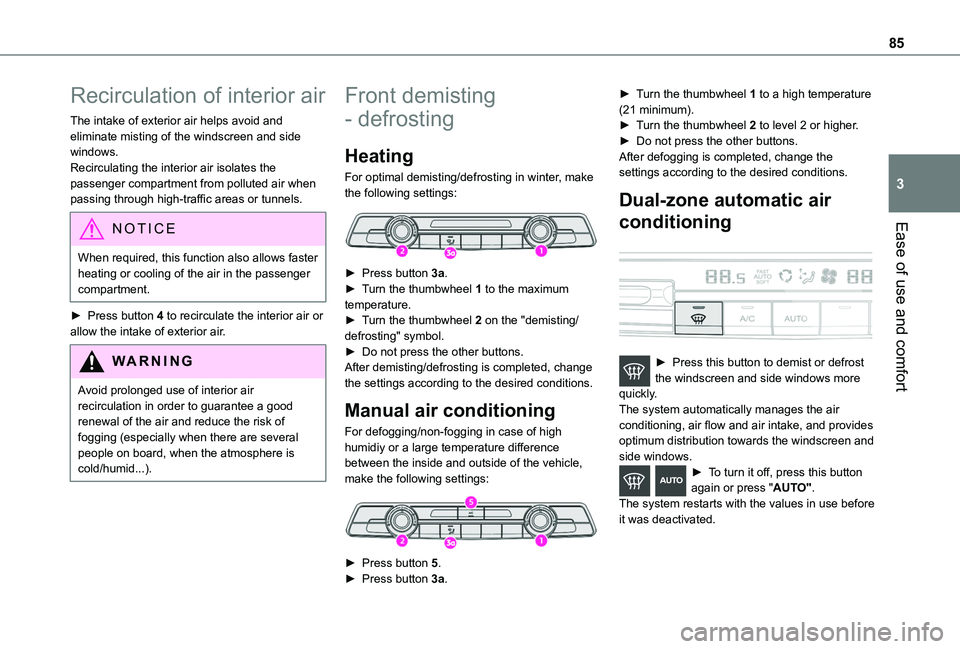
► Press button 3a.► Turn the thumbwheel 1 to the maximum temperature.► Turn the thumbwheel 2 on the "demisting/defrosting" symbol.► Do not press the other buttons.After demisting/defrosting is completed, change the settings according to the desired conditions.
Manual air conditioning
For defogging/non-fogging in case of high humidiy or a large temperature difference between the inside and outside of the vehicle, make the following settings:
► Press button 5.► Press button 3a.
► Turn the thumbwheel 1 to a high temperature (21 minimum).► Turn the thumbwheel 2 to level 2 or higher.► Do not press the other buttons.After defogging is completed, change the settings according to the desired conditions.
Dual-zone automatic air
conditioning
► Press this button to demist or defrost the windscreen and side windows more quickly.The system automatically manages the air conditioning, air flow and air intake, and provides optimum distribution towards the windscreen and side windows.► To turn it off, press this button again or press "AUTO".The system restarts with the values in use before it was deactivated.
Page 86 of 320
86
NOTIC E
Heated windscreen and washer jetsFor more information on the Wiper control lever and in particular the heated windscreen and washer jets, refer to the corresponding section.
NOTIC E
With Stop & Start, when demisting - defrosting has been activated, STOP mode is not available.
Heated windscreen
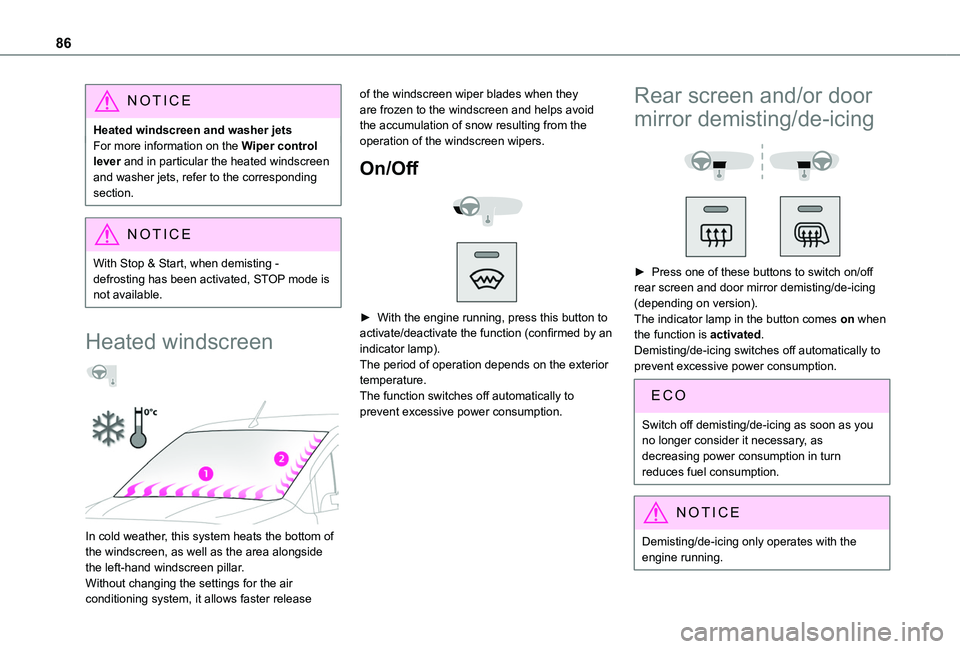
In cold weather, this system heats the bottom of the windscreen, as well as the area alongside the left-hand windscreen pillar.Without changing the settings for the air conditioning system, it allows faster release
of the windscreen wiper blades when they are frozen to the windscreen and helps avoid the accumulation of snow resulting from the operation of the windscreen wipers.
On/Off
► With the engine running, press this button to activate/deactivate the function (confirmed by an indicator lamp).The period of operation depends on the exterior temperature.The function switches off automatically to prevent excessive power consumption.
Rear screen and/or door
mirror demisting/de-icing
► Press one of these buttons to switch on/off rear screen and door mirror demisting/de-icing (depending on version).The indicator lamp in the button comes on when the function is activated.Demisting/de-icing switches off automatically to prevent excessive power consumption.
Switch off demisting/de-icing as soon as you no longer consider it necessary, as
decreasing power consumption in turn reduces fuel consumption.
NOTIC E
Demisting/de-icing only operates with the
engine running.
Page 87 of 320
87
Ease of use and comfort
3
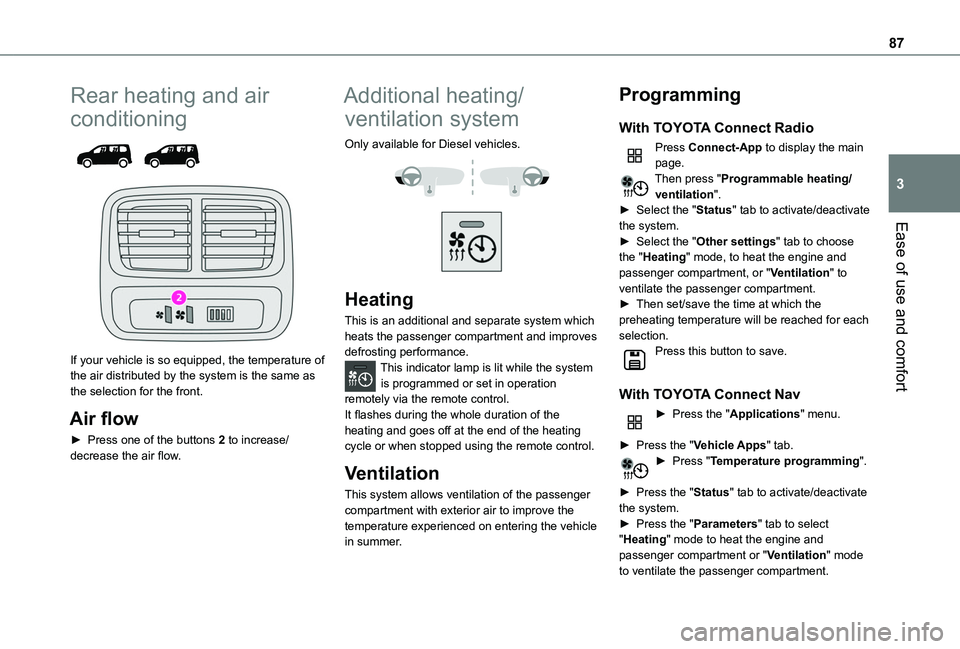
Rear heating and air
conditioning
If your vehicle is so equipped, the temperature of the air distributed by the system is the same as the selection for the front.
Air flow
► Press one of the buttons 2 to increase/decrease the air flow.
Additional heating/
ventilation system
Only available for Diesel vehicles.
Heating
This is an additional and separate system which heats the passenger compartment and improves defrosting performance.This indicator lamp is lit while the system is programmed or set in operation remotely via the remote control.It flashes during the whole duration of the heating and goes off at the end of the heating cycle or when stopped using the remote control.
Ventilation
This system allows ventilation of the passenger compartment with exterior air to improve the temperature experienced on entering the vehicle in summer.
Programming
With TOYOTA Connect Radio
Press Connect-App to display the main page.Then press "Programmable heating/ventilation".► Select the "Status" tab to activate/deactivate the system.► Select the "Other settings" tab to choose the "Heating" mode, to heat the engine and passenger compartment, or "Ventilation" to ventilate the passenger compartment.► Then set/save the time at which the preheating temperature will be reached for each selection.Press this button to save.
With TOYOTA Connect Nav
► Press the "Applications" menu.
► Press the "Vehicle Apps" tab.► Press "Temperature programming".
► Press the "Status" tab to activate/deactivate the system.► Press the "Parameters" tab to select "Heating" mode to heat the engine and passenger compartment or "Ventilation" mode to ventilate the passenger compartment.
Page 98 of 320
98
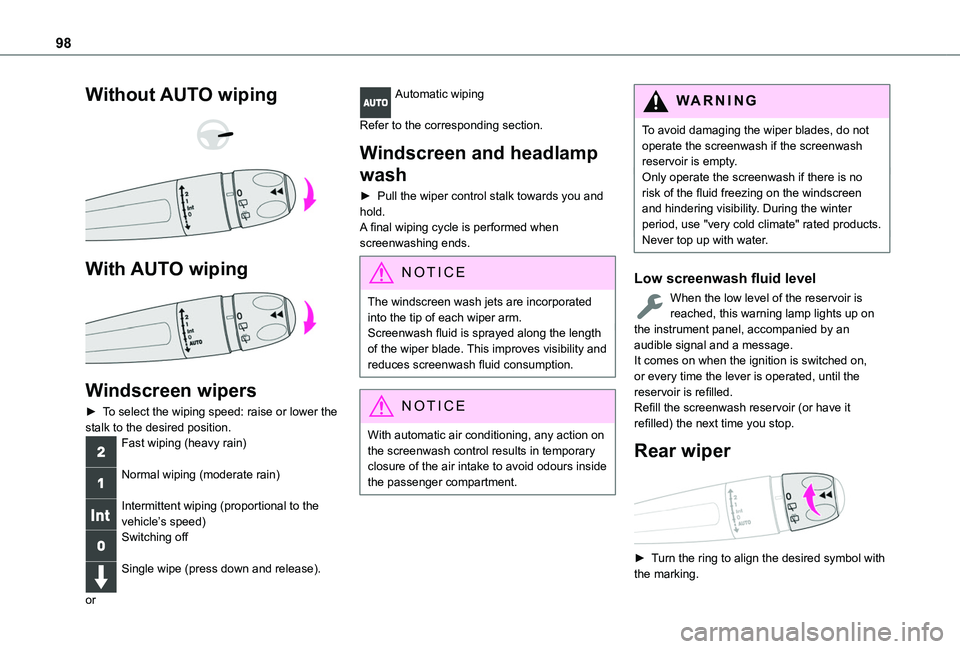
Without AUTO wiping
With AUTO wiping
Windscreen wipers
► To select the wiping speed: raise or lower the stalk to the desired position.Fast wiping (heavy rain)
Normal wiping (moderate rain)
Intermittent wiping (proportional to the vehicle’s speed)Switching off
Single wipe (press down and release).
or
Automatic wiping
Refer to the corresponding section.
Windscreen and headlamp
wash
► Pull the wiper control stalk towards you and hold.A final wiping cycle is performed when screenwashing ends.
NOTIC E
The windscreen wash jets are incorporated into the tip of each wiper arm.Screenwash fluid is sprayed along the length of the wiper blade. This improves visibility and reduces screenwash fluid consumption.
NOTIC E
With automatic air conditioning, any action on the screenwash control results in temporary closure of the air intake to avoid odours inside the passenger compartment.
WARNI NG
To avoid damaging the wiper blades, do not operate the screenwash if the screenwash reservoir is empty.Only operate the screenwash if there is no risk of the fluid freezing on the windscreen and hindering visibility. During the winter period, use "very cold climate" rated products.Never top up with water.
Low screenwash fluid level
When the low level of the reservoir is reached, this warning lamp lights up on the instrument panel, accompanied by an audible signal and a message.It comes on when the ignition is switched on, or every time the lever is operated, until the reservoir is refilled.Refill the screenwash reservoir (or have it refilled) the next time you stop.
Rear wiper
► Turn the ring to align the desired symbol with the marking.
Page 132 of 320
132
without pressing the accelerator pedal, until the engine starts. Once the engine starts, release the key so it returns to position 2.
NOTIC E
The warning lamp does not come on if the engine is already hot.In certain climatic conditions, it is advised to follow the recommendations below:
– In mild conditions, do not leave the engine at idle to warm up but move off straight away and drive at moderate speed. Depending on version, if the air conditioning is activated and the exterior temperature exceeds 35°C, the engine's idle speed may increase, up to 1,300 rpm, depending on the cooling requirements.– In wintry conditions, the preheater warning lamp will stay on for a longer period after switching on the ignition; wait until it goes off before starting.– In very severe wintry conditions (temperature below -23°C), to ensure correct operation and durability of the mechanical components of the vehicle (engine and gearbox), leave the engine running for 4 minutes before starting the vehicle.Never leave the engine running in an enclosed area without adequate ventilation: internal combustion engines emit toxic exhaust gases, such as carbon monoxide. Danger of poisoning and death!
NOTIC E
With Petrol engine, after a cold start, preheating the catalytic converter can cause noticeable engine vibrations when stationary, with the engine running, for anything up to 2 minutes (accelerated idle speed).
WARNI NG
If the engine does not start immediately, switch off the ignition.Wait a few seconds before operating the starter motor again. If the engine does not start after several attempts, do not keep trying: risk of damaging the starter motor and the engine.Contact any authorized Toyota retailer or Toyota authorized repairer, or any reliable repairer.
With the Keyless Entry and Starting
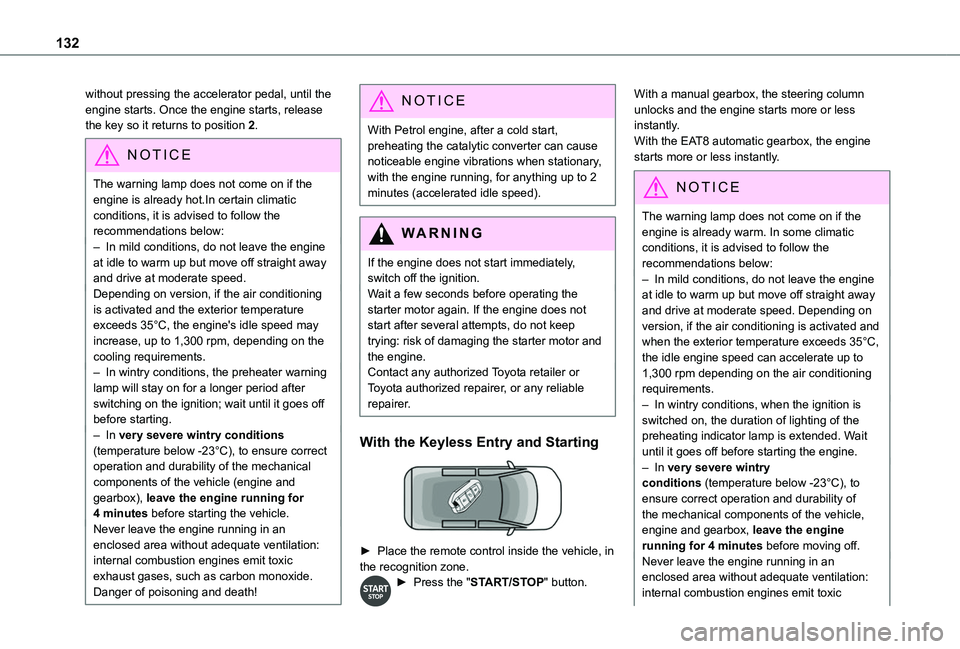
► Place the remote control inside the vehicle, in the recognition zone.► Press the "START/STOP" button.
With a manual gearbox, the steering column unlocks and the engine starts more or less instantly.With the EAT8 automatic gearbox, the engine starts more or less instantly.
NOTIC E
The warning lamp does not come on if the engine is already warm. In some climatic conditions, it is advised to follow the recommendations below:– In mild conditions, do not leave the engine at idle to warm up but move off straight away and drive at moderate speed. Depending on version, if the air conditioning is activated and when the exterior temperature exceeds 35°C, the idle engine speed can accelerate up to 1,300 rpm depending on the air conditioning requirements.– In wintry conditions, when the ignition is switched on, the duration of lighting of the preheating indicator lamp is extended. Wait
until it goes off before starting the engine.– In very severe wintry conditions (temperature below -23°C), to ensure correct operation and durability of the mechanical components of the vehicle, engine and gearbox, leave the engine running for 4 minutes before moving off.Never leave the engine running in an enclosed area without adequate ventilation: internal combustion engines emit toxic
Page 148 of 320
148
Regenerative braking
With the Brake function and when decelerating
The Brake function emulates engine braking, slowing the vehicle with no need to depress the brake pedal. The vehicle slows more quickly when the driver releases the accelerator pedal.The energy recovered when the accelerator pedal is released is then used to partially recharge the traction battery, thereby increasing the vehicle's driving range.
WARNI NG
The resulting deceleration of the vehicle does not cause the brake lamps to come on.
► From mode D/R, press button B to activate/deactivate the function (the button lights up when the function is activated).D/R on the instrument panel is replaced with B.The system status is not saved when the ignition is switched off.
WARNI NG
In some situations (e.g. battery full, extreme temperatures), the amount of regenerative braking may be temporarily limited, resulting
in less deceleration.The driver must remain alert to traffic conditions and must always be ready to use the brake pedal.
With the brake pedal
When the brake pedal is depressed, the intelligent braking system automatically recovers some of the energy and uses it to recharge the traction battery.This energy recovery also reduces use of the brake pads, thereby limiting their wear.
NOTIC E
The driver may experience a different sensation when depressing the brake pedal compared to a vehicle without regenerative braking.
Driving modes
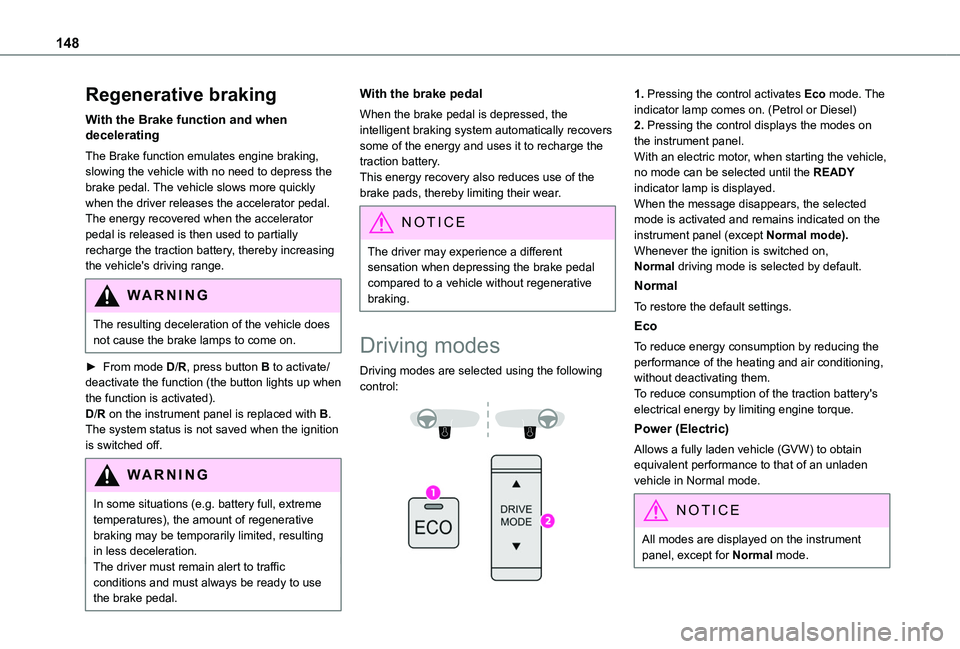
Driving modes are selected using the following control:
1. Pressing the control activates Eco mode. The indicator lamp comes on. (Petrol or Diesel)2. Pressing the control displays the modes on the instrument panel.With an electric motor, when starting the vehicle, no mode can be selected until the READY indicator lamp is displayed.When the message disappears, the selected mode is activated and remains indicated on the instrument panel (except Normal mode).Whenever the ignition is switched on, Normal driving mode is selected by default.
Normal
To restore the default settings.
Eco
To reduce energy consumption by reducing the performance of the heating and air conditioning, without deactivating them.To reduce consumption of the traction battery's electrical energy by limiting engine torque.
Power (Electric)
Allows a fully laden vehicle (GVW) to obtain equivalent performance to that of an unladen vehicle in Normal mode.
NOTIC E
All modes are displayed on the instrument panel, except for Normal mode.
Page 198 of 320
198
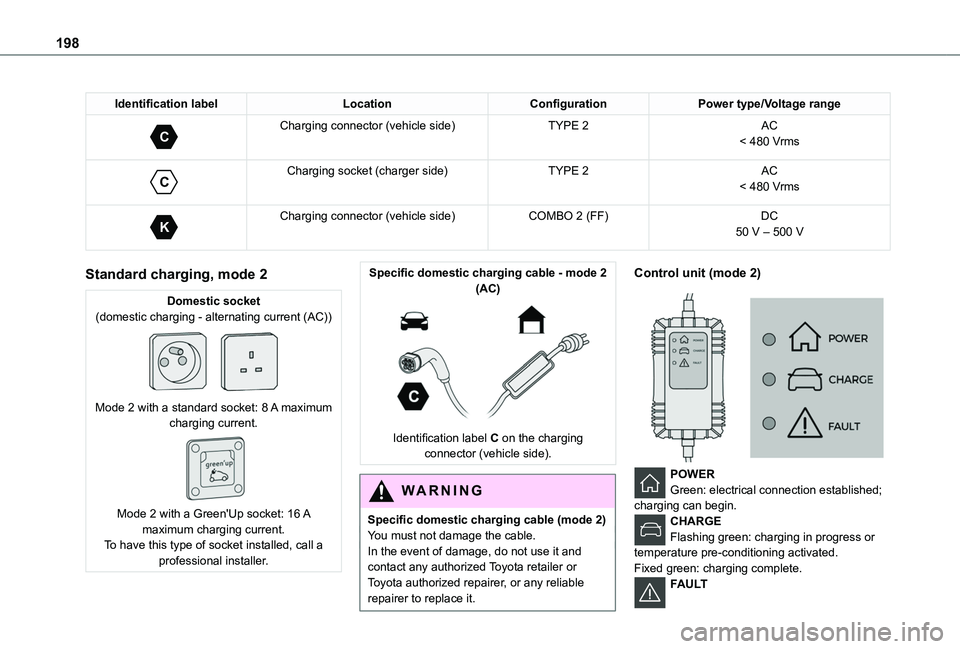
Identification labelLocationConfigurationPower type/Voltage range
C
Charging connector (vehicle side)TYPE 2AC< 480 Vrms
C
Charging socket (charger side)TYPE 2AC< 480 Vrms
K
Charging connector (vehicle side)COMBO 2 (FF)DC50 V – 500 V
Standard charging, mode 2
Domestic socket(domestic charging - alternating current (AC))
Mode 2 with a standard socket: 8 A maximum charging current.
Mode 2 with a Green'Up socket: 16 A maximum charging current.To have this type of socket installed, call a professional installer.
Specific domestic charging cable - mode 2 (AC)
Identification label C on the charging
connector (vehicle side).
WARNI NG
Specific domestic charging cable (mode 2)You must not damage the cable.In the event of damage, do not use it and contact any authorized Toyota retailer or Toyota authorized repairer, or any reliable
repairer to replace it.
Control unit (mode 2)
POWERGreen: electrical connection established; charging can begin.CHARGEFlashing green: charging in progress or temperature pre-conditioning activated.Fixed green: charging complete.FAULT
Page 200 of 320
200
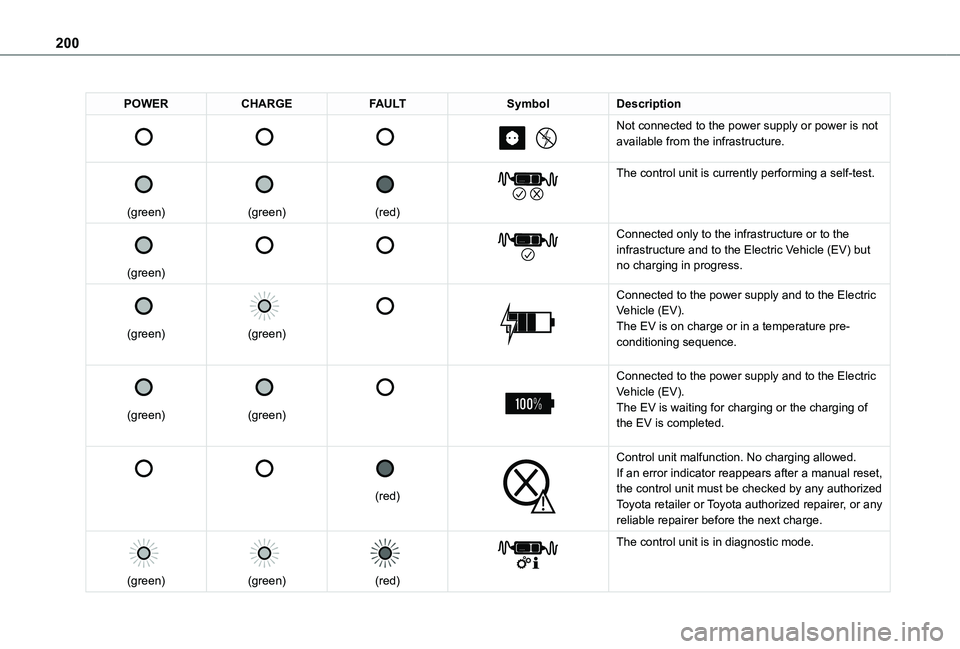
POWERCHARGEFAULTSymbolDescription
Not connected to the power supply or power is not available from the infrastructure.
(green)
(green)
(red)
The control unit is currently performing a self-test.
(green)
Connected only to the infrastructure or to the
infrastructure and to the Electric Vehicle (EV) but no charging in progress.
(green)
(green)
Connected to the power supply and to the Electric Vehicle (EV).The EV is on charge or in a temperature pre-conditioning sequence.
(green)
(green)
Connected to the power supply and to the Electric Vehicle (EV).The EV is waiting for charging or the charging of the EV is completed.
(red)
Control unit malfunction. No charging allowed.If an error indicator reappears after a manual reset, the control unit must be checked by any authorized Toyota retailer or Toyota authorized repairer, or any reliable repairer before the next charge.
(green)
(green)
(red)
The control unit is in diagnostic mode.