turn signal TOYOTA PROACE CITY 2022 Owners Manual
[x] Cancel search | Manufacturer: TOYOTA, Model Year: 2022, Model line: PROACE CITY, Model: TOYOTA PROACE CITY 2022Pages: 320, PDF Size: 75.81 MB
Page 19 of 320
19
Instruments
1
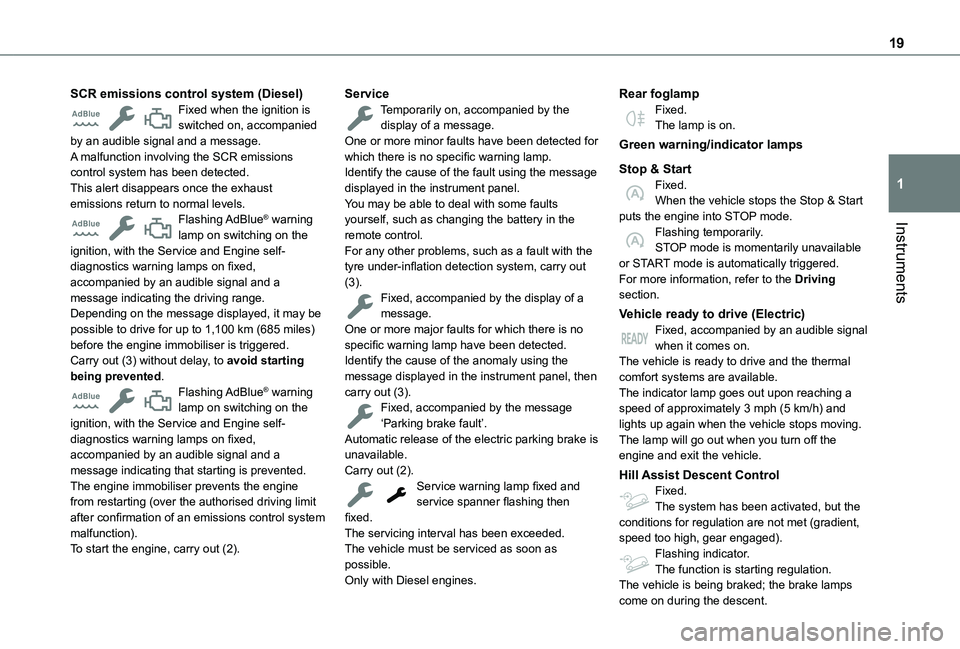
SCR emissions control system (Diesel)Fixed when the ignition is switched on, accompanied by an audible signal and a message.A malfunction involving the SCR emissions control system has been detected.This alert disappears once the exhaust emissions return to normal levels.Flashing AdBlue® warning lamp on switching on the ignition, with the Service and Engine self-diagnostics warning lamps on fixed, accompanied by an audible signal and a message indicating the driving range.Depending on the message displayed, it may be possible to drive for up to 1,100 km (685 miles) before the engine immobiliser is triggered.Carry out (3) without delay, to avoid starting being prevented.Flashing AdBlue® warning lamp on switching on the ignition, with the Service and Engine self-diagnostics warning lamps on fixed,
accompanied by an audible signal and a message indicating that starting is prevented.The engine immobiliser prevents the engine from restarting (over the authorised driving limit after confirmation of an emissions control system malfunction).To start the engine, carry out (2).
ServiceTemporarily on, accompanied by the display of a message.One or more minor faults have been detected for which there is no specific warning lamp.Identify the cause of the fault using the message displayed in the instrument panel.You may be able to deal with some faults yourself, such as changing the battery in the remote control.For any other problems, such as a fault with the tyre under-inflation detection system, carry out (3).Fixed, accompanied by the display of a message.One or more major faults for which there is no specific warning lamp have been detected.Identify the cause of the anomaly using the message displayed in the instrument panel, then carry out (3).Fixed, accompanied by the message ‘Parking brake fault’.Automatic release of the electric parking brake is
unavailable.Carry out (2).Service warning lamp fixed and service spanner flashing then fixed.The servicing interval has been exceeded.The vehicle must be serviced as soon as possible.Only with Diesel engines.
Rear foglampFixed.The lamp is on.
Green warning/indicator lamps
Stop & StartFixed.When the vehicle stops the Stop & Start puts the engine into STOP mode.Flashing temporarily.STOP mode is momentarily unavailable or START mode is automatically triggered.For more information, refer to the Driving section.
Vehicle ready to drive (Electric)Fixed, accompanied by an audible signal when it comes on.The vehicle is ready to drive and the thermal comfort systems are available.The indicator lamp goes out upon reaching a speed of approximately 3 mph (5 km/h) and lights up again when the vehicle stops moving.The lamp will go out when you turn off the
engine and exit the vehicle.
Hill Assist Descent ControlFixed.The system has been activated, but the conditions for regulation are not met (gradient, speed too high, gear engaged).Flashing indicator.The function is starting regulation.The vehicle is being braked; the brake lamps
come on during the descent.
Page 25 of 320
25
Instruments
1
Malfunction of the SCR emissions control system
Malfunction detection
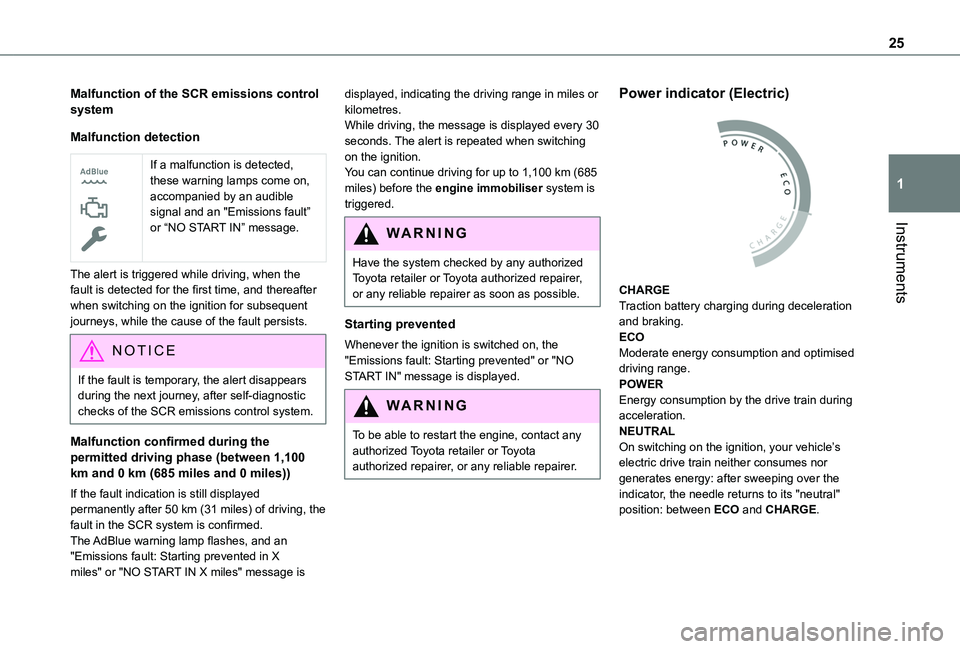
If a malfunction is detected, these warning lamps come on, accompanied by an audible signal and an "Emissions fault” or “NO START IN” message.
The alert is triggered while driving, when the fault is detected for the first time, and thereafter when switching on the ignition for subsequent journeys, while the cause of the fault persists.
NOTIC E
If the fault is temporary, the alert disappears during the next journey, after self-diagnostic checks of the SCR emissions control system.
Malfunction confirmed during the permitted driving phase (between 1,100 km and 0 km (685 miles and 0 miles))
If the fault indication is still displayed permanently after 50 km (31 miles) of driving, the fault in the SCR system is confirmed.The AdBlue warning lamp flashes, and an "Emissions fault: Starting prevented in X miles" or "NO START IN X miles" message is
displayed, indicating the driving range in miles or kilometres.While driving, the message is displayed every 30 seconds. The alert is repeated when switching on the ignition.You can continue driving for up to 1,100 km (685 miles) before the engine immobiliser system is triggered.
WARNI NG
Have the system checked by any authorized Toyota retailer or Toyota authorized repairer, or any reliable repairer as soon as possible.
Starting prevented
Whenever the ignition is switched on, the "Emissions fault: Starting prevented" or "NO START IN" message is displayed.
WARNI NG
To be able to restart the engine, contact any authorized Toyota retailer or Toyota authorized repairer, or any reliable repairer.
Power indicator (Electric)
CHARGETraction battery charging during deceleration and braking.ECOModerate energy consumption and optimised driving range.POWEREnergy consumption by the drive train during acceleration.NEUTRAL
On switching on the ignition, your vehicle’s electric drive train neither consumes nor generates energy: after sweeping over the indicator, the needle returns to its "neutral" position: between ECO and CHARGE.
Page 36 of 320
36
Activation/Deactivation
With button
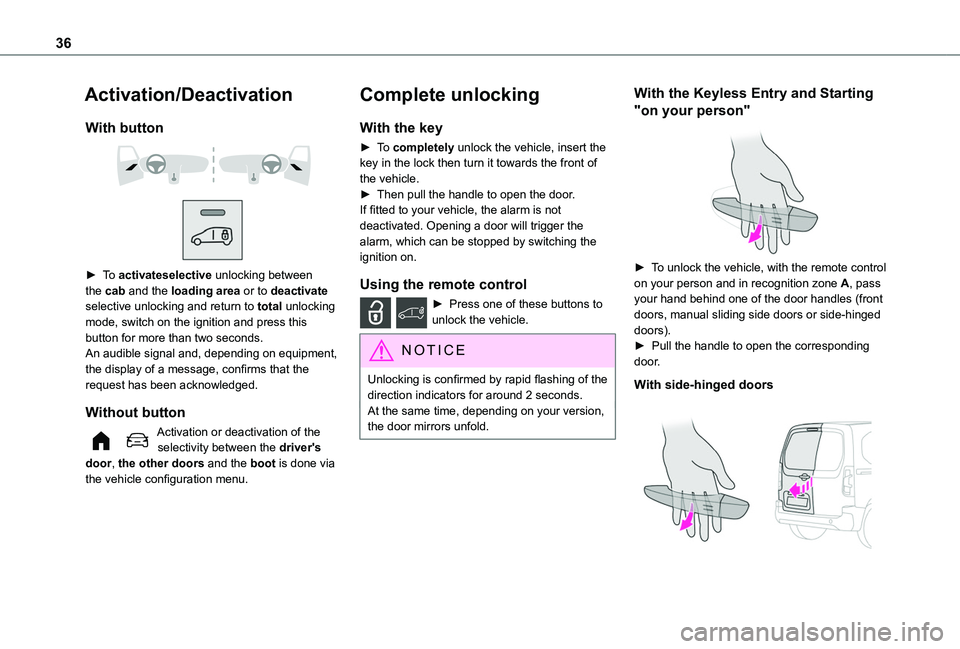
► To activateselective unlocking between the cab and the loading area or to deactivate selective unlocking and return to total unlocking mode, switch on the ignition and press this button for more than two seconds.An audible signal and, depending on equipment, the display of a message, confirms that the request has been acknowledged.
Without button
Activation or deactivation of the selectivity between the driver's door, the other doors and the boot is done via the vehicle configuration menu.
Complete unlocking
With the key
► To completely unlock the vehicle, insert the key in the lock then turn it towards the front of the vehicle.► Then pull the handle to open the door.If fitted to your vehicle, the alarm is not deactivated. Opening a door will trigger the alarm, which can be stopped by switching the ignition on.
Using the remote control
► Press one of these buttons to unlock the vehicle.
NOTIC E
Unlocking is confirmed by rapid flashing of the direction indicators for around 2 seconds.At the same time, depending on your version, the door mirrors unfold.
With the Keyless Entry and Starting
"on your person"
► To unlock the vehicle, with the remote control on your person and in recognition zone A, pass your hand behind one of the door handles (front doors, manual sliding side doors or side-hinged doors).► Pull the handle to open the corresponding door.
With side-hinged doors
Page 38 of 320
38
Unlocking
NOTIC E
Unlocking is signalled by rapid flashing of the
direction indicators for a few seconds.Depending on version, the door mirrors unfold and the alarm is deactivated.
With the key
► To completely unlock the vehicle, insert the key in the lock then turn it towards the front of the vehicle.► Then pull the handle to open the door.If fitted to your vehicle, the alarm is not deactivated. Opening a door will trigger the alarm, which can be stopped by switching the ignition on.
Using the remote control
► Press this button to unlock the vehicle.
With the Keyless Entry and
Starting "on your person"
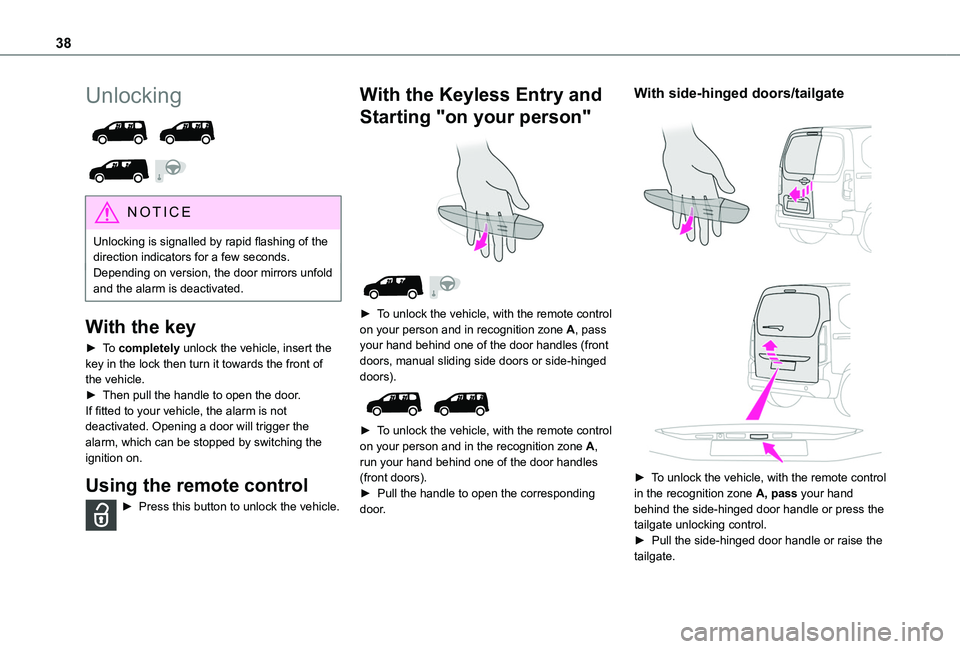
► To unlock the vehicle, with the remote control on your person and in recognition zone A, pass your hand behind one of the door handles (front doors, manual sliding side doors or side-hinged doors).
► To unlock the vehicle, with the remote control
on your person and in the recognition zone A, run your hand behind one of the door handles (front doors).► Pull the handle to open the corresponding door.
With side-hinged doors/tailgate
► To unlock the vehicle, with the remote control in the recognition zone A, pass your hand behind the side-hinged door handle or press the tailgate unlocking control. ► Pull the side-hinged door handle or raise the tailgate.
Page 39 of 320
39
Access
2
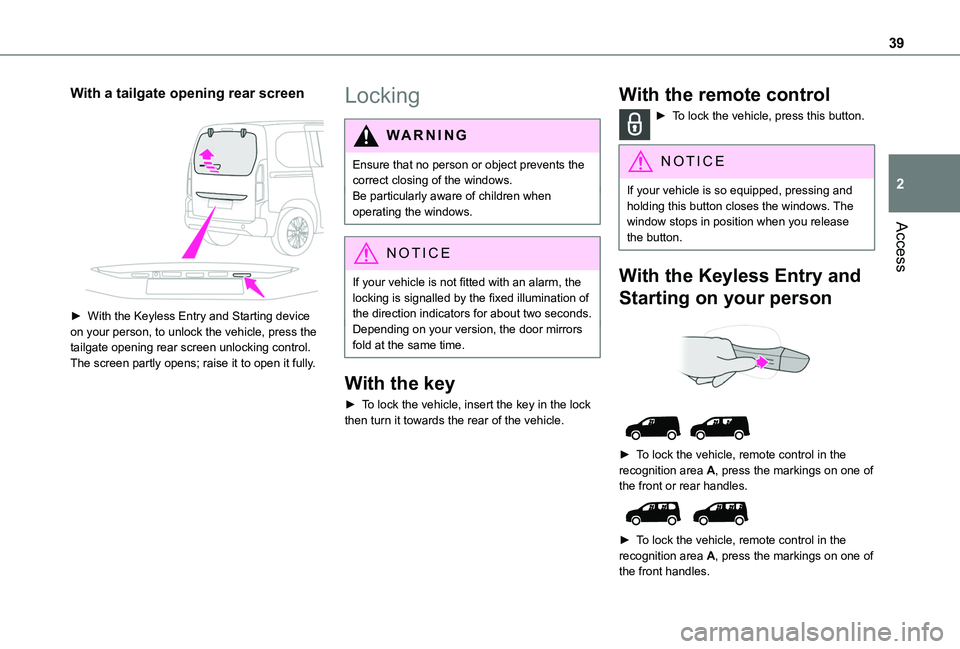
With a tailgate opening rear screen
► With the Keyless Entry and Starting device on your person, to unlock the vehicle, press the tailgate opening rear screen unlocking control. The screen partly opens; raise it to open it fully.
Locking
WARNI NG
Ensure that no person or object prevents the correct closing of the windows.Be particularly aware of children when operating the windows.
NOTIC E
If your vehicle is not fitted with an alarm, the locking is signalled by the fixed illumination of the direction indicators for about two seconds.Depending on your version, the door mirrors fold at the same time.
With the key
► To lock the vehicle, insert the key in the lock then turn it towards the rear of the vehicle.
With the remote control
► To lock the vehicle, press this button.
NOTIC E
If your vehicle is so equipped, pressing and holding this button closes the windows. The window stops in position when you release the button.
With the Keyless Entry and
Starting on your person
► To lock the vehicle, remote control in the recognition area A, press the markings on one of the front or rear handles.
► To lock the vehicle, remote control in the recognition area A, press the markings on one of the front handles.
Page 40 of 320
40
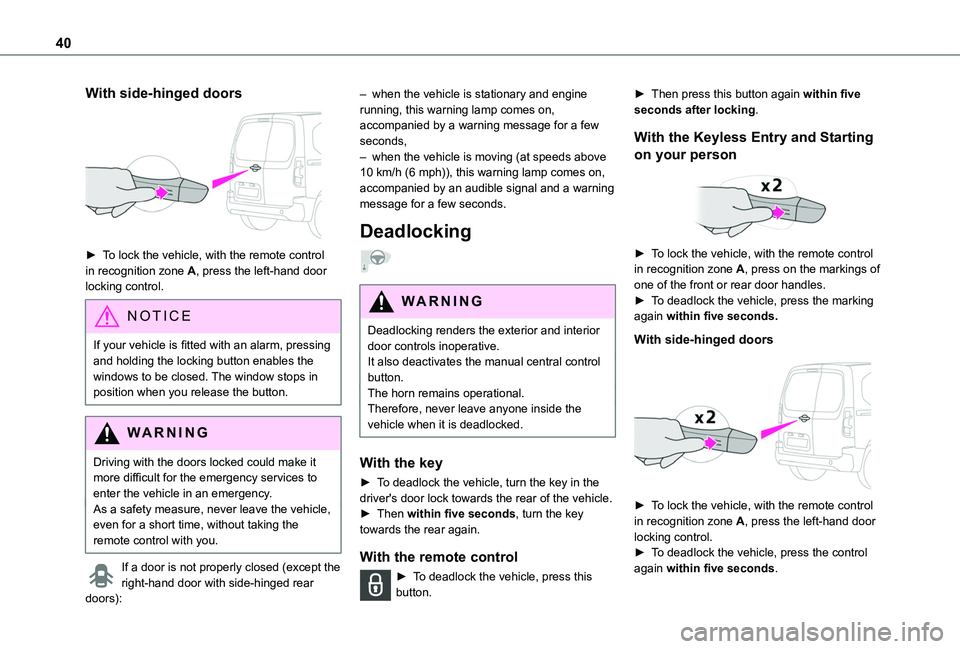
With side-hinged doors
► To lock the vehicle, with the remote control in recognition zone A, press the left-hand door locking control.
NOTIC E
If your vehicle is fitted with an alarm, pressing and holding the locking button enables the windows to be closed. The window stops in position when you release the button.
WARNI NG
Driving with the doors locked could make it more difficult for the emergency services to enter the vehicle in an emergency.As a safety measure, never leave the vehicle, even for a short time, without taking the remote control with you.
If a door is not properly closed (except the right-hand door with side-hinged rear
doors):
– when the vehicle is stationary and engine running, this warning lamp comes on, accompanied by a warning message for a few seconds, – when the vehicle is moving (at speeds above 10 km/h (6 mph)), this warning lamp comes on, accompanied by an audible signal and a warning message for a few seconds.
Deadlocking
WARNI NG
Deadlocking renders the exterior and interior door controls inoperative.It also deactivates the manual central control button.The horn remains operational.Therefore, never leave anyone inside the vehicle when it is deadlocked.
With the key
► To deadlock the vehicle, turn the key in the driver's door lock towards the rear of the vehicle.► Then within five seconds, turn the key towards the rear again.
With the remote control
► To deadlock the vehicle, press this button.
► Then press this button again within five seconds after locking.
With the Keyless Entry and Starting
on your person
► To lock the vehicle, with the remote control in recognition zone A, press on the markings of one of the front or rear door handles.► To deadlock the vehicle, press the marking again within five seconds.
With side-hinged doors
► To lock the vehicle, with the remote control in recognition zone A, press the left-hand door locking control.
► To deadlock the vehicle, press the control again within five seconds.
Page 42 of 320
42
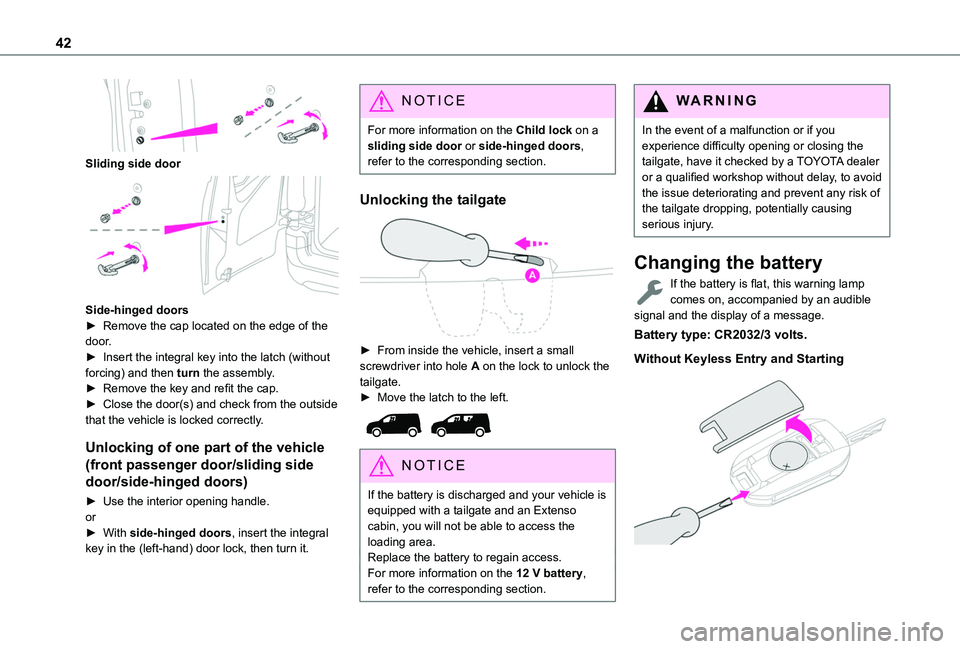
Sliding side door
Side-hinged doors► Remove the cap located on the edge of the door.► Insert the integral key into the latch (without forcing) and then turn the assembly.► Remove the key and refit the cap. ► Close the door(s) and check from the outside that the vehicle is locked correctly.
Unlocking of one part of the vehicle
(front passenger door/sliding side
door/side-hinged doors)
► Use the interior opening handle.or► With side-hinged doors, insert the integral key in the (left-hand) door lock, then turn it.
NOTIC E
For more information on the Child lock on a sliding side door or side-hinged doors, refer to the corresponding section.
Unlocking the tailgate
► From inside the vehicle, insert a small screwdriver into hole A on the lock to unlock the tailgate.► Move the latch to the left.
NOTIC E
If the battery is discharged and your vehicle is equipped with a tailgate and an Extenso cabin, you will not be able to access the loading area.
Replace the battery to regain access.For more information on the 12 V battery, refer to the corresponding section.
WARNI NG
In the event of a malfunction or if you experience difficulty opening or closing the tailgate, have it checked by a TOYOTA dealer or a qualified workshop without delay, to avoid the issue deteriorating and prevent any risk of the tailgate dropping, potentially causing serious injury.
Changing the battery
If the battery is flat, this warning lamp comes on, accompanied by an audible signal and the display of a message.
Battery type: CR2032/3 volts.
Without Keyless Entry and Starting
Page 93 of 320
93
Lighting and visibility
4
used in fog or falling snow (rules may vary depending on country).Do not forget to switch off the foglamps when they are no longer necessary.
NOTIC E
Switching off of the lamps when the ignition is switched offWhen the ignition is switched off, all of the lamps turn off immediately, except for dipped beam headlamps if automatic guide-me-home lighting is activated.
NOTIC E
Switching on the lamps after switching off the ignitionIf the driver's door is opened, a temporary audible signal warns the driver that the lamps are on.They will go off automatically after a period
of time that depends on the level of charge in the battery (entering energy economy mode).
NOTIC E
In some weather conditions (e.g. low temperature or humidity), misting on the internal surface of the glass of the headlamps and rear lamps is normal, and will disappear
after the lamps have been on for a few minutes.
WARNI NG
Never look too closely at the light beam of LED technology lamps - risk of serious eye injury!
NOTIC E
Travelling abroadIf planning to use your vehicle in a country that drives on the other side of the road, the dipped beam headlamps must be adjusted to avoid dazzling oncoming drivers.Contact any authorized Toyota retailer or Toyota authorized repairer, or any reliable repairer.
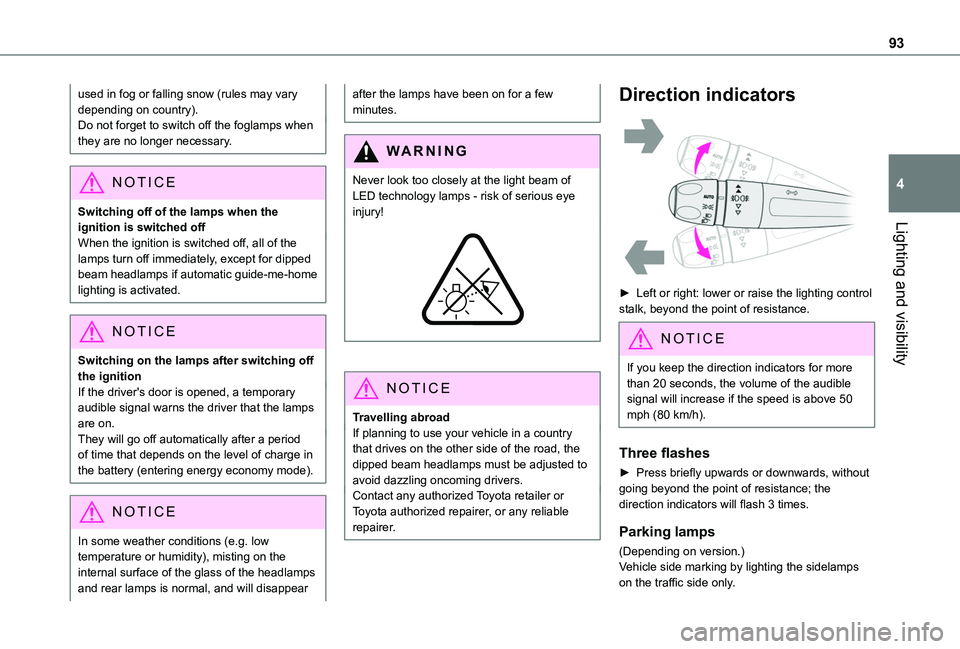
Direction indicators
► Left or right: lower or raise the lighting control stalk, beyond the point of resistance.
NOTIC E
If you keep the direction indicators for more than 20 seconds, the volume of the audible signal will increase if the speed is above 50 mph (80 km/h).
Three flashes
► Press briefly upwards or downwards, without going beyond the point of resistance; the direction indicators will flash 3 times.
Parking lamps
(Depending on version.)Vehicle side marking by lighting the sidelamps on the traffic side only.
Page 94 of 320
94
► Within one minute after switching off the ignition, operate the lighting control lever upwards or downwards, depending on the side of the traffic (for example: when parking on the right; push the lighting control lever down to light up on the left).This is confirmed by an audible signal and illumination of the corresponding direction indicator lamp in the instrument panel.► To switch off the parking lamps, return the lighting control lever to the central position.
Automatic headlamp
illumination
When a low level of ambient light is detected by a sunshine sensor, the number plate lamps, sidelamps and dipped beam headlamps are switched on automatically, without any action on the part of the driver. They can also come on if rain is detected, at the same time as the automatic rain sensitive wipers.As soon as the brightness returns to a sufficient
level or after the windscreen wipers are switched off, the lamps are switched off automatically.
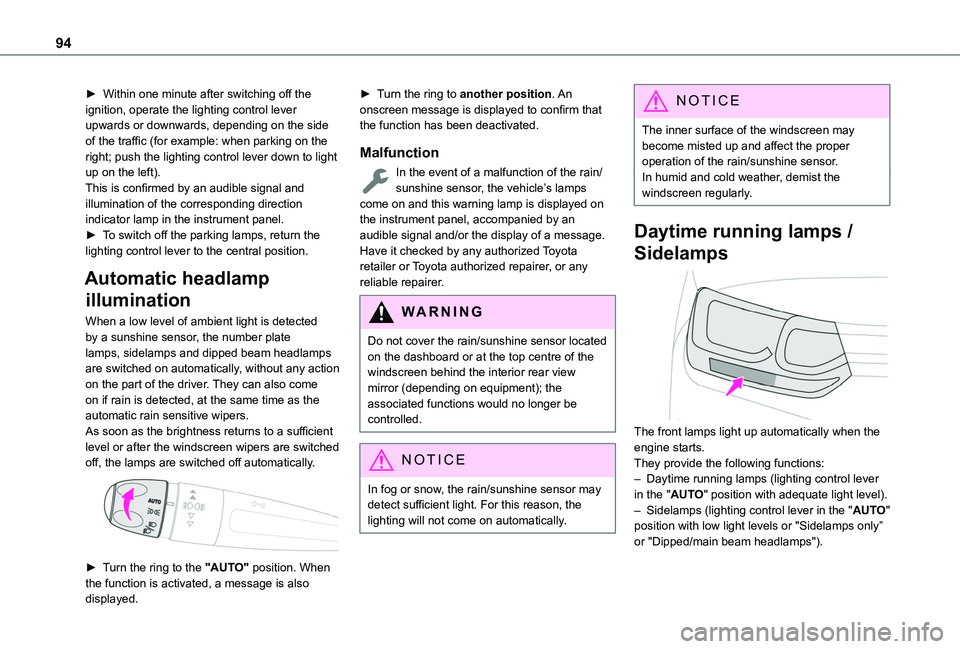
► Turn the ring to the "AUTO" position. When the function is activated, a message is also displayed.
► Turn the ring to another position. An onscreen message is displayed to confirm that the function has been deactivated.
Malfunction
In the event of a malfunction of the rain/sunshine sensor, the vehicle’s lamps come on and this warning lamp is displayed on the instrument panel, accompanied by an audible signal and/or the display of a message.Have it checked by any authorized Toyota retailer or Toyota authorized repairer, or any reliable repairer.
WARNI NG
Do not cover the rain/sunshine sensor located on the dashboard or at the top centre of the windscreen behind the interior rear view mirror (depending on equipment); the associated functions would no longer be controlled.
NOTIC E
In fog or snow, the rain/sunshine sensor may detect sufficient light. For this reason, the lighting will not come on automatically.
NOTIC E
The inner surface of the windscreen may become misted up and affect the proper operation of the rain/sunshine sensor.In humid and cold weather, demist the windscreen regularly.
Daytime running lamps /
Sidelamps
The front lamps light up automatically when the engine starts.They provide the following functions:– Daytime running lamps (lighting control lever in the "AUTO" position with adequate light level).– Sidelamps (lighting control lever in the "AUTO" position with low light levels or "Sidelamps only” or "Dipped/main beam headlamps").
Page 98 of 320
98
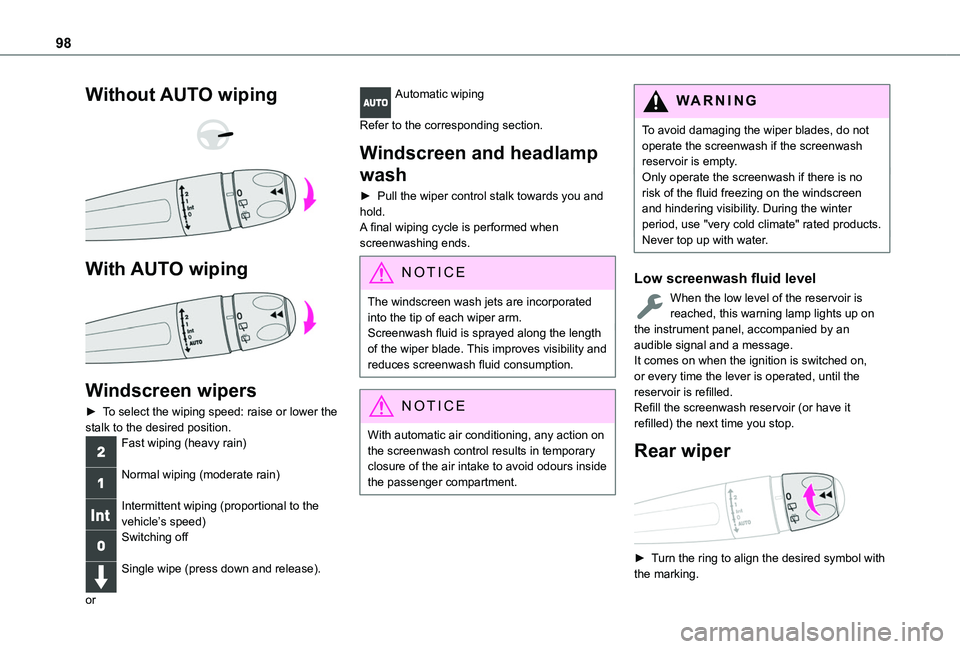
Without AUTO wiping
With AUTO wiping
Windscreen wipers
► To select the wiping speed: raise or lower the stalk to the desired position.Fast wiping (heavy rain)
Normal wiping (moderate rain)
Intermittent wiping (proportional to the vehicle’s speed)Switching off
Single wipe (press down and release).
or
Automatic wiping
Refer to the corresponding section.
Windscreen and headlamp
wash
► Pull the wiper control stalk towards you and hold.A final wiping cycle is performed when screenwashing ends.
NOTIC E
The windscreen wash jets are incorporated into the tip of each wiper arm.Screenwash fluid is sprayed along the length of the wiper blade. This improves visibility and reduces screenwash fluid consumption.
NOTIC E
With automatic air conditioning, any action on the screenwash control results in temporary closure of the air intake to avoid odours inside the passenger compartment.
WARNI NG
To avoid damaging the wiper blades, do not operate the screenwash if the screenwash reservoir is empty.Only operate the screenwash if there is no risk of the fluid freezing on the windscreen and hindering visibility. During the winter period, use "very cold climate" rated products.Never top up with water.
Low screenwash fluid level
When the low level of the reservoir is reached, this warning lamp lights up on the instrument panel, accompanied by an audible signal and a message.It comes on when the ignition is switched on, or every time the lever is operated, until the reservoir is refilled.Refill the screenwash reservoir (or have it refilled) the next time you stop.
Rear wiper
► Turn the ring to align the desired symbol with the marking.