open bonnet TOYOTA PROACE CITY VERSO 2019 Owners Manual
[x] Cancel search | Manufacturer: TOYOTA, Model Year: 2019, Model line: PROACE CITY VERSO, Model: TOYOTA PROACE CITY VERSO 2019Pages: 272, PDF Size: 58.6 MB
Page 5 of 272
5
Overview
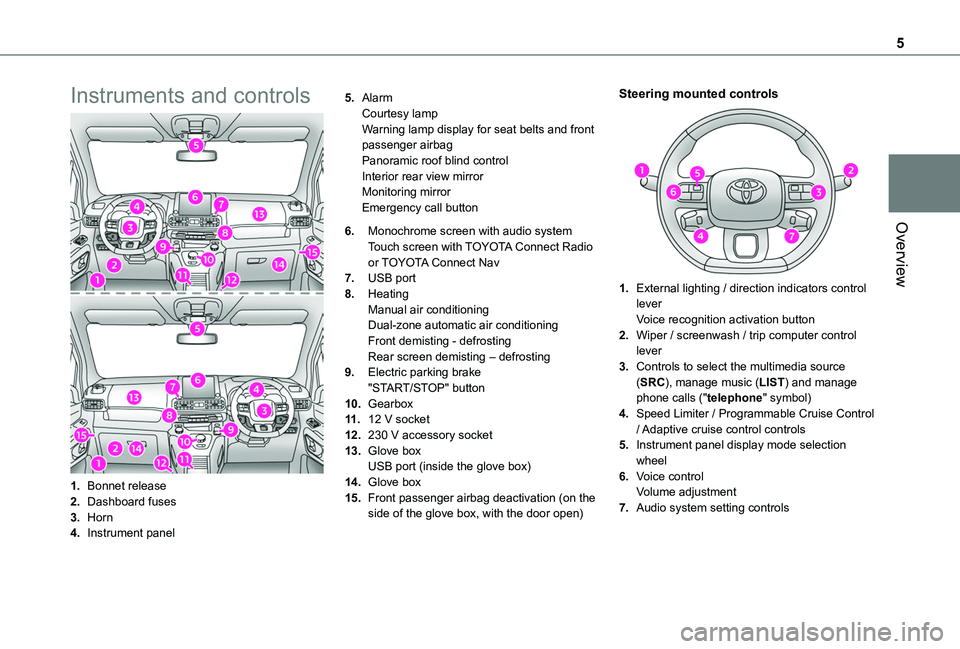
Instruments and controls
1.Bonnet release
2.Dashboard fuses
3.Horn
4.Instrument panel
5.AlarmCourtesy lampWarning lamp display for seat belts and front passenger airbagPanoramic roof blind controlInterior rear view mirrorMonitoring mirrorEmergency call button
6.Monochrome screen with audio system
Touch screen with TOYOTA Connect Radio or TOYOTA Connect Nav
7.USB port
8.HeatingManual air conditioningDual-zone automatic air conditioningFront demisting - defrostingRear screen demisting – defrosting
9.Electric parking brake"START/STOP" button
10.Gearbox
11 .12 V socket
12.230 V accessory socket
13.Glove boxUSB port (inside the glove box)
14.Glove box
15.Front passenger airbag deactivation (on the side of the glove box, with the door open)
Steering mounted controls
1.External lighting / direction indicators control leverVoice recognition activation button
2.Wiper / screenwash / trip computer control lever
3.Controls to select the multimedia source (SRC), manage music (LIST) and manage phone calls ("telephone" symbol)
4.Speed Limiter / Programmable Cruise Control / Adaptive cruise control controls
5.Instrument panel display mode selection wheel
6.Voice controlVolume adjustment
7.Audio system setting controls
Page 34 of 272
34
may occur if a person or an object is trapped or caught.
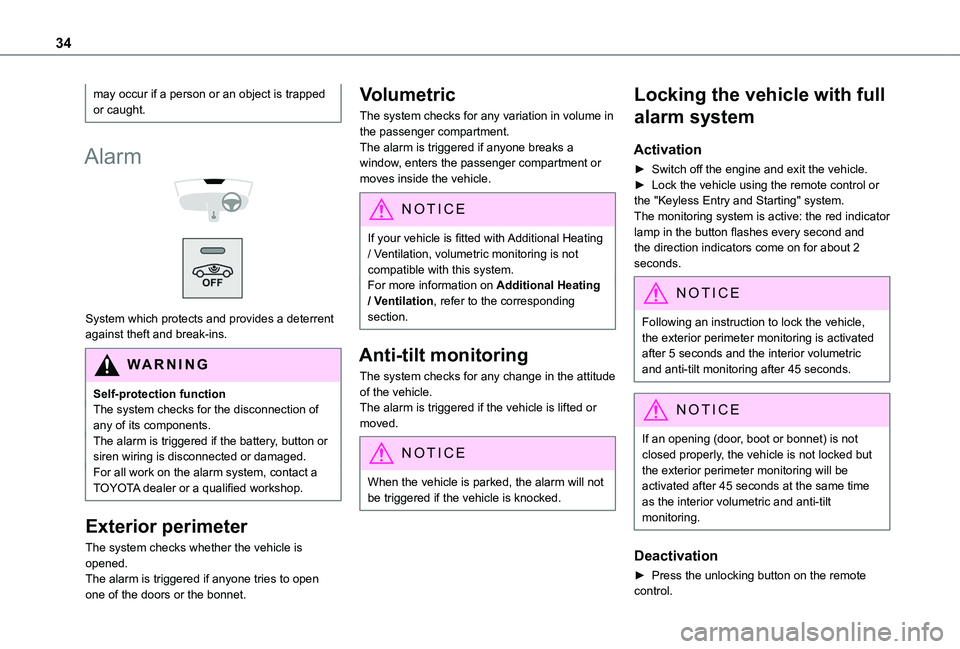
Alarm
System which protects and provides a deterrent against theft and break-ins.
WARNI NG
Self-protection functionThe system checks for the disconnection of any of its components.The alarm is triggered if the battery, button or siren wiring is disconnected or damaged.For all work on the alarm system, contact a TOYOTA dealer or a qualified workshop.
Exterior perimeter
The system checks whether the vehicle is opened.The alarm is triggered if anyone tries to open one of the doors or the bonnet.
Volumetric
The system checks for any variation in volume in the passenger compartment.The alarm is triggered if anyone breaks a window, enters the passenger compartment or moves inside the vehicle.
NOTIC E
If your vehicle is fitted with Additional Heating / Ventilation, volumetric monitoring is not compatible with this system.For more information on Additional Heating / Ventilation, refer to the corresponding section.
Anti-tilt monitoring
The system checks for any change in the attitude of the vehicle.The alarm is triggered if the vehicle is lifted or moved.
NOTIC E
When the vehicle is parked, the alarm will not be triggered if the vehicle is knocked.
Locking the vehicle with full
alarm system
Activation
► Switch off the engine and exit the vehicle.► Lock the vehicle using the remote control or the "Keyless Entry and Starting" system.The monitoring system is active: the red indicator lamp in the button flashes every second and the direction indicators come on for about 2 seconds.
NOTIC E
Following an instruction to lock the vehicle, the exterior perimeter monitoring is activated after 5 seconds and the interior volumetric and anti-tilt monitoring after 45 seconds.
NOTIC E
If an opening (door, boot or bonnet) is not closed properly, the vehicle is not locked but the exterior perimeter monitoring will be activated after 45 seconds at the same time as the interior volumetric and anti-tilt monitoring.
Deactivation
► Press the unlocking button on the remote control.
Page 109 of 272
109
Driving
6
and from N to R. This will not cause any damage to the gearbox.Do not exceed 100 km/h (60 mph), local speed restrictions permitting.Have it checked by a TOYOTA dealer or a qualified workshop.
WARNI NG
There is a risk of damage to the gearbox:
– if you press the accelerator and brake pedals at the same time (braking or acceleration must be done only with the right foot),– if you force the selector from position P to another position when the battery is flat.
EC O
To reduce fuel consumption when stationary for long periods with the engine running (traffic jam, etc.), position the selector on N and apply the parking brake.
WARNI NG
If your vehicle has an automatic gearbox, do not try to start the engine by pushing the vehicle.
Gear efficiency indicator
(Depending on engine.)This system helps reduce fuel consumption by recommending the most appropriate gear.
Operation
Depending on the driving situation and the vehicle's equipment, the system may advise to skip one or more gears.Gear shift recommendations should not be considered compulsory. In fact, the road layout, the traffic density and safety remain the deciding factors when choosing the best gear. The driver therefore remains responsible for deciding whether or not to follow the indications issued by the system.This function cannot be deactivated.
NOTIC E
With an automatic gearbox, the system is only active in manual operation.
The information appears in the instrument panel, in the form of an ascending or descending arrow and the recommended gear.
NOTIC E
The system adapts its gear shift recommendation according to the driving conditions (slope, load, etc.) and the driver’s
requirements (power, acceleration, braking, etc.).The system never suggests:– engaging first gear;– engaging reverse.
Stop & Start
The Stop & Start function puts the engine temporarily into standby - STOP mode - during phases when the vehicle is stopped (red lights, queues, etc.). The engine restarts automatically - START mode - as soon as the driver wishes to move off again.Primarily designed for urban use, the function is intended to reduce fuel consumption and exhaust emissions as well as the noise level when stationary.The function does not affect the functionalities of the vehicle, in particular the braking.
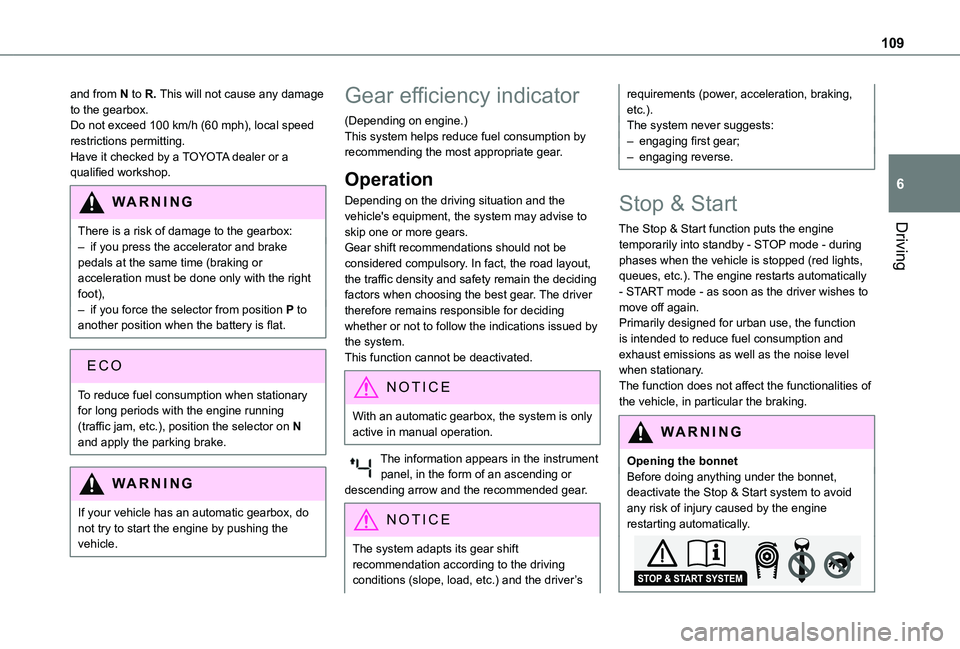
WARNI NG
Opening the bonnetBefore doing anything under the bonnet, deactivate the Stop & Start system to avoid any risk of injury caused by the engine restarting automatically.
Page 153 of 272
153
Practical information
7
WARNI NG
In the event of loading a 7-seat model (not exceeding 40 cm (1 ft 3") in height) on the roof, do not exceed the following loads:– Three transverse bars bolted to the roof: 100 kg (220 lb).– An aluminium rack: 70 kg (154 lb).– A steel rack: 65 kg (143 lb).
W ARNI NG
As a safety measure and to avoid damaging the roof, it is essential to use the roof bars and racks approved for your vehicle.Observe the instructions on fitting and use contained in the guide supplied with the roof bars and racks.
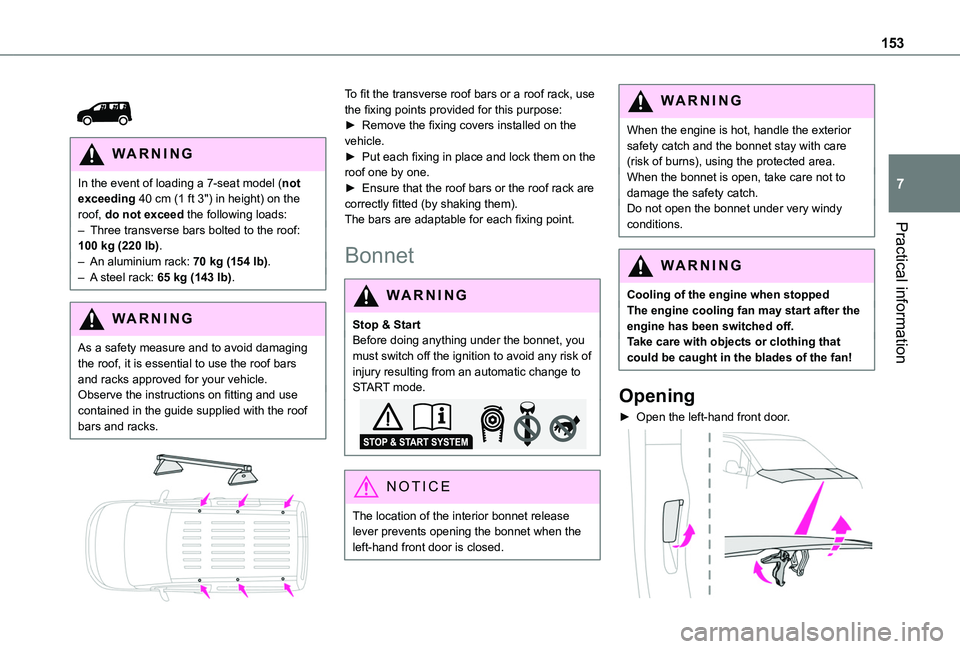
To fit the transverse roof bars or a roof rack, use the fixing points provided for this purpose:► Remove the fixing covers installed on the vehicle.► Put each fixing in place and lock them on the roof one by one.► Ensure that the roof bars or the roof rack are correctly fitted (by shaking them).The bars are adaptable for each fixing point.
Bonnet
WARNI NG
Stop & StartBefore doing anything under the bonnet, you must switch off the ignition to avoid any risk of injury resulting from an automatic change to START mode.
NOTIC E
The location of the interior bonnet release lever prevents opening the bonnet when the left-hand front door is closed.
WARNI NG
When the engine is hot, handle the exterior safety catch and the bonnet stay with care (risk of burns), using the protected area.When the bonnet is open, take care not to damage the safety catch.Do not open the bonnet under very windy conditions.
WARNI NG
Cooling of the engine when stoppedThe engine cooling fan may start after the engine has been switched off.Take care with objects or clothing that could be caught in the blades of the fan!
Opening
► Open the left-hand front door.
Page 154 of 272
154
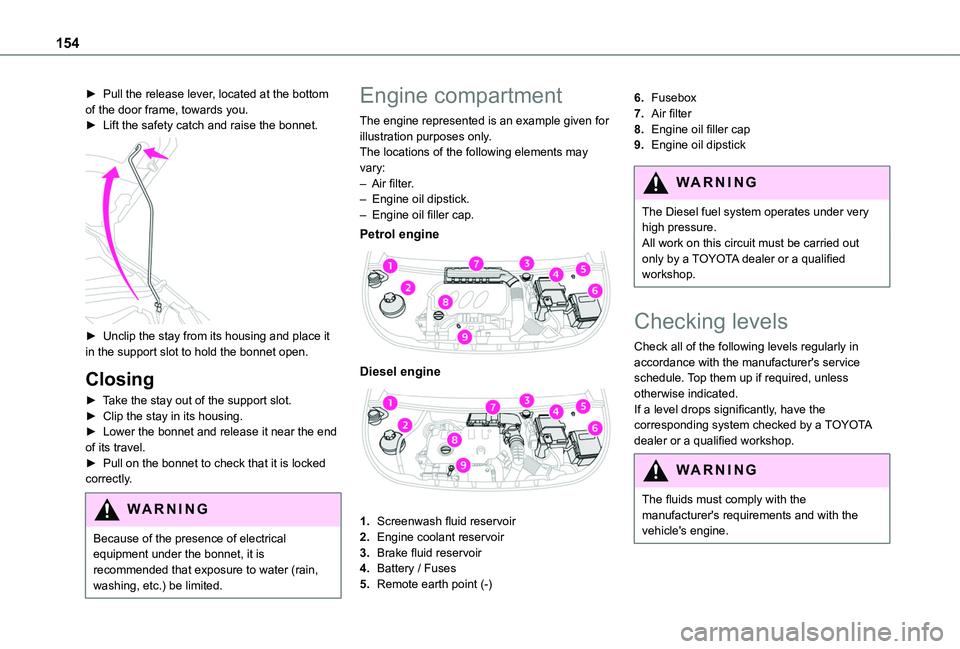
► Pull the release lever, located at the bottom of the door frame, towards you.► Lift the safety catch and raise the bonnet.
► Unclip the stay from its housing and place it in the support slot to hold the bonnet open.
Closing
► Take the stay out of the support slot.► Clip the stay in its housing.► Lower the bonnet and release it near the end of its travel.► Pull on the bonnet to check that it is locked correctly.
WARNI NG
Because of the presence of electrical
equipment under the bonnet, it is recommended that exposure to water (rain, washing, etc.) be limited.
Engine compartment
The engine represented is an example given for illustration purposes only.The locations of the following elements may vary:– Air filter.– Engine oil dipstick.– Engine oil filler cap.
Petrol engine
Diesel engine
1.Screenwash fluid reservoir
2.Engine coolant reservoir
3.Brake fluid reservoir
4.Battery / Fuses
5.Remote earth point (-)
6.Fusebox
7.Air filter
8.Engine oil filler cap
9.Engine oil dipstick
WARNI NG
The Diesel fuel system operates under very high pressure.All work on this circuit must be carried out only by a TOYOTA dealer or a qualified workshop.
Checking levels
Check all of the following levels regularly in accordance with the manufacturer's service schedule. Top them up if required, unless otherwise indicated.If a level drops significantly, have the corresponding system checked by a TOYOTA dealer or a qualified workshop.
WARNI NG
The fluids must comply with the manufacturer's requirements and with the vehicle's engine.
Page 170 of 272
170
WARNI NG
After changing a wheelStow the punctured wheel in the carrier.Go to a TOYOTA dealer or a qualified workshop as soon as possible.Have the punctured tyre examined. After inspection, the technician will advise you on whether the tyre can be repaired or if it must be replaced.
NOTIC E
Some driving aid functions should be disabled, e.g. the Active Safety Brake.
NOTIC E
If your vehicle has tyre under-inflation detection, check the tyre pressures and reinitialise the system.For more information on Under-inflation detection, refer to the corresponding section.
NOTIC E
Wheel with wheel trimWhen refitting the wheel, refit the wheel
trim, starting by aligning the cutout with the valve and then pushing the trim into place all round its edge with the palm of your hand.
NOTIC E
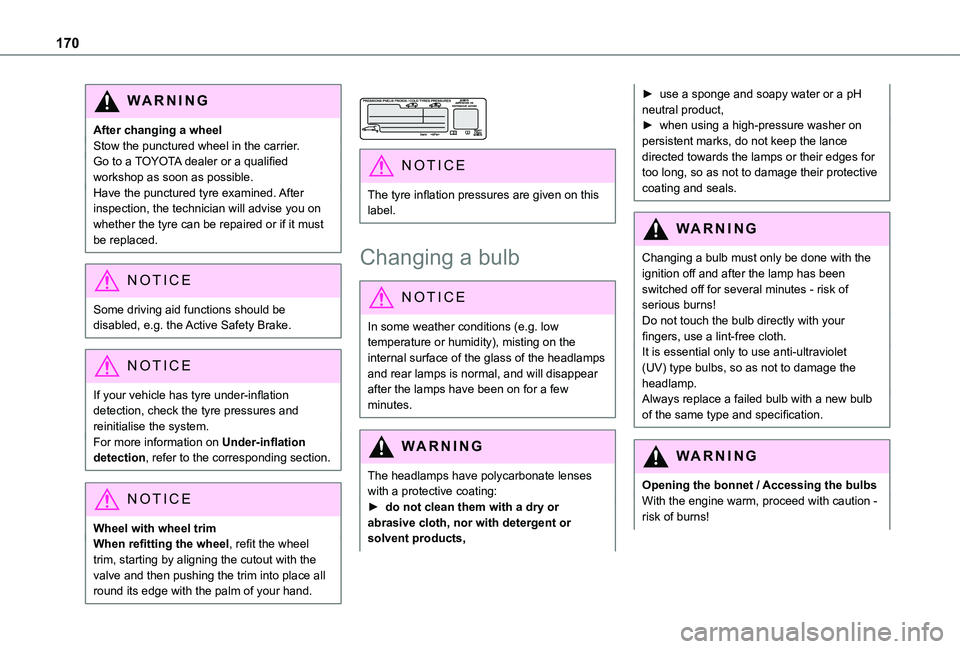
The tyre inflation pressures are given on this label.
Changing a bulb
NOTIC E
In some weather conditions (e.g. low temperature or humidity), misting on the internal surface of the glass of the headlamps and rear lamps is normal, and will disappear after the lamps have been on for a few minutes.
WARNI NG
The headlamps have polycarbonate lenses with a protective coating:► do not clean them with a dry or abrasive cloth, nor with detergent or solvent products,
► use a sponge and soapy water or a pH neutral product,► when using a high-pressure washer on persistent marks, do not keep the lance directed towards the lamps or their edges for too long, so as not to damage their protective coating and seals.
WARNI NG
Changing a bulb must only be done with the ignition off and after the lamp has been switched off for several minutes - risk of serious burns!Do not touch the bulb directly with your fingers, use a lint-free cloth.It is essential only to use anti-ultraviolet (UV) type bulbs, so as not to damage the headlamp.Always replace a failed bulb with a new bulb of the same type and specification.
WARNI NG
Opening the bonnet / Accessing the bulbsWith the engine warm, proceed with caution - risk of burns!
Page 178 of 272
178
12 V battery
Procedure for starting the engine using another battery or charging a discharged battery.
Lead-acid starter batteries
ECO
Batteries contain harmful substances such as
sulphuric acid and lead.They must be disposed of in accordance with regulations and must not, in any circumstances, be discarded with household waste.Take used remote control batteries and vehicle batteries to a special collection point.
WARNI NG
Protect your eyes and face before handling the battery.All operations on the battery must be carried out in a well ventilated area and away from naked flames and sources of sparks, so as to avoid the risk of explosion or fire.Wash your hands afterwards.
WARNI NG
Versions equipped with Stop & Start are fitted with a 12 V lead-acid battery with special technology and specifications.It should only be replaced by a TOYOTA dealer or a qualified workshop.
Access to the battery
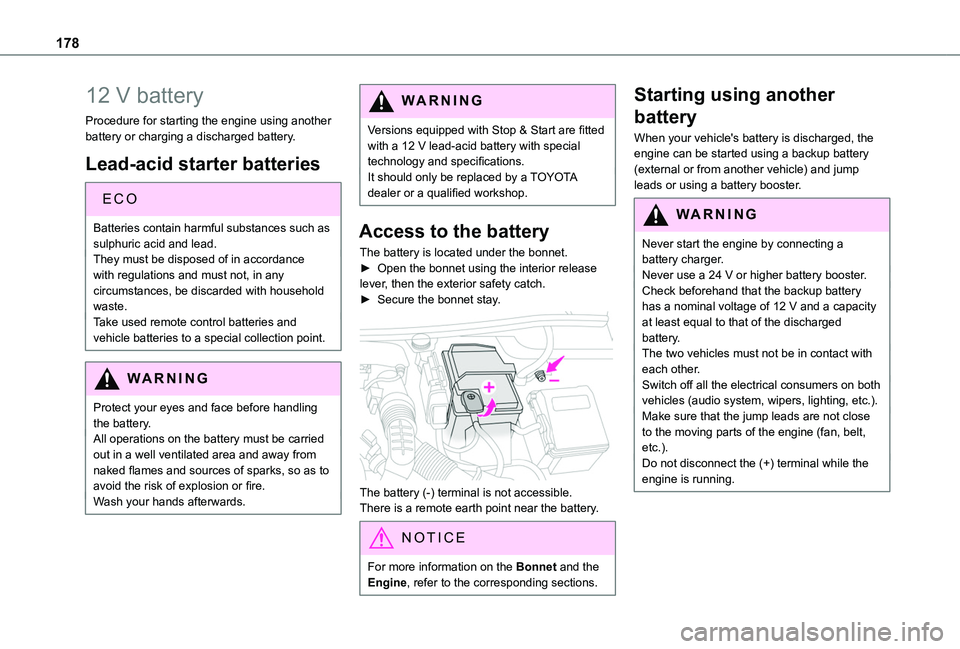
The battery is located under the bonnet.► Open the bonnet using the interior release lever, then the exterior safety catch.► Secure the bonnet stay.
The battery (-) terminal is not accessible.There is a remote earth point near the battery.
NOTIC E
For more information on the Bonnet and the Engine, refer to the corresponding sections.
Starting using another
battery
When your vehicle's battery is discharged, the engine can be started using a backup battery (external or from another vehicle) and jump leads or using a battery booster.
WARNI NG
Never start the engine by connecting a battery charger.Never use a 24 V or higher battery booster.Check beforehand that the backup battery has a nominal voltage of 12 V and a capacity at least equal to that of the discharged battery.The two vehicles must not be in contact with each other.Switch off all the electrical consumers on both vehicles (audio system, wipers, lighting, etc.).Make sure that the jump leads are not close to the moving parts of the engine (fan, belt, etc.).Do not disconnect the (+) terminal while the engine is running.
Page 247 of 272
247
Alphabetical index
Lamps, parking 65Lamps, rear 174Lane departure warning active 131, 136LEDs - Light-emitting diodes 65, 171Level, AdBlue® 156Level, brake fluid 156Level, Diesel additive 156–157Level, engine coolant 16, 156Level, engine oil 155Levels and checks 154–156Level, screenwash fluid 68, 156Light-emitting diodes - LEDs 65, 171Lighting 63Lighting, exterior 63Lighting, guide-me home 65Lighting, welcome 66Loading 152Load reduction mode 152Locating your vehicle 24Locking 23–24, 26–27Locking from the inside 31Low fuel level 146–147
Lumbar 39
M
Maintenance (advice) 161Maintenance, routine 11 6, 156Manoeuvring aids (recommendations) 11 4Markings, identification 189Mat 47, 11 6
Memorising a speed 128Menu 210Menu, main 192Menus (audio) 205–206, 218–219Messages 237Messages, quick 237Mirror, child surveillance 42Mirror, rear view 42Mirrors, door 41–42, 58–59, 134Misfuel prevention 147Mountings, ISOFIX 90MP3 CD 196
N
Navigation 224–226Navigation, connected 226–228Net 52–53Net, high load retaining 51Number plate lamps 175
O
Obstacle detection 137Oil change 155Oil consumption 155OIl, engine 155On-board tools 163–164Opening the bonnet 153Opening the boot 23
Opening the doors 23
P
Pads, brake 158Paint 162, 189Paint colour code 189Park Assist 142Parking brake 100, 158Parking brake, electric 101–103, 158Parking sensors, audible and visual 137Parking sensors, front 138Parking sensors, rear 138Plates, identification 189Player, Apple® 196, 209, 234Player, MP3 CD 195–196Player, USB 194, 208, 234Port, USB 48, 194, 208, 229, 234Pressures, tyres 158, 166, 170, 189Pre-tensioning seat belts 81Priming the fuel system 163
Profiles 213, 238Programmable cruise control 122Protecting children 82, 84–87, 89, 92–94Puncture 164, 166
R
Radar (warnings) 11 5Radio 192–193, 206–207, 209, 232