reset TOYOTA PROACE CITY VERSO EV 2022 User Guide
[x] Cancel search | Manufacturer: TOYOTA, Model Year: 2022, Model line: PROACE CITY VERSO EV, Model: TOYOTA PROACE CITY VERSO EV 2022Pages: 320, PDF Size: 75.81 MB
Page 200 of 320
200
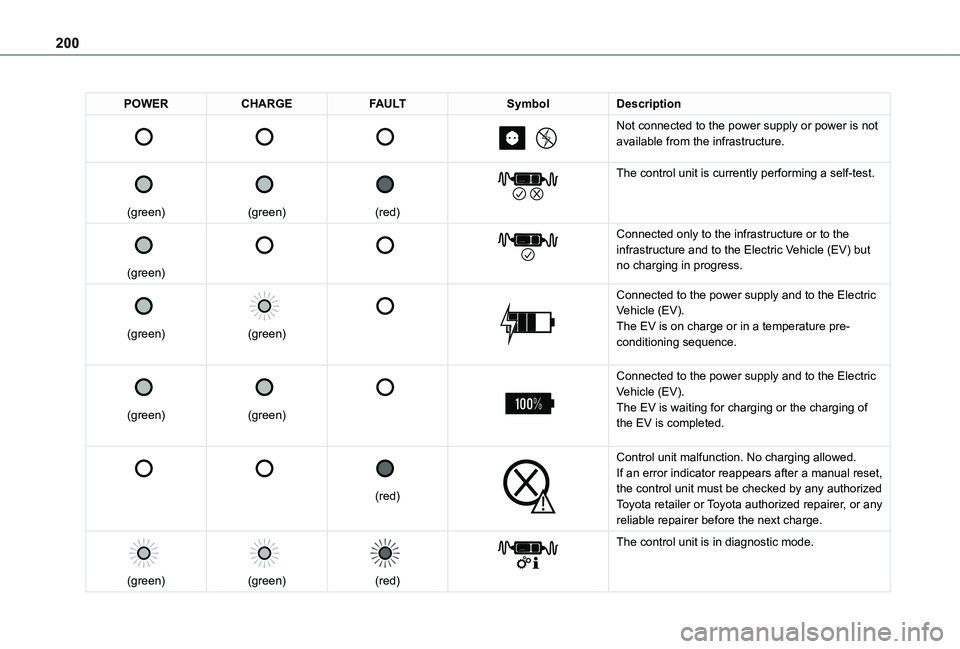
POWERCHARGEFAULTSymbolDescription
Not connected to the power supply or power is not available from the infrastructure.
(green)
(green)
(red)
The control unit is currently performing a self-test.
(green)
Connected only to the infrastructure or to the
infrastructure and to the Electric Vehicle (EV) but no charging in progress.
(green)
(green)
Connected to the power supply and to the Electric Vehicle (EV).The EV is on charge or in a temperature pre-conditioning sequence.
(green)
(green)
Connected to the power supply and to the Electric Vehicle (EV).The EV is waiting for charging or the charging of the EV is completed.
(red)
Control unit malfunction. No charging allowed.If an error indicator reappears after a manual reset, the control unit must be checked by any authorized Toyota retailer or Toyota authorized repairer, or any reliable repairer before the next charge.
(green)
(green)
(red)
The control unit is in diagnostic mode.
Page 201 of 320

201
Practical information
7
Manual reset procedureThe control unit can be reset by simultaneously disconnecting the chargi\
ng connector and the wall socket.Then, reconnect the wall socket first. For more information, refer to the handbook.
Accelerated charging, mode 3
Accelerated charging unit (depending on version)(accelerated charging - single-phase or three-phase alternating current (AC))
In mode 3 with an accelerated charging unit socket: 32 A maximum charging current.
In mode 3 with an accelerated charging unit (Wallbox): 32 A maximum charging current.
Charging cable, mode 3 (AC)
Identification labels C on the charging connector (vehicle side) and on the socket (charger side).
WARNI NG
Accelerated charging unitDo not disassemble or modify the charging unit - risk of electrocution and/or fire!Refer to the charging unit manufacturer's user manual for the operating instructions.
Superfast charging, mode 4
Public fast charger(superfast charging - direct current (DC))
Charging cable, mode 4 (DC)(integrated into the public fast charger)
Identification label K on the charging connector (side vehicle).Only use public fast chargers where the cable length does not exceed 30 metres.
Page 240 of 320
240
Disconnecting/reconnecting
the battery
In order to maintain an adequate state of charge for starting the engine, we recommend disconnecting the battery if the vehicle is to be unused for an extended period.Before disconnecting the battery:► Close all openings (doors, boot, windows, roof).► Switch off all electricity-consuming devices (audio system, wipers, lamps, etc.).► Switch off the ignition and wait for 4 minutes.After accessing the battery, it is only necessary to disconnect the (+) terminal.
Quick-release terminal clamp
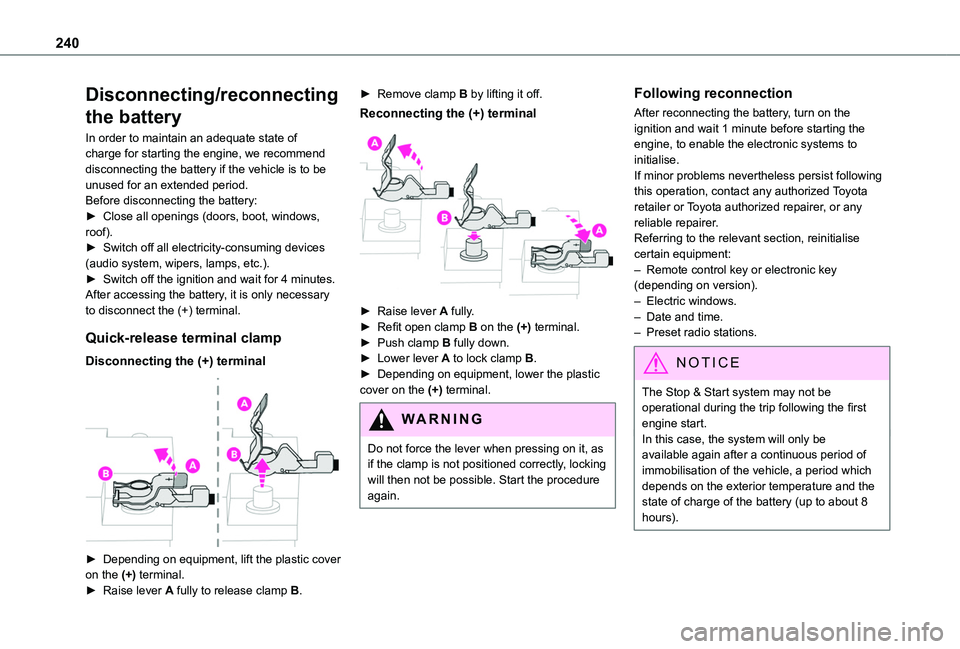
Disconnecting the (+) terminal
► Depending on equipment, lift the plastic cover on the (+) terminal.► Raise lever A fully to release clamp B.
► Remove clamp B by lifting it off.
Reconnecting the (+) terminal
► Raise lever A fully.► Refit open clamp B on the (+) terminal.► Push clamp B fully down.► Lower lever A to lock clamp B.► Depending on equipment, lower the plastic cover on the (+) terminal.
WARNI NG
Do not force the lever when pressing on it, as if the clamp is not positioned correctly, locking will then not be possible. Start the procedure again.
Following reconnection
After reconnecting the battery, turn on the ignition and wait 1 minute before starting the engine, to enable the electronic systems to initialise.If minor problems nevertheless persist following this operation, contact any authorized Toyota retailer or Toyota authorized repairer, or any reliable repairer.Referring to the relevant section, reinitialise certain equipment:– Remote control key or electronic key (depending on version).– Electric windows.– Date and time.– Preset radio stations.
NOTIC E
The Stop & Start system may not be operational during the trip following the first engine start.In this case, the system will only be
available again after a continuous period of immobilisation of the vehicle, a period which depends on the exterior temperature and the state of charge of the battery (up to about 8 hours).
Page 256 of 320
256
Steering mounted controls
Steering mounted controls -
Type 1
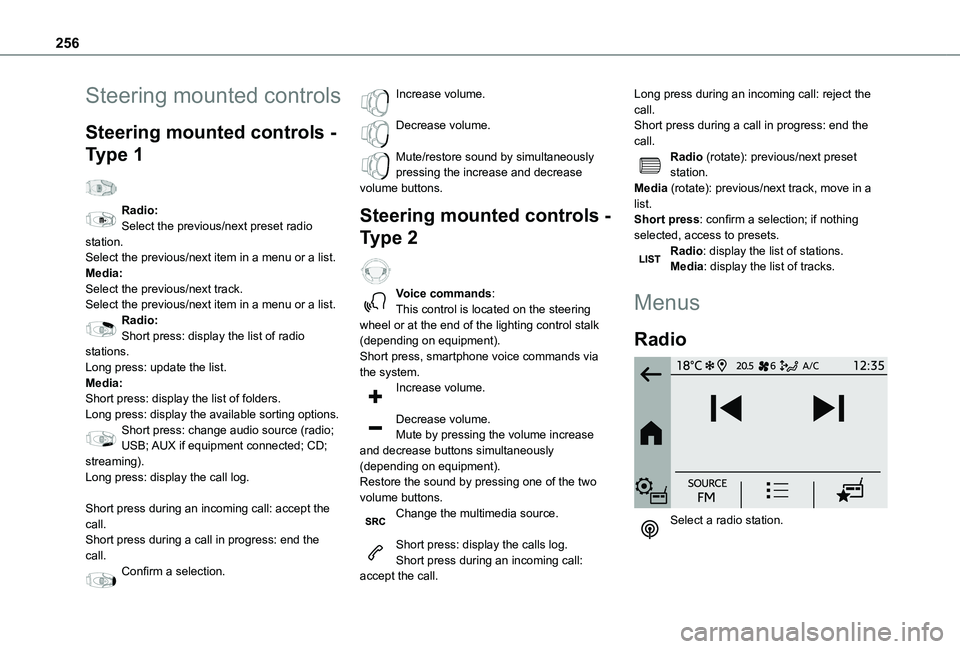
Radio:Select the previous/next preset radio station.Select the previous/next item in a menu or a list.Media:Select the previous/next track.Select the previous/next item in a menu or a list.Radio:Short press: display the list of radio stations.Long press: update the list.Media:Short press: display the list of folders.Long press: display the available sorting options.Short press: change audio source (radio;
USB; AUX if equipment connected; CD; streaming).Long press: display the call log.
Short press during an incoming call: accept the call.Short press during a call in progress: end the call.Confirm a selection.
Increase volume.
Decrease volume.
Mute/restore sound by simultaneously pressing the increase and decrease volume buttons.
Steering mounted controls -
Type 2
Voice commands:This control is located on the steering wheel or at the end of the lighting control stalk (depending on equipment).Short press, smartphone voice commands via the system.Increase volume.
Decrease volume.Mute by pressing the volume increase
and decrease buttons simultaneously (depending on equipment).Restore the sound by pressing one of the two volume buttons.Change the multimedia source.
Short press: display the calls log.Short press during an incoming call: accept the call.
Long press during an incoming call: reject the call.Short press during a call in progress: end the call.Radio (rotate): previous/next preset station.Media (rotate): previous/next track, move in a list.Short press: confirm a selection; if nothing selected, access to presets.Radio: display the list of stations.Media: display the list of tracks.
Menus
Radio
Select a radio station.
Page 258 of 320
258
Radio
Choose the band
Press the "Radio" menu.
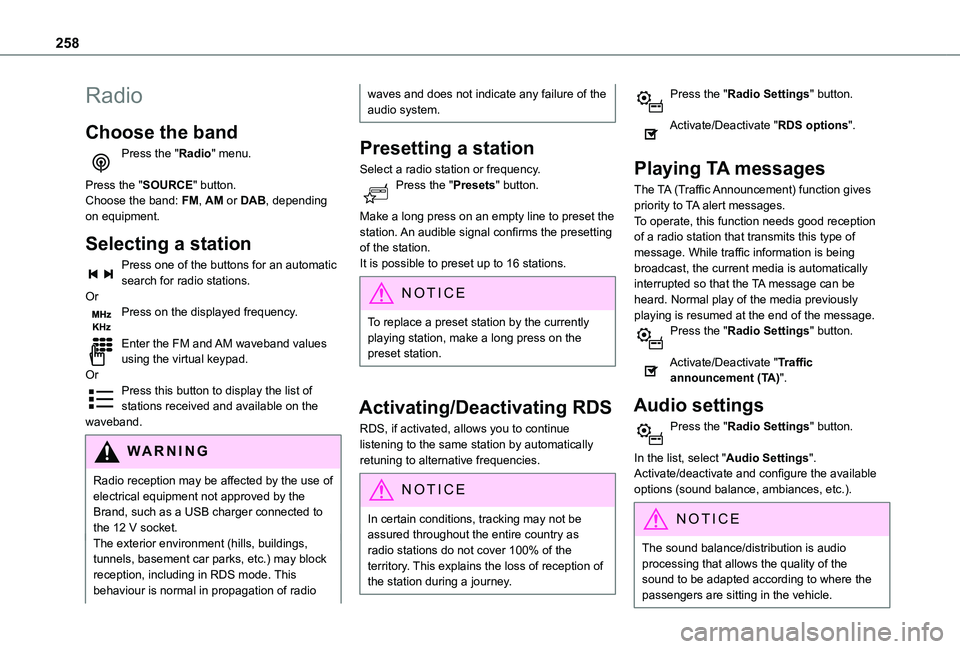
Press the "SOURCE" button.Choose the band: FM, AM or DAB, depending on equipment.
Selecting a station
Press one of the buttons for an automatic search for radio stations.OrPress on the displayed frequency.
Enter the FM and AM waveband values using the virtual keypad.OrPress this button to display the list of stations received and available on the waveband.
WARNI NG
Radio reception may be affected by the use of electrical equipment not approved by the Brand, such as a USB charger connected to the 12 V socket.The exterior environment (hills, buildings, tunnels, basement car parks, etc.) may block reception, including in RDS mode. This behaviour is normal in propagation of radio
waves and does not indicate any failure of the audio system.
Presetting a station
Select a radio station or frequency.Press the "Presets" button.
Make a long press on an empty line to preset the station. An audible signal confirms the presetting of the station.It is possible to preset up to 16 stations.
NOTIC E
To replace a preset station by the currently playing station, make a long press on the preset station.
Activating/Deactivating RDS
RDS, if activated, allows you to continue listening to the same station by automatically retuning to alternative frequencies.
NOTIC E
In certain conditions, tracking may not be assured throughout the entire country as
radio stations do not cover 100% of the territory. This explains the loss of reception of the station during a journey.
Press the "Radio Settings" button.
Activate/Deactivate "RDS options".
Playing TA messages
The TA (Traffic Announcement) function gives priority to TA alert messages.To operate, this function needs good reception of a radio station that transmits this type of message. While traffic information is being broadcast, the current media is automatically interrupted so that the TA message can be heard. Normal play of the media previously playing is resumed at the end of the message.Press the "Radio Settings" button.
Activate/Deactivate "Traffic announcement (TA)".
Audio settings
Press the "Radio Settings" button.
In the list, select "Audio Settings".Activate/deactivate and configure the available options (sound balance, ambiances, etc.).
NOTIC E
The sound balance/distribution is audio processing that allows the quality of the sound to be adapted according to where the passengers are sitting in the vehicle.
Page 263 of 320
263
Touch screen BLUETOOTH audio system
10
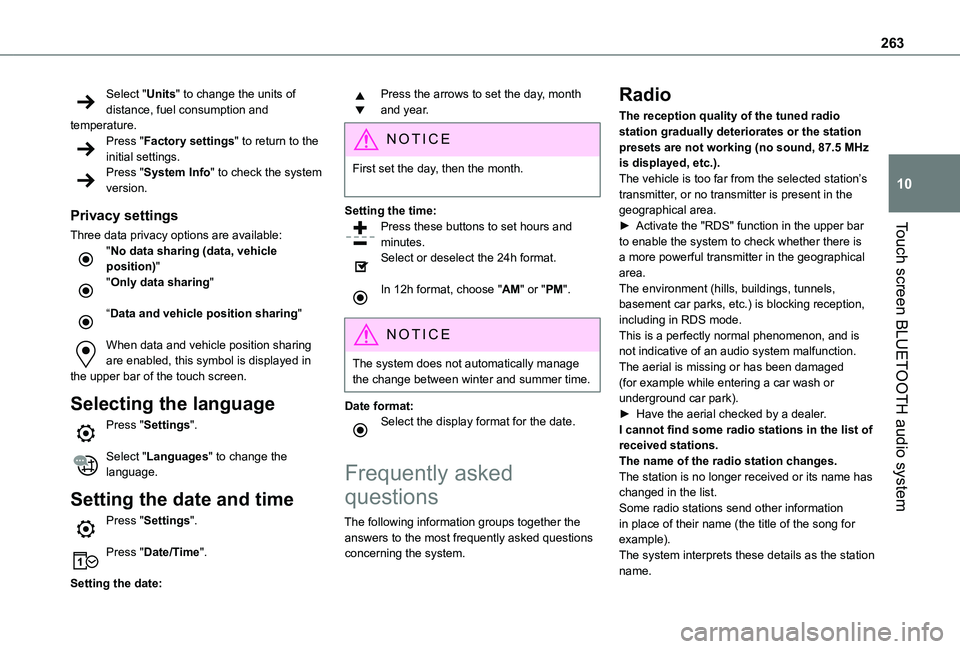
Select "Units" to change the units of distance, fuel consumption and temperature.Press "Factory settings" to return to the initial settings.Press "System Info" to check the system version.
Privacy settings
Three data privacy options are available:"No data sharing (data, vehicle position)""Only data sharing"
“Data and vehicle position sharing"
When data and vehicle position sharing are enabled, this symbol is displayed in the upper bar of the touch screen.
Selecting the language
Press "Settings".
Select "Languages" to change the language.
Setting the date and time
Press "Settings".
Press "Date/Time".
Setting the date:
Press the arrows to set the day, month and year.
NOTIC E
First set the day, then the month.
Setting the time:Press these buttons to set hours and minutes.
Select or deselect the 24h format.
In 12h format, choose "AM" or "PM".
NOTIC E
The system does not automatically manage the change between winter and summer time.
Date format:Select the display format for the date.
Frequently asked
questions
The following information groups together the answers to the most frequently asked questions
concerning the system.
Radio
The reception quality of the tuned radio station gradually deteriorates or the station presets are not working (no sound, 87.5 MHz is displayed, etc.).The vehicle is too far from the selected station’s transmitter, or no transmitter is present in the geographical area.► Activate the "RDS" function in the upper bar to enable the system to check whether there is a more powerful transmitter in the geographical area.The environment (hills, buildings, tunnels, basement car parks, etc.) is blocking reception, including in RDS mode.This is a perfectly normal phenomenon, and is not indicative of an audio system malfunction.The aerial is missing or has been damaged (for example while entering a car wash or underground car park).► Have the aerial checked by a dealer.I cannot find some radio stations in the list of
received stations.The name of the radio station changes.The station is no longer received or its name has changed in the list.Some radio stations send other information in place of their name (the title of the song for example).The system interprets these details as the station name.
Page 264 of 320
264
► Press the "Radio Settings" button then select "Update list". The radio reception is cut off while searching for available stations (approximately 30 seconds).
Media
Playback of my USB memory stick starts only after a very long wait (around 2 to 3 minutes).Some files supplied with the memory stick may greatly slow down access to reading the memory stick (multiplication by 10 of the cataloguing time).► Delete the files supplied with the memory stick and limit the number of sub-folders in the file structure on the memory stick. Some characters in information about the currently playing media are not displayed correctly.The audio system is unable to process certain types of character.► Use standard characters to name tracks and folders.Playback of streaming files does not start.
The connected device does not automatically launch playback.► Start playback from the device.Track names and playing times are not displayed on the audio streaming screen.The Bluetooth profile does not allow the transfer of this information.
Telephone
I cannot connect my Bluetooth telephone.The telephone's Bluetooth function may be switched off or the telephone may not be visible.► Check that the telephone has Bluetooth switched on.► Check in the telephone settings that it is "visible to all".The Bluetooth telephone is not compatible with the system.► Check the compatibility of the telephone on the Brand's website (services).The volume of the telephone connected in Bluetooth mode is inaudible.The volume depends on both the system and the telephone.Ambient noise affects the quality of the telephone call.► Increase the volume of the audio system, to maximum if required, and increase the volume of the telephone if necessary.► Reduce ambient noise (close windows,
reduce ventilation, slow down, etc.).The contacts are not listed in alphabetical order.Some telephones offer display options. Depending on the settings chosen, contacts can be transferred in a specific order.► Modify the telephone directory display settings.
Settings
When the treble and bass settings are changed, the ambience is deselected.When the ambience is changed, the treble and bass settings are reset.Selecting an ambience imposes the treble and bass settings, and vice versa.► Modify the treble and bass or ambience settings to obtain the desired musical ambience.There is a difference in sound quality between audio sources.To allow for optimal listening quality, the sound settings can be tailored to different audio sources, which can generate audible differences when changing source.► Check that the sound settings are appropriate to the sources listened to. Adjust the sound functions to the middle position.When the engine is off, the system switches off after several minutes of use.When the engine is switched off, the system's operating time depends on the state of charge of
the battery.The switch-off is normal: the system automatically goes into energy economy mode and switches off to maintain an adequate charge in the battery.► Start the vehicle’s engine to increase the charge of the battery.
Page 266 of 320
266
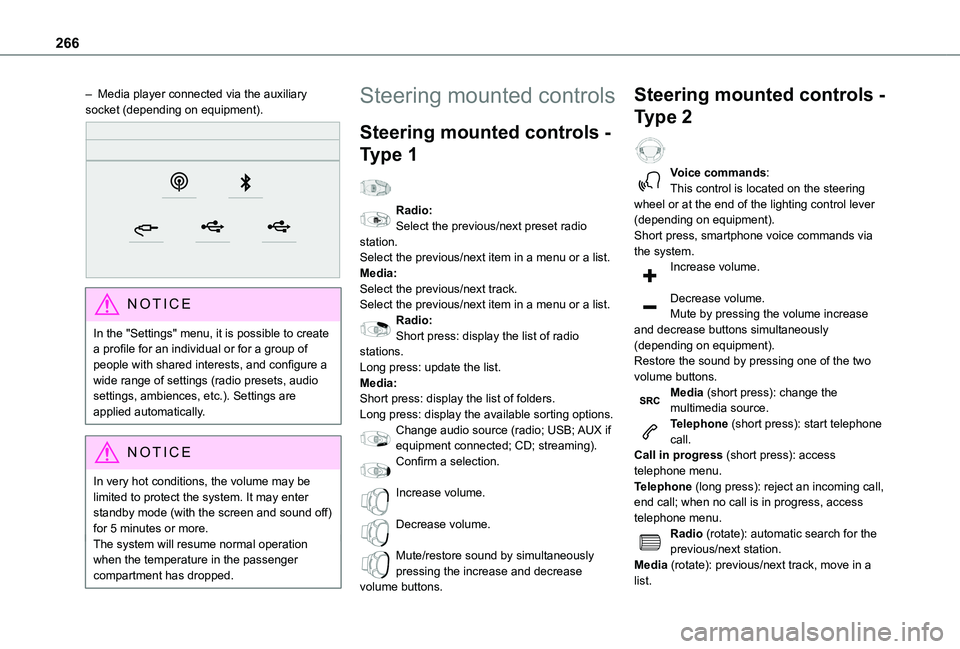
– Media player connected via the auxiliary socket (depending on equipment).
NOTIC E
In the "Settings" menu, it is possible to create a profile for an individual or for a group of people with shared interests, and configure a wide range of settings (radio presets, audio settings, ambiences, etc.). Settings are applied automatically.
NOTIC E
In very hot conditions, the volume may be limited to protect the system. It may enter standby mode (with the screen and sound off) for 5 minutes or more.The system will resume normal operation when the temperature in the passenger compartment has dropped.
Steering mounted controls
Steering mounted controls -
Type 1
Radio:Select the previous/next preset radio station.Select the previous/next item in a menu or a list.Media:Select the previous/next track.Select the previous/next item in a menu or a list.Radio:Short press: display the list of radio stations.Long press: update the list.Media:Short press: display the list of folders.Long press: display the available sorting options.Change audio source (radio; USB; AUX if
equipment connected; CD; streaming).Confirm a selection.
Increase volume.
Decrease volume.
Mute/restore sound by simultaneously pressing the increase and decrease volume buttons.
Steering mounted controls -
Type 2
Voice commands:This control is located on the steering wheel or at the end of the lighting control lever (depending on equipment).Short press, smartphone voice commands via the system.Increase volume.
Decrease volume.Mute by pressing the volume increase and decrease buttons simultaneously (depending on equipment).Restore the sound by pressing one of the two volume buttons.Media (short press): change the multimedia source.Telephone (short press): start telephone call.
Call in progress (short press): access telephone menu.Telephone (long press): reject an incoming call, end call; when no call is in progress, access telephone menu.Radio (rotate): automatic search for the previous/next station.Media (rotate): previous/next track, move in a list.
Page 267 of 320
267
TOYOTA Connect Radio
11
Short press: confirm a selection; if nothing selected, access to presets.Radio: display the list of stations.Media: display the list of tracks.Radio (press and hold): update the list of stations received.
Menus
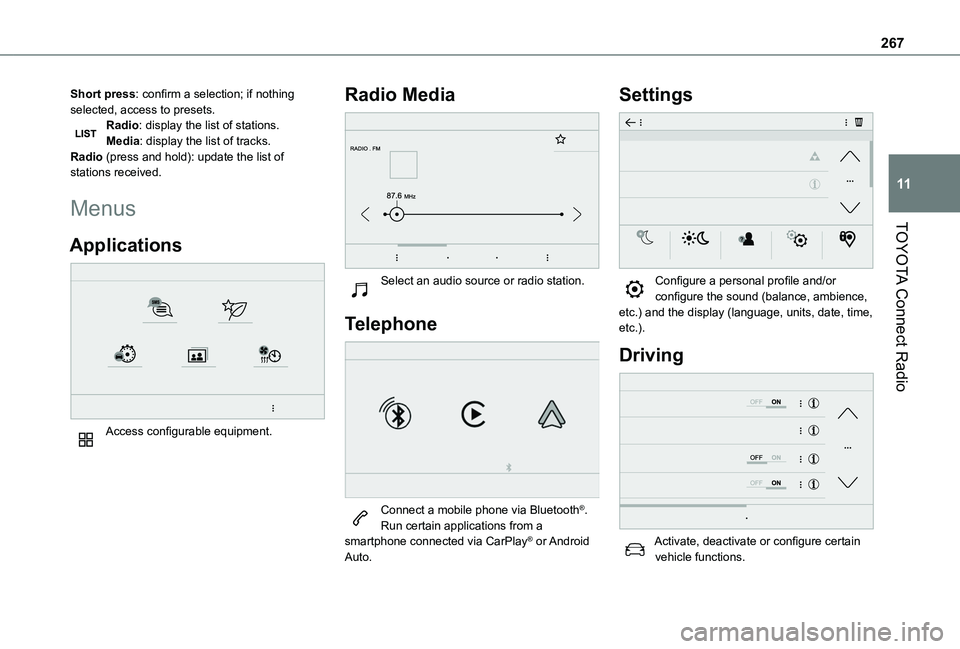
Applications
Access configurable equipment.
Radio Media
Select an audio source or radio station.
Telephone
Connect a mobile phone via Bluetooth®.Run certain applications from a smartphone connected via CarPlay® or Android Auto.
Settings
Configure a personal profile and/or configure the sound (balance, ambience, etc.) and the display (language, units, date, time, etc.).
Driving
Activate, deactivate or configure certain vehicle functions.
Page 269 of 320
269
TOYOTA Connect Radio
11
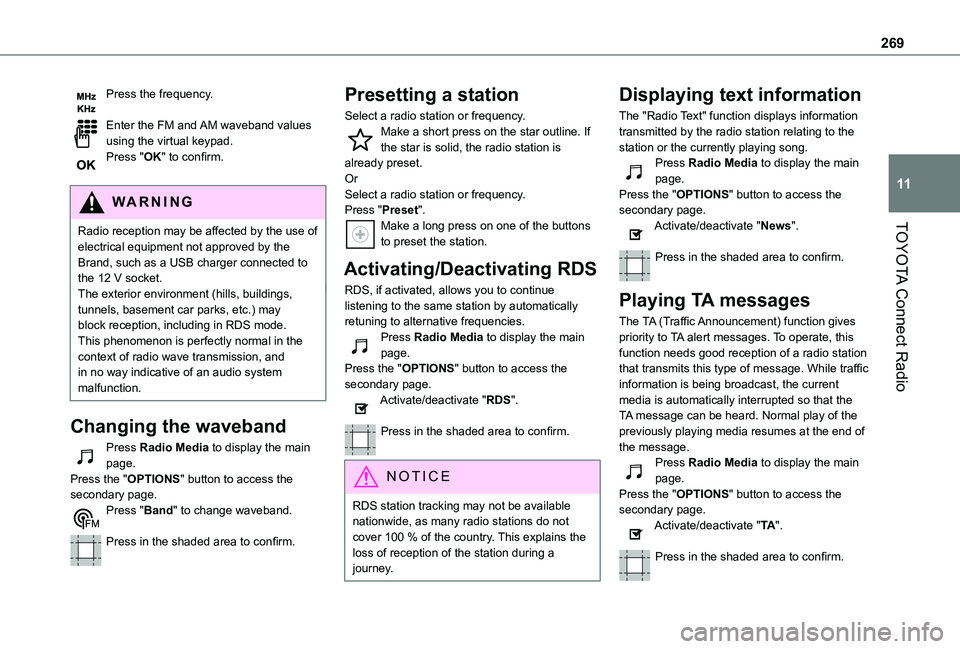
Press the frequency.
Enter the FM and AM waveband values using the virtual keypad.Press "OK" to confirm.
WARNI NG
Radio reception may be affected by the use of
electrical equipment not approved by the Brand, such as a USB charger connected to the 12 V socket.The exterior environment (hills, buildings, tunnels, basement car parks, etc.) may block reception, including in RDS mode. This phenomenon is perfectly normal in the context of radio wave transmission, and in no way indicative of an audio system malfunction.
Changing the waveband
Press Radio Media to display the main page. Press the "OPTIONS" button to access the secondary page.Press "Band" to change waveband.
Press in the shaded area to confirm.
Presetting a station
Select a radio station or frequency.Make a short press on the star outline. If the star is solid, the radio station is already preset.OrSelect a radio station or frequency.Press "Preset".Make a long press on one of the buttons to preset the station.
Activating/Deactivating RDS
RDS, if activated, allows you to continue listening to the same station by automatically retuning to alternative frequencies.Press Radio Media to display the main page.Press the "OPTIONS" button to access the secondary page.Activate/deactivate "RDS".
Press in the shaded area to confirm.
NOTIC E
RDS station tracking may not be available nationwide, as many radio stations do not cover 100 % of the country. This explains the loss of reception of the station during a journey.
Displaying text information
The "Radio Text" function displays information transmitted by the radio station relating to the station or the currently playing song.Press Radio Media to display the main page.Press the "OPTIONS" button to access the secondary page.Activate/deactivate "News".
Press in the shaded area to confirm.
Playing TA messages
The TA (Traffic Announcement) function gives priority to TA alert messages. To operate, this function needs good reception of a radio station that transmits this type of message. While traffic information is being broadcast, the current media is automatically interrupted so that the TA message can be heard. Normal play of the previously playing media resumes at the end of
the message.Press Radio Media to display the main page.Press the "OPTIONS" button to access the secondary page.Activate/deactivate "TA".
Press in the shaded area to confirm.