child seat TOYOTA PROACE VERSO 2023 Manual del propietario (in Spanish)
[x] Cancel search | Manufacturer: TOYOTA, Model Year: 2023, Model line: PROACE VERSO, Model: TOYOTA PROACE VERSO 2023Pages: 360, tamaño PDF: 70.22 MB
Page 2 of 360
2
■Overview
Overview 4Labels 6
■Eco-driving
1Instruments
Instrument Panel 10Warning and indicator lamps 12Indicators 18Lighting dimmer 24Trip computer 24Touch screen 26Remotely operable functions (Electric) 28Setting the date and time 29
2Access
Electronic key with remote control function and built-in key, 30Unlocking/Complete or selective unlocking 32Back-up procedures 36Central locking 39Electric sliding side door(s) 40General recommendations for the sliding side doors 42Hands-free sliding side door(s) 44Side-hinged rear doors 46Tailgate 47Tailgate rear screen 48Alarm 48Electric windows 50
3Ease of use and comfort
Front seats 522-seat front bench seat 54
Steering wheel adjustment 56Mirrors 56Smart Cargo 58Precautions for the seats and bench seats 62Fixed one-piece bench seat 63Fixed rear seat and bench seat 65Rear seat and bench seat on rails 67Individual rear seat(s) on rails 69Crew Cab, fixed 72Crew Cab, folding 73Interior fittings 74Loading area fittings 78Seating area fittings 80Panoramic sunroof 82Retractable sliding table 82Heating and Ventilation 86Heating 87Manual air conditioning 87Dual-zone automatic air conditioning 88Front demisting - defrosting 91Rear screen and/or door mirror demisting/de-icing 91Rear heating - air conditioning 92Additional heating/ventilation system 92A/C preconditioning (Electric) 96Courtesy lamp(s) 96
4Lighting and visibility
Lighting control lever 99Direction indicators 100Daytime running lamps/Sidelamps 101Automatic illumination of headlamps 101Guide-me-home and welcome lighting 101Automatic lighting systems - General recommendations 102Automatic headlamp dipping 103
Headlamp beam height adjustment 104Interior ambient lighting 104Wiper control lever 105Automatic wipers 106Changing a wiper blade 108
5Safety
General safety recommendations 109Hazard warning lamps 11 0Emergency or assistance 11 0Horn 11 2Pedestrian horn (Electric) 11 2Vehicle stability control (VSC) 11 2Toyota Traction Select 11 5Seat belts 11 6Airbags 120Child seats 123Deactivating the front passenger airbag 125ISOFIX and i-Size child seats 131i-Size child seats 143Manual child lock 146Electric child lock 146Child lock on rear windows 147
6Driving
Driving recommendations 148Starting/switching off the engine 150Manual parking brake 155Electric parking brake 155Hill start assist 1586-speed manual gearbox 159Gear efficiency indicator 159Automatic gearbox 160Drive selector (Electric) 164Driving modes (Electric) 165Stop & Start 166
Page 7 of 360
7
Overview
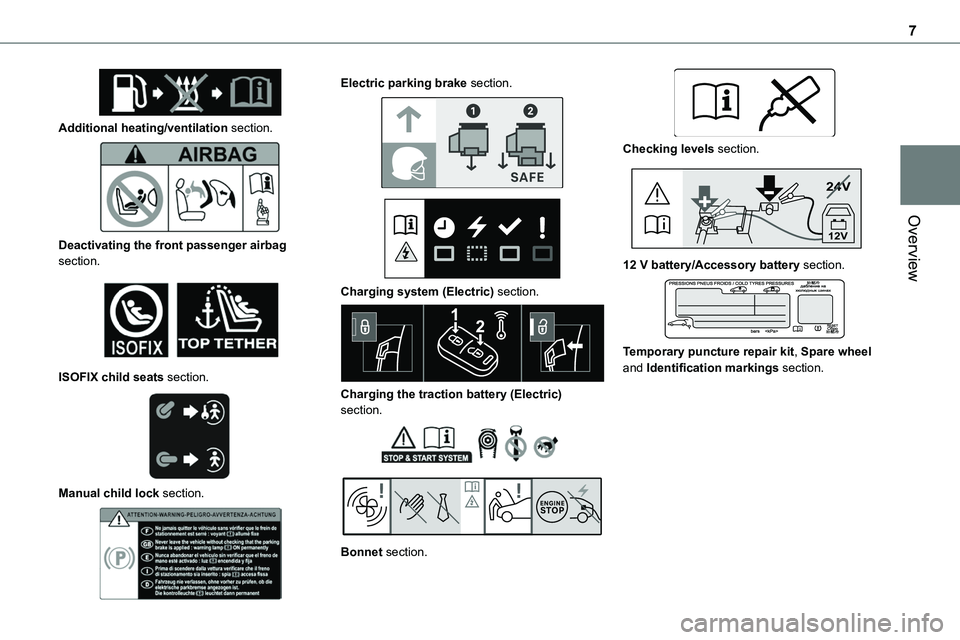
Additional heating/ventilation section.
Deactivating the front passenger airbag section.
ISOFIX child seats section.
Manual child lock section.
Electric parking brake section.
Charging system (Electric) section.
Charging the traction battery (Electric) section.
Bonnet section.
Checking levels section.
24V
12V
12 V battery/Accessory battery section.
Temporary puncture repair kit, Spare wheel and Identification markings section.
Page 16 of 360
16
Press the button to reactivate it.The DSC/ASR system is activated automatically when the vehicle is started, and from around 50 km/h (30 mph).
Under-inflationFixed, accompanied by an audible signal and a message.The pressure in one or more wheels is too low.Check the pressure of the tyres as soon as
possible.Reinitialise the detection system after adjusting the pressure.Under-inflation warning lamp flashing then fixed and Service warning lamp fixed.The tyre pressure monitoring system is faulty.Under-inflation detection is no longer monitored.Check the tyre pressures as soon as possible and carry out (3).
Engine pre-heating (Diesel)Temporarily on(up to approximately 30 seconds in severe weather conditions).When switching on the ignition, if the weather conditions and the engine temperature make it necessary.Wait until the warning lamp goes off before starting.When the warning lamp goes off, starting will occur immediately if you press and hold:– the clutch pedal with a manual gearbox.– the brake pedal with an automatic gearbox.
If the engine does not start, make the engine starting request again, while keeping your foot on the pedal.
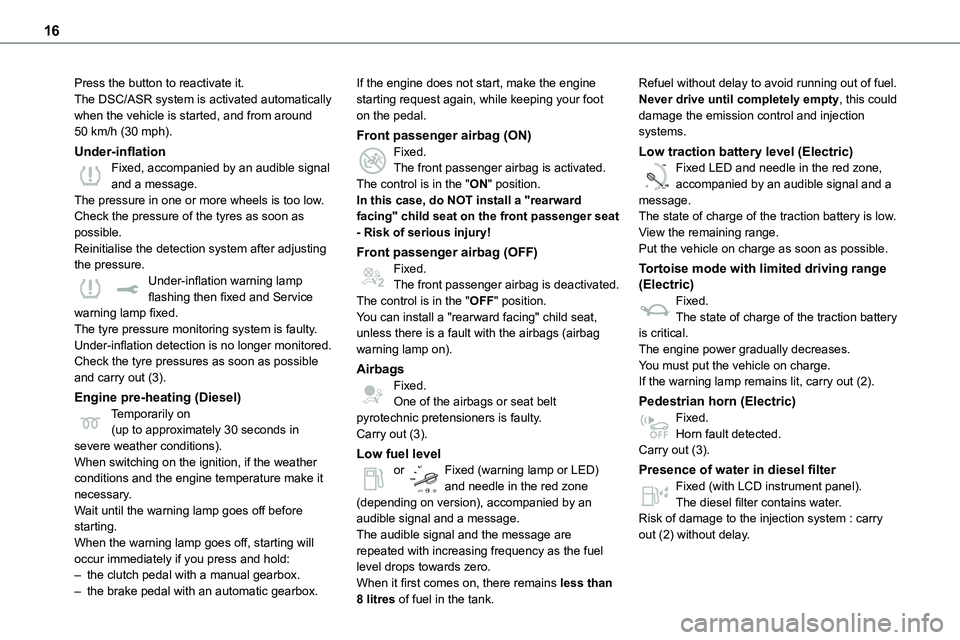
Front passenger airbag (ON)Fixed.The front passenger airbag is activated.The control is in the "ON" position.In this case, do NOT install a "rearward facing" child seat on the front passenger seat
- Risk of serious injury!
Front passenger airbag (OFF)Fixed.The front passenger airbag is deactivated.The control is in the "OFF" position.You can install a "rearward facing" child seat, unless there is a fault with the airbags (airbag warning lamp on).
AirbagsFixed.One of the airbags or seat belt pyrotechnic pretensioners is faulty.Carry out (3).
Low fuel levelor Fixed (warning lamp or LED) and needle in the red zone (depending on version), accompanied by an audible signal and a message.The audible signal and the message are repeated with increasing frequency as the fuel level drops towards zero.When it first comes on, there remains less than 8 litres of fuel in the tank.
Refuel without delay to avoid running out of fuel.Never drive until completely empty, this could damage the emission control and injection systems.
Low traction battery level (Electric)
0 %
100
Fixed LED and needle in the red zone, accompanied by an audible signal and a message.The state of charge of the traction battery is low.
View the remaining range.Put the vehicle on charge as soon as possible.
Tortoise mode with limited driving range (Electric)Fixed.The state of charge of the traction battery is critical.The engine power gradually decreases.You must put the vehicle on charge.If the warning lamp remains lit, carry out (2).
Pedestrian horn (Electric)Fixed.Horn fault detected.Carry out (3).
Presence of water in diesel filterFixed (with LCD instrument panel).The diesel filter contains water.Risk of damage to the injection system : carry out (2) without delay.
Page 81 of 360
81
Ease of use and comfort
3
Lower fixings (behind row 2)
► Use the stowing rings.
Fit the net
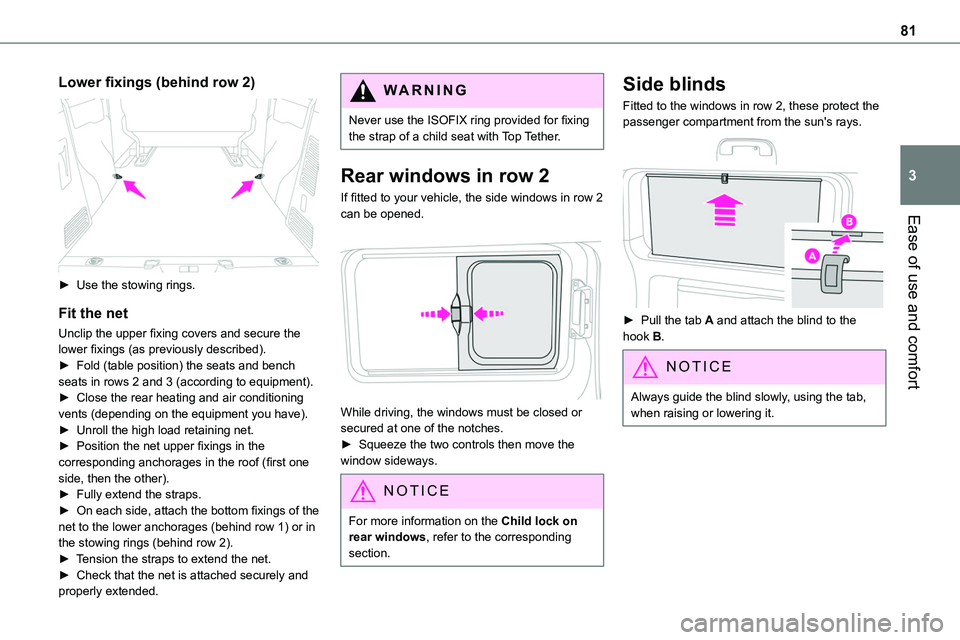
Unclip the upper fixing covers and secure the lower fixings (as previously described).► Fold (table position) the seats and bench seats in rows 2 and 3 (according to equipment).► Close the rear heating and air conditioning vents (depending on the equipment you have).► Unroll the high load retaining net.► Position the net upper fixings in the corresponding anchorages in the roof (first one side, then the other).► Fully extend the straps.► On each side, attach the bottom fixings of the net to the lower anchorages (behind row 1) or in
the stowing rings (behind row 2).► Tension the straps to extend the net.► Check that the net is attached securely and properly extended.
WARNI NG
Never use the ISOFIX ring provided for fixing the strap of a child seat with Top Tether.
Rear windows in row 2
If fitted to your vehicle, the side windows in row 2 can be opened.
While driving, the windows must be closed or secured at one of the notches.► Squeeze the two controls then move the window sideways.
NOTIC E
For more information on the Child lock on rear windows, refer to the corresponding section.
Side blinds
Fitted to the windows in row 2, these protect the passenger compartment from the sun's rays.
► Pull the tab A and attach the blind to the hook B.
NOTIC E
Always guide the blind slowly, using the tab, when raising or lowering it.
Page 119 of 360
11 9
Safety
5
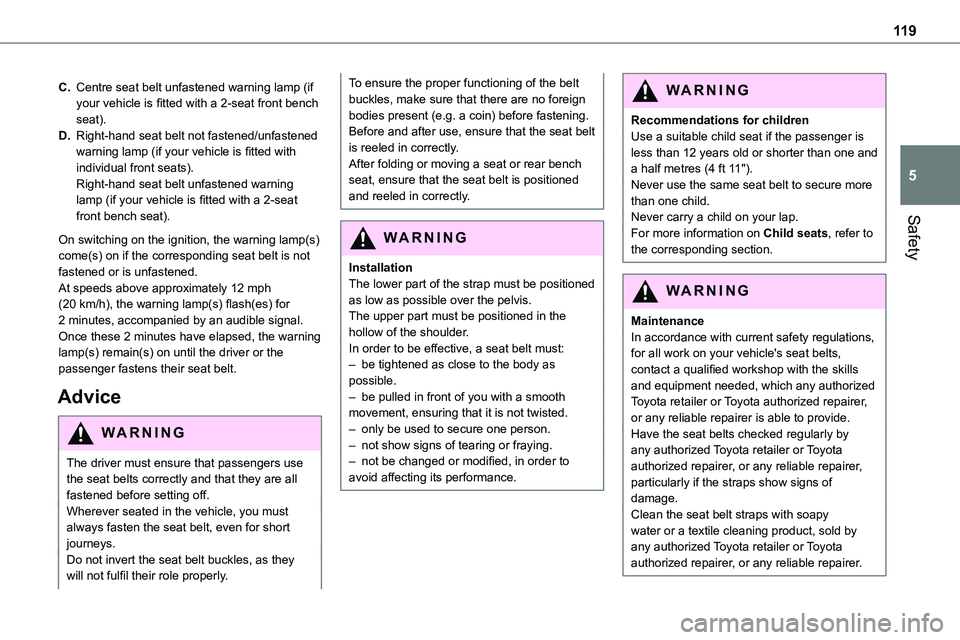
C.Centre seat belt unfastened warning lamp (if your vehicle is fitted with a 2-seat front bench seat).
D.Right-hand seat belt not fastened/unfastened warning lamp (if your vehicle is fitted with individual front seats).Right-hand seat belt unfastened warning lamp (if your vehicle is fitted with a 2-seat front bench seat).
On switching on the ignition, the warning lamp(s) come(s) on if the corresponding seat belt is not fastened or is unfastened.At speeds above approximately 12 mph (20 km/h), the warning lamp(s) flash(es) for 2 minutes, accompanied by an audible signal. Once these 2 minutes have elapsed, the warning lamp(s) remain(s) on until the driver or the passenger fastens their seat belt.
Advice
WARNI NG
The driver must ensure that passengers use the seat belts correctly and that they are all fastened before setting off.Wherever seated in the vehicle, you must always fasten the seat belt, even for short
journeys.Do not invert the seat belt buckles, as they will not fulfil their role properly.
To ensure the proper functioning of the belt buckles, make sure that there are no foreign bodies present (e.g. a coin) before fastening.Before and after use, ensure that the seat belt is reeled in correctly.After folding or moving a seat or rear bench seat, ensure that the seat belt is positioned and reeled in correctly.
WARNI NG
InstallationThe lower part of the strap must be positioned as low as possible over the pelvis.The upper part must be positioned in the hollow of the shoulder.In order to be effective, a seat belt must:– be tightened as close to the body as possible.– be pulled in front of you with a smooth movement, ensuring that it is not twisted.– only be used to secure one person.– not show signs of tearing or fraying.– not be changed or modified, in order to avoid affecting its performance.
WARNI NG
Recommendations for childrenUse a suitable child seat if the passenger is less than 12 years old or shorter than one and a half metres (4 ft 11").Never use the same seat belt to secure more than one child.Never carry a child on your lap.
For more information on Child seats, refer to the corresponding section.
WARNI NG
MaintenanceIn accordance with current safety regulations, for all work on your vehicle's seat belts, contact a qualified workshop with the skills and equipment needed, which any authorized Toyota retailer or Toyota authorized repairer, or any reliable repairer is able to provide.Have the seat belts checked regularly by any authorized Toyota retailer or Toyota authorized repairer, or any reliable repairer, particularly if the straps show signs of damage.Clean the seat belt straps with soapy water or a textile cleaning product, sold by
any authorized Toyota retailer or Toyota authorized repairer, or any reliable repairer.
Page 122 of 360
122
WARNI NG
In the event of a minor impact or bump at the side of the vehicle or if the vehicle rolls over, the airbags may not be deployed.In the event of a rear or front collision, none of the lateral airbags are deployed.
Advice
WARNI NG
For the airbags to be fully effective, observe the safety recommendations below.Adopt a normal and upright sitting position.Fasten your seat belt and position it correctly.Do not place anything between the occupants and the airbags (e.g. child, animal, object), do not fix or attach anything near or in the path of the airbags, as this could cause injuries when they are deployed.Never modify the original definition of the vehicle, particularly in the area directly around the airbags.Even if all of the precautions mentioned are observed, a risk of injury or of minor burns to the head, chest or arms cannot be ruled out
when an airbag is deployed. The bag inflates almost instantly (within a few milliseconds) then deflates within the same time,
discharging the hot gas via openings provided for this purpose.After an accident or if the vehicle has been stolen, have the airbag systems checked.All work must be carried out only by any authorized Toyota retailer or Toyota authorized repairer, or any reliable repairer.
WARNI NG
Front airbagsDo not drive holding the steering wheel by its spokes or resting your hands on the centre part of the wheel.Passengers must not place their feet on the dashboard.Do not smoke as deployment of the airbags can cause burns or the risk of injury from a cigarette or pipe.Never remove or pierce the steering wheel or hit it violently.Do not fix or attach anything to the steering wheel or dashboard, as this could cause injuries when the airbags are deployed.
WARNI NG
Lateral airbagsUse only approved seat covers compatible with the deployment of these airbags. For information on the range of seat covers suitable for your vehicle, contact any authorized Toyota retailer or Toyota authorized repairer, or any reliable repairer.
Do not fix or attach anything to the seat backrests (e.g. clothing) as this could cause injuries to the chest or arm when the airbag is deployed.Do not sit with the upper part of the body any nearer to the door than necessary.The vehicle's front door panels include side impact sensors.A damaged door or any unauthorised or incorrectly executed work (modification or repair) on the front doors or their interior trim could compromise the operation of these sensors - risk of malfunction of the lateral airbags!All work must be carried out only by any authorized Toyota retailer or Toyota authorized repairer, or any reliable repairer.
Page 123 of 360
123
Safety
5
PROACE VERSO
WARNI NG
Curtain airbagsDo not fix or attach anything to the roof, as this could cause head injuries when the curtain airbag is deployed.Do not remove the grab handles installed on the roof, as these help to secure the curtain airbags.
Child seats
NOTIC E
The regulations on carrying children are specific to each country. Refer to the legislation in force in your country.
For maximum safety, please observe the following recommendations:– In accordance with European regulations, all children under the age of 12 or less than 150 cm (4 ft 11”) tall must travel in approved child seats suited to their weight, on seats fitted with a seat belt or ISOFIX mountings.
– Statistically, the safest seats in your vehicle for carrying children are the rear seats.– Children weighing less than 9 kg (20 lb) must travel in the "rear facing" position, whether in the front or rear of the vehicle.
NOTIC E
It is recommended that children travel on the rear seats of the vehicle:– ‘rear facing’ up to the age of 3,– ‘forward facing’ over the age of 3.
WARNI NG
Make sure that the seat belt is correctly positioned and tightened.For child seats with a support leg, ensure that the support leg is in firm and steady contact with the floor.
Advice
WARNI NG
An incorrectly installed child seat compromises the child's safety in the event of an accident.Ensure that there is no seat belt or seat belt buckle under the child seat, as this could destabilise it.
Remember to fasten the seat belts or the harness of child seats, keeping the slack relative to the child's body to a minimum, even for short journeys.When installing a child seat using the seat belt, ensure that the seat belt is tightened correctly on the child seat and that it secures the child seat firmly on the seat of the vehicle. If the passenger seat is adjustable, move it
forwards if necessary.Remove the head restraint before installing a child seat with a backrest on a passenger seat.Ensure that the head restraint is stored or attached securely to prevent it from being thrown around the vehicle in the event of sharp braking. Refit the head restraint once the child seat has been removed.
WARNI NG
Installing a booster seatThe chest part of the seat belt must be positioned on the child's shoulder without touching the neck.Ensure that the lap part of the seat belt passes correctly over the child's thighs.Use a booster seat with backrest, equipped
with a belt guide at shoulder level.
Page 124 of 360
124
WARNI NG
Additional protectionsTo prevent accidental opening of the doors and rear windows, use the "Child lock".Take care not to open the rear windows by more than one third.To protect young children from the rays of the sun, fit side blinds on the rear windows.
As a safety precaution, do not leave:– a child alone and unattended in a vehicle,– a child or an animal in a vehicle which is exposed to the sun, with the windows closed,– the keys within reach of children inside the vehicle.
Child seat at the rear
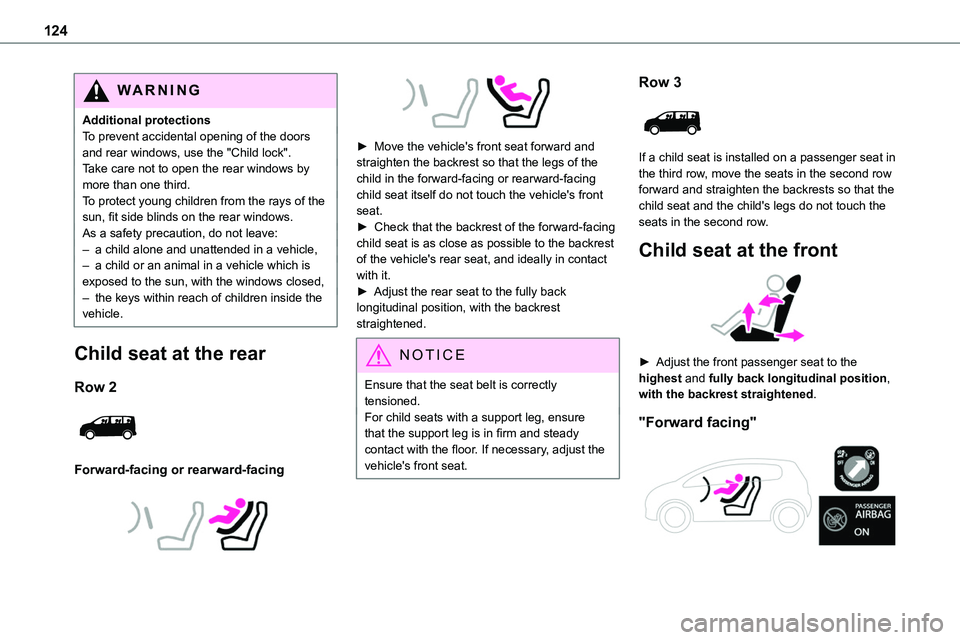
Row 2
Forward-facing or rearward-facing
► Move the vehicle's front seat forward and straighten the backrest so that the legs of the child in the forward-facing or rearward-facing child seat itself do not touch the vehicle's front seat.► Check that the backrest of the forward-facing child seat is as close as possible to the backrest of the vehicle's rear seat, and ideally in contact with it.► Adjust the rear seat to the fully back longitudinal position, with the backrest straightened.
NOTIC E
Ensure that the seat belt is correctly tensioned.For child seats with a support leg, ensure
that the support leg is in firm and steady contact with the floor. If necessary, adjust the vehicle's front seat.
Row 3
If a child seat is installed on a passenger seat in the third row, move the seats in the second row forward and straighten the backrests so that the child seat and the child's legs do not touch the seats in the second row.
Child seat at the front
► Adjust the front passenger seat to the highest and fully back longitudinal position, with the backrest straightened.
"Forward facing"
Page 125 of 360
125
Safety
5
WARNI NG
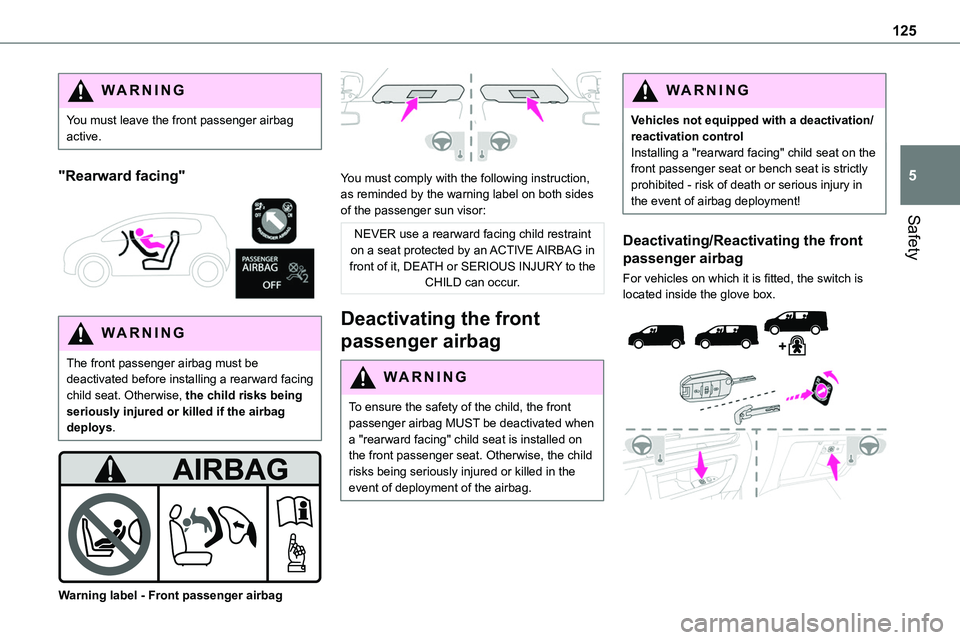
You must leave the front passenger airbag active.
"Rearward facing"
WARNI NG
The front passenger airbag must be deactivated before installing a rearward facing child seat. Otherwise, the child risks being seriously injured or killed if the airbag deploys.
Warning label - Front passenger airbag
You must comply with the following instruction, as reminded by the warning label on both sides of the passenger sun visor:
NEVER use a rearward facing child restraint on a seat protected by an ACTIVE AIRBAG in front of it, DEATH or SERIOUS INJURY to the CHILD can occur.
Deactivating the front
passenger airbag
WARNI NG
To ensure the safety of the child, the front passenger airbag MUST be deactivated when
a "rearward facing" child seat is installed on the front passenger seat. Otherwise, the child risks being seriously injured or killed in the event of deployment of the airbag.
WARNI NG
Vehicles not equipped with a deactivation/reactivation controlInstalling a "rearward facing" child seat on the front passenger seat or bench seat is strictly prohibited - risk of death or serious injury in the event of airbag deployment!
Deactivating/Reactivating the front
passenger airbag
For vehicles on which it is fitted, the switch is located inside the glove box.
Page 126 of 360
126
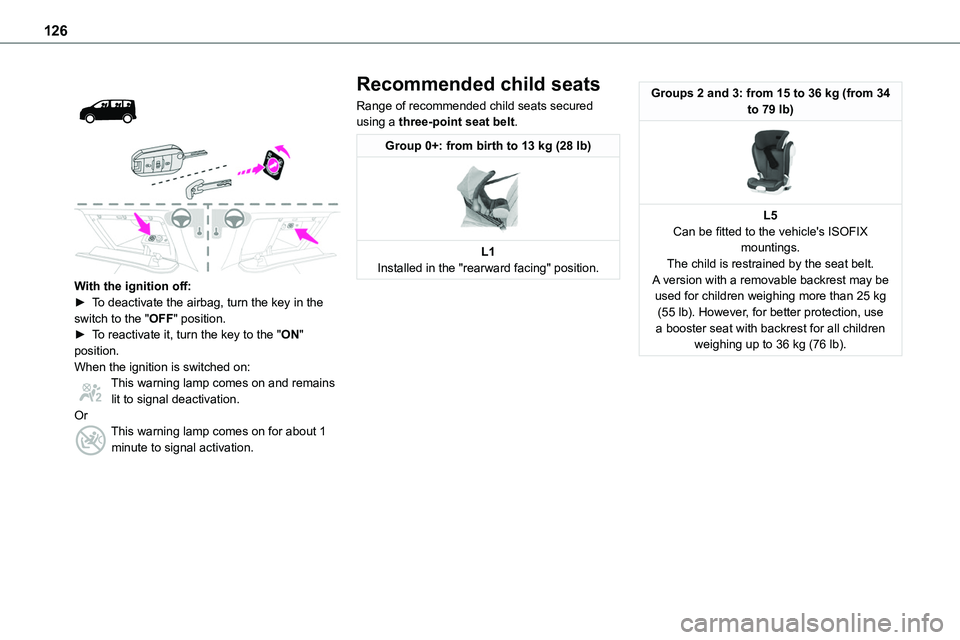
With the ignition off:► To deactivate the airbag, turn the key in the switch to the "OFF" position. ► To reactivate it, turn the key to the "ON" position.When the ignition is switched on:This warning lamp comes on and remains lit to signal deactivation.OrThis warning lamp comes on for about 1 minute to signal activation.
Recommended child seats
Range of recommended child seats secured using a three-point seat belt.
Group 0+: from birth to 13 kg (28 lb)
L1Installed in the "rearward facing" position.
Groups 2 and 3: from 15 to 36 kg (from 34 to 79 lb)
L5Can be fitted to the vehicle's ISOFIX mountings.The child is restrained by the seat belt.A version with a removable backrest may be used for children weighing more than 25 kg (55 lb). However, for better protection, use a booster seat with backrest for all children weighing up to 36 kg (76 lb).