power steering TOYOTA PROACE VERSO 2023 Manual del propietario (in Spanish)
[x] Cancel search | Manufacturer: TOYOTA, Model Year: 2023, Model line: PROACE VERSO, Model: TOYOTA PROACE VERSO 2023Pages: 360, tamaño PDF: 70.22 MB
Page 12 of 360
12
NOTIC E
For more information on the Indicators, please refer to the corresponding section.
Warning and indicator
lamps
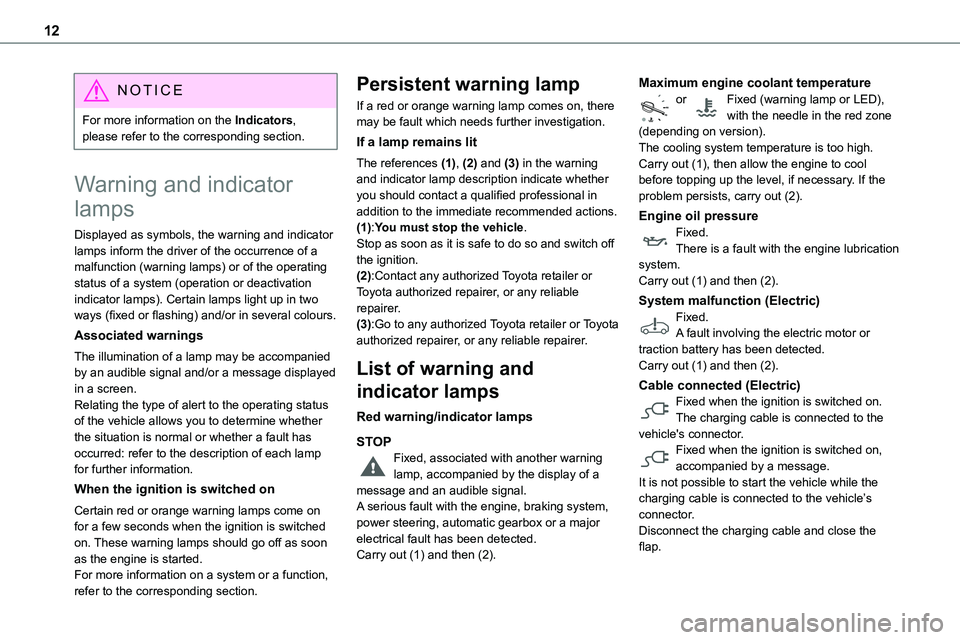
Displayed as symbols, the warning and indicator lamps inform the driver of the occurrence of a malfunction (warning lamps) or of the operating status of a system (operation or deactivation indicator lamps). Certain lamps light up in two ways (fixed or flashing) and/or in several colours.
Associated warnings
The illumination of a lamp may be accompanied by an audible signal and/or a message displayed in a screen.Relating the type of alert to the operating status of the vehicle allows you to determine whether the situation is normal or whether a fault has occurred: refer to the description of each lamp for further information.
When the ignition is switched on
Certain red or orange warning lamps come on for a few seconds when the ignition is switched on. These warning lamps should go off as soon as the engine is started.For more information on a system or a function, refer to the corresponding section.
Persistent warning lamp
If a red or orange warning lamp comes on, there may be fault which needs further investigation.
If a lamp remains lit
The references (1), (2) and (3) in the warning and indicator lamp description indicate whether you should contact a qualified professional in addition to the immediate recommended actions.
(1):You must stop the vehicle.Stop as soon as it is safe to do so and switch off the ignition.(2):Contact any authorized Toyota retailer or Toyota authorized repairer, or any reliable repairer.(3):Go to any authorized Toyota retailer or Toyota authorized repairer, or any reliable repairer.
List of warning and
indicator lamps
Red warning/indicator lamps
STOPFixed, associated with another warning lamp, accompanied by the display of a message and an audible signal.A serious fault with the engine, braking system, power steering, automatic gearbox or a major electrical fault has been detected.Carry out (1) and then (2).
Maximum engine coolant temperatureor Fixed (warning lamp or LED), with the needle in the red zone (depending on version).The cooling system temperature is too high.Carry out (1), then allow the engine to cool before topping up the level, if necessary. If the problem persists, carry out (2).
Engine oil pressure
Fixed.There is a fault with the engine lubrication system.Carry out (1) and then (2).
System malfunction (Electric)Fixed.A fault involving the electric motor or traction battery has been detected.Carry out (1) and then (2).
Cable connected (Electric)Fixed when the ignition is switched on.The charging cable is connected to the vehicle's connector.Fixed when the ignition is switched on, accompanied by a message.It is not possible to start the vehicle while the charging cable is connected to the vehicle’s connector.Disconnect the charging cable and close the flap.
Page 17 of 360
17
Instruments
1
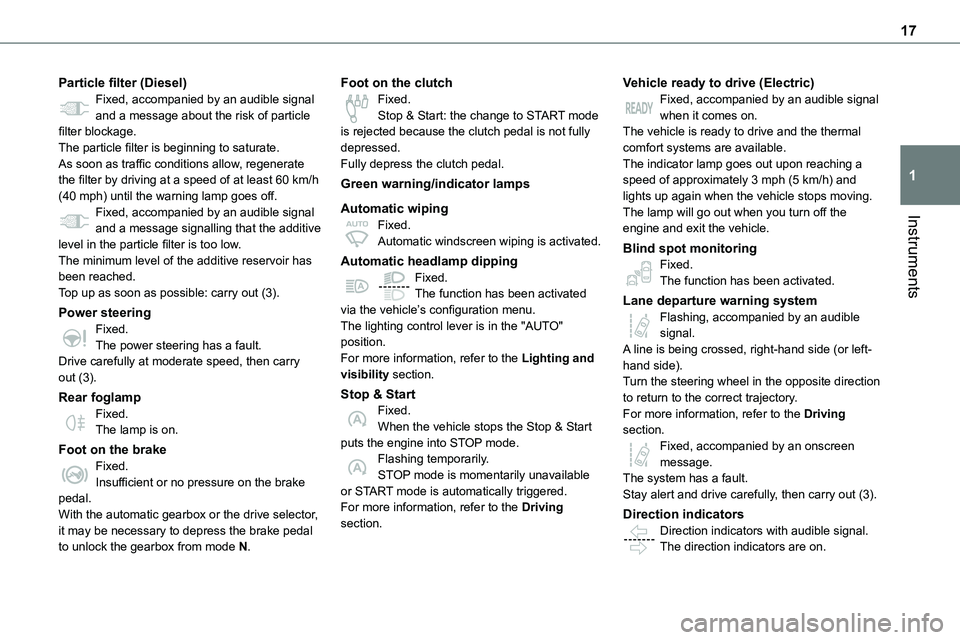
Particle filter (Diesel)Fixed, accompanied by an audible signal and a message about the risk of particle filter blockage.The particle filter is beginning to saturate.As soon as traffic conditions allow, regenerate the filter by driving at a speed of at least 60 km/h (40 mph) until the warning lamp goes off.Fixed, accompanied by an audible signal
and a message signalling that the additive level in the particle filter is too low.The minimum level of the additive reservoir has been reached.Top up as soon as possible: carry out (3).
Power steeringFixed.The power steering has a fault.Drive carefully at moderate speed, then carry out (3).
Rear foglampFixed.The lamp is on.
Foot on the brakeFixed.Insufficient or no pressure on the brake pedal.With the automatic gearbox or the drive selector, it may be necessary to depress the brake pedal to unlock the gearbox from mode N.
Foot on the clutchFixed.Stop & Start: the change to START mode is rejected because the clutch pedal is not fully depressed.Fully depress the clutch pedal.
Green warning/indicator lamps
Automatic wiping
Fixed.Automatic windscreen wiping is activated.
Automatic headlamp dippingFixed.The function has been activated via the vehicle’s configuration menu.The lighting control lever is in the "AUTO" position.For more information, refer to the Lighting and visibility section.
Stop & StartFixed.When the vehicle stops the Stop & Start puts the engine into STOP mode.Flashing temporarily.STOP mode is momentarily unavailable or START mode is automatically triggered.For more information, refer to the Driving section.
Vehicle ready to drive (Electric)Fixed, accompanied by an audible signal when it comes on.The vehicle is ready to drive and the thermal comfort systems are available.The indicator lamp goes out upon reaching a speed of approximately 3 mph (5 km/h) and lights up again when the vehicle stops moving.The lamp will go out when you turn off the
engine and exit the vehicle.
Blind spot monitoringFixed.The function has been activated.
Lane departure warning systemFlashing, accompanied by an audible signal.A line is being crossed, right-hand side (or left-hand side).Turn the steering wheel in the opposite direction to return to the correct trajectory.For more information, refer to the Driving section.Fixed, accompanied by an onscreen message.The system has a fault.Stay alert and drive carefully, then carry out (3).
Direction indicatorsDirection indicators with audible signal.The direction indicators are on.
Page 77 of 360
77
Ease of use and comfort
3
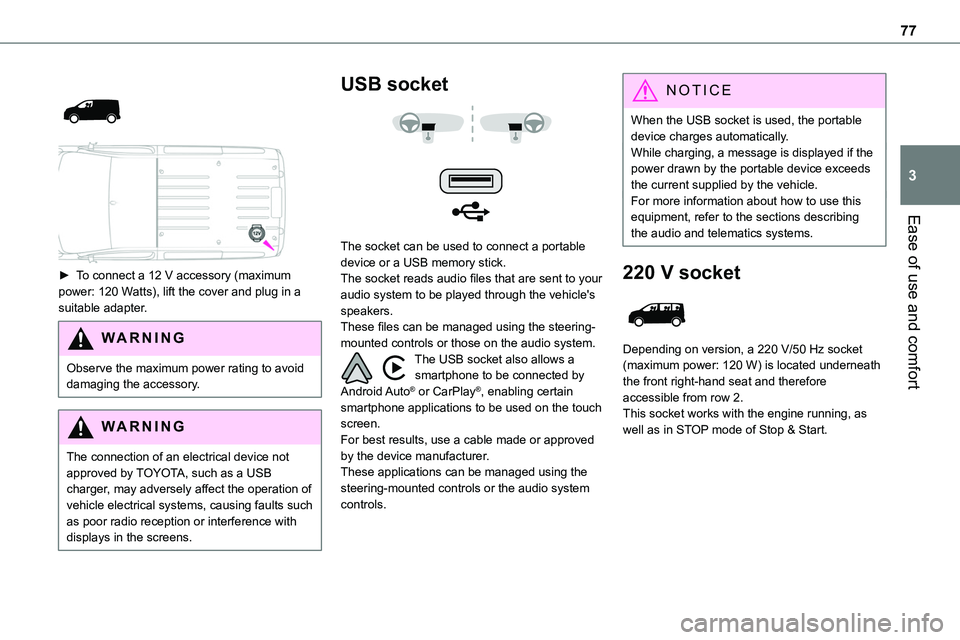
► To connect a 12 V accessory (maximum power: 120 Watts), lift the cover and plug in a suitable adapter.
WARNI NG
Observe the maximum power rating to avoid damaging the accessory.
WARNI NG
The connection of an electrical device not approved by TOYOTA, such as a USB charger, may adversely affect the operation of vehicle electrical systems, causing faults such as poor radio reception or interference with
displays in the screens.
USB socket
The socket can be used to connect a portable device or a USB memory stick.The socket reads audio files that are sent to your audio system to be played through the vehicle's speakers.These files can be managed using the steering-mounted controls or those on the audio system.The USB socket also allows a smartphone to be connected by Android Auto® or CarPlay®, enabling certain smartphone applications to be used on the touch screen.For best results, use a cable made or approved by the device manufacturer.These applications can be managed using the steering-mounted controls or the audio system controls.
NOTIC E
When the USB socket is used, the portable device charges automatically.While charging, a message is displayed if the power drawn by the portable device exceeds the current supplied by the vehicle.For more information about how to use this equipment, refer to the sections describing
the audio and telematics systems.
220 V socket
Depending on version, a 220 V/50 Hz socket (maximum power: 120 W) is located underneath the front right-hand seat and therefore accessible from row 2.This socket works with the engine running, as well as in STOP mode of Stop & Start.
Page 153 of 360
153
Driving
6
Key left in the ignition
NOTIC E
When opening the driver's door, an alert message is displayed, accompanied by an audible signal, to remind you that the key is still in the ignition switch at position 1 (Stop).If the key has been left in the ignition switch at position 2 (Ignition on), the ignition will be switched off automatically after one hour.To switch the ignition back on, turn the key to position 1 (Stop), then back to position 2 (Ignition on).
With Smart Entry & Start
► Immobilise the vehicle.► With the remote control in the recognition zone, press the "START/STOP" button.The engine stops and the steering column locks.
NOTIC E
If the vehicle is not immobilised, the engine will not stop.
WARNI NG
To avoid any risk of jamming the pedals:– only use mats which are suited to the fixings already present in the vehicle; these fixings must be used,– never place one mat on top of another.The use of mats not approved by TOYOTA may interfere with access to the pedals and
hinder the operation of the cruise control / speed limiter.The mats approved by TOYOTA have two fixings located below the seat.
Starting/Switching off the
electric motor
Starting
The drive selector must be in mode P.► If using a conventional or remote control key, depress the brake pedal and turn the key until it reaches position 3.► If using Smart Entry & Start, depress the brake pedal and briefly press the "START/STOP" button.► Keep your foot on the brake pedal until the READY indicator lamp comes on and an audible signal is emitted, indicating that the vehicle is ready to drive.
► With your foot on the brake, select mode D or R.► Release the brake pedal, then accelerate.On starting, the instrument panel lights up and the power indicator needle performs one sweep then moves to the "neutral" position. The steering column automatically unlocks (you may hear a sound and feel the steering wheel move).
Switching off
► If using a conventional or remote control key, turn the key fully to position 1 (Stop).► If using Smart Entry & Start, press the "START/STOP" button.Before exiting the vehicle, check that:– The drive selector is in mode P.– The READY indicator lamp is off.
NOTIC E
The drive selector moves automatically to mode P when the motor is switched off or when the driver's door is opened.
NOTIC E
If the driver's door is opened while the required conditions for stopping are not satisfied, an audible signal is emitted, accompanied by the display of a warning message.
Page 160 of 360
160
NOTIC E
With an automatic gearbox, the system is only active in manual operation.
The information appears in the instrument panel, in the form of an ascending or descending arrow and the recommended gear.
NOTIC E
The system adapts its gear shift recommendation according to the driving conditions (slope, load, etc.) and the driver’s requirements (request for power, acceleration, braking, etc.).The system never suggests:– engaging first gear.– engaging reverse.
Automatic gearbox
Automatic 6 or 8-speed gearbox, with electronic management of gear changes. It also offers a manual mode with sequential gear changes via control paddles located behind the steering wheel.
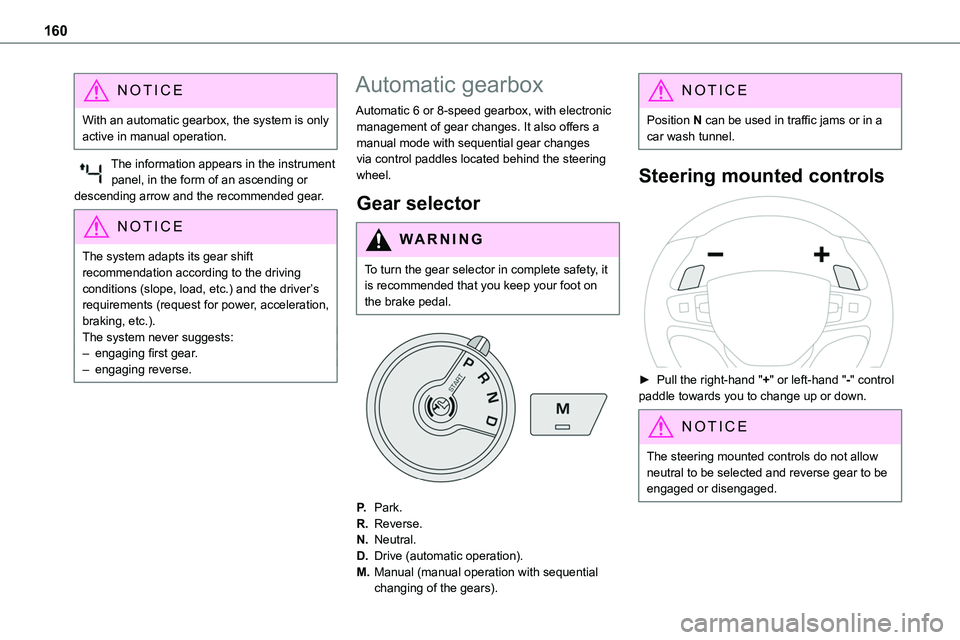
Gear selector
WARNI NG
To turn the gear selector in complete safety, it is recommended that you keep your foot on the brake pedal.
P.Park.
R.Reverse.
N.Neutral.
D.Drive (automatic operation).
M.Manual (manual operation with sequential
changing of the gears).
NOTIC E
Position N can be used in traffic jams or in a car wash tunnel.
Steering mounted controls
► Pull the right-hand "+" or left-hand "-" control paddle towards you to change up or down.
NOTIC E
The steering mounted controls do not allow neutral to be selected and reverse gear to be engaged or disengaged.
Page 214 of 360
214
Opening
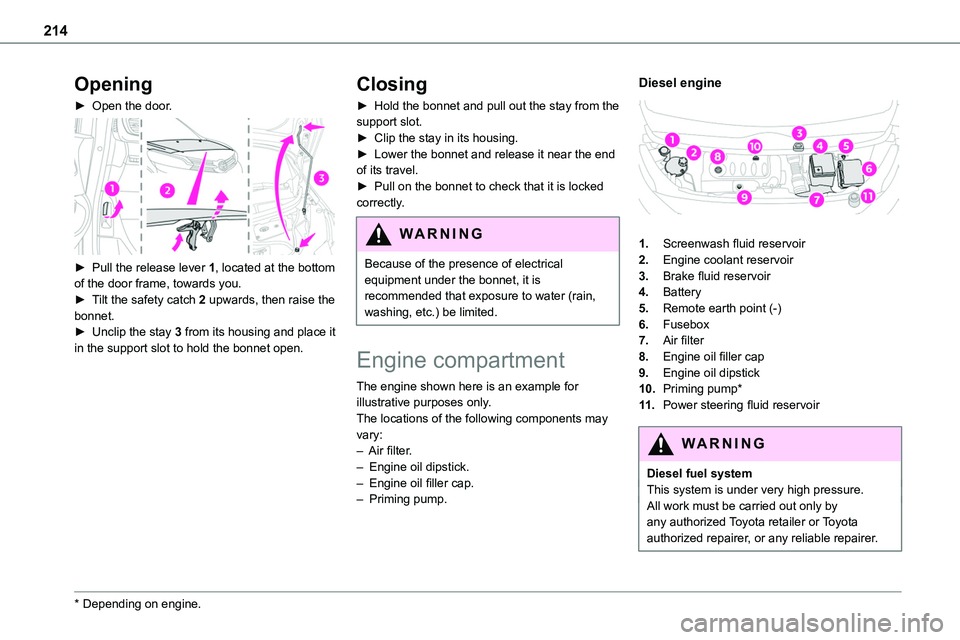
► Open the door.
► Pull the release lever 1, located at the bottom of the door frame, towards you.► Tilt the safety catch 2 upwards, then raise the bonnet.► Unclip the stay 3 from its housing and place it in the support slot to hold the bonnet open.
* Depending on engine.
Closing
► Hold the bonnet and pull out the stay from the support slot.► Clip the stay in its housing.► Lower the bonnet and release it near the end of its travel.► Pull on the bonnet to check that it is locked correctly.
WARNI NG
Because of the presence of electrical equipment under the bonnet, it is recommended that exposure to water (rain, washing, etc.) be limited.
Engine compartment
The engine shown here is an example for illustrative purposes only.The locations of the following components may vary:– Air filter.– Engine oil dipstick.– Engine oil filler cap.– Priming pump.
Diesel engine
1.Screenwash fluid reservoir
2.Engine coolant reservoir
3.Brake fluid reservoir
4.Battery
5.Remote earth point (-)
6.Fusebox
7.Air filter
8.Engine oil filler cap
9.Engine oil dipstick
10.Priming pump*
11 .Power steering fluid reservoir
WARNI NG
Diesel fuel systemThis system is under very high pressure.All work must be carried out only by any authorized Toyota retailer or Toyota authorized repairer, or any reliable repairer.
Page 215 of 360
215
Practical information
7
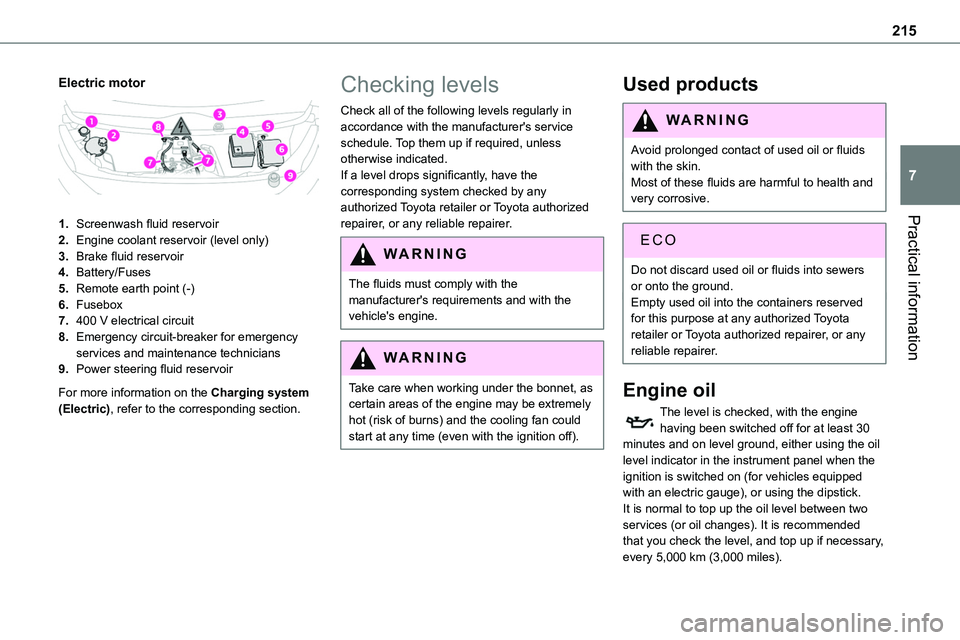
Electric motor
1.Screenwash fluid reservoir
2.Engine coolant reservoir (level only)
3.Brake fluid reservoir
4.Battery/Fuses
5.Remote earth point (-)
6.Fusebox
7.400 V electrical circuit
8.Emergency circuit-breaker for emergency services and maintenance technicians
9.Power steering fluid reservoir
For more information on the Charging system (Electric), refer to the corresponding section.
Checking levels
Check all of the following levels regularly in accordance with the manufacturer's service schedule. Top them up if required, unless otherwise indicated.If a level drops significantly, have the corresponding system checked by any authorized Toyota retailer or Toyota authorized
repairer, or any reliable repairer.
WARNI NG
The fluids must comply with the manufacturer's requirements and with the vehicle's engine.
WARNI NG
Take care when working under the bonnet, as certain areas of the engine may be extremely hot (risk of burns) and the cooling fan could start at any time (even with the ignition off).
Used products
WARNI NG
Avoid prolonged contact of used oil or fluids with the skin.Most of these fluids are harmful to health and very corrosive.
ECO
Do not discard used oil or fluids into sewers or onto the ground.Empty used oil into the containers reserved for this purpose at any authorized Toyota retailer or Toyota authorized repairer, or any reliable repairer.
Engine oil
The level is checked, with the engine having been switched off for at least 30 minutes and on level ground, either using the oil level indicator in the instrument panel when the ignition is switched on (for vehicles equipped with an electric gauge), or using the dipstick.It is normal to top up the oil level between two services (or oil changes). It is recommended that you check the level, and top up if necessary, every 5,000 km (3,000 miles).
Page 216 of 360
216
WARNI NG
In order to maintain the reliability of the engine and emissions control system, never use additives in the engine oil.
Checking using the dipstick
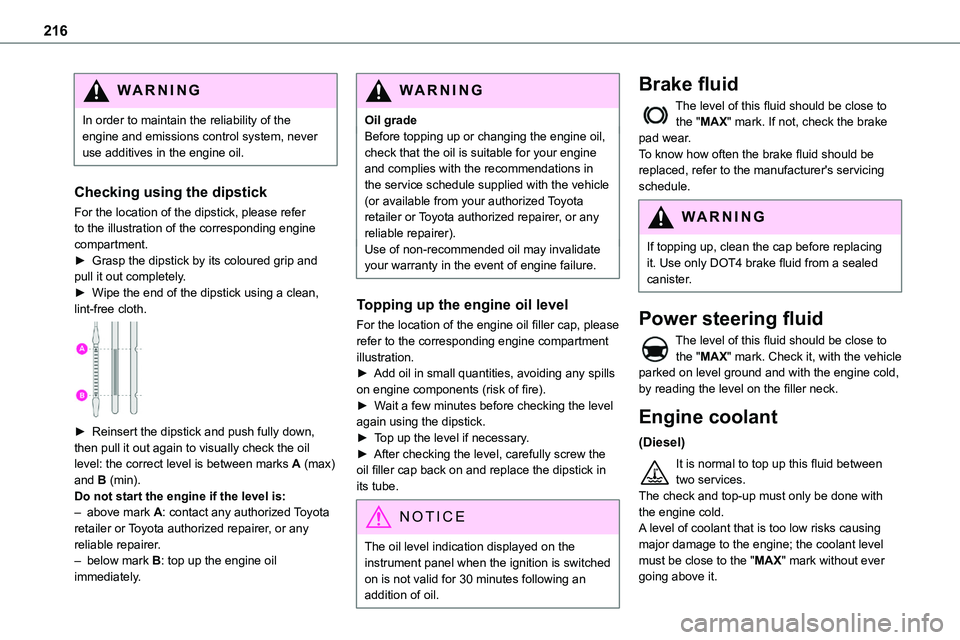
For the location of the dipstick, please refer
to the illustration of the corresponding engine compartment.► Grasp the dipstick by its coloured grip and pull it out completely.► Wipe the end of the dipstick using a clean, lint-free cloth.
► Reinsert the dipstick and push fully down, then pull it out again to visually check the oil level: the correct level is between marks A (max) and B (min). Do not start the engine if the level is:– above mark A: contact any authorized Toyota retailer or Toyota authorized repairer, or any reliable repairer.– below mark B: top up the engine oil immediately.
WARNI NG
Oil gradeBefore topping up or changing the engine oil, check that the oil is suitable for your engine and complies with the recommendations in the service schedule supplied with the vehicle (or available from your authorized Toyota retailer or Toyota authorized repairer, or any
reliable repairer).Use of non-recommended oil may invalidate your warranty in the event of engine failure.
Topping up the engine oil level
For the location of the engine oil filler cap, please refer to the corresponding engine compartment illustration.► Add oil in small quantities, avoiding any spills on engine components (risk of fire).► Wait a few minutes before checking the level again using the dipstick.► Top up the level if necessary.► After checking the level, carefully screw the oil filler cap back on and replace the dipstick in its tube.
NOTIC E
The oil level indication displayed on the instrument panel when the ignition is switched on is not valid for 30 minutes following an addition of oil.
Brake fluid
The level of this fluid should be close to the "MAX" mark. If not, check the brake pad wear.To know how often the brake fluid should be replaced, refer to the manufacturer's servicing schedule.
WARNI NG
If topping up, clean the cap before replacing it. Use only DOT4 brake fluid from a sealed canister.
Power steering fluid
The level of this fluid should be close to the "MAX" mark. Check it, with the vehicle parked on level ground and with the engine cold, by reading the level on the filler neck.
Engine coolant
(Diesel)
It is normal to top up this fluid between two services.The check and top-up must only be done with the engine cold.A level of coolant that is too low risks causing
major damage to the engine; the coolant level must be close to the "MAX" mark without ever going above it.
Page 323 of 360
323
Alphabetical index
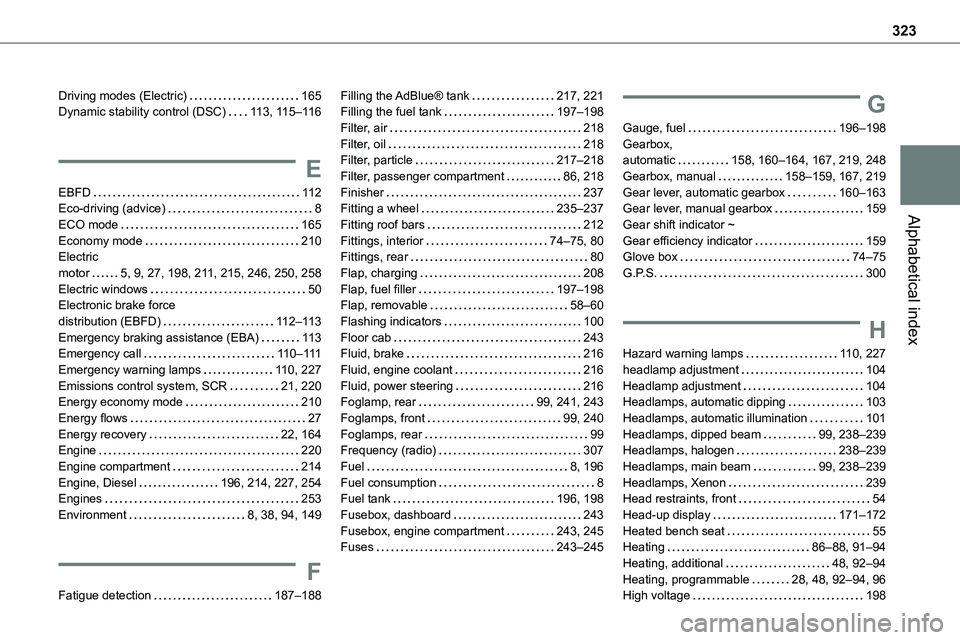
Driving modes (Electric) 165Dynamic stability control (DSC) 11 3, 11 5–11 6
E
EBFD 11 2Eco-driving (advice) 8
ECO mode 165Economy mode 210Electric motor 5, 9, 27, 198, 2 11, 215, 246, 250, 258Electric windows 50Electronic brake force distribution (EBFD) 11 2–11 3Emergency braking assistance (EBA) 11 3Emergency call 11 0–111Emergency warning lamps 11 0, 227Emissions control system, SCR 21, 220Energy economy mode 210Energy flows 27Energy recovery 22, 164Engine 220Engine compartment 214Engine, Diesel 196, 214, 227, 254Engines 253Environment 8, 38, 94, 149
F
Fatigue detection 187–188
Filling the AdBlue® tank 217, 221Filling the fuel tank 197–198Filter, air 218Filter, oil 218Filter, particle 217–218Filter, passenger compartment 86, 218Finisher 237Fitting a wheel 235–237
Fitting roof bars 212Fittings, interior 74–75, 80Fittings, rear 80Flap, charging 208Flap, fuel filler 197–198Flap, removable 58–60Flashing indicators 100Floor cab 243Fluid, brake 216Fluid, engine coolant 216Fluid, power steering 216Foglamp, rear 99, 241, 243Foglamps, front 99, 240Foglamps, rear 99Frequency (radio) 307Fuel 8, 196Fuel consumption 8Fuel tank 196, 198Fusebox, dashboard 243Fusebox, engine compartment 243, 245Fuses 243–245
G
Gauge, fuel 196–198Gearbox, automatic 158, 160–164, 167, 219, 248Gearbox, manual 158–159, 167, 219Gear lever, automatic gearbox 160–163Gear lever, manual gearbox 159
Gear shift indicator ~ Gear efficiency indicator 159Glove box 74–75G.P.S. 300
H
Hazard warning lamps 11 0, 227headlamp adjustment 104Headlamp adjustment 104Headlamps, automatic dipping 103Headlamps, automatic illumination 101Headlamps, dipped beam 99, 238–239Headlamps, halogen 238–239Headlamps, main beam 99, 238–239Headlamps, Xenon 239Head restraints, front 54Head-up display 171–172Heated bench seat 55Heating 86–88, 91–94Heating, additional 48, 92–94Heating, programmable 28, 48, 92–94, 96High voltage 198
Page 324 of 360
324
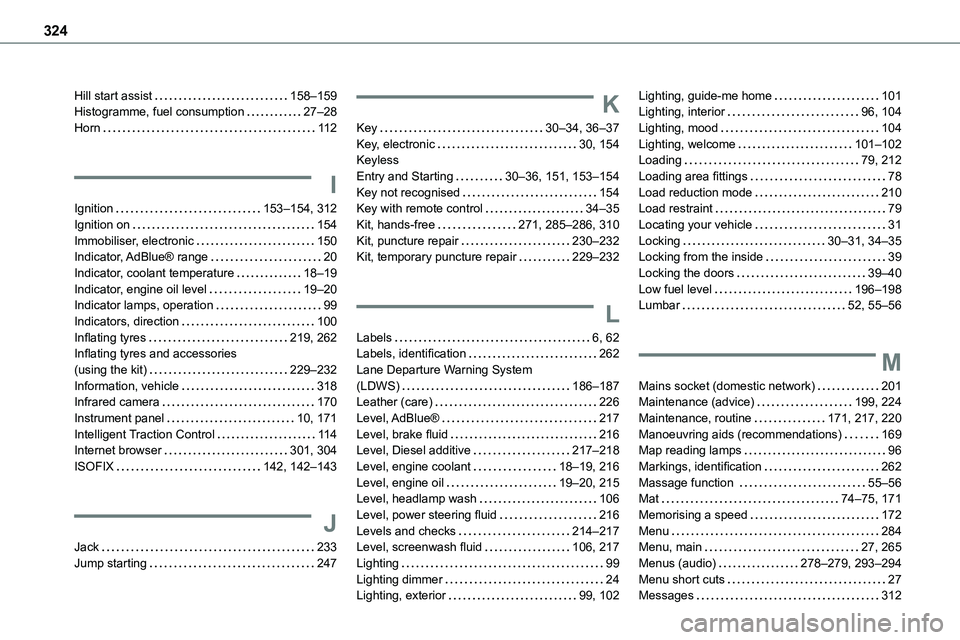
Hill start assist 158–159Histogramme, fuel consumption 27–28Horn 11 2
I
Ignition 153–154, 312
Ignition on 154Immobiliser, electronic 150Indicator, AdBlue® range 20Indicator, coolant temperature 18–19Indicator, engine oil level 19–20Indicator lamps, operation 99Indicators, direction 100Inflating tyres 219, 262Inflating tyres and accessories (using the kit) 229–232Information, vehicle 318Infrared camera 170Instrument panel 10, 171Intelligent Traction Control 11 4Internet browser 301, 304ISOFIX 142, 142–143
J
Jack 233Jump starting 247
K
Key 30–34, 36–37Key, electronic 30, 154Keyless Entry and Starting 30–36, 151, 153–154Key not recognised 154Key with remote control 34–35
Kit, hands-free 271, 285–286, 310Kit, puncture repair 230–232Kit, temporary puncture repair 229–232
L
Labels 6, 62Labels, identification 262Lane Departure Warning System (LDWS) 186–187Leather (care) 226Level, AdBlue® 217Level, brake fluid 216Level, Diesel additive 217–218Level, engine coolant 18–19, 216Level, engine oil 19–20, 215Level, headlamp wash 106Level, power steering fluid 216Levels and checks 214–217Level, screenwash fluid 106, 217Lighting 99Lighting dimmer 24Lighting, exterior 99, 102
Lighting, guide-me home 101Lighting, interior 96, 104Lighting, mood 104Lighting, welcome 101–102Loading 79, 212Loading area fittings 78Load reduction mode 210Load restraint 79
Locating your vehicle 31Locking 30–31, 34–35Locking from the inside 39Locking the doors 39–40Low fuel level 196–198Lumbar 52, 55–56
M
Mains socket (domestic network) 201Maintenance (advice) 199, 224Maintenance, routine 171, 217, 220Manoeuvring aids (recommendations) 169Map reading lamps 96Markings, identification 262Massage function 55–56Mat 74–75, 171Memorising a speed 172Menu 284Menu, main 27, 265Menus (audio) 278–279, 293–294Menu short cuts 27Messages 312