recommended TOYOTA PROACE VERSO 2023 Owners Manual
[x] Cancel search | Manufacturer: TOYOTA, Model Year: 2023, Model line: PROACE VERSO, Model: TOYOTA PROACE VERSO 2023Pages: 360, PDF Size: 70.22 MB
Page 12 of 360
12
NOTIC E
For more information on the Indicators, please refer to the corresponding section.
Warning and indicator
lamps
Displayed as symbols, the warning and indicator lamps inform the driver of the occurrence of a malfunction (warning lamps) or of the operating status of a system (operation or deactivation indicator lamps). Certain lamps light up in two ways (fixed or flashing) and/or in several colours.
Associated warnings
The illumination of a lamp may be accompanied by an audible signal and/or a message displayed in a screen.Relating the type of alert to the operating status of the vehicle allows you to determine whether the situation is normal or whether a fault has occurred: refer to the description of each lamp for further information.
When the ignition is switched on
Certain red or orange warning lamps come on for a few seconds when the ignition is switched on. These warning lamps should go off as soon as the engine is started.For more information on a system or a function, refer to the corresponding section.
Persistent warning lamp
If a red or orange warning lamp comes on, there may be fault which needs further investigation.
If a lamp remains lit
The references (1), (2) and (3) in the warning and indicator lamp description indicate whether you should contact a qualified professional in addition to the immediate recommended actions.
(1):You must stop the vehicle.Stop as soon as it is safe to do so and switch off the ignition.(2):Contact any authorized Toyota retailer or Toyota authorized repairer, or any reliable repairer.(3):Go to any authorized Toyota retailer or Toyota authorized repairer, or any reliable repairer.
List of warning and
indicator lamps
Red warning/indicator lamps
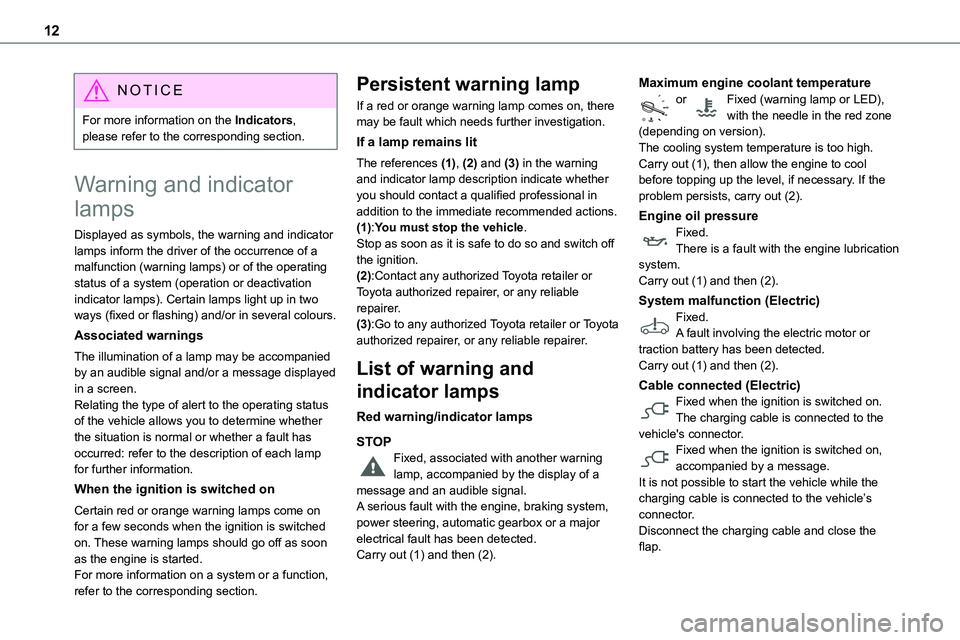
STOPFixed, associated with another warning lamp, accompanied by the display of a message and an audible signal.A serious fault with the engine, braking system, power steering, automatic gearbox or a major electrical fault has been detected.Carry out (1) and then (2).
Maximum engine coolant temperatureor Fixed (warning lamp or LED), with the needle in the red zone (depending on version).The cooling system temperature is too high.Carry out (1), then allow the engine to cool before topping up the level, if necessary. If the problem persists, carry out (2).
Engine oil pressure
Fixed.There is a fault with the engine lubrication system.Carry out (1) and then (2).
System malfunction (Electric)Fixed.A fault involving the electric motor or traction battery has been detected.Carry out (1) and then (2).
Cable connected (Electric)Fixed when the ignition is switched on.The charging cable is connected to the vehicle's connector.Fixed when the ignition is switched on, accompanied by a message.It is not possible to start the vehicle while the charging cable is connected to the vehicle’s connector.Disconnect the charging cable and close the flap.
Page 55 of 360
55
Ease of use and comfort
3
Armrest
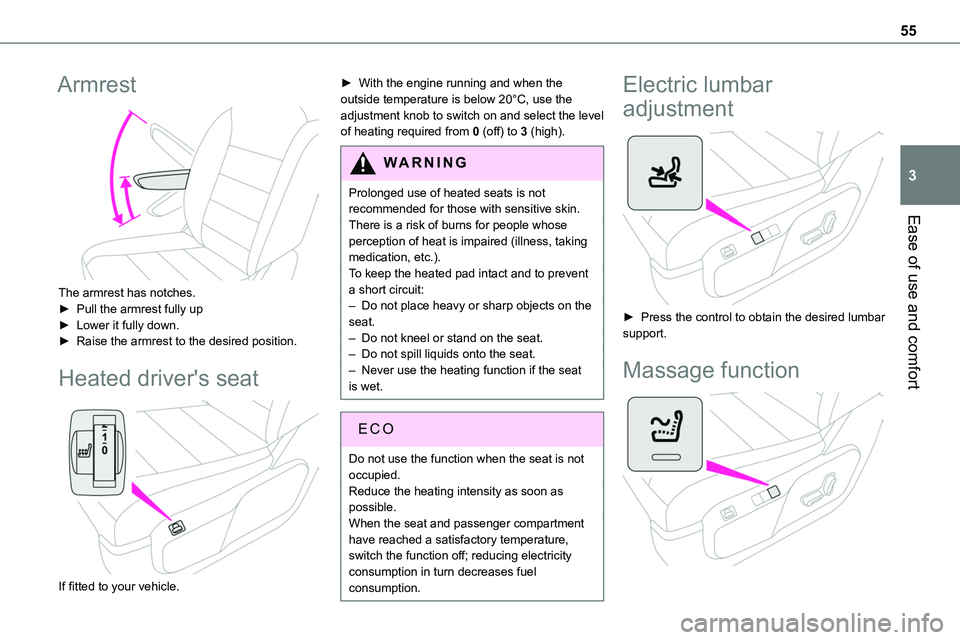
The armrest has notches.► Pull the armrest fully up► Lower it fully down.► Raise the armrest to the desired position.
Heated driver's seat
If fitted to your vehicle.
► With the engine running and when the outside temperature is below 20°C, use the adjustment knob to switch on and select the level of heating required from 0 (off) to 3 (high).
WARNI NG
Prolonged use of heated seats is not recommended for those with sensitive skin.
There is a risk of burns for people whose perception of heat is impaired (illness, taking medication, etc.).To keep the heated pad intact and to prevent a short circuit:– Do not place heavy or sharp objects on the seat.– Do not kneel or stand on the seat.– Do not spill liquids onto the seat.– Never use the heating function if the seat is wet.
EC O
Do not use the function when the seat is not occupied.Reduce the heating intensity as soon as possible.When the seat and passenger compartment have reached a satisfactory temperature, switch the function off; reducing electricity consumption in turn decreases fuel consumption.
Electric lumbar
adjustment
► Press the control to obtain the desired lumbar support.
Massage function
Page 74 of 360
74
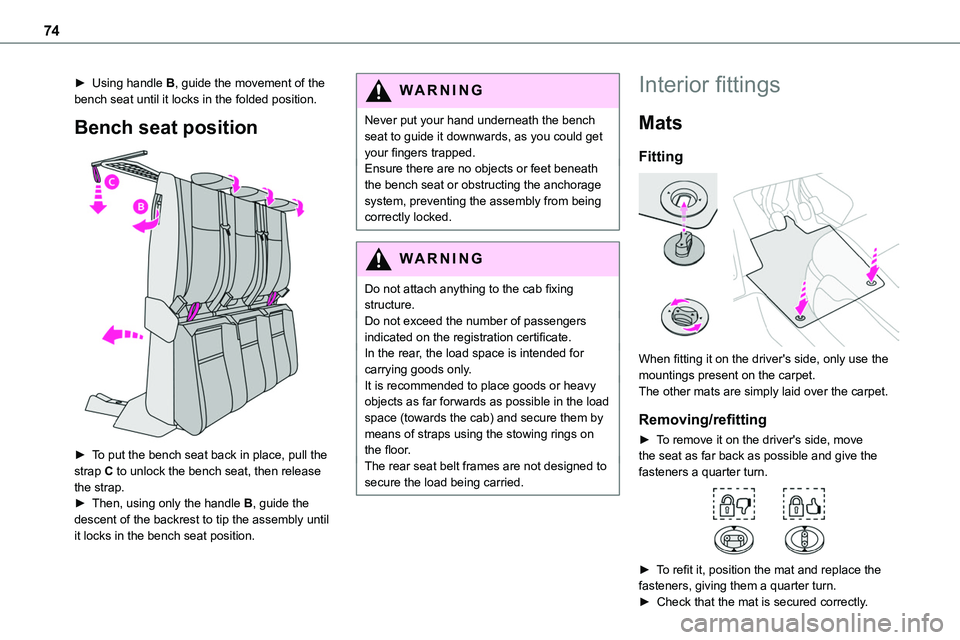
► Using handle B, guide the movement of the bench seat until it locks in the folded position.
Bench seat position
► To put the bench seat back in place, pull the strap C to unlock the bench seat, then release the strap.► Then, using only the handle B, guide the descent of the backrest to tip the assembly until
it locks in the bench seat position.
WARNI NG
Never put your hand underneath the bench seat to guide it downwards, as you could get your fingers trapped.Ensure there are no objects or feet beneath the bench seat or obstructing the anchorage system, preventing the assembly from being correctly locked.
WARNI NG
Do not attach anything to the cab fixing structure.Do not exceed the number of passengers indicated on the registration certificate.In the rear, the load space is intended for carrying goods only.It is recommended to place goods or heavy objects as far forwards as possible in the load space (towards the cab) and secure them by means of straps using the stowing rings on the floor.The rear seat belt frames are not designed to secure the load being carried.
Interior fittings
Mats
Fitting
When fitting it on the driver's side, only use the mountings present on the carpet.The other mats are simply laid over the carpet.
Removing/refitting
► To remove it on the driver's side, move the seat as far back as possible and give the fasteners a quarter turn.
► To refit it, position the mat and replace the
fasteners, giving them a quarter turn.► Check that the mat is secured correctly.
Page 79 of 360
79
Ease of use and comfort
3
Use the stowing rings on the rear floor to secure loads.As a safety precaution in case of sharp braking, we recommend placing heavy objects as far forwards as possible (i.e. near the cab).We recommend using the stowing rings on the floor to firmly secure the load.
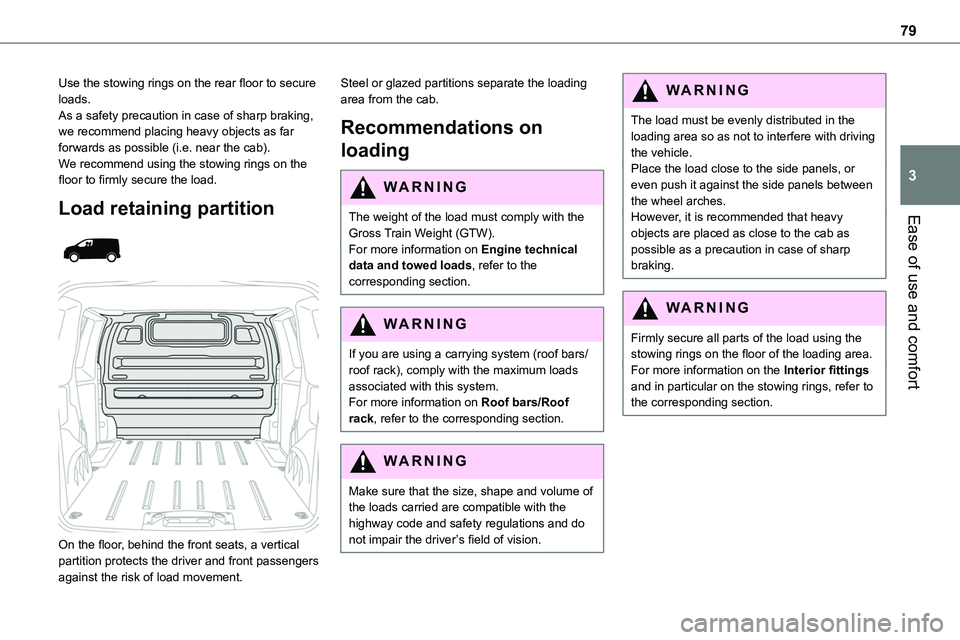
Load retaining partition
On the floor, behind the front seats, a vertical partition protects the driver and front passengers against the risk of load movement.
Steel or glazed partitions separate the loading area from the cab.
Recommendations on
loading
WARNI NG
The weight of the load must comply with the
Gross Train Weight (GTW).For more information on Engine technical data and towed loads, refer to the corresponding section.
WARNI NG
If you are using a carrying system (roof bars/roof rack), comply with the maximum loads associated with this system.For more information on Roof bars/Roof rack, refer to the corresponding section.
WARNI NG
Make sure that the size, shape and volume of the loads carried are compatible with the highway code and safety regulations and do not impair the driver’s field of vision.
WARNI NG
The load must be evenly distributed in the loading area so as not to interfere with driving the vehicle.Place the load close to the side panels, or even push it against the side panels between the wheel arches.However, it is recommended that heavy
objects are placed as close to the cab as possible as a precaution in case of sharp braking.
WARNI NG
Firmly secure all parts of the load using the stowing rings on the floor of the loading area.For more information on the Interior fittings and in particular on the stowing rings, refer to the corresponding section.
Page 95 of 360
95
Ease of use and comfort
3
WARNI NG
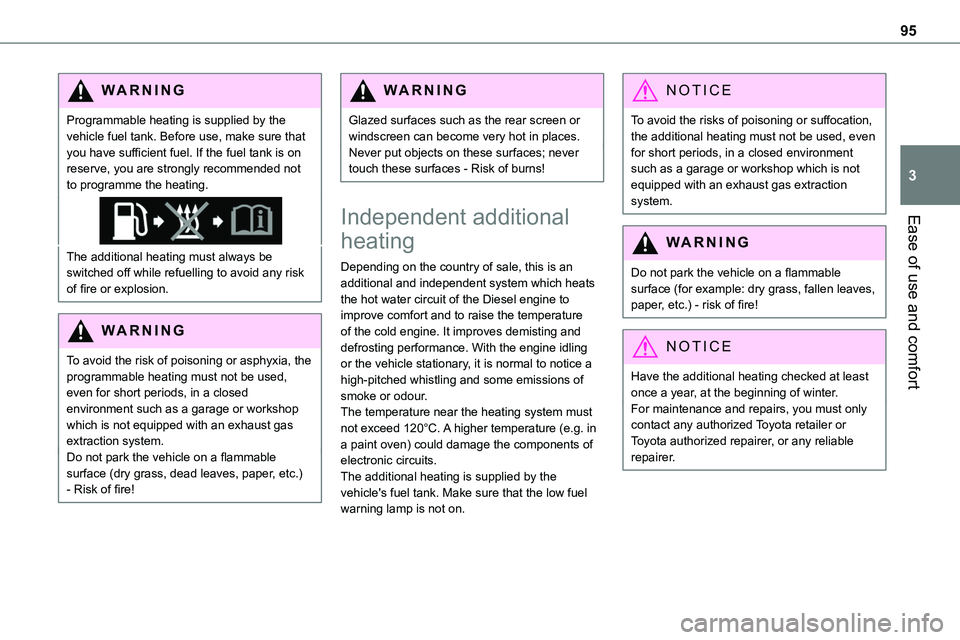
Programmable heating is supplied by the vehicle fuel tank. Before use, make sure that you have sufficient fuel. If the fuel tank is on reserve, you are strongly recommended not to programme the heating.
The additional heating must always be switched off while refuelling to avoid any risk of fire or explosion.
WARNI NG
To avoid the risk of poisoning or asphyxia, the programmable heating must not be used, even for short periods, in a closed environment such as a garage or workshop which is not equipped with an exhaust gas extraction system.Do not park the vehicle on a flammable surface (dry grass, dead leaves, paper, etc.) - Risk of fire!
WARNI NG
Glazed surfaces such as the rear screen or windscreen can become very hot in places.Never put objects on these surfaces; never touch these surfaces - Risk of burns!
Independent additional
heating
Depending on the country of sale, this is an additional and independent system which heats the hot water circuit of the Diesel engine to improve comfort and to raise the temperature of the cold engine. It improves demisting and defrosting performance. With the engine idling or the vehicle stationary, it is normal to notice a high-pitched whistling and some emissions of smoke or odour.The temperature near the heating system must not exceed 120°C. A higher temperature (e.g. in a paint oven) could damage the components of electronic circuits.The additional heating is supplied by the vehicle's fuel tank. Make sure that the low fuel warning lamp is not on.
NOTIC E
To avoid the risks of poisoning or suffocation, the additional heating must not be used, even for short periods, in a closed environment such as a garage or workshop which is not equipped with an exhaust gas extraction system.
WARNI NG
Do not park the vehicle on a flammable surface (for example: dry grass, fallen leaves, paper, etc.) - risk of fire!
NOTIC E
Have the additional heating checked at least once a year, at the beginning of winter.For maintenance and repairs, you must only contact any authorized Toyota retailer or Toyota authorized repairer, or any reliable repairer.
Page 113 of 360
11 3
Safety
5
NOTIC E
The normal operation of the ABS may result in slight vibrations in the brake pedal.
This warning lamp comes on fixed in the event of an ABS malfunction.The vehicle retains conventional braking. Drive carefully at a moderate speed.
Have it checked by any authorized Toyota retailer or Toyota authorized repairer, or any reliable repairer.This warning lamp, when lit together with the STOP and ABS warning lamps, accompanied by a message and an audible signal, indicates an EBFD malfunction.You must stop the vehicle.Stop as soon as it is safe to do so and switch off the ignition.Contact any authorized Toyota retailer or Toyota authorized repairer, or any reliable repairer.
WARNI NG
When changing wheels (tyres and rims), ensure that these are approved for your vehicle.
WARNI NG
After an impactHave it checked by any authorized Toyota retailer or Toyota authorized repairer, or any reliable repairer.
Emergency braking
assistance (EBA)
In an emergency, this system enables you to reach the optimum braking pressure more quickly and therefore reduce the stopping distance.It is triggered in relation to the speed at which the brake pedal is pressed. This is felt by a reduction in the resistance of the pedal and an increase in braking efficiency.
Anti-slip regulation (ASR)
/ Dynamic stability control
(DSC)
Anti-slip regulation (or traction control) optimises traction by using engine braking and by applying the brakes on the driving wheels to avoid one or more wheels spinning. It also enhances the vehicle's directional stability.If there is a difference between the vehicle’s trajectory and the path desired by the driver, the dynamic stability control system automatically uses engine braking and the brakes on one or
more wheels to return the vehicle to the desired path, within the limits of the laws of physics.These systems are activated automatically every time the vehicle is started.These systems are activated in the event of a problem with grip or trajectory (confirmed by this warning lamp flashing on the instrument panel).
Deactivation/Reactivation
In exceptional conditions (moving a vehicle that is bogged down in mud, stuck in snow, on loose soil, etc.), it may prove useful to deactivate the DSC/ASR systems, so that the wheels can move freely and regain grip.However, it is recommended that the systems be reactivated as soon as possible.
NOTIC E
Only the ASR system can be deactivated from the touch screen.
Deactivating using the button or Toyota Traction SelectPress this button or turn the thumbwheel to this position.The indicator lamp in the button or thumbwheel comes on: the DSC/ASR systems no longer
have an effect on engine operation.Deactivating using the touch screenIn the "Driving/Vehicle" menu, deactivate the ASR system.
Page 114 of 360
11 4
A confirmation message is displayed and this warning lamp on the instrument panel comes on.The ASR system no longer acts on the operation of the engine.Reactivating using the button or Toyota Traction SelectPress this button.
OrTurn the thumbwheel to this position.
The indicator lamp in the button or thumbwheel goes off.Reactivating using the touch screenIn the "Driving/Vehicle" menu, activate the ASR system.A confirmation message is displayed and this warning lamp on the instrument panel goes off.These systems are reactivated automatically every time the ignition is switched off, or at speeds over 31 mph (50 km/h).Below 31 mph (50 km/h), these systems must be reactivated manually.
Malfunction
In the event of a malfunction, this warning lamp comes on on the instrument panel, accompanied by the display of a message and an audible signal.
Have it checked by any authorized Toyota retailer or Toyota authorized repairer, or any reliable repairer.
WARNI NG
ASR/DSCThese systems enhance safety during normal driving, but should not encourage the driver to
take extra risks or drive at high speed.It is in conditions of reduced grip (rain, snow, ice) that the risk of loss of grip increases. It is therefore important for your safety to keep these systems activated in all conditions, and particularly in difficult conditions.Correct operation of these systems depends on compliance with the manufacturer's recommendations relating to the wheels (tyres and rims), braking and electronic components, as well as the assembly and repair procedures provided by any authorized Toyota retailer or Toyota authorized repairer, or any reliable repairer.In order to ensure that these systems remain effective in wintry conditions, the use of snow or all-season tyres is recommended. All four wheels must be fitted with tyres approved for your vehicle.All tyre specifications are listed on the tyre/paint label. For more information on Identification markings, refer to the corresponding section.
Intelligent traction control
Depending on version, the vehicle has a system to help with driving on snow: intelligent traction control.This system detects situations of poor surface grip that could make it difficult to move off or make progress on deep fresh snow or compacted snow.In these situations, the system limits the amount
of wheel spin to provide the best traction and trajectory control for the vehicle.
NOTIC E
The use of snow tyres is strongly recommended on surfaces offering low levels of grip.
Trailer stability assist (TSA)
When towing, this system reduces the risk of the vehicle or trailer snaking.
Operation
The system is activated automatically when the ignition is switched on.The electronic stability control system (VSC) must not have any faults.
The vehicle speed must be between 37 and 99 mph (60 and 160 km/h).If the system detects that the trailer is snaking, it applies the brakes to stabilise the trailer and reduces engine power, if
Page 123 of 360
123
Safety
5
PROACE VERSO
WARNI NG
Curtain airbagsDo not fix or attach anything to the roof, as this could cause head injuries when the curtain airbag is deployed.Do not remove the grab handles installed on the roof, as these help to secure the curtain airbags.
Child seats
NOTIC E
The regulations on carrying children are specific to each country. Refer to the legislation in force in your country.
For maximum safety, please observe the following recommendations:– In accordance with European regulations, all children under the age of 12 or less than 150 cm (4 ft 11”) tall must travel in approved child seats suited to their weight, on seats fitted with a seat belt or ISOFIX mountings.
– Statistically, the safest seats in your vehicle for carrying children are the rear seats.– Children weighing less than 9 kg (20 lb) must travel in the "rear facing" position, whether in the front or rear of the vehicle.
NOTIC E
It is recommended that children travel on the rear seats of the vehicle:– ‘rear facing’ up to the age of 3,– ‘forward facing’ over the age of 3.
WARNI NG
Make sure that the seat belt is correctly positioned and tightened.For child seats with a support leg, ensure that the support leg is in firm and steady contact with the floor.
Advice
WARNI NG
An incorrectly installed child seat compromises the child's safety in the event of an accident.Ensure that there is no seat belt or seat belt buckle under the child seat, as this could destabilise it.
Remember to fasten the seat belts or the harness of child seats, keeping the slack relative to the child's body to a minimum, even for short journeys.When installing a child seat using the seat belt, ensure that the seat belt is tightened correctly on the child seat and that it secures the child seat firmly on the seat of the vehicle. If the passenger seat is adjustable, move it
forwards if necessary.Remove the head restraint before installing a child seat with a backrest on a passenger seat.Ensure that the head restraint is stored or attached securely to prevent it from being thrown around the vehicle in the event of sharp braking. Refit the head restraint once the child seat has been removed.
WARNI NG
Installing a booster seatThe chest part of the seat belt must be positioned on the child's shoulder without touching the neck.Ensure that the lap part of the seat belt passes correctly over the child's thighs.Use a booster seat with backrest, equipped
with a belt guide at shoulder level.
Page 126 of 360
126
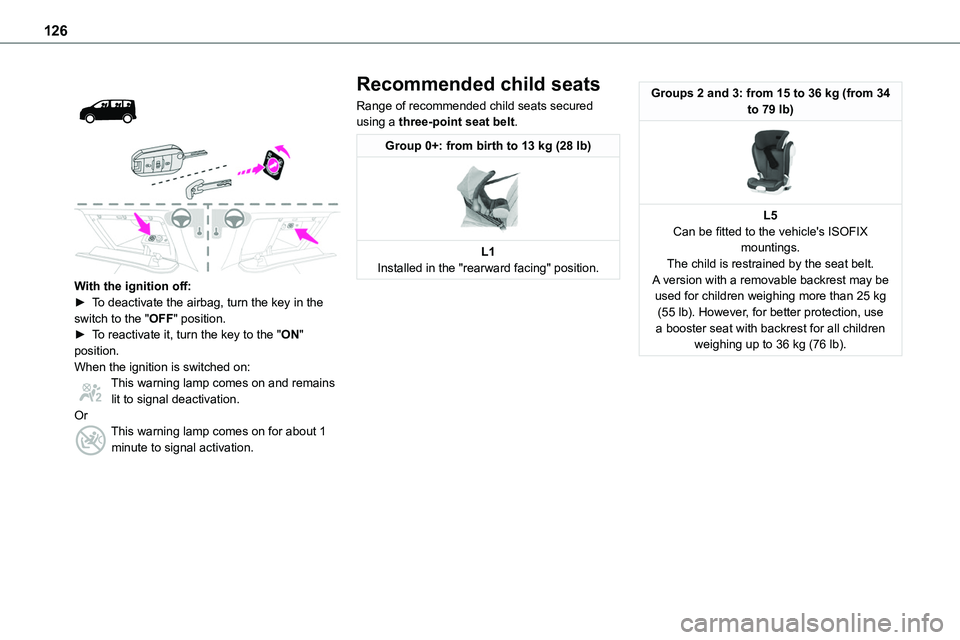
With the ignition off:► To deactivate the airbag, turn the key in the switch to the "OFF" position. ► To reactivate it, turn the key to the "ON" position.When the ignition is switched on:This warning lamp comes on and remains lit to signal deactivation.OrThis warning lamp comes on for about 1 minute to signal activation.
Recommended child seats
Range of recommended child seats secured using a three-point seat belt.
Group 0+: from birth to 13 kg (28 lb)
L1Installed in the "rearward facing" position.
Groups 2 and 3: from 15 to 36 kg (from 34 to 79 lb)
L5Can be fitted to the vehicle's ISOFIX mountings.The child is restrained by the seat belt.A version with a removable backrest may be used for children weighing more than 25 kg (55 lb). However, for better protection, use a booster seat with backrest for all children weighing up to 36 kg (76 lb).
Page 132 of 360
132
This ISOFIX and i-Size mounting system provides fast, reliable and safe fitting of a child seat inside the vehicle.ISOFIX and i-Size child seats are fitted with two latches which are secured to the two front rings A.Some child seats also have an upper strap which is attached to rear ring B.To secure the child seat to the Top Tether:
– remove and stow the head restraint before installing a child seat on this seat (refit it once the child seat has been removed),– pass the strap of the child seat over the top of the seat backrest, centring it between the openings for the head restraint rods,– attach the hook of the upper strap to rear ring B,– tighten the upper strap.
WARNI NG
Incorrect installation of a child seat in a vehicle can compromise a child's safety in the event of an accident.Strictly follow the fitting instructions provided in the installation guide supplied with the child seat.
NOTIC E
For information on the various options for
installing ISOFIX child seats in your vehicle, refer to the summary table.
Recommended ISOFIX child
seats
NOTIC E
Also consult the user guide from the child seat’s manufacturer to find out how to install and remove the seat.
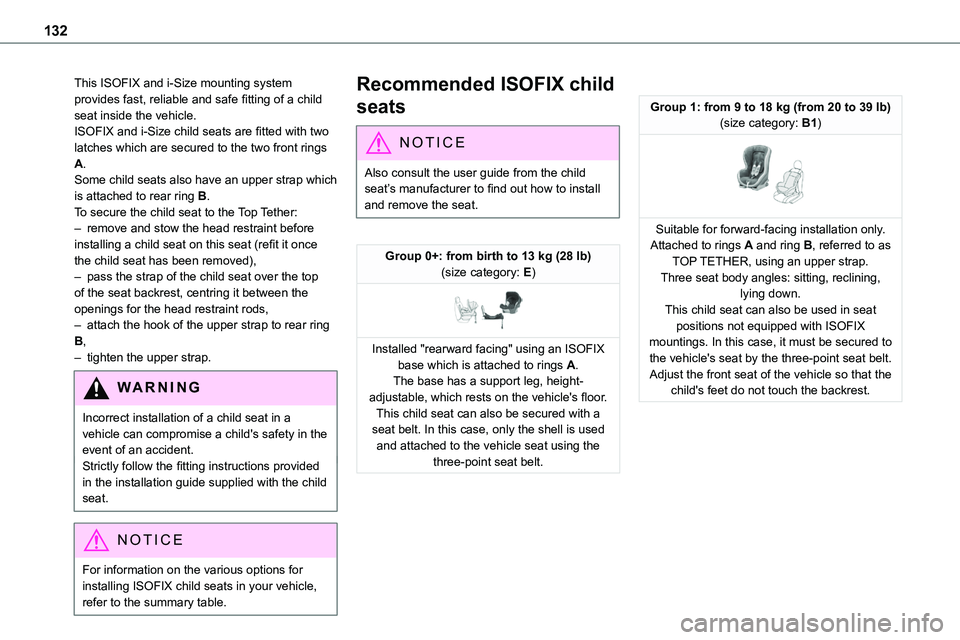
Group 0+: from birth to 13 kg (28 lb)(size category: E)
Installed "rearward facing" using an ISOFIX base which is attached to rings A.The base has a support leg, height-adjustable, which rests on the vehicle's floor.This child seat can also be secured with a seat belt. In this case, only the shell is used
and attached to the vehicle seat using the three-point seat belt.
Group 1: from 9 to 18 kg (from 20 to 39 lb)(size category: B1)
Suitable for forward-facing installation only.Attached to rings A and ring B, referred to as TOP TETHER, using an upper strap.Three seat body angles: sitting, reclining, lying down.This child seat can also be used in seat positions not equipped with ISOFIX mountings. In this case, it must be secured to the vehicle's seat by the three-point seat belt. Adjust the front seat of the vehicle so that the child's feet do not touch the backrest.