bonnet TOYOTA PROACE VERSO EV 2020 Owners Manual
[x] Cancel search | Manufacturer: TOYOTA, Model Year: 2020, Model line: PROACE VERSO EV, Model: TOYOTA PROACE VERSO EV 2020Pages: 360, PDF Size: 68.91 MB
Page 3 of 360
3
Contents
Stop & Start 166Under-inflation detection 168Driving and manoeuvring aids - General recommendations 170Head-up display 172Memorising speeds 173Speed Limit Recognition and Recommendation 174Speed limiter 176Cruise control - particular recommendations 178Cruise control 179Adaptive Cruise Control 181Active Safety Brake with Collision Risk Alert and Intelligent emergency braking assistance 185Lane departure warning system 187Distraction detection 188Blind Spot Monitoring System 190Parking sensors 191VisioPark Light 193Top Rear Vision 194
7Practical informationCompatibility of fuels 197Refuelling 197Misfuel prevention (Diesel) 199Charging system (Electric) 199Charging the traction battery (Electric) 207Energy economy mode 2 11Snow chains 2 11Towing device 212Roof bars / Roof rack 213Bonnet 214Engine compartment 215Checking levels 216
Speed checks 218AdBlue® (Diesel engines) 221Free-wheeling 223Advice on care and maintenance 225
8In the event of a breakdownWarning triangle 227Running out of fuel (Diesel) 227Tool box 228Temporary puncture repair kit 229Spare wheel 233Changing a bulb 237Changing a fuse 24312 V battery / Accessory battery 246Towing 250
9Technical dataEngine technical data and towed loads 252Diesel engines 253Electric motor 257Dimensions 259Identification markings 262
10Bluetooth® audio systemFirst steps 263Steering mounted controls 264Menus 265Radio 265DAB (Digital Audio Broadcasting) radio 267Media 268Telephone 271Frequently asked questions 274
11TOYOTA Pro TouchFirst steps 276
Steering mounted controls 277Menus 278Applications 279Radio 280DAB (Digital Audio Broadcasting) radio 282Media 282Telephone 284Settings 287Frequently asked questions 289
12 TOYOTA Pro Touch with navigation systemFirst steps 291Steering mounted controls 292Menus 293Voice commands 294Navigation 298Connected navigation 301Applications 303Radio 306DAB (Digital Audio Broadcasting) radio 308Media 308Telephone 310Settings 313Frequently asked questions 315
■ Alphabetical index
Page 4 of 360

4
Presentation
Instruments and controls
NOTIC E
These illustrations and descriptions are intended as a guide. The presence and location of some components varies
according to the version, trim level and country of sale.
1.Glove boxDeactivation of the front passenger airbag
2.12 V (120 W) accessory sockets
3.USB socket
4.Electric parking brake
5.Instrument panel
6.StorageCup/can holder
7.Storage compartment
8.Upper storage compartment
9.220 V (150 W) accessory socket
10.Horn
11 .Courtesy lampWarning lamps display for seat belts and front passenger airbagInterior rear view mirrorEmergency and assistance call button
12.Heating/Air conditioning
Front demisting – de-icingRear screen demisting – de-icing
13."START/STOP" button
14.Gearbox or drive selectorChoice of driving mode
15.Monochrome screen with audio systemTouch screen with TOYOTA Pro Touch or TOYOTA Pro Touch with navigation system
16.Bonnet release
17.Dashboard fuses
18.Head-up display
NOTIC E
Depending on the vehicle's equipment, the storage compartments may be open or closed. This configuration is shown as an example.
Steering-mounted controls
1.Exterior lighting/Direction indicators control stalks
2.Wiper controls/Screenwash/Trip computer
Page 7 of 360
7
Overview
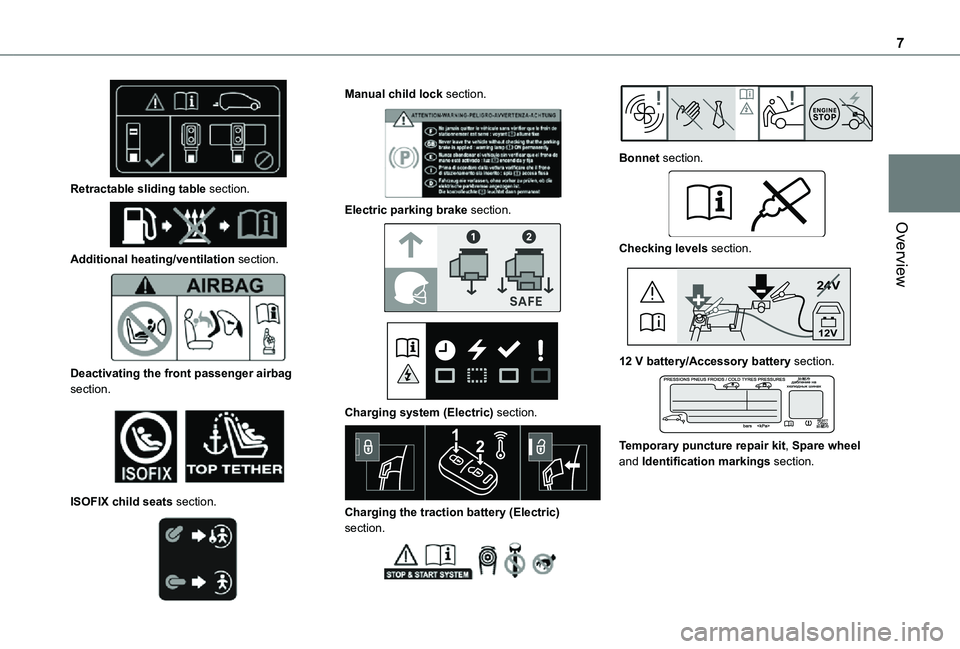
Retractable sliding table section.
Additional heating/ventilation section.
Deactivating the front passenger airbag section.
ISOFIX child seats section.
Manual child lock section.
Electric parking brake section.
Charging system (Electric) section.
Charging the traction battery (Electric) section.
Bonnet section.
Checking levels section.
24V
12V
12 V battery/Accessory battery section.
Temporary puncture repair kit, Spare wheel and Identification markings section.
Page 19 of 360
19
Instruments
1
Wait a few minutes before switching off the engine.
WARNI NG
After switching off the ignition, carefully open the bonnet and check the coolant level.
NOTIC E
For more information on Checking levels, refer to the corresponding section.
Checking
After driving for a few minutes, the temperature and pressure in the cooling system increase.To top up the level:► wait at least one hour for the engine to cool,► unscrew the cap by two turns to allow the pressure to drop,► when the pressure has dropped, remove the cap,► top up the level to the "MAX" mark.For more information on Checking levels, refer to the corresponding section.
WARNI NG
Be aware of the risk of scalding when topping up the coolant. Do not fill above the maximum level (indicated on the reservoir).
Engine oil level indicator
(Depending on version)On versions fitted with an electric oil gauge, the state of the engine oil level is displayed on the instrument panel for a few seconds when the ignition is switched on, at the same time as the servicing information.
NOTIC E
The level read will only be correct if the vehicle is on level ground and the engine has been off for more than 30 minutes.
Oil level correct
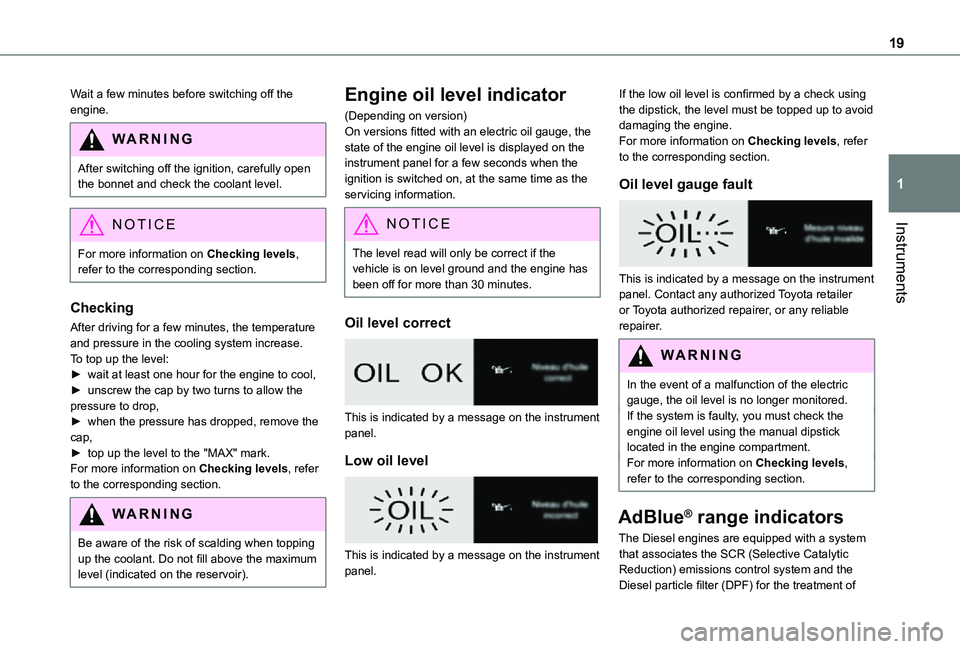
This is indicated by a message on the instrument panel.
Low oil level
This is indicated by a message on the instrument panel.
If the low oil level is confirmed by a check using the dipstick, the level must be topped up to avoid damaging the engine.For more information on Checking levels, refer to the corresponding section.
Oil level gauge fault
This is indicated by a message on the instrument panel. Contact any authorized Toyota retailer or Toyota authorized repairer, or any reliable repairer.
WARNI NG
In the event of a malfunction of the electric gauge, the oil level is no longer monitored.If the system is faulty, you must check the engine oil level using the manual dipstick located in the engine compartment.For more information on Checking levels, refer to the corresponding section.
AdBlue® range indicators
The Diesel engines are equipped with a system
that associates the SCR (Selective Catalytic Reduction) emissions control system and the Diesel particle filter (DPF) for the treatment of
Page 49 of 360
49
Access
2
Alarm
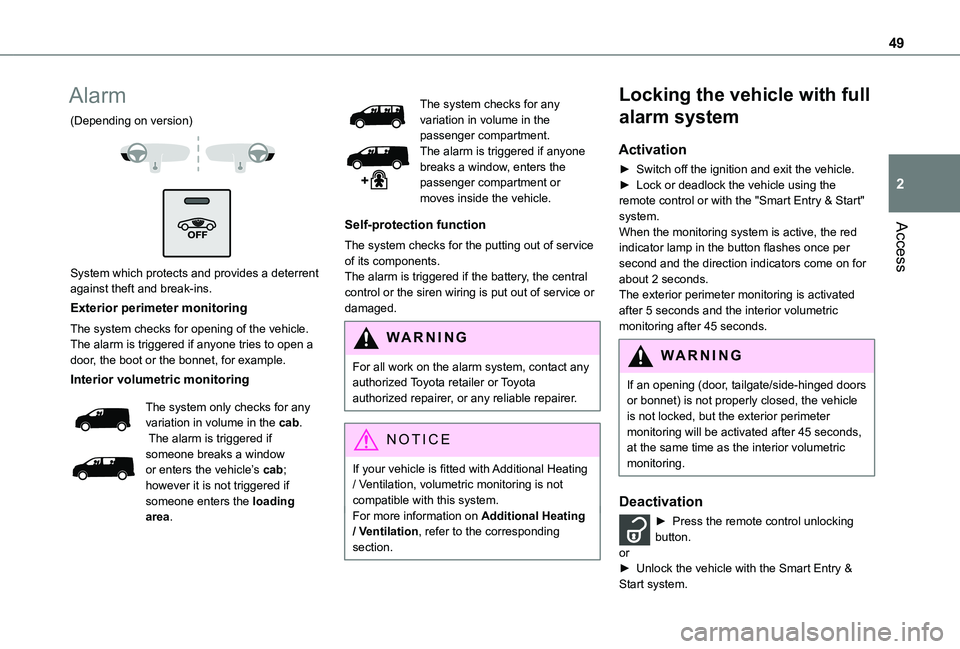
(Depending on version)
System which protects and provides a deterrent against theft and break-ins.
Exterior perimeter monitoring
The system checks for opening of the vehicle.The alarm is triggered if anyone tries to open a door, the boot or the bonnet, for example.
Interior volumetric monitoring
The system only checks for any variation in volume in the cab. The alarm is triggered if
someone breaks a window or enters the vehicle’s cab; however it is not triggered if someone enters the loading area.
The system checks for any variation in volume in the passenger compartment.The alarm is triggered if anyone breaks a window, enters the passenger compartment or moves inside the vehicle.
Self-protection function
The system checks for the putting out of service of its components.The alarm is triggered if the battery, the central control or the siren wiring is put out of service or damaged.
WARNI NG
For all work on the alarm system, contact any authorized Toyota retailer or Toyota authorized repairer, or any reliable repairer.
NOTIC E
If your vehicle is fitted with Additional Heating / Ventilation, volumetric monitoring is not compatible with this system.For more information on Additional Heating / Ventilation, refer to the corresponding section.
Locking the vehicle with full
alarm system
Activation
► Switch off the ignition and exit the vehicle.► Lock or deadlock the vehicle using the remote control or with the "Smart Entry & Start" system.When the monitoring system is active, the red indicator lamp in the button flashes once per second and the direction indicators come on for about 2 seconds.The exterior perimeter monitoring is activated after 5 seconds and the interior volumetric monitoring after 45 seconds.
WARNI NG
If an opening (door, tailgate/side-hinged doors or bonnet) is not properly closed, the vehicle is not locked, but the exterior perimeter monitoring will be activated after 45 seconds, at the same time as the interior volumetric monitoring.
Deactivation
► Press the remote control unlocking button.or► Unlock the vehicle with the Smart Entry & Start system.
Page 104 of 360
104
WARNI NG
Clean the windscreen regularly, particularly the area in front of the camera.The internal surface of the windscreen can also become misted around the camera. In humid and cold weather, demist the windscreen regularly.Do not allow snow to accumulate on the bonnet or roof of the vehicle as this could obstruct the detection camera.
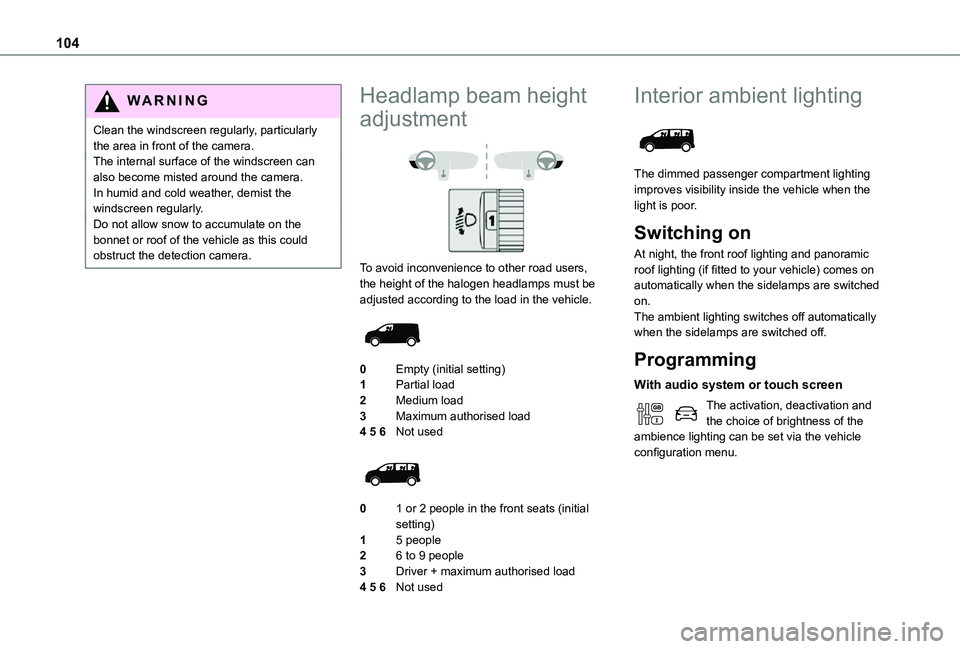
Headlamp beam height
adjustment
To avoid inconvenience to other road users, the height of the halogen headlamps must be adjusted according to the load in the vehicle.
0Empty (initial setting)
1Partial load
2Medium load
3Maximum authorised load
4 5 6Not used
01 or 2 people in the front seats (initial setting)
15 people
26 to 9 people
3Driver + maximum authorised load
4 5 6Not used
Interior ambient lighting
The dimmed passenger compartment lighting improves visibility inside the vehicle when the light is poor.
Switching on
At night, the front roof lighting and panoramic roof lighting (if fitted to your vehicle) comes on automatically when the sidelamps are switched on.The ambient lighting switches off automatically when the sidelamps are switched off.
Programming
With audio system or touch screen
The activation, deactivation and the choice of brightness of the ambience lighting can be set via the vehicle configuration menu.
Page 105 of 360
105
Lighting and visibility
4
Wiper control lever
NOTIC E
Before operating the wipers in wintry conditions, clear any snow, ice or frost from the windscreen, and from around the wiper arms and blades.
WARNI NG
Do not operate the wipers on a dry windscreen. In extremely hot or cold weather, check that the wiper blades are not stuck to the windscreen before operating the wipers.
NOTIC E
After using an automatic car wash, you may temporarily notice abnormal noises and poorer wiping performance. You do not need to replace the wiper blades.
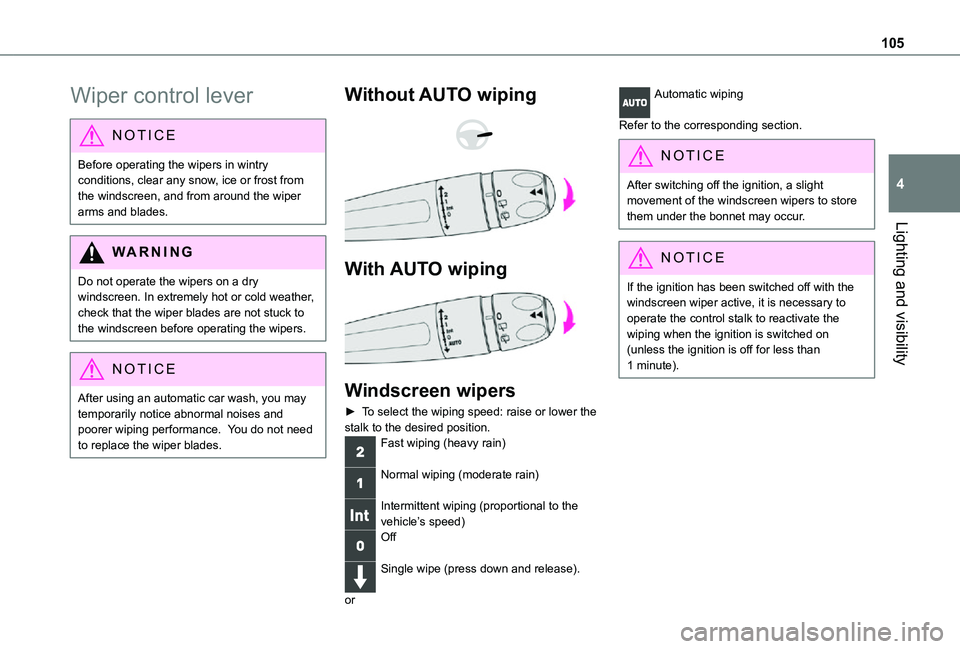
Without AUTO wiping
With AUTO wiping
Windscreen wipers
► To select the wiping speed: raise or lower the stalk to the desired position.Fast wiping (heavy rain)
Normal wiping (moderate rain)
Intermittent wiping (proportional to the vehicle’s speed)Off
Single wipe (press down and release).
or
Automatic wiping
Refer to the corresponding section.
NOTIC E
After switching off the ignition, a slight movement of the windscreen wipers to store them under the bonnet may occur.
NOTIC E
If the ignition has been switched off with the windscreen wiper active, it is necessary to operate the control stalk to reactivate the wiping when the ignition is switched on (unless the ignition is off for less than 1 minute).
Page 208 of 360
208
For domestic or accelerated charging
WARNI NG
Before chargingDepending on the context:► Have a professional check that the electrical system to be used complies with applicable standards and is compatible with the vehicle.► Have a professional electrician install a dedicated domestic power socket or accelerated charging unit (Wallbox) compatible with the vehicle.You should preferably use the charging cable available as an accessory.For more information, contact a any authorized Toyota retailer or Toyota authorized repairer, or any reliable repairer.
WARNI NG
(During charging)While charging is in progress, unlocking the vehicle will cause the charging to stop.If no action is taken on one of the openings (door or boot) or on the charging nozzle, the vehicle will lock again after 30 seconds and charging will resume automatically.Never work under the bonnet:– Some areas remain very hot, even an hour after charging ends - risk of burns!– The fan may start at any time - risk of cuts or strangulation!
WARNI NG
After chargingCheck that the charging flap is closed.Do not leave the cable connected to the domestic power socket - risk of short-circuit or electrocution in the event of contact with or
immersion in water!
For superfast charging
NOTIC E
Before chargingCheck that the fast public charging station and its charging cable are compatible with the vehicle.If the exterior temperature is below:– 0°C, charging times may be extended.– -20°C, charging is still possible, but charging times may be extended even further (the battery has to be heated first).
WARNI NG
After chargingCheck that the charging flap is closed.
Connection
► Before charging, check that the drive selector is in mode P, otherwise charging is not possible.
► Open the charging flap by pressing the push-button, and check that there are no foreign bodies on the charging connector.
Page 214 of 360
214
Roof racks
NOTIC E
Max. authorised load weight:– Compact: 140 kg,– Medium and Long: 170 kg.
To fit a roof rack, use the fixing points provided for this purpose:
► Place the roof rack on the roof aligned with the fixing points and secure each one to the roof in turn.► Ensure that the roof rack is correctly fitted (by shaking it).
Bonnet
WARNI NG
Stop & StartBefore doing anything under the bonnet, you must switch off the ignition to avoid any risk of injury resulting from an automatic change to START mode.
WARNI NG
Electric motorTake care with objects or clothing that could be caught in the blades of the cooling fan or in certain moving components - risk of strangulation and serious injury!Before carrying out any work under the
bonnet, you must switch off the ignition, check that the READY indicator lamp is off on the instrument panel and disconnect the charging nozzle if it is plugged in.
NOTIC E
The location of the interior bonnet release lever prevents opening the bonnet when the left-hand front door is closed.
WARNI NG
When the engine is hot, handle the exterior
safety catch and the bonnet stay with care (risk of burns), using the protected area.When the bonnet is open, take care not to damage the safety catch.Do not open the bonnet under very windy conditions.
WARNI NG
Cooling of the engine when stoppedThe engine cooling fan may start after the engine has been switched off.Take care with objects or clothing that could be caught in the blades of the fan!
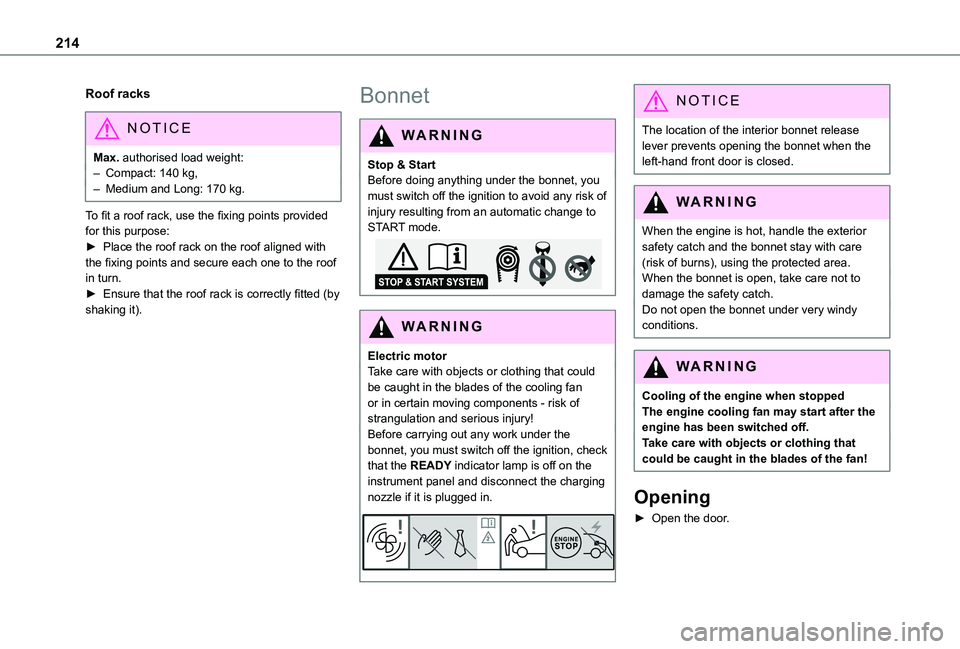
Opening
► Open the door.
Page 215 of 360
215
Practical information
7
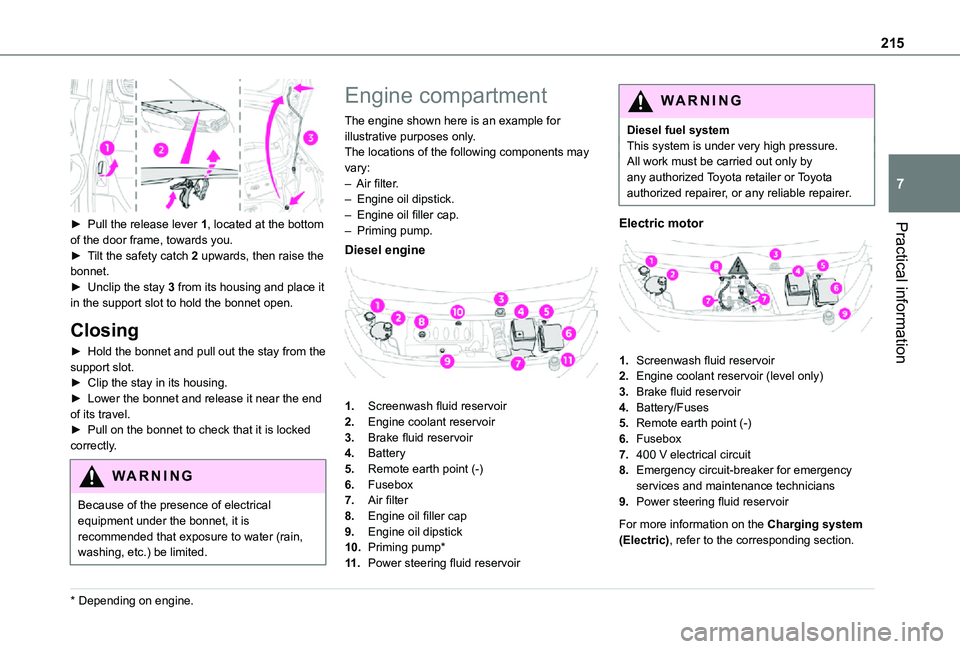
► Pull the release lever 1, located at the bottom of the door frame, towards you.► Tilt the safety catch 2 upwards, then raise the bonnet.► Unclip the stay 3 from its housing and place it in the support slot to hold the bonnet open.
Closing
► Hold the bonnet and pull out the stay from the support slot.► Clip the stay in its housing.► Lower the bonnet and release it near the end of its travel.► Pull on the bonnet to check that it is locked
correctly.
WARNI NG
Because of the presence of electrical equipment under the bonnet, it is recommended that exposure to water (rain, washing, etc.) be limited.
* Depending on engine.
Engine compartment
The engine shown here is an example for illustrative purposes only.The locations of the following components may vary:– Air filter.– Engine oil dipstick.– Engine oil filler cap.– Priming pump.
Diesel engine
1.Screenwash fluid reservoir
2.Engine coolant reservoir
3.Brake fluid reservoir
4.Battery
5.Remote earth point (-)
6.Fusebox
7.Air filter
8.Engine oil filler cap
9.Engine oil dipstick
10.Priming pump*
11 .Power steering fluid reservoir
WARNI NG
Diesel fuel systemThis system is under very high pressure.All work must be carried out only by any authorized Toyota retailer or Toyota authorized repairer, or any reliable repairer.
Electric motor
1.Screenwash fluid reservoir
2.Engine coolant reservoir (level only)
3.Brake fluid reservoir
4.Battery/Fuses
5.Remote earth point (-)
6.Fusebox
7.400 V electrical circuit
8.Emergency circuit-breaker for emergency services and maintenance technicians
9.Power steering fluid reservoir
For more information on the Charging system (Electric), refer to the corresponding section.