battery TOYOTA RAV4 2023 Service Manual
[x] Cancel search | Manufacturer: TOYOTA, Model Year: 2023, Model line: RAV4, Model: TOYOTA RAV4 2023Pages: 574, PDF Size: 17.31 MB
Page 359 of 574
3595-4. Using the other interior features
5
Interior features
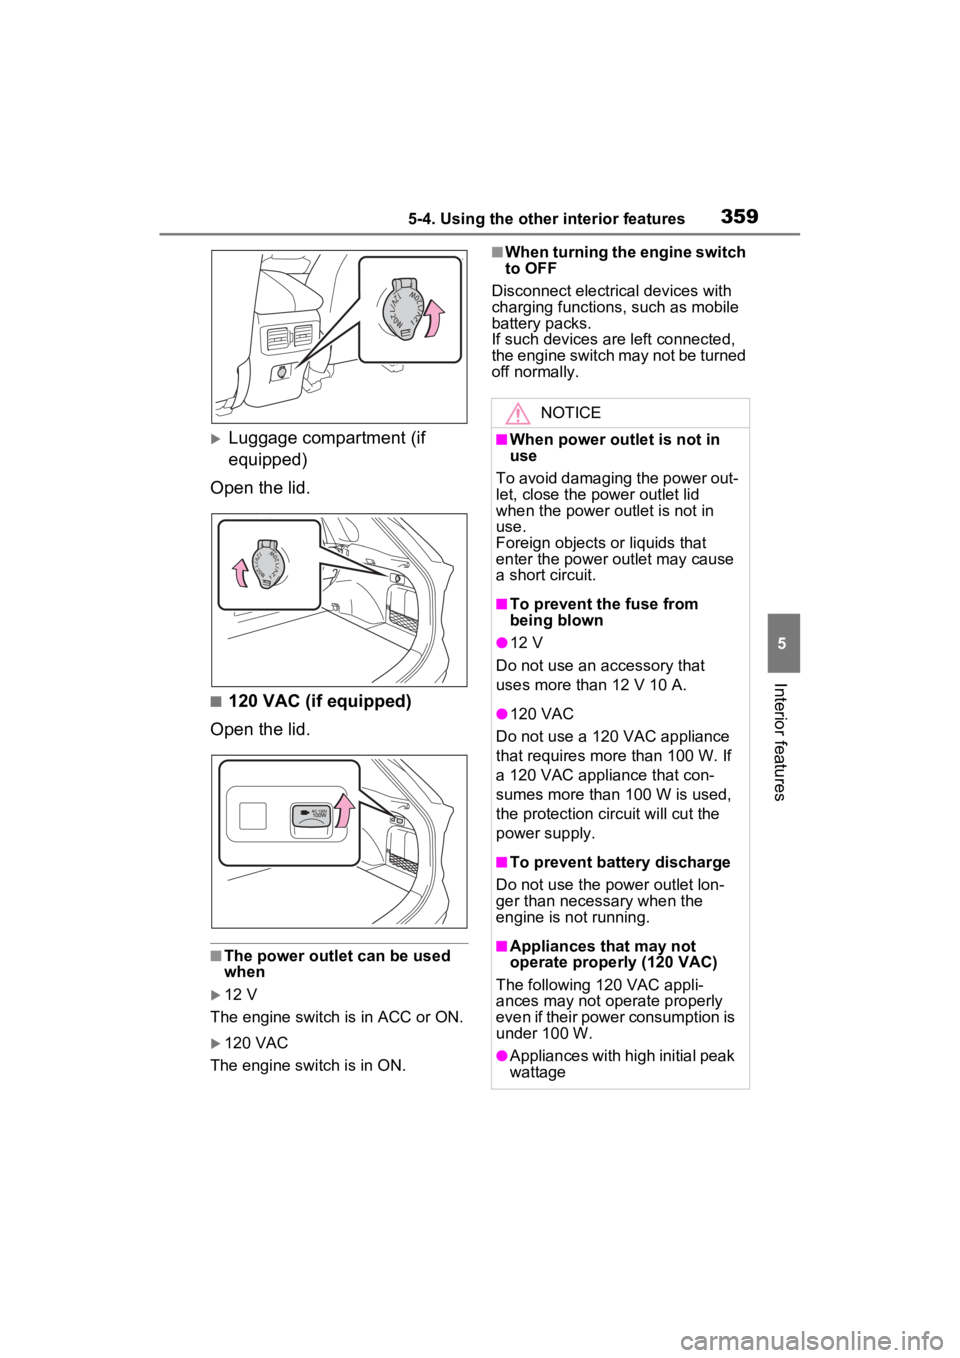
Luggage compartment (if
equipped)
Open the lid.
■120 VAC (if equipped)
Open the lid.
■The power outlet can be used
when
12 V
The engine switch is in ACC or ON.
120 VAC
The engine switch is in ON.
■When turning the engine switch
to OFF
Disconnect electrical devices with
charging functions, such as mobile
battery packs.
If such devices are left connected,
the engine switch may not be turned
off normally.
NOTICE
■When power outlet is not in
use
To avoid damaging the power out-
let, close the po wer outlet lid
when the power outlet is not in
use.
Foreign objects or liquids that
enter the power outlet may cause
a short circuit.
■To prevent the fuse from
being blown
●12 V
Do not use an accessory that
uses more than 12 V 10 A.
●120 VAC
Do not use a 120 VAC appliance
that requires more than 100 W. If
a 120 VAC appliance that con-
sumes more than 100 W is used,
the protection circuit will cut the
power supply.
■To prevent battery discharge
Do not use the p ower outlet lon-
ger than necessary when the
engine is not running.
■Appliances that may not
operate properly (120 VAC)
The following 120 VAC appli-
ances may not ope rate properly
even if their power consumption is
under 100 W.
●Appliances with high initial peak
wattage
Page 361 of 574
3615-4. Using the other interior features
5
Interior features
A portable device can be
charged by just placing Qi stan-
dard wireless charge compatible
portable devices according to
the Wireless Power Consortium,
such as smartphones and
mobile batteries, etc., on the
charge area.
This function cannot be used
with portable devices that are
larger than the charging tray. Also, depending on the portable
device, it may not operate as
normal. Please read the opera-
tion manual for portable devices
to be used.
■The “Qi” logo
The “Qi” logo is a trademark of
the Wireless Power Consortium.
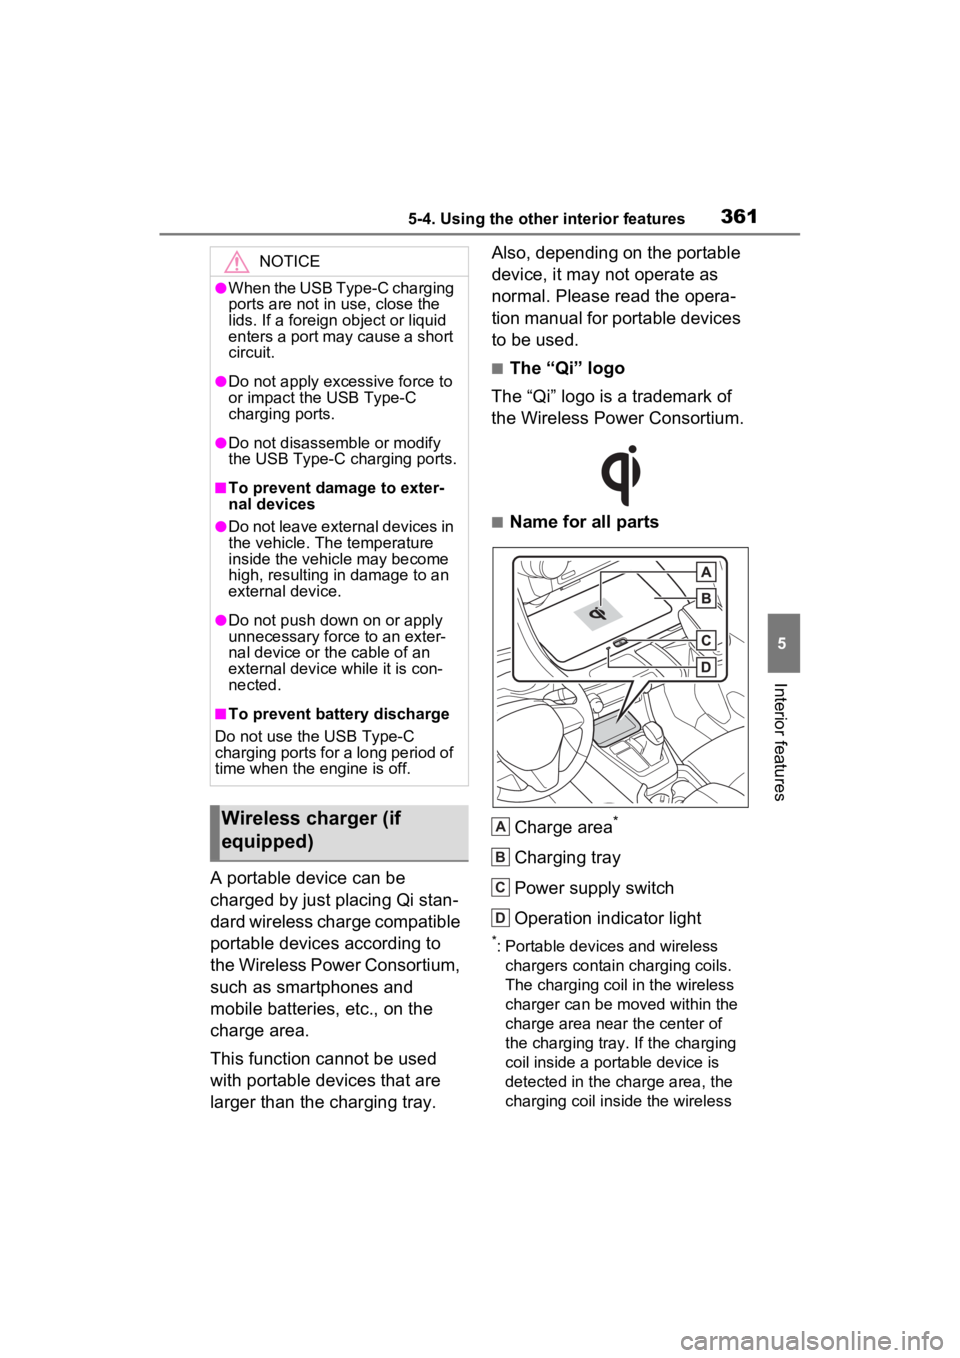
■Name for all parts
Charge area
*
Charging tray
Power supply switch
Operation indicator light
*: Portable devices and wireless chargers contain charging coils.
The charging coil in the wireless
charger can be moved within the
charge area near the center of
the charging tray. If the charging
coil inside a portable device is
detected in the charge area, the
charging coil inside the wireless
NOTICE
●When the USB Type-C charging
ports are not in use, close the
lids. If a foreign object or liquid
enters a port may cause a short
circuit.
●Do not apply excessive force to
or impact the USB Type-C
charging ports.
●Do not disassemble or modify
the USB Type-C charging ports.
■To prevent damage to exter-
nal devices
●Do not leave external devices in
the vehicle. The temperature
inside the vehicle may become
high, resulting in damage to an
external device.
●Do not push down on or apply
unnecessary force to an exter-
nal device or the cable of an
external device while it is con-
nected.
■To prevent battery discharge
Do not use the USB Type-C
charging ports for a long period of
time when the engine is off.
Wireless charger (if
equipped)A
B
C
D
Page 368 of 574
3685-4. Using the other interior features
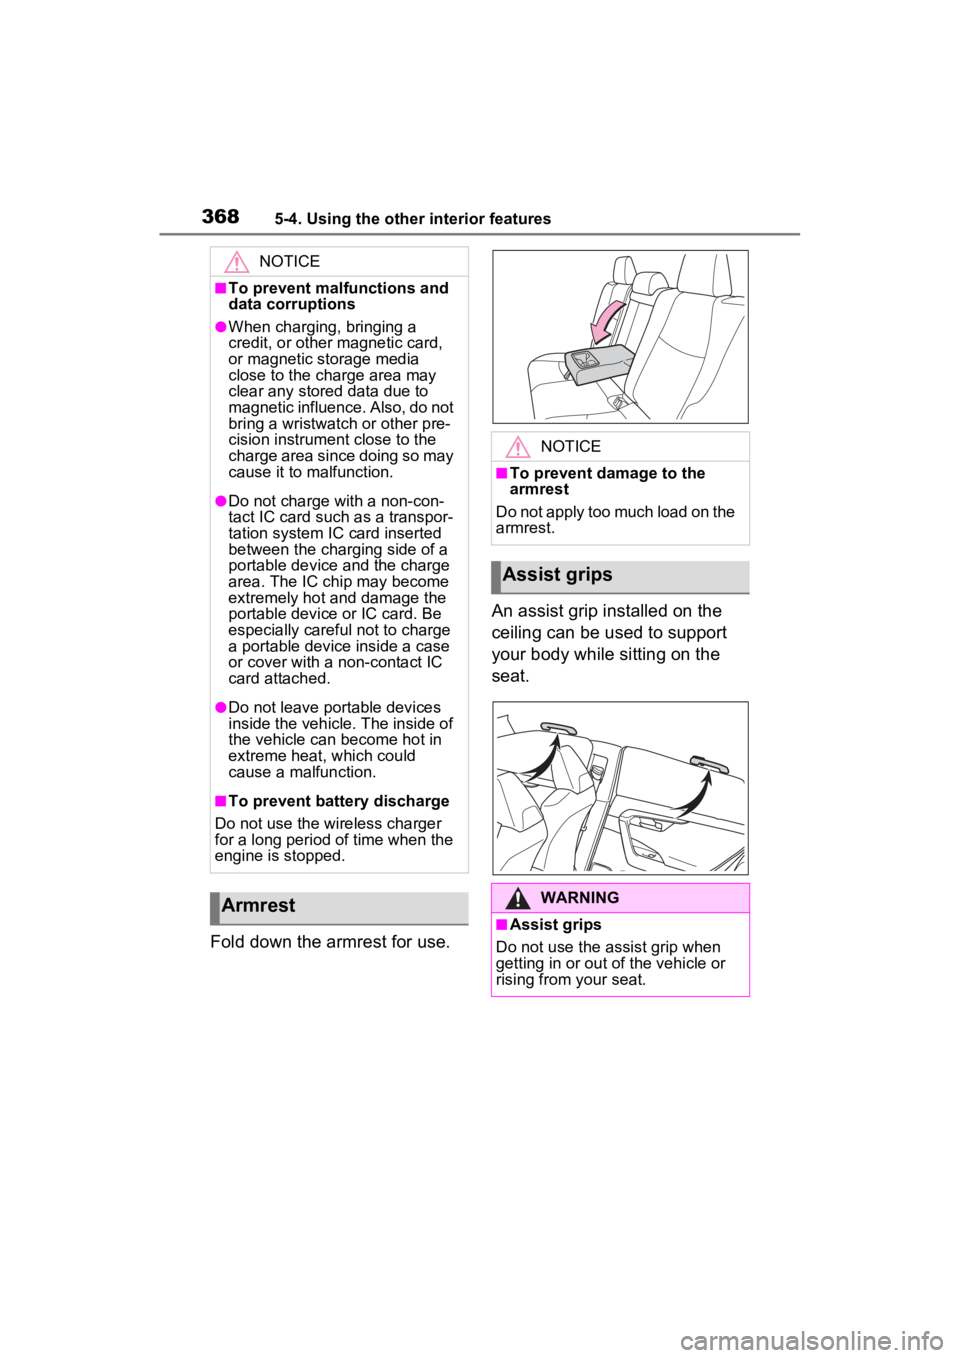
Fold down the armrest for use.An assist grip installed on the
ceiling can be used to support
your body while sitting on the
seat.
NOTICE
■To prevent malfunctions and
data corruptions
●When charging, bringing a
credit, or other magnetic card,
or magnetic storage media
close to the charge area may
clear any stored data due to
magnetic influence. Also, do not
bring a wristwatch or other pre-
cision instrument close to the
charge area since doing so may
cause it to malfunction.
●Do not charge with a non-con-
tact IC card such as a transpor-
tation system IC card inserted
between the charging side of a
portable device and the charge
area. The IC chip may become
extremely hot and damage the
portable device or IC card. Be
especially careful not to charge
a portable device inside a case
or cover with a non-contact IC
card attached.
●Do not leave portable devices
inside the vehicle. The inside of
the vehicle can
become hot in
extreme heat, which could
cause a malfunction.
■To prevent battery discharge
Do not use the wireless charger
for a long period of time when the
engine is stopped.
Armrest
NOTICE
■To prevent damage to the
armrest
Do not apply too much load on the
armrest.
Assist grips
WARNING
■Assist grips
Do not use the assist grip when
getting in or out of the vehicle or
rising from your seat.
Page 370 of 574
3705-4. Using the other interior features
device.
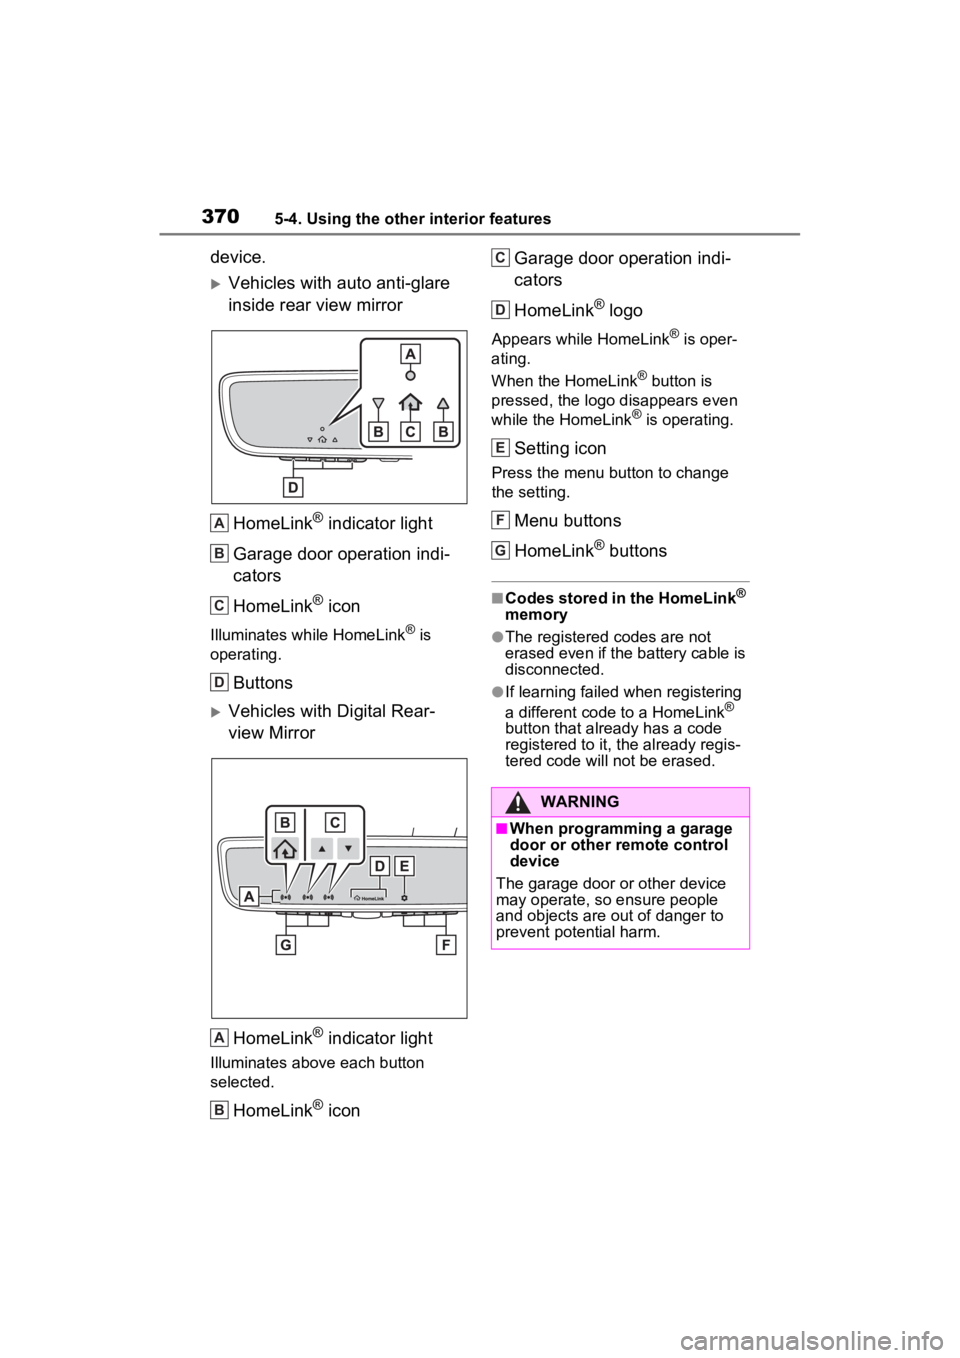
Vehicles with auto anti-glare
inside rear view mirrorHomeLink
® indicator light
Garage door operation indi-
cators
HomeLink
® icon
Illuminates while HomeLink® is
operating.
Buttons
Vehicles with Digital Rear-
view Mirror
HomeLink
® indicator light
Illuminates above each button
selected.
HomeLink® icon Garage door operation indi-
cators
HomeLink
® logo
Appears while HomeLink® is oper-
ating.
When the HomeLink
® button is
pressed, the logo disappears even
while the HomeLink
® is operating.
Setting icon
Press the menu button to change
the setting.
Menu buttons
HomeLink
® buttons
■Codes stored in the HomeLink®
memory
●The registered codes are not
erased even if the battery cable is
disconnected.
●If learning failed when registering
a different code to a HomeLink®
button that already has a code
registered to it, the already regis-
tered code will not be erased.
A
B
C
D
A
B
WARNING
■When programming a garage
door or other remote control
device
The garage door or other device
may operate, so ensure people
and objects are out of danger to
prevent potential harm.
C
D
E
F
G
Page 371 of 574
3715-4. Using the other interior features
5
Interior features■Before programming
HomeLink
®
During programming, it is pos-
sible that garage doors,
gates, or other devices may
operate. For this reason,
make sure that people and
objects are clear of the
garage door or other devices
to prevent injury or other
potential harm.
It is recommended that a new
battery be placed in the
remote control transmitter for
successful programming.
Garage door opener motors
manufactured after 1995 may
be equipped with rolling code
protection. If this is the case, you may need a stepladder or
other sturdy, safe device to
reach the “Learn” or “Smart”
button on the garage door
opener motor.
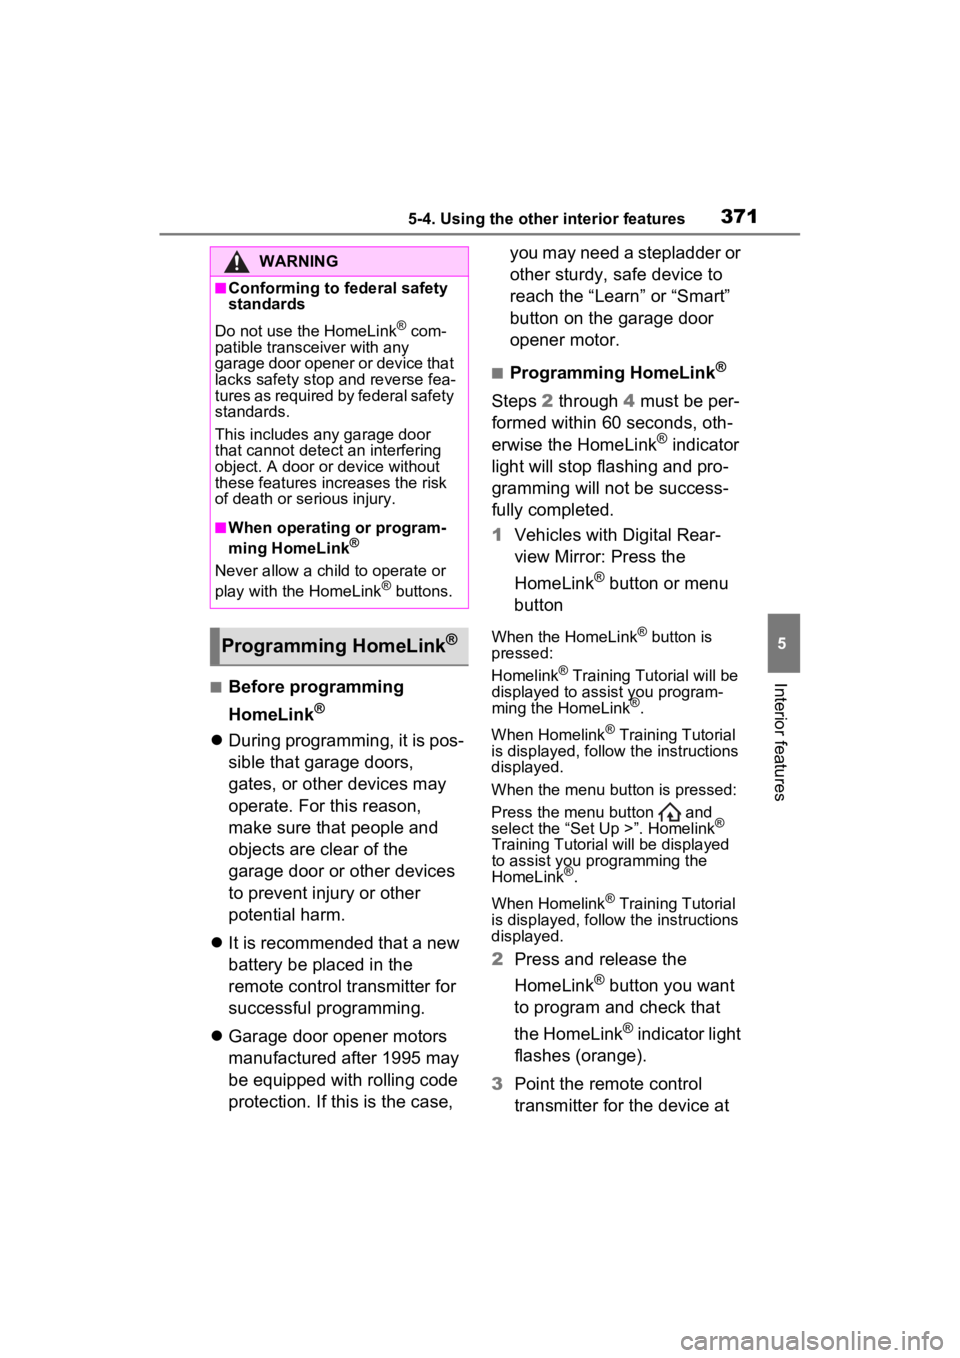
■Programming HomeLink®
Steps
2 through 4 must be per-
formed within 60 seconds, oth-
erwise the HomeLink
® indicator
light will stop flashing and pro-
gramming will not be success-
fully completed.
1 Vehicles with Digital Rear-
view Mirror: Press the
HomeLink
® button or menu
button
When the HomeLink® button is
pressed:
Homelink
® Training Tutorial will be
displayed to assist you program-
ming the HomeLink
®.
When Homelink
® Training Tutorial
is displayed, follow the instructions
displayed.
When the menu button is pressed:
Press the menu button and
select the “Set U p >”. Homelink
®
Training Tutorial will be displayed
to assist you programming the
HomeLink
®.
When Homelink
® Training Tutorial
is displayed, follow the instructions
displayed.
2 Press and release the
HomeLink
® button you want
to program and check that
the HomeLink
® indicator light
flashes (orange).
3 Point the remote control
transmitter for the device at
WARNING
■Conforming to federal safety
standards
Do not use the HomeLink
® com-
patible transceiver with any
garage door opener or device that
lacks safety stop and reverse fea-
tures as required by federal safety
standards.
This includes any garage door
that cannot detect an interfering
object. A door or device without
these features increases the risk
of death or se rious injury.
■When operating or program-
ming HomeLink®
Never allow a child to operate or
play with the HomeLink® buttons.
Programming HomeLink®
Page 374 of 574
3745-4. Using the other interior features
if the garage door opener
motor is trained to
HomeLink
®, both garage
door operation indicators will
flash rapidly (green) and the
light on the garage door
opener motor will blink twice,
indicating that 2-way commu-
nication is enabled.
If the indicators do not flash, per-
form 2 and 3 within the first 10
presses of the HomeLink
® button
after programming has been com-
pleted.
2 Press a programmed
HomeLink
® button to oper-
ate a garage door.
3 Within 1 minute of pressing
the HomeLink
® button, after
the garage door operation
has stopped, press the
“Learn” or “Smart” button on
the garage door opener
motor. Within 5 seconds of
the establishment of 2-way
communication with the
garage door opener, both
garage door operation indica-
tors in the vehicle will flash
rapidly (green) and the light
on the garage door opener
motor will blink twice, indicat-
ing that 2-way communica-
tion is enabled.
■Reprogramming a single
HomeLink
® button
When the following procedure is
performed, buttons which
already have devices registered to them can be overwritten:
1
Press and hold the desired
HomeLink
® button.
2 When the HomeLink
® indica-
tor starts flashing orange,
release the HomeLink
® but-
ton and perform “Program-
ming HomeLink
®” 1 (it takes
20 seconds for the
HomeLink
® indicator to start
flashing).
■Before programming
●Install a new battery in the trans-
mitter.
●The battery side of the transmitter
must be pointed away from the
HomeLink
® buttons.
Press the appropriate
HomeLink® button. The
HomeLink® indicator light
should turn on.
The status of the opening and
closing of a garage door is
shown by the garage door oper-
ation indicators.
Operating HomeLink®
Page 377 of 574
379
6
6
Maintenance and care
Maintenance and care
6-1. Maintenance and careCleaning and protecting the vehicle exterior .......... 380
Cleaning and protecting the vehicle interior ........... 384
6-2. Maintenance Maintenance requirements.................................. 387
General maintenance.. 389
Emission inspection and maintenance (I/M) pro-
grams ........................ 391
6-3. Do-it-yourself mainte- nance
Do-it-yourself service pre- cautions ..................... 393
Hood ........................... 395
Positioning a floor jack 396
Engine compartment ... 398
Tires ............................ 405
Tire inflation pressure . 416
Wheels ......... ...............418
Air conditioning filter .... 420
Wiper insert replacement .................................. 422
Wireless remote con- trol/electronic key battery.................................. 425
Checking and replacing fuses.......................... 428
Headlight aim .............. 431
Light bulbs................... 432
Page 378 of 574
3806-1. Maintenance and care
6-1.Maintenance and care
Working from top to bottom,
liberally apply water to the
vehicle body, wheel wells and
underside of the vehicle to
remove any dirt and dust.
Wash the vehicle body using
a sponge or soft cloth, such
as a chamois.
For hard-to-remove marks,
use car wash soap and rinse
thoroughly with water.
Wipe away any water.
Wax the vehicle when the
waterproof coating deterio-
rates.
If water does not bead on a clean
surface, apply wax when the vehi-
cle body is cool.
■Automatic car washes
●Before washing the vehicle:
• Fold the mirrors
• Turn off the power back door (if equipped)
Start washing from the front of the
vehicle. Make sure to extend the
mirrors before driving.
●Brushes used in automatic car washes may scratch the vehicle
surface, parts (wheel, etc.) and
harm your vehicle’s paint.
●Rear spoiler may not be washable
in some automatic car washes.
There may also be an increased
risk of damage to vehicle.
■High pressure car washes
As water may enter the cabin, do
not bring the nozzle tip near the
gaps around the doors or perimeter
of the windows, or spray these
areas continuously.
■Note for a smart key system (if
equipped)
If the door handle becomes wet
while the electronic key is within the
effective range, t he door may lock
and unlock repeatedly. In that case,
follow the following correction pro-
cedures to wash the vehicle:
●Place the key in a position 6 ft. (2
m) or more separate from the
vehicle while the vehicle is being
washed. (Take care to ensure that
the key is not stolen.)
●Set the electronic key to battery-
saving mode to disable the smart
key system. ( P.140)
■Wheels and wheel ornaments (if
equipped)
●Remove any dirt immediately by
using a neutral detergent.
●Wash detergent off with water
immediately after use.
●To protect the paint from damage,
make sure to obs erve the follow-
ing precautions.
• Do not use acidic, alkaline or abrasive detergent.
• Do not use hard brushes.
• Do not use detergent on the wheels when they are hot, such
as after driving or parking in hot
weather.
●For vehicles with matte painted
wheels: The wheels are not main-
tained in the same way as normal
aluminum wheels. For details,
Cleaning a nd protect-
ing the vehicle exte-
rior
Perform the following to
protect the vehicle and
maintain it in prime condi-
tion:
Cleaning instructions
Page 385 of 574
3876-2. Maintenance
6
Maintenance and care
6-2.Maintenance
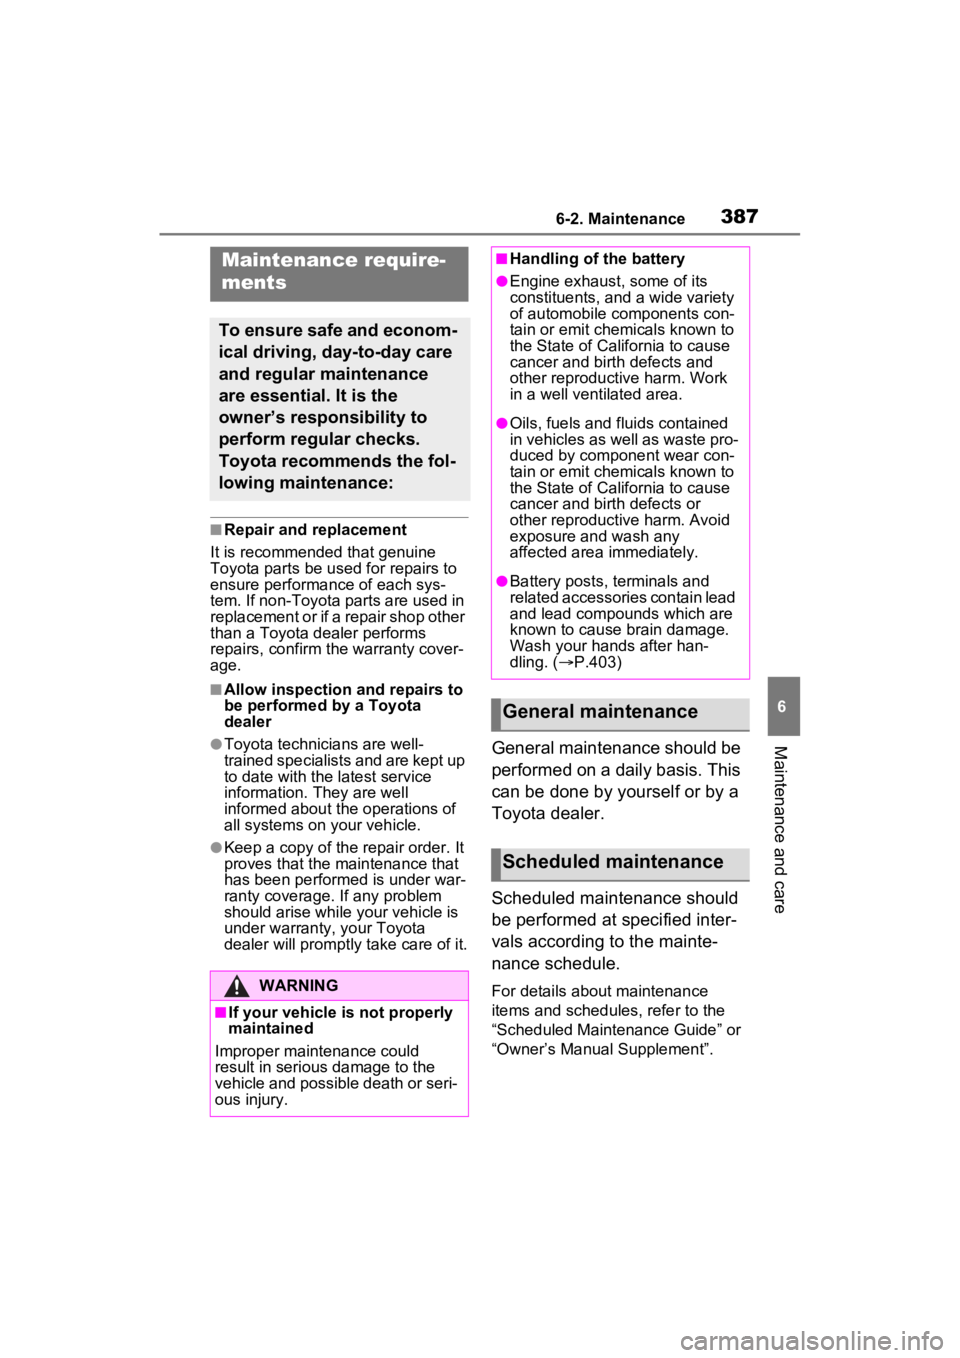
■Repair and replacement
It is recommended that genuine
Toyota parts be used for repairs to
ensure performanc e of each sys-
tem. If non-Toyota p arts are used in
replacement or if a repair shop other
than a Toyota dealer performs
repairs, confirm the warranty cover-
age.
■Allow inspection and repairs to
be performed by a Toyota
dealer
●Toyota technicians are well-
trained specialists and are kept up
to date with the latest service
information. They are well
informed about the operations of
all systems on your vehicle.
●Keep a copy of the repair order. It
proves that the maintenance that
has been performed is under war-
ranty coverage. If any problem
should arise while your vehicle is
under warranty, your Toyota
dealer will promptly take care of it.
General maintenance should be
performed on a daily basis. This
can be done by yourself or by a
Toyota dealer.
Scheduled maintenance should
be performed at specified inter-
vals according to the mainte-
nance schedule.
For details about maintenance
items and schedules, refer to the
“Scheduled Maintenance Guide” or
“Owner’s Manual Supplement”.
Maintenance require-
ments
To ensure safe and econom-
ical driving, day-to-day care
and regular maintenance
are essential. It is the
owner’s responsibility to
perform regular checks.
Toyota recommends the fol-
lowing maintenance:
WARNING
■If your vehicle is not properly
maintained
Improper maintenance could
result in serious damage to the
vehicle and possible death or seri-
ous injury.
■Handling of the battery
●Engine exhaust, some of its
constituents, and a wide variety
of automobile components con-
tain or emit chemicals known to
the State of California to cause
cancer and birth defects and
other reproductive harm. Work
in a well ventilated area.
●Oils, fuels and fluids contained
in vehicles as well as waste pro-
duced by component wear con-
tain or emit chemicals known to
the State of California to cause
cancer and birth defects or
other reproductive harm. Avoid
exposure and wash any
affected area immediately.
●Battery posts, terminals and
related accessories contain lead
and lead compounds which are
known to cause brain damage.
Wash your hands after han-
dling. ( P.403)
General maintenance
Scheduled maintenance
Page 387 of 574
3896-2. Maintenance
6
Maintenance and care
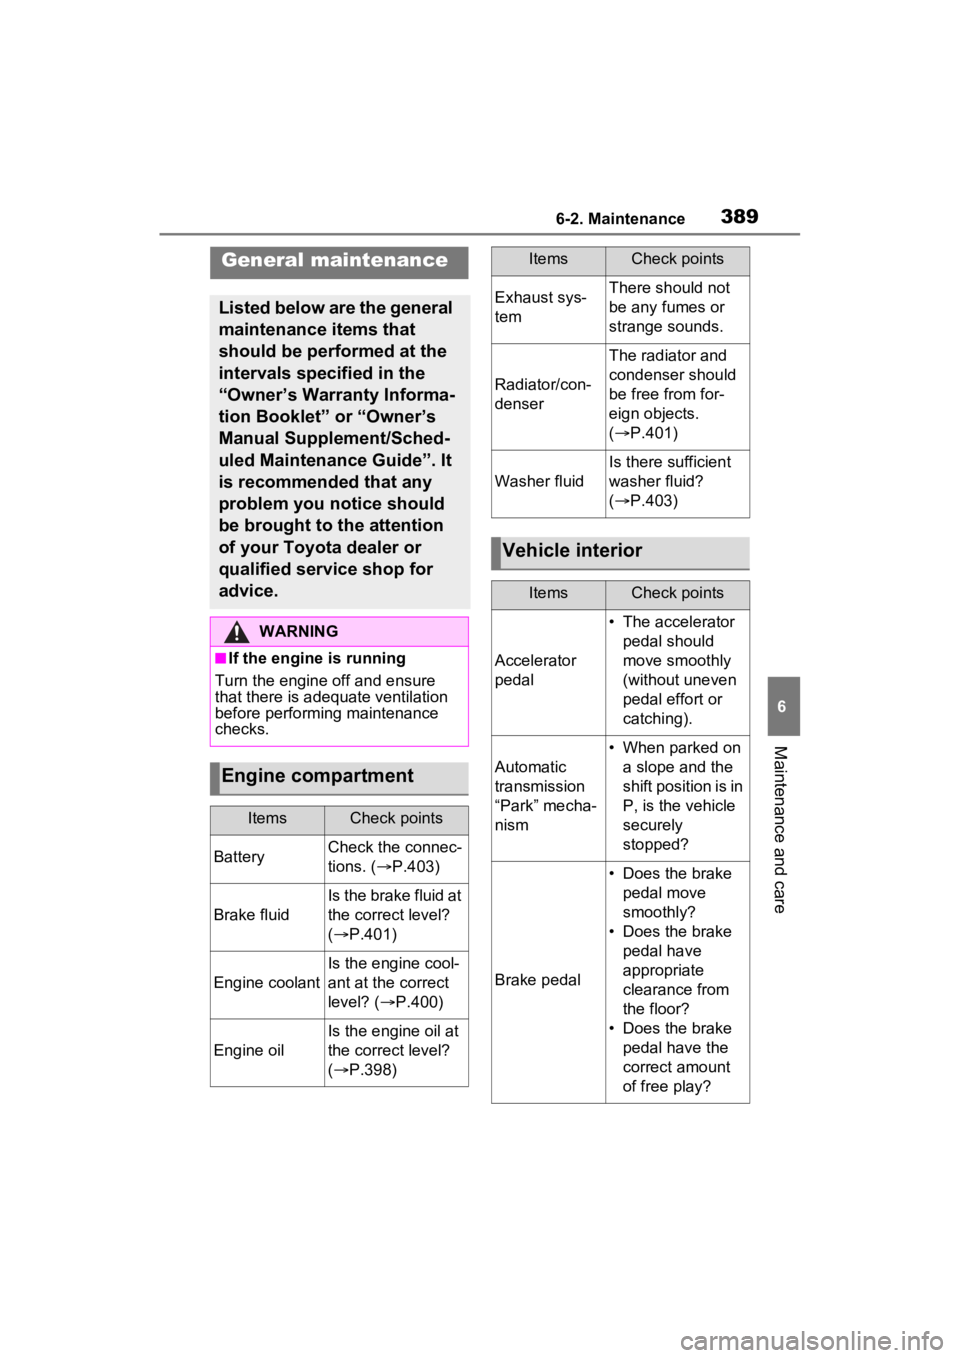
General maintenance
Listed below are the general
maintenance items that
should be performed at the
intervals specified in the
“Owner’s Warranty Informa-
tion Booklet” or “Owner’s
Manual Supplement/Sched-
uled Maintenance Guide”. It
is recommended that any
problem you notice should
be brought to the attention
of your Toyota dealer or
qualified service shop for
advice.
WARNING
■If the engine is running
Turn the engine off and ensure
that there is adequate ventilation
before performing maintenance
checks.
Engine compartment
ItemsCheck points
BatteryCheck the connec-
tions. ( P.403)
Brake fluid
Is the brake fluid at
the correct level?
( P.401)
Engine coolant
Is the engine cool-
ant at the correct
level? ( P.400)
Engine oil
Is the engine oil at
the correct level?
( P.398)
Exhaust sys-
temThere should not
be any fumes or
strange sounds.
Radiator/con-
denser
The radiator and
condenser should
be free from for-
eign objects.
( P.401)
Washer fluid
Is there sufficient
washer fluid?
( P.403)
Vehicle interior
ItemsCheck points
Accelerator
pedal
• The accelerator
pedal should
move smoothly
(without uneven
pedal effort or
catching).
Automatic
transmission
“Park” mecha-
nism
• When parked on a slope and the
shift position is in
P, is the vehicle
securely
stopped?
Brake pedal
• Does the brake pedal move
smoothly?
• Does the brake pedal have
appropriate
clearance from
the floor?
• Does the brake pedal have the
correct amount
of free play?
ItemsCheck points