reset TOYOTA RAV4 PLUG-IN HYBRID 2021 User Guide
[x] Cancel search | Manufacturer: TOYOTA, Model Year: 2021, Model line: RAV4 PLUG-IN HYBRID, Model: TOYOTA RAV4 PLUG-IN HYBRID 2021Pages: 666, PDF Size: 161.28 MB
Page 200 of 666
1983-1. Instrument cluster
warming up is finished.
Hybrid system output may be restricted when the gasoline engine is displayed in
blue.
■Display
Audio system without navigation
function
1 Press the “MENU” button.
2 Select “Info” on the “Menu”
screen.
3 Select “Trip information” or “His-
tory”.
Audio system with navigation
function
1 Press the “MENU” button.
2 Select “Info” on the “Menu”
screen.
3 Select “ECO” on the “Informa-
tion” screen.
4 Select “Trip information” or “His-
tory”.
■Trip information
If a screen other than “Trip informa -
tion” is displayed, select “Trip infor -
mation”.
The image is an example only, and may
vary slightly from actual conditions.
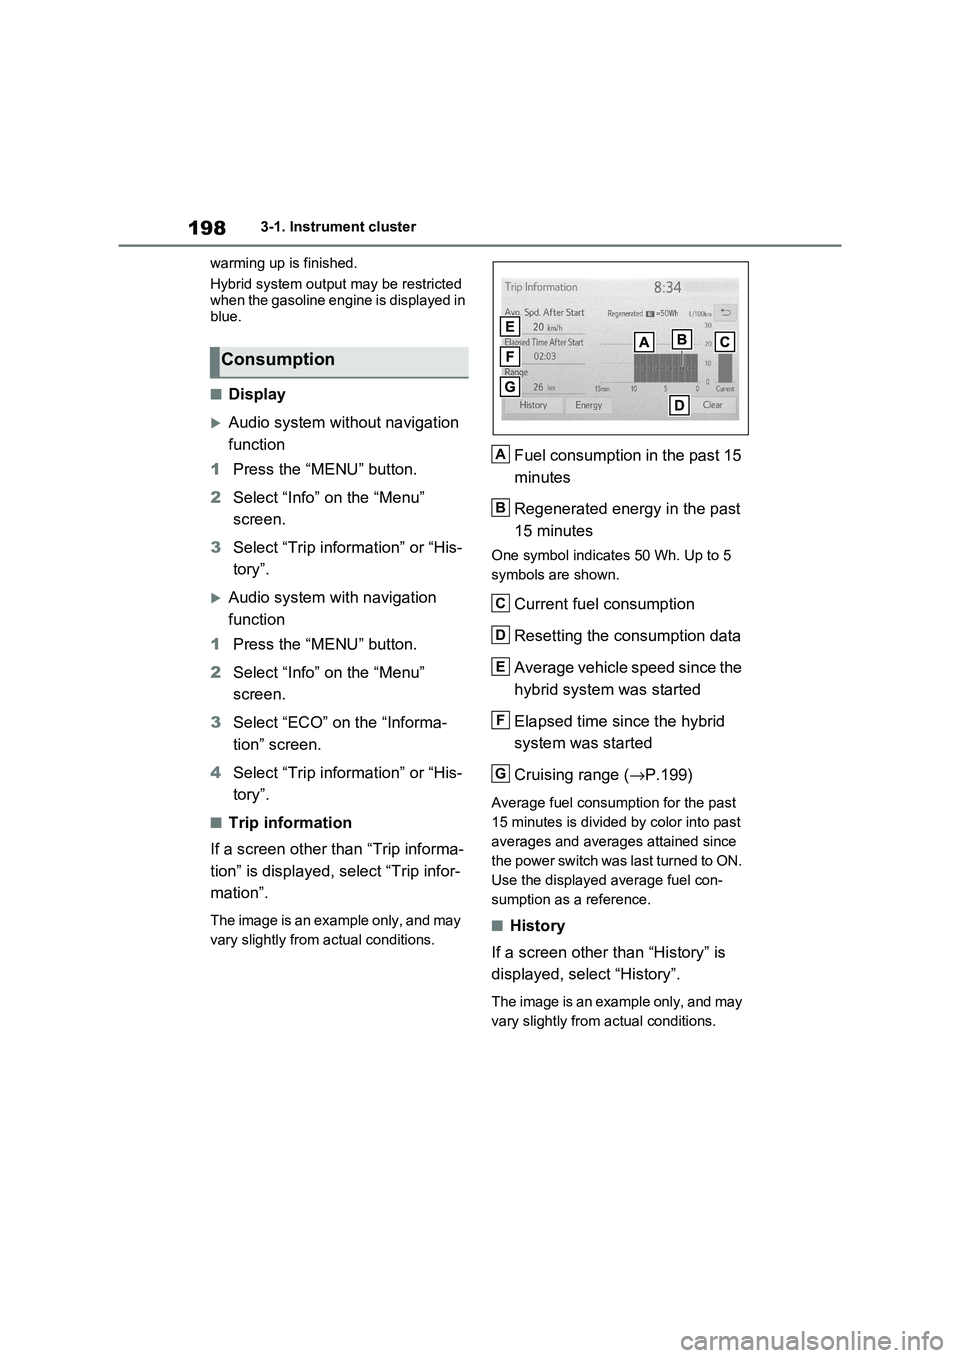
Fuel consumption in the past 15
minutes
Regenerated energy in the past
15 minutes
One symbol indicate s 50 Wh. Up to 5
symbols are shown.
Current fuel consumption
Resetting the consumption data
Average vehicle speed since the
hybrid system was started
Elapsed time since the hybrid
system was started
Cruising range ( →P.199)
Average fuel consumption for the past
15 minutes is divided by color into past
averages and averages attained since
the power switch was last turned to ON.
Use the displayed average fuel con -
sumption as a reference.
■History
If a screen other than “History” is
displayed, select “History”.
The image is an example only, and may
vary slightly from actual conditions.
Consumption
A
B
C
D
E
F
G
Page 201 of 666

199
3
3-1. Instrument cluster
Vehicle status information and indicators
Best recorded fuel consumption
Latest fuel consumption
Previous fuel consumption
record
• Without navigation function:
Displays the daily average fuel con -
sumption. (Instead of the date, “Trip 1”
through “Trip 5” will be displayed.)
• With navigation function:
Displays the daily average fuel con -
sumption.
Updating the latest fuel con -
sumption data
Resetting the history data
The average fuel consumption history
is divided by color into past averages
and the average fuel consumption
since the last tim e updated. Use the
displayed average fuel consumption as
a reference.
■Updating the history data
Update the latest fue l consumption by
selecting “Update” to measure the cur -
rent fuel consumption again.
■Resetting the data
The fuel consumption data can be
deleted by selecting “Clear”.
■Cruising range
Displays the estimated maximum dis -
tance that can be driven with the quan -
tity of fuel remaining.
This distance is computed based on
your average fuel consumption. As a
result, the act ual distance that can be driven may differ from that displayed.
A
B
C
D
E
Page 210 of 666
2084-2. Opening, closing and locking the doors
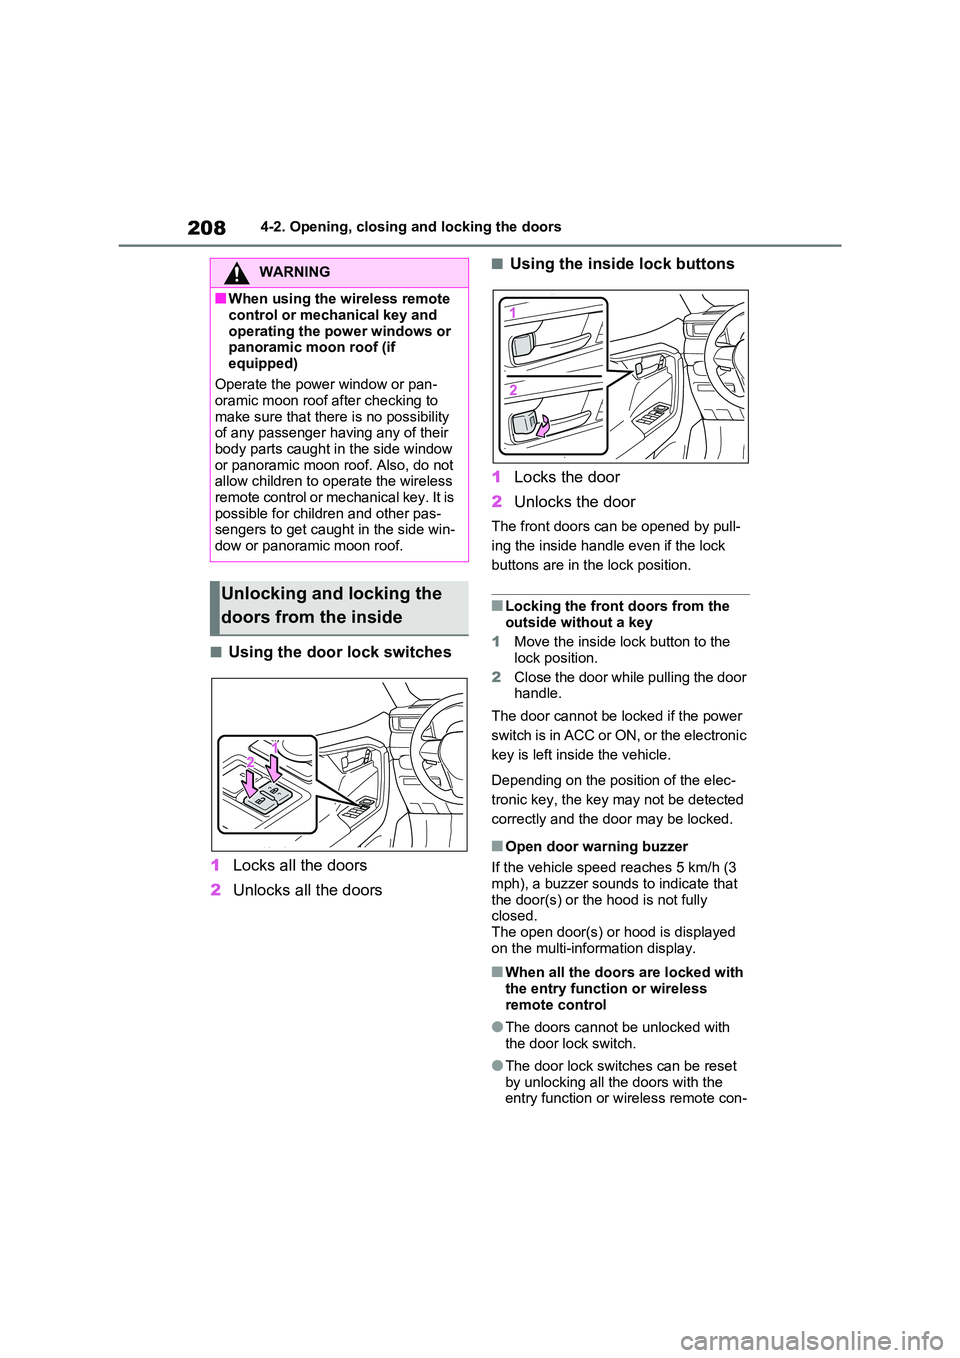
■Using the door lock switches
1 Locks all the doors
2 Unlocks all the doors
■Using the inside lock buttons
1 Locks the door
2 Unlocks the door
The front doors can be opened by pull-
ing the inside handle even if the lock
buttons are in the lock position.
■Locking the front doors from the
outside without a key
1 Move the inside lock button to the
lock position.
2 Close the door while pulling the door handle.
The door cannot be locked if the power
switch is in ACC or ON, or the electronic
key is left insi de the vehicle.
Depending on the position of the elec -
tronic key, the key m ay not be detected
correctly and the door may be locked.
■Open door warning buzzer
If the vehicle speed r eaches 5 km/h (3
mph), a buzzer sounds to indicate that
the door(s) or the hood is not fully closed.
The open door(s) or hood is displayed
on the multi-information display.
■When all the doors are locked with
the entry functi on or wireless remote control
●The doors cannot b e unlocked with the door lock switch.
●The door lock switc hes can be reset by unlocking all th e doors with the
entry function or w ireless remote con-
WARNING
■When using the wireless remote
control or mechanical key and
operating the power windows or panoramic moon roof (if
equipped)
Operate the power window or pan - oramic moon roof a fter checking to
make sure that there is no possibility
of any passenger having any of their
body parts caught in the side window or panoramic moon r oof. Also, do not
allow children to o perate the wireless
remote control or me chanical key. It is possible for chil dren and other pas-
sengers to get caugh t in the side win-
dow or panoramic moon roof.
Unlocking and locking the
doors from the inside
Page 224 of 666
2224-2. Opening, closing and locking the doors
The settings of the power back door
system can be changed by select -
ing the “Vehicle Settings” from the
screen of the multi-information
display and displaying the “PBD”
screen. ( →P.186)
The changed power back door settings
are not reset by turning the power
switch to OFF. In order to restore the
original settings, they need to be
changed back on the screen of the
multi-information display.
The open position of the power
back door can be adjusted.
1 Stop the back door in the desir-
able position. ( →P.213)
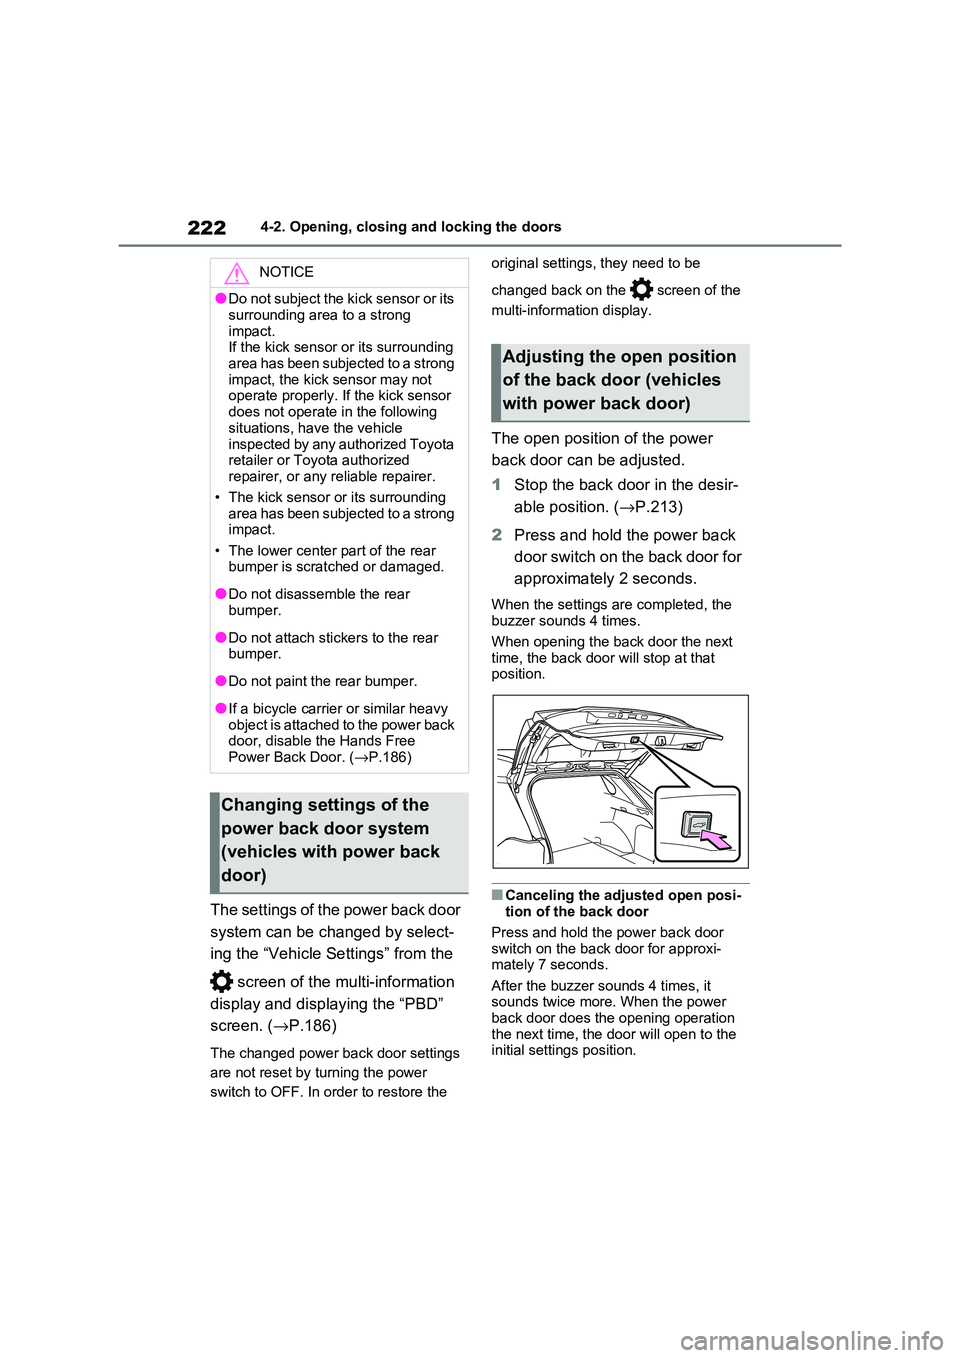
2 Press and hold the power back
door switch on the back door for
approximately 2 seconds.
When the settings are completed, the
buzzer sounds 4 times.
When opening the back door the next
time, the back door will stop at that
position.
■Canceling the adjusted open posi - tion of the back door
Press and hold the power back door
switch on the back door for approxi - mately 7 seconds.
After the buzzer s ounds 4 times, it
sounds twice more. When the power back door does the opening operation
the next time, the door will open to the
initial settings position.
NOTICE
●Do not subject the kick sensor or its
surrounding area to a strong
impact. If the kick sensor or its surrounding
area has been subjected to a strong
impact, the kick sensor may not operate properly. If the kick sensor
does not operate in the following
situations, have the vehicle
inspected by any authorized Toyota retailer or Toyota authorized
repairer, or any reliable repairer.
• The kick sensor or its surrounding area has been subjected to a strong
impact.
• The lower center part of the rear bumper is scratched or damaged.
●Do not disassemble the rear bumper.
●Do not attach sti ckers to the rear bumper.
●Do not paint the rear bumper.
●If a bicycle carrier o r similar heavy
object is attached to the power back door, disable the Hands Free
Power Back Door. ( →P.186)
Changing settings of the
power back door system
(vehicles with power back
door)
Adjusting the open position
of the back door (vehicles
with power back door)
Page 275 of 666
273
4
4-3. Adjusting the seats
Before driving
*: If equipped
■Recording procedure
1 Check that the shift lever is in P.
2 Turn the power switch to ON.
3 Adjust the driver’s seat to the
desired positions.
4 While pressing the “SET” but-
ton, or within 3 seconds after the
“SET” button is pressed, press
button “1” or “2” until the buzzer
sounds.
If the selected butt on has already been preset, the previously recorded position
WARNING
●Do not allow chil dren to enter the
luggage compartment.
●Do not operate the rear seat if it is
occupied.
●Be careful not to get feet or hands
caught in the moving parts or joints
of the seats dur ing operation.
●Do not allow children to operate the
seat.
■After returning the rear seatback
to the upright position
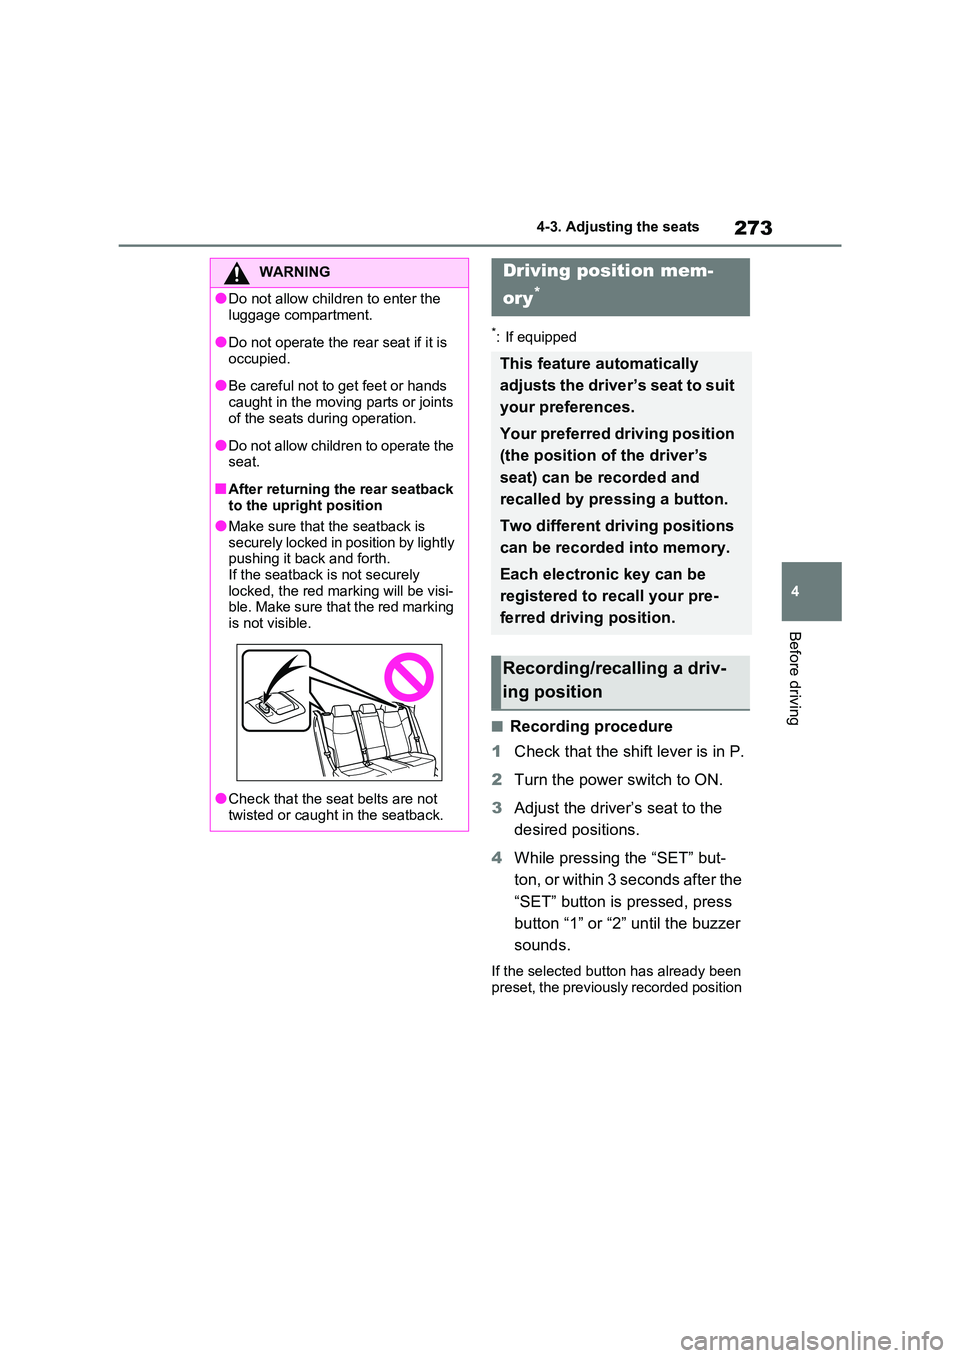
●Make sure that the seatback is securely locked in position by lightly
pushing it back and forth.
If the seatback is not securely locked, the red marking will be visi -
ble. Make sure that the red marking
is not visible.
●Check that the sea t belts are not
twisted or caught in the seatback.
Driving position mem-
ory*
This feature automatically
adjusts the driver’s seat to suit
your preferences.
Your preferred driving position
(the position of the driver’s
seat) can be recorded and
recalled by pr essing a button.
Two different driving positions
can be recorded into memory.
Each electronic key can be
registered to recall your pre -
ferred driving position.
Recording/recalling a driv -
ing position
Page 392 of 666
3905-5. Using the driving support systems
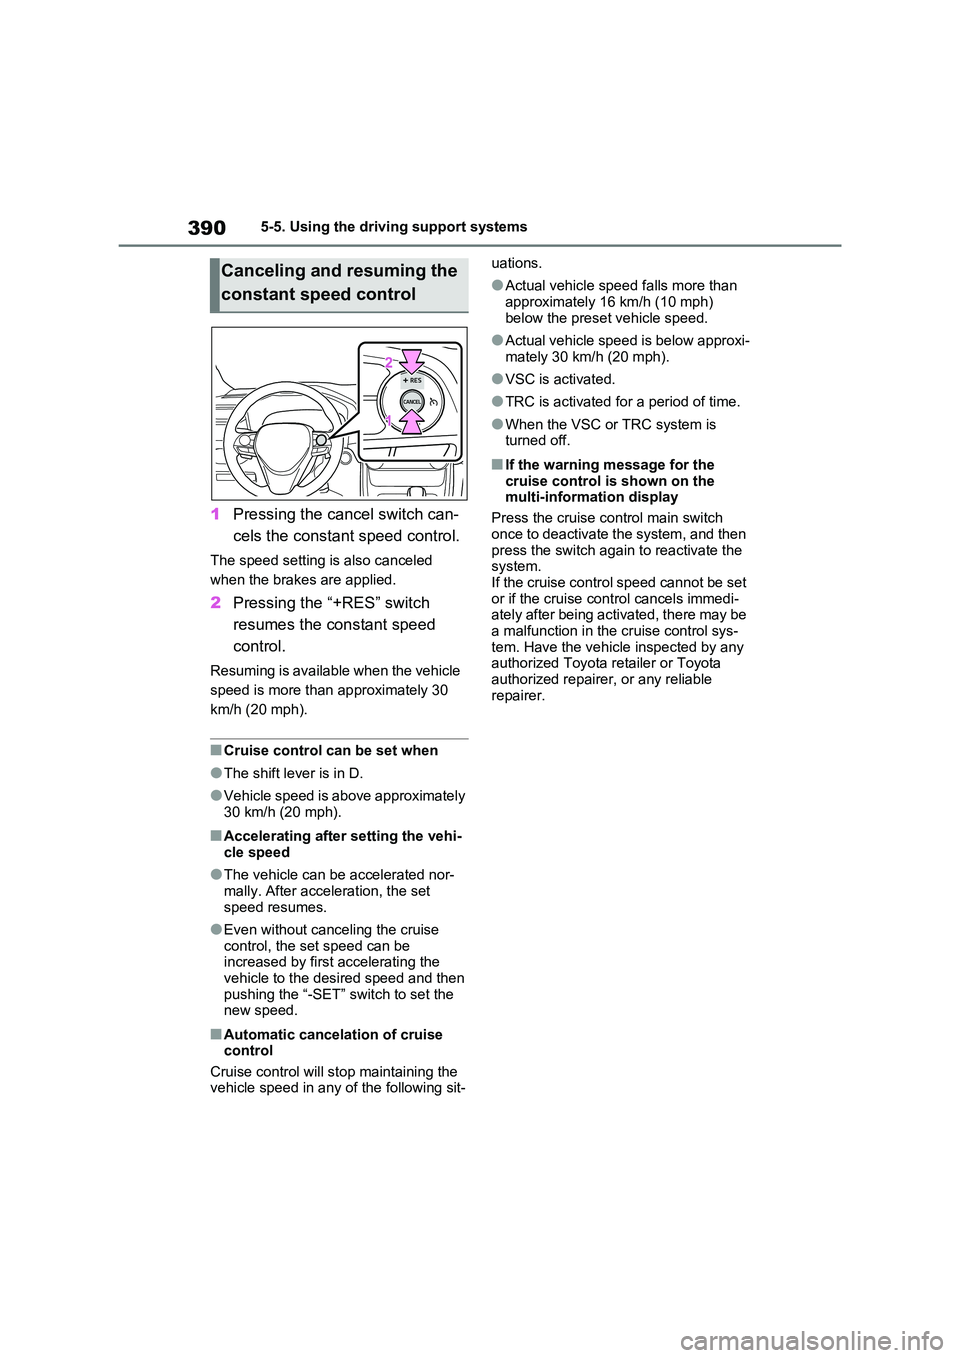
1Pressing the cancel switch can-
cels the constant speed control.
The speed setting is also canceled
when the brakes are applied.
2 Pressing the “+RES” switch
resumes the constant speed
control.
Resuming is available when the vehicle
speed is more than ap proximately 30
km/h (20 mph).
■Cruise control can be set when
●The shift lever is in D.
●Vehicle speed is above approximately 30 km/h (20 mph).
■Accelerating after setting the vehi -
cle speed
●The vehicle can be accelerated nor-
mally. After acceleration, the set
speed resumes.
●Even without canceling the cruise
control, the set speed can be
increased by first accelerating the vehicle to the desired speed and then
pushing the “-SET” switch to set the
new speed.
■Automatic cancelation of cruise control
Cruise control will st op maintaining the
vehicle speed in any of the following sit -
uations.
●Actual vehicle speed falls more than
approximately 16 km/h (10 mph)
below the preset vehicle speed.
●Actual vehicle speed is below approxi -
mately 30 km/h (20 mph).
●VSC is activated.
●TRC is activated for a period of time.
●When the VSC or TRC system is turned off.
■If the warning message for the
cruise control is shown on the
multi-information display
Press the cruise control main switch
once to deactivate the system, and then
press the switch agai n to reactivate the system.
If the cruise control speed cannot be set
or if the cruise control cancels immedi - ately after being acti vated, there may be
a malfunction in the cruise control sys-
tem. Have the vehicle inspected by any authorized Toyota r etailer or Toyota
authorized repairer, or any reliable
repairer.
Canceling and resuming the
constant speed control
Page 527 of 666
525
7
7-3. Do-it-yours elf maintenance
Maintenance and care
●If you accidentally perform initializa-
tion when initializ ation is not neces- sary, adjust the tire inflation pressure
to the specified level when the tires
are cold, and conduct initialization again.
●While the position of each tire is being determined and the inflation pres -
sures are not being displayed on the
multi-information display, if the infla - tion pressure of a ti re drops, the tire
pressure warning light will come on.
■If the tire pressure warning system
is not initialized properly
●In the following situations, initialization
may take longer than usual to be com - pleted or may not be possible. Nor -
mally, initialization completes within
approximately 30 minutes. • Vehicle is not drive n at approximately
40 km/h (25 mph) or more
• Vehicle is driven on unpaved roads • Vehicle is driven near other vehicles
and system cannot recognize tire
pressure warning valve and transmit - ters of your vehicle over those of other
vehicles.
• If the vehicle is dri ven in heavy traffic or another situation where other vehi -
cles are driven close by, it may take
time for the system t o recognize the tire pressure warning valve and trans -
mitters of your vehicle over those of
other vehicles.
●If initialization does not complete after
driving for 1 hour or more, park the vehicle in a safe place for approxi-
mately 20 minutes and then drive the
vehicle again.
●If the vehicle is rev ersed during initial-
ization, the data up to that point is
reset, so perform the initialization pro - cedure again from the beginning.
●In the following situations, initialization will not be started or was not com -
pleted properly and the system will not
operate properly. Pe rform the initial- ization procedure again.
• If, when attempting to start initializa -
tion, the tire pressure warning light
does not blink 3 times.
• If, when the vehicl e has been driven for about 20 minutes after performing
initialization, the tire pressure warning
light blinks for approximately 1 minute and then illuminates.
If initialization cannot be completed after
performing the above procedure, con -
tact any authorized T oyota retailer or
Toyota authorized repairer, or any reli -
able repairer.
Every tire pressure warning valve
and transmitter has a unique ID
code. When replacing a tire pres -
sure warning valve and transmitter,
it is necessary to register the ID
code.
When registering the ID codes, per -
form the following procedure.
1 Park the vehicle in a safe place,
wait for approxi mately 20 min-
utes, and then start the hybrid
system.
WARNING
■When initializing the tire pres -
sure warning system
Do not initialize tire inflation pressure without first adjusting the tire inflation
pressure to the specified level. Other -
wise, the tire pressu re warning light may not come on even if the tire infla-
tion pressure is lo w, or it may come
on when the tire inf lation pressure is actually normal.
Registering ID codes
Page 529 of 666
527
7
7-3. Do-it-yours elf maintenance
Maintenance and care
●ID codes can be registered by your-
self, but depending on the driving con - ditions and drivi ng environment,
registration may t ake some time to
complete.
●As the tires will be warm when regis -
tration is completed, make sure to allow the tires to c ool before perform-
ing initialization.
■Canceling ID code registration
●To cancel ID code registration after it
has been started, s elect “Identifying
Each Wheel & Position” on the multi-
information display and press and
hold again.
●If ID code registration has been can -
celed, the tire pres sure warning light
will blink for approximately 1 minute when the power switch is turned to
ON and then illuminate. The tire pres -
sure warning syst em will be opera- tional when the tire pressure warning
light turns off.
●If the warning light does not turn off
even after several minutes have
elapsed, ID code registration may not have been canceled correctly. To can -
cel registration, perform the ID code
registration start procedure again and then turn the power switch off before
driving.
■If ID codes are no t registered prop-
erly
●In the following situations, ID code
registration may take longer than usual to be completed or may not be
possible. Normally, registration com -
pletes within appr oximately 30 min- utes.
If ID code registrati on is not complete
after driving for app roximately 30 min- utes, continue driving for a while.
• Vehicle is not parked for approxi -
mately 20 minutes or more before driving
• Vehicle is not drive n at approximately
40 km/h (25 mph) or more • Vehicle is driven on unpaved roads
• Vehicle is driven near other vehicles
and system cannot recognize tire
pressure warning valve and transmit - ters of your vehicle over those of other
vehicles
• Wheel with tire p ressure warning valve and transmit ter installed is
inside or near the vehicle
If registration does not complete after
driving for 1 hour or more, perform the
ID code registration procedure again
from the beginning.
●If the vehicle is reversed during regis -
tration, the data up to that point is
reset, so perform the registration pro - cedure again from the beginning.
●In the following si tuations, ID code registration will no t be started or was
not completed properly and the sys -
tem will not operate properly. Perform the ID code regist ration procedure
again.
• If, when attempting to start ID code registration, the ti re pressure warning
light does not blink slowly 3 times.
• If, when the vehicl e has been driven for about 10 minutes after performing
ID code registration, the tire pressure
warning light blinks for approximately 1 minute and the n illuminates.
●If ID code registration cannot be com- pleted after perfo rming the above pro-
cedure, contact any authorized
Toyota retailer or Toyota authorized repairer, or any reliable repairer.
Your vehicle is equipped with tire
pressure warning system with the
function to have ID codes regis-
tered for a second wheel set, for
example a winter set. You can reg -
ister a second wheel set by your -
self, any authorized Toyota retailer
or Toyota authorized repairer, or
any reliable repairer.
Selecting wheel set